How Does Shopify Shipping Work: A Complete Guide
Shipping has been one of the most time-consuming and frustrating aspects of running an online store. The more your business expands, the more complicated the fulfilment process will be.
Fortunately, Shopify Shipping makes it plain sailing for you to manage everything. You’ll have more time to focus on other aspects to thrive your business when using Shopify as your eCommerce platform. But how does Shopify Shipping work?
In this blog post, LitOS will resolve a bunch of questions related to Shopify Shipping:
- A brief look at Shopify Shipping
- How does Shopify Shipping work?
- How to set up Shopify Shipping
- Key notes on Shopify Shipping
Now, let’s hit the ground running!
What Is Shopify Shipping?
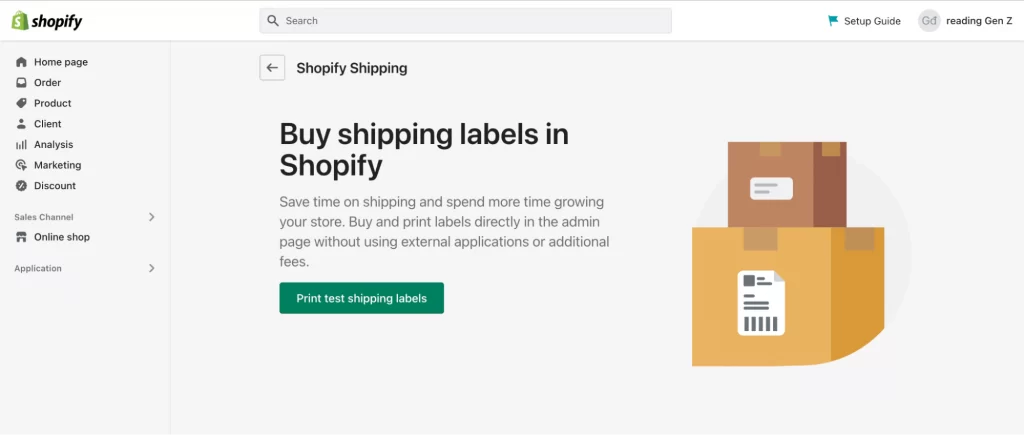
Shopify Shipping is your all‑in‑one solution for faster fulfillment, discounted rates, and smooth customer experiences. Through Shopify’s admin, you can purchase and print shipping labels, whether one at a time or in bulk, and manage shipping across both domestic and global orders.
Key Benefits of Shopify Shipping
Here are some of the key benefits that make it an essential feature for growing eCommerce businesses:
- Integrated Label Printing: Print directly from Shopify (up to 100 labels at once), including packing slips.
- Discounted Carrier Rates: Access deeply negotiated rates—US merchants can save up to 88% on USPS, UPS, and DHL Express; Canada with Canada Post/Purolator; Australia via Sendle; and Europe through partners like DPD, Evri, Colissimo, BRT, and more.
- Real‑time Calculated Rates: Display live shipping rates at checkout instead of flat fees, if your store and fulfillment location are eligible.
- Fast Order Pickup Scheduling: Depending on your carrier/location (e.g. USPS), you can schedule pickups directly from the Shopify admin.
- Tracking and Insurance: Includes tracking and up to $200 insurance (or up to $5,000 in the U.S. for eligible labels).
- International Shipping Made Easier: Shopify handles customs documentation, international rates, and supports services like delivery‑duty‑paid (DDP) for certain carriers such as DHL Express.
Eligibility and Requirements of Shopify Shipping
Not all stores are eligible to use Shopify Shipping, and it’s important to understand the requirements before relying on it for your fulfillment strategy.
First, your store must be based in a supported country, and your shipping-from location must align with your store’s primary address. For example, if you plan to use carriers like DPD or Evri, your store must be located in the UK. If your business operates outside of supported regions, you won’t be able to access Shopify’s carrier-calculated rates and will need alternative solutions, either flat‑rate shipping or third‑party shipping apps.
Beyond geographic requirements, Shopify also requires accurate product and packaging data for its shipping system to function properly. Each product should have a defined weight and ideally, dimensions as well as HS (Harmonized System) codes for international shipments.
Additionally, certain advanced services, like delivery duty paid (DDP) shipping labels, are only available through specific carriers such as DHL. Meeting these criteria ensures that your Shopify store can fully leverage the features of Shopify Shipping, including discounted rates, label printing, and international delivery support.
How Does Shopify Shipping Work?
Shopify Shipping has partnered with leading carriers such as USPS, UPS, and DHL Express in the United States, Canada Post in Canada, and Sendle in Australia, offering multiple mail classes with each carrier.
Before fulfilling an order, merchants should ensure that all order details are correct. In cases where changes are required, such as customer requests or inventory issues, you may need to review how to cancel Shopify order to avoid unnecessary shipping costs or fulfillment errors.
Let’s take a look at how Shopify Shipping works:
- Create a shipping label.
- Purchase and print shipping labels.
- Bring the parcel to the collection point.
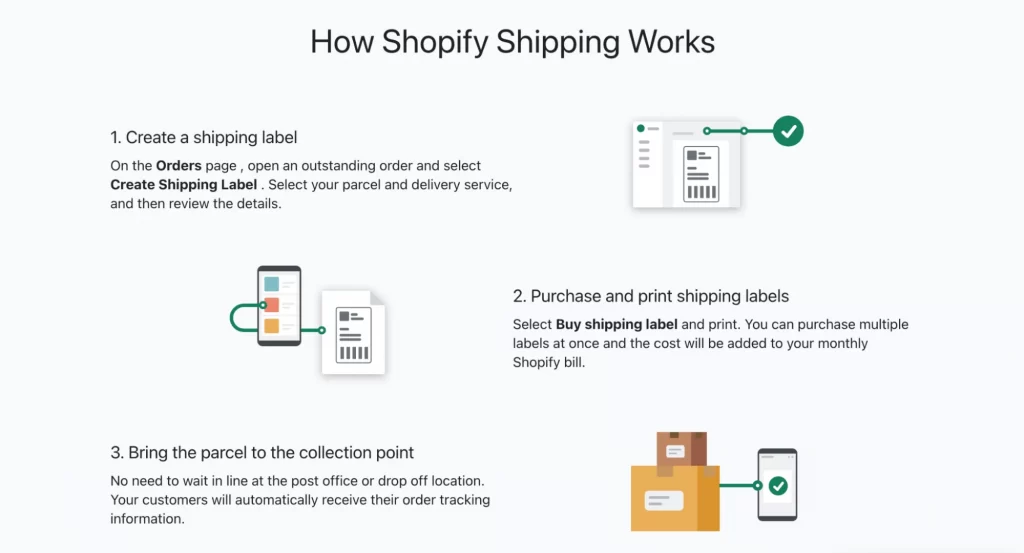
Depending on your location, carrier, and mail class, Shopify Shipping gives merchants access to features like overnight delivery, package pick-ups, shipping insurance, tracking data, international shipping, and more.
Besides, Shopify has worked directly with carriers to negotiate affordable shipping rates for each service and automatically added to every plan at no extra cost to you.
How to Set up Shopify Shipping
1. Review Your Shopify Shipping Eligibility
Your business must have an eligible fulfillment location if you want to use Shopify Shipping. And for some carriers, your store needs to be in the same country as the approved fulfillment location.
For instance, if you want to purchase shipping labels from Evri or DPD, your store’s address must be in the United Kingdom. In addition, you must have a fulfillment location there and understand how does Shopify Shipping work.
You can order labels from the following carriers through Shopify Shipping, depending on your fulfillment locations.
2. Add Your Shipping Location Address
The next step is to set up your locations. When setting up your business with Shopify, you must enter your business address, so your address is most likely already there. However, you need to make sure the address is correct.
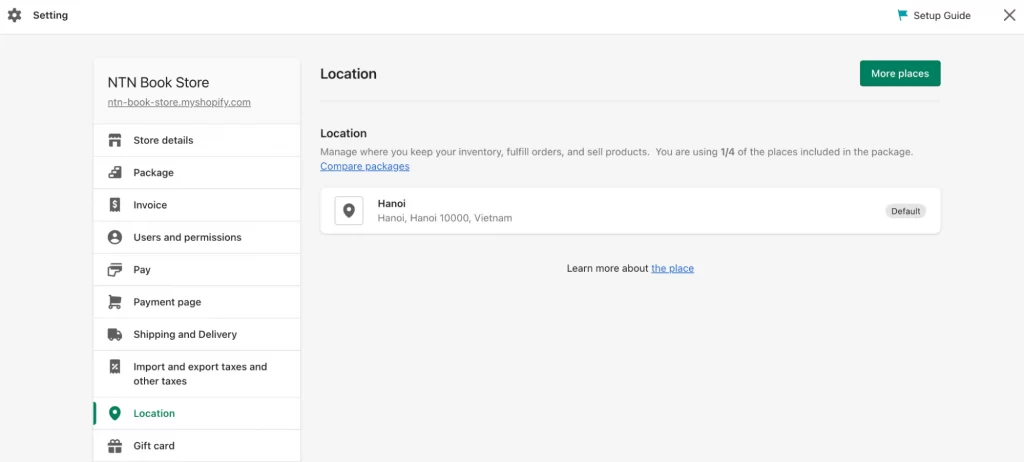
If you intend to ship from a location other than your business, make sure to include this address in the “Location” section on your settings page:
- Click “Setting” from your Shopify admin dashboard to access shipping and delivery settings.
- Enter the address from which your products will be shipped in the “Default” section.
- Make any changes to your address then remember to click the “Save” button.
Once your shipping location is correctly set, you can proceed with configuring shipping zones, rates, and country-specific rules as outlined in our guide on how to set up international shipping on Shopify.
3. Set Package Dimensions and Weight
In your Shopify admin, you can set package dimensions and weight that you use to ship your products. When your customer checks out, Shopify Shipping will use the package dimensions and weight to calculate shipping costs. And in the checkout, only the dimensions of the default package are applied.
Here are simple steps to set package dimensions and the weight you can follow:
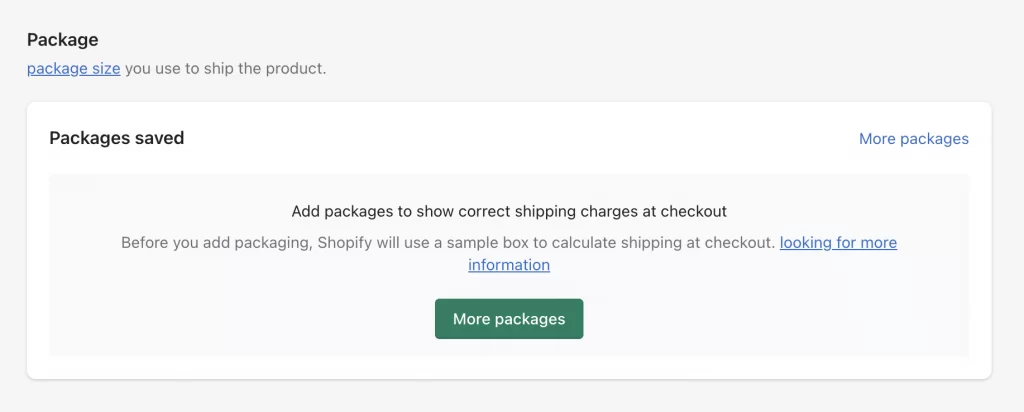
- From your Shopify admin, go to “Setting” then click “Shipping and Delivery”.
- In the “Packages saved” section, click the “More packages” button.
- Adjust the package’s settings.
- Click “Save”.
If you ship your products in multiple package types, you can adjust the package dimensions when purchasing the shipping label. You can use a shipping app if you want a shipping carrier to calculate the shipping cost at checkout based on packages other than your default package.
4. Add All Product Weight
Your products’ details must include precise weights. Keep in mind that the weight of shipping containers such as boxes or envelopes you use to ship your product is added to that of your product. The total weight will decide how much it costs to ship your package to your customer.
Shopify Shipping will then calculate the most accurate label rates by combining the package size, box weight, and item(s) weight for each order.
- Simply navigate to “Product” section from your Shopify admin
- Add “Weight” as an editable field
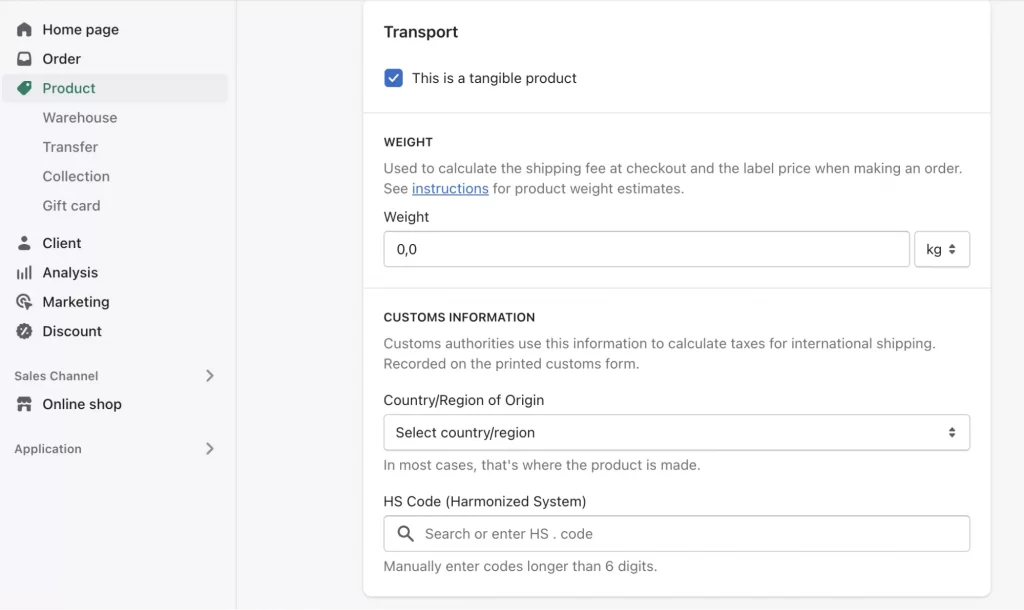
You’ll be able to edit the weight of each SKU product.
5. Set up Your Printer
Before purchasing your first shipping label, you need to decide how you’ll print your shipping labels. A desktop printer or a shipping label printer can help in this case. Keep in mind to use one of the Shopify-supported label printers if you want to use a shipping label printer.
Label printers use labels with an adhesive backing that you directly attach to your shipments. So, if you use a desktop printer, attach the labels to your packages with a plastic sleeve or packing tape.
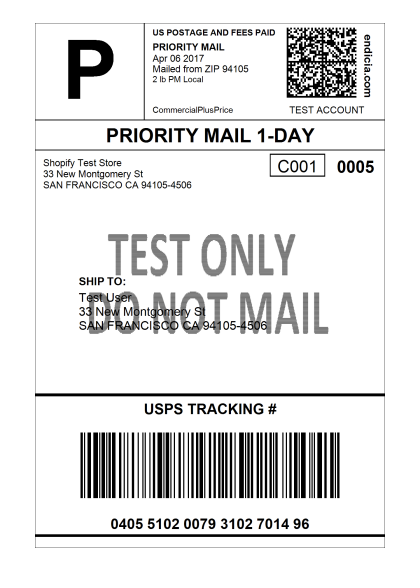
Pro Tips: You can print a test shipping label to make sure that your printer is set up properly. You aren’t charged for printing a test label.
To set up your printer, you can do the following simple steps:
- Go to “Setting” in your Shopify admin and then click “Shipping and Delivery“.
- Click “Print Test Label” next to the format you want to print in the Shipping labels section.
- Download, locate and open the file of the label on your computer.
- Choose the print option.
- Select the printer you want to use to print the label in the print dialog.
- Choose the paper size that corresponds to the printer you’re using to print the label.
- Click “Print“.
6. Select Shipping Calculated Rates to Zones
When you create a new Shopify account, the Shopify Shipping rates are automatically added in the following cases:
- USPS rates are automatically added if your store is located in the United States.
- When your store is in Canada, Canada Post rates are automatically included.
- If your store is based in Australia, flat rates are automatically added, and you have the option to activate Sendle rates.
In your shipping settings, you can change which shipping rates are available to customers.
If you prefer to use custom flat rates or want to avoid real-time carrier pricing altogether, you can follow our detailed guide on how to remove shipping calculated at checkout Shopify to ensure your checkout experience aligns with your pricing strategy.
Key Notes on Shopify Shipping
1. Shopify Shipping Carrier
The first step of getting to know how does Shopify Shipping work is to learn about Shopify Shipping carriers. Each shipping carrier has its own set of policies, resources, and requirements. To avoid shipping delays or unnecessary fees, make sure you understand the specifics of the shipping carriers from which you purchase labels.
Carrier-calculated shipping rates via Shopify Shipping frequently display expected transit time alongside the shipping rate at checkout. However, they do not include your processing time. At the checkout, you can display delivery dates that include your processing time and transit time.
2. Shopify Shipping Rates
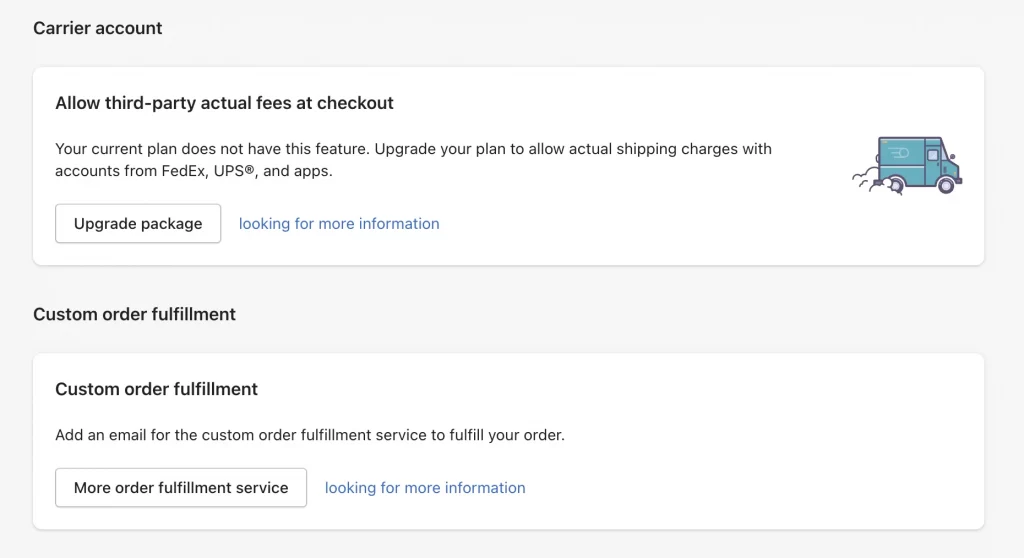
To fully understand how Shopify Shipping works, it’s essential to grasp how Shopify calculates shipping rates and how you can access discounted rates based on your location and subscription plan. Shopify has negotiated shipping discounts with major carriers like USPS, UPS, DHL Express (U.S.), Canada Post (Canada), Sendle (Australia), and others across Europe. These discounts are automatically available on all Shopify plans, with higher discounts typically available on the Advanced and Plus plans.
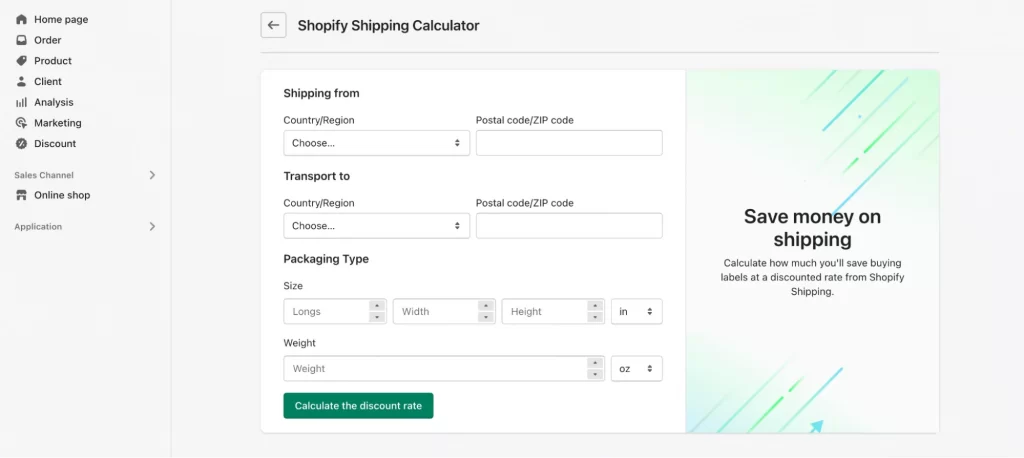
Let’s take a look at how to calculate your Shopify Shipping rates:
- From your Shopify admin, go to Settings > Shipping and Delivery.
- Scroll to the Carrier Calculated Shipping Rates section.
- Select your shipping origin (country and postal code).
- Choose the destination country and postal code.
- Enter your package dimensions and weight under the Package Type section.
- Click Calculate the discounted rate to see the available services and real-time shipping costs based on your input.
This tool helps you preview what your customers might pay at checkout, allowing you to plan your pricing strategy or offer competitive shipping options without cutting too deeply into your margins.
3. Shopify Shipping Insurance
To qualify for shipping insurance through Shopify Shipping, your package must originate in the United States, and the label must be purchased directly through Shopify Shipping using Shopify in your admin. Your products also need to comply with Shipsurance’s Terms of Service.
If your store is on the Grow, Advanced, or Plus plan and has Shopify Payments activated, you’ll automatically receive up to $200 USD of included insurance per eligible label at no extra cost, even for Managed Markets orders.
For shipments covered through Managed Markets on the Basic plan or any order exceeding that $200 limit, you can still purchase insurance up to $5,000 USD during label creation.
FAQs about Shopify Shipping
Still have questions? Whether you’re new to Shopify or just getting started with its shipping features, here are some frequently asked questions to help you better understand how Shopify Shipping works and how to make the most of it:
Who is eligible to use Shopify Shipping?
Shopify Shipping is available only to merchants in supported countries. Your store must have an eligible fulfillment location in the same region e.g. U.S. stores for USPS/UPS, Canada for Canada Post/Purolator, Australia for Sendle, and select European countries for DPD, Evri, and others. You also need accurate product data (weight, dimensions, HS codes) to activate international labels.
What types of shipping rates can I offer customers?
You can configure flat, free, or calculated (real‑time) rates. Shopify supports carrier-calculated shipping if eligible so customers see live rates at checkout. You can also create weight‑based, price‑based, or location‑based flat‑rate shipping options.
Can I print multiple shipping labels at once?
Yes. Shopify allows you to batch-print up to 100 labels (and packing slips) directly from your admin, using either a standard desktop printer or a supported label printer.
Does Shopify support international shipping and customs documentation?
Yes. Shopify Shipping supports international fulfillment by auto‑generating required customs forms. It also supports delivery‑duty‑paid (DDP) shipping through certain partners like DHL Express, so merchants can pay duties up-front at checkout. However, you must assign HS codes and clear product descriptions in order to create labels for international shipments.
Conclusion
With Shopify Shipping, what used to be a time-consuming and error-prone task can now be managed quickly, affordably, and with confidence all from within your Shopify admin. From discounted carrier rates and built-in label printing to real-time rate calculations and international support, Shopify Shipping gives you the tools to streamline your operations and focus on growing your business.
As an official Shopify Partner with over 11 years in eCommerce technology and development, LitOS has enabled hundreds of brands with everything from store launches and seamless migrations to fully custom growth plans built for long‑term success. Whether you’re looking for a fresh start, an optimized migration, or a tailored growth roadmap, our certified Shopify experts make it scalable and friction‑free from day one.
Have a project in mind? Contact Us to get started →