
How to Add Afterpay to Shopify (2025 Guide)
Learning how to add Afterpay to Shopify is one of the easiest ways to give your customers more flexibility at checkout. With Afterpay, shoppers can split their purchase into four interest-free installments while you receive the full payment upfront.
Adding Afterpay to your Shopify store allows customers to pay in four equal payments and gives your business a simple way to boost conversion rates, increase average order value, and build customer trust.
In this guide, you will learn:
- How to set up an Afterpay account and connect it to your Shopify store
- How to activate Afterpay at checkout
- How to display clear payment messages on your product and cart pages
Each step is written for beginners, so you can follow along easily and get Afterpay working smoothly in your Shopify checkout. Now, let’s get started.
Prerequisites: What You Need Before Adding Afterpay to Shopify
Before learning how to add Afterpay to Shopify store, make sure you meet the basic eligibility and setup requirements. This ensures that Afterpay will work correctly at checkout and that your store can process payments without issues.
Eligibility requirements
1. Supported countries and regional brands (Afterpay or Clearpay)
Afterpay is available for merchants based in Australia, New Zealand, Canada, and the United States. If your store is based in the United Kingdom, Afterpay operates under the brand name Clearpay. You must have a registered business and bank account in one of these supported regions to qualify.
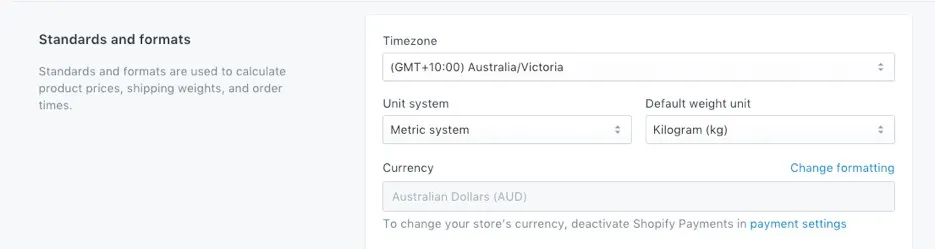
2. Store address and base currency must match your Afterpay region
Your Shopify store address and currency settings must match the region where your Afterpay account is registered.
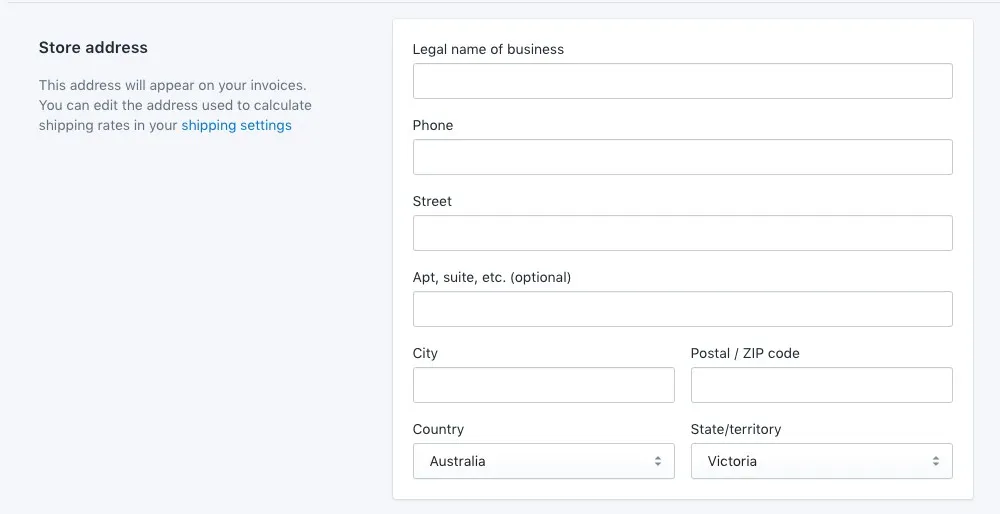
For example, a store with an Australian address should use Australian Dollars (AUD) as the base currency. If your currency and region do not match, Afterpay will not appear as an available payment method.
3. Shopify plan and staff permissions needed
Afterpay can be added to any paid Shopify plan. You just need to make sure you are logged in as the store owner or have full permissions to manage payment settings. Staff accounts without billing or payment access cannot complete the integration.
4. Order amount limits and excluded product types
Afterpay supports orders within certain value ranges, depending on your country. Most commonly, it applies to orders between 1 and 4,000 USD (or equivalent). Some restricted products, such as gift cards or digital subscriptions, may not be eligible for installment payments.
Setup requirements
1. Create an Afterpay merchant account and Business Hub access
If you do not already have an Afterpay account, follow these steps to create one and access your Business Hub.
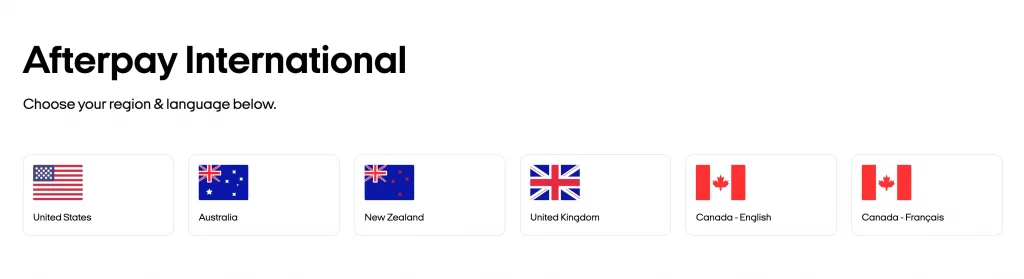
- Step 1: Go to the Afterpay Business website and choose your country.
- Step 2: Click Sign Up or Get Started to begin the merchant registration process.
- Step 3: Enter your business information, including your legal name, store URL, contact details, and business registration number.
- Step 4: Add your banking information to receive payouts from Afterpay. The account must be located in the same country as your business.
- Step 5: Review the merchant agreement and click Submit.
- Step 6: Once approved, you will receive an invitation to access the Afterpay Business Hub, where you can manage orders, view settlements, and find your merchant ID and API credentials.
When you first log in, ensure you have the necessary permissions to connect your account to Shopify. Only users with User or Hub Admin permissions can complete the verification step during Shopify integration.
2. Gather merchant ID or credentials
After creating your account, you will find your unique merchant ID inside the Business Hub. Let’s keep this information ready, as you will need it when connecting Afterpay to Shopify.
3. Decide capture setting policy (automatic vs manual capture)
Shopify allows stores to capture payments automatically or manually. If you use manual capture, Afterpay will place an authorization hold on the customer’s payment. You must capture the payment within 13 days, or the authorization will expire.
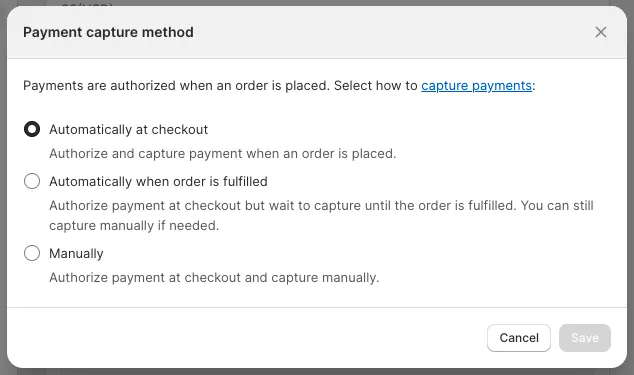
For most merchants, automatic capture is recommended for a smoother order processing experience.
How to Add Afterpay to Shopify
Once your Afterpay merchant account is ready, you can connect it directly from your Shopify admin. The process only takes a few minutes, and once complete, customers will see Afterpay as a payment option at checkout.
Step 1: Go to Settings → Payments → Add payment method
Go to your Shopify admin dashboard and make sure you are signed in with the account that has full access to payment settings.
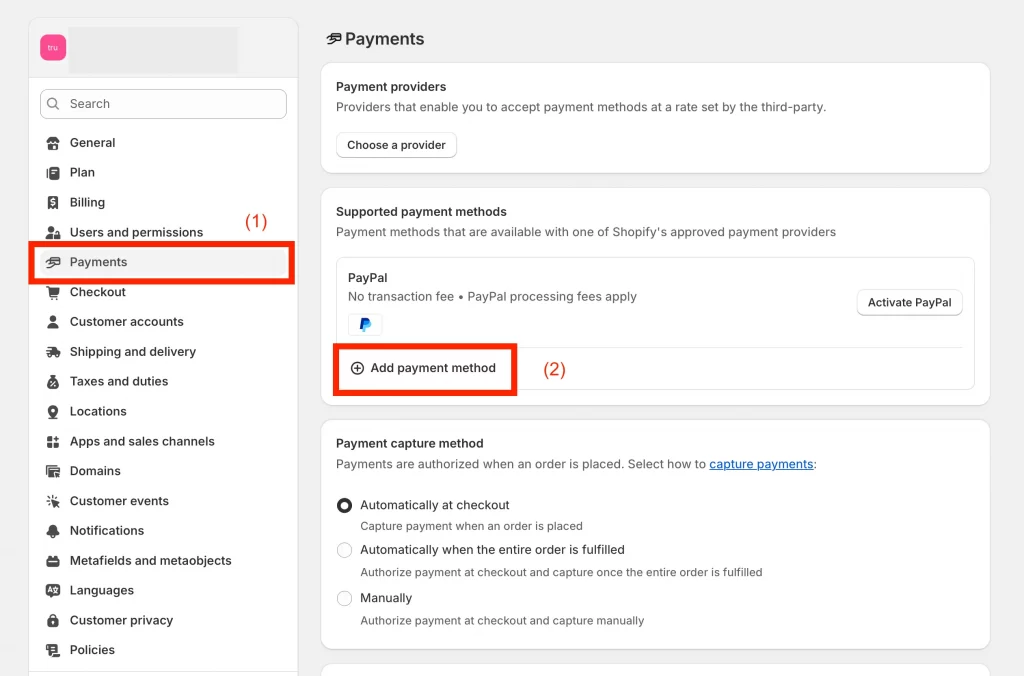
In the Shopify admin, click Settings at the bottom left corner, then choose Payments (1). Scroll to the Supported payment methods section and click Add payment method (2).
Step 2: Search and select “Afterpay (New)”
In the search bar, type Afterpay, or you can click here to install it directly to your Shopify store.
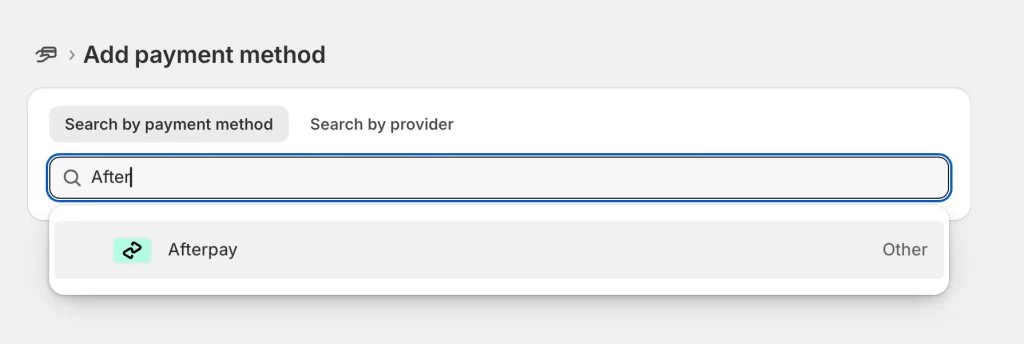
You may see two versions: Afterpay (New) and Afterpay (Legacy). You should select Afterpay (New) to ensure you are using the latest integration.
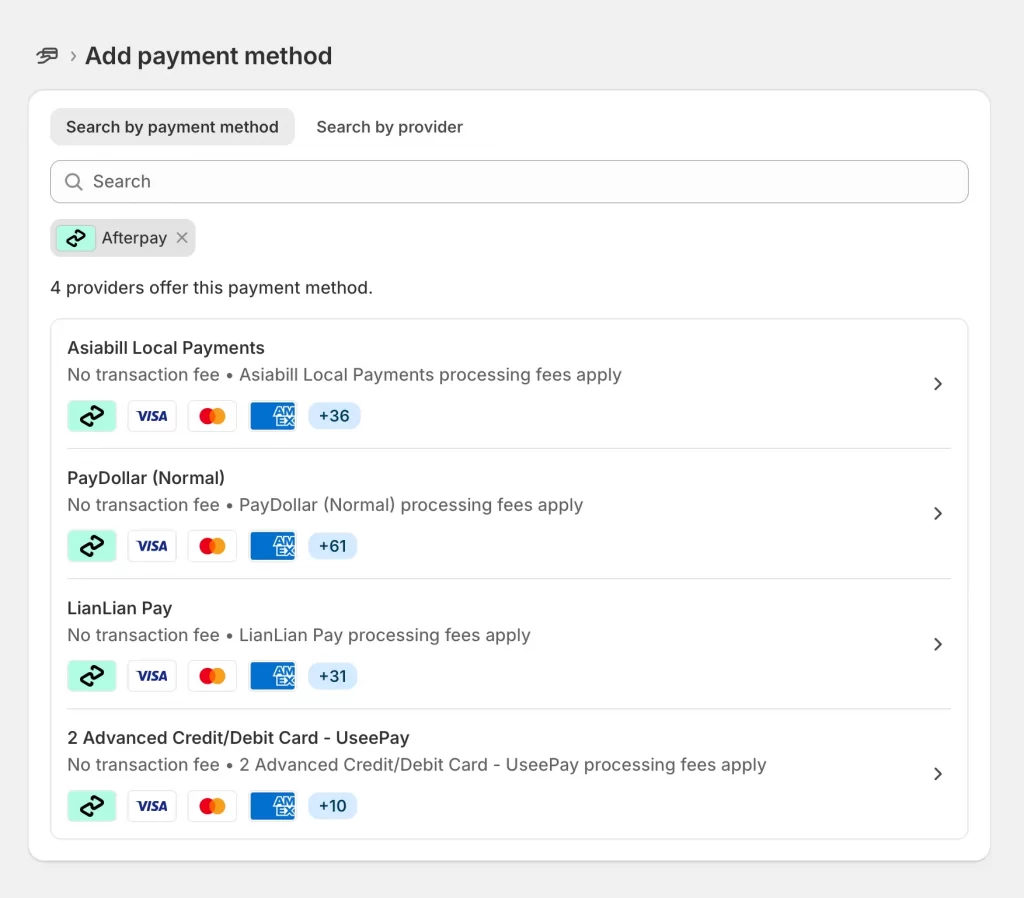
If no direct Afterpay option appears and you see other payment providers (for example, AsiaBill, PayDollar, or LianLian Pay) with the Afterpay logo, those gateways can process Afterpay payments for your region. You can select one of them or contact Shopify Support to confirm which provider best fits your country’s requirements.
Step 3: Install the Afterpay for Shopify
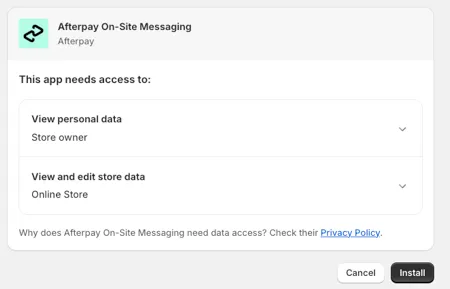
Shopify will prompt you to install the Afterpay app to complete the setup.
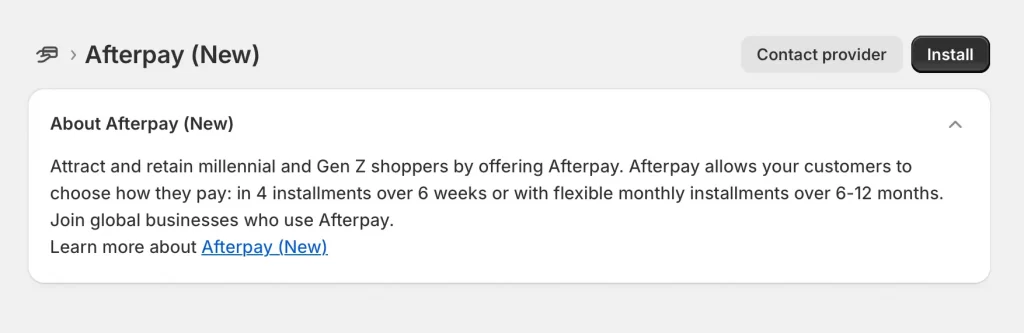
Click Install, review the permissions, and confirm.

After installation, the app will appear under your Payments section.
Step 4: Redirect to Business Hub and connect your merchant account
After the app is installed, you will be redirected to the Afterpay Business Hub login page.
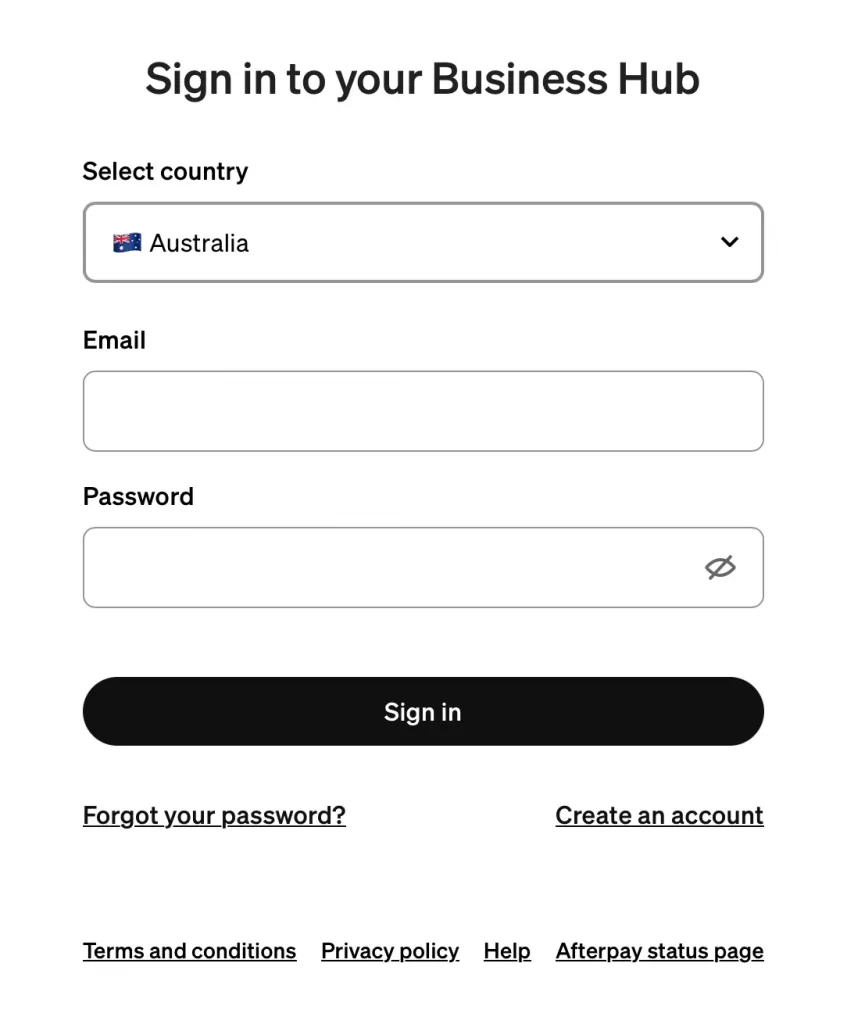
Sign in with your Afterpay merchant credentials, select your merchant account, and click Connect.
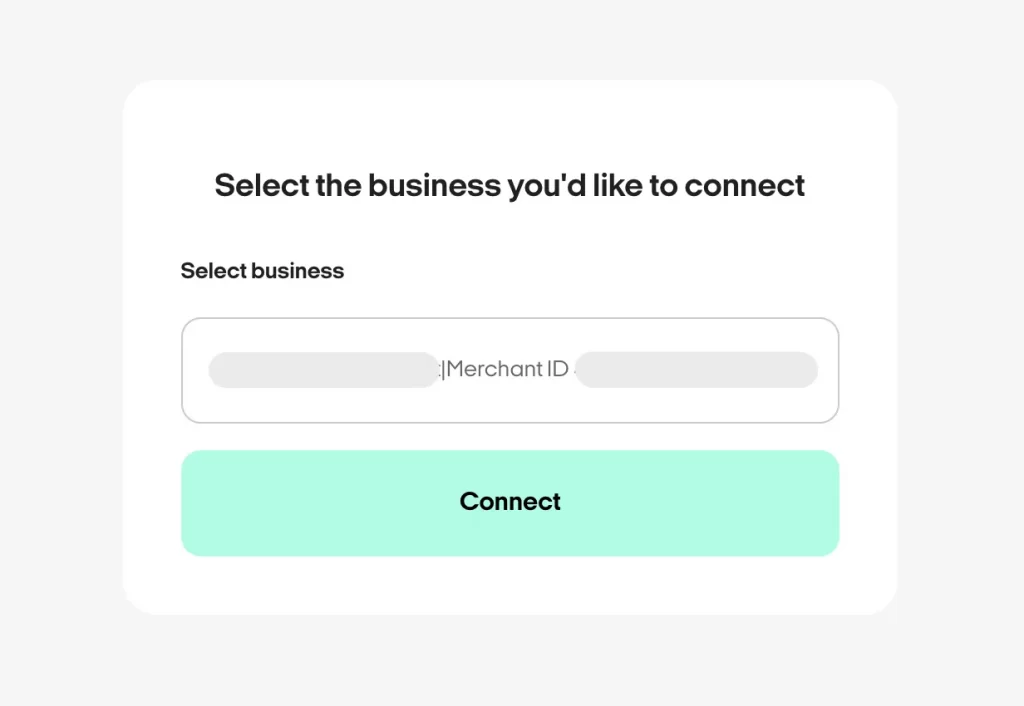
This step links your Shopify store to your Afterpay account.
Step 5: Return to Shopify and activate Afterpay at checkout
Once connected, Shopify will return you to the payment settings page.
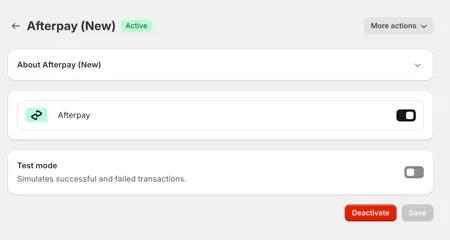
Here, you can review your connection details and activate Afterpay as a live payment option. Make sure the toggle for Enable Afterpay is turned on.
Step 7: Verify Afterpay appears as a checkout option
Visit your store’s checkout page and go through a test purchase. If everything is connected correctly, Afterpay will appear as one of the available payment methods.
Do not enable test mode on a live store, as this will prevent customers from completing payments. And that’s how to set up Afterpay on Shopify.
How to Add Afterpay Messaging to Your Storefront
Afterpay messaging helps customers understand that they can pay in installments before reaching checkout. It displays “Pay in 4 with Afterpay” information on your product and cart pages. This step is optional, but it can improve customer awareness and boost conversions.
⚠️ Note: You must already have Afterpay live and visible at checkout before installing this app. The Afterpay On-Site Messaging app does not add the payment method. It only displays informational banners on your store.
Step 1: Install the Afterpay On-Site Messaging app
Go to the Shopify App Store and search for Afterpay On-Site Messaging.
Click Add app and then Install app.
After installation, open the app from your Shopify dashboard.
Step 2: Open Theme Editor and add Afterpay messaging to product pages
In the app dashboard, click Open Theme Editor.
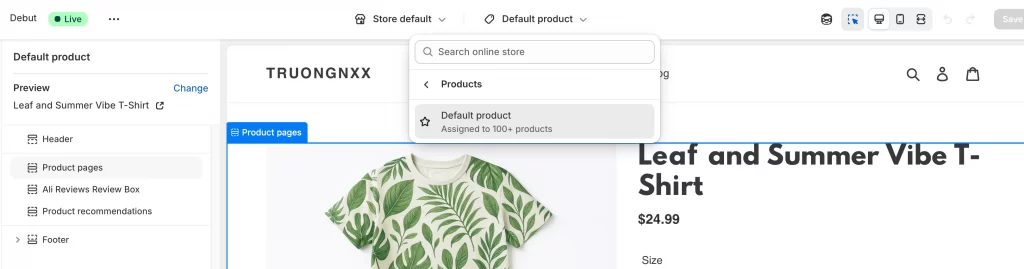
At the top of the editor, open the dropdown menu and select Products → Default product.
Hover near the product price until you see a + symbol, then click Add block and choose Payments Messaging – Afterpay On-Site Messaging.
Click Save to apply your changes.
Step 3: Add messaging to the cart page
Return to the Theme Editor and open the Cart template.
Hover near the subtotal area and click the + icon.

Add a new Afterpay On-Site Messaging block and position it below the subtotal or above the checkout button.
Click Save once finished.
Step 4: Customize styling (text, logo, color, placement)
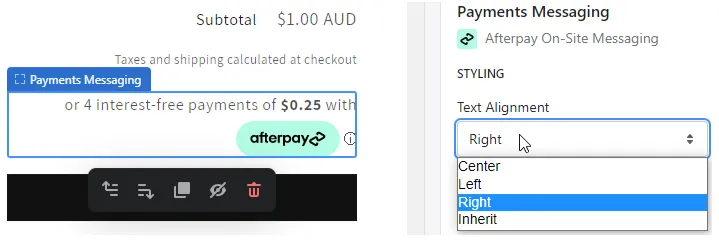
Inside the Theme Editor, select the Afterpay block you added. Here, you can adjust:
- Text alignment
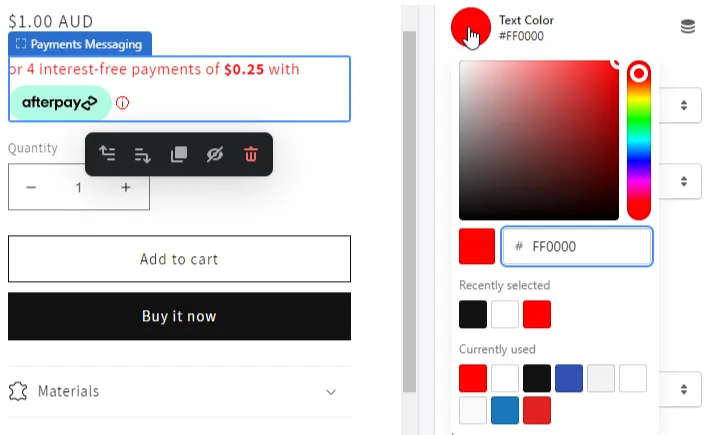
- Font size and color
- Logo color theme (mint, white, or black)
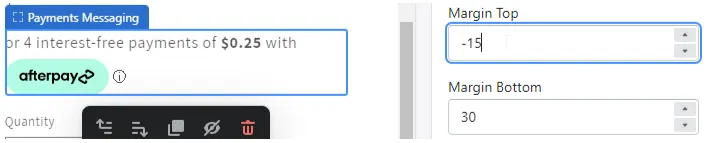
- Margins and spacing for desktop and mobile
You can also choose to show or hide the “interest-free” phrase or bold the payment amount.
Step 5: Hide or exclude Afterpay messaging on selected products
If you do not want the messaging to appear on specific products, create a new product template without the Afterpay block. You should assign this template only to products that should not display installment information.
What to Do After Adding Afterpay to Shopify
Afterpay should now appear as a payment option at checkout. Before promoting it to customers, take some time to make sure everything works properly and looks professional.
1. Run a live test order on a low-priced product
First, you should make a small live purchase from your store using Afterpay to see exactly what your customers will experience. Let’s choose an inexpensive product and go through the checkout process from start to finish. Once the order appears in your Shopify admin and in the Afterpay Business Hub, you can refund it to yourself. This simple test helps confirm that payments are processed correctly.
2. Confirm that taxes, shipping, and discounts apply correctly
Since Afterpay divides the total order into four payments, it is important that all costs are included in the final amount before checkout. You can add a few test discounts or different shipping rates to confirm that the payment summary is accurate.
If something does not look right, check your tax settings in Settings > Taxes and Duties and review your shipping profiles to make sure they are applied correctly.
3. Enable analytics tracking and create a filter for Afterpay orders
You should also track the performance of Afterpay orders to see how they affect your sales. In the Shopify Orders tab, use filters to view orders by payment method and save a custom view called “Afterpay Orders.”
You can also enable Shopify Analytics or Google Analytics to track metrics such as conversion rate, average order value, and refund activity for Afterpay transactions. This information helps you understand how installment payments influence your results.
4. Update product pages, FAQs, and policy pages
Let your customers know that Afterpay is available. You can add a short line on your product pages such as “Available to pay in four interest-free installments with Afterpay.” Let’s include a short explanation in your FAQ section and mention it again in your return policy so customers know how refunds are handled.
5. Check your storefront display
After confirming that checkout works, you should review your product and cart pages to ensure the Afterpay messaging is visible. If you changed themes after installation and the message no longer appears, you can reinstall the Afterpay On-Site Messaging app or manually reinsert the snippet.
Additionally, even when using external gateways like Afterpay, you must still configure Shopify Payments or another primary processor.
Troubleshooting Common Afterpay Issues in Shopify
If Afterpay is not showing up at checkout or transactions fail, most problems can be fixed through a few quick checks. Before contacting Afterpay or Shopify support, review the following points to identify and correct the issue.
1. Region or currency mismatch
Afterpay will only appear if your Shopify store’s address and currency match the region of your Afterpay account. For example, a store based in the United States must use US Dollars and have a US address. If these do not match, update them in Settings > Store details before reconnecting your account.
2. Unable to verify your merchant account in the Business Hub
To verify your merchant account, your Afterpay user profile must have User or Hub Admin permissions. If you do not see the verification option, contact your company’s Business Hub administrator to adjust your access level before trying again.
3. Unable to log in to the Business Hub
If you are redirected to the Business Hub and cannot log in, click Forgot my password to reset your login. If you still cannot access your account, ask your internal onboarding contact to create or reactivate your user profile.
You can also reach the Merchant Admin team for assistance by email:
- Australia and New Zealand: [email protected]
- United States and Canada: [email protected].
When contacting support, please include your full name, merchant ID, trading name, and registered email address.
4. Technical error at checkout
If you see the message “Your payment cannot be processed for technical reasons. Please try a different payment method”, the issue often occurs when a customer checks out without entering an email address. To prevent this, go to Settings > Checkout and select Customers can only check out using email.
5. Test mode enabled on a live store
When test mode is active, customers cannot complete real payments. Open Settings > Payments, click Afterpay, and make sure test mode is turned off. Use a dedicated development store for testing instead.
6. Afterpay not appearing or disappearing from the storefront
If Afterpay worked previously and then disappeared, it may be caused by a theme change or an app conflict. When you install a new theme, Afterpay product page messaging needs to be re-added. Open the Afterpay On-Site Messaging app and reinstall the messaging blocks or manually insert the snippet again.
If the payment method itself does not appear at checkout, temporarily disable recently added apps or switch to a default Shopify theme to test for conflicts.
7. Manual capture timing and expired authorizations
When manual capture is enabled, Afterpay places a 13-day hold on the customer’s payment. If the order is not captured within that time, the authorization expires, and the funds are released back to the customer. Captured payments are automatically settled as usual.
8. Order value outside Afterpay limits
Afterpay is only available for orders within specific limits. Most regions support transactions between one and four thousand dollars. Orders outside this range will not show Afterpay as an option at checkout.
9. Customer returned to checkout after attempting payment
Customers are redirected back to the Shopify checkout page if the order total is below the minimum, above the maximum, or uses a non-supported currency. Once the order value and currency meet Afterpay’s requirements, payment will process normally.
10. Afterpay missing from Express Checkout
Afterpay is not available in Shopify Express Checkout. Customers can still select it in the regular payment method list. If it does not appear there either, contact your Afterpay Delivery Manager for assistance.
11. POS availability and limitations
Afterpay works with Shopify POS in selected regions only. You can check your Business Hub or contact the Afterpay support team to confirm if in-store payments are supported in your country.
How to Add Afterpay to Shopify: FAQs
What do I need to add Afterpay to my Shopify store?
You need an approved Afterpay merchant account, a Shopify store on any paid plan, and a store address and currency that match your Afterpay region. Once you have these, you can install the Afterpay (New) app from your Shopify payment settings and connect your merchant account through the Business Hub.
Why is Afterpay not showing up on Shopify?
If Afterpay does not appear at checkout, check that your store’s address and currency match your Afterpay account region. Also confirm that Afterpay is activated under Settings > Payments and that test mode is turned off. Orders below one dollar or above the regional limit will not display Afterpay as an option.
How do I add Afterpay as a payment option?
Go to Settings > Payments in your Shopify admin, click Add payment methods, and search for Afterpay (New). Install the app, connect your merchant account through the Afterpay Business Hub, and activate the payment option in Shopify. Once active, Afterpay will appear automatically at checkout.
How do I add an Afterpay icon to Shopify?
To display the Afterpay logo or “Pay in 4” message on your product and cart pages, install the Afterpay On-Site Messaging app from the Shopify App Store. This app allows you to add payment messaging blocks through the Theme Editor and customize their size, color, and placement.
How much does Afterpay charge on Shopify?
Afterpay charges merchants a transaction fee for each successful order. The rate may vary by region and business type, so you can find the exact percentage in your Afterpay Business Hub or in your merchant agreement. There are no additional setup fees or monthly charges from Shopify to use Afterpay.
Final Words
Learning how to add Afterpay to Shopify store gives your customers more flexibility and helps you attract those who prefer to pay in installments. Once everything is set up, take time to test the checkout, review your messaging, and make sure the payment option is clearly visible on your product and cart pages.
If your store is based in a supported region and you follow the setup steps carefully, Afterpay can be activated in just a few minutes. It is a simple change that can improve the shopping experience and encourage more visitors to complete their purchases.
Make your Shopify checkout ready for growth!
At LitOS, we help merchants go beyond basic payment setup. From connecting Afterpay and other payment providers to optimizing checkout flow and store performance, our team ensures your Shopify store is built for smooth transactions and higher conversions.
CONTACT US
