
How to Add Pages on Shopify in 5 Steps: 2025 Guide
You’ve launched your Shopify store, uploaded your products, and picked out a great theme. Yet something is still missing: the pages! Since they give your customers a clear place to learn your story, read your policies, or contact you for support, learning how to add pages on Shopify is very important.
But don’t worry. In this guide, we’ll show you exactly how to create a page in Shopify in 5 steps:
- Step 1. Go to the Pages section
- Step 2. Create a new page
- Step 3. Add and format your content
- Step 4. Set page visibility and publishing options
- Step 5. Save and preview your page
Let’s get started!
How to Add Pages on Shopify in 5 Steps
To add new pages on Shopify, you can proceed right inside Shopify’s built-in dashboard. It only takes a few quick steps to set up and publish your page content!
Below is how to create a new page in Shopify in detail:
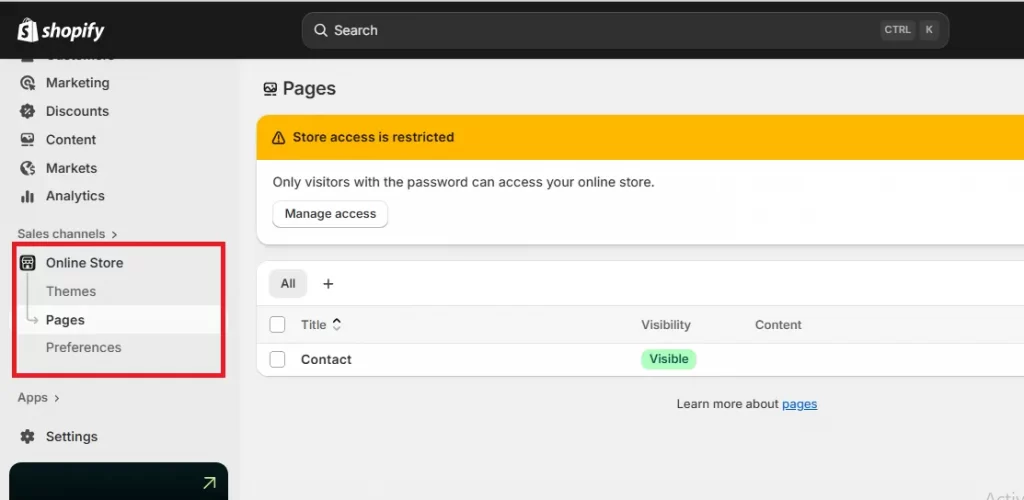
Step 1. Go to the Pages section
First, log in to your Shopify Admin, then head to Online Store → Pages. Here’s where you can view all your existing pages and create new ones whenever needed.
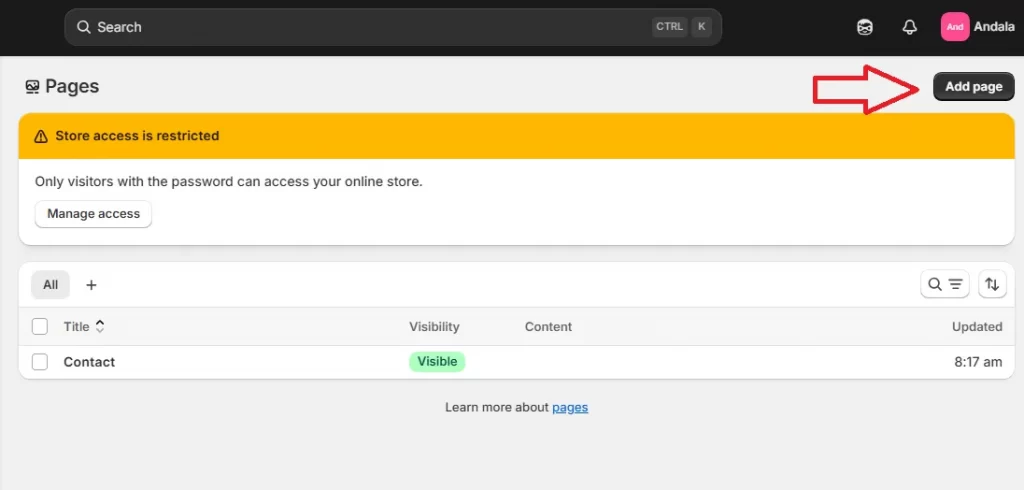
Step 2. Create a new page
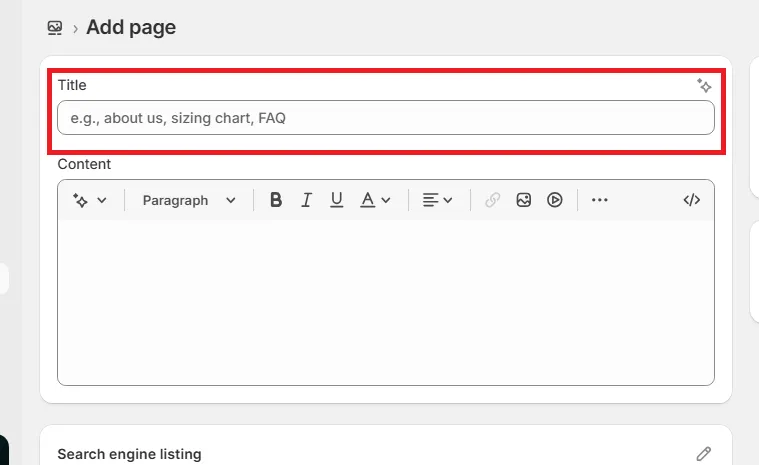
Now, click Add page to open the editor, then enter a Title for your page. That’s how to add a page; very simple!
This title isn’t just what customers will see in your navigation; it also appears in browser tabs and search engine results, so make sure it’s clear and descriptive! For example, “About Us,” “FAQs,” or “Shipping & Returns” are simple, effective choices that tell both users and search engines exactly what the page is about.
Step 3. Add and format your content
Next, let’s see how to edit Shopify pages!
In the Content section, you can start writing and formatting your text. Shopify’s editor works much like a word processor, so you can easily add headings, paragraphs, images, or even embedded videos. Keep the layout clean and easy to scan so visitors can find what they’re looking for right away.

Step 4. Set page visibility and publishing options
Now, move to the Visibility settings on the right-hand side:
- If you want your page to go live immediately, keep Visible selected as that’s already the default option.
- If you’d like to hide it for now while you work on it, choose Hidden instead.
- You can also schedule a specific publish date and time by clicking the calendar icon, which is handy if you’re preparing a page for an upcoming event, campaign, or product launch.

Step 5. Save and preview your page
Once you’ve added your content and set visibility preferences, click Save. Shopify will create your new page instantly. You can preview it right away to make sure everything looks good and displays properly on desktop and mobile. And that’s how to add pages on Shopify in minutes!
Adding pages is only one part of building a complete store. If you are still in the early stages, it helps to follow a full guide on how to set up a Shopify store so your pages, products, and navigation all work together from day one. This ensures your new pages support sales instead of feeling disconnected.
How to Create Pages on Shopify with LitOS
We have just discussed how to add pages on Shopify.
However, as you may have noticed, the built-in editor only offers a basic set of tools. Sure, it’s great for simple text and images, but if you want to include richer content, interactive media, or custom layouts that truly reflect your brand identity, the default options can feel a little limited!
That’s where LitOS makes a difference. As a leading Shopify agency, LitOS helps merchants go beyond Shopify’s standard page builder to create beautifully designed, high-performing pages that not only look great but also deliver measurable results. Our process is simple, collaborative, and entirely tailored to your goals:
- We start by understanding your business, audience, and objectives to define exactly what your page needs to achieve.
- Based on your requirements, our team suggests the best approach, be it a custom Shopify section, Liquid coding, or integrating third-party tools for advanced functionality.
- Our team then designs and builds your page with a strong focus on aesthetics, brand consistency, and user experience, ensuring it looks professional and works flawlessly across devices.
Ready to take your Shopify store to the next level with visually stunning, brand-aligned, and performance-driven pages? Get in touch with LitOS today!
Let’s build your store beyond the basics!
At LitOS, we help Shopify brands turn simple pages into high-performing experiences. With smarter technology, data-driven strategy, and hands-on Shopify expertise, we make your store not only look complete but also work harder for growth. From setup to scaling, every page can move your business forward.
Contact UsHow to Change Page Visibility in Bulk
Though editing existing pages on Shopify usually means opening them one by one to make adjustments, there’s one thing you can easily update in bulk: page visibility. Instead of spending time tweaking each page individually, Shopify lets you show or hide multiple pages at once with just a few clicks! Let us show you how:
Step 1. Open the pages section
Start by logging into your Shopify Admin, then go to Online Store → Pages (just like Step 1 of our How to add pages on Shopify guide).
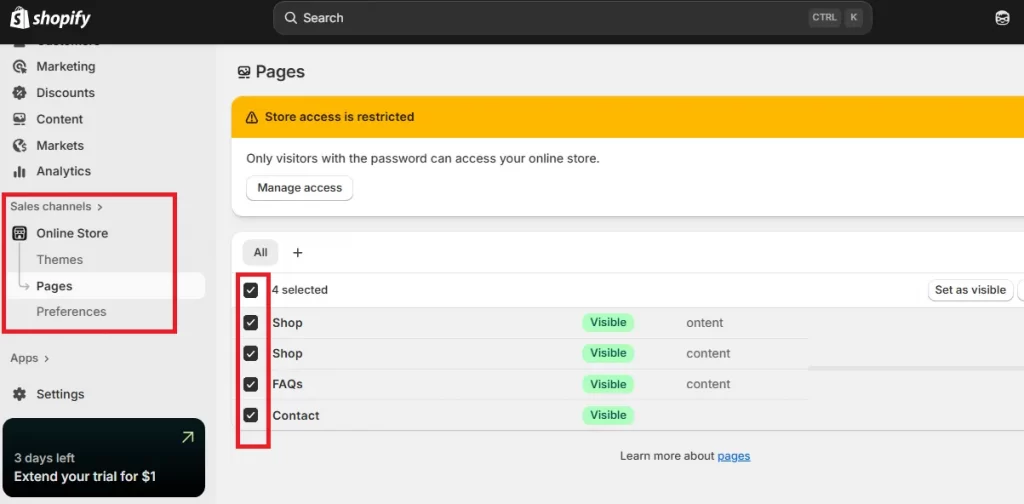
Once you’re on the Pages dashboard, check the boxes next to the pages you want to change. You can select as many as you like: a few pages, an entire section, or even all of them at once.
Step 2. Change the visibility in bulk
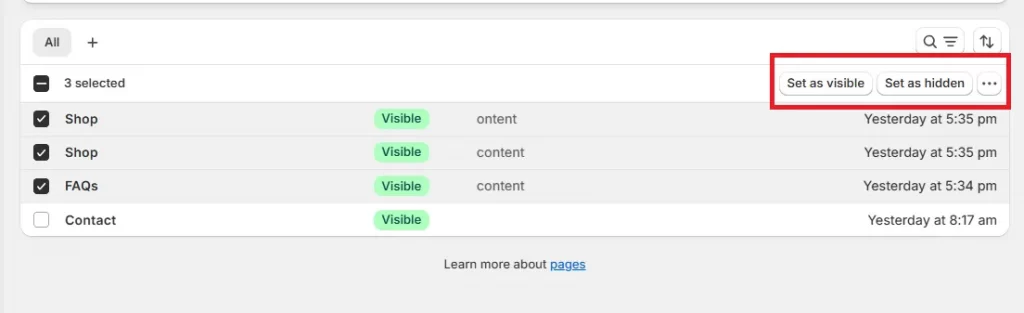
After selecting your pages, you’ll see visibility options appear at the top of the list. You have two choices:
- Click Set as visible to make all selected pages live on your storefront.
- Click Set as hidden to remove them from public view while keeping them saved in your admin.
After you’ve made your selection, Shopify will instantly update the visibility settings for all chosen pages.
Step 3. Review and confirm your changes
Finally, after the update, take a quick look at the visibility column to make sure your changes were applied correctly. You can always adjust them again later (for example, re-publishing hidden pages when you’re ready to relaunch them). That’s it!
Note: There are times when hiding pages is not enough, such as during site maintenance or a soft launch. In these cases, knowing how to lock a Shopify store can help you control access while you make changes. This is especially useful when updating multiple pages or redesigning your store.
8 Common Types of Pages on Shopify
Now that we’ve learned how to add pages on Shopify, let’s take a look at the most common types of pages every store should have:
- Homepage: As the store’s main hub, it guides every type of visitor to the products or information they need most.
- Landing pages: Unlike your homepage, landing pages focus on a specific audience or campaign. They’re usually built for visitors coming from ads, emails, social media, or partner sites, with content tailored to their interests.
- Policy pages: These are where you clearly explain your store’s terms and policies, such as refunds, returns, exchanges, and shipping.
- Contact page: Every store needs an easy way for customers to reach out when they have questions or issues. A clear Shopify contact page can prevent frustration and improve your brand’s reputation for good service.
- FAQ page: Frequently asked questions save time for both you and your shoppers. Addressing common concerns upfront keeps people engaged and prevents them from leaving due to uncertainty.
- About Us page: This is your chance to tell your brand’s story, highlight your mission, and connect with customers on a personal level. A strong About Us page can greatly boost trust and loyalty.
- Collection page: These pages organize products into logical groups (like “Best Sellers,” “New Arrivals,” or “Gifts for Dad”) so customers can easily find what they want without endless scrolling.
- Product pages: The core of any eCommerce site. Each product page should include high-quality images, videos, detailed descriptions, and persuasive copy to help visitors make confident purchase decisions.
If your pages need custom layouts, advanced features, or higher conversions, it may be time to work with a professional. Many growing brands choose to hire a Shopify developer to build custom pages that load fast, look polished, and match their brand goals. This saves time and avoids costly design mistakes.
Bonus: Best Apps for Adding Pages on Shopify
Still want to go beyond Shopify’s default page editor, but without using complex code? In that case, there are four popular apps from the Shopify App Store that can help you manage how to add pages on Shopify much more easily:
| App | Key Features | Pricing |
| PageFly Landing Page Builder | Drag-and-drop editor for creating any type of page-landing, product, collection, or homepage. Offers 130+ templates, built-in SEO tools, and integrations with major Shopify apps. | Free plan available; paid plans start at $18/month. |
| GemPages Page Builder | Build high-converting pages without coding. Includes AI-powered layout suggestions, conversion rate optimization tools, and responsive design options. | Free plan for 1 page; paid plans from $29/month. |
| EComposer Page Builder | Fast, intuitive builder with modern templates for home, landing, blog, and policy pages. Features real-time editing and integrates seamlessly with Shopify themes. | Free plan available; premium plans start at $19/month. |
| PlusPage | Enhances Shopify’s native editor by allowing custom layouts, background videos, and advanced sections not included in most themes. Ideal for merchants wanting lightweight customization. | From $8.99/month with free trial available. |
How to Add Pages on Shopify: FAQs
How do I add a page to the menu on Shopify?
To add a page to your store’s menu, go to Online Store > Navigation in your Shopify admin. Choose the menu you want to edit and click "Add menu item". Enter the page name, then select Pages under the “Link” field. Choose the page you want to connect and hit "Add." Your new page will now appear in your store’s navigation.
How do I add more pages to my Shopify header?
To include additional pages, simply repeat the same process: open your Main Menu, click Add menu item, and link it to the desired page. After saving, refresh your storefront to see the new link appear in the header bar.
How many pages can I create on Shopify?
Shopify doesn’t impose a strict limit on the number of pages you can create. You can add as many as your store needs and edit Shopify website the way you like. However, it’s best to keep your navigation organized and intuitive to avoid overwhelming customers.
How do I add a new product page on Shopify?
Product pages are automatically generated when you add a new product. Simply go to Products > Add product in your Shopify admin, then fill in all the details like title, images, description, pricing, inventory, and SEO information. Once you click Save, Shopify will create a dedicated product page that matches your store’s theme and structure.
Final Words
All in all, learning how to add pages on Shopify is the crucial step to building trust and guiding shoppers through every part of their Shopify navigation. Once your pages are set up and connected, your store becomes easier to navigate, more transparent, and far more professional in the eyes of your customers!
But if you’d rather skip the trial and error or want expert help polishing your Shopify store, LitOS can step in. From page optimization and quick layout fixes to UX improvements during peak sales days, our team helps you keep your store running fast and looking sharp when it matters most. Reach out to LitOS and let’s make your Shopify site ready for real growth!
And now, let’s turn your pages into a powerful brand story!
At LitOS, we help merchants bring structure and strategy together on Shopify. Whether you’re refining your product pages, creating content hubs, or building landing pages that convert, our experts make every element cohesive, fast, and ready to grow with your business.
Contact Us
