
How to Add WooCommerce to WordPress in 2026: Step-by-Step for Beginners
This article explains how to add WooCommerce to WordPress when you already have a website and want to start selling online without rebuilding it. WooCommerce integrates directly into WordPress as a plugin, so you can manage ecommerce features from the same admin area.
In this guide, you will learn how to:
- Add WooCommerce to WordPress safely
- Set up the minimum eCommerce settings needed to accept orders
- Troubleshoot common installation and setup issues
Once you complete these steps, your WordPress site will be ready to run WooCommerce.
What You Need Before Installing WooCommerce on WordPress
Before installing WooCommerce, make sure your WordPress site meets a few basic requirements so the installation and setup process runs smoothly.
First, you need a self-hosted WordPress website (WordPress.org). WooCommerce only works with self-hosted WordPress sites and cannot be installed on WordPress.com free plans.
Second, you must have administrator access to your WordPress dashboard, since installing and activating plugins requires admin permissions.
Third, your hosting environment should meet WooCommerce’s minimum technical requirements. Most modern WordPress hosting providers already support these by default, including:
- PHP 8.0 or higher
- MySQL 8.0+ or MariaDB 10.4+
- HTTPS (SSL certificate enabled)
- WordPress memory limit of at least 128 MB (256 MB recommended)
You usually don’t need to configure these manually unless your hosting is outdated.
Finally, make sure your WordPress theme is compatible with WooCommerce. You don’t need to change your theme before installation, but a WooCommerce-ready theme helps prevent layout or checkout issues later.
If your site meets these requirements, you’re ready to learn how to add WooCommerce to existing WordPress site.
How to Add WooCommerce to WordPress
Adding WooCommerce to WordPress only takes a few minutes and does not affect your existing pages or content. You’ll install WooCommerce like any other WordPress plugin and activate it from the dashboard.
Step 1: Log in to your WordPress dashboard
Log in to your WordPress admin area using an account with administrator access. You can usually access the dashboard by going to: yourwebsite.com/wp-admin
Once logged in, you’ll see the main WordPress dashboard menu on the left.
Step 2: Install the WooCommerce plugin
From the WordPress dashboard:
- Go to Plugins → Add New
- Use the search box in the top-right corner and type WooCommerce
- Find the official WooCommerce plugin developed by Automattic
- Click Install Now
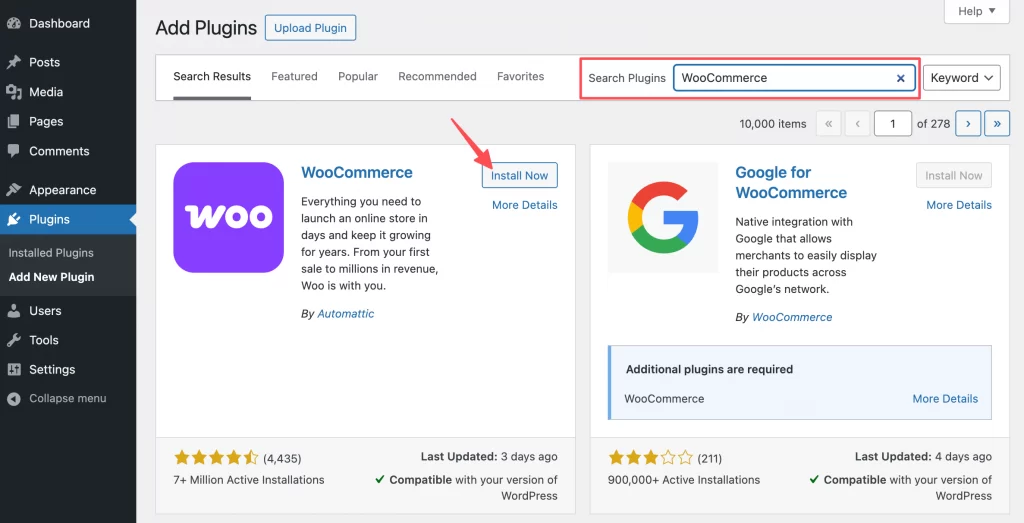
WordPress will download and install the plugin automatically.
Step 3: Activate WooCommerce
After installation is complete, the Install Now button will change to Activate.
Click Activate to add WooCommerce to your WordPress site.
Once activated:
- A new WooCommerce menu will appear in your dashboard
- WooCommerce is now successfully added to WordPress
- The setup wizard will be ready to start next
At this point, WooCommerce is installed and active, but your store is not fully configured yet. In the next section, you’ll set up WooCommerce so it can accept orders.
How to Set Up WooCommerce After Installation
After adding WooCommerce to WordPress, you need to complete a few essential setup steps so your site can function as an online store. WooCommerce guides you through this process using a built-in setup wizard.
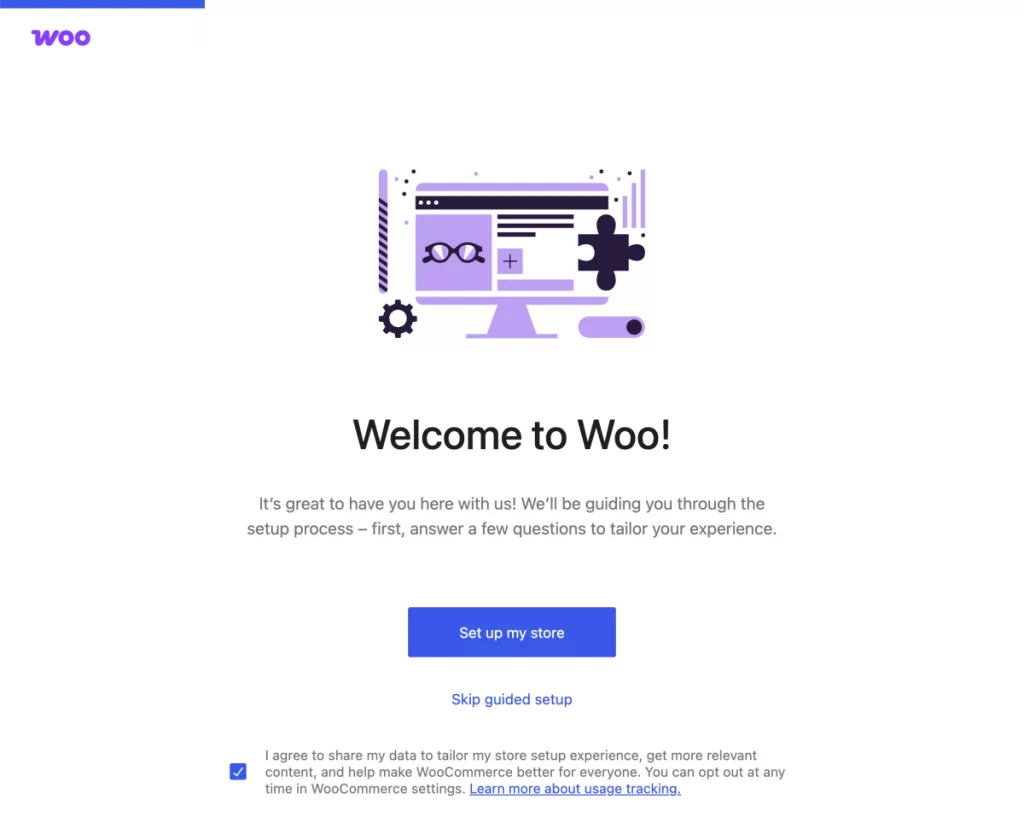
Step 1: Start the WooCommerce Setup Wizard
Right after you activate WooCommerce, the Setup Wizard usually opens automatically on the next screen. WooCommerce provides a built-in setup wizard to guide initial configuration, and all settings can be adjusted later.
If it doesn’t show up, you can start it manually:
- In your WordPress dashboard, go to WooCommerce → Home
- Look for the setup prompt and click Set up my store (or similar wording)
- If you don’t see it there, go to WooCommerce → Settings to begin configuring your store
Once the wizard starts, it will guide you through the core setup steps in order (store details, payments, shipping, and taxes).
Step 2: Enter basic store details
In this step, you’ll provide essential information that WooCommerce uses to configure your store’s core behavior.
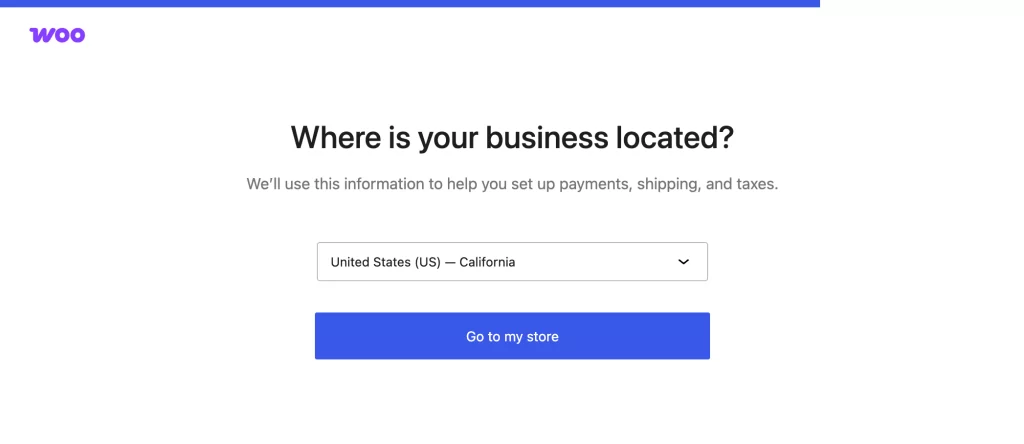
Inside the setup wizard, enter the following details:
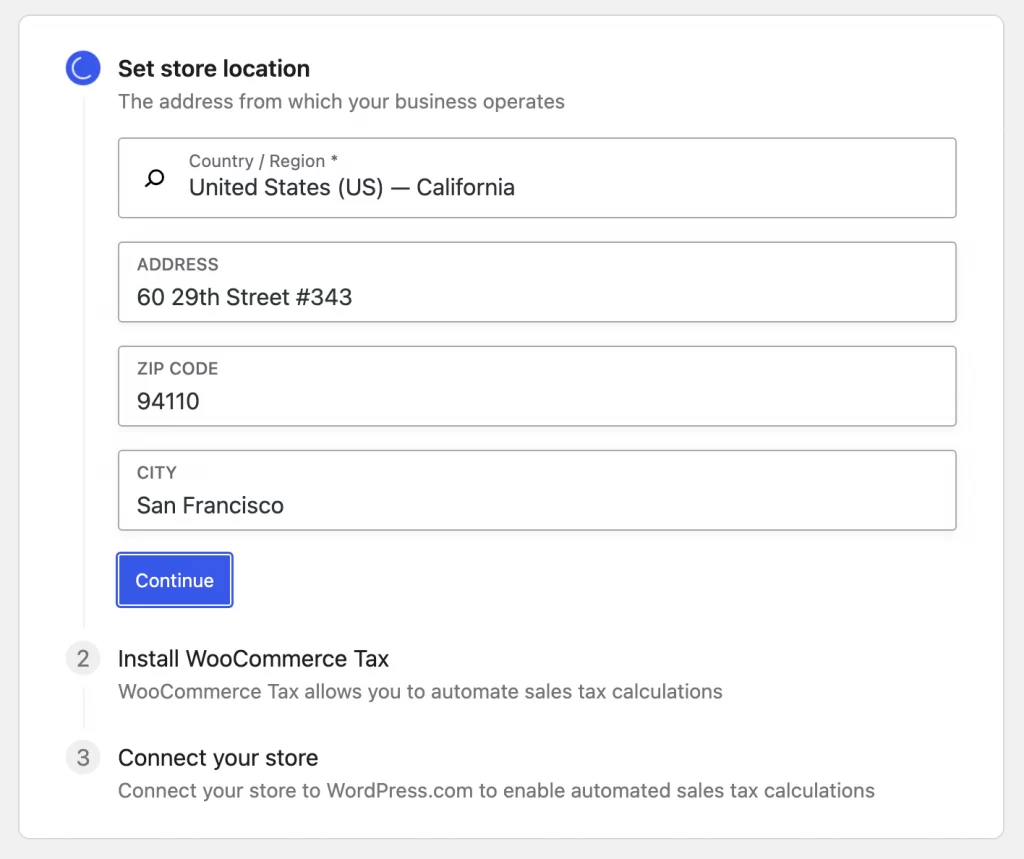
- Store location: Select the country and region where your business is based
- Currency: Choose the currency you want to use for pricing and payments
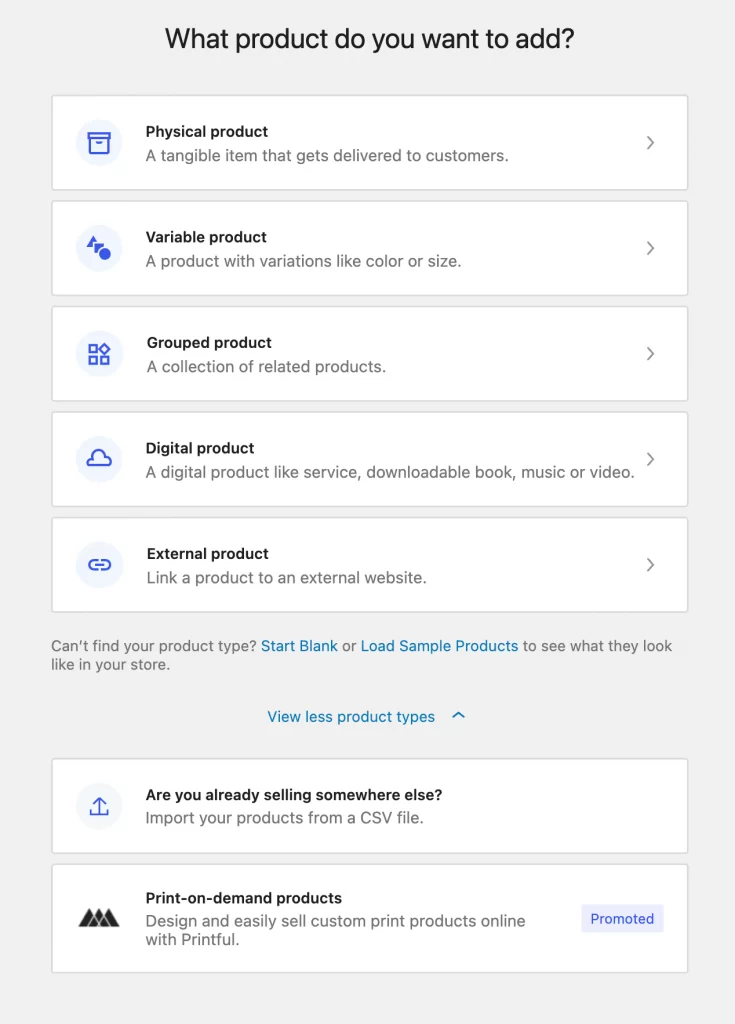
- Product type: Specify whether you plan to sell physical products, digital products, or both
These settings affect how prices are displayed, how taxes are calculated, and how checkout works, so make sure the information is accurate before moving to the next step.
Step 3: Configure essential eCommerce settings
This step makes sure your WooCommerce store can accept orders correctly.
Payments: Enable at least one payment method so customers can complete checkout. Common options include PayPal, Stripe, or direct bank transfer. You can add more payment methods later if needed.
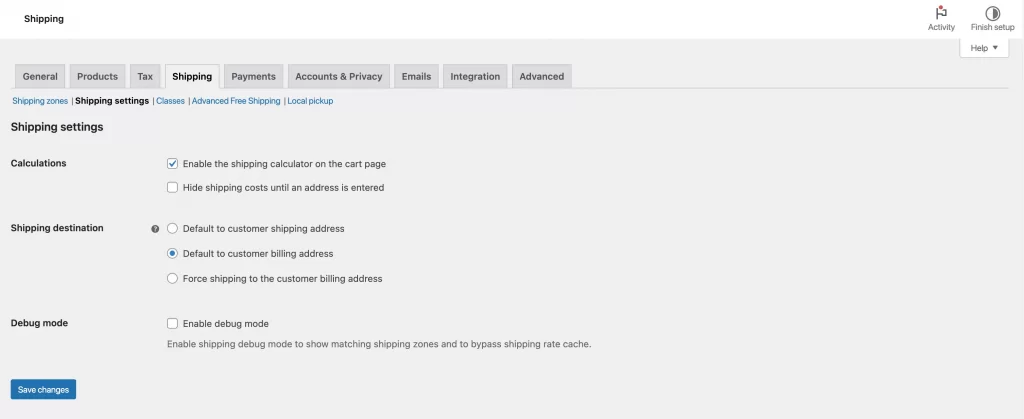
Shipping: Create a basic shipping zone and choose a simple shipping method such as flat rate or free shipping. This allows WooCommerce to calculate shipping costs during checkout.
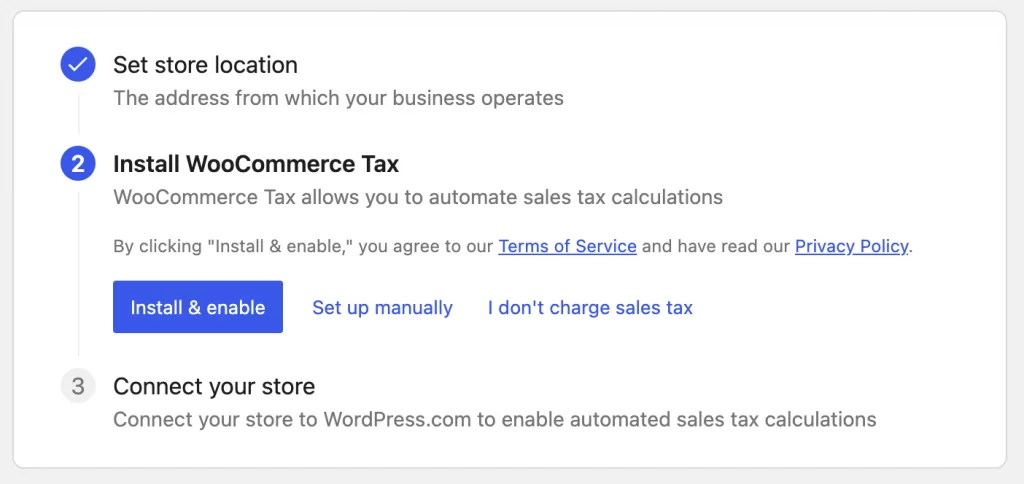
Taxes: Turn on tax settings if taxes apply to your store. Use the default tax configuration based on your store location. You can adjust tax rules in more detail after your store is live.
These settings are enough to complete the setup and move forward.
Step 4: Review WooCommerce theme compatibility
After completing the basic setup, review how WooCommerce displays with your current WordPress theme.
You can open a product page, the cart page, and the checkout page to confirm that layouts load correctly and all buttons and forms work as expected.
You do not need to change your theme unless you see layout or usability issues that affect the shopping or checkout experience.
Step 5: Add a test product (optional but recommended)
For this WooCommerce WordPress tutorial, we recommend adding a test product to confirm that WooCommerce is working correctly on your WordPress site.
You can create a simple product with a name, price, and basic description. Then view the product page, add the item to the cart, and proceed to checkout. This step lets you verify that product pages, cart functionality, and checkout flow all work as expected before adding real products.
Step 6: Review and save your settings
Before finishing the setup, let’s take a moment to review the settings you have entered in the setup wizard.
Now, you can check your store details, payment methods, shipping options, and tax settings to make sure everything is correct. When you are satisfied, save your settings to apply the configuration.
This helps ensure your WooCommerce store is ready to operate without issues.
Step 7: Finish setup and access the WooCommerce dashboard
After saving your settings, complete the setup wizard to finish configuring WooCommerce.
Once the setup is complete, you will be taken to the WooCommerce dashboard. At this point, WooCommerce is fully set up on your WordPress site and ready to accept orders.
And that’s how to install and set up WooCommerce plugin on your existing WordPress site.
How to Customize WooCommerce (Basic Settings Only)
After setup is complete, you can make a few basic adjustments to ensure WooCommerce fits your WordPress site without changing themes or adding plugins.
1. Adjust store pages and checkout behavior
Go to WooCommerce → Settings → Advanced and confirm that the Shop, Cart, Checkout, and My Account pages are assigned correctly.
Let’s review checkout options such as allowing guest checkout or requiring account creation, and choose the option that best fits your store.
2. Customize store emails and notifications
WooCommerce automatically sends emails to customers and store owners for orders, payments, and account updates. Before launching your store, you should review these email settings to ensure they display correctly and are sent from the proper address.
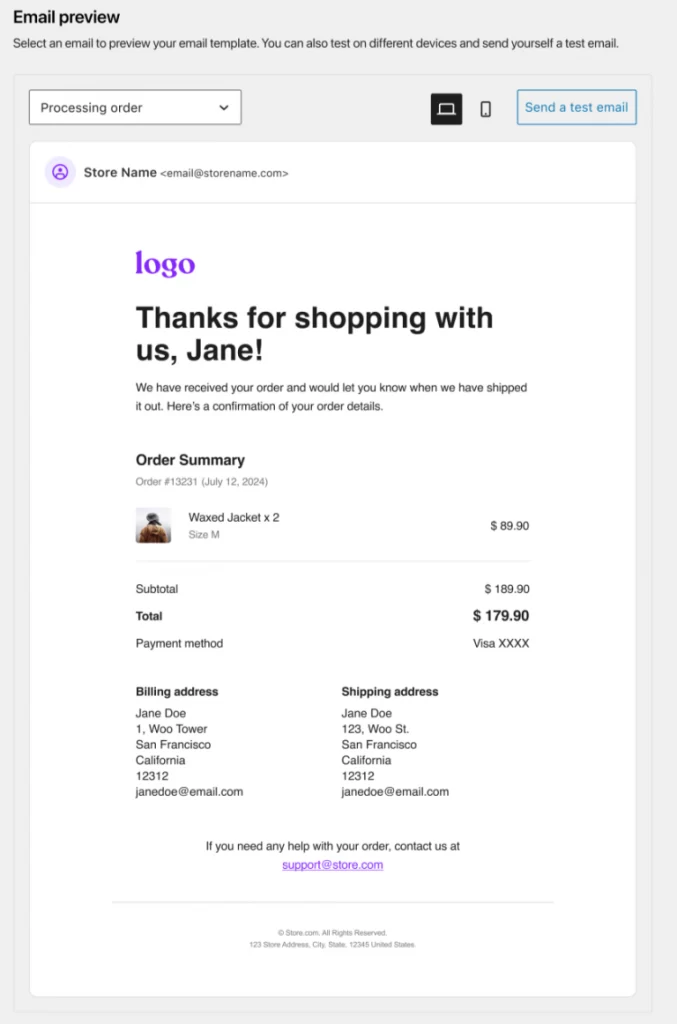
Go to WooCommerce → Settings → Emails and confirm that the store name and sender email address are accurate. You should also review which email notifications are enabled so customers receive the correct messages after placing an order.
Related reading: How to Customize WooCommerce Emails for Better Branding.
3. Review default WooCommerce settings
WooCommerce includes several default settings that control how prices, locations, and measurements are handled across your store. You should review these settings to ensure they match how your business operates.

Go to WooCommerce → Settings → General and check the currency display, default customer location, and measurement units for weight and dimensions. Adjust these values if needed, then save your changes to apply them across your store.
Troubleshooting: Common Issues When Adding WooCommerce to WordPress
This section of the WooCommerce tutorial helps you fix common problems that may appear when installing or setting up WooCommerce. Most issues can be resolved quickly without changing your theme or rebuilding your site.
1. WooCommerce plugin won’t install or activate
This issue usually occurs because of hosting limitations or plugin conflicts. First, you should make sure your WordPress site meets WooCommerce’s minimum requirements and that you are logged in with administrator access.
If the problem continues, temporarily deactivate other plugins and try installing WooCommerce again. In many cases, a conflict with another plugin prevents WooCommerce from activating properly.
2. WooCommerce setup wizard does not start automatically
Sometimes the WooCommerce setup wizard does not launch right after activation. This does not mean WooCommerce was installed incorrectly.
Go to WooCommerce → Home in your WordPress dashboard and look for the setup prompt to start the wizard manually. If you do not see it there, open WooCommerce → Settings and begin configuring your store from the settings pages.
Once the wizard starts, you can continue with the setup steps normally.
3. WooCommerce pages are missing after installation
WooCommerce normally creates the Shop, Cart, Checkout, and My Account pages automatically during setup. If these pages are missing, the setup wizard may not have completed correctly.

Go to WooCommerce → Settings → Advanced and check whether the required pages are assigned. If they are not set, you can create the pages manually and assign them from the dropdown menus.
After saving the changes, revisit your store to confirm that the pages are working properly.
4. Theme layout breaks after adding WooCommerce
Theme layout issues can occur if your current WordPress theme is not fully compatible with WooCommerce. This may cause product pages, the cart, or the checkout page to display incorrectly after WooCommerce is installed.
Start by confirming whether the issue is theme related. Temporarily switch to a default WordPress theme and reload the affected WooCommerce pages. If the layout works correctly with the default theme, your active theme is likely causing the problem.
In some cases, layout issues are caused by custom WooCommerce template overrides inside the theme. WooCommerce uses template files to control how store content is displayed, and outdated template overrides can break layouts after WooCommerce updates.
Advanced users only: The example below shows how hooks can be used safely without modifying WooCommerce templates.
// Advanced example: modifying WooCommerce output using a hook

add_action( 'woocommerce_email_order_details', 'custom_woo_email_content' );

function custom_woo_email_content() {

    // Custom output goes here

}
You do not need to use code to add or set up WooCommerce. If your site relies on a custom or child theme, a developer may need to review how WooCommerce templates are overridden and update them safely.
For deeper technical reference, consult the official WooCommerce documentation on template structure and template overrides.
5. Errors after uninstalling or reinstalling WooCommerce
Errors after uninstalling or reinstalling WooCommerce usually happen because some WooCommerce data or settings remain in the database.
When you deactivate and delete WooCommerce, WordPress does not automatically remove orders, products, or settings. If you reinstall WooCommerce later, these leftover settings can sometimes cause conflicts or unexpected behavior.
To fix this issue, first deactivate WooCommerce and clear any related caches if your site uses caching. Then reinstall and activate WooCommerce again, and review the main settings to make sure they match your current store configuration.
If problems continue, you may need to remove leftover WooCommerce data or ask a developer to review the database before reinstalling.
How to Uninstall WooCommerce in WordPress Safely
If you no longer need WooCommerce or want to remove it temporarily, it’s important to uninstall it the right way to avoid errors or leftover data issues.
Option 1: Disable WooCommerce only
This option is useful if you want to pause your store without deleting any data.
Go to Plugins → Installed Plugins, find WooCommerce, and click Deactivate. WooCommerce will stop running, but all products, orders, and settings will remain in your database.
You can reactivate WooCommerce at any time and continue using your store as before.
Option 2: Completely uninstall WooCommerce
Choose this option if you want to remove the WooCommerce plugin from your WordPress site.
First, go to Plugins → Installed Plugins, deactivate WooCommerce, and then click Delete. This removes the plugin files from your site.
By default, uninstalling WooCommerce does not delete store data. Products, orders, coupons, and settings will still exist in the database unless you take extra steps to remove them.
Removing all WooCommerce data (advanced users only)
If you need to permanently remove all WooCommerce data, including products and order records, additional configuration is required.
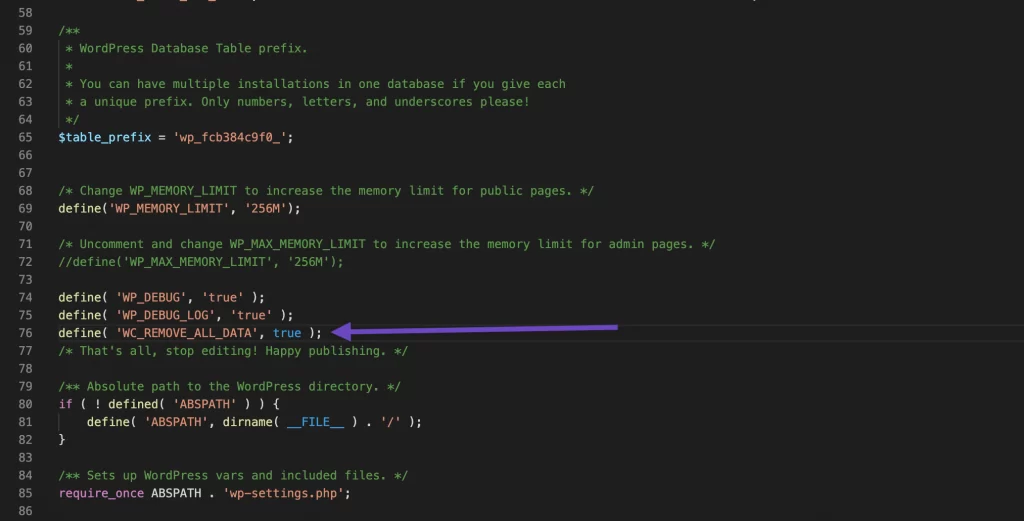
WooCommerce allows full data removal by adding a setting to the site’s wp-config.php file before deactivating and deleting the plugin. This action is permanent and cannot be undone.
define( 'WC_REMOVE_ALL_DATA', true );After saving this change, deactivating and deleting WooCommerce will remove all related data from the database.
Because this process is destructive, you should always create a full site backup before proceeding. WooCommerce support does not provide assistance with data recovery after full removal.
How to Add WooCommerce to WordPress: FAQs
How do I add WooCommerce to a WordPress page?
WooCommerce is added to your WordPress site as a plugin, not to a single page. After installation, WooCommerce automatically creates key pages such as Shop, Cart, and Checkout, which you can place in menus or link to like any other WordPress page.
How much does it cost to add WooCommerce to WordPress?
WooCommerce itself is free to install and use. However, you may incur additional costs for hosting, premium WooCommerce themes, extensions, or payment processing fees depending on your needs.
How do WordPress and WooCommerce work together?
WordPress handles your website content and structure, while WooCommerce adds ecommerce functionality such as products, cart, checkout, and order management on top of WordPress.
How do I add the WooCommerce shop page in WordPress?
WooCommerce creates the Shop page automatically during setup. If it is missing, you can create a new page and assign it as the Shop page under WooCommerce → Settings → Products.
Final Words
Now that you know how to add WooCommerce to WordPress, you can enable ecommerce functionality on your site without rebuilding pages or changing your existing setup. The installation and setup process is simple, and WooCommerce works alongside WordPress rather than replacing it.
With the basics in place, you can move forward at your own pace by adjusting settings, adding products, and expanding features only when needed. This approach keeps your store stable while giving you flexibility to grow.
And now, let’s build what’s next!
If you’ve added WooCommerce to WordPress and want to go further, LitOS helps brands build, customize, and scale ecommerce stores with the right strategy and technical foundation. From setup refinement to long-term growth, we focus on solutions that are stable, scalable, and results-driven.
Contact Us
