
How to Customize WooCommerce Checkout Page
You can learn how to customize WooCommerce checkout page in a simple, clear, and structured way. The right changes help you improve the user flow, adjust the layout, and create a checkout experience that fits your store’s goals.
This guide covers:
- What to check before editing your WooCommerce checkout
- How to use the block editor for layout control
- How to adjust fields with plugins
- How to apply advanced edits with PHP, CSS, and hooks
- How to solve common WooCommerce checkout issues
Each method suits a different type of store and skill level, so you can choose the path that gives you the results you want.
Before You Customize WooCommerce Checkout Page
A few early checks help you avoid problems and choose the right method for your store. This section gives you the foundation you need before you change anything on the checkout page.
1. Check your WooCommerce version and theme type
Your WooCommerce version and theme determine the tools available to you. Block themes support the modern checkout blocks. Classic themes rely on shortcodes unless you convert them. This check tells you exactly which path to follow in the next sections.
2. Understand blocks checkout versus classic shortcode checkout
Each system behaves differently, and this affects how you customize WooCommerce checkout page or even how to edit checkout page in WordPress when your theme relies on older markup. The classic shortcode checkout follows the older layout with fewer editing options. Knowing the difference helps you avoid plugin conflicts and missing payment methods.
3. Create a backup and use a child theme for code changes
A backup protects your store from unexpected issues. A child theme keeps your custom PHP or CSS safe during updates. This preparation gives you a stable environment before you make deeper changes.
Important: If your store uses WooCommerce’s High-Performance Order Storage (HPOS), ensure that any code snippets or plugins you add are declared compatible. Using outdated code on an HPOS-enabled site can lead to order data syncing errors.
4. Decide what you want to customize (user flow, layout, fields, payment experience)
A clear goal leads to cleaner results. You may want a shorter form, a more focused layout, a smoother payment step, or a checkout that reflects your brand. This decision guides you toward the right method and prevents unnecessary edits.
5. Choose your customization method: Block Editor, plugin, custom code, CSS, or action hook
Each method fits a different need. The block editor gives visual control. Plugins help you adjust fields with no code. Custom code and hooks give full flexibility. Clear direction at this stage saves you time and avoids conflicts during customization.
How to Customize WooCommerce Checkout Page Using Block Editor (Block Themes)
If your store uses a block theme, you already have the most flexible checkout editor available in WooCommerce. This method suits store owners who want a visual way to control layout and fields without touching code. You can adjust the flow, remove distractions, and shape the checkout to fit your design.
Step 1: Open the checkout template in Appearance and Editor
You can access the checkout template through Appearance → Editor, which gives you direct control for WooCommerce checkout page customization without a plugin.
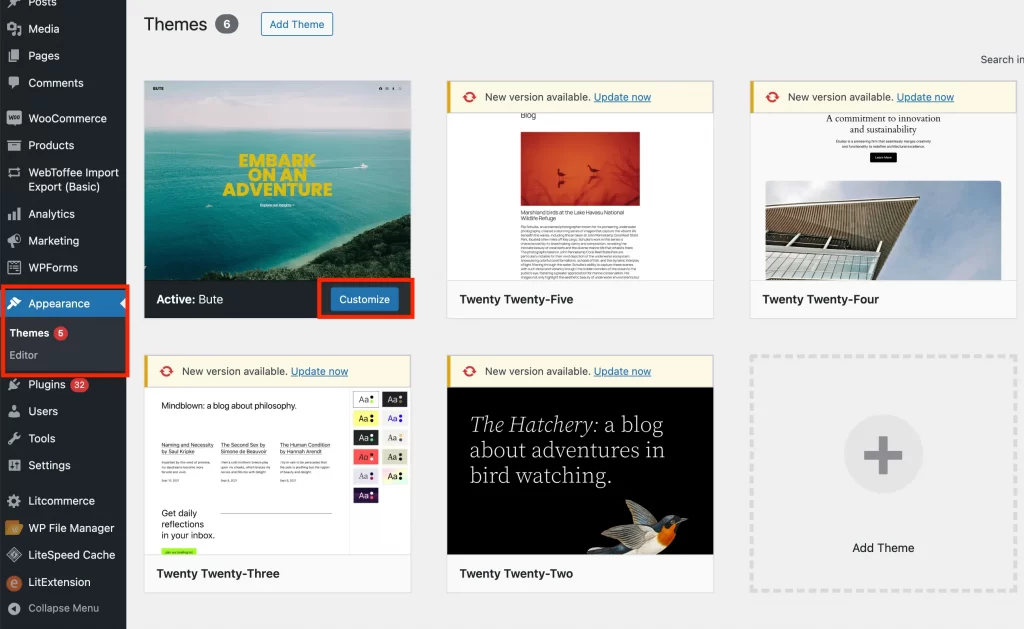
Browse your template and click Customize.
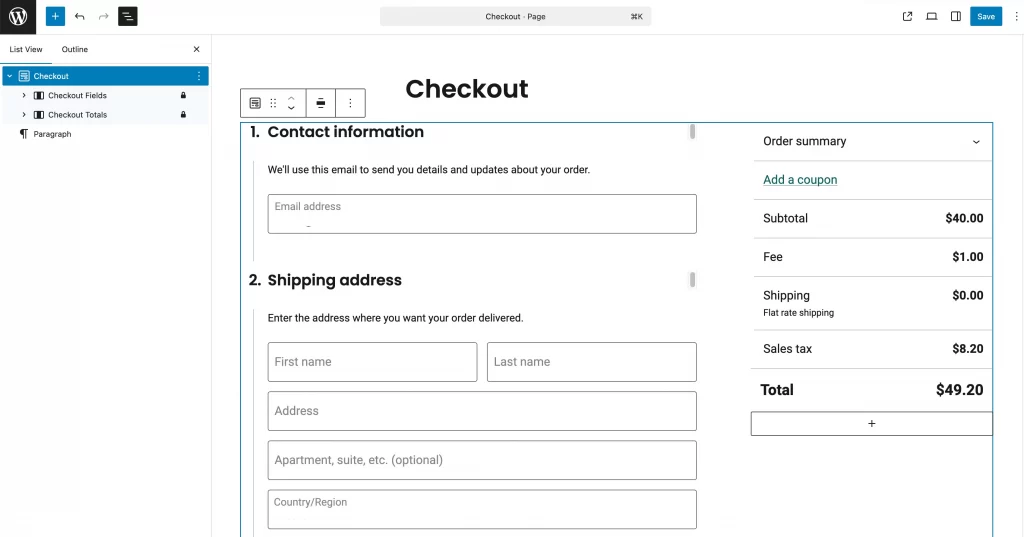
This brings you to the Site Editor, where WooCommerce places all checkout blocks. The layout loads exactly the way your customers see it.

Go to Template > Page: Checkout to learn how to customize WooCommerce checkout page.
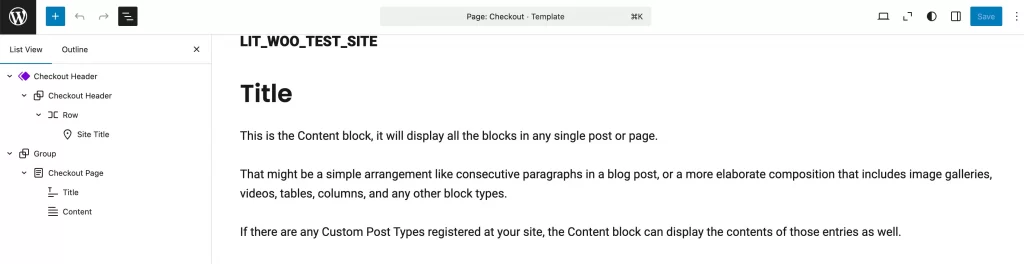
Step 2: Add, remove, or rearrange checkout blocks
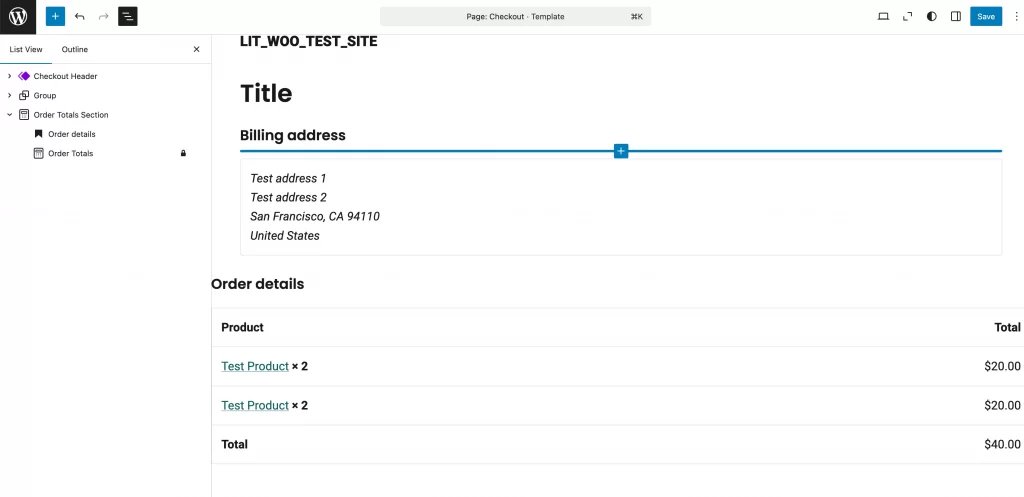
You can click on each inner block to control its position. The billing address, shipping address, order summary, and store notices all appear as separate blocks. You can remove sections you do not need or move them to match your preferred flow.
Step 3: Edit billing, shipping, coupon, and order summary sections
Each block offers settings in the sidebar. You can hide the coupon field, show or hide sections, or refine labels if your theme supports it. This approach keeps your checkout cleaner and more direct.
Step 4: Save and publish your changes
Click Save when you finish rearranging your layout. Your changes apply immediately on the checkout page. A quick test with a sample product helps you confirm the flow works smoothly.
How to Customize WooCommerce Checkout Page Using Block Editor (Classic Themes)
If your store uses a classic theme, you can still use the modern checkout blocks. The process feels slightly different because classic themes rely on pages instead of the full Site Editor. The steps below guide you through the switch from the old shortcode layout to the new block system.
Step 1: Open the Checkout page in Pages
You can go to Pages → All Pages and select “Checkout.” This page holds the shortcode layout by default.

Step 2: Transform the classic shortcode into the Checkout block
Your checkout page may show the WooCommerce checkout shortcode [woocommerce_checkout], which means your theme still uses the older layout system. You can try the Transform option to convert it into the Checkout block.
Some themes support a clean conversion, which gives you the modern block-based layout immediately.
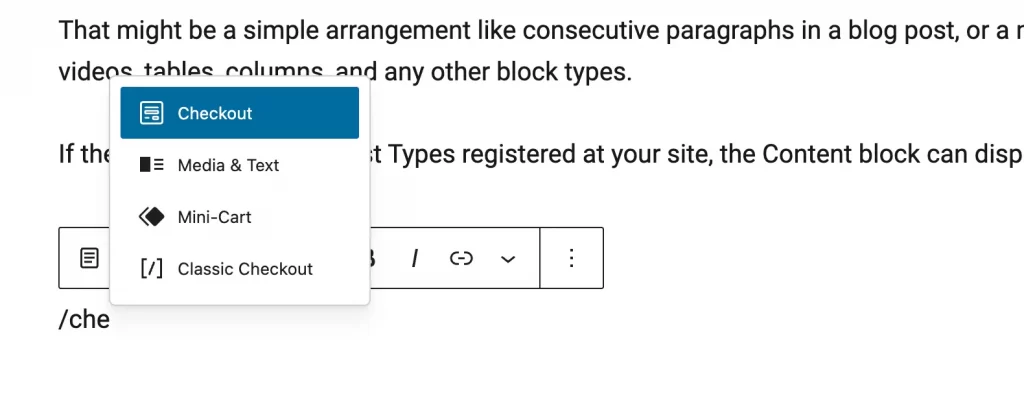
Step 3: Replace content with the Checkout block
Some themes cannot transform the shortcode. If that happens, you can delete the shortcode and insert the Checkout block from the block inserter. The block loads with all inner sections, so you can edit each part of the checkout layout without issues.
Step 4: Rearrange or remove inner blocks
You can click inside the Checkout block to adjust the order of billing, shipping, coupon, or order summary sections. You can also remove any part your store does not need.
Step 5: Update the page to apply your layout
Click Update to save your changes. Your checkout now uses the block layout even though your theme is not a block theme.
How to Customize WooCommerce Checkout Fields with a Plugin
Many store owners prefer a plugin because it offers full control over checkout fields without touching code. This method works on any theme and gives you a safe, flexible way to adjust the form based on your store’s needs. You can add new fields, hide fields you do not need, or change how each field behaves.
| Feature | CheckoutWC | FunnelKit | Checkout Field Editor |
| Best For | “Shopify-Style” Replacement | Sales Funnels & Order Bumps | Simple Field Edits |
| Code Required | No | No | No |
| Key Feature | Express Pay & Side Cart | One-Click Upsells | Add/Remove Fields |
| Cost | Premium | Free / Premium | Free / Premium |
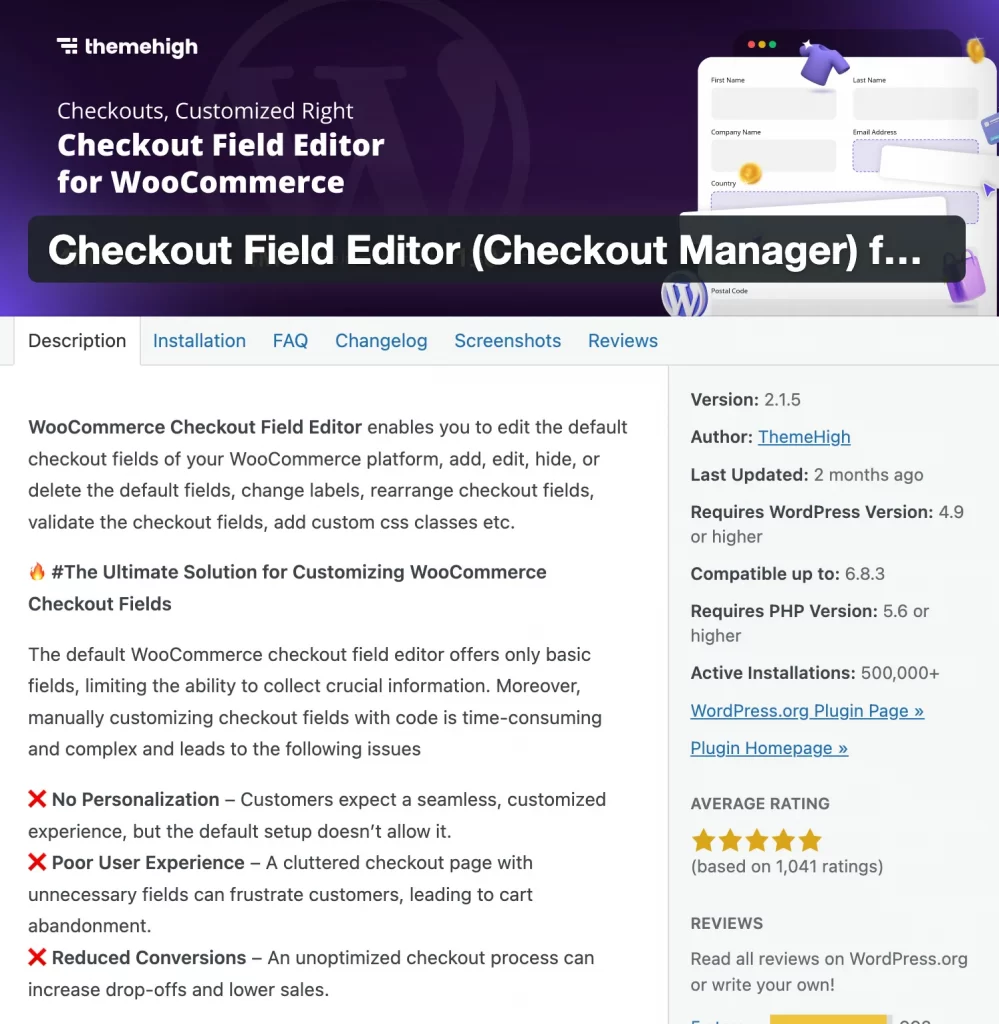
Option 1. Using Checkout Field Editor
This customize checkout page WooCommerce plugin gives you direct access to billing and shipping fields, which helps you adjust the form without writing code.
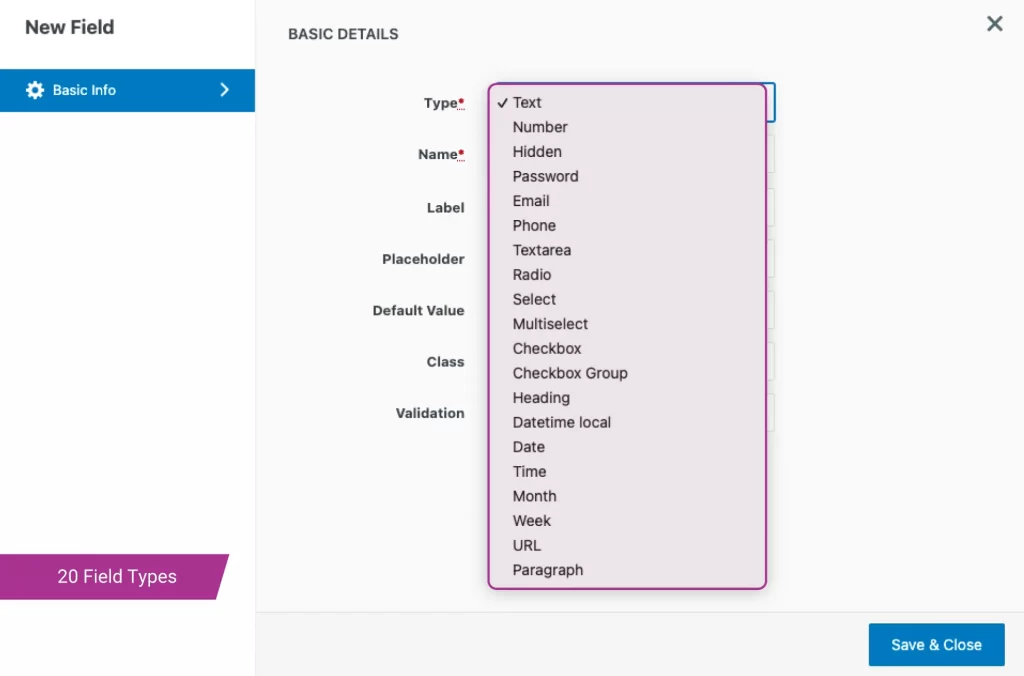
1. Add new fields
You can create fields for delivery notes, pickup times, tax IDs, gift messages, or anything your business requires. Each field type has its own settings, including label, placeholder, and position.
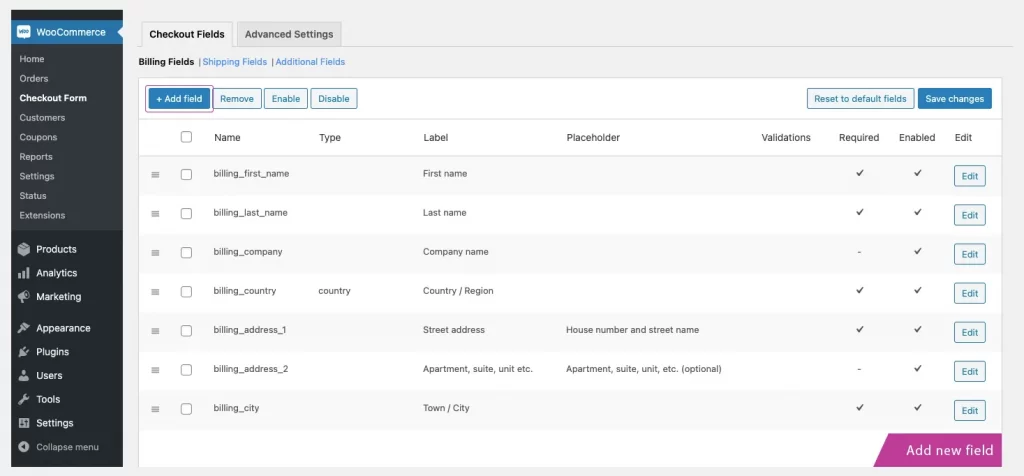
2. Edit or remove existing billing and shipping fields
You can change field labels, reorder them, or completely remove fields that add friction. This keeps the form simpler and faster for customers.
3. Make fields required or optional
You can mark fields as required if they are essential for order processing. Optional fields support a smoother flow when you want fewer barriers in the checkout process.
Option 2. Using page builders or funnel builders
This method suits stores that want deeper control over layout, design, and conversion elements.
1. Elementor-based checkout templates
You can load a WooCommerce template and use widgets to shape each part of the checkout. This gives you control over spacing, typography, and the overall structure.
2. FunnelKit one-page checkout
This tool lets you create a focused one-page checkout that reduces friction. You can place product details, order summary, and payment choices in a clean and optimized layout.
3. Add order bumps, upsells, and checkout add-ons
You can increase average order value by placing relevant offers inside the checkout flow. These features appear in a native style that matches your page builder design.
How to Customize WooCommerce Checkout Page with Custom Code (Advanced)
Developers and technical store owners often prefer custom code because it offers deeper control than plugins or the block editor. This method allows you to tailor the checkout to your exact business rules, add logic that plugins do not support, and adjust the layout at a structural level.
1. Remove unnecessary fields
// Add to your child theme's functions.php
add_filter( 'woocommerce_checkout_fields' , 'custom_remove_checkout_fields' );

function custom_remove_checkout_fields( $fields ) {
    // Remove Company Name and Address Line 2
    unset($fields['billing']['billing_company']);
    unset($fields['billing']['billing_address_2']);
    unset($fields['shipping']['shipping_company']);
    unset($fields['shipping']['shipping_address_2']);
    return $fields;
}
2. Move email field to top
// Move Email field to the top of the Billing section
add_filter( 'woocommerce_billing_fields', 'move_email_to_top' );

function move_email_to_top( $fields ) {
    $fields['billing_email']['priority'] = 1;
    return $fields;
}
3. Make phone number optional
// Make Phone Number Optional
add_filter( 'woocommerce_billing_fields', 'make_phone_optional' );

function make_phone_optional( $address_fields ) {
    $address_fields['billing_phone']['required'] = false;
    return $address_fields;
}
4. Override checkout templates in a child theme
You can copy WooCommerce template files into your child theme and modify the markup. This method gives you absolute control over structure and function. Any major customization that requires a layout change usually happens at this level.
5. Remove the header and footer on the checkout page
Some stores prefer a focused checkout that shows no links or distractions. A clean layout often improves completion rates, especially when your customers feel guided toward the payment step. You have several ways to remove the header and footer depending on your theme and your preferred method.
1. Using the Site Editor (block themes)
You can remove the header and footer directly from the checkout template:
- Go to Appearance → Editor → Templates → WooCommerce → Page: Checkout.
- Open the template and delete the header and footer blocks.
- Save the changes to apply a distraction-free layout on your checkout page.
Note: In the Site Editor, ensure you are editing the ‘Page: Checkout’ template. Deleting the header block here only affects the checkout page; your main site header will remain safe.
2. Using CSS
Some themes do not give direct access to the checkout template. In that case, you can hide the header and footer with a simple CSS rule.
You can place this code in Additional CSS or in your child theme’s style.css file:
/* Universal Distraction-Free Checkout */
.woocommerce-checkout.header,
.woocommerce-checkout.footer,
.woocommerce-checkout header,
.woocommerce-checkout footer,
.woocommerce-checkout.site-header,
.woocommerce-checkout.site-footer {
    display: none!important;
}
Replace XX with the ID of your checkout page. This approach affects only the checkout page and does not change site-wide layouts.
3. Using PHP in functions.php
Developers often choose a PHP method because it hides header and footer elements only when the checkout page loads. You can add this snippet to your child theme’s functions.php file:
function remove_header_footer_from_checkout() {
    // Only run on the checkout page
    if ( is_checkout() &&! is_order_received_page() ) {?>
        <style>
            header, footer,.site-header,.site-footer,.elementor-location-header,.elementor-location-footer {
                display: none!important;
            }
        </style>
    <?php }
}
add_action( 'wp_head', 'remove_header_footer_from_checkout' );
This method keeps your global design intact while clearing the checkout path for customers.
Troubleshooting Common WooCommerce Checkout Issues
Checkout problems often appear after you change layouts, fields, or payment settings. This section helps you identify the most common issues and gives you a clear direction on what to check first. A quick review of these points usually solves the problem without extra tools.
1. Payment methods not showing after customization
This issue often points to a gateway that does not support the block checkout. You can test by switching to the classic shortcode checkout or checking the gateway’s compatibility notes. Incorrect currency or country settings also cause the payment step to disappear.
If you are using the modern WooCommerce Checkout Block and payment methods (like generic local gateways) are missing, check if the plugin declares support for ‘WooCommerce Blocks’. If not, you must switch back to the Classic Shortcode [woocommerce_checkout] to restore functionality.
2. Checkout block not loading or missing fields
A broken block often relates to JavaScript errors, especially on stores that previously relied on the WooCommerce checkout shortcode or older template overrides. You can open your browser console to look for plugin conflicts. A caching plugin that optimizes scripts too aggressively also creates missing sections or unresponsive buttons.
3. Plugin conflicts affecting checkout layout or functionality
A checkout field plugin, a shipping extension, or a page builder sometimes overrides WooCommerce scripts. You can disable plugins one by one to identify the source. A conflict usually becomes clear once the layout loads correctly after deactivation.
4. Theme overrides breaking the checkout page
Your theme may contain outdated WooCommerce template files. You can switch temporarily to Storefront to confirm the issue. If the checkout loads correctly, the problem comes from your theme’s override files.
5. Slow checkout performance or page not responding
Heavy scripts, large images, or caching rules slow down the checkout flow. You can check your performance plugins and exclude the checkout page from minification. The speed improves as soon as scripts load in the correct order.
How to Customize WooCommerce Checkout Page: FAQs
How can I customize the WooCommerce checkout page without a plugin?
You can make changes with the block editor if your theme supports blocks. You can add or remove checkout blocks, rearrange sections, or adjust the layout. You can also use custom code in a child theme if you need deeper control.
How do I add custom fields to WooCommerce checkout?
You can add fields with the Checkout Field Editor plugin or create them manually with PHP filters. Both methods let you set labels, placeholders, and required status. You can also position the field anywhere inside the form.
How do I fix WooCommerce payment methods not showing?
This issue often comes from a gateway that does not support the block checkout. You can test with the classic checkout shortcode or switch off caching plugins briefly. You should also confirm that your currency, country, and account setup meet the gateway’s requirements.
How do I switch between block checkout and classic checkout?
You can open the Checkout page and transform the block into the classic shortcode or replace the shortcode with the Checkout block. WooCommerce settings under the Advanced tab must also point to the correct page for the switch to work.
Final Words
Your WooCommerce checkout works best when the layout, fields, and payment flow match the way your customers shop. This guide gives you full control, whether you prefer the block editor, a plugin, or advanced code. Every method serves a different type of store and a different level of customization.
As you fine-tune your checkout, your customers see a clearer path to completion and your store gains a more reliable conversion flow.
And now, let’s build what’s next!
At LitOS, we help brands grow smarter on WooCommerce with better technology, practical strategy, and hands-on support that delivers real results. From migration to long-term growth, we make the process seamless and scalable.

