
How to Edit Footer in Shopify: Step-by-Step Guide in 2026
If you’re wondering how to edit footer in Shopify, the good news is that most changes can be done directly inside the Theme Editor without touching code. In this guide, you’ll learn:
- What the Shopify footer is and why it matters
- What elements you can edit (menus, text, policies, payment icons, social links)
- How to edit footer in Shopify step by step using the Theme Editor
- Advanced customization options using code or Custom Liquid
- Common footer issues and how to fix them
By the end, you’ll know exactly how to structure, customize, and optimize your Shopify footer for better navigation, stronger branding, and improved user experience.
What Is a Shopify Footer?
What the Shopify footer is
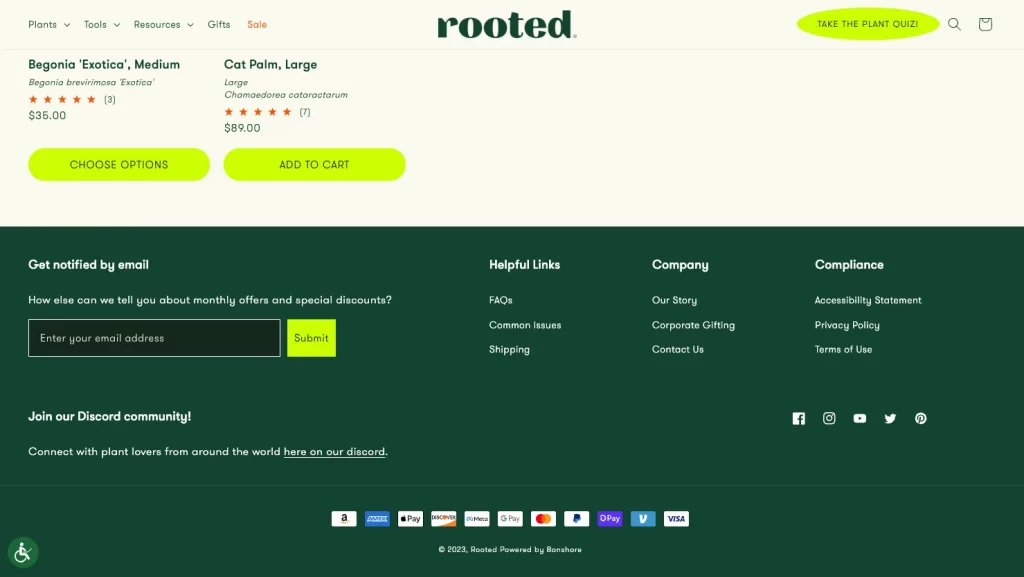
The Shopify footer is the bottom section of your online store. It appears on every page, including your homepage, product pages, collections, and blog posts.

Most Shopify themes, including the Dawn theme, include a footer by default. This section usually contains navigation links, contact details, policy pages, social media icons, and sometimes a newsletter signup form.
Because the footer appears site-wide, any changes you make to it will affect your entire store.
Why the footer matters for your Shopify store
Many store owners focus only on the header or homepage. But the footer plays an important role in how customers experience your store.
- First, it improves navigation. Visitors often scroll to the bottom of a page when they are looking for help, legal information, or secondary links. A clear footer makes it easy to find what they need.
- Second, it supports branding. The footer reinforces your brand identity through layout, colors, and consistent messaging.
- Third, it builds trust. Showing your contact details, policy pages, and accepted payment methods helps customers feel confident about buying from your store.
In short, the footer is not just a design element. It is a functional part of your store that improves usability, credibility, and conversions.
What Elements You Can Edit in a Shopify Footer
Below is a simple overview of what you can customize in your Shopify footer and where those settings usually live.
| Element | What you can edit | Where to edit it | Why it matters |
| Content blocks | Add or remove blocks like menus, text, newsletter signup, social icons, or custom Liquid | Theme Editor → Footer section | Controls the structure and layout of your footer |
| Footer menu | Choose which navigation menu appears and edit its links | Online Store → Navigation (create/edit menu) + assign in Theme Editor | Helps customers quickly find important pages |
| Store information | Address, phone number, email | Settings → General (Store details) | Builds trust and makes contact easy |
| Legal & policy pages | Privacy Policy, Terms, Refund Policy | Settings → Policies + link via menu | Required for compliance and customer confidence |
| Payment icons | Show accepted payment methods (Visa, Mastercard, PayPal, etc.) | Theme Editor → Footer settings | Reassures customers at checkout |
| Social media links | Add Facebook, Instagram, TikTok, etc. | Settings → Brand (or Social links) + enable in footer | Increases engagement and brand visibility |
| Newsletter signup | Enable email subscription form | Theme Editor → Add block → Newsletter | Supports email marketing growth |
| Styling & design | Colors, layout, column alignment, spacing | Theme settings → Footer design options | Keeps your branding consistent |
Instead of randomly adding links or blocks, you can structure your footer with purpose. In the next section, we’ll walk through the exact steps to edit your Shopify footer using the Theme Editor, so you can apply these elements correctly and confidently.
How to Edit Footer in Shopify Using the Theme Editor
Now that you understand what you can edit, let’s go step by step through how to actually update your Shopify footer. The Theme Editor is the easiest and safest way to customize your footer. You do not need coding knowledge for most changes.
Step 1: Open the Theme Editor
Log in to your Shopify admin dashboard.
From the left sidebar, click: Online Store → Themes. Here, you will see your current published theme.

Find your active theme and click Customize (or Edit theme, depending on your interface).
This opens the Shopify Theme Editor, where you can visually edit your store. The editor will load, showing your homepage by default, with sections like Header, Image banner, and Footer visible in the sidebar.
Step 2: Scroll to and select the Footer Section
In the left sidebar, scroll down to the Footer area (below the Template sections). Click on Footer to expand it and reveal all available footer settings and blocks.
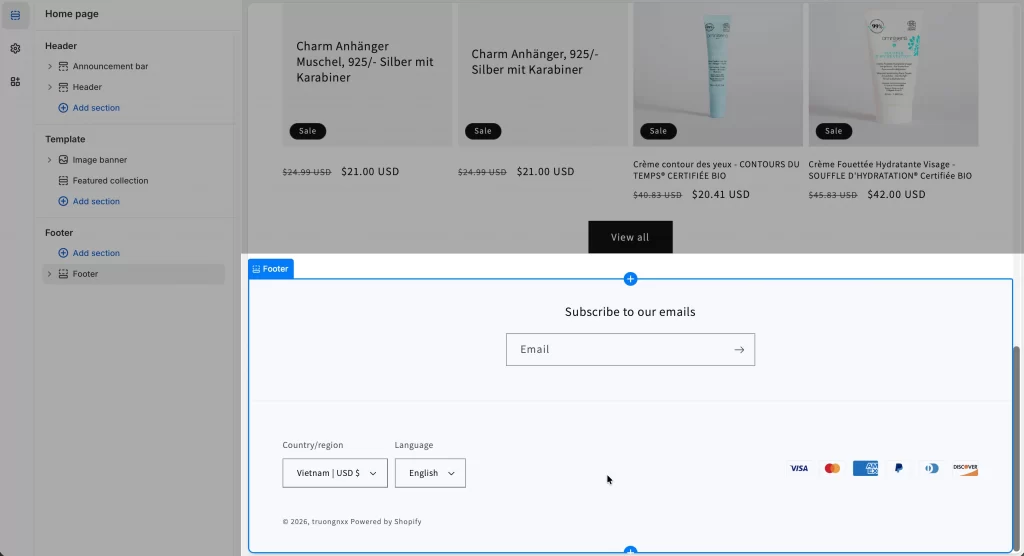
You might see blocks like “Menu,” “Text,” “Email signup,” and “Follow on social” that you can customize or rearrange.
Step 3: Customize text, menus, icons, and layout
Inside the Footer section of the Theme Editor, you can update content and design without editing code. Below are the most common changes you may want to make.
1. Edit footer menus
You can control which navigation menu appears in your footer directly from the Theme Editor.
In the Footer section, click on a Menu block. From the dropdown, select the menu you want to display, such as “Footer menu,” or create a new one.
If you need to change the links inside that menu, go to Online Store → Navigation, open the “Footer menu,” and add or remove links as needed. For example, many stores include links like About Us, Contact, Shipping Info, and Returns.
Click Save after editing.
2. Update the bottom footer information
You can also update the information that appears at the very bottom of your store.
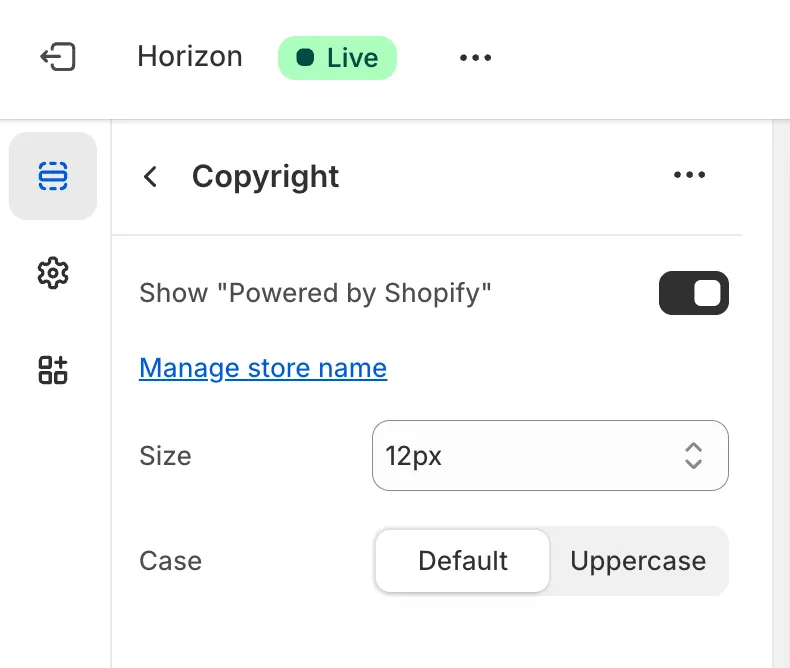
To edit the copyright text, open the Footer settings and find the Copyright field. You can enter something like:
© 2026 Your Store Name. All rights reserved.
If you need to update your store address, phone number, or email, go to Settings → General and edit the information under Store details. If the footer block is enabled, this information will automatically appear in your footer.
For example, you might display:
Phone: (555) 123-4567
Email: [email protected]
3. Remove or edit “Powered by Shopify”
Many store owners want to remove or replace the “Powered by Shopify” text in the footer.
The simplest way to change it is through Edit default theme content. From Online Store → Themes, click the three dots next to your theme and select Edit default theme content. Search for the word “powered,” then replace the text with a single space or your own message, such as: Built with care in New York.
If the text still appears, you may need to edit the theme file directly. Go to Edit code → Sections → footer.liquid and remove the line:
{{ powered_by_link }}4. Link legal and policy pages
Legal and policy pages are important for trust and compliance. These usually include your Privacy Policy, Terms of Service, and Refund Policy.
First, create or review your policies in Settings → Policies. Once they are ready, you can add them to your footer menu by going to Online Store → Navigation and inserting the correct links, such as:
- /policies/privacy-policy
- /policies/terms-of-service
- /policies/refund-policy
Some themes also provide a Policy links block, which automatically connects to your policy pages without manually creating menu links.
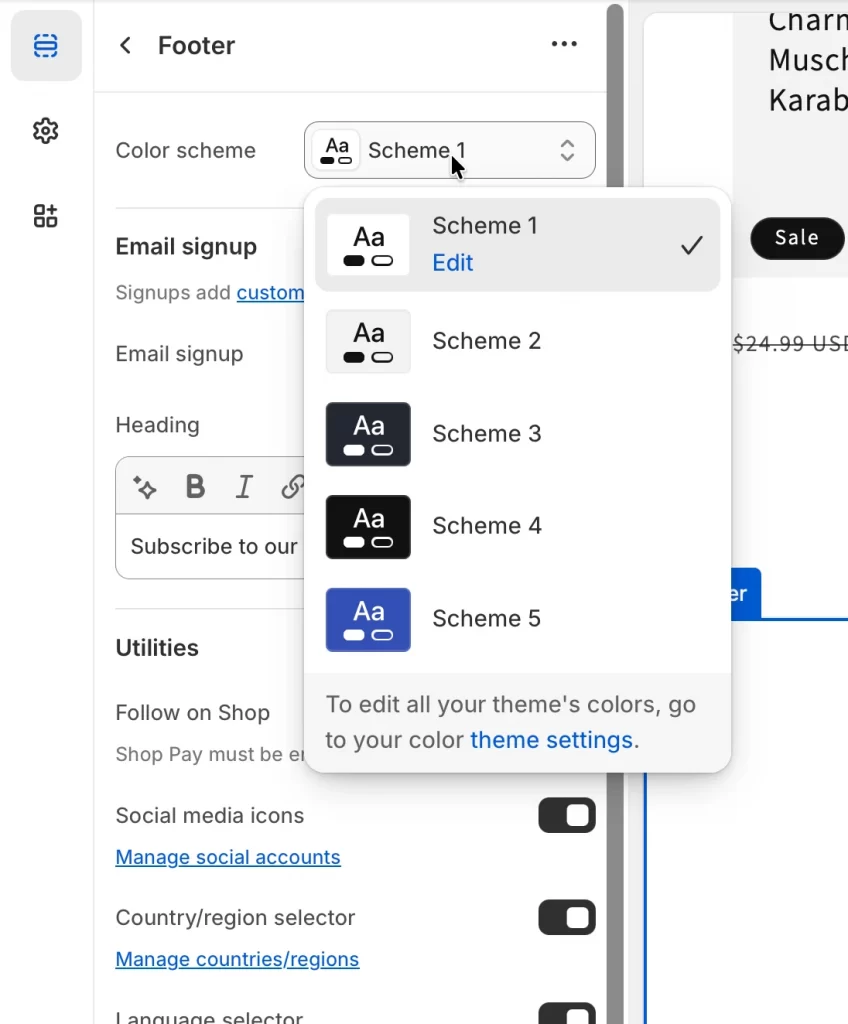
5. Adjust footer design and layout
Besides content, you can also control how your footer looks.
Inside the Footer settings, you may change the number of columns, adjust alignment, or update background and text colors. For example, you might switch from four columns to three for a cleaner layout, or use a black background with white text for a stronger visual contrast.
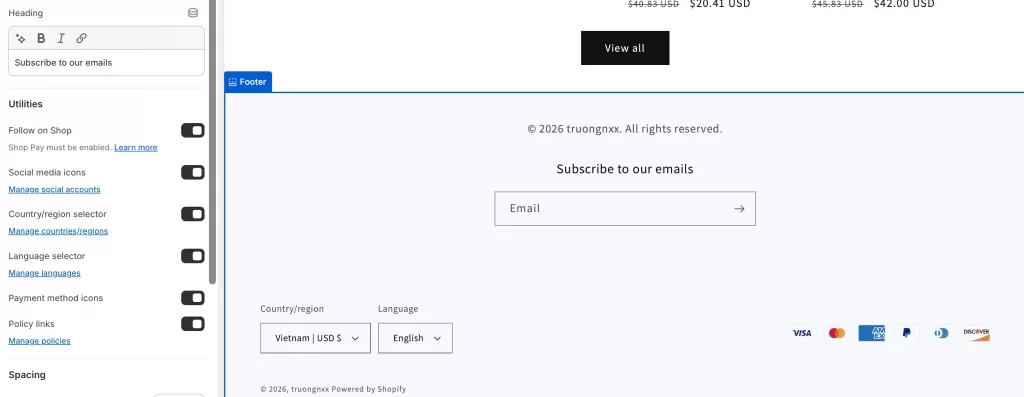
To display social media icons, go to Settings → Brand and add your social profile URLs. Once added, enable the social block in the Footer section.
If you want to show accepted payment methods, simply enable the Show payment icons option. You can also add a newsletter signup block and customize its heading and button text to match your brand tone.
Step 4: Save and preview changes
After you finish editing your footer, click Save in the top-right corner of the Theme Editor. If something does not look right, you can return to the Footer section and adjust it immediately. Always save again after making changes.
Advanced Footer Customization Options in Shopify
The Theme Editor is enough for most stores. However, if you need more control over layout, functionality, or design, Shopify also offers advanced customization options.
These methods give you greater flexibility, but some require technical knowledge.
1. Edit default theme content (translations & labels)
This option lets you change standard text across your theme, including footer text, without editing code. You can use this method if you want to translate footer content, adjust default phrases, or modify newsletter text.
For example, you might:
- Translate your footer into another language
- Replace “Powered by Shopify”
- Change “Subscribe to our emails” to “Join our VIP list”
How to do it: Go to Online Store → Themes, click the three dots next to your theme, and choose Edit default theme content.
You can use the search bar to find words like “footer,” “powered,” or “newsletter.” Edit the text fields and click Save.
This method is safe and does not affect your layout structure.
2. Edit footer theme code (footer.liquid)
If you need complete control over structure and styling, you can edit the footer code directly. This requires knowledge of HTML, CSS, and Liquid.
You may use this method when:
- You want to restructure the footer layout
- You need to remove hardcoded elements
- You want to add custom HTML sections
- You need advanced styling
How to access it: Go to Online Store → Themes → … → Edit code, then open the Sections folder and select footer.liquid. You can also add custom elements such as trust badges or additional sections.
Important: You must always duplicate your theme before editing code. This protects your store in case something breaks.
3. Add custom Liquid blocks
Custom Liquid blocks allow you to add dynamic content or custom code directly inside the Theme Editor. This is a safer alternative to editing theme files.
You can use Custom Liquid blocks to:
- Add custom HTML or CSS
- Embed Google Maps
- Display recent blog posts
- Add styled trust badges
- Insert third-party widgets
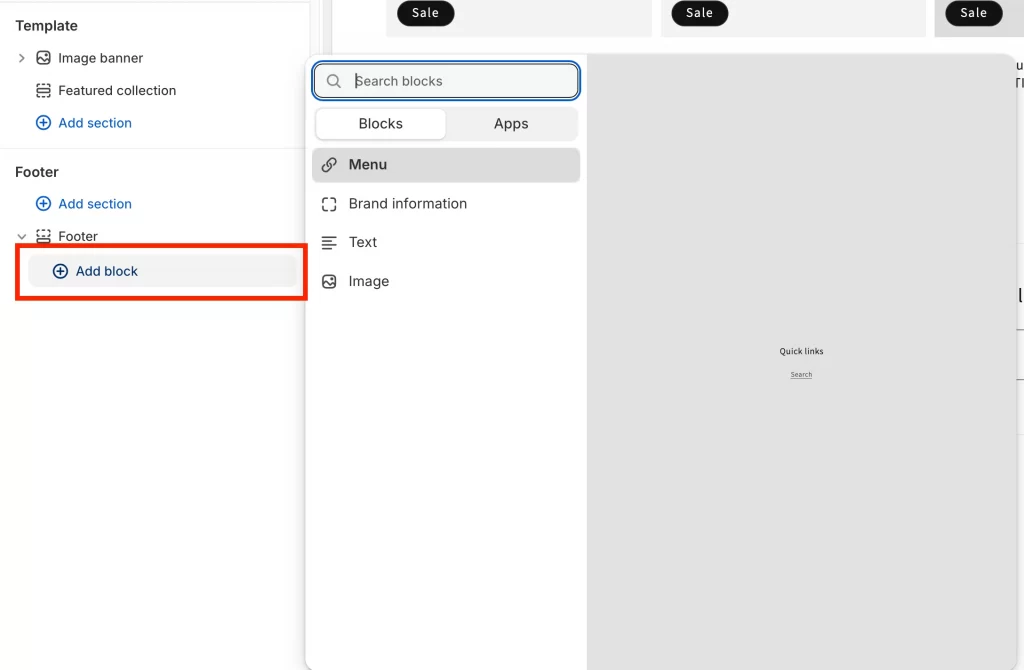
To add one, open the Theme Editor, scroll to the Footer section, click Add block, and choose Custom Liquid. Then paste your code and click Save.
This method is ideal for merchants who want flexibility without modifying core theme files.
4. Use app blocks in the footer
Many Shopify apps offer ready-made footer blocks that you can add without writing code. This is useful when you want to show product reviews or rating badges, add live chat support, display an Instagram feed or integrate loyalty programs.
After installing an app, open the Theme Editor, scroll to the Footer section, click Add block, and select the app block. Then configure the settings and save.
Some popular examples include:
- Review apps that show star ratings
- Email marketing tools with custom signup forms
- Live chat integrations
- Translation apps with language switchers
- Multi-currency tools for international stores
When choosing an app, check the Shopify App Store description to confirm it supports theme blocks or app embeds.
Tips for a Good Shopify Footer
A good Shopify footer is not just about adding links. It should help customers navigate your store, build trust, and support conversions without feeling crowded or confusing.
1. Keep navigation clear and organized
Your footer should be structured in logical groups so customers can quickly find what they need.
Limit your footer to three or four columns. Let’s give each column a clear heading, such as Shop, Help, Company, or Legal. Try to keep each column focused, with around five to seven links.
You should avoid adding too many links. A long list can overwhelm visitors and make it harder to decide where to click. Also, avoid vague headings like “More” or “Other.”
2. Include trust and compliance elements
Your footer should also build credibility and meet legal requirements. Some important elements include:
- Payment icons (Visa, Mastercard, PayPal, etc.)
- Policy links (Privacy, Terms, Refunds)
- Contact information (email, phone, address)
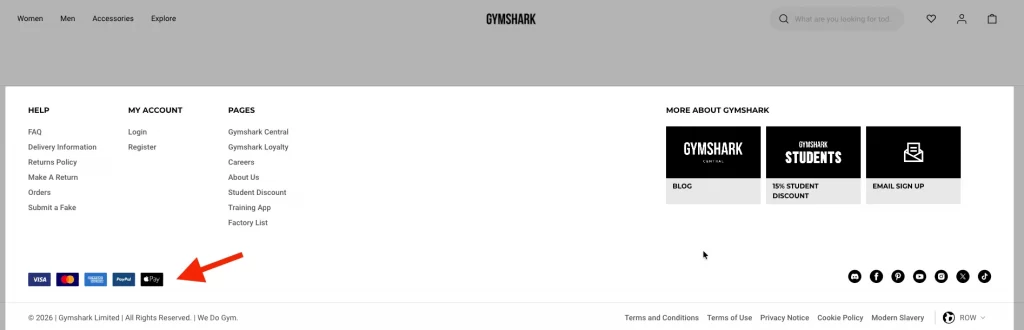
You can also display security badges or business credentials if relevant. For example, showing accepted payment methods and a secure checkout message reassures customers before they buy.
If your business has certifications (organic, fair trade, B-Corp), adding them in the footer can help differentiate your brand.
3. Optimize for mobile first
Most Shopify traffic comes from mobile devices. Your footer must work well on smaller screens.
On mobile, footer columns usually stack vertically. Keep the layout simple and avoid long blocks of text. Make sure links are easy to tap and text is readable.
Many themes support collapsible (accordion-style) sections on mobile. This keeps the footer clean while still offering access to important links.
Before publishing changes, always check the footer on a real mobile device, not only in desktop preview mode.
4. Make it scannable and visually balanced
A clean layout improves usability.
You should use consistent spacing between columns and sections. Leave enough white space so the footer does not feel crowded. Also, font sizes should be kept consistent and avoid too many colors.
Let’s make sure text contrast is strong enough to read easily, especially if you use a dark background. Links should be clearly distinguishable. A well-balanced footer feels organized, calm, and intentional, not busy or cluttered.
Troubleshoot Common Footer Issues in Shopify
Even small footer changes can sometimes cause unexpected issues. Below are the most common problems and how to fix them step by step.
1. Footer not displaying or missing
If your footer is completely gone or shows a blank space, don’t panic. This usually happens for simple reasons.
1.1. Footer section was removed
Open the Theme Editor and check if the Footer section appears in the sidebar. If it is missing, click Add section, select Footer, and save.
1.2. Footer is hidden
In the Theme Editor, click the Footer section and check if it is set to visible. Some themes include a hide/visibility toggle.
1.3. Editing the wrong theme
Go to Online Store → Themes and confirm you are editing the published (current) theme. If you edited a draft theme, either publish it or switch to the active one.
1.4. Theme code error (advanced)
If the footer still does not appear, open Edit code and check that the following line exists in theme.liquid, just before </body>:
{% section 'footer' %}If it is missing, add it and save. If nothing works, revert to a previous theme version or contact the theme developer.
2. Social media icons not showing
If your social icons are missing or not clickable, the issue is usually configuration-related.
2.1. Social URLs not added
Go to Settings → Brand (or General on older stores) and add your full social URLs. You should always use complete links, such as:
| Correct | Incorrect |
| https://instagram.com/yourstore | @yourstore |
2.2 Social block not enabled
Open the Theme Editor, scroll to the Footer section, and add or enable the Follow on social block.
2.3. Theme does not support social icons\
If your theme does not include this feature, you can add a Custom Liquid block and insert manual icon code. You should test the links in preview mode before publishing.
3. Footer appears different on mobile vs desktop
It is normal for the footer layout to change on mobile, but it should not look broken. If columns overlap, text is too small, or links are hard to tap, check the following:
- Preview the footer in mobile mode inside the Theme Editor
- Test on a real mobile device
- Reduce the number of columns (1-2 is ideal for mobile)
- Ensure font size is at least 14px
- Make sure links have enough spacing
If you added custom CSS, confirm it includes responsive rules. For example:
@media (max-width: 768px) {

  .footer-columns {

    grid-template-columns: 1fr;

  }

}
You should avoid adding too much content to the footer, especially on small screens.
4. Multiple footers appearing
If you see two footers stacked or duplicated content, it is usually caused by duplication in the theme or an app conflict.
4.1. Footer duplicated in Theme Editor
Open the Theme Editor and check if more than one Footer section exists. Remove any duplicate sections.
4.2. Footer added twice in theme code
Go to Edit code → theme.liquid and search for: {% section ‘footer’ %}. You should make sure it appears only once, just before </body>.
4.3. App conflict
Some apps automatically insert their own footer. You can disable recently installed apps one by one to identify the cause. Also, check app settings for footer embed options. If the issue started after a theme update, review your theme history or contact theme support.
How to Edit Footer in Shopify: FAQs
How do I edit the storefront footer?
Go to Online Store → Themes → Customize. Scroll to the Footer section in the Theme Editor, click it, and edit blocks, text, menus, or design settings. Click Save when finished. Your footer updates site-wide across all pages.
How do I add pages to my footer in Shopify?
First, go to Online Store → Navigation and edit or create a Footer menu. Add the pages you want (About, Contact, Policies, etc.) and save. Then go to Themes → Customize → Footer, add a Menu block, and select your footer menu.
How do I add text to the footer of Shopify?
Open Themes → Customize → Footer, click Add block, and select Text. Enter your heading and content, then save. You can also update copyright text directly inside the Footer settings.
How do I add social media icons to my Shopify footer?
Go to Settings → Brand and enter your full social media URLs (including https://). Then open Themes → Customize → Footer, add or enable the Social media block, and save. The icons will appear automatically based on the URLs you added.
Final Words
Now you know exactly how to edit footer in Shopify using the Theme Editor, manage footer menus, update store information, and customize design elements across your entire store.
For most merchants, the built-in editor is more than enough to create a clean, organized, and mobile-friendly footer. If you need more flexibility, advanced options like Custom Liquid blocks or editing footer.liquid can give you full control.
Remember, your footer appears on every page. A well-structured footer improves navigation, builds trust, and supports conversions, even though it sits at the bottom of your store.
Let’s keep it simple, purposeful, and aligned with your brand.
And now, let’s build what’s next!
At LitOS, we help brands grow smarter on Shopify with better technology, practical strategy, and hands-on support that delivers real results. From migration to long-term growth, we make the process seamless and scalable.
Contact Us
