
How to Sell Photos on Shopify (What Actually Works in 2026)
Many photographers ask how to sell photos on Shopify and whether the platform can realistically generate sales. While creating a Shopify store is straightforward, turning photos into paid orders often requires more than a clean design and a few product listings.
This guide breaks the process down into practical points:
- Photography business models that perform well on Shopify
- A clear, step-by-step approach on how to sell photos on Shopify for beginners
- Practical tips & considerations photographers should understand
Rather than promising quick results, this article focuses on what tends to work in real situations, helping photographers decide if Shopify is the right tool for their business in 2026.
Why Many Photographers Choose Shopify to Sell Photos Online
Many photographers choose Shopify because it lets them sell photos on their own website, under their own name and brand.
With Shopify, you can upload photos as products, set your own prices, and accept payments directly from customers. You do not need to rely on stock photo websites or online marketplaces that control pricing, take high fees, or limit how your photos are used.
Shopify also works well for different photography needs. You can sell digital photo downloads, printed photos, or even photography services in one place. This makes it easier to manage everything from a single dashboard.
Another reason photographers choose Shopify is control. You decide how your photos are displayed, what license buyers get, and how customers contact you. You also keep customer information, which helps you build long-term relationships instead of one-time sales.
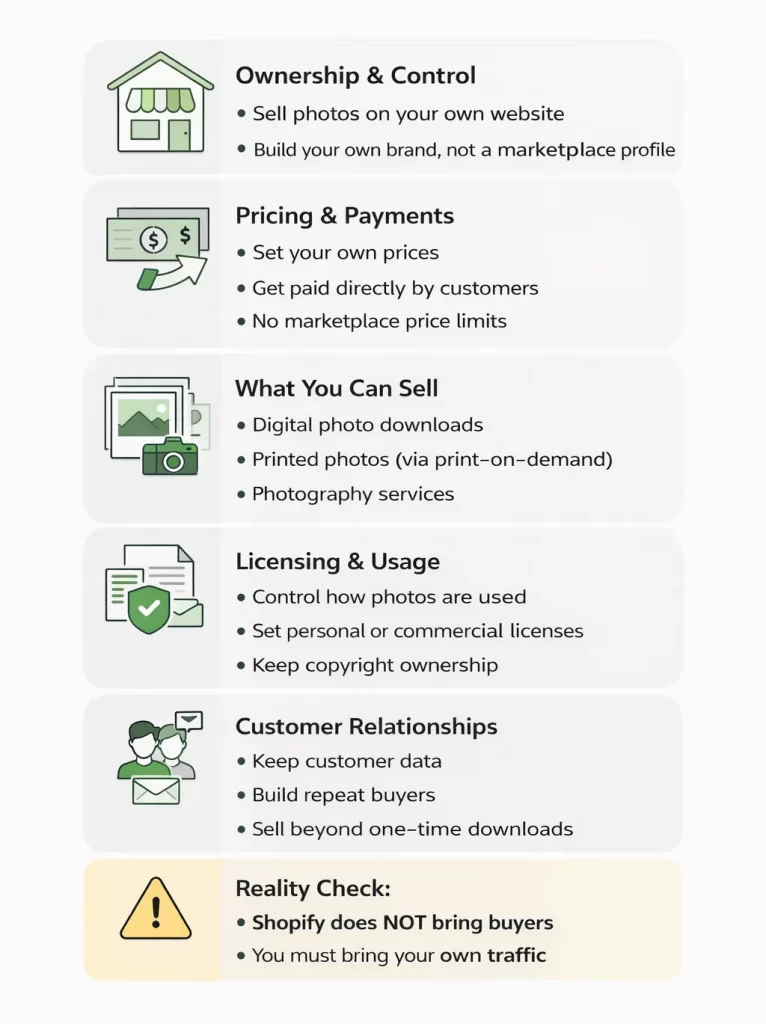
That said, Shopify does not bring buyers automatically. It is a selling tool, not a marketplace. Photographers who succeed with Shopify usually already have an audience, clients, or a clear plan to bring traffic to their store.
In short, Shopify is a good choice for photographers who want full control, flexibility, and a professional way to sell photos online, as long as they understand that sales depend on their own marketing efforts.
Photography Business Models That Actually Work on Shopify
Not every photography business model works well on Shopify. Many photographers fail because they try to sell photos to strangers without a clear reason for people to buy. The models below are the ones that work best in real situations.
Model 1: Selling to a known audience (events, clients, communities)
This is the most reliable model for photographers on Shopify.
You already know the buyers, and they already know you. Examples include event photography, school photos, sports teams, weddings, or local communities. People visit your store because they are looking for their own photos, not because they are browsing randomly.
Shopify works well here because you can create private collections, sell digital downloads, or offer prints in an organized way.
Model 2: Digital downloads with a clear use case
Selling digital photos works when buyers know exactly how they will use the photos. This includes photos for:
- Websites and blogs
- Marketing and social media
- Presentations or educational content
- Commercial or editorial use
In this model, buyers are paying for usage rights, not decoration. Clear licenses, simple pricing, and fast delivery are more important than artistic style.
Model 3: Print-on-demand as brand merch, not art
Selling prints works best when photos are connected to a brand, identity, or community. Examples include:
- Sports clubs
- Music artists
- Influencers or creators
- Local places or niche interests
People buy these prints to support a brand or show belonging, not to collect fine art. Print-on-demand apps work well here because you do not need to manage inventory.
A good example of this approach is UGallery, an online art store built on Shopify. Instead of listing thousands of random artworks, the store focuses on curated collections, clear presentation, and helping buyers understand where each piece fits in their space.
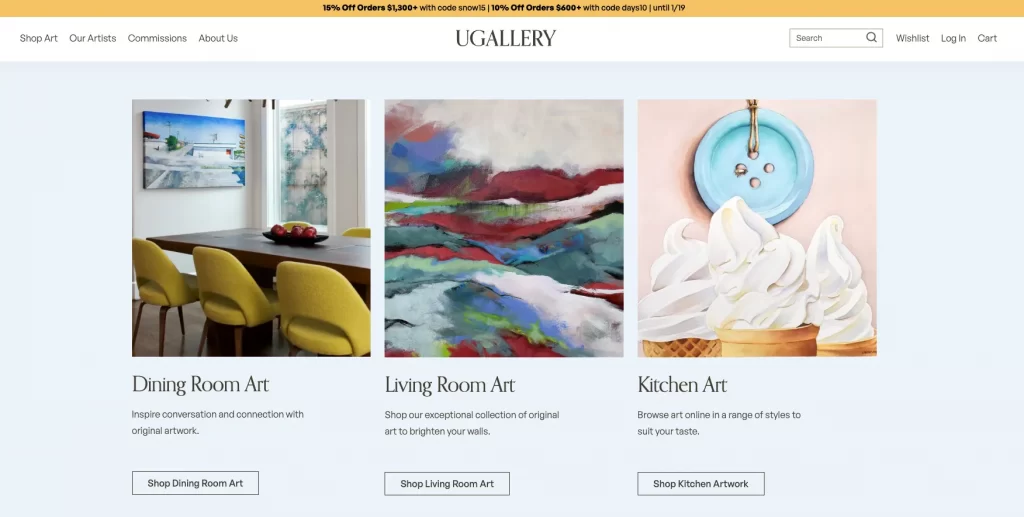
This kind of structure works better than selling photos or artwork without context, especially when buyers are not actively searching for a specific image.
Models that usually fail (and why)
Some models look attractive but rarely work on Shopify:
- Selling random landscape or travel photos to strangers
- Uploading hundreds of photos without curation
- Competing only on how “beautiful” a photo is
The problem is not Shopify. The problem is no demand and no clear buyer reason.
In summary, Shopify works best when photography is sold with a defined audience, a specific use case, or a clear reason to buy. Without those elements, even a well-designed store is unlikely to generate results.
How to Sell Photos on Shopify in 9 Steps
Selling photos on Shopify is not complicated, but it works best when you follow a clear order. The steps below focus on setting up your store correctly from the start, so you avoid common mistakes later.
You do not need technical skills to follow these steps. Each step builds on the previous one and helps you move from planning to launching your store with confidence.
Step 1: Choose what to sell (photo type and selling model)
Start by deciding what you will sell and who the photos are for. This decision affects pricing, product setup, and how people understand your store.
First, choose the type of photos you want to focus on. It is better to start with one clear category so your store feels focused and easy to understand. For example: fashion, food, pets, events, travel, lifestyle, real estate, or product photography. A clear niche makes it easier for buyers to understand your work and trust your store.
Next, choose your selling model:
- Digital downloads if customers need the files quickly for online use
- Prints if customers want something physical (posters, canvas, framed prints)
- Services if you want to sell packages like shoots, editing, or bookings
You can combine models later, but at the beginning, it’s better to lead with one primary offer. A simple store converts better than a store that tries to sell everything at once.
Finally, define the buyer’s purpose in one sentence. For example:
- “Pet owners buying prints of their pets.”
- “Restaurants needing food photos for marketing.”
- “Athletes buying event photos of themselves.”
If you can’t describe the buyer and the use case clearly, it usually means the model is not ready yet and Shopify won’t solve that by itself.
Step 2: Create your Shopify account and pick the right plan
Once you know what you want to sell, the next step is to create your Shopify account.
Go to Shopify’s website and sign up using your email address. Shopify will guide you through a short setup process where you answer basic questions about your business. You don’t need to worry about getting everything perfect at this stage.
When choosing a plan, start simple. For most photographers selling digital photos or a small number of prints, the basic Shopify plan is enough. It includes everything you need to upload products, accept payments, and manage orders.

You can upgrade your plan later if your store grows or if you need more advanced features. Paying for a higher plan early does not increase sales, so it’s better to keep costs low at the beginning.
After creating your account, you will have access to the Shopify dashboard, where you manage your products, orders, and settings in one place. This dashboard is where you will do most of your work going forward.
Step 3: Choose a photography-friendly theme
Your theme controls how your photos look and how easy your store is to use.
Choose a theme that keeps the design clean and simple. Photos should be large, clear, and easy to view on both desktop and mobile. Avoid themes with too many animations, sliders, or text blocks that distract people from the images.

When reviewing a theme, check these basics:
- Photos load quickly
- Images look good on mobile phones
- Navigation is simple and easy to understand
- Product pages focus on the photo, not decorations
Free Shopify themes are usually good enough to start. Many paid themes look nice, but they do not guarantee more sales. What matters most is that buyers can view photos easily and understand what they are buying.
If you are selling digital photos, it helps to choose a theme designed for downloadable products. You can refer to this guide on the best Shopify themes for digital products to see examples that work well for photographers.
Before installing a theme, preview it with photography examples if possible. Imagine how your own photos would look on the homepage, collection pages, and product pages.
Step 4: Add photos as products (collections, variants, licensing options)
Now it’s time to add your photos to Shopify as products.
Each photo (or photo set) should be treated like a product with a clear title, description, and price. Use simple names that describe the photo and its purpose, not artistic or abstract titles.
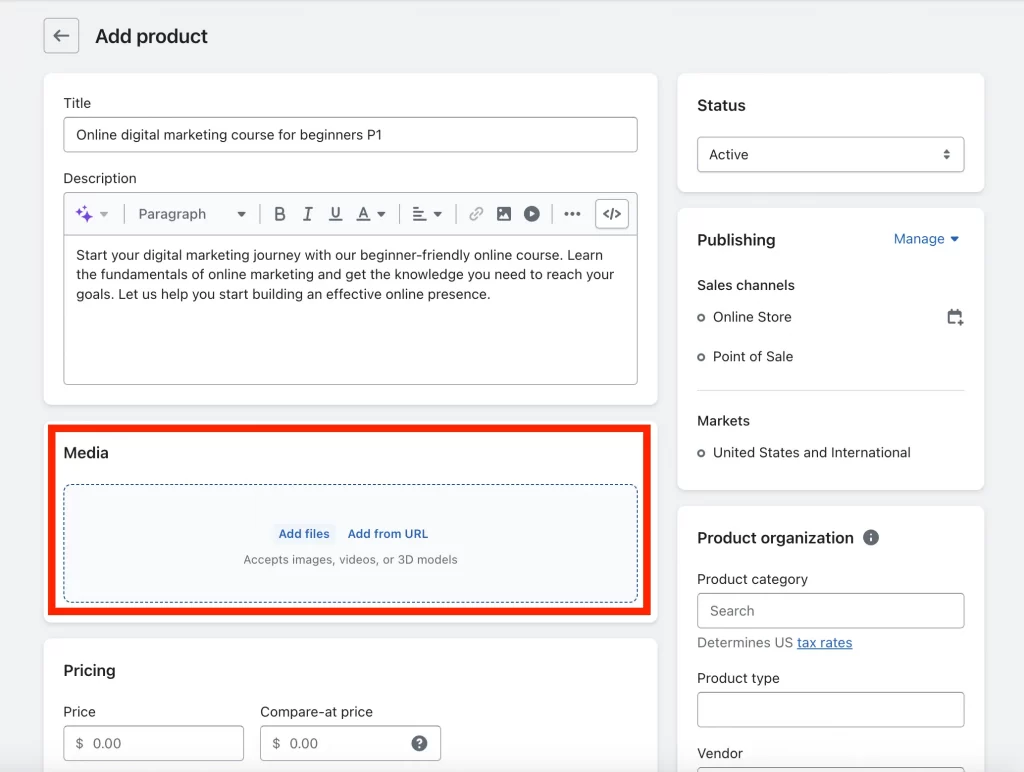
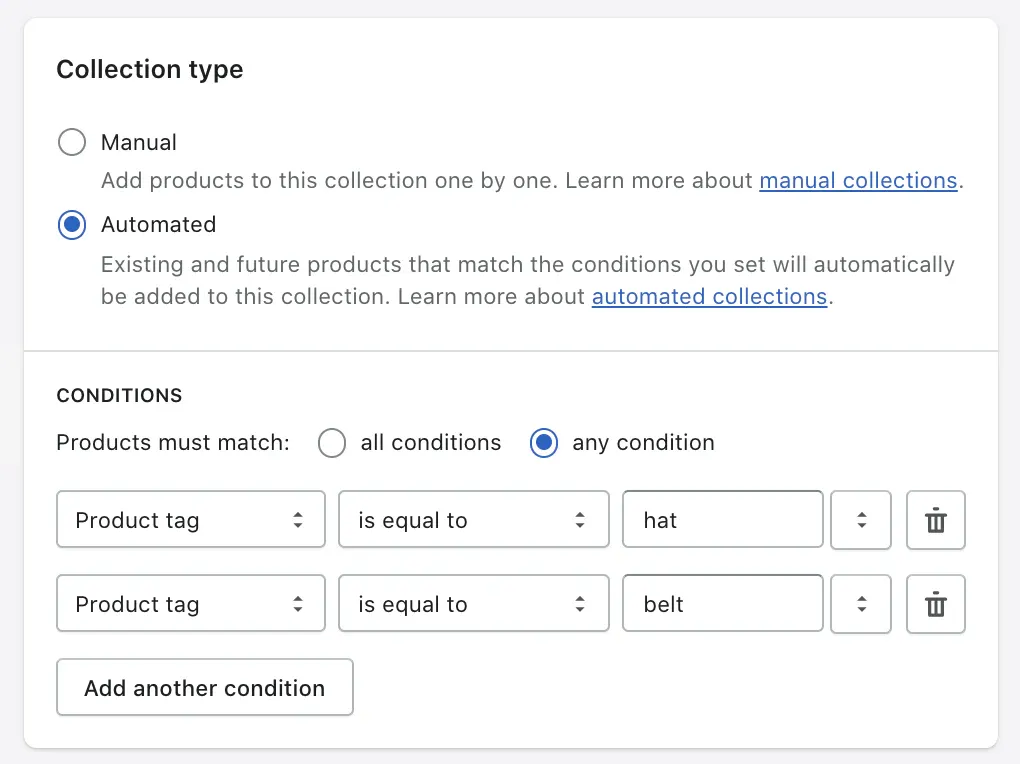
Start by organizing your photos into collections. Collections help buyers browse your store more easily. For example, you can group photos by subject (pets, food, events), by use case (commercial, editorial), or by project.
Next, use variants if a photo has different options. Variants can include:
- File size (small, medium, large)
- Format (JPG, PNG, high-resolution)
- License type (personal use, commercial use)
This keeps everything on one product page instead of creating many separate listings.
In the product description, clearly explain:
- What the buyer receives
- How the photo can be used
- Whether the photo is for personal or commercial use
You should avoid long or complicated text. Clear and direct descriptions help buyers feel confident and reduce questions before checkout.
Not sure where to start with Shopify?
Setting up a photography store can feel overwhelming. If you’d like a second opinion on themes, apps, or store structure, LitOS can help you make the right choices before launch.
Get GuidanceStep 5: Install Digital Downloads or a print-on-demand app
How you deliver photos depends on what you are selling.
If you sell digital photos, install Shopify’s Digital Downloads app from the Shopify App Store. This app allows customers to receive their files automatically after payment, without any manual work from you.
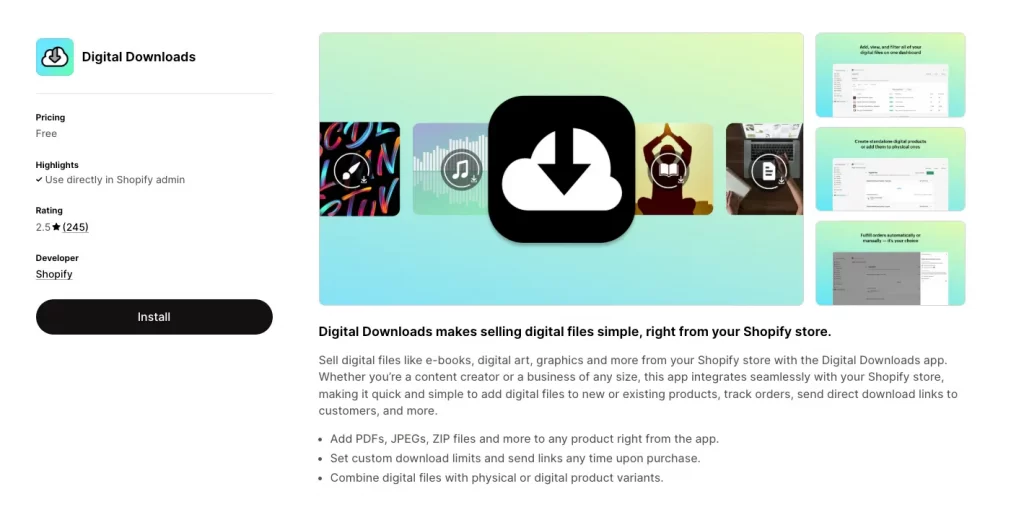
After installing the app:
- Attach photo files to each product or variant
- Use ZIP files if you sell bundles or collections
- Set reasonable download limits to prevent abuse
- Check the email template so customers clearly understand how to download their files
Customers will receive a download link on the order confirmation page and by email.
Learn more: How to sell digital products on Shopify.
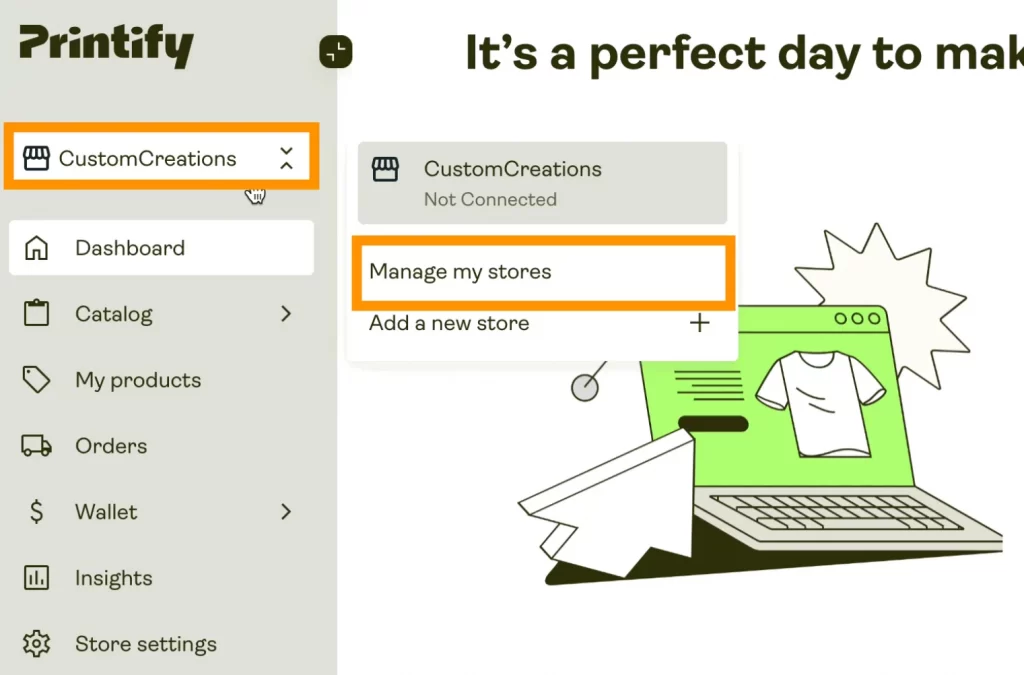
If you sell physical prints, connect a print-on-demand app like Printify instead. These apps handle printing and shipping when an order is placed, so you don’t need to store inventory or ship products yourself.
Let’s choose one method to start. Mixing digital downloads and prints is possible later, but keeping things simple makes testing and troubleshooting much easier.
Once delivery is set up, the next step is making sure customers can pay and receive their orders without issues.
Step 7: Add policies and license terms
Before opening your store to the public, take time to add the basic policy pages that buyers expect to see.
At a minimum, your photography store should include a Privacy Policy, Refund Policy, and Terms of Service. Shopify can generate templates for these pages, which you can edit to match how you run your business.

For photographers, license terms are especially important. Buyers need to know what they are allowed to do with the photos after purchase. Make this clear in simple language, either on the product page or in a dedicated licensing section.
Your license notes should explain:
- Whether the photo is for personal use or commercial use
- Whether the license is exclusive or non-exclusive
- What buyers are not allowed to do (for example, reselling or redistributing the photo)
You should defitely avoid legal jargon where possible. Most buyers are not lawyers, and clear explanations build trust faster than complex wording.
Well-written policies reduce questions, prevent misunderstandings, and protect you if problems arise later.
Step 8: Test checkout and delivery
Before inviting real customers to your store, make sure everything works as expected.
Let’s place a test order to experience the buying process from the customer’s point of view. You can check that payments go through correctly and that the order confirmation page looks clear and professional.
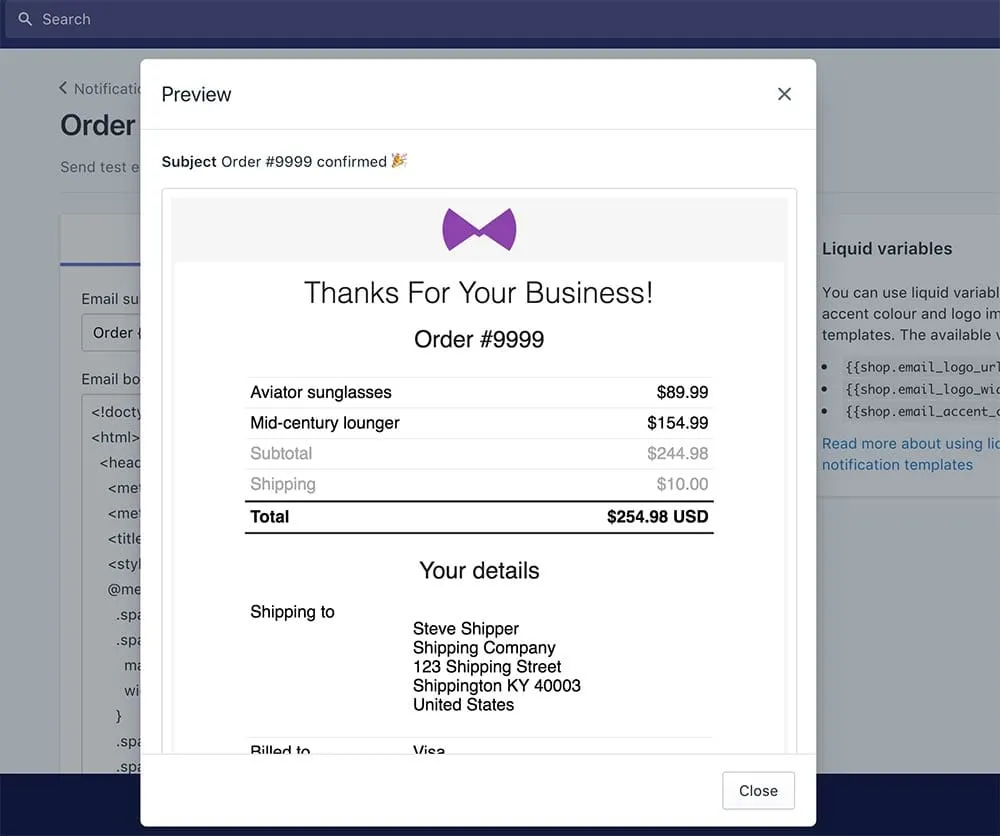
For digital photos, you should confirm that download links are sent properly by email and appear on the order confirmation page. Let’s download the files yourself to be sure they open correctly and match what the product description promises.
For printed photos, it’s good to place a sample order through your print-on-demand provider. Then, you can review print quality, packaging, and delivery time so you know exactly what customers will receive.
Most importantly, you should pay attention to small details during testing. Any confusing messages, broken links, or missing files can quickly damage trust, especially for first-time buyers.
Step 9: Launch and promote your Shopify store
When everything is ready and tested, it’s time to make your store public.
Let’s remove the password from your Shopify store so visitors can access it. You can do a final check of your homepage, product pages, and navigation to make sure nothing feels confusing or unfinished.
Promotion is just as important as the launch itself. Shopify gives you the place to sell, but it does not bring buyers automatically. You can start by sharing your store with people who already know your work, such as past clients, followers, or communities you are part of.
Simple promotion ideas include:
- Sending the store link to past clients
- Sharing selected photos on social media with a clear link to buy
- Adding the store link to your portfolio website or email signature
You should focus on quality traffic, not large numbers. A small group of interested buyers is more valuable than many visitors who have no reason to purchase.
After launch, it’s time to pay attention to how people interact with your store. Which photos get views, which ones sell, and where visitors leave the site will help you improve over time.
By following these steps on how to sell photos on Shopify, you will have a fully working store where customers can view, buy, and receive your photos without manual work.
However, setting up the store is only the foundation. Pricing, legal clarity, and how you bring buyers to the store play a much bigger role in whether your photography business actually makes sales.
Practical Tips and Considerations for Selling Photos on Shopify
If you are thinking about selling digital photos online, it helps to be realistic about what actually moves the needle. A clean setup is important, but it is rarely the reason a Shopify photography store makes money.
Pricing is about usage, not effort
Many photographers price photos based on how much time or skill went into creating them. Buyers rarely think that way. They usually care about how they can use the photo and what problem it helps them solve.
Photos used for business, marketing, or promotion generally sell more easily than photos meant only for decoration. Simple pricing works best, especially at the beginning. When prices and licenses are easy to understand, people are more likely to buy.
Licensing clarity matters more than legal perfection
Most buyers are not trying to steal your work. They just want to know what they are allowed to do with the photo.
Clear, short explanations of usage rights build more trust than long legal pages. Saying whether a photo is for personal or commercial use, and whether the license is exclusive or non-exclusive, is usually enough to remove doubt and move buyers forward.
Photo theft happens, but it is rarely the biggest problem
At some point, you may find your photo used without permission. That can be frustrating, but it is part of selling images online.
Keeping original files and metadata gives you proof of ownership. In many cases, a simple removal request solves the issue. Spending too much time chasing every misuse often costs more energy than it is worth, especially when you are still growing.
Traffic does not come from Shopify
Shopify is a selling tool, not a discovery platform. It will not bring buyers on its own.
Most photographers see their first sales from people who already know their work, such as past clients, followers, or communities they belong to. Cold traffic is harder, and selling to strangers usually takes time and a clear use case.
Curation beats volume every time
Uploading everything you have rarely helps. Buyers feel overwhelmed when there are too many similar options. A smaller, well-curated collection makes your work easier to understand and easier to buy. It also makes your store feel more intentional and professional.
Taken together, these points show that selling photos on Shopify is less about technical setup and more about clarity, focus, and realistic expectations.
When photographers treat Shopify as a tool and make intentional choices about pricing, licensing, and audience, the platform becomes far more effective and far less frustrating.
How to Sell Photos on Shopify: FAQs
How do you sell your photos on Shopify?
You sell photos on Shopify by creating a store, adding photos as digital downloads or prints, setting prices and license terms, and bringing buyers to your site through your own audience or marketing.
Is Shopify good for selling photo prints?
Shopify works well for selling photo prints when the prints are connected to a clear audience, brand, or purpose. It is less effective for selling generic art prints to strangers without an existing audience or strong reason to buy.
What items can you not sell on Shopify?
Shopify does not allow the sale of illegal content, stolen intellectual property, or items that violate copyright laws. For photographers, this means you cannot sell photos you do not own the rights to or images that require model or property releases without proper permission.
Can people steal my photos on Shopify?
Yes, photo theft can happen on any online platform, including Shopify. While no system fully prevents it, clear licensing terms, lower-resolution previews, and keeping original files as proof of ownership help reduce risk and make it easier to respond if misuse occurs.
What kind of photos actually sell on Shopify?
Photos tend to sell on Shopify when they serve a clear purpose, such as event photos, commercial images, niche content, or photos tied to a specific community or brand. Random or purely decorative photos usually struggle unless the photographer already has a strong following.
Final Verdict: When Shopify Is Worth It for Photography
Shopify is worth using for photography when you already know who your buyers are and why they want your photos. It works best for photographers who sell to existing audiences, clients, or niche communities, and who want full control over pricing, licensing, and presentation.
Shopify is also a good choice if you plan to sell digital downloads, prints through print-on-demand, or photography services under your own brand. In these cases, Shopify acts as a reliable system that handles checkout, delivery, and basic store management.
However, Shopify is usually not a good fit if your plan is to upload photos and wait for strangers to discover them. The platform does not generate traffic or demand on its own, and selling generic or decorative photos without a clear use case often leads to frustration.
In simple terms, Shopify is worth it when photography is treated as a focused product, not a gallery. When photographers combine clear positioning with realistic expectations, Shopify becomes a useful tool rather than a disappointing experiment.

