
Shopify Checkout Page: How to Edit and Optimize for Higher Conversions (2026)
The Shopify checkout page is where customers complete their purchase after adding products to the cart. This is the final step before payment, and it has the biggest impact on whether an order is completed or abandoned.
In this guide, you’ll learn:
- What the Shopify checkout page is and how it works
- How to edit checkout using Shopify’s official tools
- Practical ways to optimize checkout for higher conversions
Shopify intentionally limits checkout customization on Basic, Grow, and Advanced plans to keep payments secure and reliable. This guide focuses on maximizing those built-in options to reduce friction, build trust, and help more customers finish checkout without hacks or unsupported code.
Shopify Checkout Page Overview: What It Is & How It Works
What is Shopify checkout page?
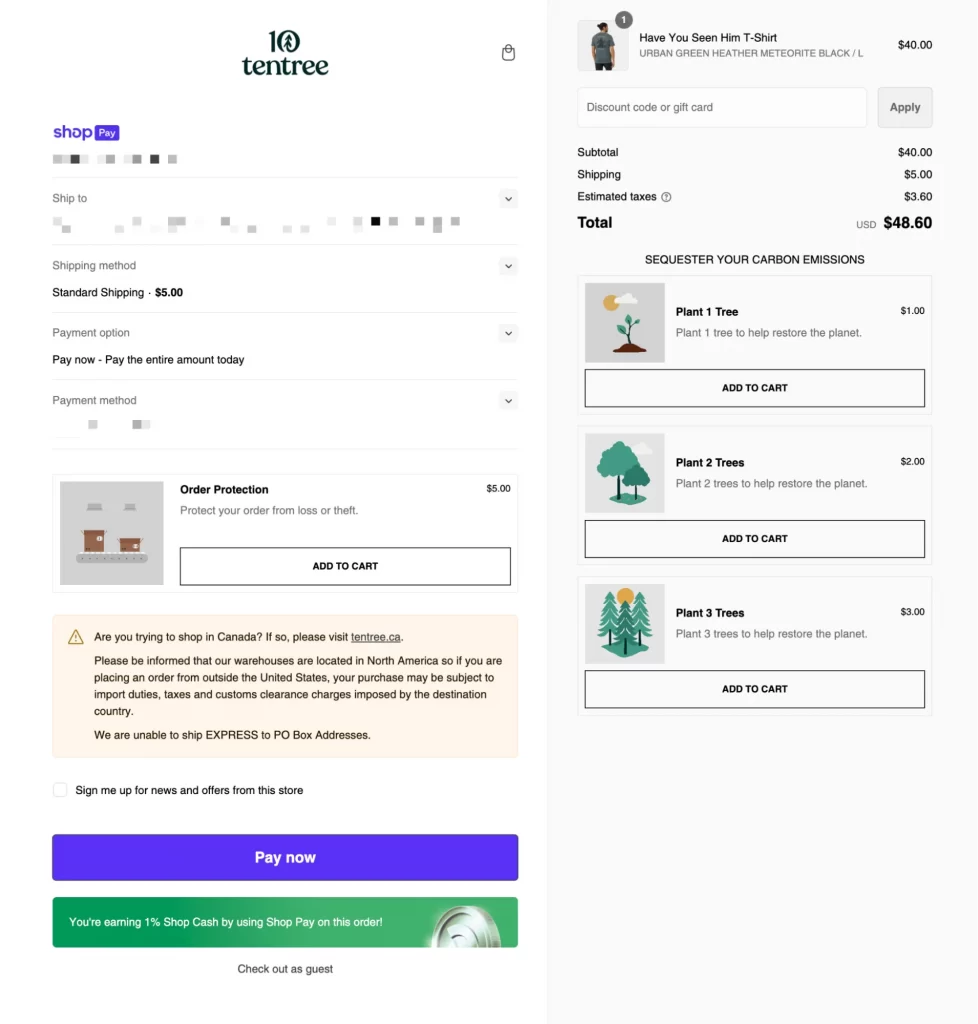
The Shopify checkout page is where customers finish their purchase after adding products to the cart. Here, customers enter their shipping address, contact details, and payment information.
Shopify checks inventory during checkout and processes payments in a secure, encrypted system. This checkout is hosted and managed by Shopify, not by your theme.
How Shopify checkout is structured
Shopify uses a simple checkout flow designed to help customers complete their orders faster. Most stores use Shopify’s one-page checkout, where shipping and payment details are handled in one flow.
The checkout has its own Shopify-controlled URL and works separately from your storefront. After payment, customers see the order status page with order details and tracking information.
What you can (and can’t) customize on Shopify checkout page
Shopify limits checkout customization to keep payments secure and stable. On standard Shopify plans, you cannot edit checkout code or change the checkout structure.
However, on Basic, Grow, and Advanced plans, you can still customize important parts of checkout. This includes branding (logo, colors, fonts), form settings, and customer contact options using Shopify’s checkout editor.
Advanced checkout flow changes are only available on Shopify Plus. For most stores, improving conversions comes from optimizing what Shopify already allows, not from changing the checkout layout.
How to Edit Checkout Page in Shopify
(Basic customization on standard Shopify plans)
Important: Shopify checkout is intentionally restricted on standard plans. This guide focuses on basic checkout customization that most stores can use safely. Advanced checkout page customization is available on Shopify Plus and requires a different setup.
Now, here are the steps on how to edit and customize the Shopify checkout page:
Step 1: Go to Shopify admin → Settings → Checkout

This is the central place where Shopify controls checkout design, behavior, and customer information. Here, you manage:
- Checkout branding
- Customer contact method
- Required and optional form fields
Step 2: In Configurations, find your active configuration
Most Shopify stores we’ve seen use:
- One default configuration for all customers
- Or separate configurations for specific markets
You can select the configuration you want to update.
Step 3: Click Customize
You’re now in the checkout editor. This editor lets you:
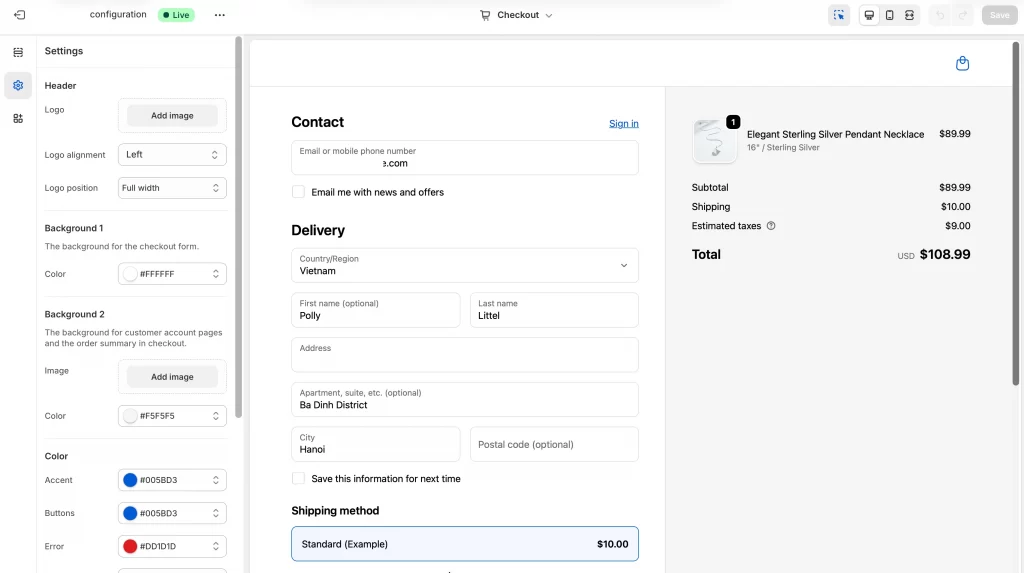
- Preview checkout on desktop and mobile
- Switch between checkout, thank you, and order status pages
- See changes in real time before saving
Step 4: Use the checkout & accounts editor to make changes
This is where you make practical improvements that affect conversion.
You can:
- Match your branding: add your logo, set colors and fonts, and use clean background images
- Improve layout clarity: adjust spacing and visual balance (within Shopify’s limits)
- Simplify forms: hide unnecessary fields and only keep what customers really need
- Choose contact method: let customers check out with email, phone, or both
- Adjust language: edit checkout text so instructions are clear and friendly
All changes are visual and safe, so there is no code required.
Step 5: Click Save, then test your checkout
After saving, you should always test your checkout. You can check that:
- The checkout works smoothly on mobile and desktop
- Form options behave as expected
- Branding is clear and readable
- Order confirmation and emails are correct
Small changes here can have a big impact on the conversion of your Shopify store.
How to Optimize Shopify Checkout Page for Higher Conversions
1. Strengthen branding and trust signals
Start in Settings → Checkout → Customize and align checkout branding with your storefront. Then you can add your logo, use your main brand colors, and keep fonts consistent. Customers should feel they are still on the same, legitimate store.
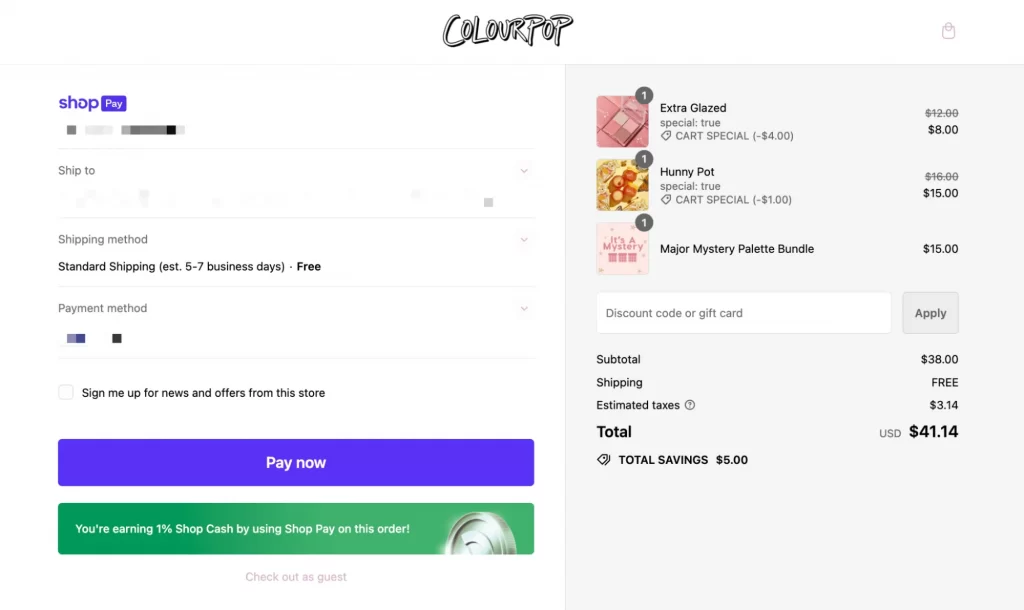
You can also enable Shop Pay through Shopify Payments. It acts as both a trust signal and an accelerated checkout, especially effective for returning customers.
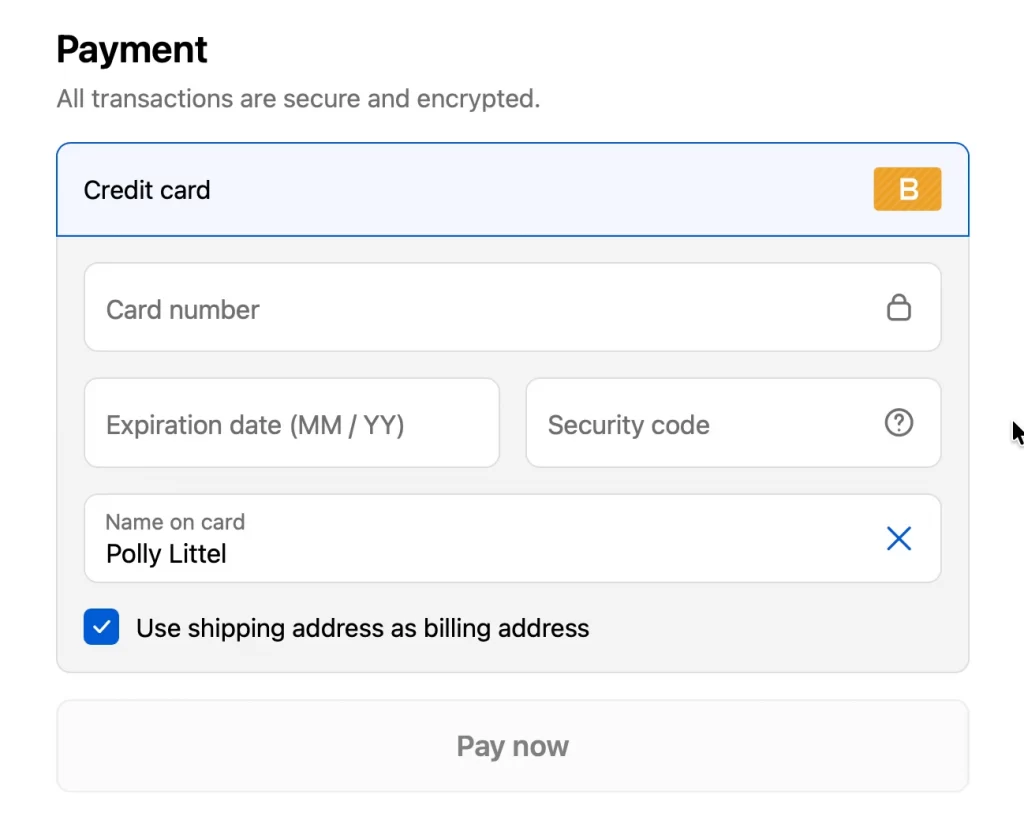
You don’t need to add security badges manually. Shopify checkout is already protected with SSL encryption and PCI compliance. Instead, focus on clarity. Add refund, privacy, and shipping policies in Settings → Checkout so customers can review them during checkout.
2. Reduce unnecessary form fields
Go to Settings → Checkout and review the Customer information section. Only require fields that are necessary to fulfill the order.
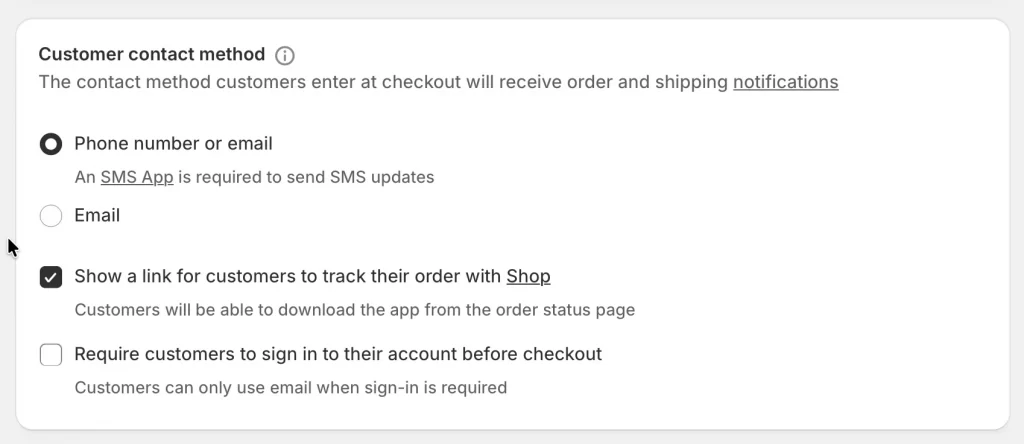
Let’s set fields like company name and address line 2 to optional or remove them. You should require a phone number only if your carrier or payment provider needs it. Also, keep email required so you can send order updates and recover abandoned checkouts.
If a field is not used after purchase, it should not block checkout.
3. Display shipping costs and policies early
Unexpected costs cause hesitation. In Shipping and delivery, let’s make sure shipping rates are clear and predictable. In Policies, you should add return and refund information so customers know what to expect.
Even simple policy text can reduce doubt before customers reach the payment step.
4. Optimize checkout for mobile devices
You should preview checkout in the editor, then test it on a real phone. Let’s check that buttons are easy to tap, text is readable, and form fields don’t feel cramped. If something feels slow or awkward on mobile, it will likely hurt conversion.
Most checkouts happen on mobile so let’s optimize for that first.
5. Enable abandoned checkout recovery emails
In Settings → Notifications, enable abandoned checkout emails. These emails are sent automatically when a customer enters an email but does not complete payment.

Now, you can customize the email message so it’s short and clear. Discounts can help, but use them carefully. Also, track performance in Shopify Analytics and adjust timing or content if recovery rates are low.
This is one of the easiest conversion wins available on all plans.
6. Use Shopify apps strategically (not excessively)
Install apps only when they solve a clear problem. Too many apps may slow down checkout and create distractions.
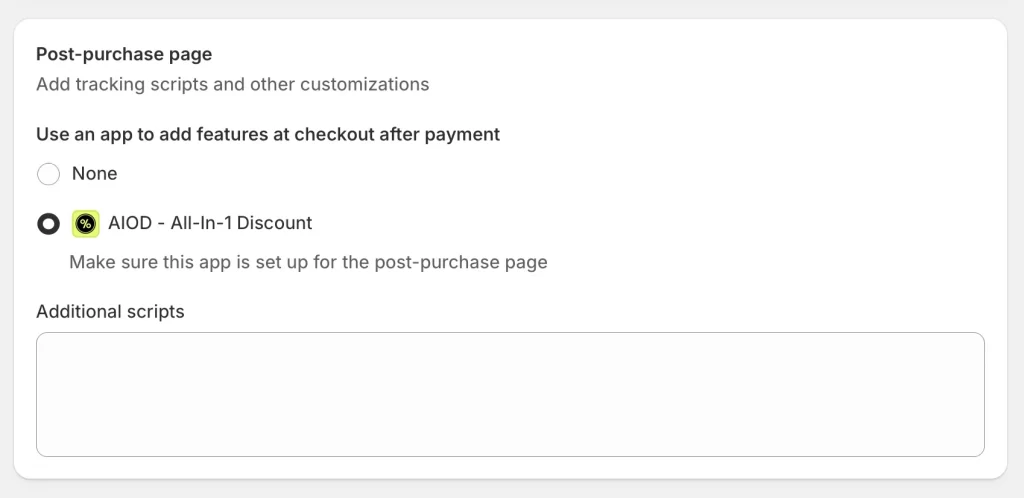
On Basic, Grow, and Advanced plans, you should focus apps on the thank you and order status pages. Apps that modify the main checkout steps require Shopify Plus.
If you need simple custom fields or dynamic content, tools like Checkout Blocks can often replace multiple apps. You should review installed apps regularly and remove anything that does not add value.
And that’s how to customize checkout page in Shopify for higher conversion.
Want to take your Shopify checkout further?
LitOS works with growing Shopify brands to optimize checkout page, improve conversion rates, and prepare stores for long-term scale, all within Shopify’s official customization framework.
Contact UsCommon Shopify Checkout Mistakes (and How to Fix Them)
1. Trying to override or hack checkout code
Many merchants start by treating checkout like a normal theme page. They try to edit code, inject scripts, or use outdated methods such as checkout.liquid. This usually happens because they want more control over layout or behavior.
The problem is that Shopify checkout is no longer designed that way. It is a hosted, controlled environment. Those methods are deprecated for security and compliance reasons, so they either do nothing or cause instability.
How to fix it:
- Stop thinking in terms of “editing checkout code.” Instead, work within the checkout editor and Shopify’s extension system.
- Focus on branding, form settings, and approved apps. If a change requires code injection, it’s not supported on your plan.
- Advanced checkout logic is a Shopify Plus topic, not a workaround problem.
Once you accept this, many other mistakes disappear.
2. Overloading checkout with apps or blocks
After realizing checkout code can’t be hacked, some merchants go in the opposite direction: they add apps. A lot of them. Upsells, trust badges, timers, custom fields, messages, all layered onto the checkout.
This usually makes things worse. Checkout becomes slower, visually noisy, and harder to complete. Every extra element adds friction at the most sensitive moment of the purchase.
How to fix it:
- Treat checkout as a single-purpose page: payment completion.
- Anything that does not directly support that goal should be removed.
- Keep only the apps that clearly improve trust or reduce friction.
- Move upsells, reviews, loyalty prompts, and extra content to the thank you or order status pages, where they belong.
A clean checkout almost always converts better than a feature-rich one.
3. Ignoring mobile checkout UX
These first two mistakes become even more damaging on mobile. What looks “acceptable” on desktop often feels broken on a phone. Long forms, small buttons, and stacked content quickly overwhelm mobile users.
Since a large share of Shopify traffic is mobile, this mistake has an outsized impact on conversion.
How to fix it:
- Always evaluate checkout from a mobile-first perspective.
- Preview mobile in the editor, then test on real devices.
- Reduce required fields, rely on accelerated checkouts like Shop Pay, Apple Pay, and Google Pay, and keep visual elements minimal.
- If it feels slow or crowded on a phone, simplify it.
Mobile clarity is not optional.
4. Misunderstanding Shopify Plan Limitations
At this point, frustration often sets in. Merchants expect certain checkout changes to be possible on Basic or Grow plans and feel blocked when apps or features require Shopify Plus.
This leads to wasted time, wrong tool choices, and unrealistic expectations.
How to fix it:
- Be clear about what your plan allows.
- On all plans, you can optimize branding, form behavior, abandoned checkout recovery, and post-purchase pages.
- Customizing the core checkout steps (information, shipping, payment) requires Shopify Plus.
The important part is that most conversion gains do not require Plus. They come from better UX, fewer fields, clear costs, and trust, all available on standard plans
5. Making changes without testing or tracking
Finally, even when merchants make reasonable changes, they often apply several at once and don’t measure the result. When conversion goes up or down, they don’t know why.
This turns checkout optimization into guesswork.
How to fix it:
- Change one thing at a time.
- Test with real orders before publishing.
- Track checkout abandonment, conversion rate, and mobile vs desktop performance in Shopify Analytics.
- Give each change enough time, at least one to two weeks, before judging results.
Your Shopify checkout optimization is a process, not a single adjustment.
All these mistakes come from the same root cause: trying to control checkout instead of optimizing it. Shopify’s checkout is intentionally constrained. When you work with those constraints, focusing on clarity, speed, and trust, conversion improves.
Shopify Checkout Page: FAQs
How do you set up a checkout page on Shopify?
You don’t need to create a checkout page manually. Shopify automatically provides a checkout for every store. You manage its settings, branding, and behavior from Settings → Checkout in your admin.
How can you customize a Shopify checkout page?
On Basic, Grow, and Advanced plans, you can customize checkout using the checkout editor. This includes your logo, colors, fonts, form fields, customer contact method, and checkout language. You cannot edit checkout code or change the checkout structure.
How do I edit the shopping cart page on Shopify?
The shopping cart page is different from the checkout page. The cart is part of your theme and can be edited in the theme editor or with theme code. Checkout is hosted by Shopify and is edited only through Settings → Checkout.
What is the fastest way to check out on Shopify?
The fastest way is to enable accelerated checkout options like Shop Pay, Apple Pay, and Google Pay. These allow customers to complete checkout with saved payment and shipping information, especially on mobile.
What’s the difference between checkout customization on Basic vs Shopify Plus plans?
On Basic, Grow, and Advanced plans, customization is limited to branding, form settings, and post-purchase pages. Shopify Plus allows deeper customization of the main checkout steps (information, shipping, payment) using official APIs and extensions. Most stores can improve conversion without needing Plus.
Final Verdict
The Shopify checkout page is intentionally controlled, and that’s a strength, not a limitation. On Basic, Grow, and Advanced plans, you don’t win by trying to change how checkout works. You win by optimizing what Shopify already allows.
Most conversion gains come from clear branding, fewer form fields, transparent costs, mobile-first design, and smart recovery flows. These changes are simple, safe, and available to every store.
Deep checkout customization is only necessary in specific cases, and that’s where Shopify Plus makes sense. For most merchants, focusing on clarity, speed, and trust delivers better results than complex customization ever will. If your checkout feels clean, fast, and familiar, it’s already doing its job.

