
Shopify Product Page Customization by 4 Methods: 2025 Update
If you’ve ever felt frustrated that your Shopify product page doesn’t look quite how you imagined, you’re not alone. Many store owners quickly realize that while Shopify’s default templates are functional, they don’t always provide the flexibility needed to tell a compelling product story. But the good news? Shopify product page customization isn’t reserved for developers or design experts anymore!
Be it small design tweaks, complete layout revamps, or advanced elements, there’s a method suited to your skill level. Let us walk you through the four main solutions of how to create custom product page in Shopify:
- With the Theme Editor
- Via premium, optimized themes
- Using code
- By installing apps from the Shopify App Store
Let’s get started!
Method 1: Shopify Product Page Customization with the Theme Editor
For those who are completely new to Shopify customization, the Theme Editor is the most beginner-friendly way to start. It doesn’t require coding knowledge and allows you to make visual changes directly from your Shopify dashboard.
Let us show you how to carry out your Shopify product page customization with this method:
Step 1: Access the Shopify theme editor
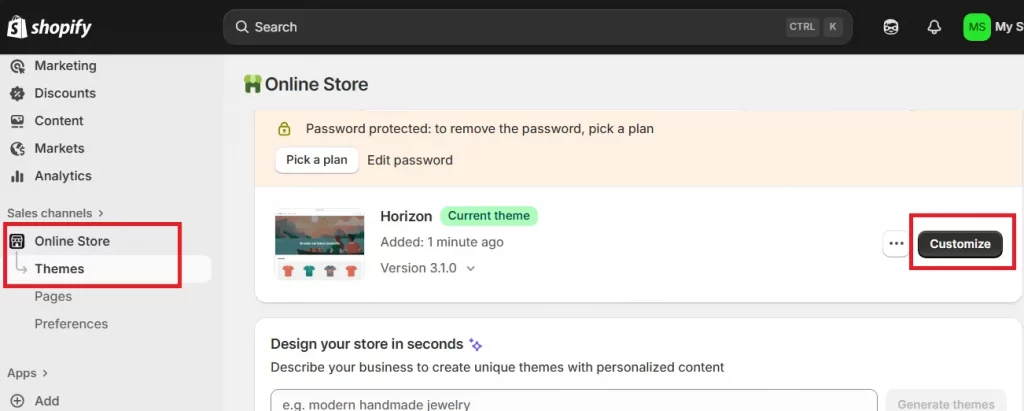
First, log in to your Shopify admin panel and navigate to Online Store → Themes. You’ll see a list of all your themes, including the one currently active on your store.
Next to your active theme, click “Customize.” This opens the Theme Editor, a drag-and-drop interface where you can preview your store on the right and adjust its content and style from the left sidebar.
Step 2. Choose the product page template
Now, at the top of the editor, you’ll see a dropdown that lets you switch between different page types (like Home page, Collection page, or Product page). Choose Product Pages. This ensures that every change you make applies specifically to your product detail pages, not the rest of your site.
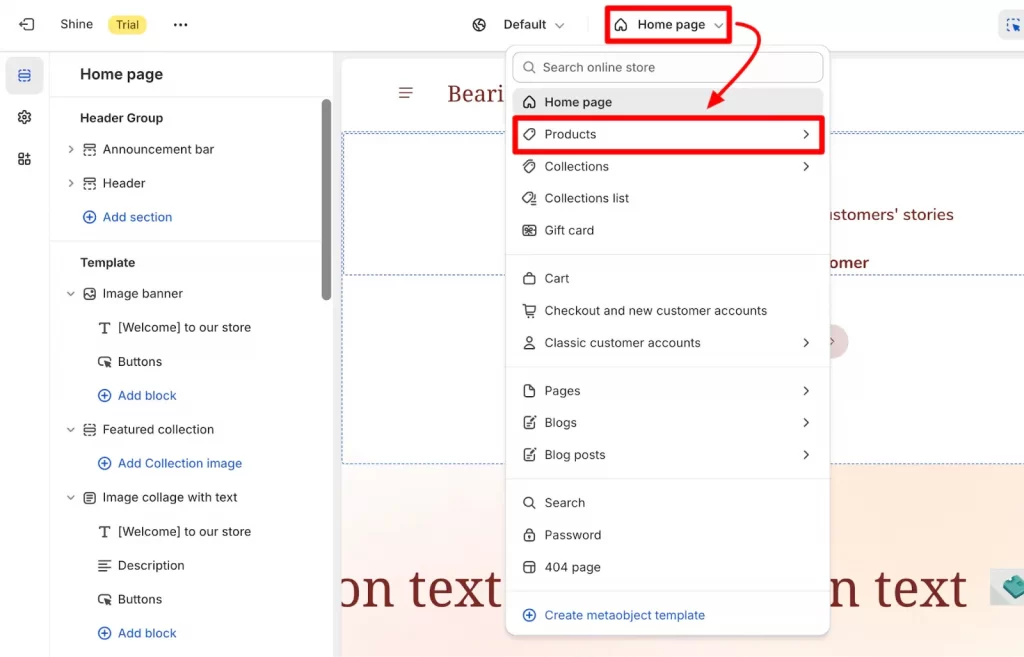
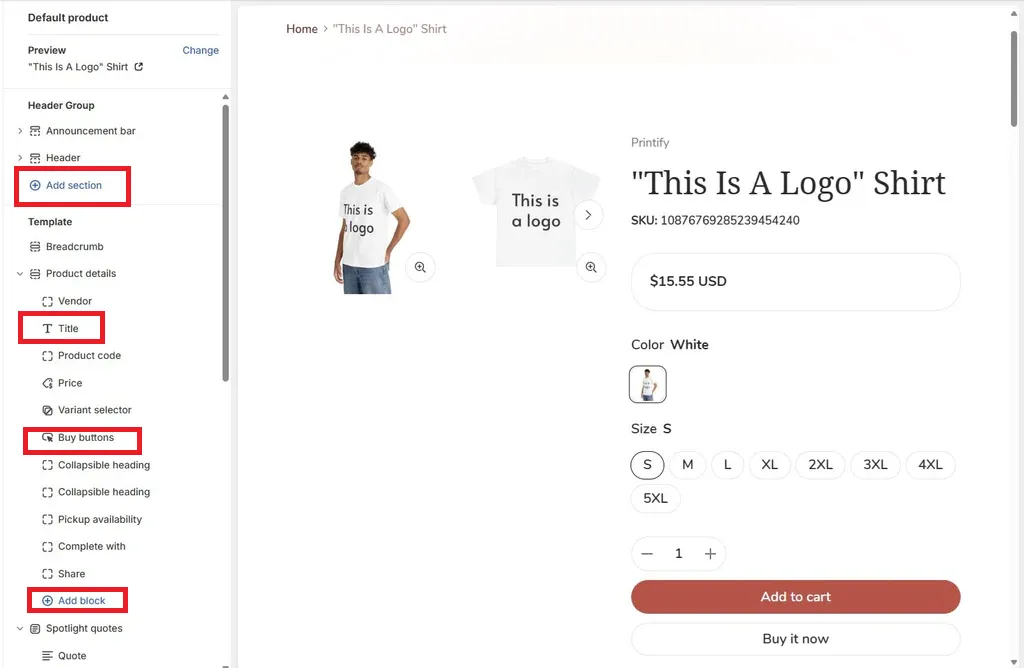
Once you’re in the product page view, take a moment to understand how your layout is structured. Typically, you’ll see the product photo on the left, and the details (name, price, variants, and “Add to Cart” button) on the right. Knowing how these elements are organized helps you decide what needs adjustment in Step 3.
Step 3. Customize the design and layout
It’s time to proceed with your Shopify product page customization!
You can start small — try updating the button color, text style, or background tone to reflect your brand identity. For instance, if your store focuses on eco-friendly products, soft green tones can convey sustainability and trust.
Likewise, you can also modify the image ratio, tweak typography, and adjust spacing between sections for better readability.
Method 2: Shopify Product Page Customization with Optimized Themes
All in all, the default Theme Editor is ideal for smaller tweaks and quick layout changes. However, because most themes restrict how deeply you can modify structure, you might soon feel limited.
And that’s when optimized Shopify themes come into play! These are premium themes built with more powerful customization tools, perfect for stores ready to go beyond the basics for their Shopify product page customization:
Step 1: Find a theme that fits your brand
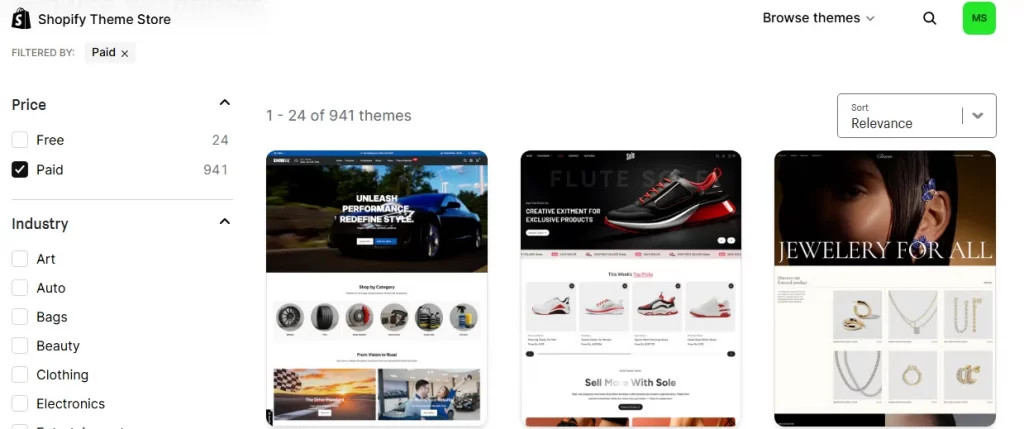
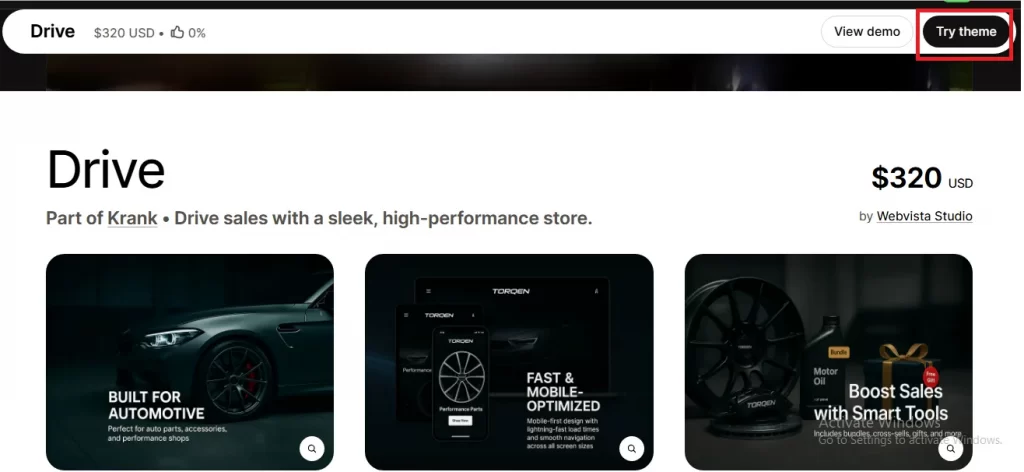
First, head over to the Shopify Theme Store (with 940+ premium themes) and start browsing. Each of these paid themes is built with specific brand types in mind, so the right one can save you hours of editing later!
For example, a fashion brand might prioritize high-resolution image galleries; meanwhile, a tech store might need quick-spec comparison tables or sticky “Add to Cart” buttons. You can always use the preview feature to visualize your products in the theme’s layout before installing.
Step 2: Explore Shopify product page customization tools
Once you’ve chosen a theme, click “Try theme” to install it in your store and return to Online Store → Themes → Customize.
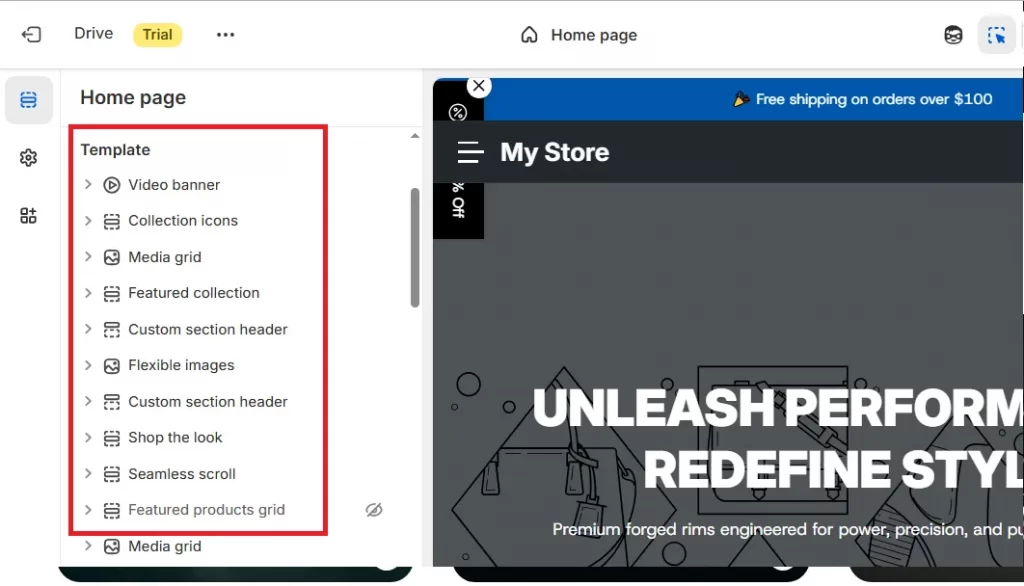
Optimized themes come with more design options than Shopify’s free ones; you can often rearrange sections, control product image sliders, toggle tabs for specifications, and even display customer reviews dynamically.
Each theme offers different features, so spend some time exploring each section in the sidebar. For example, you might find controls for adding badges like “Best Seller,” enabling quick-view popups, or activating promotional banners. These features are designed to boost engagement and improve conversion rates right out of the box!
Method 3: Advanced Product Page Customization Using Code
When you’ve reached the point where even pre-built options from premium themes can’t capture your exact vision, editing the theme code becomes the ultimate solution for Shopify product page customization! This method allows you to change virtually every aspect of your product page, from the layout of elements to the way dynamic content is displayed.
Step 1: Understand the basics of Shopify’s code
Shopify themes are built using Liquid, HTML, CSS, and JavaScript:
- Liquid handles dynamic data like product titles, prices, or variant details
- HTML defines the structure
- CSS controls design and spacing
- JavaScript adds interactive elements.
If you’re new to coding but genuinely want to give this method a try, then we suggest exploring Shopify’s Theme Development Documentation to understand how these languages interact.
Step 2. Access and backup your theme files
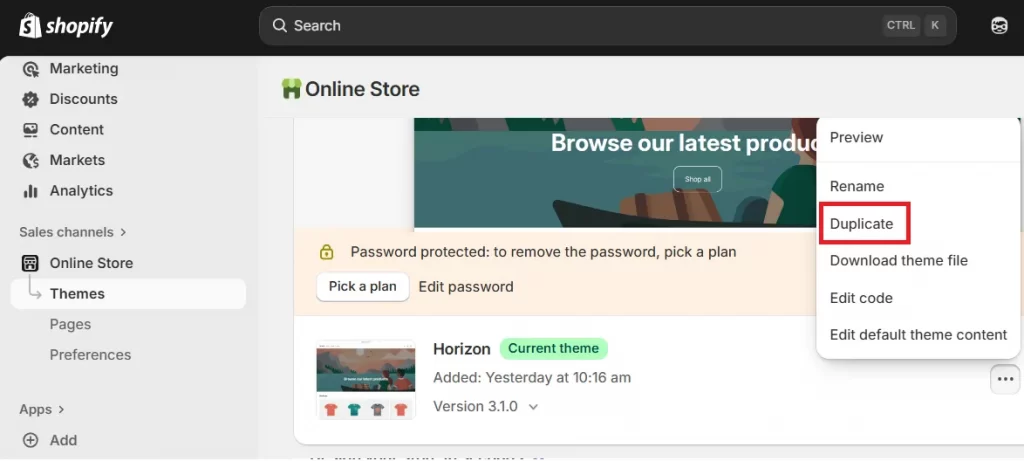
Before making any edits, always duplicate your theme by clicking Duplicate. This creates a full backup version that you can restore instantly if something goes wrong.
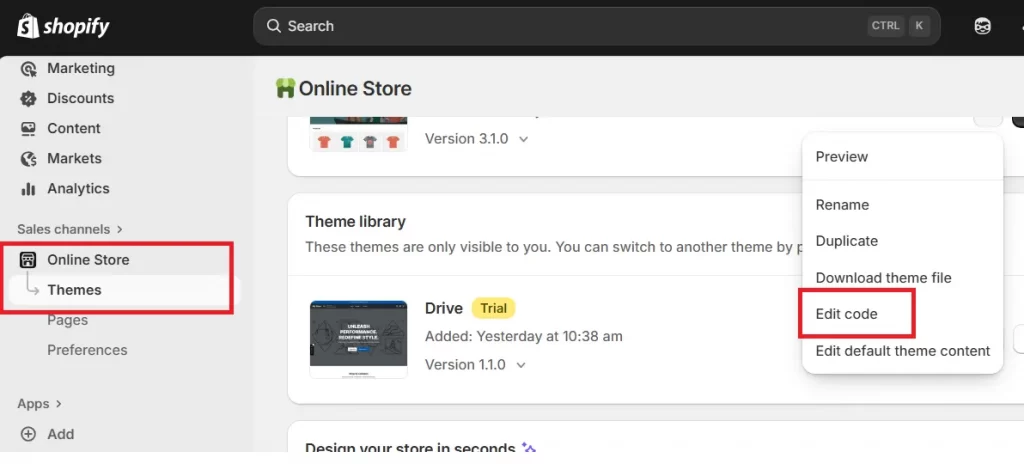
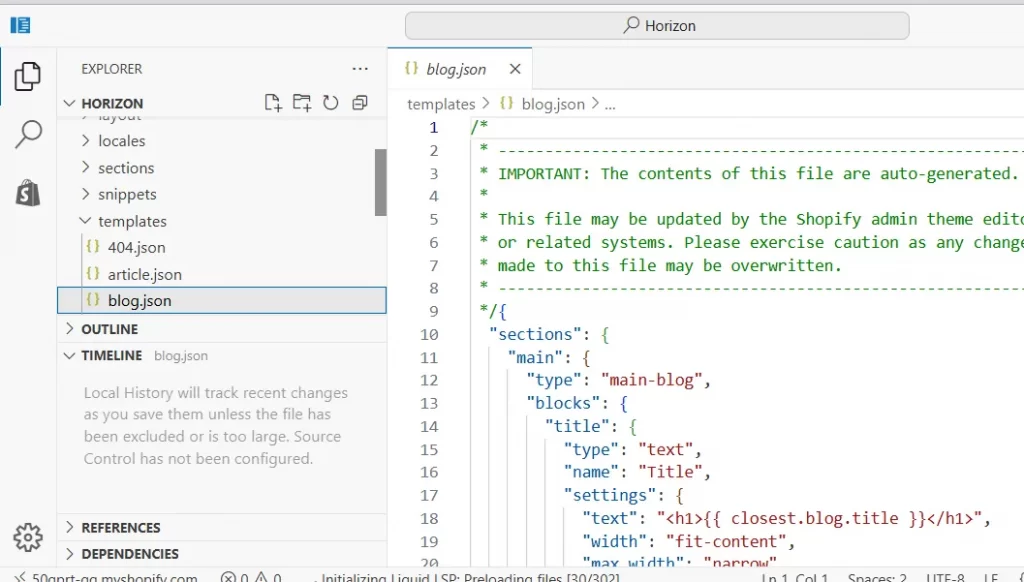
Now, to start editing, go to Online Store → Themes, click the three-dot icon next to your active theme, and select Edit code.
Inside the code editor, you’ll see folders for “Templates,” “Sections,” “Assets,” and more. Your product page layout is usually stored in /templates/product.liquid or /templates/product.json (for Online Store 2.0 themes).
Step 3: Edit the product template and add custom features
Open the product template file and start editing.
You could, for instance, rearrange the position of the product image gallery and description, add collapsible content blocks, or embed a YouTube video to demonstrate your product. For styling, open your .css files to adjust font sizes, colors, and spacing. Check out this detailed Shopify documentation to see what you can do with each file!
Plus, if you’d like to show dynamic data (such as inventory levels or countdown timers), we suggest using Liquid tags like {{ product.available }} or include a snippet to fetch custom metafields.
Once your edits are done, preview before publishing your Shopify product page customization.
Method 4: Using Apps for Shopify Product Page Customization
Not everyone has the time (or patience) to work with code, but that’s perfectly fine. With Shopify apps, you can achieve almost the same level of creative control using simple drag-and-drop tools! These apps combine the flexibility of custom coding with the convenience of visual editing.
Step 1. Find and install a page builder app
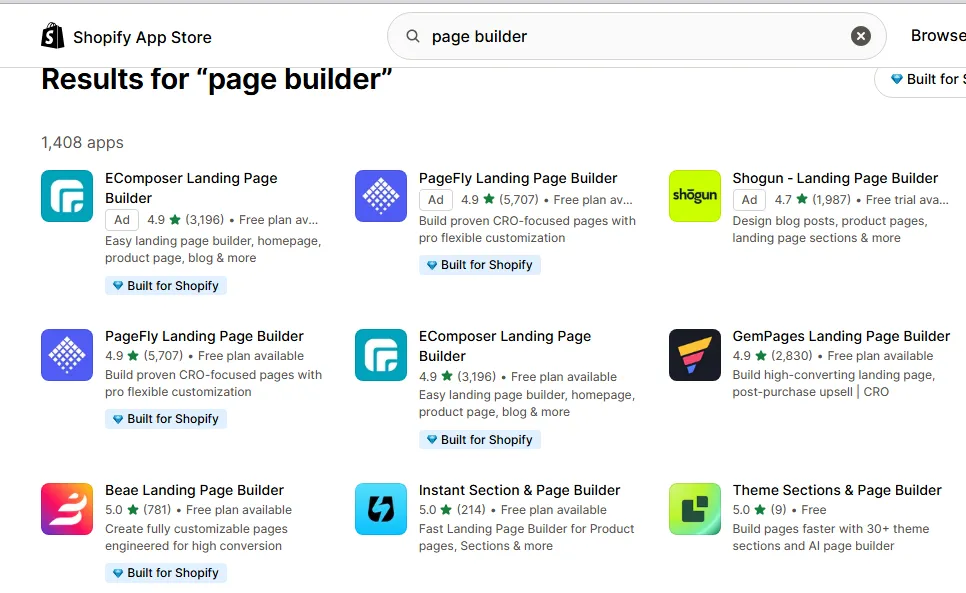
First, go to the Shopify App Store and search for “page builder.” You’ll find numerous highly rated options built specifically for Shopify 2.0 themes.
Choose one that matches your skill level and design needs. Apps like PageFly, Shogun, or GemPages are popular choices because they offer rich design flexibility with minimal setup.
Once installed, open the app and connect it to your store. You can choose whether to customize existing product pages or build entirely new ones. Most page builders also provide template libraries, so you can start from a professionally designed layout instead of a blank canvas.
Step 2. Build your product page with drag-and-drop controls
Inside the editor, you’ll find a visual workspace that resembles a design canvas. You can drag text boxes, image galleries, buttons, and videos into position, then tweak their settings on the sidebar. For instance, you might add a countdown timer next to your “Add to Cart” button, or include an accordion tab to organize your product specifications.
What makes page builder apps powerful is that they offer real-time responsiveness: you can instantly preview how your page looks on different devices. Some even allow you to show or hide sections on mobile versus desktop for a cleaner, optimized layout.
Step 3. Refine performance and integrate features
Once the layout looks good, you can enhance it further by adding marketing and performance tools. Many page builder apps support integrations with email marketing, reviews, and upsell apps. You can also insert custom tracking scripts or snippets for conversion analytics.
Finally, test your product page from a shopper’s perspective: is the “Add to Cart” button visible without scrolling? Are descriptions easy to scan? Does it look trustworthy? These final checks ensure your design doesn’t just look great but also performs great too.
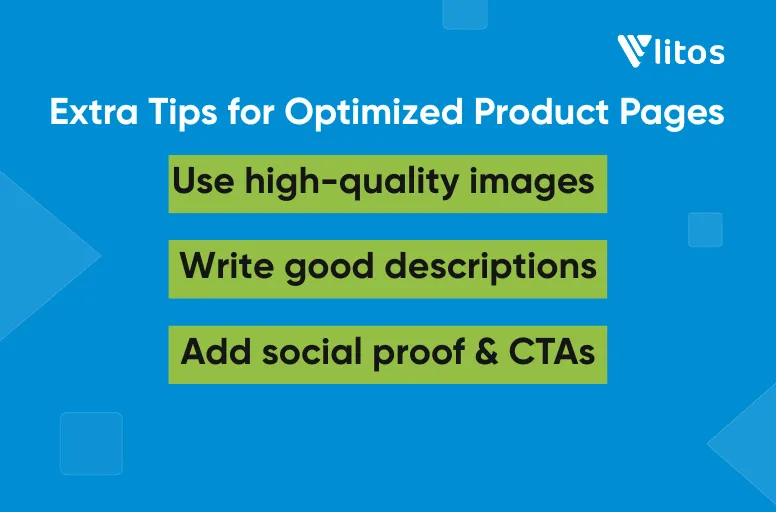
Extra Tips for Optimized Product Pages
Now that you’ve learned multiple ways for Shopify product page customization, let’s take things a step further. Below are three extra tips that can help you fine-tune your page for higher engagement and better conversions:
Tip 1: Use high-quality images and optimize for speed
Images are the heart of any product page; they’re the first thing customers notice and the quickest way to build trust. Hence, large, unoptimized images can also slow down your store, hurting both SEO and user experience!
We suggest uploading high-resolution images (at least 1500px width) to ensure your products look sharp on all screens, but make sure to compress them before uploading. You can use free tools like TinyPNG or Shopify’s built-in image optimizer to reduce file size without losing quality.
And if your product has multiple variants (like colors or materials), show each variation with a clear photo so customers can visualize what they’re choosing. Also, activate image zoom or hover effects if your theme supports them.
Tip 2: Write a compelling and structured product description
From our observation, many beginners make the mistake of writing long, unformatted text that looks intimidating on screen. Instead, aim for a description that is structured, persuasive, and easy to scan.
Also, you should break your description into small, clearly labeled sections using headings like “Features,” “Care Instructions,” or “Why You’ll Love It.” If your theme supports collapsible tabs or accordions, use them to keep the layout tidy and mobile-friendly.
In addition, sprinkle in SEO keywords naturally to help it rank in search results. Include relevant terms like “eco-friendly mug,” “ceramic coffee cup,” or “handmade drinkware” if that’s what your customers might search for. Writing with both people and search engines in mind is what separates a decent product page from a great one.
Tip 3. Add social proof and clear CTAs
Even the best-looking product page won’t sell unless it builds trust. That’s where social proof and clear calls-to-action (CTAs) come in!
To add social proof, activate product reviews on your page. Shopify has built-in review sections in many themes, or you can install apps like Judge.me or Loox to display star ratings and customer photos. Make sure these reviews appear close to your “Add to Cart” button so shoppers can see them right before they decide.
For your CTA, use a clear, benefit-driven button like “Add to Cart”, “Buy It Now”, or “Get Yours Today.” Avoid vague text like “Submit” or “Click Here.” If your theme allows, use a bright color for the button, ideally one that contrasts with your background but still matches your brand palette.
Shopify Product Page Customization: FAQs
How do I change the template of my product page on Shopify?
To change your product page template, go to your Shopify admin → Online Store → Themes, and click Customize next to your active theme. At the top dropdown, choose Product Pages and look for the Templates section in the sidebar.
If you want to create a new custom template, exit the editor and click Online Store → Themes → Edit Code. Under the “Templates” folder, click Add a new template, select “Product,” and name it (e.g., “product-custom”). You can then edit this new template and assign it to specific products in your admin.
How to make a good product page on Shopify?
To make a good product page, you should use a clear product title and strong imagery that highlights your product’s key features. Follow it with a concise but engaging description that focuses on benefits, not just specifications.
Also, use structured layouts and make sure the image gallery, description, reviews, and CTA are all in logical order. You can also enhance the experience with product videos, FAQ sections, or bundled recommendations to encourage more purchases.
How to add custom fields in Shopify product page?
To add custom fields, go to Settings → Custom Data → Products, then click Add definition. Give your field a name (like “Materials” or “Warranty”) and choose the type (text, number, URL, etc.).
Once saved, open a product in your admin, scroll to the Metafields section, and fill in your custom data. To display these fields on your storefront, open your Theme Editor → Product Page, select the section where you want the field to appear, and click Insert dynamic source.
How do I add a custom button to my Shopify product page?
If you’re using the Theme Editor, some themes allow you to add buttons directly as blocks — for example, “Buy Now,” “Contact Seller,” or “View Size Chart.”
But if your theme doesn’t offer that option, you can add one manually through Edit Code. Go to your product.liquid or product.json file and insert an HTML button element, such as:
View Size Guide
Final Words
Your Shopify product page is where customers decide, often within seconds, whether to buy or move on. That’s why Shopify product page customization is extremely important, as it helps you create an experience that feels trustworthy, intuitive, and true to your brand.
And if you’re planning to take your Shopify store to the next level and want expert support with store customization or theme development, the LitOS team is here to help. Our Shopify-certified developers can help you build, optimize, and scale your storefront with a clean design, fast performance, and long-term scalability.
Ready to take your product pages further?
At LitOS, we help Shopify brands create high-performing product pages that sell — with smarter design, cleaner code, and conversion-focused strategy. Whether you need expert tweaks or a full product page overhaul, we make customization seamless, scalable, and built to drive results.
Contact Us
