Shopify Order Status: All You Need to Know
An order status in eCommerce provides both merchants and customers with real-time information on the order.
Order statuses give merchants a proper overview of their online store orders, allowing them to ship out paid-for orders and follow up on unpaid ones.
Meanwhile, customers can rely on order statuses to make the dreaded “online shopping wait” a little easier. An order status page gives customers proper updates on the whereabouts of their parcel.
This guide goes through the process of checking your Shopify order status, as well as creating an order status page for your paying customers. A little note, you may need Shopify development services for some areas in this guide.
What are the Different Shopify Order Status You Need to Know

When it comes to eCommerce, there are a ton of possible order statuses. These may include canceled, partially refunded, fully refunded, scheduled, etc.
Going through them will make for quite a lengthy blog.
But there are four Shopify order statuses that every merchant should take note of. These include paid, payment pending, fulfilled, and unfulfilled.
Paid
Payment status could be either paid, payment pending, or partially paid. We won’t focus on the partially paid payment status in this guide, considering it doesn’t occur as much as a (fully) paid status.

A “paid” status shows up on an order if the customer has already processed payment for it.
This means that transactions made through credit card payments will automatically have the “paid” status.
Payment Pending
However, if the customer opts for one of your manual payment methods, they can place an order even before processing payment (e.g., Cash on Delivery, Bank Transfer).
An order made through manual payment methods will be an unpaid order (Payment Pending) until payment can be processed.
The merchant would have to manually set an order’s status from “payment pending” to “paid.”
Fulfilled
An order fulfillment status can be fulfilled, unfulfilled, or partially fulfilled. We’ll focus on the first two for now.

A “fulfilled” order is one that’s already shipped out. This is the usual scenario, but merchants may choose to mark an order fulfilled for other reasons, such as payment received or upon specific request by the customer account.
Unfulfilled

By default, orders will appear “unfulfilled.”
This indicates orders that are being held back by something, such as payment, non-availability of the requested item, or an incorrect customer address, among others.
To fulfill an order on Shopify, simply click on “Fulfill items” on the order.
Finalize by clicking “fulfill items” again.
How to Check your Shopify Orders’ Status
Your Shopify orders’ status will conveniently appear next to each order entry found on the Orders tab.
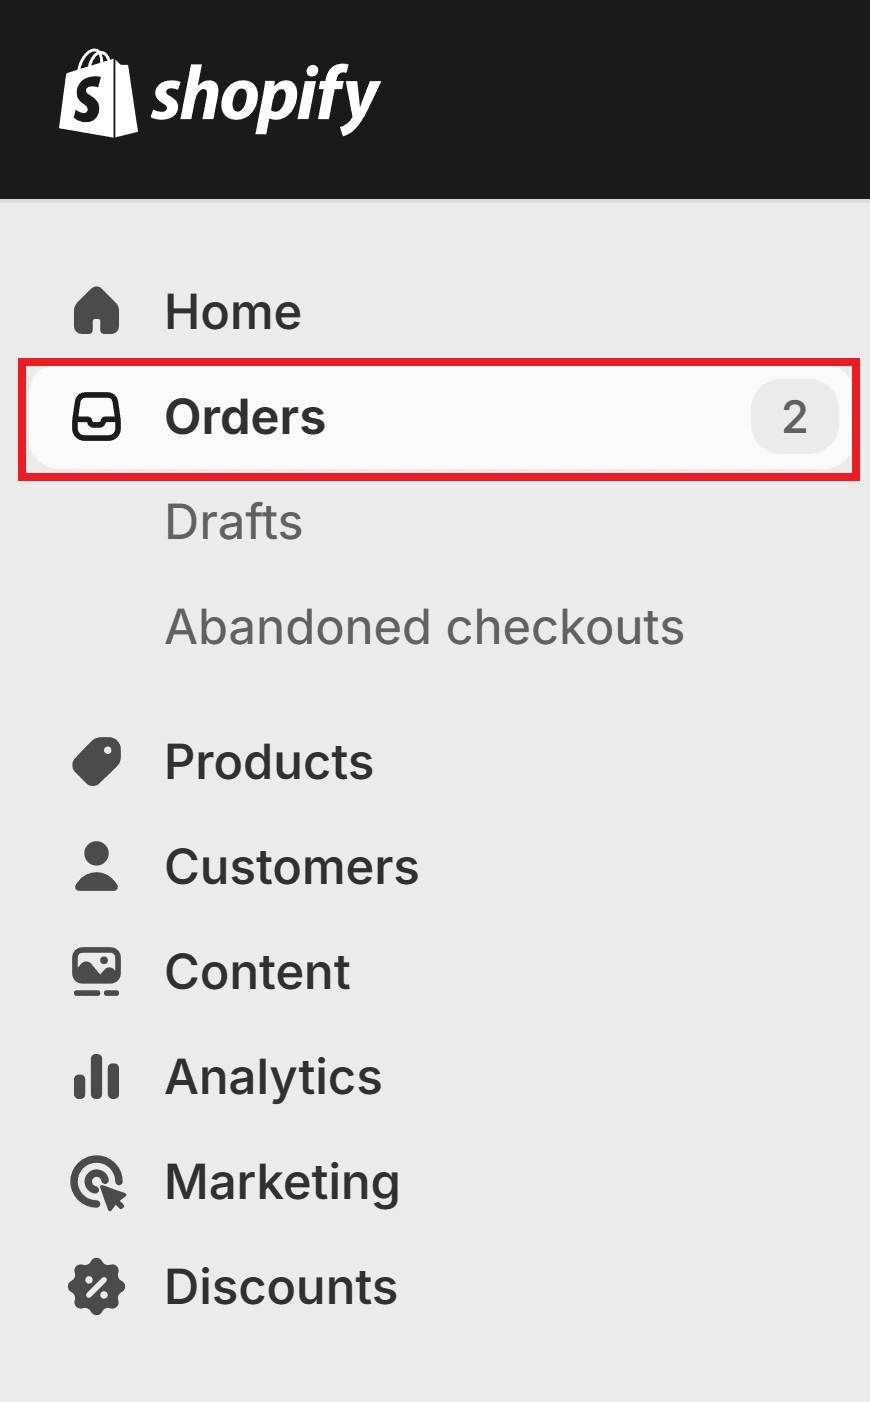
From the main dashboard, click on “Orders” from the admin panel.
There, you’ll see all your orders.
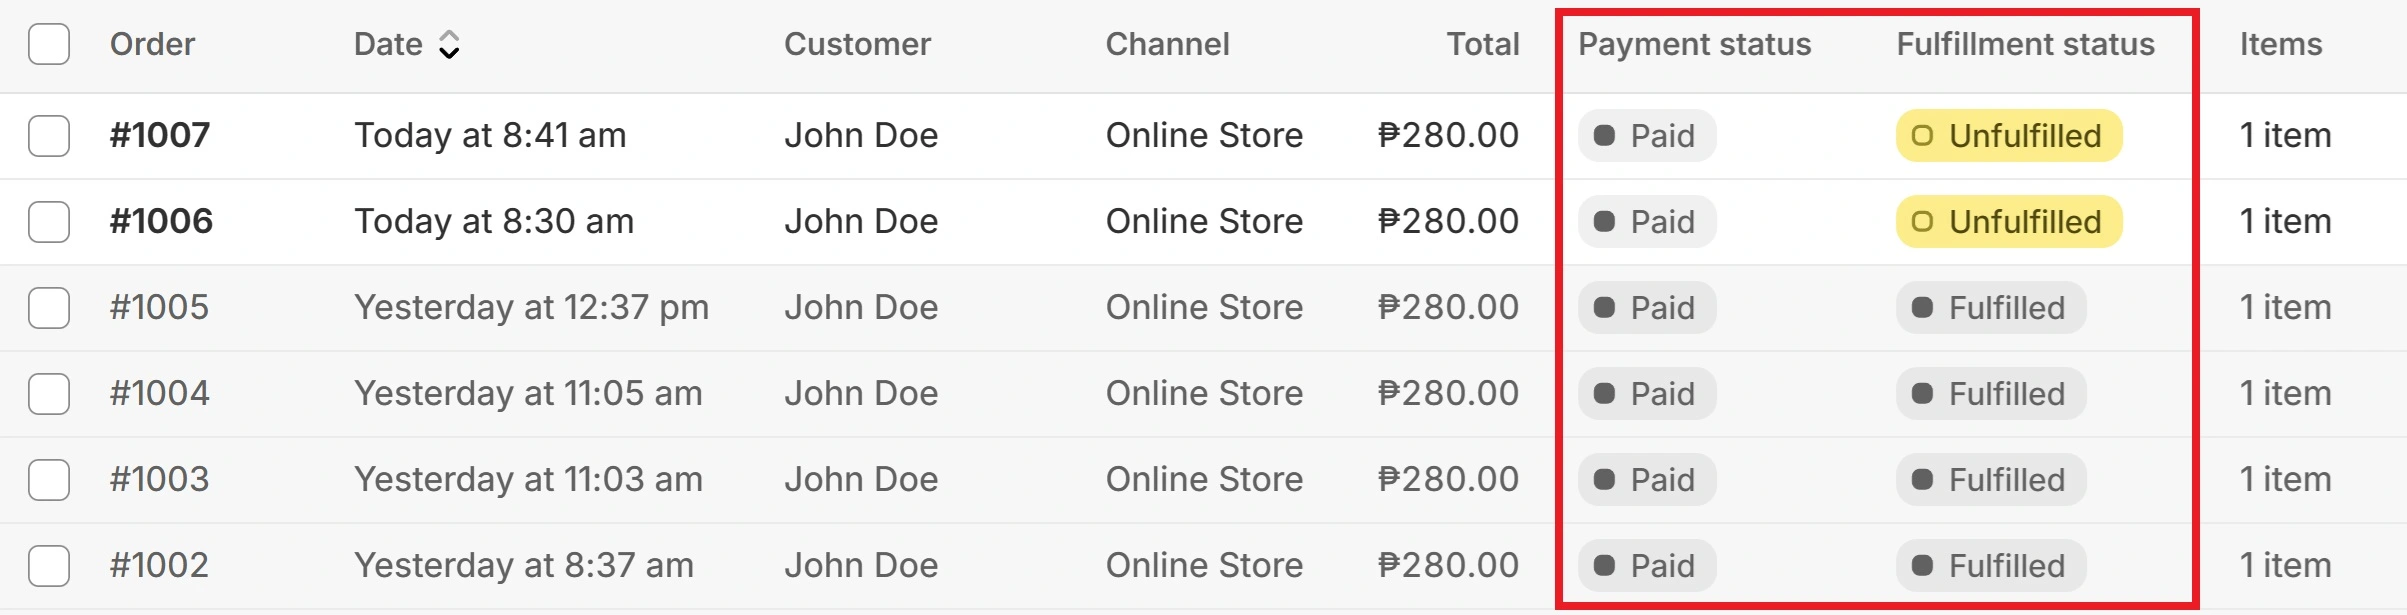
Pay attention to the “Payment Status” and “Fulfillment Status” columns of the order. You’ll see your Shopify orders’ status there.
How to Process Orders on Shopify
The goal of any Shopify merchant should be to process and fulfill orders as they are made.
Doing that is simple. Go to the “Orders” tab of the Shopify admin panel.
Click on any “unfulfilled” order.
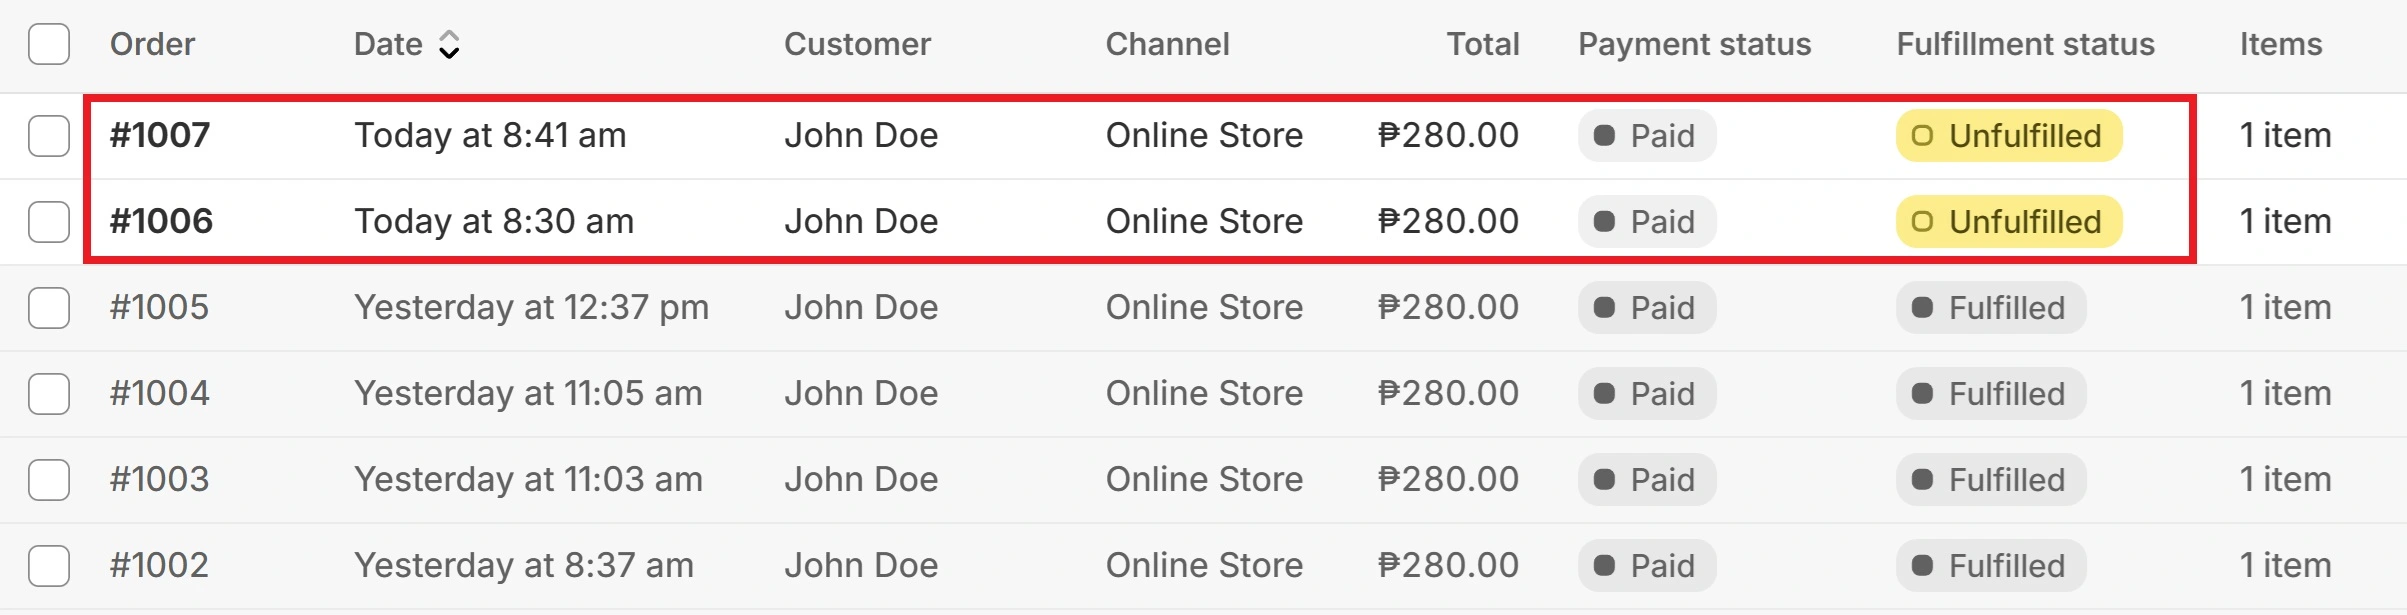
You’ll be taken to the order’s details page.
From there, you may decide whether to refund, edit, or cancel the order. (Cancel order can be found underneath “More actions“.)
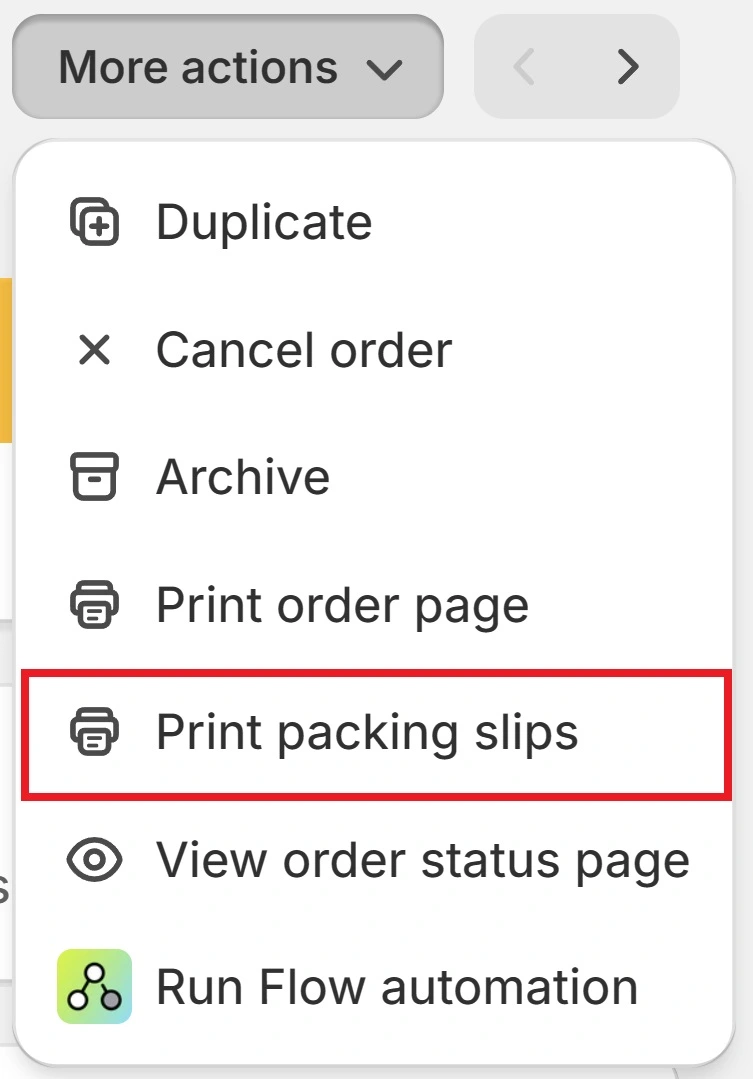
If you wish to fulfill the order, click “More actions” then select “Print packing slips.”
Print the packing slip and attach it to the respective parcel.
Ship the parcel out and take note of the tracking number, carrier, and, if applicable, the tracking URL.
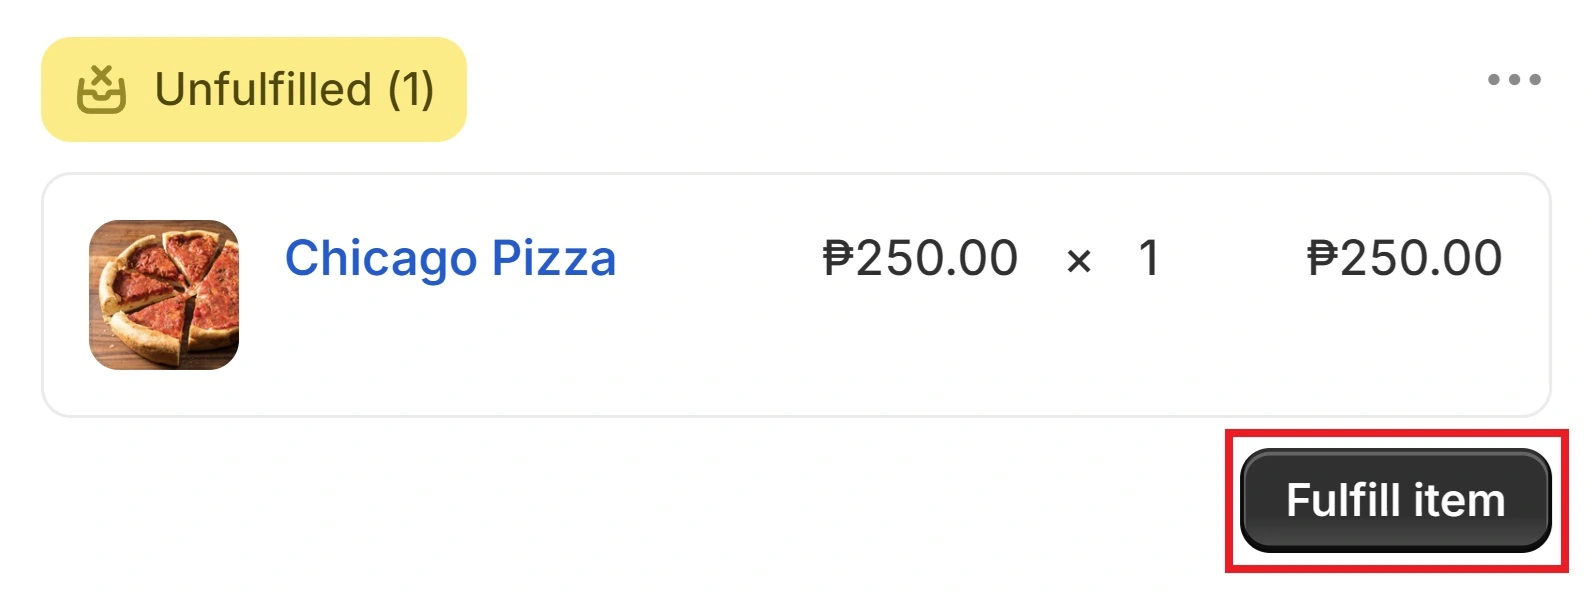
Click on “Fulfill item.”
![]()
In the screen that follows, place the tracking number and carrier in their respective fields then click “Fulfill item.”
There are a couple more things to consider when processing orders:
- If an order is “Paid” and “Fulfilled” with a tracking number, then that means the order has been shipped out to a paying customer.
- If an order is “Paid” and “Unfulfilled”, go through the aforementioned steps to have it processed.
- If an order is “Unpaid” and “Unfulfilled,” you may choose to send the customer an invoice or cancel the order if it goes unpaid for quite some time.
- We highly suggest avoiding “Unpaid” and “Fulfilled” with tracking number status.
Add Tracking Numbers to Orders
Adding tracking numbers to your Shopify orders allows you to keep track of and monitor your order’s delivery status from the Shopify dashboard.
This can be crucial to keeping everything streamlined and within a single interface.
After you send out an order, your courier of choice (e.g., FedEx, UPS) will provide you with your shipment tracking number. Take note of this number.
To add a tracking number to an order, first go to the Orders tab from the main dashboard.
![]()
Pay attention to orders that don’t have “tracking added.” You’ll want to add tracking numbers to these orders.
Select an order you want to add a tracking number for. Make sure you’re matching the right tracking number to its corresponding order.

Click on “Fulfill item.”
Indicate the
- tracking number
- shipping carrier
- and tracking URL
in their respective fields.
Shopify recognizes many various postal services and their tracking number formats, so it may automatically select your shipping courier. However, if Shopify chooses incorrectly, simply edit the shipping carrier to the correct one.
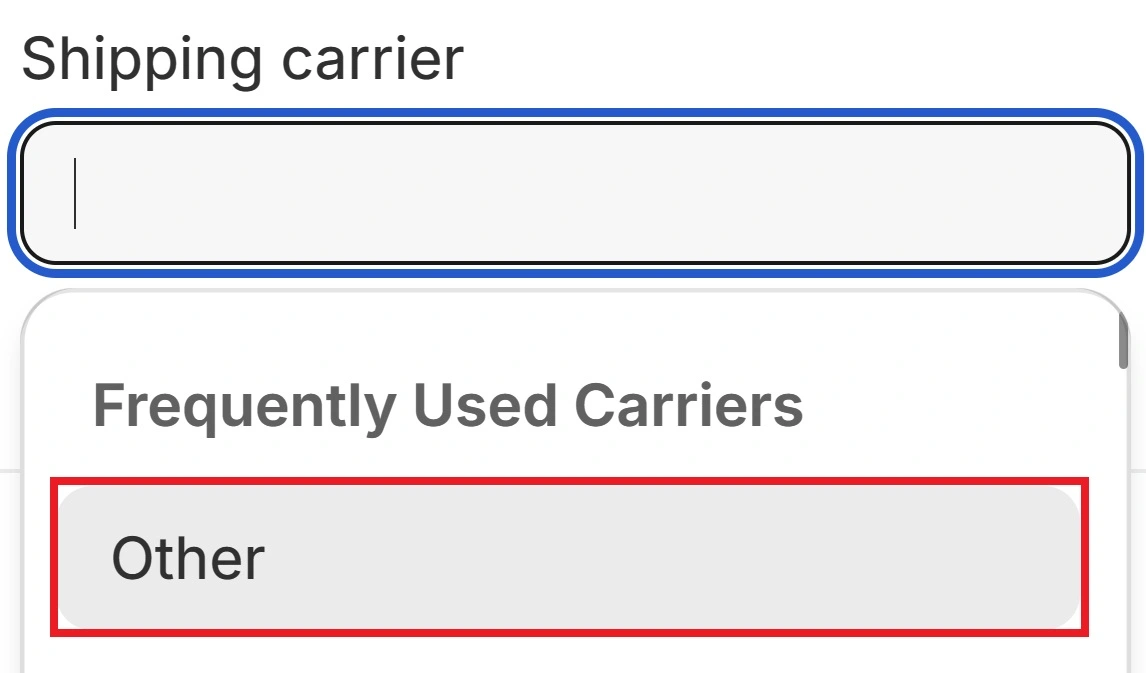
Sometimes, Shopify won’t recognize a courier. In these cases, select “Other” as the shipping carrier and input the tracking URL into its respective field.
How can Customers Track the Shopify Order Status
It’s crucial for customers to receive real-time updates on the status of their orders. This will improve customer satisfaction and reduce the load on your customer support team.
To provide order updates to customers, you’ll need an order status page.
Creating a Shopify Order Status Page
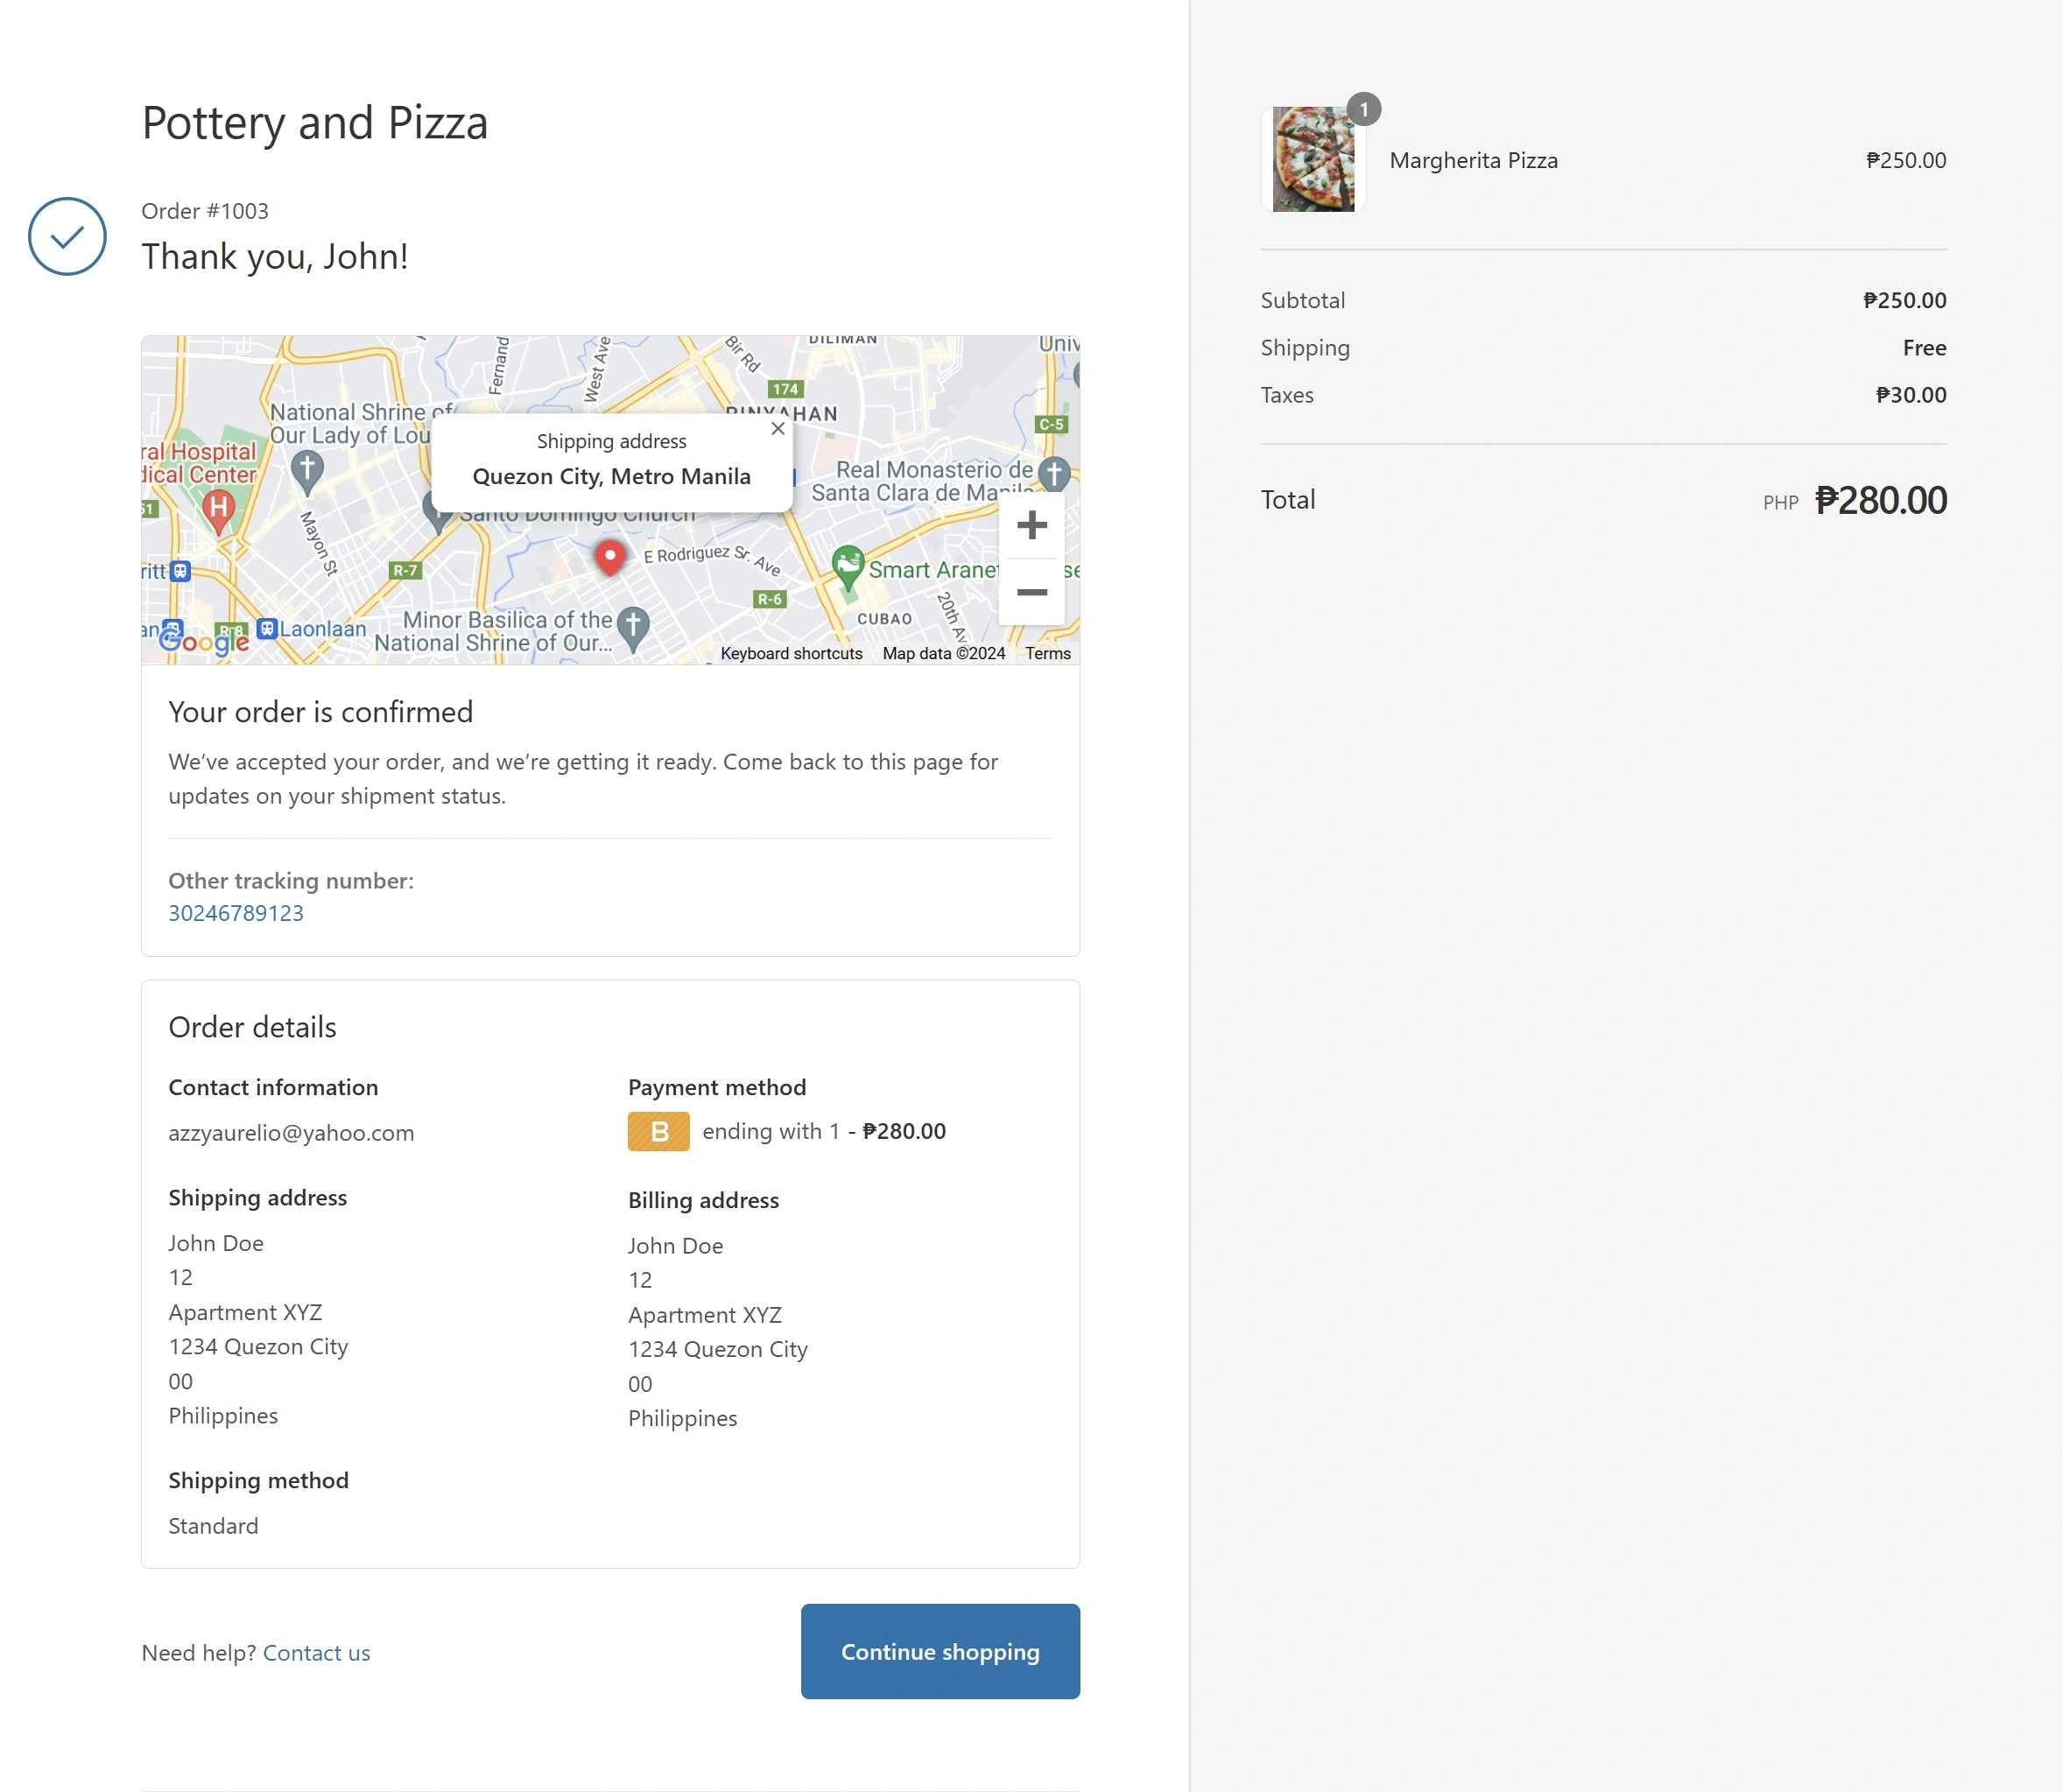
The Shopify order status page is the final page of a store’s checkout process. This page comes after the entire checkout process, whether you’re using a Shopify one page checkout or multiple-page checkout.
These pages display the order’s total amount, order details, the courier name, and tracking number. If you’re using a Shopify-supported courier, it will also show a map displaying the parcel’s whereabouts.
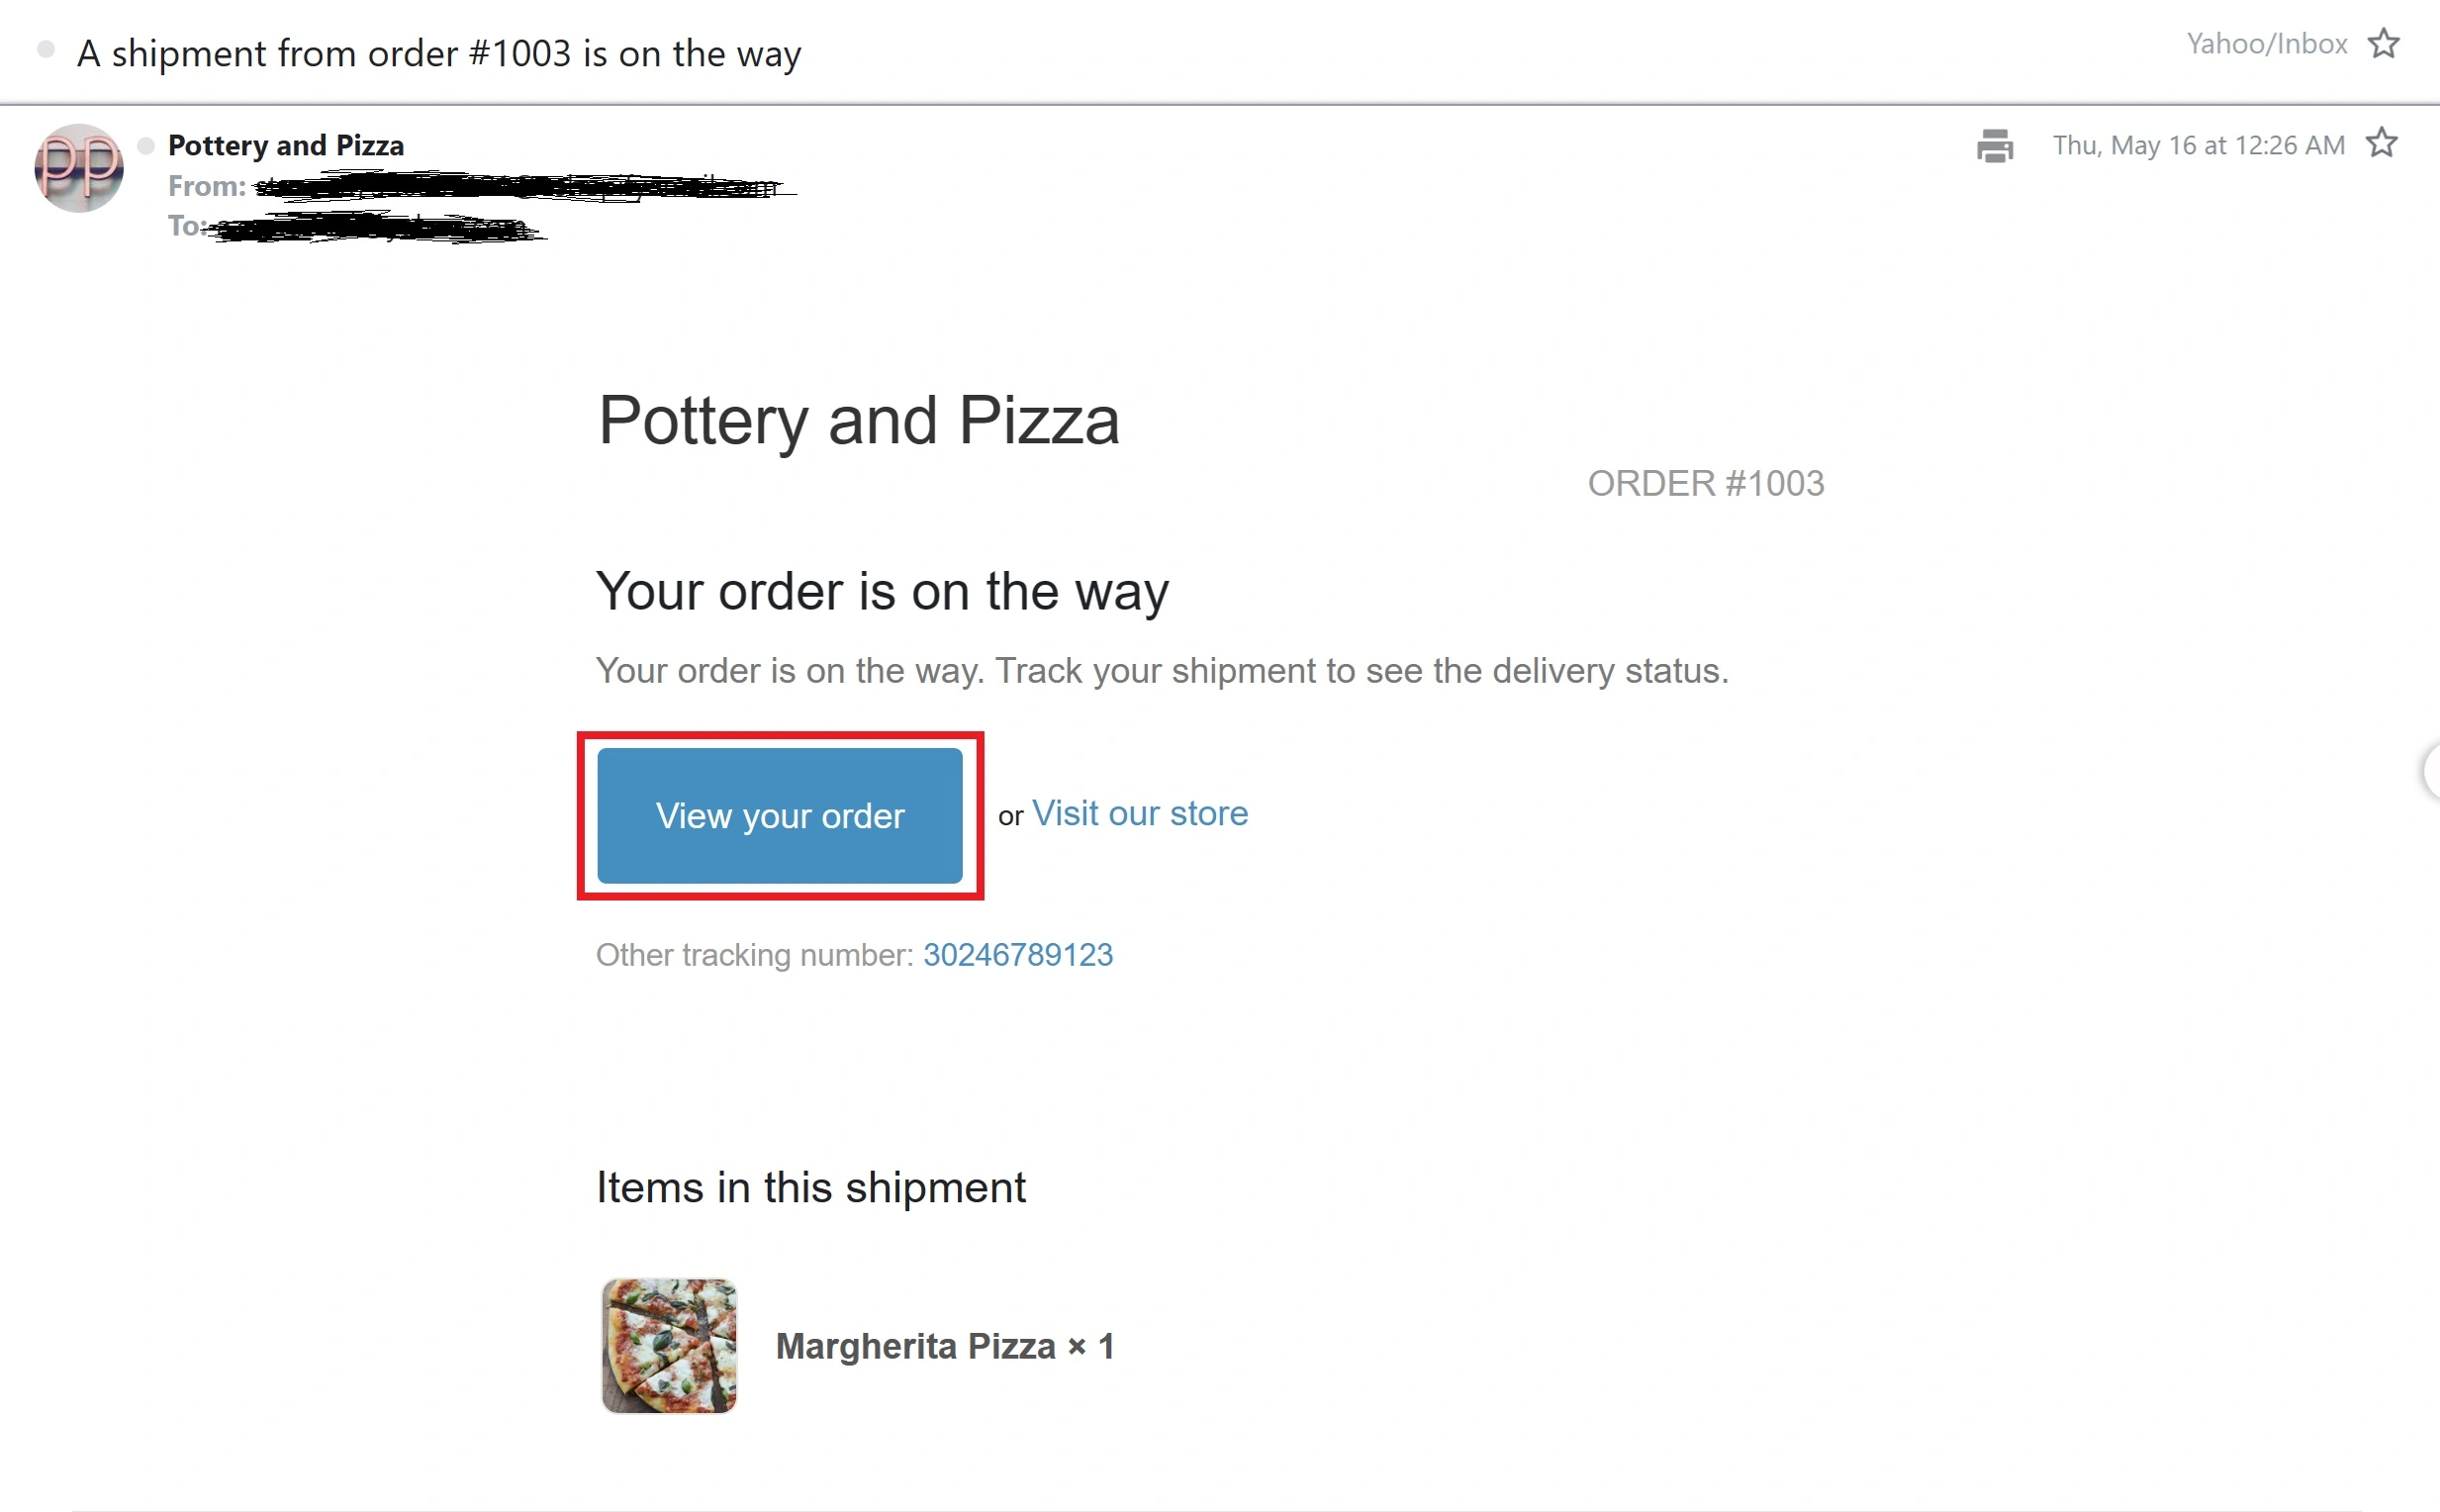
Shopify’s order update emails will contain a link to the order status page.
How to Customize Your Shopify Order Status Page
You can’t edit your order status page from the theme editor.
You can’t edit the order status page by changing your theme either unless you’re proficient in Shopify theme development.
To edit your order status page, you’ll need to customize your checkout.
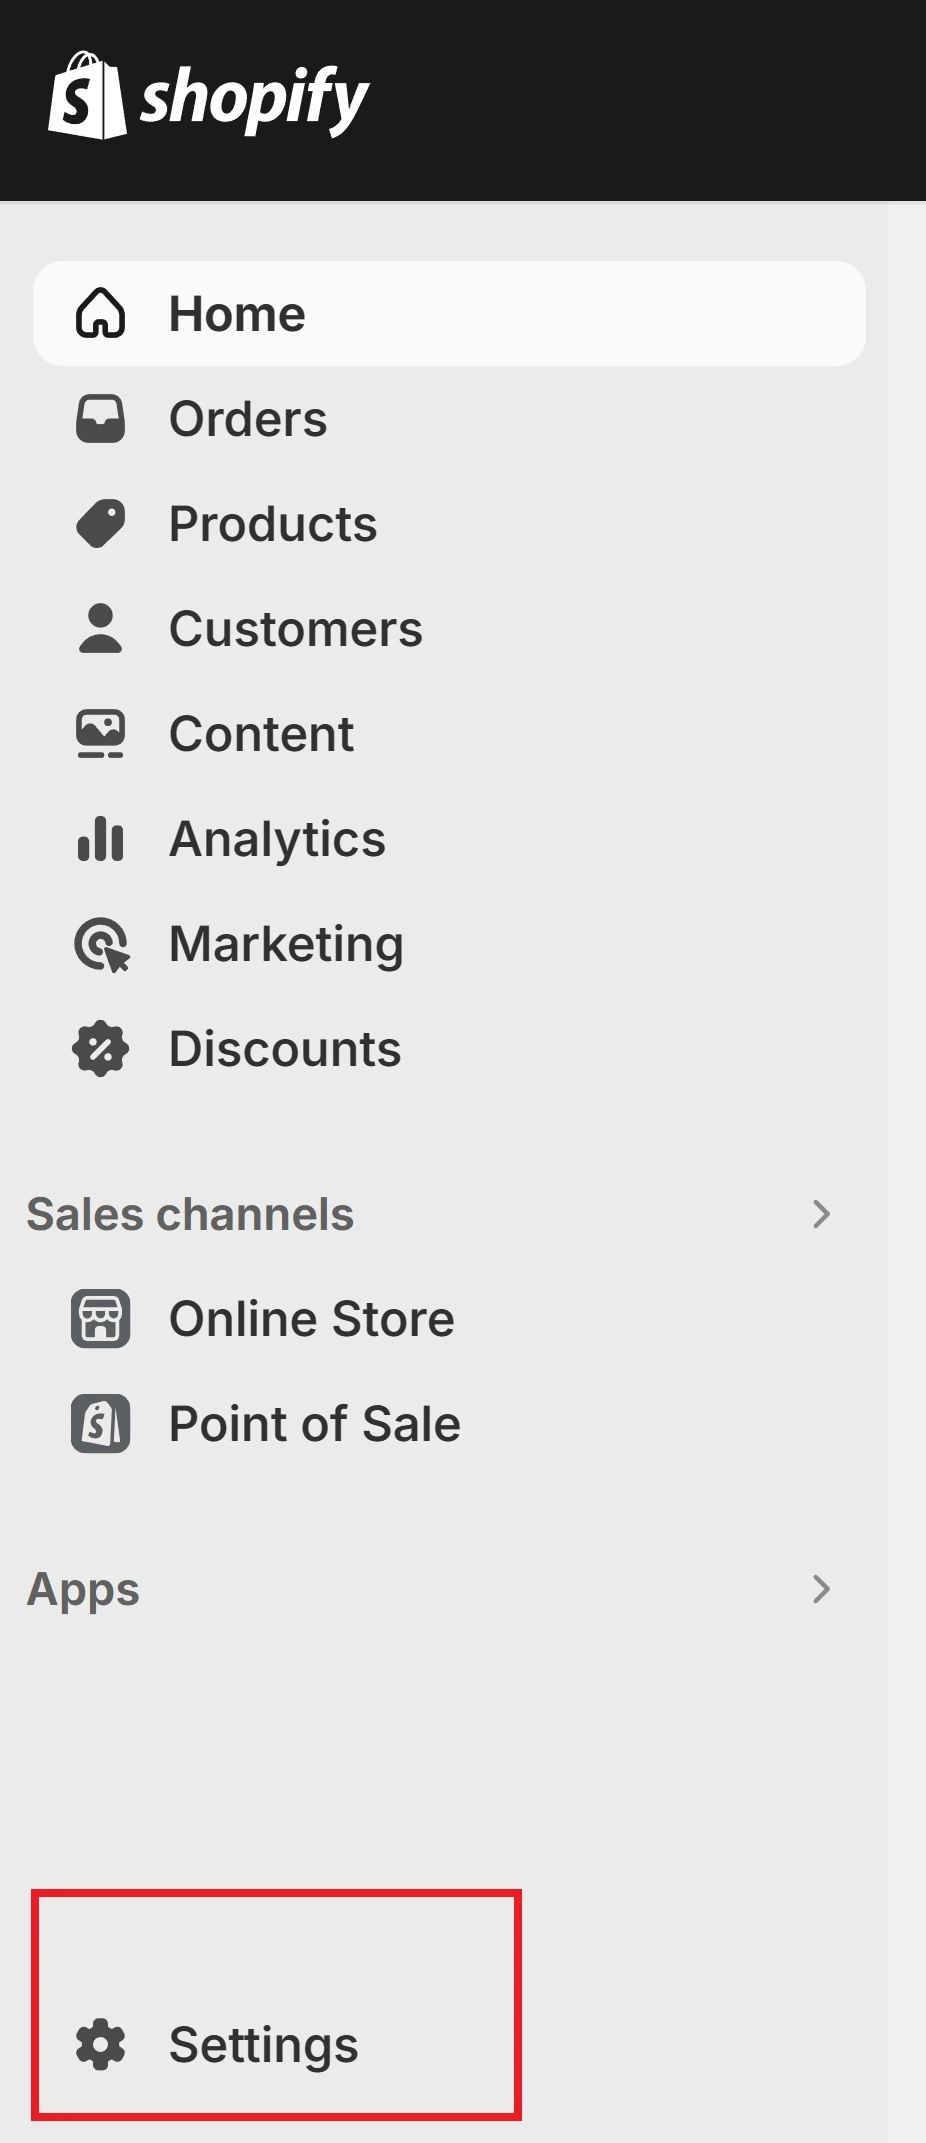
First, click on “Settings” from the admin panel.
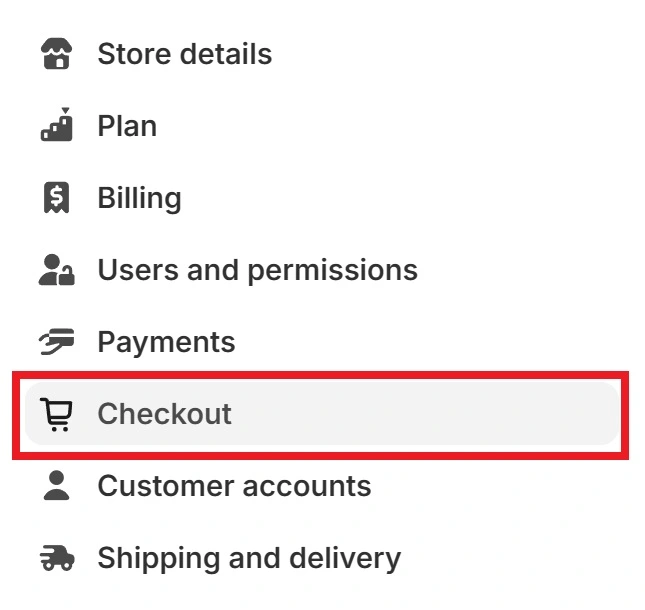
Then click on the “Checkout” tab.
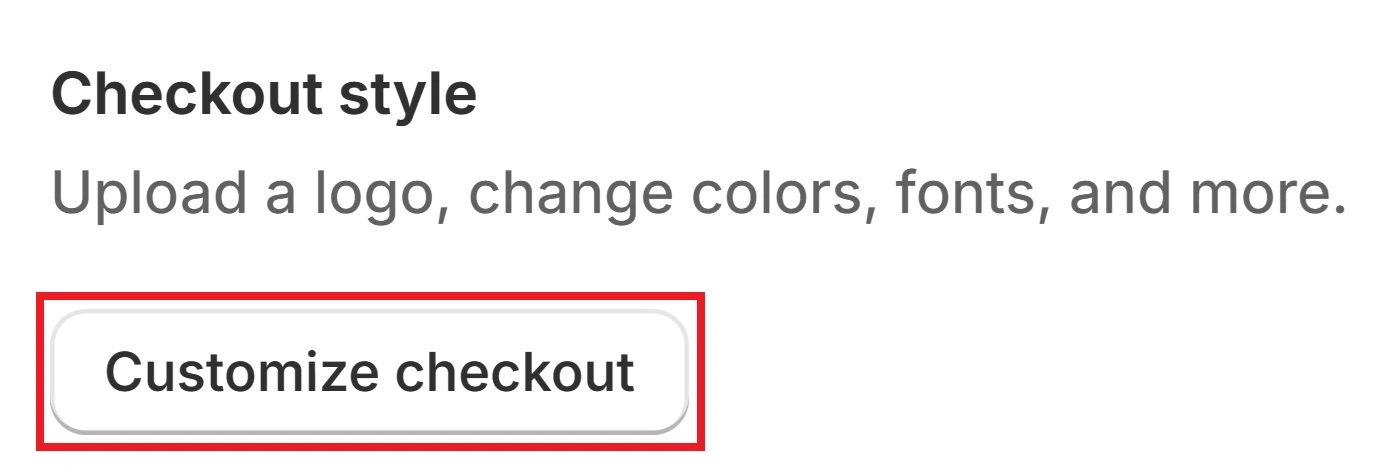
Click the “Customize checkout” button.
You’ll be taken to the theme editor, wherein you can modify how your checkout looks and feels.

Select “theme settings.” It’s the gear icon on the left.
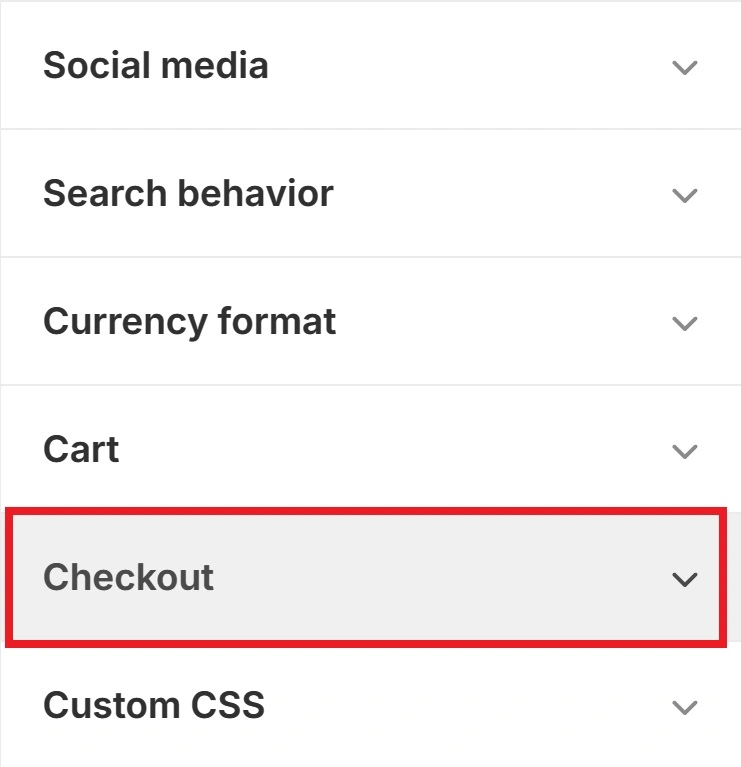
Scroll down to “Checkout.”
From there, you can add a banner, logo, and background image, as well as change the color scheme and typography, among many others.
Edit the checkout section as you please.
Changing how the checkout looks will also alter the order status page’s appearance. Keep this in mind when designing your checkout page.
However, there’s no way to view order status page from the theme editor.
If you want to see how your order status page will look, go to the “Set Up Your Email Templates” section of this guide to send a test email to yourself. This test email will contain the link to your order status page, allowing you to see how it looks.
Use a Shopify-Supported Shipping Carrier
When you add a tracking number to an order (as stated earlier in “Add Tracking Numbers to Orders”), it allows merchants to receive real-time information on the parcel’s whereabouts.
However, if merchants use a Shopify-supported shipping carrier, their customers would see where their parcel is in real-time on a map.
This map will be displayed on an order status page.
Shopify-supported carriers in the US include:
- USPS
- UPS
- DHL Express
- FedEx
Shopify-supported carriers will be different, depending on your region or country.
Furthermore, when you fulfill an order using a Shopify-supported courier, customers will see which courier service is used via the order confirmation email.
Using a Non-Supported Shipping Carrier
If the merchant uses a shipping carrier that isn’t Shopify-supported, then customers would need to be directed to their respective tracking URL for shipping updates.
To do that, choose “Other” as your shipping option when fulfilling an order.
Input the tracking number, as you normally would.
![]()
Enter the tracking URL as well. This will be crucial information.
Having the tracking URL allows customers to immediately navigate to the third-party tracking page from the Shopify order fulfillment email. There, they can track their order in real-time (if the third-party courier provides that service).
The third-party link would be anchored to the tracking number indicated in the email. So that when customers click on the tracking number, they’re directed to the third-party tracking URL you indicated.
Capturing Customer Email at Checkout
Shopify will require either the customer’s mobile number or email before they finalize their purchase. This will allow Shopify to send order updates.
However, while Shopify sends order confirmations over both SMS and email, order and shipping updates are only sent via email.
This is why we highly suggest capturing customer email instead of giving them the option to place either their email or number.
Here’s how you can set up Shopify to capture customers’ emails at checkout.
First, go to “Settings” from the admin panel.
Select “Checkout.”
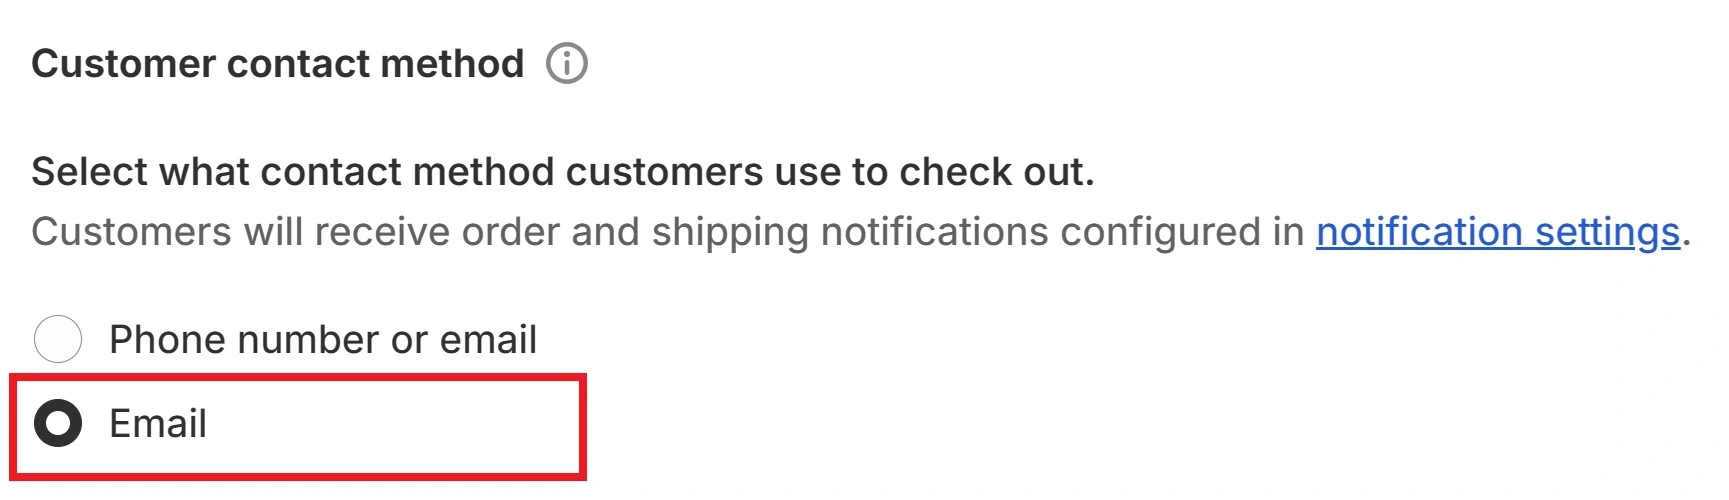
Underneath the “Customer contact method” section, tick the email radio box.
But don’t finalize yet. We also want to capture the customer’s mobile number so that the courier has someone to call, should any issues arise with delivery.
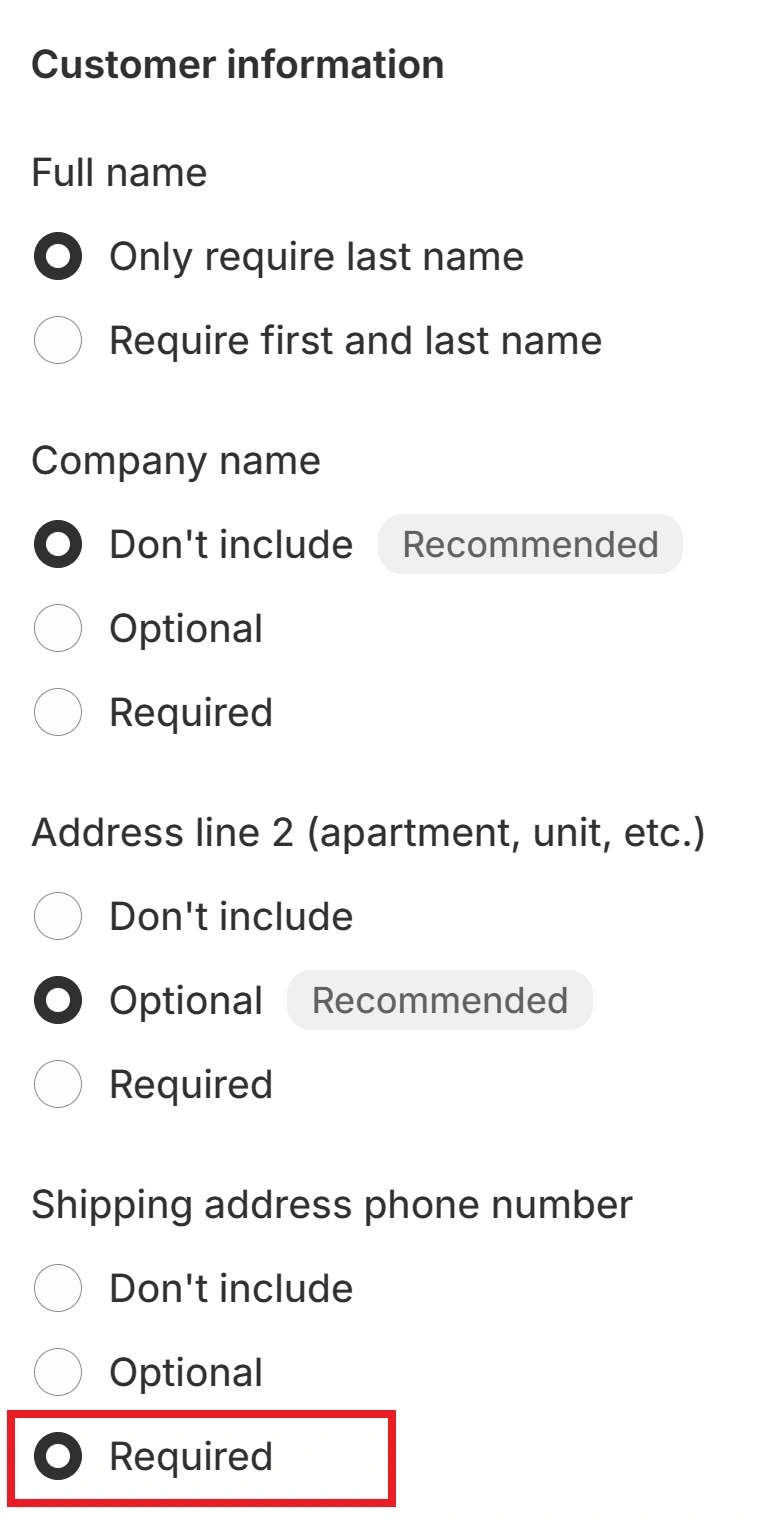
Underneath “customer information,” make sure “Shipping address phone number” is set to “Required.”
Finalize by clicking “Save.”
Now, customers will be required to enter their email before placing an order.
This also means customers will get Shopify order updates via email, ensuring that they receive instantaneous and real-time order updates.
Set Up Your Email Templates
Shopify’s default email template for confirming order placement already includes a link to the order status page. So, there’s no need to alter the email templates.
However, if you wish to do so, you’ll need some HTML knowledge.
Here’s how you can edit your store’s email templates.
First, go to “Settings” from the Shopify admin.
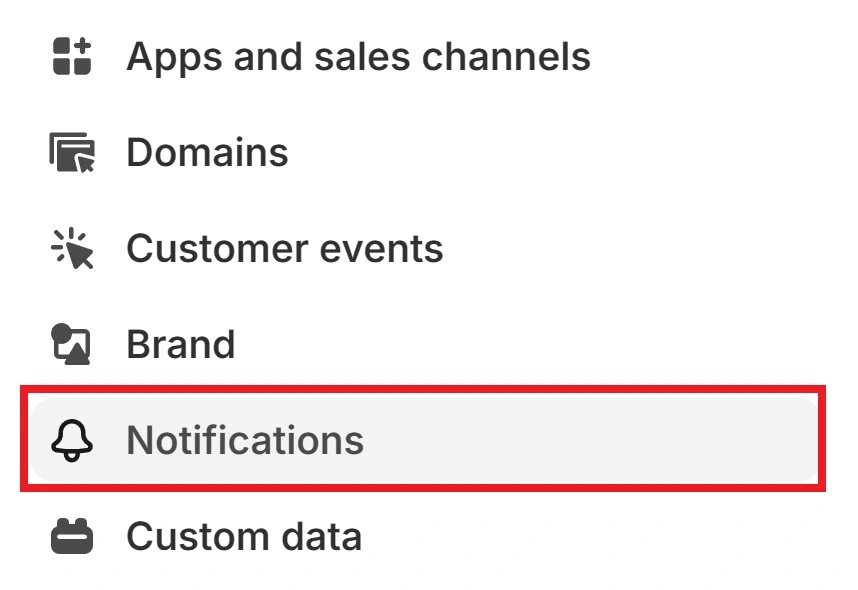
Then click “Notifications.”
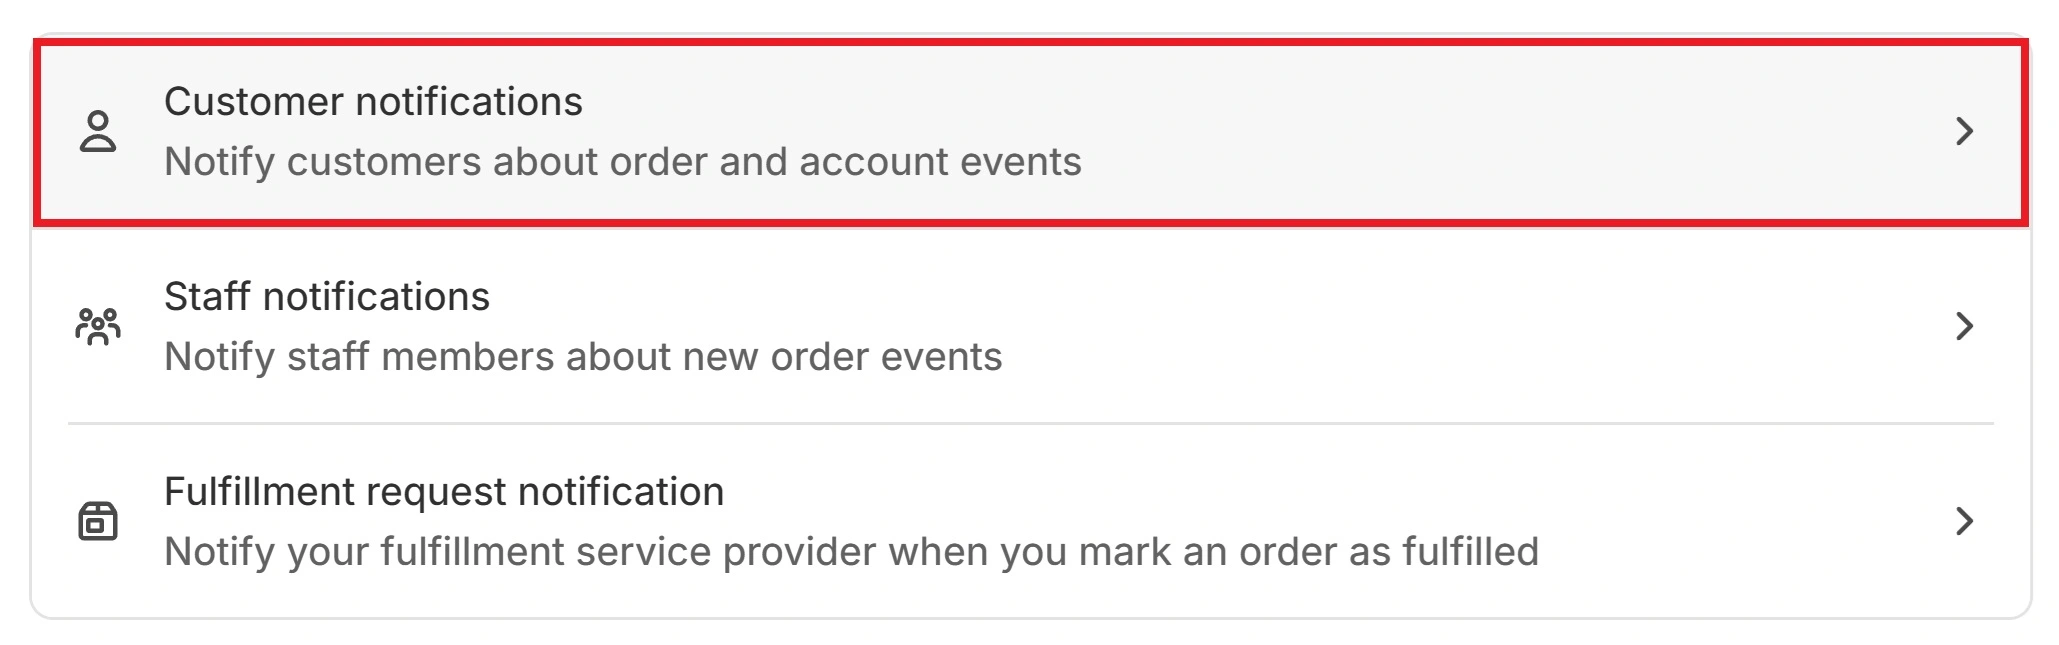
Select “Customer Notifications.”
Here, you’ll see a list of all the email templates that Shopify sends to customers. This includes order cancellations, payment errors, refunds, and many others.
For this guide, let’s pay attention to the following emails:
- Order confirmation — found in the “Order processing” section.
- Shipping confirmation — found in the “Order processing” section.
- Out for delivery — found in the “Shipping updated” section.
- Delivered — found in the “Shipping updated” section.
Click on any of the email templates shown above to edit them.
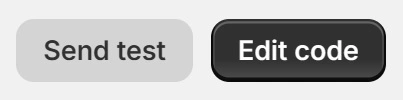
Select “Edit Code.”
You may need developer help to edit the email templates’ stylistic elements. But you may edit the copy and content yourself; just be careful not to break anything.
Edit the “Email Subject” and the “Email Body” to make content changes to any of them. Then click “Preview” to test the code and see how the email would look.
You may click “Sent Test Email” to see how the email template would look in the recipient’s inbox. This will send the test email to your Shopify-registered email.
Once you’re satisfied with your changes, click “Save” to finalize.
Do this for every email template you wish to alter.
Now, we don’t suggest you alter code without the help of an HTML-proficient individual since you may break or overlook something. But editing code will allow you to edit your email templates and add more personality and “sizzle” to your order status email updates.
Conclusion
Order management is imperative for your e commerce business. It allows your staff to manage your store’s orders in a more organized manner, making for a quicker and more business-efficient fulfillment system.
Furthermore, merchants must also keep customers updated on their respective orders. Doing so can improve customer satisfaction and reduce support tickets. Plus, it gives your brand more touch points with the customer.