Though shipping directly affects your store conversions and profit margins, we’ve observed that many WooCommerce newbies struggle with WooCommerce shipping setup.
And that’s the reason why we wrote this article – we want to give you a step-by-step guide on how to do a proper WooCommerce shipping setup. Here’s a sneak peek at what this guide covers:
- WooCommerce shipping options
- How to do a proper WooCommerce shipping setup
- Top 5 plugins for more advanced WooCommerce shipping setup
Let’s dive right in!
WooCommerce Shipping Options
Before we dive into the WooCommerce shipping setup guide, let’s take a look at the 3 default shipping options that come natively within WooCommerce’s sales features:
1. Flat rate:
With this option, you can only charge a fixed rate for shipping, regardless of the weight or quantity of items purchased. You can set up different flat rates based on shipping zones, such as local, national, or international. This option is easy to set up and ideal for stores selling similar-sized and weight products.
2. Free shipping:
Since 50% of your potential shoppers abandon their cart due to high shipping costs, setting up free shipping can effectively boost your store conversion. However, we suggest offering free shipping only for specific products or orders that meet a threshold. Otherwise, your profit margin might get hurt.
3. Local pickup:
If you have a physical location and most of your customers are in the same area as yours, you can also set up local pickup options for those who prefer to pick up their orders in person and take care of the local shipping for you.
By default, WooCommerce shipping options can be limited, especially for stores with sophisticated product catalogs or customer bases. Thus, we’ve tested and wrapped up some cool WooCommerce shipping plugins below.
But first, let us guide you through how to setup shipping in WooCommerce!
A newbie who wants to find more information on WooCommerce? Here are some insightful resources you might be interested in:
How to Do Proper WooCommerce Shipping Setup?
Wondering how to setup WooCommerce shipping? In order for you to easily catch up, we’ve decided to break down the WooCommerce shipping setup process into four easy-to-follow steps as shown:
Step 1: Create new shipping zones
The first step of WooCommerce shipping setup begins with shipping zone configuration. WooCommerce lets you set different shipping options for visitors from different geolocations – which WooCommerce calls ‘shipping zones.’
To create a new WooCommerce shipping zone, click on WooCommerce > Settings.
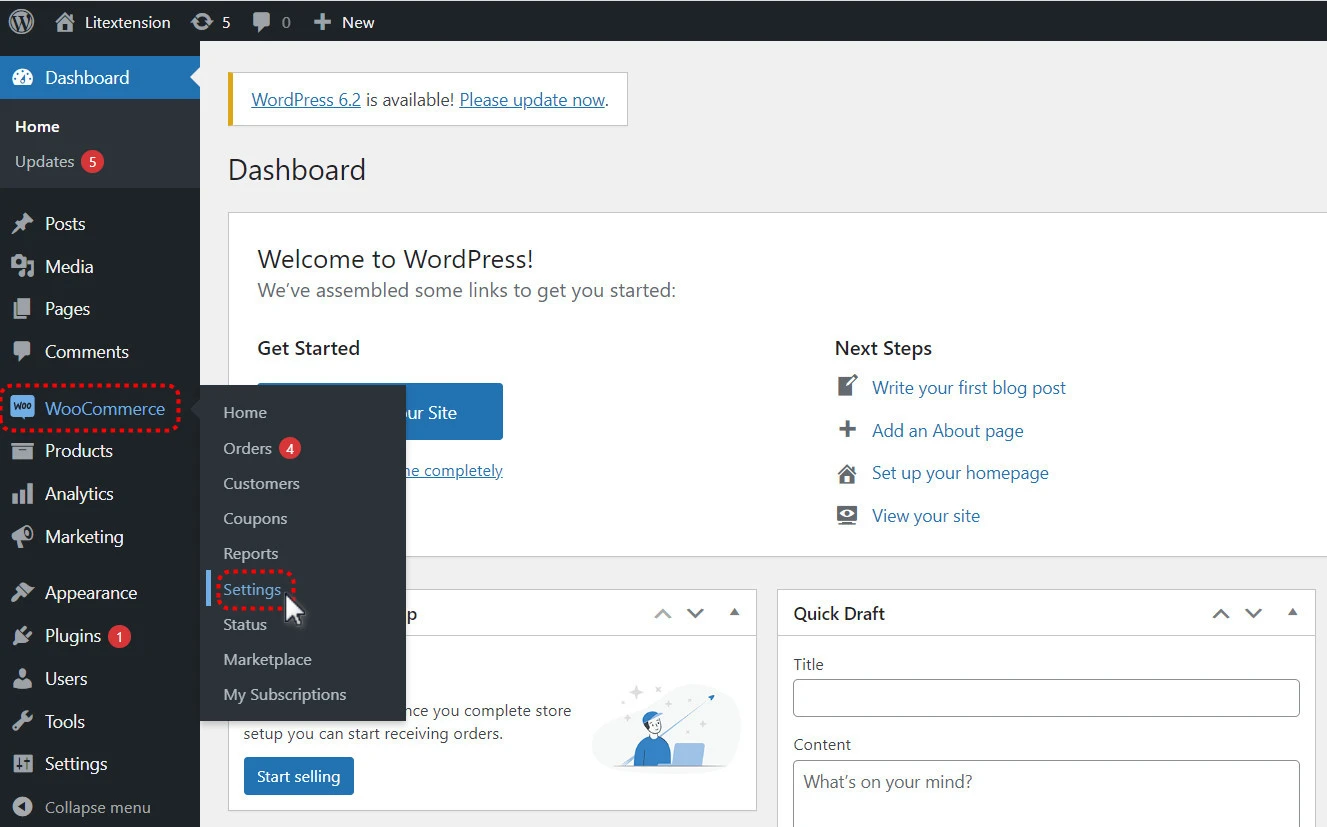
Then, proceed to the Shipping tab > Select Add shipping zone.
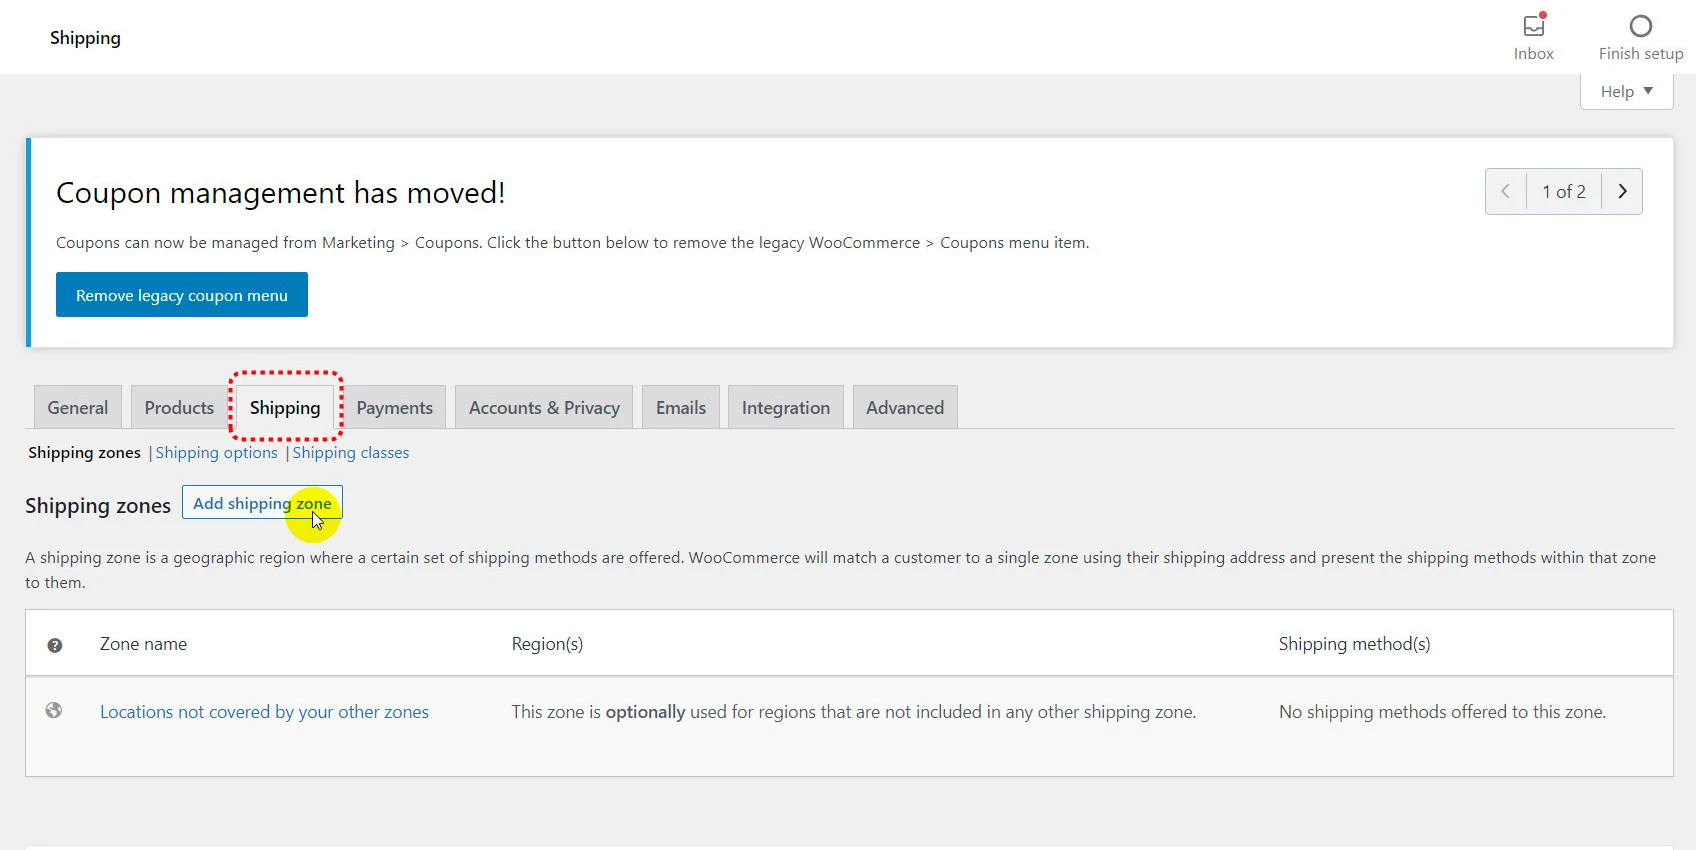
Afterward, enter the Zone name and select Zone regions as the drop-down menu collapses.
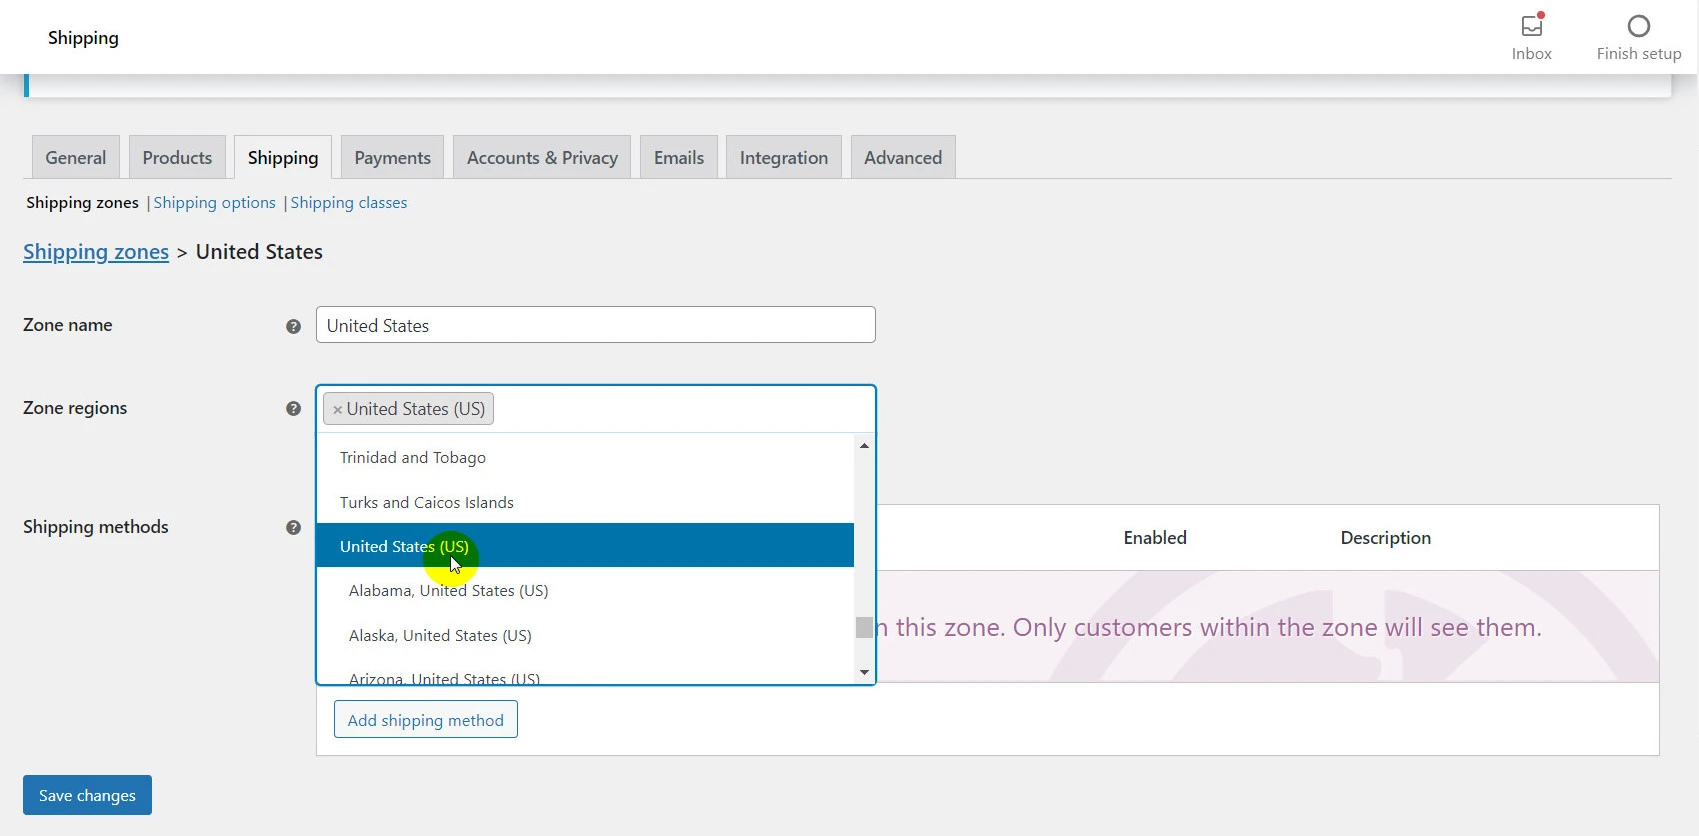
Next, select Add shipping method to continue the setup shipping WooCommerce.
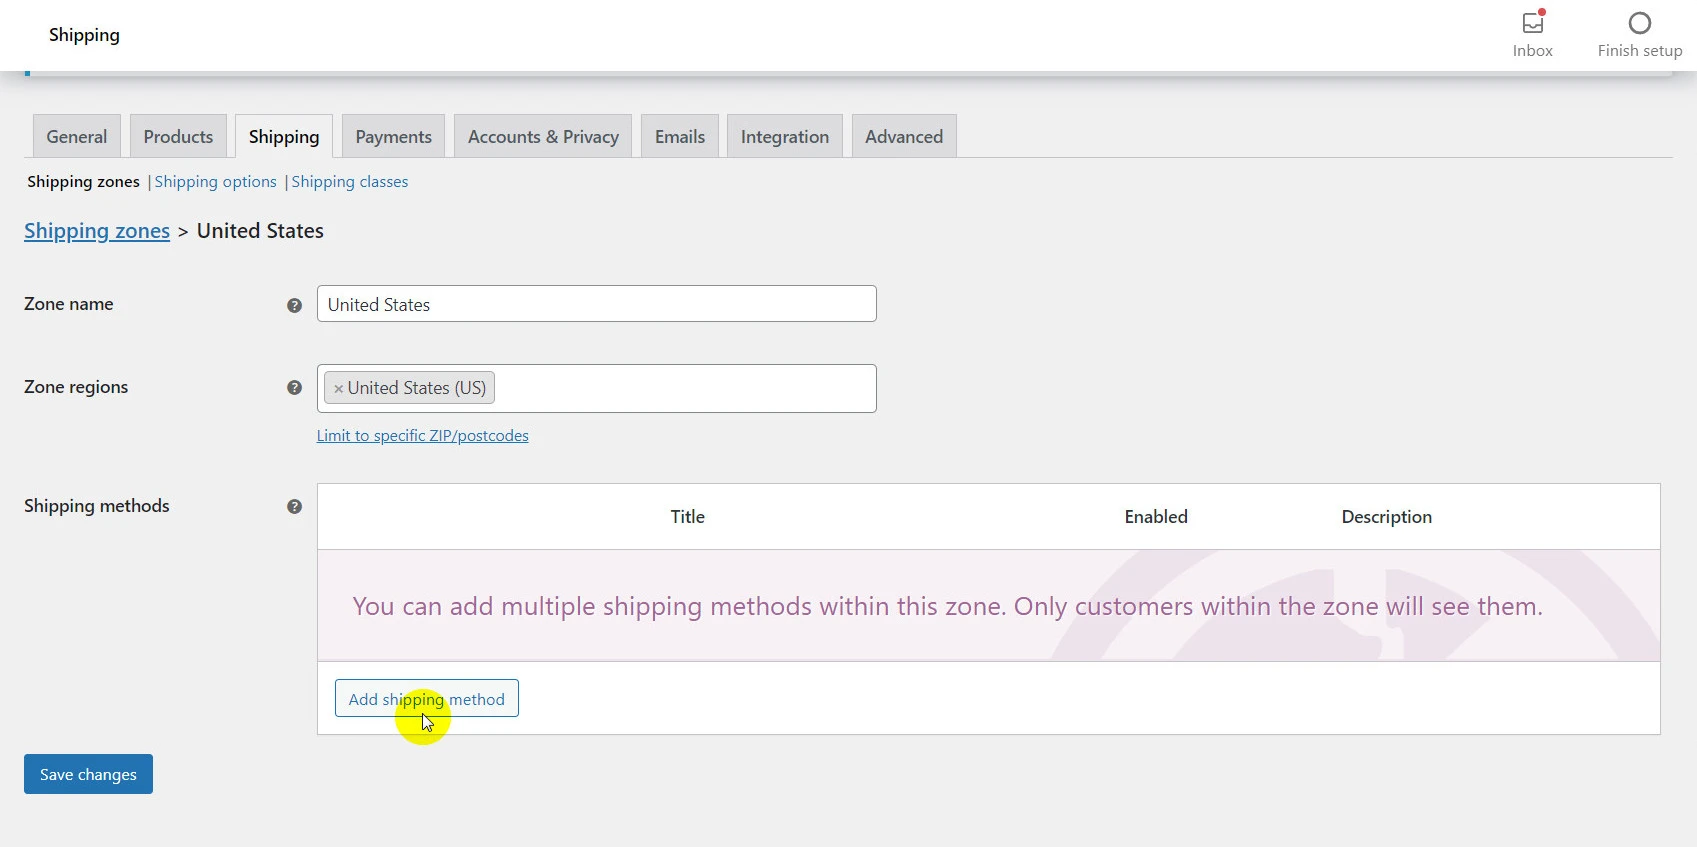
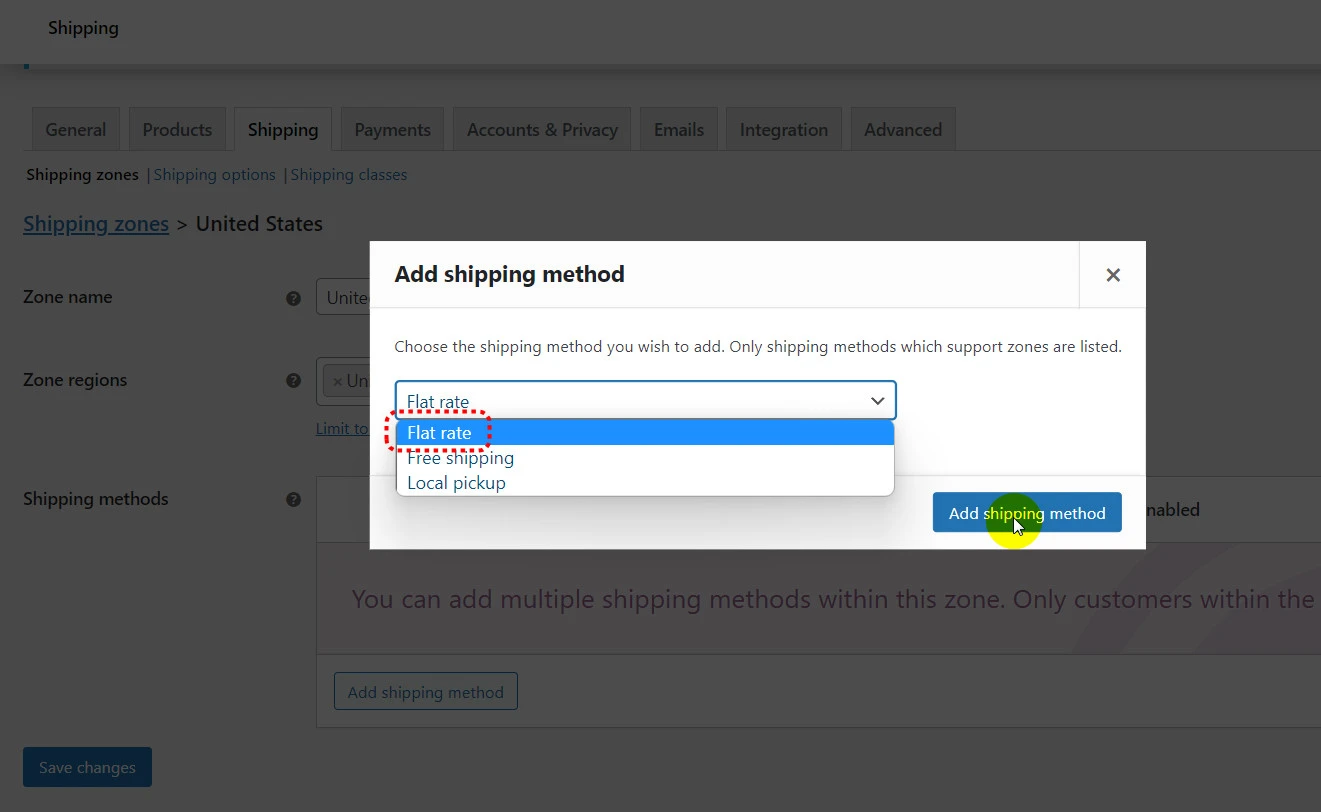
As the popup below shows up, choose the method you want to add > Choose your shipping method, for instance, flat rate > Hit Add shipping method.
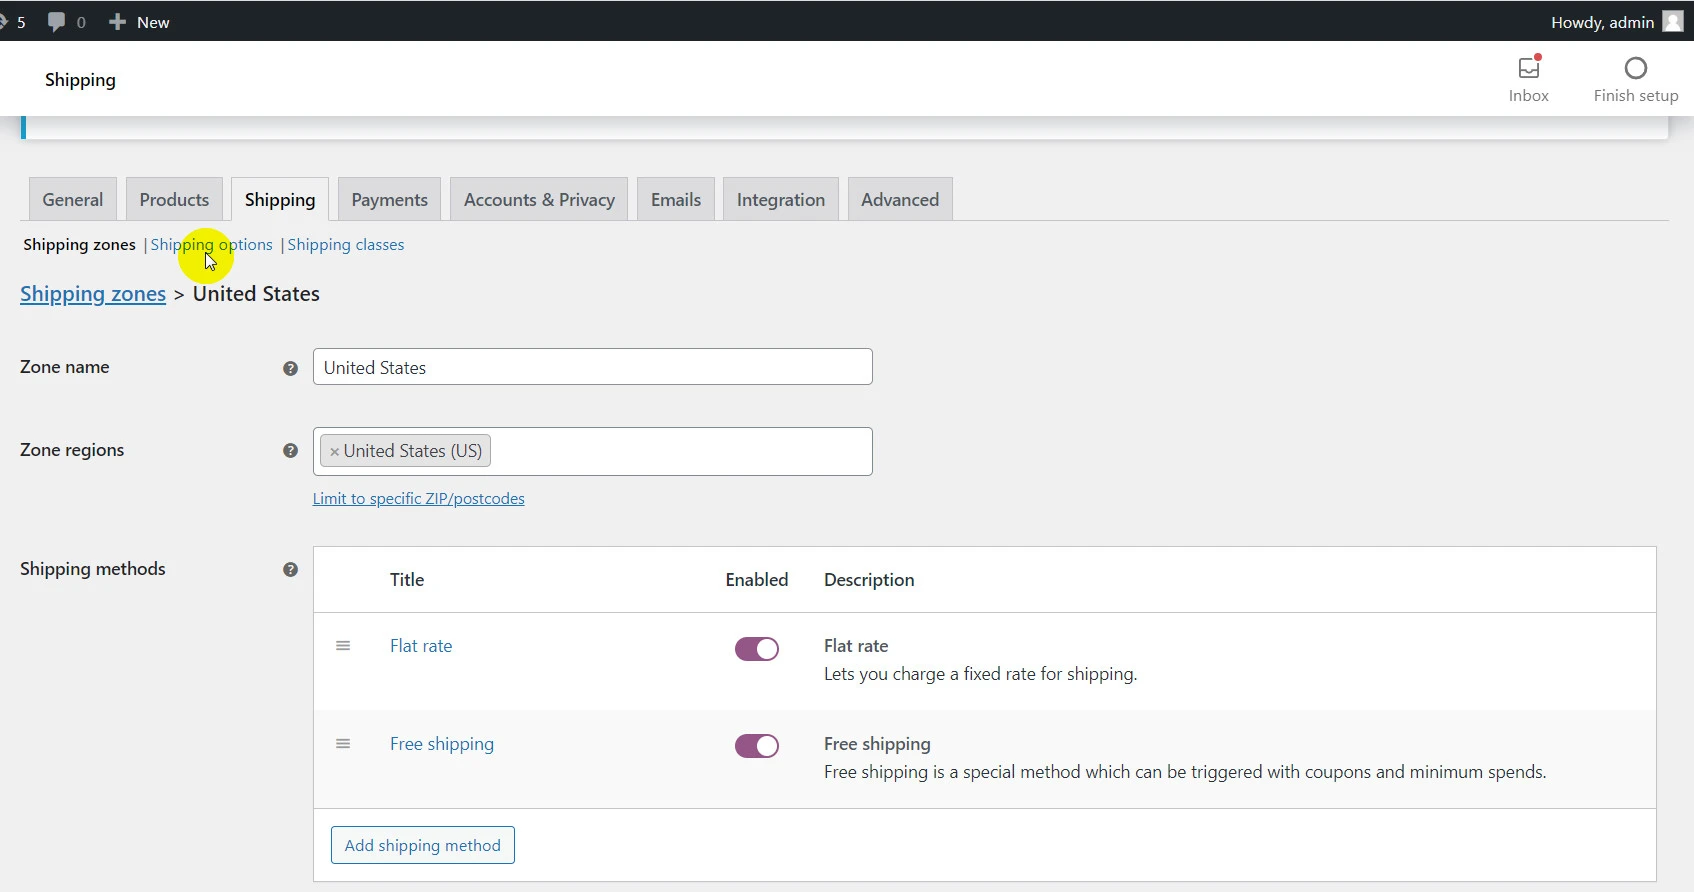
Each added shipping method is saved under a list for a specific shipping zone. And you can add multiple shipping methods for a particular shipping zone depending on the shipping options you want to offer your shoppers.
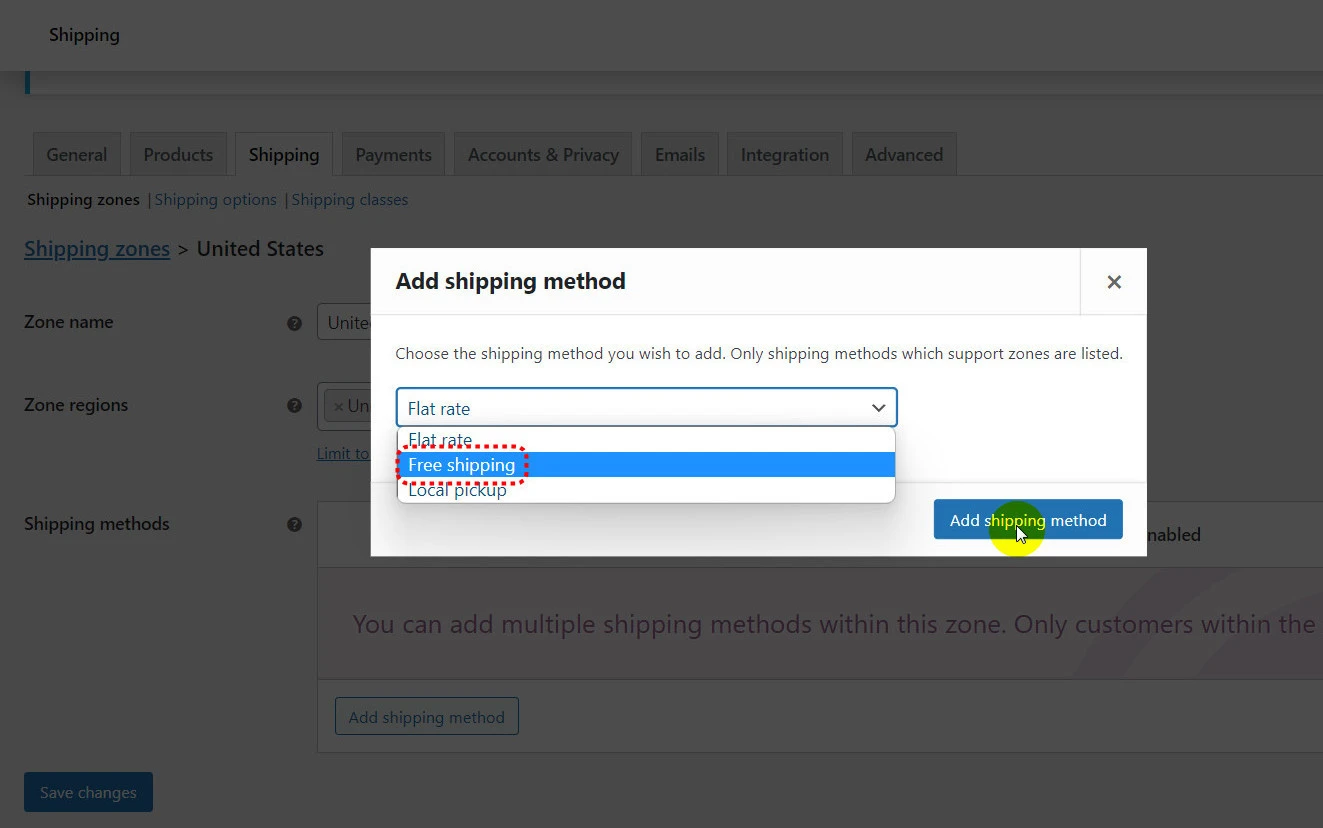
To add another shipping method, follow the same steps > Choose another method you prefer, then choose free shipping > Click on Add shipping method.
To configure more shipping details, navigate to the shipping method list > Click Edit to set up more details for each one.
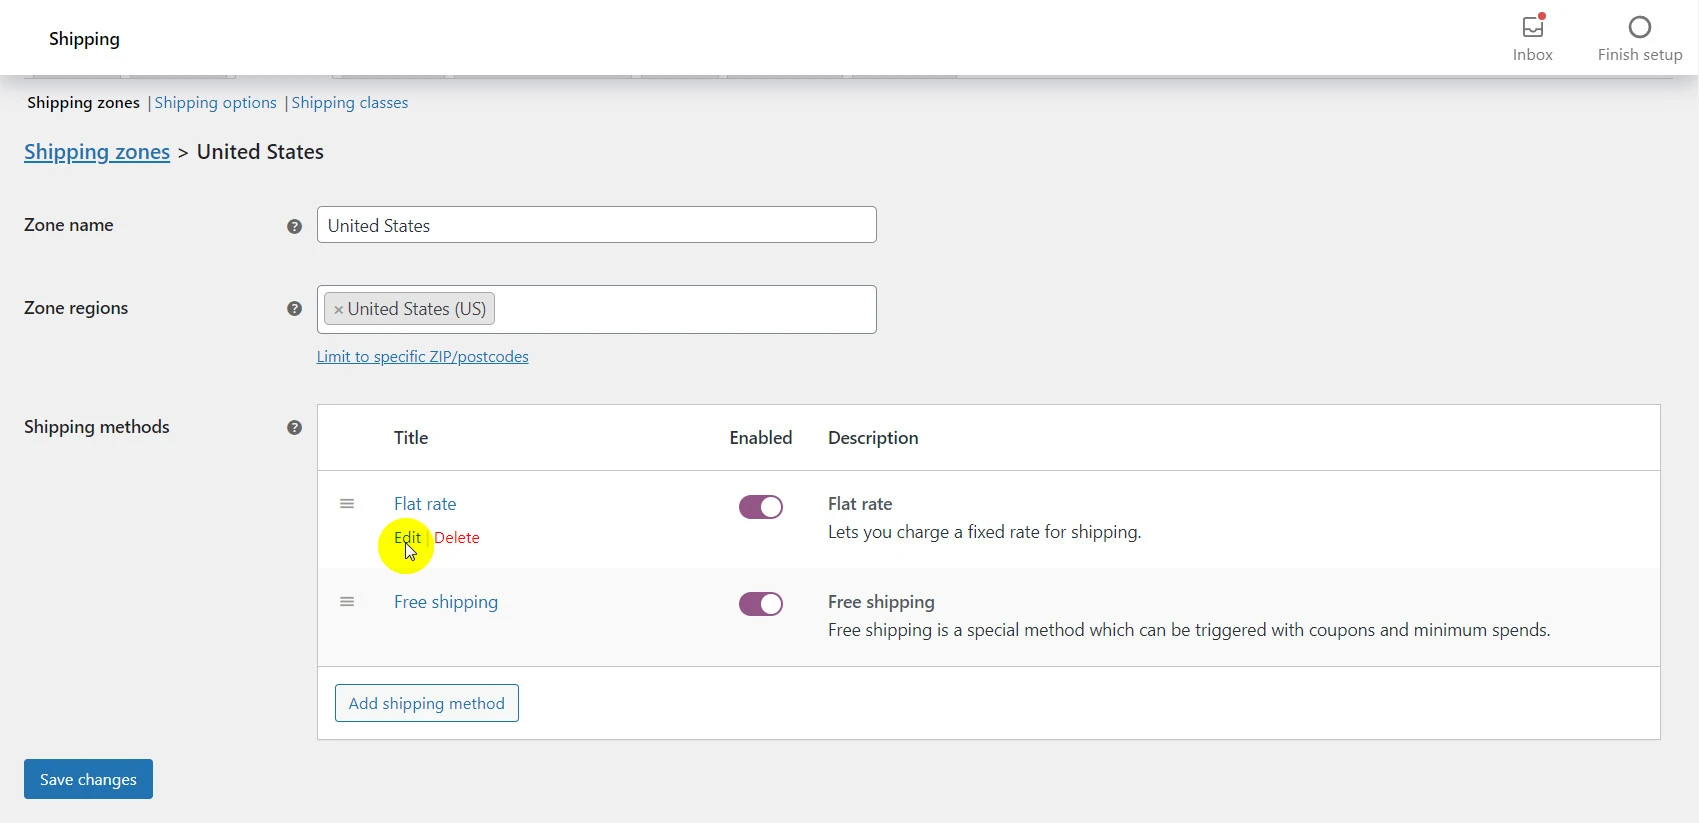
Each shipping method has its own configurations to set up. In the examples below, we chose flat rate and free shipping. So let us show you how to edit the 2 shipping methods.
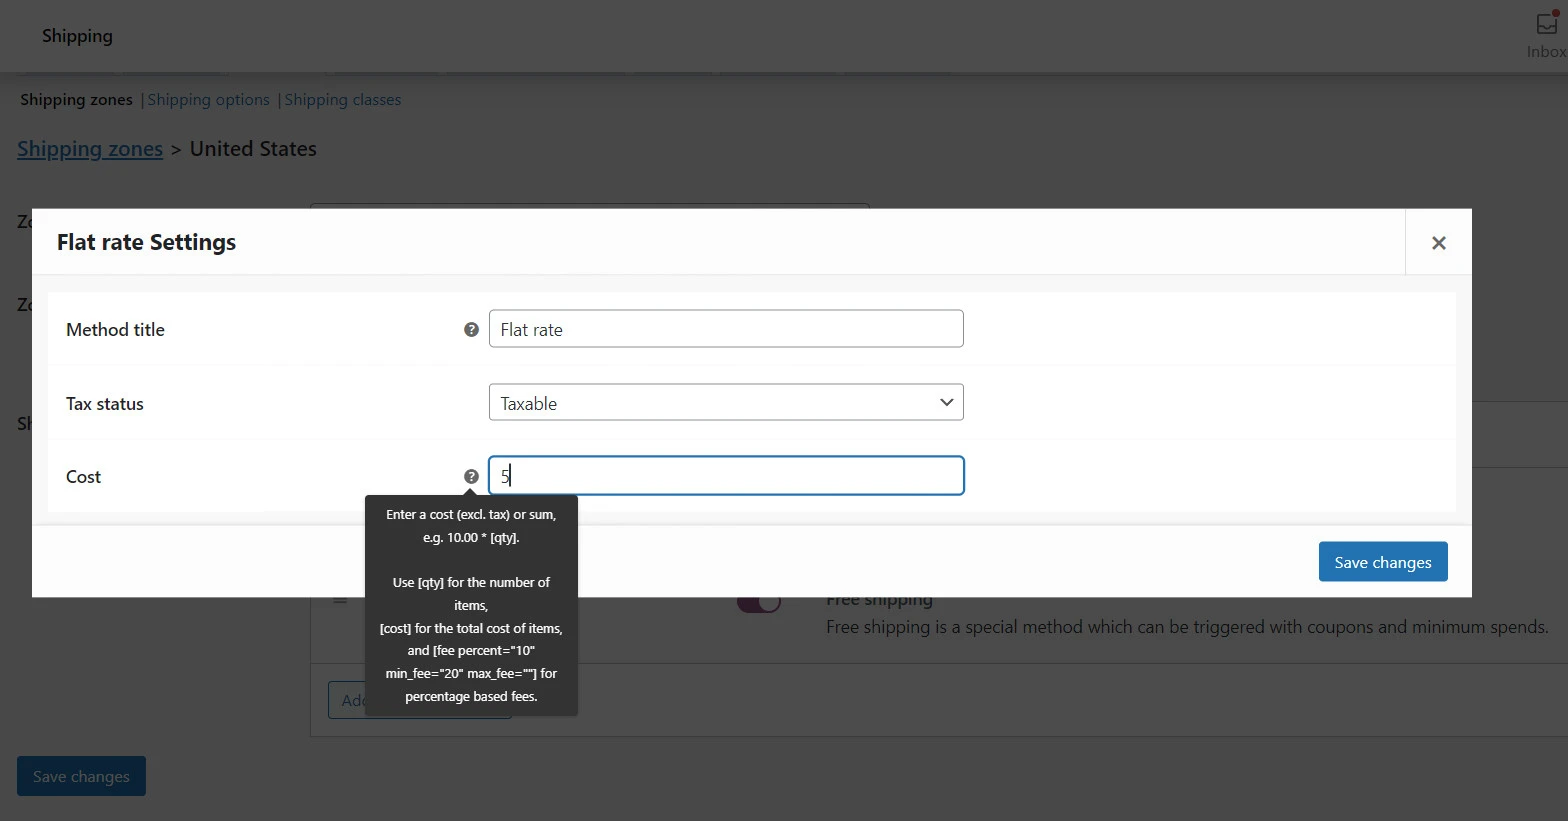
- Edit flat rate settings: For example, you can set a $5 flat rate and choose the taxable option. You can also create quantity or percentage-based shipping fees by following the guidelines from the question mark icon.
For instance: 10 + ( 1 * [qty] ) means a base shipping cost of $10 plus an extra $1 for each item added to the cart. Or 10 + [fee percent=”5″ min_fee=”3″] means a base shipping cost of $10 plus 5% of the order total, which is at least $3.
After you’ve done it, click Save changes.
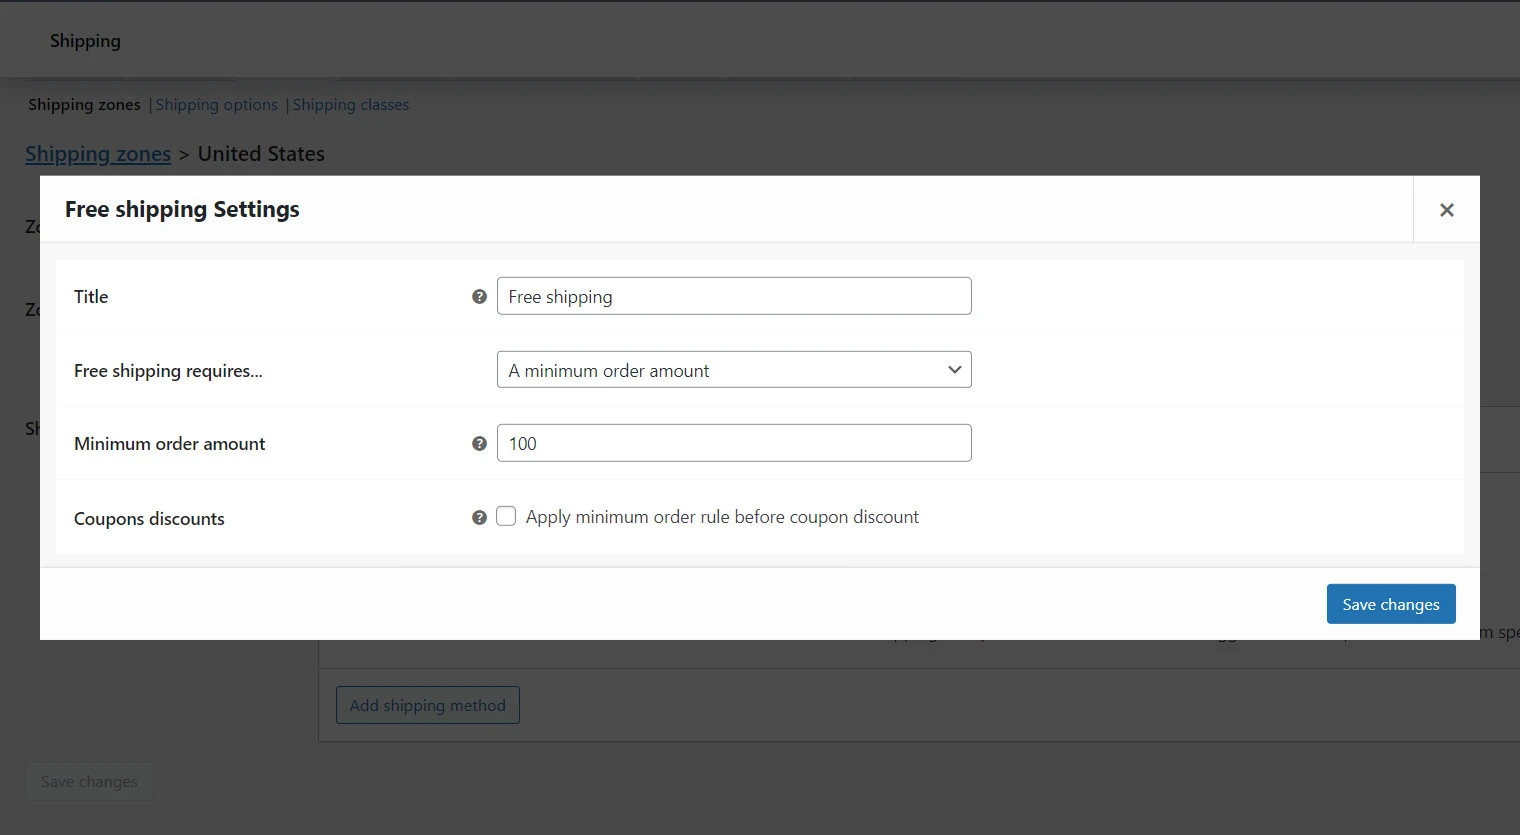
- Edit free shipping settings: A popular way is to set a minimum order amount, where your customers can get free shipping when they reach a certain spending threshold. (e.g.: Buy $100 to get free shipping).
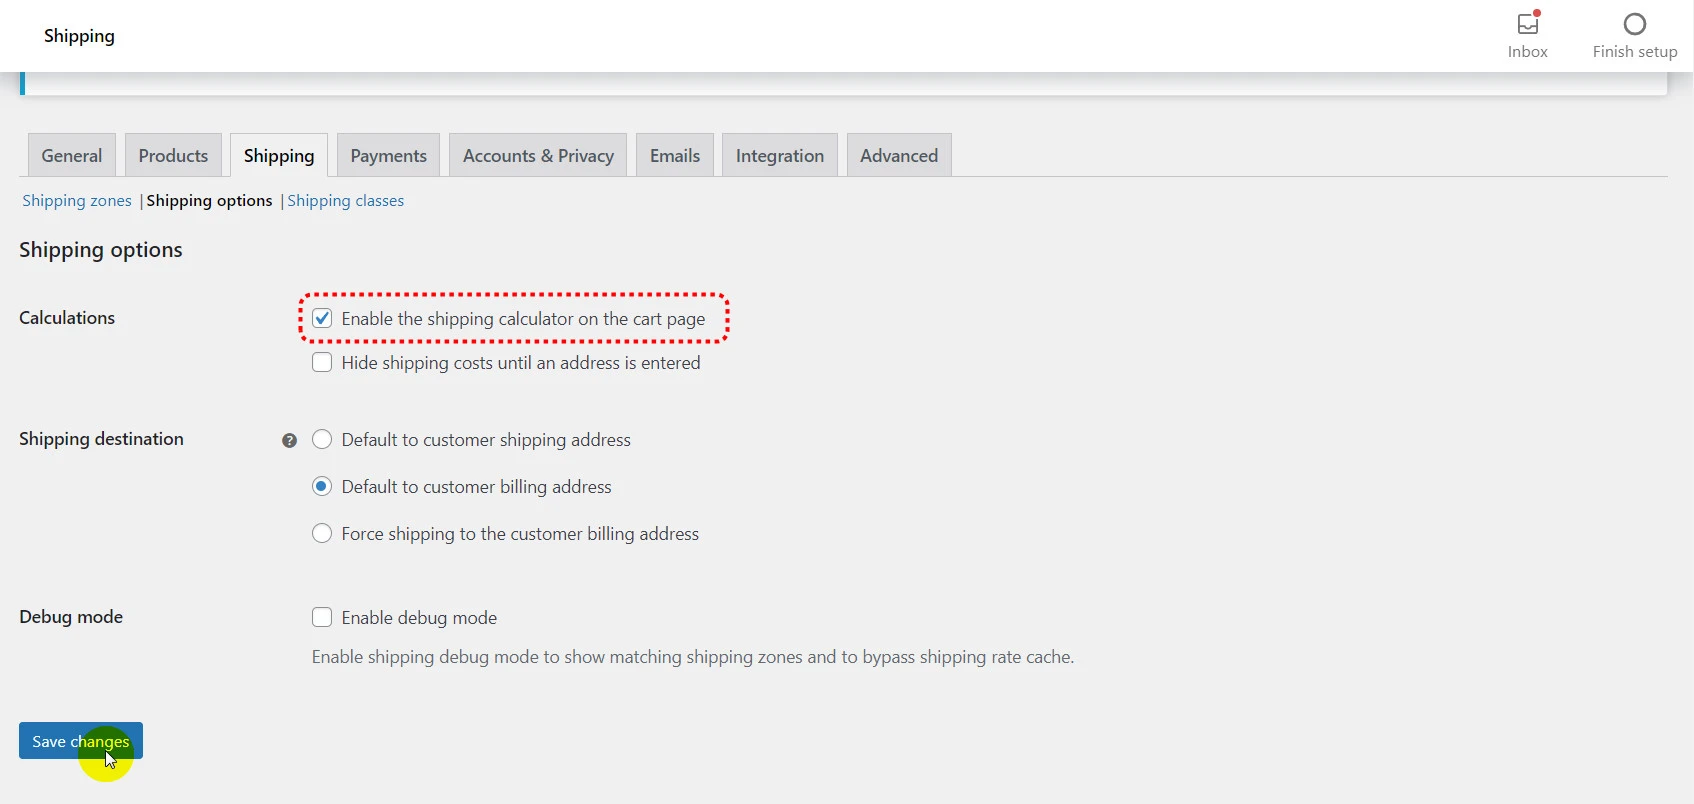
To this step, you’ve almost done. Scroll up and click on Shipping options.
You can choose whether to activate settings for shipping calculators, destinations, and more. Don’t forget to hit Save changes to finish.
Step 2: Configure WooCommerce shipping classes
Next, let us show you how to create shipping classes – a vital step of the WooCommerce shipping setup. You can use shipping classes to categorize similar product types into groups and offer the same shipping methods for these groups.
For instance, selling sporty clothes and equipment might warrant lower shipping rates for lightweight T-shirts than heavy dumbbells.
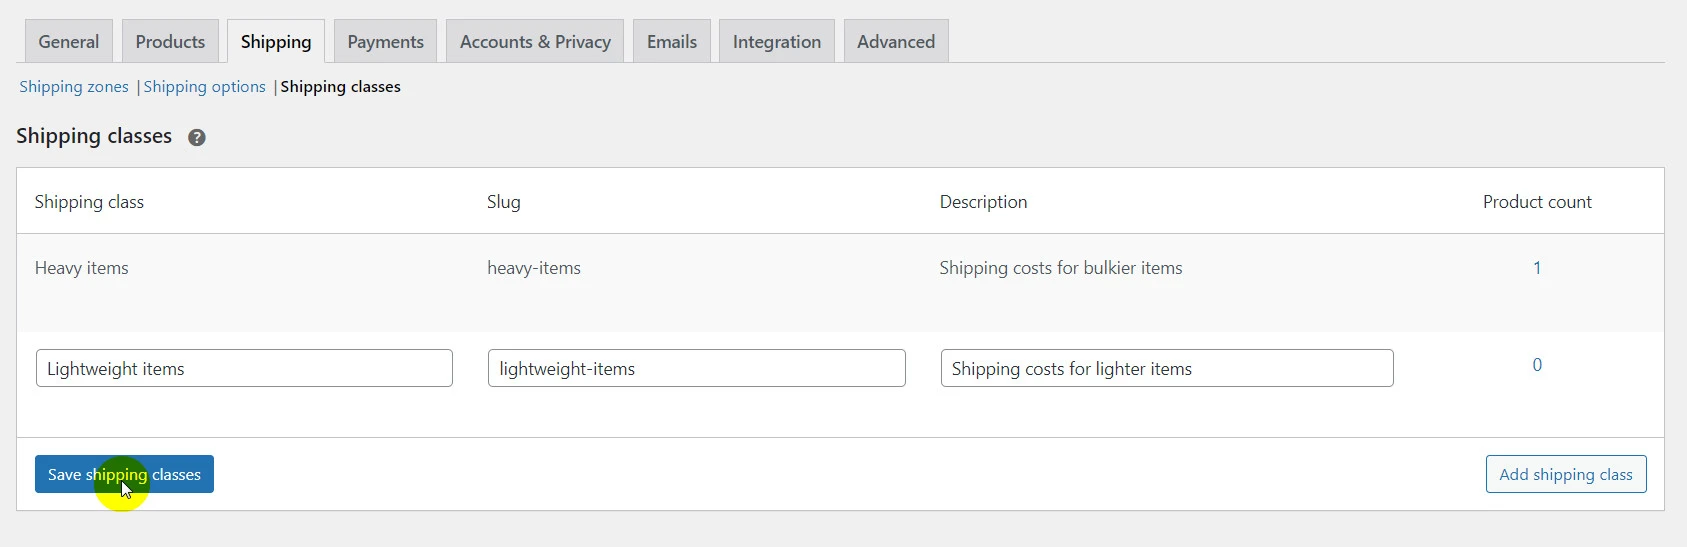
Click the Shipping classes tab next to the Shipping options tab > Add shipping class.
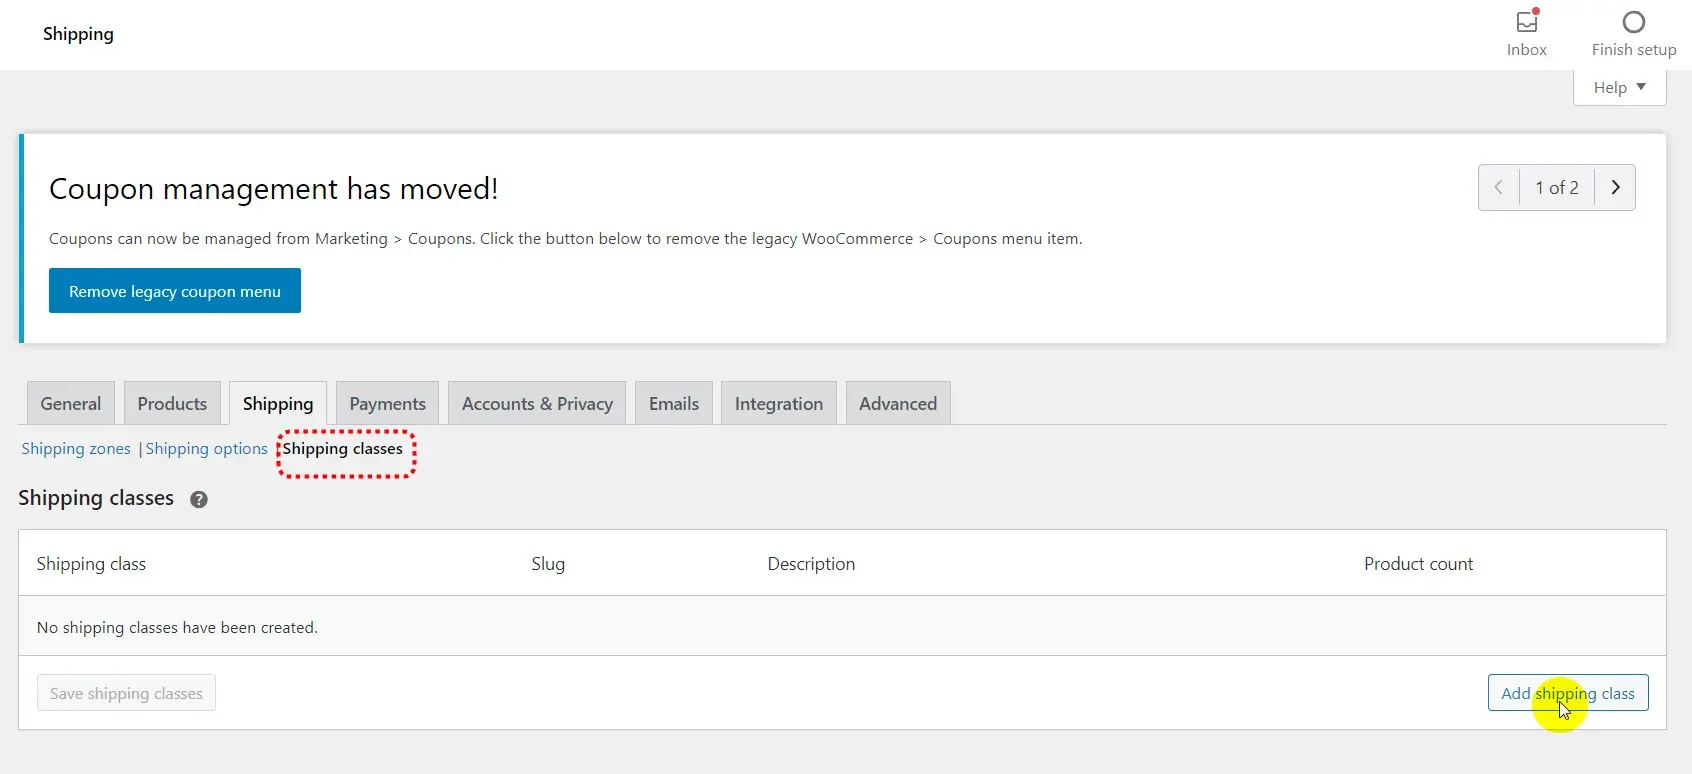
Then type in a name, URL slug, and a description for your shipping class. After you’ve done, click Save shipping classes.
Next, you have to assign the shipping class to a shipping zone. This is to help WooCommerce know the specific shipping options and costs to display when your customer purchases.
Go to the Shipping zones tab > Head to the shipping method you want to edit > Click Edit > Now you can see the Shipping class costs section that has just been added for you.
For the shipping class costs, the rule is pretty simple, like we’ve talked about in the flat rate settings.
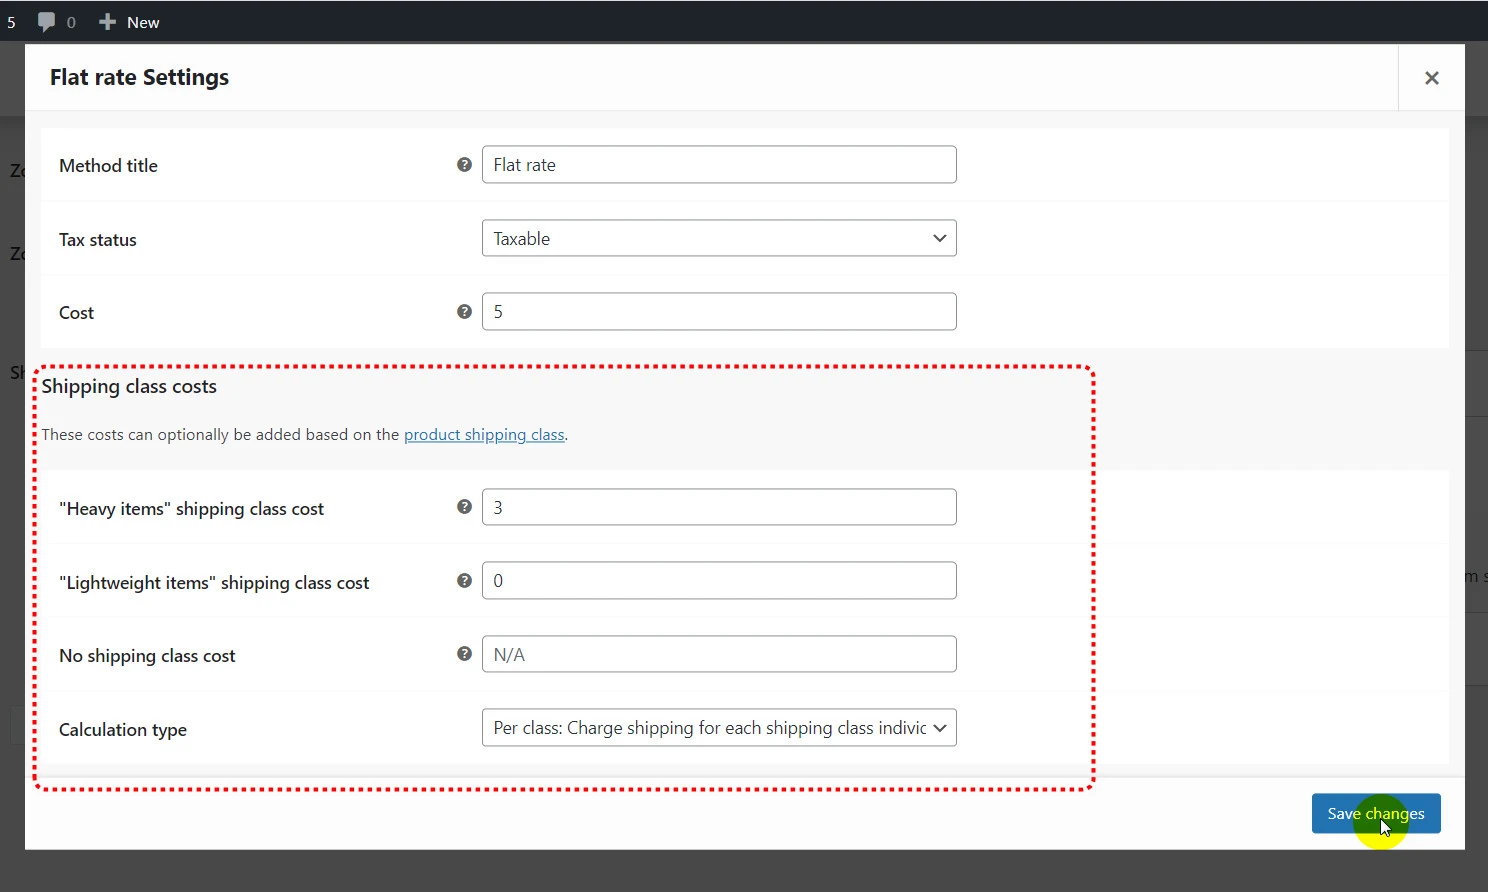
Note: For the settings we did above, if a customer buys a heavy item, they are charged a shipping fee of $5 + $3 = $8. Meanwhile, they get charged $5 for shipping if they buy a lightweight item.
After you’ve done, don’t forget to hit Save changes.
Step 3: Assign shipping classes to products
Now that you’ve created your WooCommerce shipping setup, let’s assign them to your products. This is going to be just a breeze.
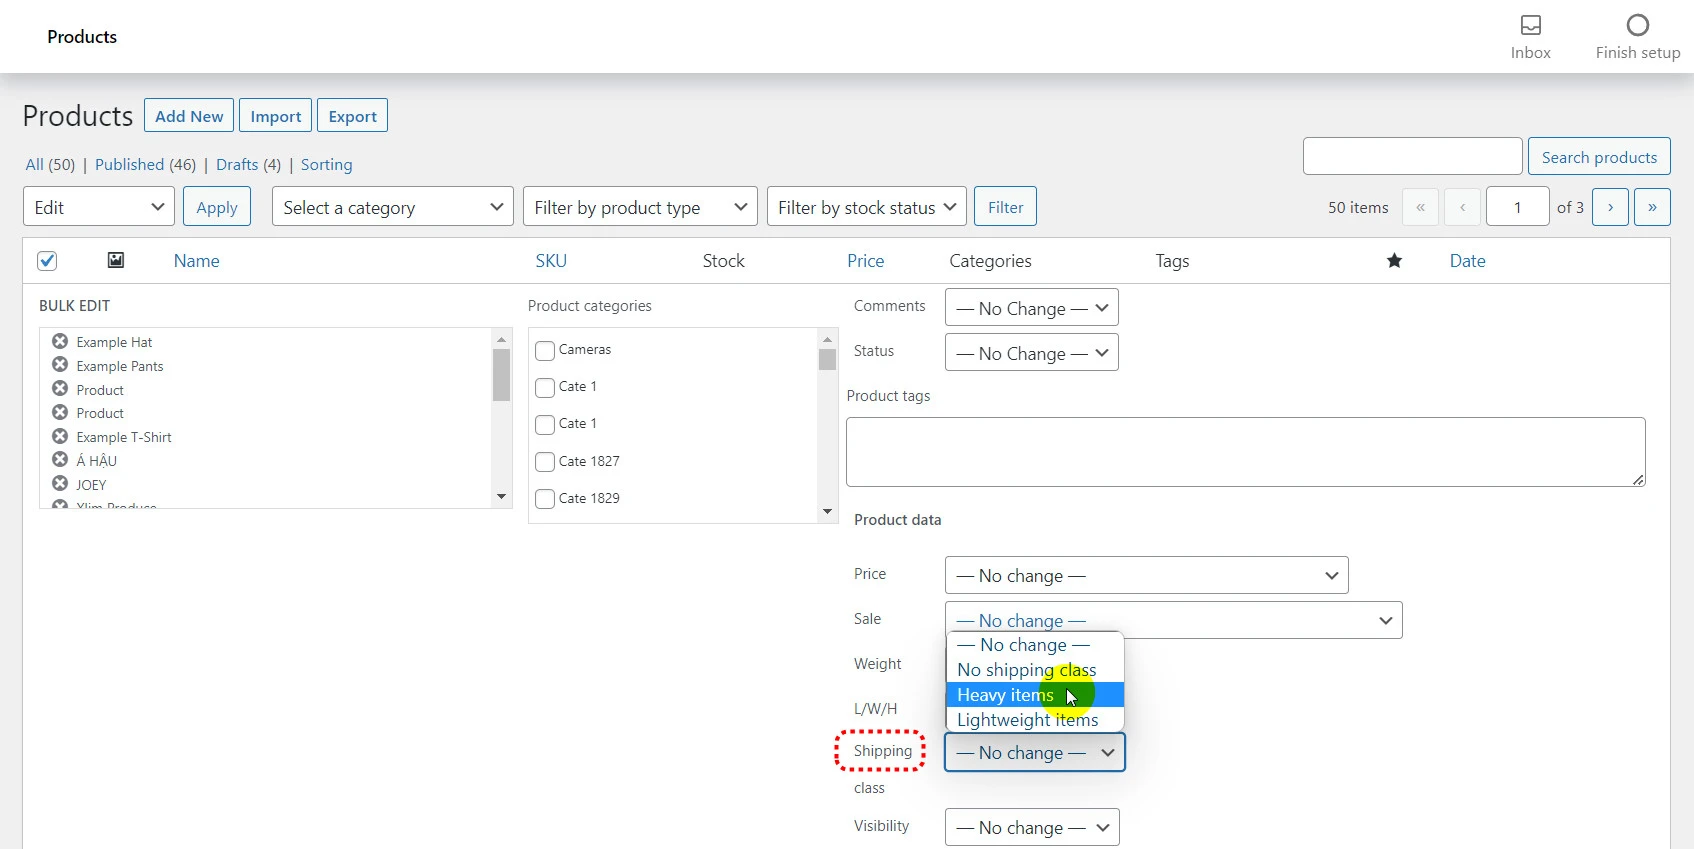
- Navigate to Products > All products
- Select the products you want to assign the shipping classes to (don’t manually assign them one by one)
- Then scroll up and click Bulk edit.
- The screen as shown below will appear > Navigate to shipping and click on it
- Choose your shipping class.
- Remember to click Update to save your changes.
Step 4: Test your WooCommerce setup shipping
It is important to test your WooCommerce shipping setup before presenting it to your store visitors.
When testing your WooCommerce shipping setup, you should simulate the average user flow on the front end to identify any shipping-related issues. Pay close attention to the following critical areas:
- Shipping classes and zones are the primary factors determining your shipping settings, so it is crucial to ensure they work correctly. So ensure you test at least one product in each shipping class and shop from one location in each shipping zone to verify that shipping rates are accurately displayed on the cart and checkout pages.
- If you have created any discounted or free shipping rules based on cart size or product combination, confirm these settings.
- If you use any third-party shipping plugins, ensure that all technical considerations, such as syncing real-time shipping rates, tracking information, and return policies, are in place.
- Evaluate the accessibility of your store’s key shipping info, such as discounts and free shipping based on cart size, to ensure site visitors can easily access it.
- Complete the entire checkout process to ensure that nothing breaks in the process.
After testing your WooCommerce shipping setup thoroughly, you’re all set!
Thêm 1 box internal links các bài how to khác của WooCommerce nha
Top 5+ Plugins For More Advanced WooCommerce Shipping Setup
If you want a more advanced WooCommerce shipping setup, here are five cool WooCommerce shipping plugins we’ve tested and approved!
1. WooCommerce Advanced Shipping: This WooCommerce shipping plugin allows you to activate shipping conditions such as stock and subtotal to calculate your rates and methods.
2. USPS Shipping Method: If you wonder how to setup live shipping rates in WooCommerce, USPS Shipping Method is the perfect solution. The extension empowers you to calculate shipping rates from the USPS in real time.
3. ShipStation Integration: The solution allows you to integrate your WooCommerce store with ShipStation, an eCommerce shipment and fulfillment platform. The plugin enables you to streamline your order fulfillment process, create shipping labels, and manage your shipping operations from one platform
4. WooCommerce Cart Based Shipping: If you prefer a simpler solution, you may want to try WooCommerce Cart Based Shipping. This plugin offers flat rate and percentage-based shipping rates calculated based on weight, quantity, or cart price.
5. Flexible Shipping: Using an advanced table, this plugin allows you to identify shipping rates by factors such as weight and cart total. With Flexible Shipping, you can offer your customers more personalized shipping options, improving their shopping experience.
6. WooCommerce Shipping Tracking: Lastly, you may want to consider WooCommerce Shipping Tracking. The plugin enables you to activate shipment tracking for your customers by linking to multiple carriers and tracking shipment timelines. By providing your customers with detailed shipment information, you can improve their confidence in your brand and help them track their orders with ease.
Besides shipping plugins, check out 15+ best WooCommerce plugins in SEO, marketing, inventory management, store analytics, etc., to fuel your WooCommerce store growth.
WooCommerce Shipping Setup – Frequently Asked Questions
[sp_easyaccordion id=”57982″]
Let’s Configure Your WooCommerce Shipping Setup!
All in all, a properly-configured WooCommerce shipping setup is very important because shipping is one of the main factors your customers decide to buy from you or not. And for that reason, we hope this WooCommerce shipping tutorial can help you set up your shipping correctly.
To stay on top of all the eCommerce news, tips, and tricks, check out LitExtension’s extensive blog site and join our Facebook Community to learn from 13K+ eCommerce entrepreneurs like you.