SEO must be done step-by-step to increase engagement and improve conversion rates for Shopify stores. Adding meta info for SEO in Shopify is essential to your social media marketing strategy, especially if you intend to cross-promote on multiple platforms. Therefore, this article will give you a thorough insight into how to add meta tag to Shopify for SEO.
We – the LitExtension team will cover some main parts:
- A list of important meta tags
- Brief to write a good meta tag description
- Adding meta info in Shopify pages
- How to add Facebook meta tag to Shopify
- How to add Gsuite meta tag in Shopify
It sounds tempting? Let’s dive deep into this article now!
What Are Meta Tags?
Meta tags are text snippets that describe the content of a website. They aslo assist search engines in determining what the page is about.
- It often has 160 characters or less.
- It only appears in the header of the page’s source code, not on the page itself.
Adding a meta-tag to your HTML source code is crucial because it affects the website’s appearance in search results. Keep reading the guides on how to add meta tags to Shopify to optimize stores for SERPs.
Important meta tags list
To consider how to add meta tag to Shopify, let’s figure out various vital kinds of meta tags as follows:
[wptb id=59470]
Each kind of meta tag has its own value. However, the title and meta description tags are two important factors that impact a SERP’s optimization.
On the results page of a search engine, the title appears first, and the meta description displays underneath the title. The meta description summarizes the web page’s content for internet users and search engine crawlers.
Let’s look at the appearance of the title and meta description on the search result page.
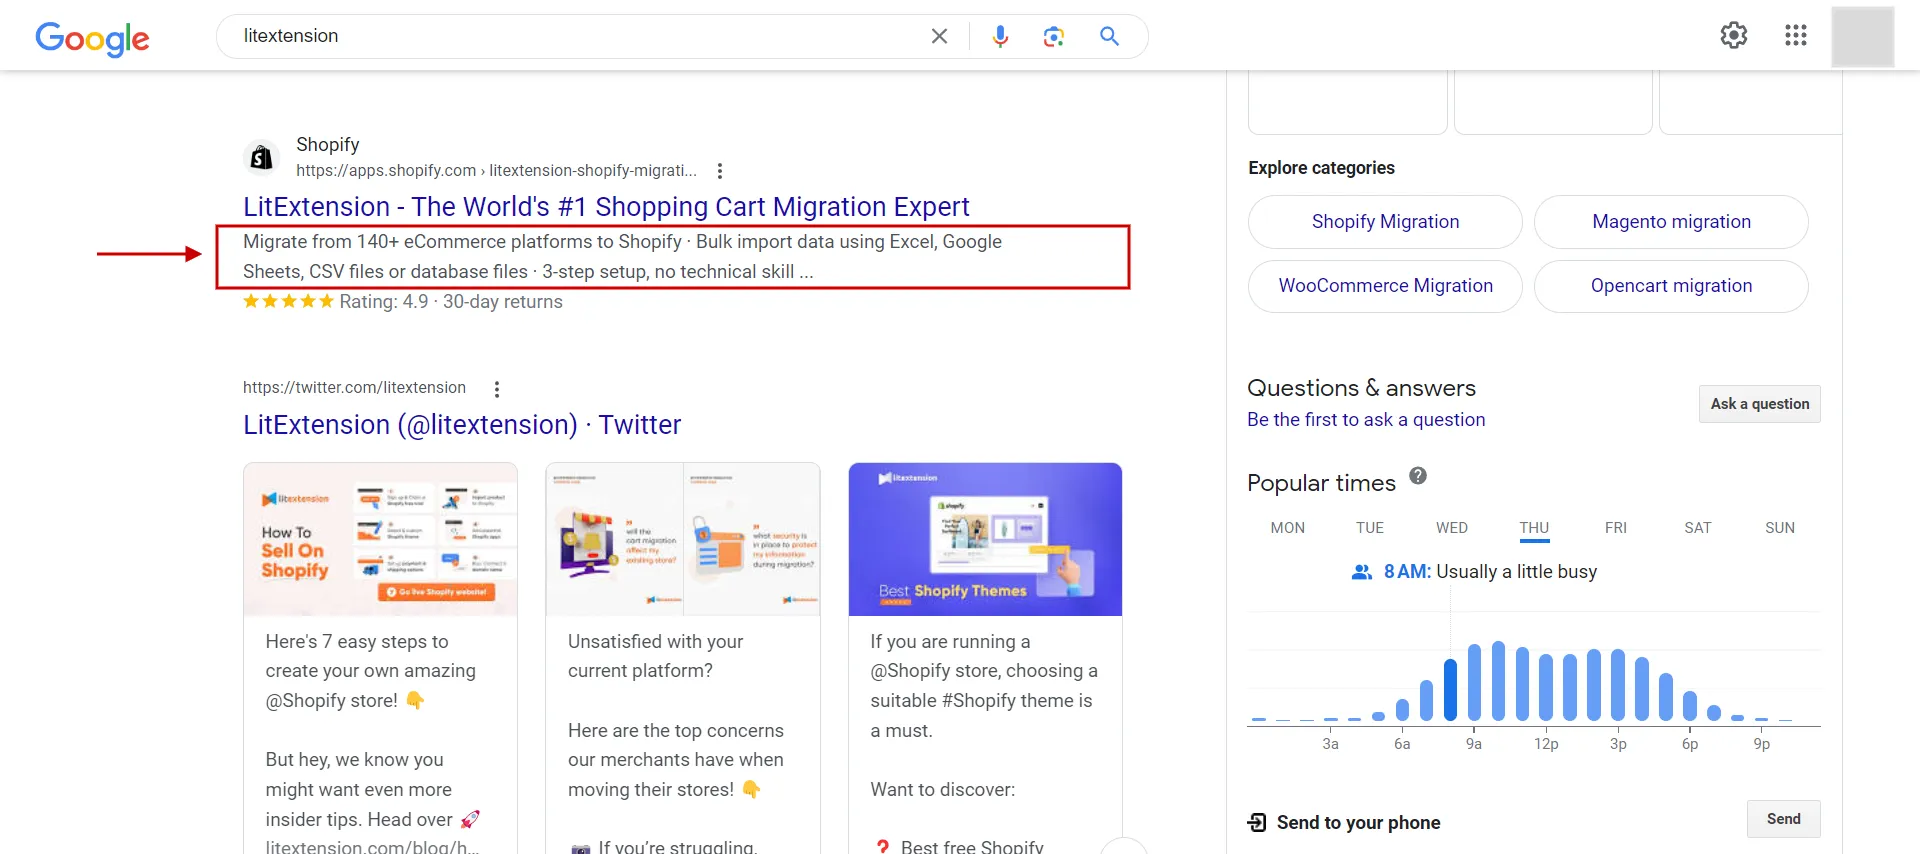
So, how to add description in Shopify to get the results as the image?
How to write a good SEO meta tag in Shopify
The foundation for better ranking is having quality title tags and meta descriptions and adding meta info for SEO in Shopify.
Here are some fundamental tips for creating a strong meta description tag in Shopify.
- Firstly, you must invest your time in researching keywords and analyzing search queries.
- Then, you decide what high-quality search queries you want to rank for and store them in a list.
- Finally, the meta description should include those keywords.
So when preparing a good SEO description tag, you need to add it to your Shopify page for optimization in SERPs. Let’s find out how to add meta tag to Shopify in the next section.
How to Add Meta Tag to Shopify for a Page
Do Shopify SEO fields generate meta tags? Of course, Shopify SEO fields update the value in meta titles, meta descriptions, and URLs. The value updates the meta tags when modifying the text in the SEO fields.
Moreover, SEO fields can be found on each resource: Pages, Collections, Products, Blogs, Homepage, Contact page, etc. It is quite similar to how to add meta tags to Shopify across the homepage, collections, products, blogs, and pages.
Here are some brief instructions about updating meta titles and meta descriptions.
First, log in Shopify account.
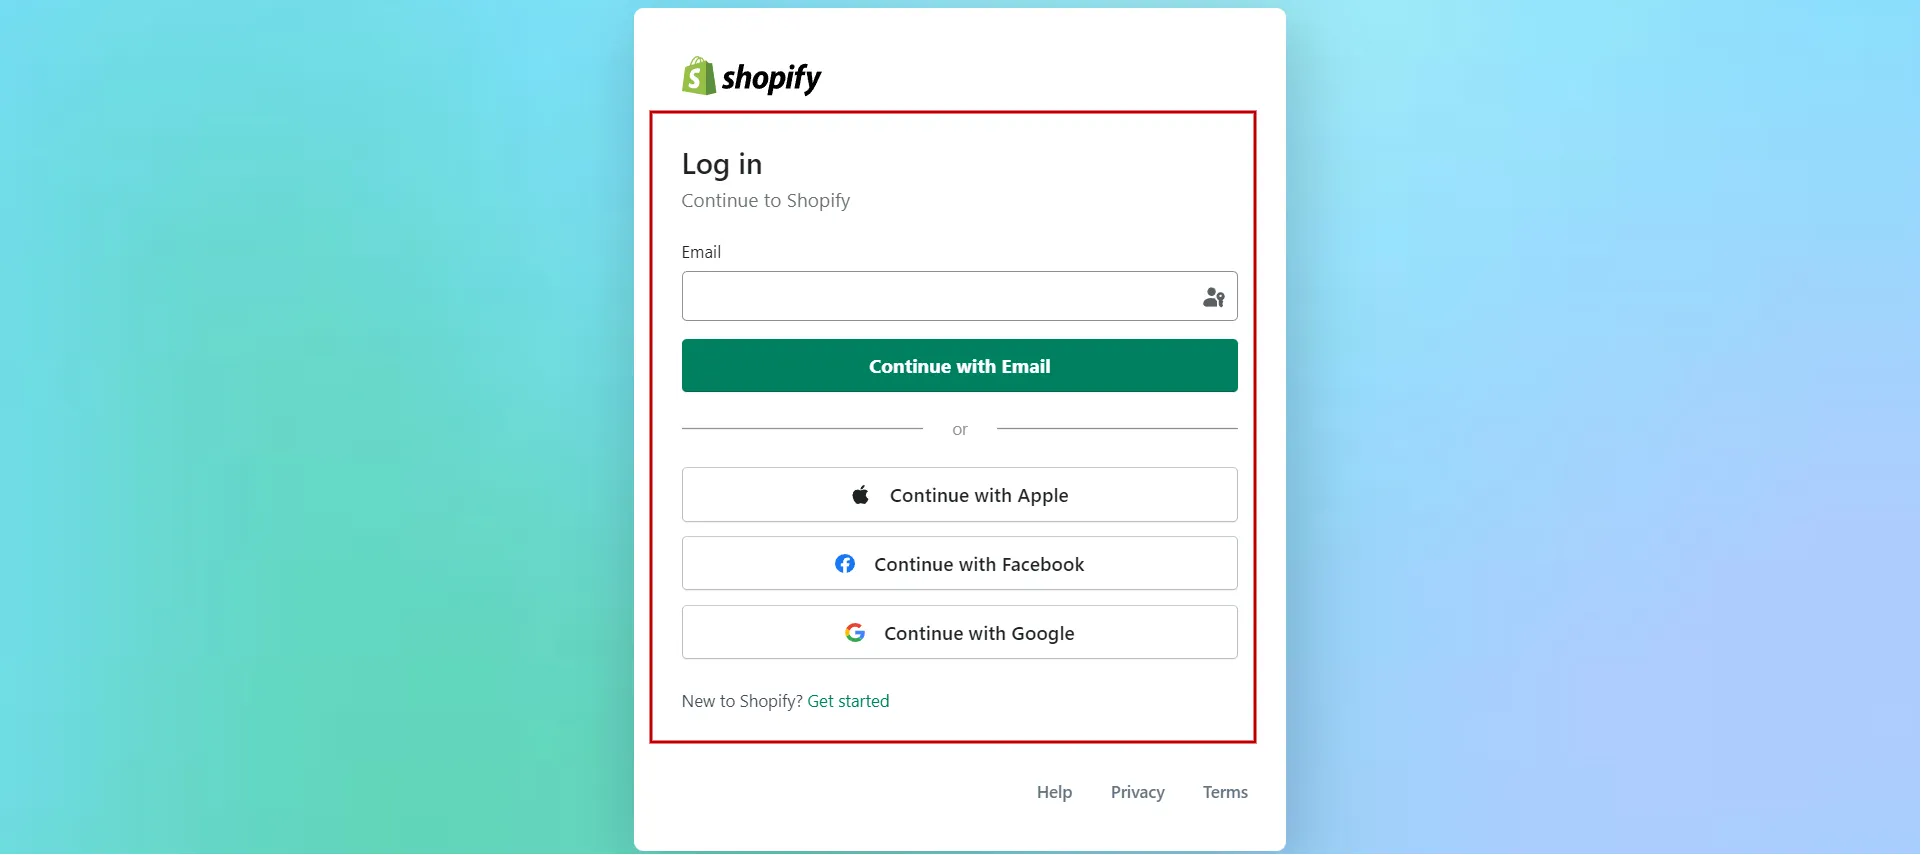
If you do not have any stores, visit the Shopify homepage to sign up quickly. If you have already set up stores, choose your store.

1. Add meta tag to Homepage tab
#Step 1: Choose online store and preferences
On the dashboard, on the left-hand bar, go to Online Store and click on it.
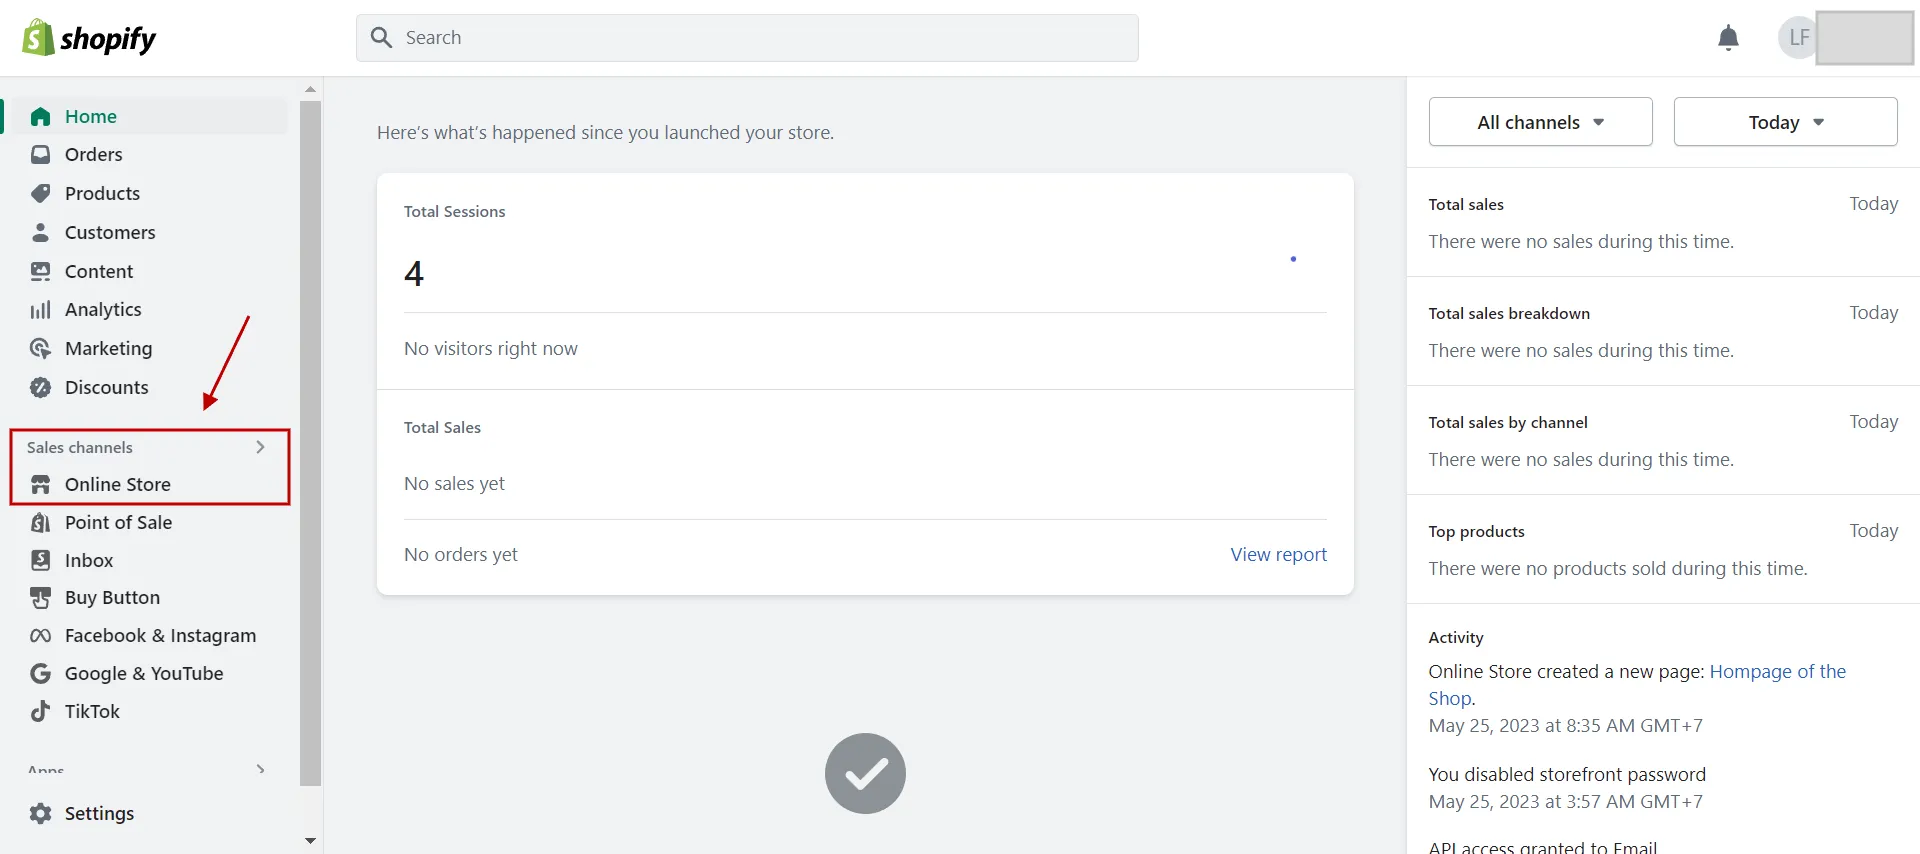
Next, choose the Preferences tab appearing below.
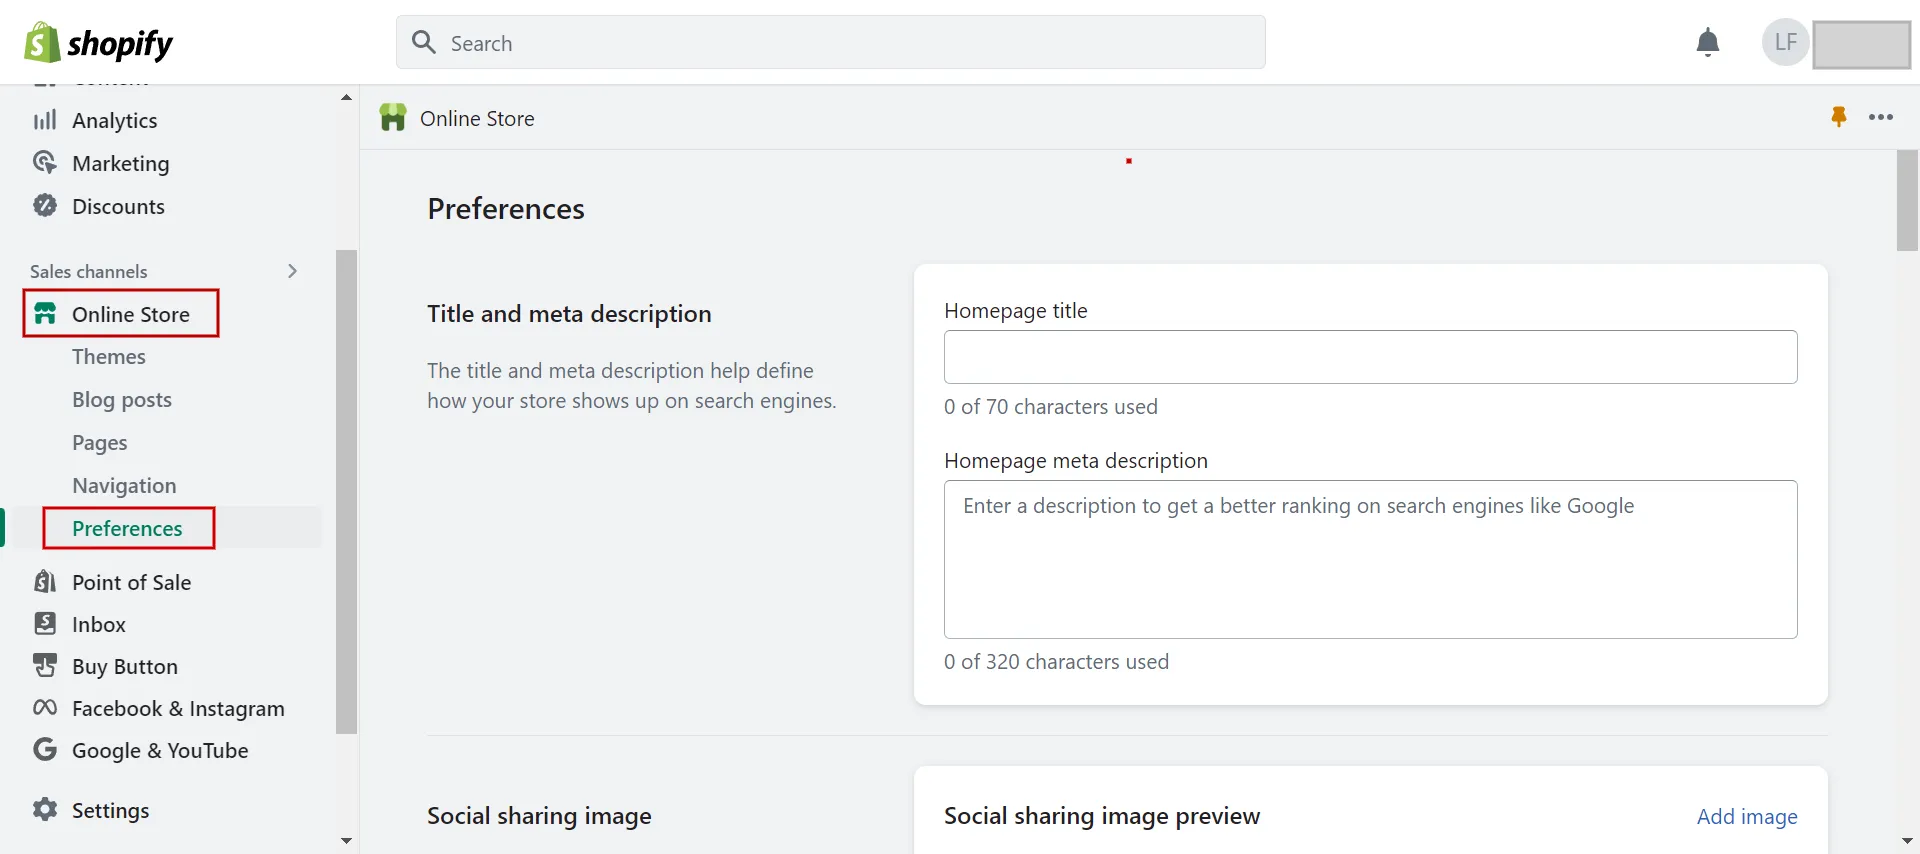
#Step 2: Update homepage meta title and meta description
In the text fields, you add meta tag to Shopify homepage, including a title and content description.
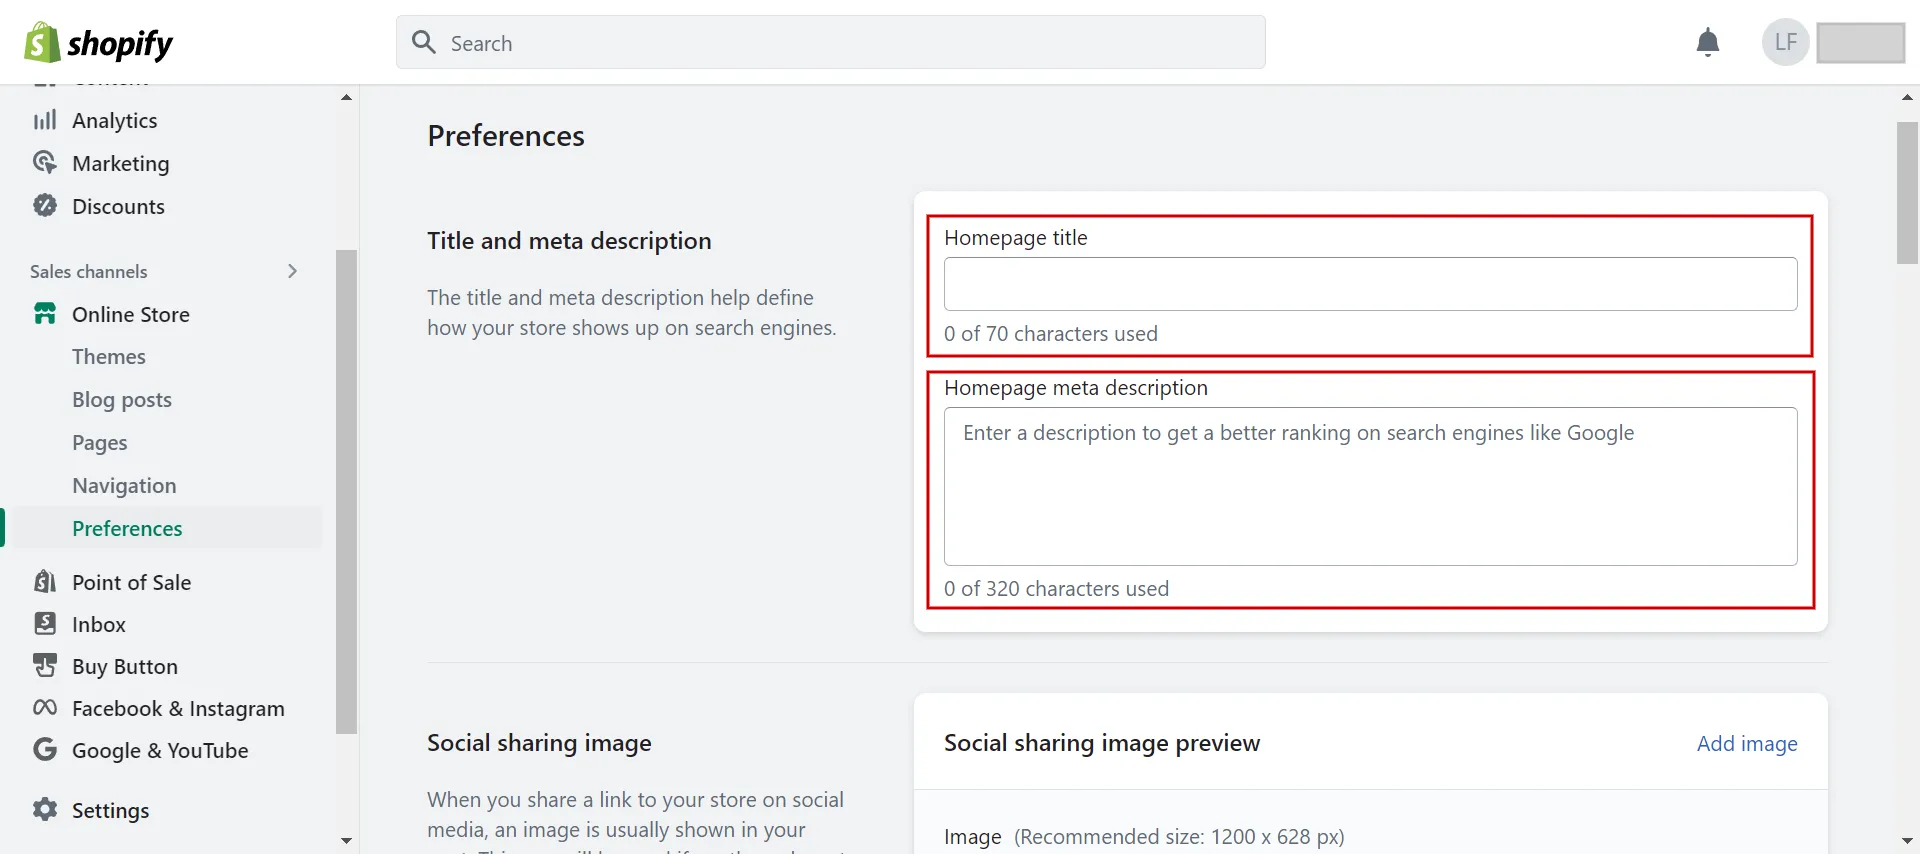
Whereas the title has 70 characters, the meta description is about 320 characters long or less. You should include the main keywords in both the meta title and description.
Then, click the Save button.
#Step 3: Confirmation
The best way to verify the changes to the meta title has been made is to visit your store and ensure you can see the text in the title of your browser tab.
Besides viewing the tab title, you should check whether each update was made exactly as you wanted by looking at the page’s source code. If the result does not match, you must modify your template again.
2. Add meta tag to All Products tab
How to add meta tag to Shopify for the products tab, including the meta title and meta description? First, choose Products.
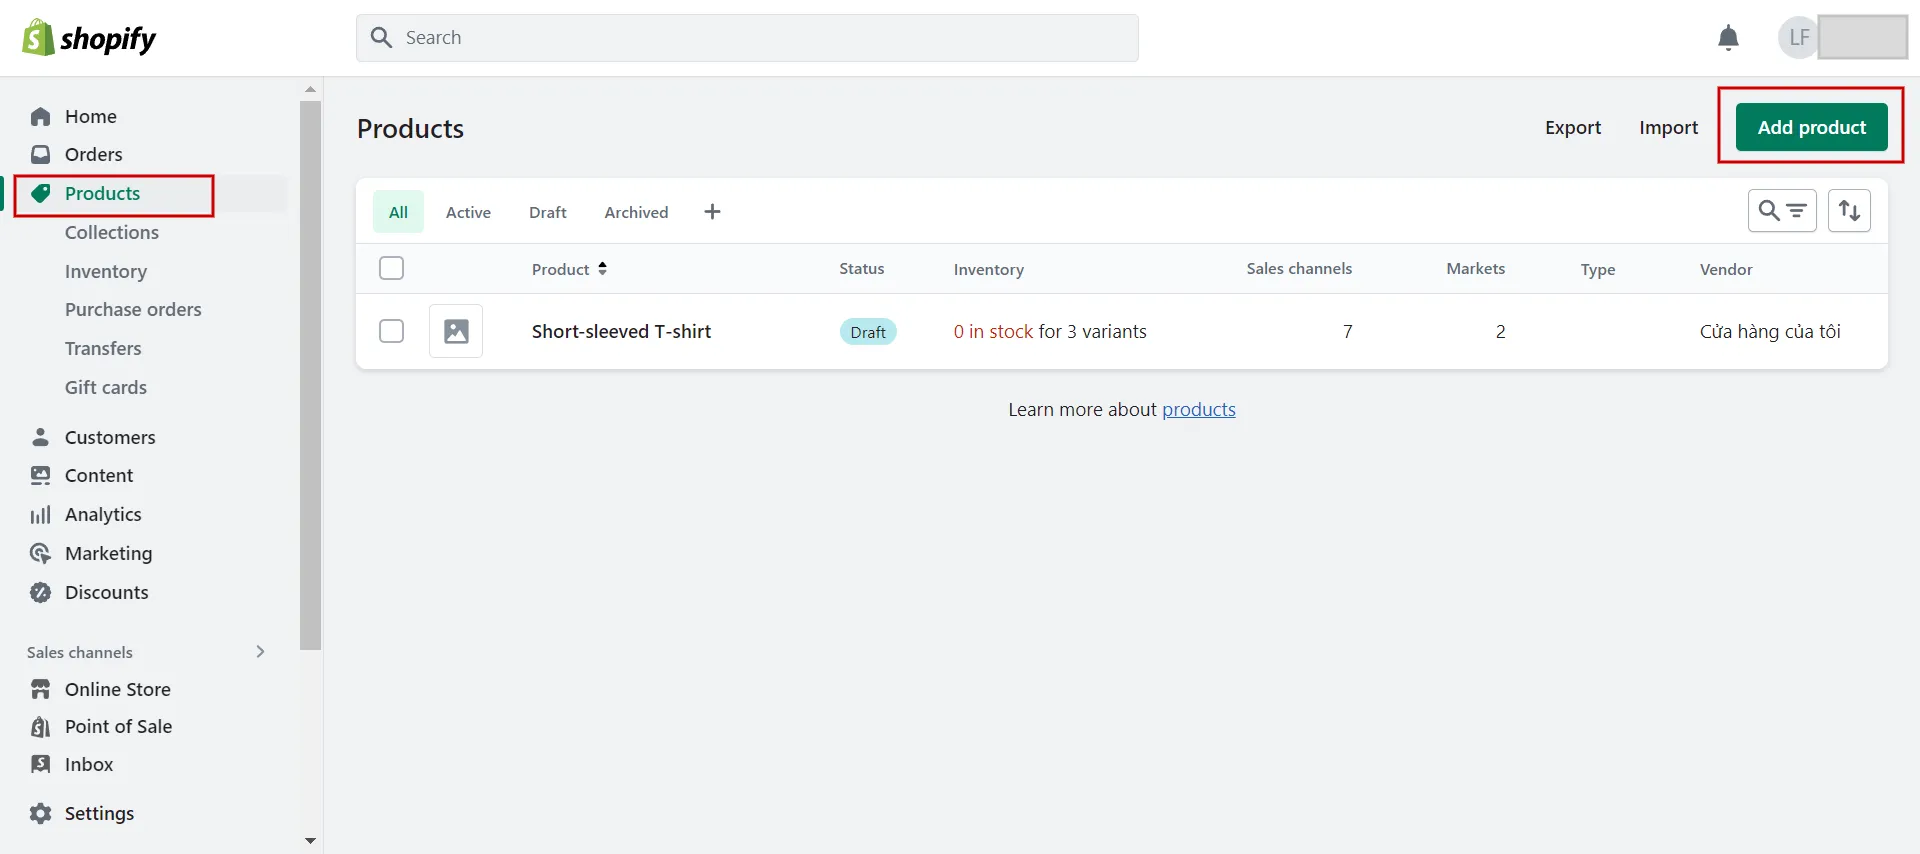
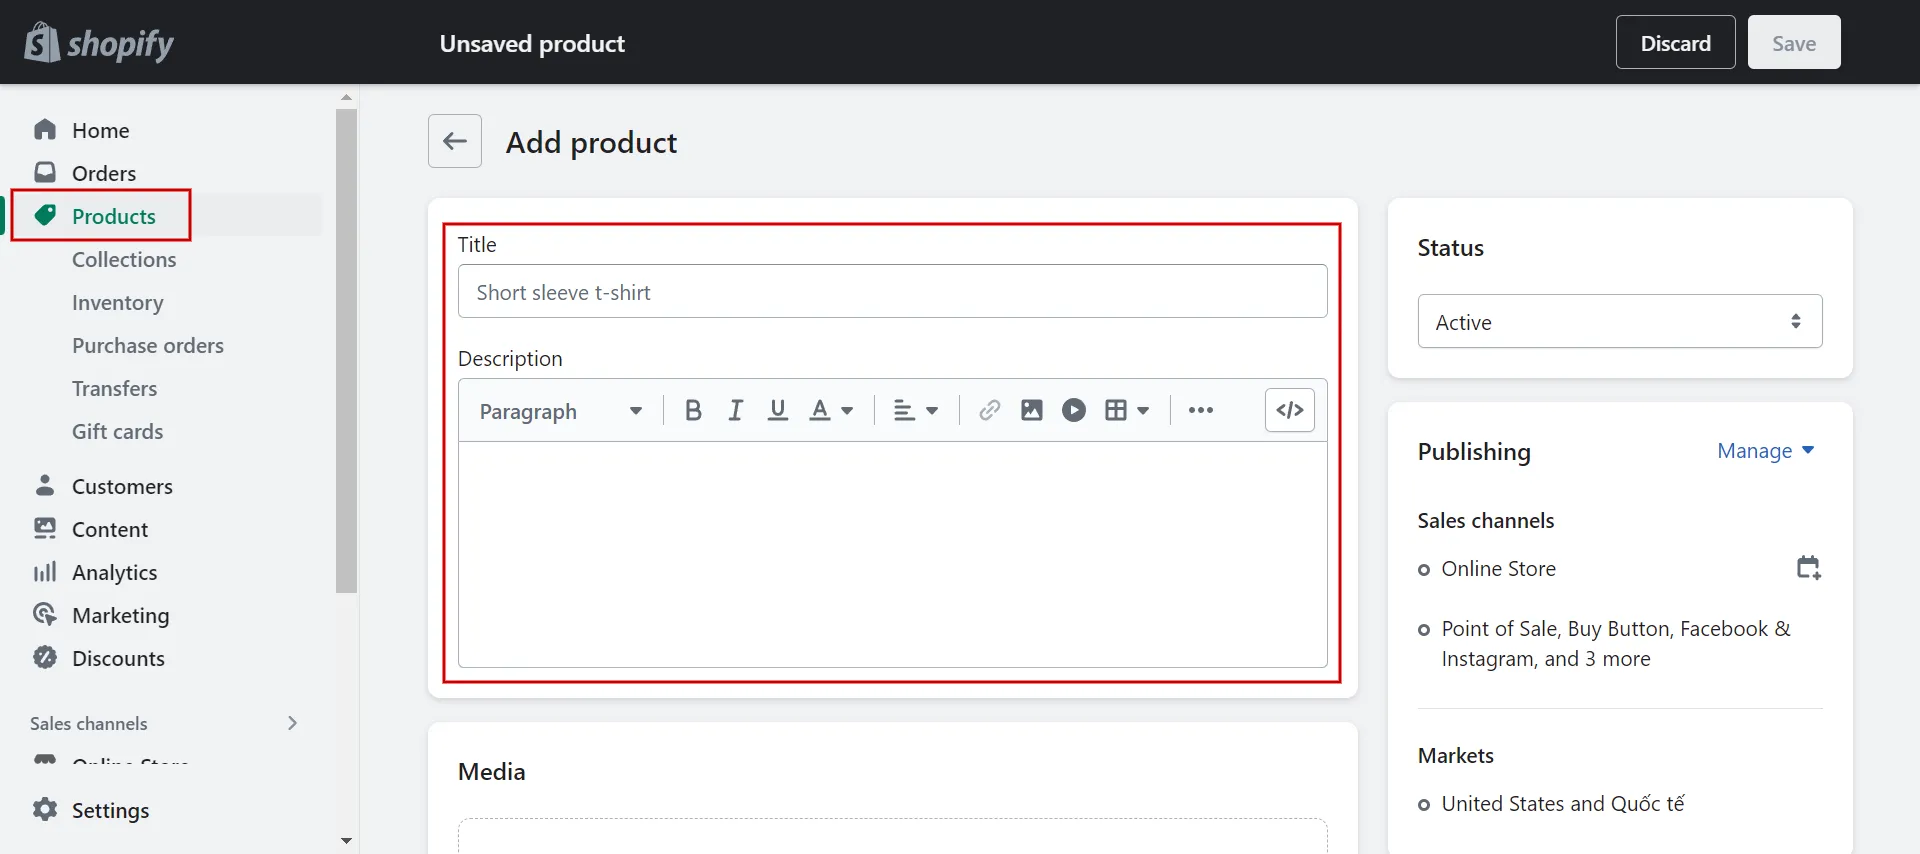
Then, you see the product lists on the right dashboard and select a product you want to edit. If it is empty, click Add Product.
The next step is entering new page title values and meta description values.
Scroll to the bottom page, click the edit button on the search engine listing box, and modify the information.
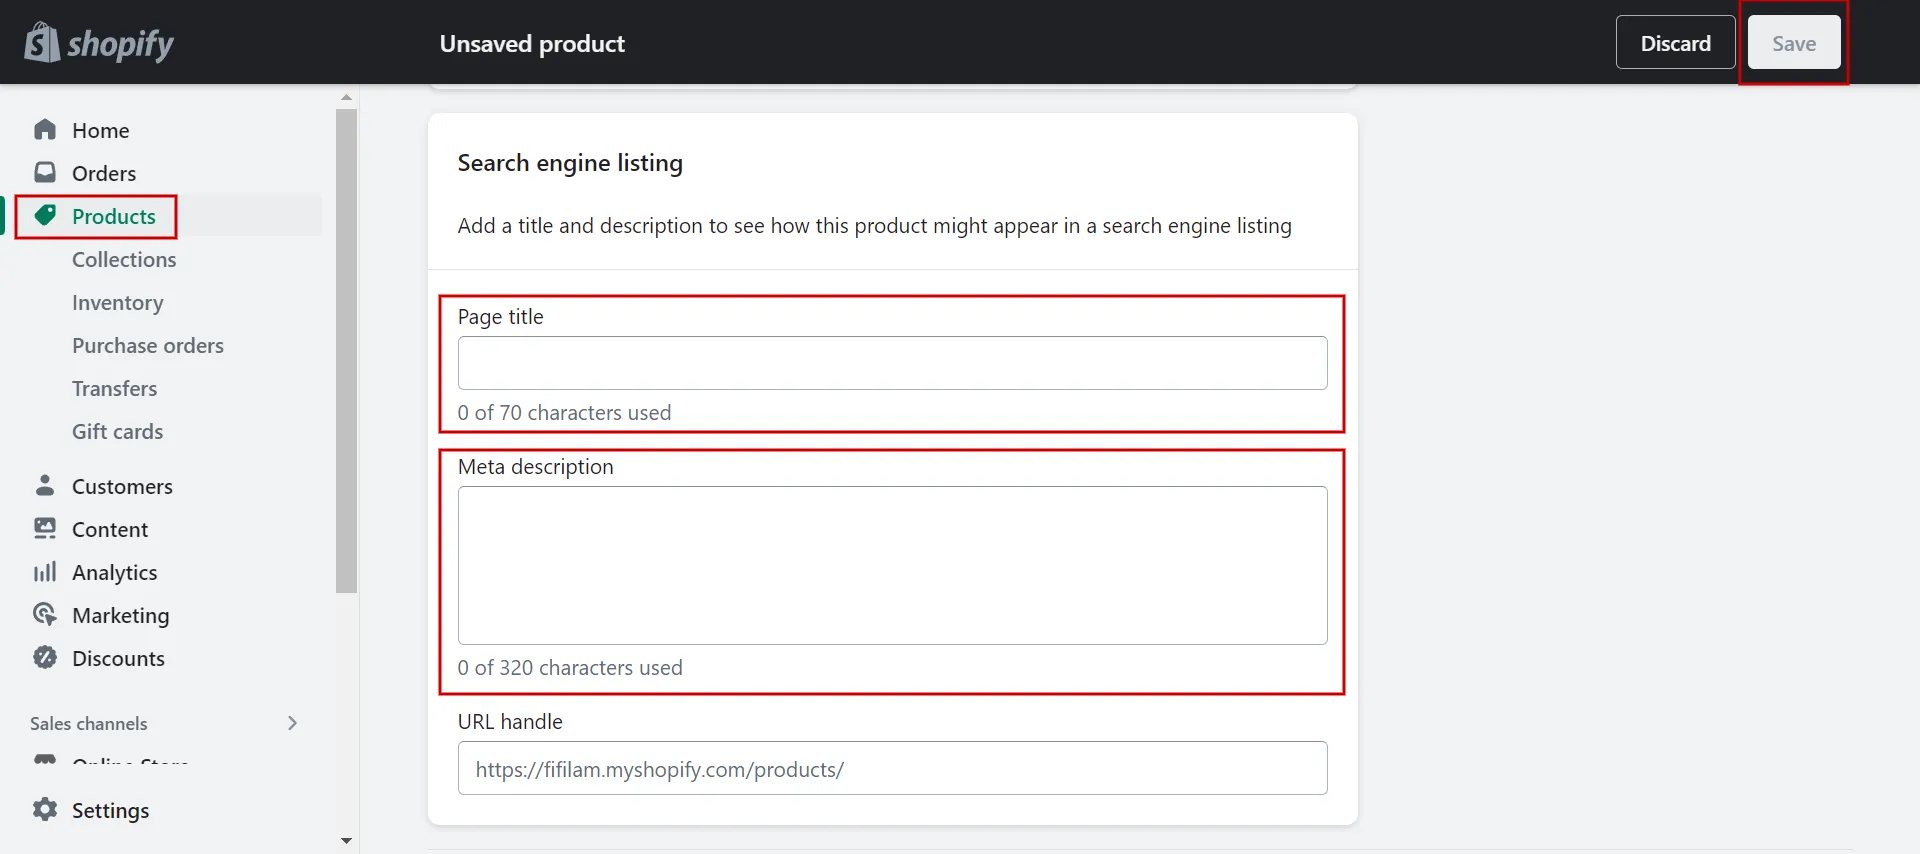
Lastly, check the page’s source code to ensure each alteration is made exactly as you intended. You must adjust your template if the outcome is incompatible.
Learn more: How to import products to Shopify – In-depth guideline.
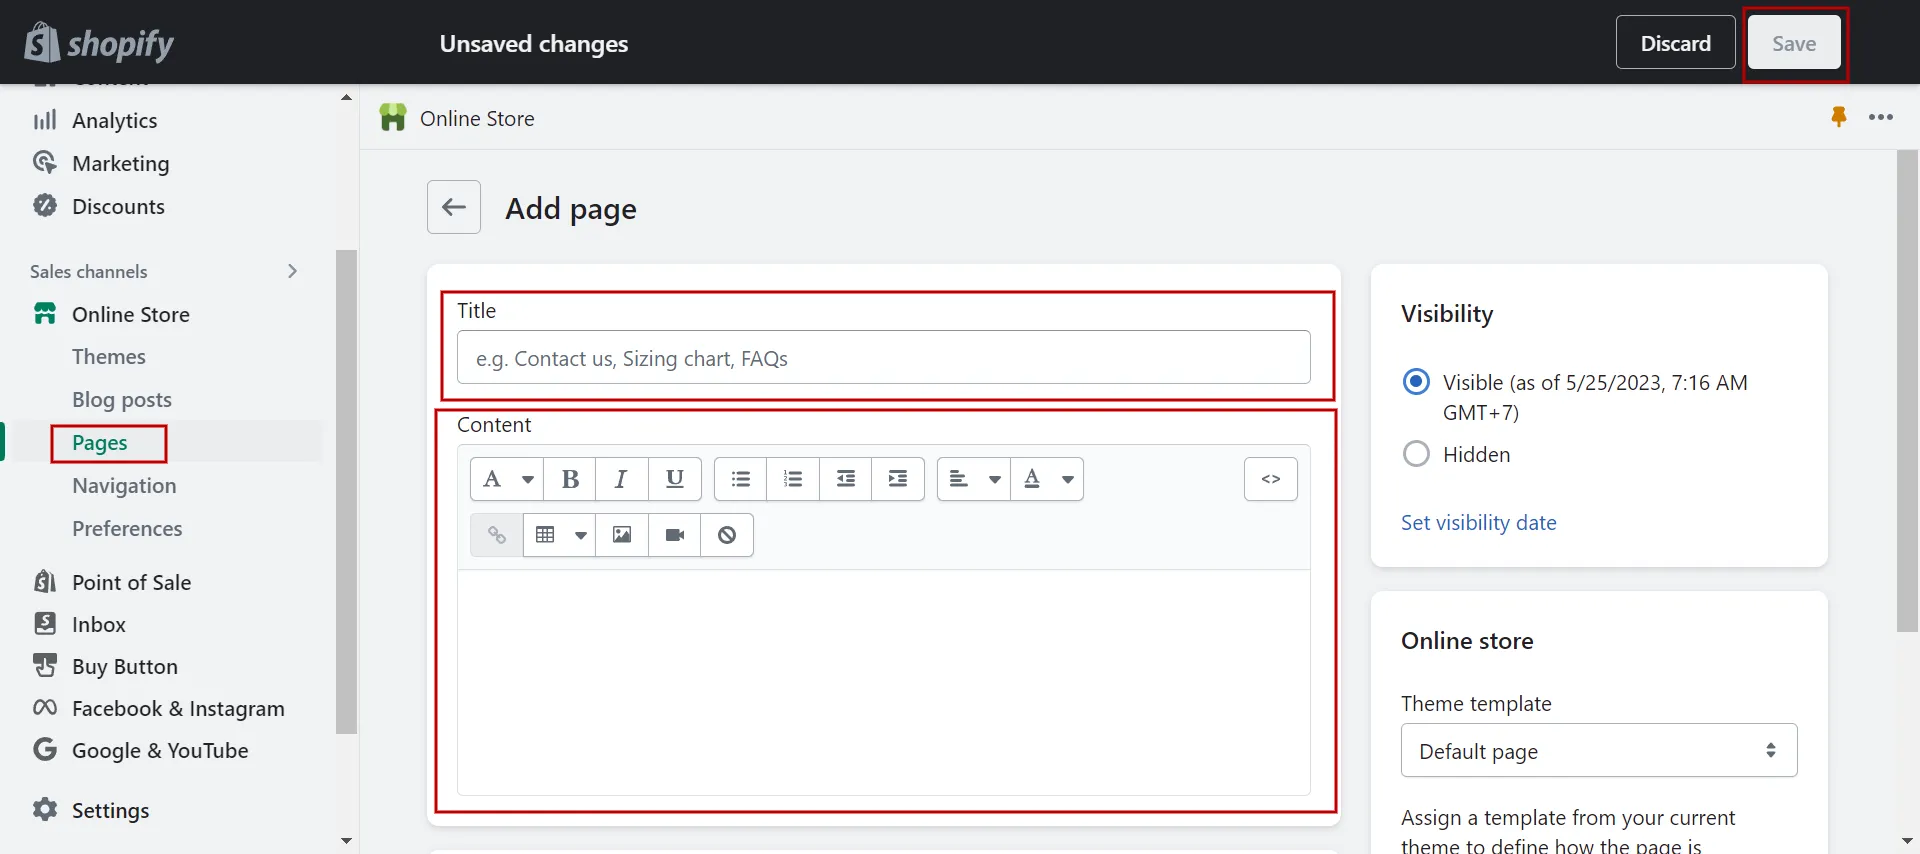
3. Add meta tag to general Pages tab
First, go to Online Stores and choose Pages. Next, choose a page or create one if you don’t already have one. Then, add values in the title and content boxes.
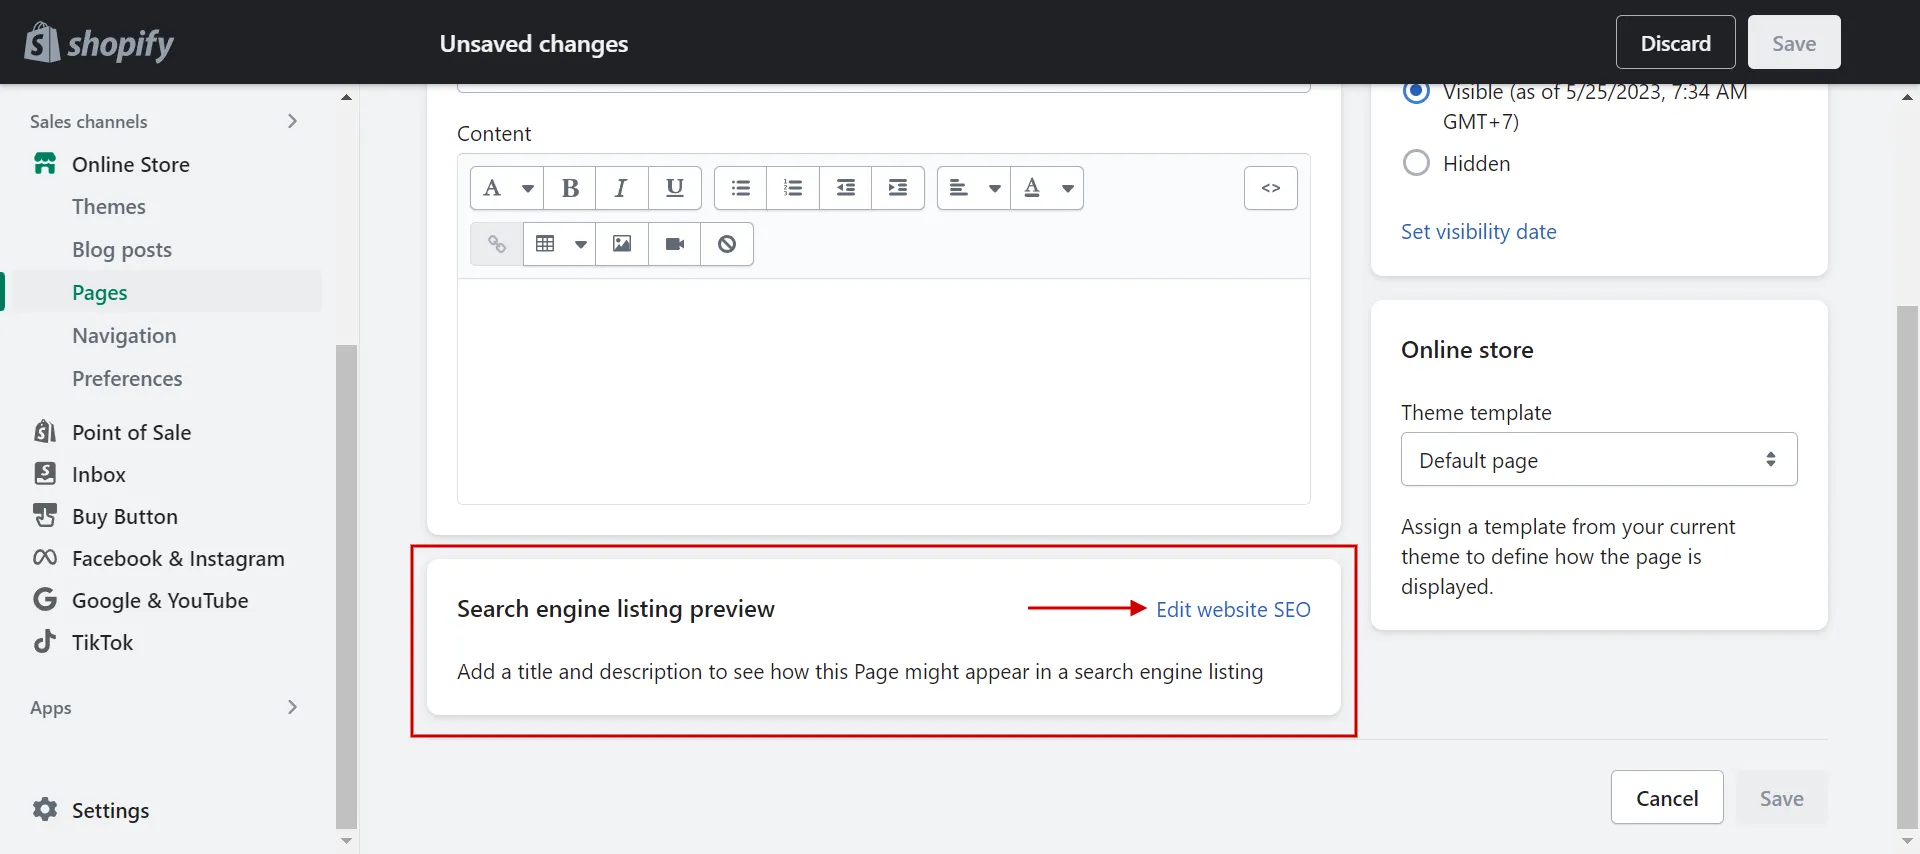
There is a box of search engine listing previews below. Click Edit SEO website at the top right corner to add and check the title and meta description.
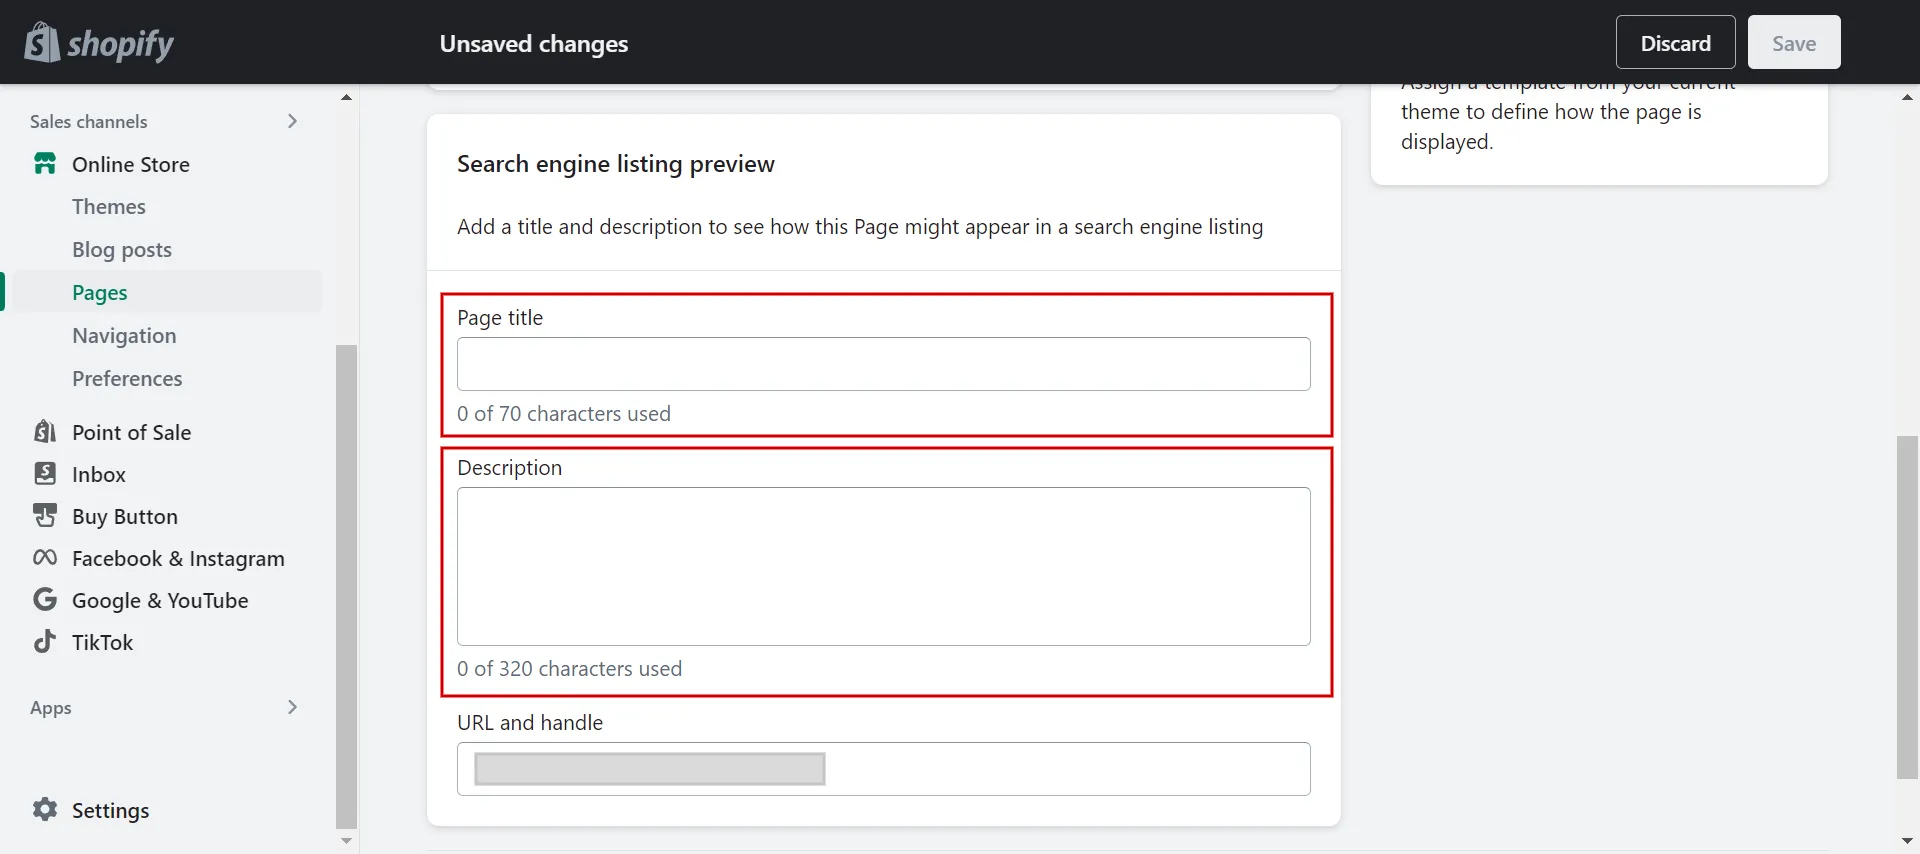
Finally, view the page’s source code to see whether each is updated exactly how you want.
How to Add Meta Tag to Shopify for Facebook
Add social media links to Shopify, such as Facebook and Gsuite meta tags, to help promote your search engine results. So how to add meta tags to HTML source code Shopify, especially Facebook meta tag?
1. Verify your Shopify domain on Facebook
Since you are using Shopify, using Meta-tag Verification is the best option; besides, there are more methods to verify your Shopify domain in Facebook Business Manage.
The question is how to add a meta tag to verify your domain on Facebook. You should copy the meta tag and place this code on your Shopify website. Let’s take a look at the details.
2. Add Facebook meta tag to Shopify in 5 steps
#Step 1: Login to Shopify store
Visit Shopify’s website to access it and log in. Once you’ve chosen your store, you go to Shopify Admin.
#Step 2: Choose themes
In the Shopify dashboard, click Online Store and navigate to Themes.
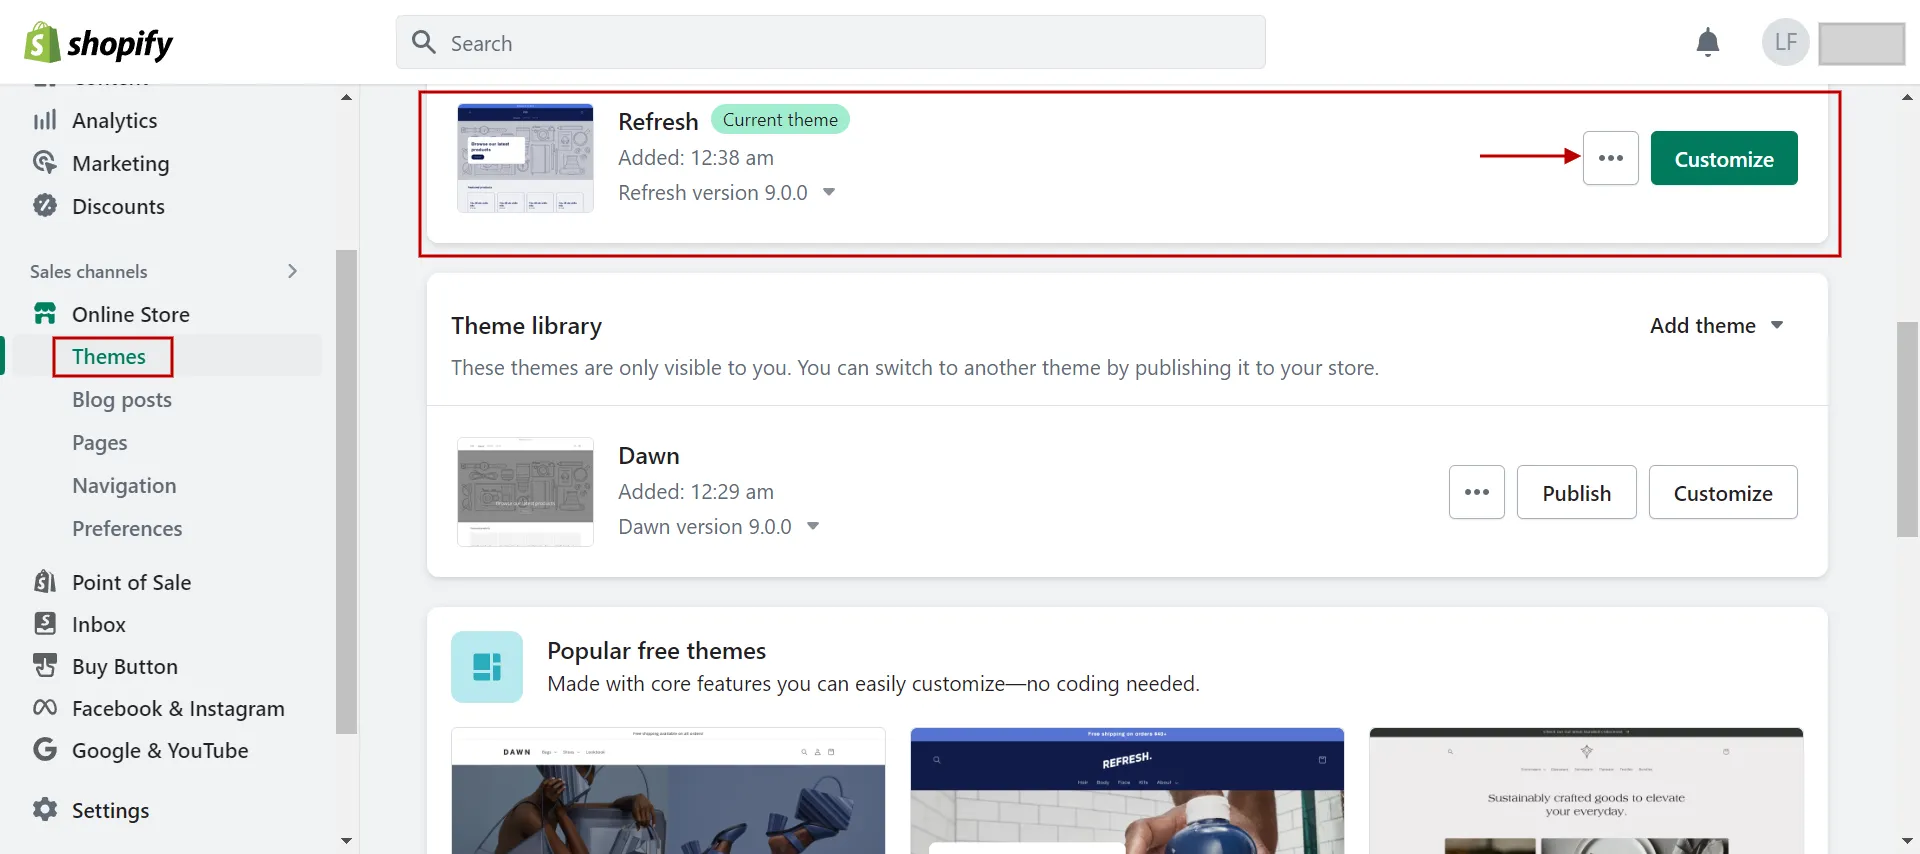
#Step 3: Edit code
Then, on the theme that you want to modify, click the Actions drop-down and select Edit Code.

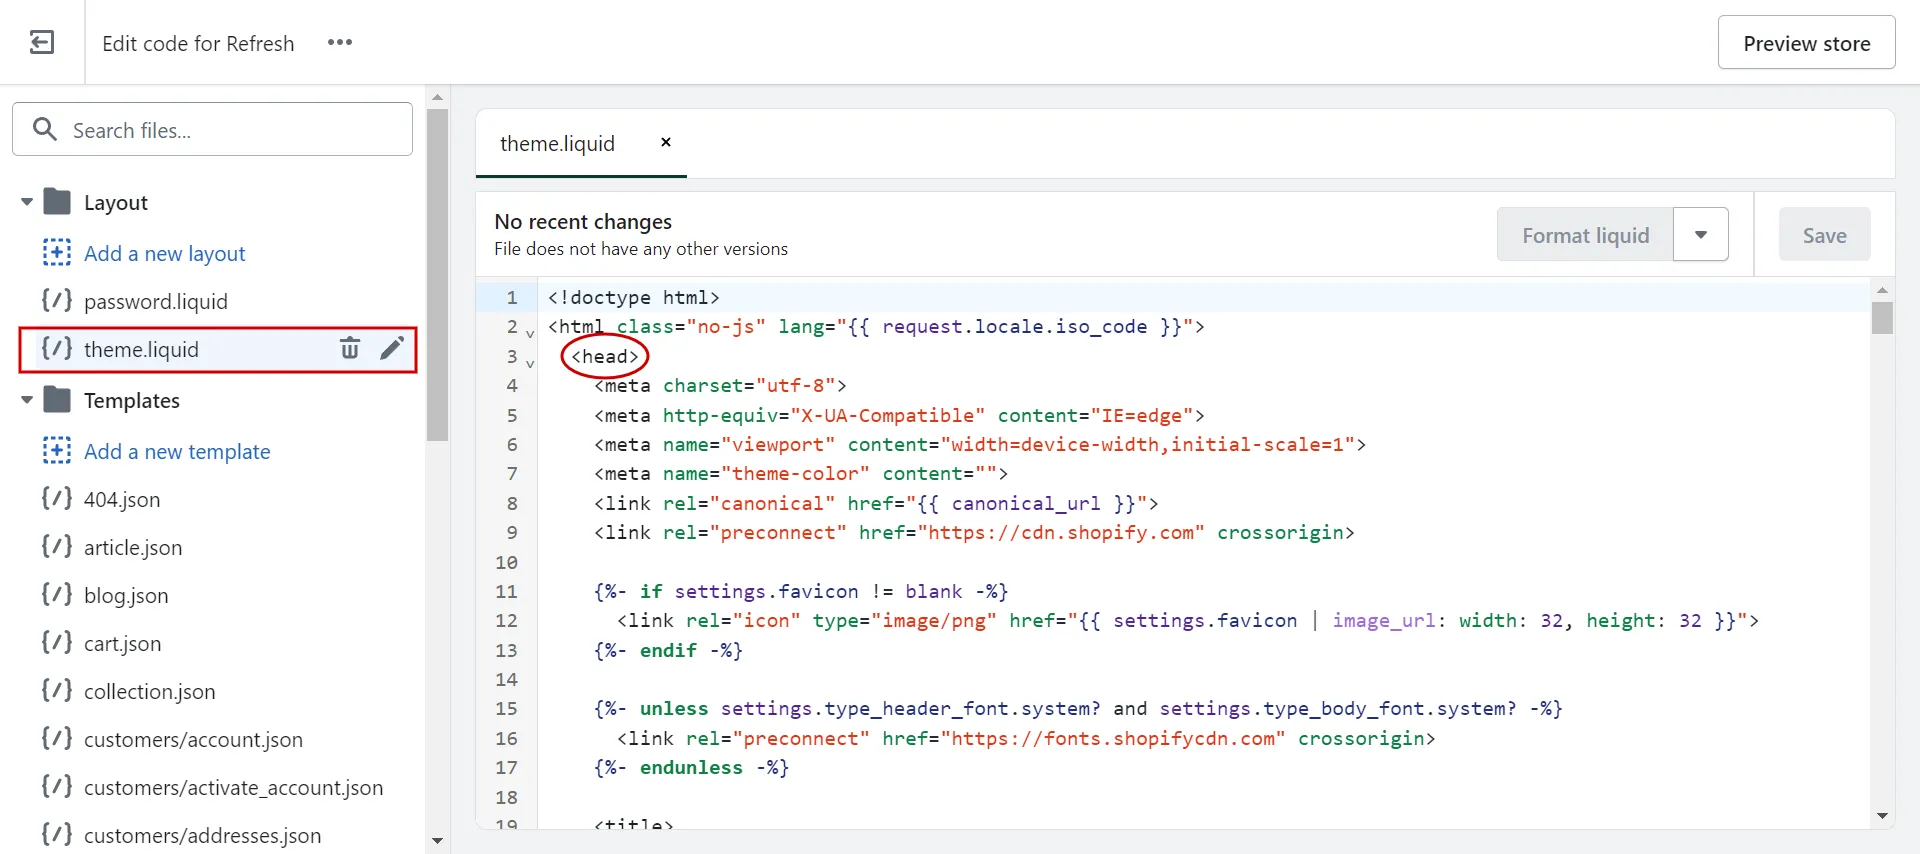
#Step 4: Locate theme.liquid
All file templates are listed in the left-hand column. The theme.liquid file is located in the Layout folder. All pages within a Shopify theme are created using the template language Liquid.
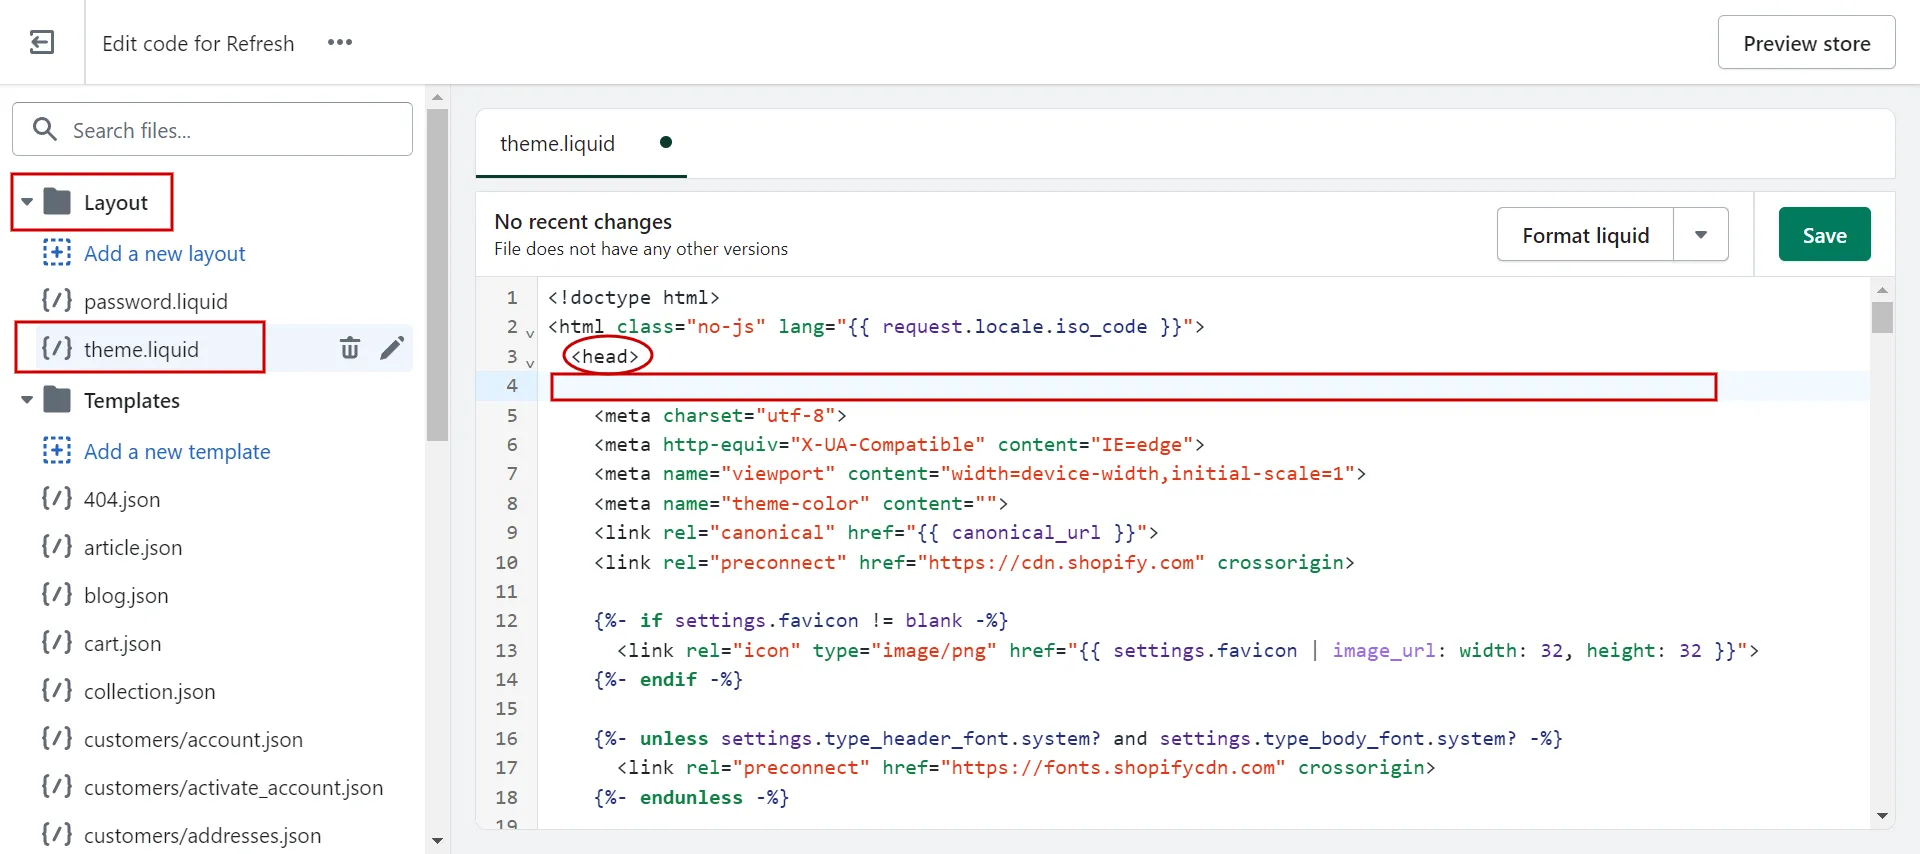
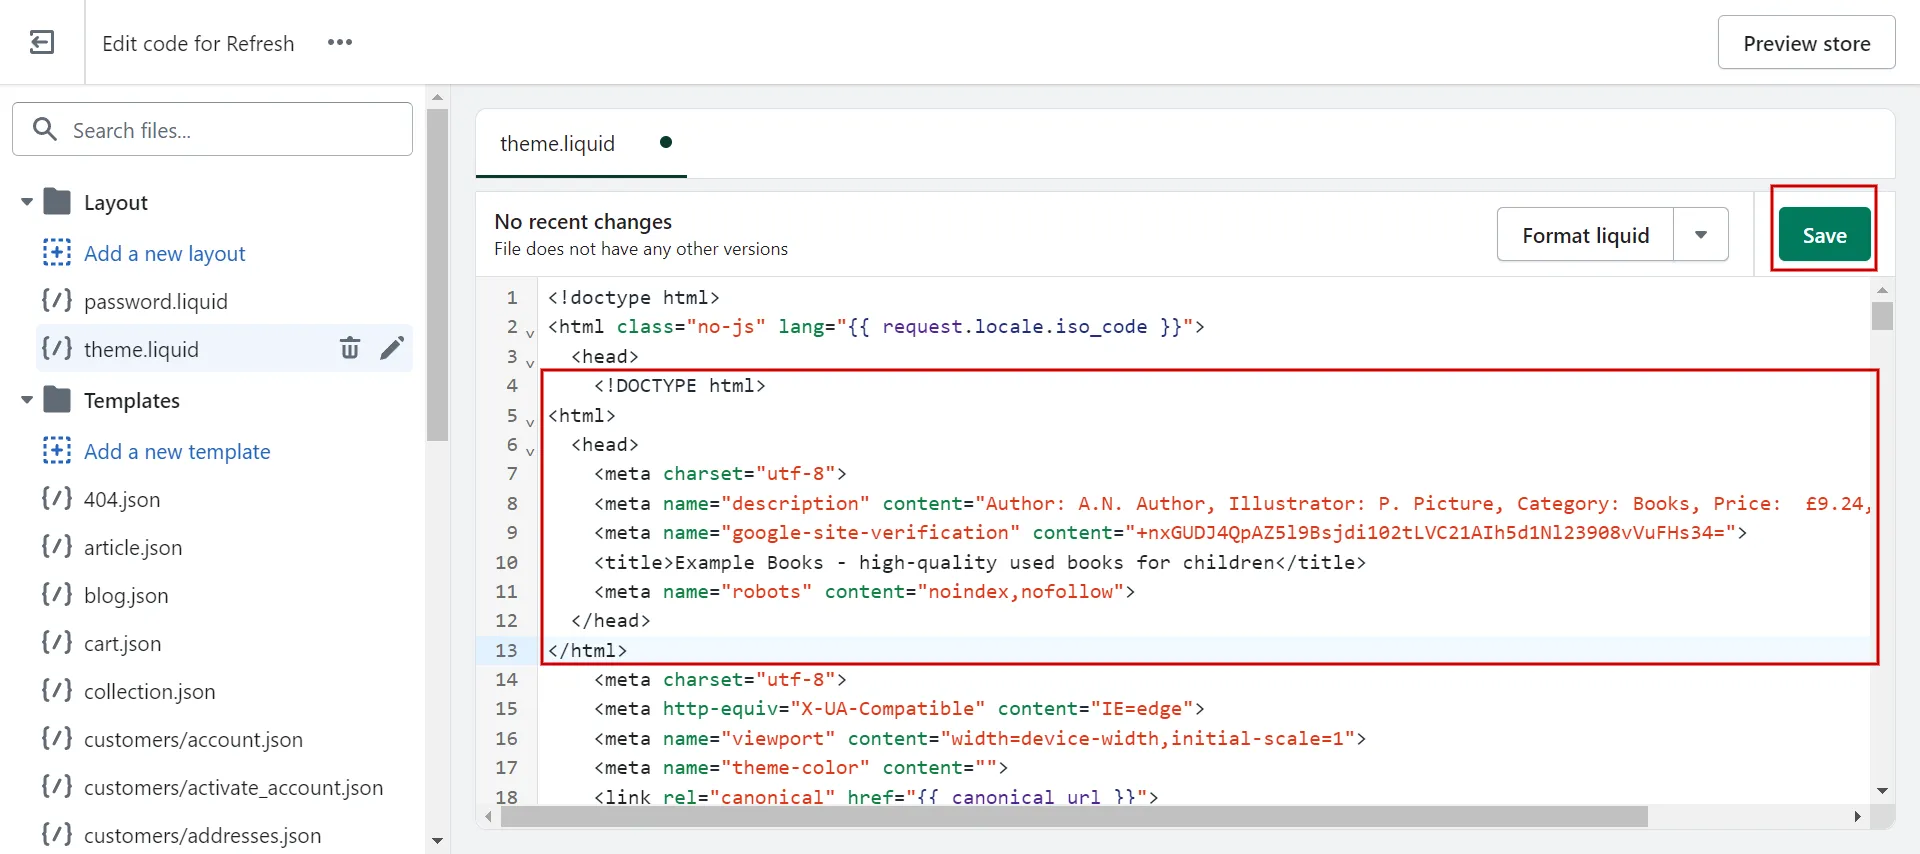
#Step 5: Add meta tag and confirm
In theme.liquid, look for the Head Tag, and hit enter to add a space. Then, insert the previously copied Facebook meta tag, then Save your changes.
Here are five steps to add Facebook meta tag to Shopify.
However, you must reopen your Facebook Business Manager and click your selected URL. The next step will take you to your website.
Click the Verify Button in your Facebook Business Manager by returning there. Facebook may take up to 72 hours to find the meta-code.
Searching for guides? How to Start a Shopify Store – Ultimate Guide for Beginners | 2023 Update. Check it out!
Want to migrate to Shopify?
If you are intending to migrate to Shopify, LitExtension offers a great migration service that helps you transfer your data from the current eCommerce platform to a new one accurately, painlessly with utmost security.
How to Add GSuite Meta Tag to Shopify
1. Connect Gsuite domain to Shopify
So how to add meta tag to html source code Shopify? You should do G Suite domain verification first.
- Enter your G Suite login information to log in.
- Choose the HTML file or meta tag option for verification. This choice is located in the Alternate Methods section.
- Copy the entire HTML tag, including the tag, to your clipboard.
2. Add Google meta tag to Shopify
Navigate to the Shopify admin area.
- First, you select the current theme by going to Online Store > Themes.
- Select the drop-down button and choose “Edit Code.”
- After that, it moves you to the code editor dashboard, where you locate the Layout section and click on the theme.liquid file there. Or you can type “theme.liquid” in the search box.
- Next, below the <Head>, copy the HTML meta tag, then paste it exactly inside the tag.
- Finally, click Save.
It is not finished yet; you should revisit GSuite and click the “Verify” button to confirm the verification procedure.
Bonus resources:
- Shopify review – Is Shopify the crown jewel of the eCommerce world?
- Shopify pricing – The full costs of owning a Shopify website
FAQs for Meta Tags on Shopify
[sp_easyaccordion id=”59440″]
Wrap-Up
In conclusion, meta tags and meta descriptions are the core for better search results. Adding meta info for SEO in Shopify is one of the first vital steps.
This article recaps how to add meta tag to Shopify, including Facebook, Gsuite, and HTML meta tags. By following one of these methods above, adding meta info for SEO in Shopify is no longer your problem.
To get more helpful advice for your online stores, visit our LitExtension blog and sign up for our eCommerce community. If you’re considering switching to Shopify, LitExtension – #1 Shopping Cart Migration Expert is ready to assist you with the fastest and most affordable solution!