Are you prepared to increase sales, decrease ad costs, track visitor behavior, retarget customers, and turbocharge your Facebook ads? By exploring how to add meta Pixel to Shopify, you can keep track of visitors’ activity on your website and improve your advertising & marketing campaigns and Shopify sales.
In this article, we – LitExtension, explain the main points about meta pixel for Shopify.
- create Meta (Facebook) pixel
- add Facebook meta pixel to Shopify online store
- change meta pixel Facebook to Shopify
Let’s figure out step-by-step instructions on how to add meta pixel to Shopify.
Meta (Facebook) Pixel Shopify 101
#1 What is a Facebook Pixel?
The Facebook Pixel is a tiny piece of code that you can add to your website (or, in this case, your Shopify store) to monitor visitor behavior and interactions.
#2 How does it work?
After installation, Facebook Pixel code collects data in the background and sends it back to Facebook, where it is processed and stored for your use in Facebook Ads Manager.
#3 Why do we need Facebook meta pixels?
It is primarily used to assess the performance of your advertising, comprehend user behavior on your website, and, more precisely, target audiences.
#4 Benefits of using Facebook Pixel Shopify
- Optimize tracking and ad performance
To improve tracking and ad performance optimization, Facebook Pixel monitors user interactions on your website after a Facebook ad clicks.
You can assess the efficacy of advertisements using this detailed data, which reveals which ads encourage desired actions and which require modification.
- Create focused customer audiences
You can create lookalike audiences with the help of Facebook Pixel.
Consider the case where you have a custom audience of customers who have bought a specific item. By using this data to create a lookalike audience of Facebook users who have qualities in common with your customers, you can increase the number of potential customers you reach and the likelihood that they will be interested in your product.
- Track conversions more accurately
Facebook Pixel tracks and records user actions on the site after they interact with a Facebook ad, which significantly improves conversion tracking for Shopify stores.
You can determine your return on ad spend (ROAS) and identify which ads result in useful actions using this comprehensive conversion tracking data. You can also improve your advertising strategy to increase overall conversions and revenue by understanding which ads and user behaviors result in conversions.
- Recognize consumer behavior
Facebook Pixel tracks how users interact with your Shopify store after viewing or clicking on a Facebook ad, which aids in understanding consumer behavior.
The Pixel, for instance, can track “View Content” events when a user views a specific item or page on your website. It may be a sign of a problem with the product’s pricing or description if many users are viewing a particular product but few are adding it to their carts.
How to Create Meta (Facebook) Pixel?
Create a Facebook meta pixel by following these steps:
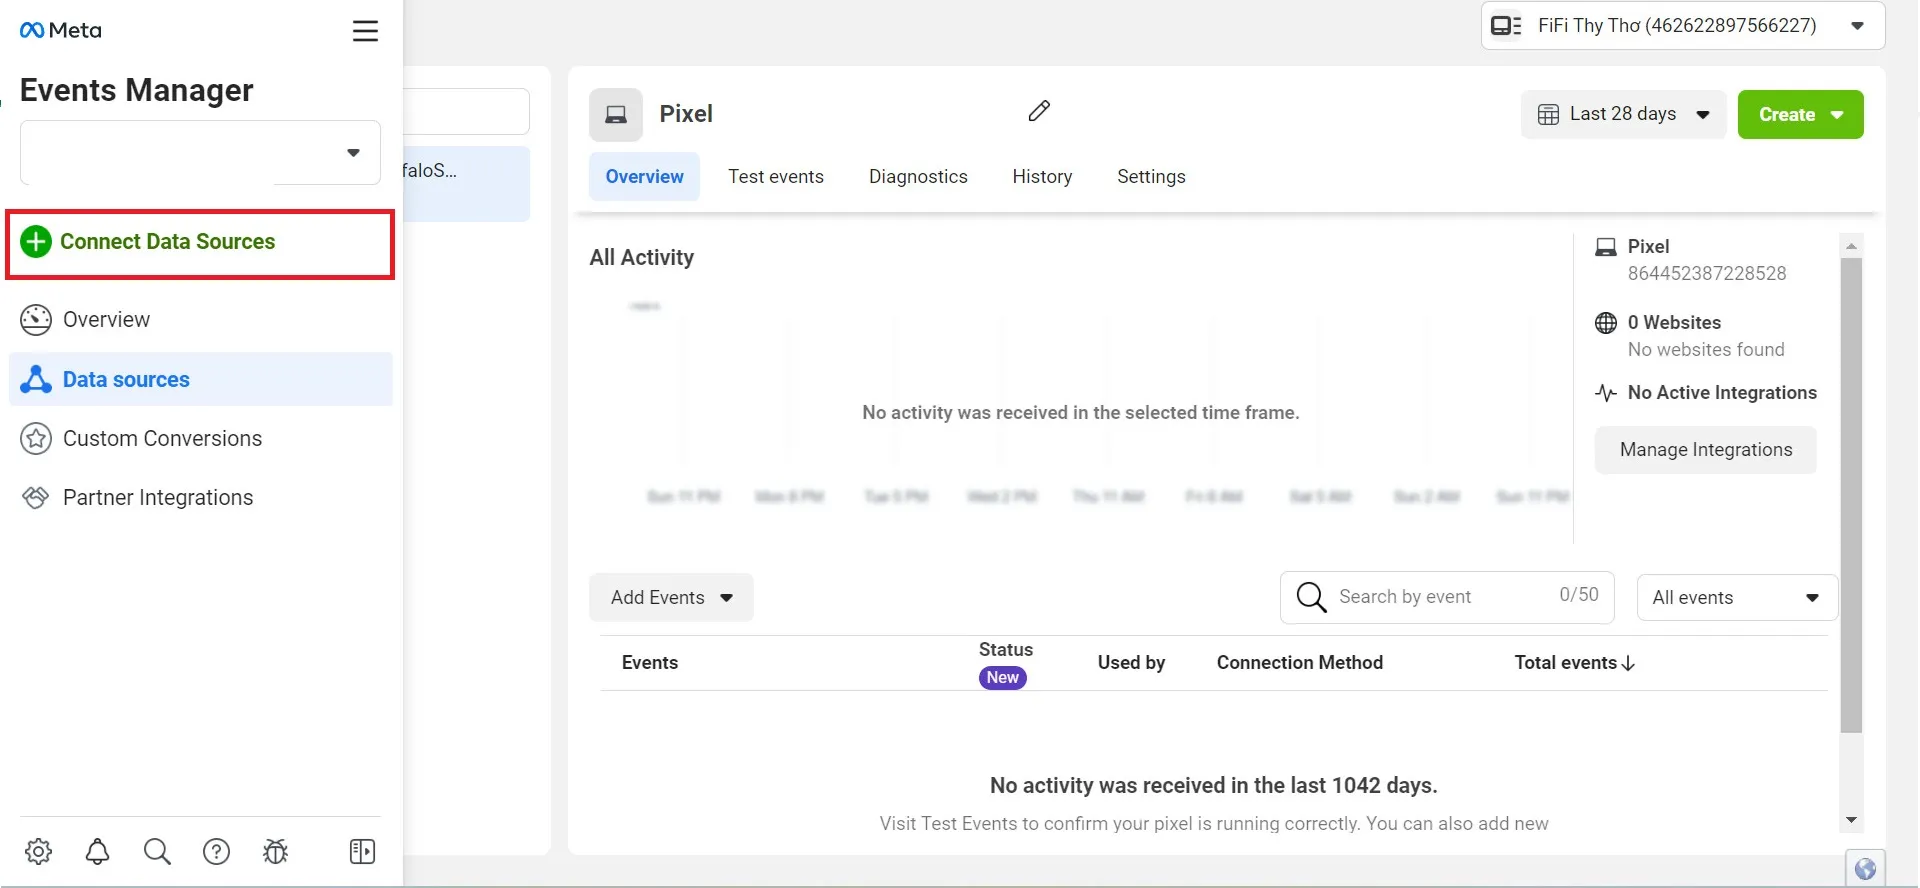
- Step 1: Visit Facebook Events Manager.
- Step 2: Click Connect Data Sources.
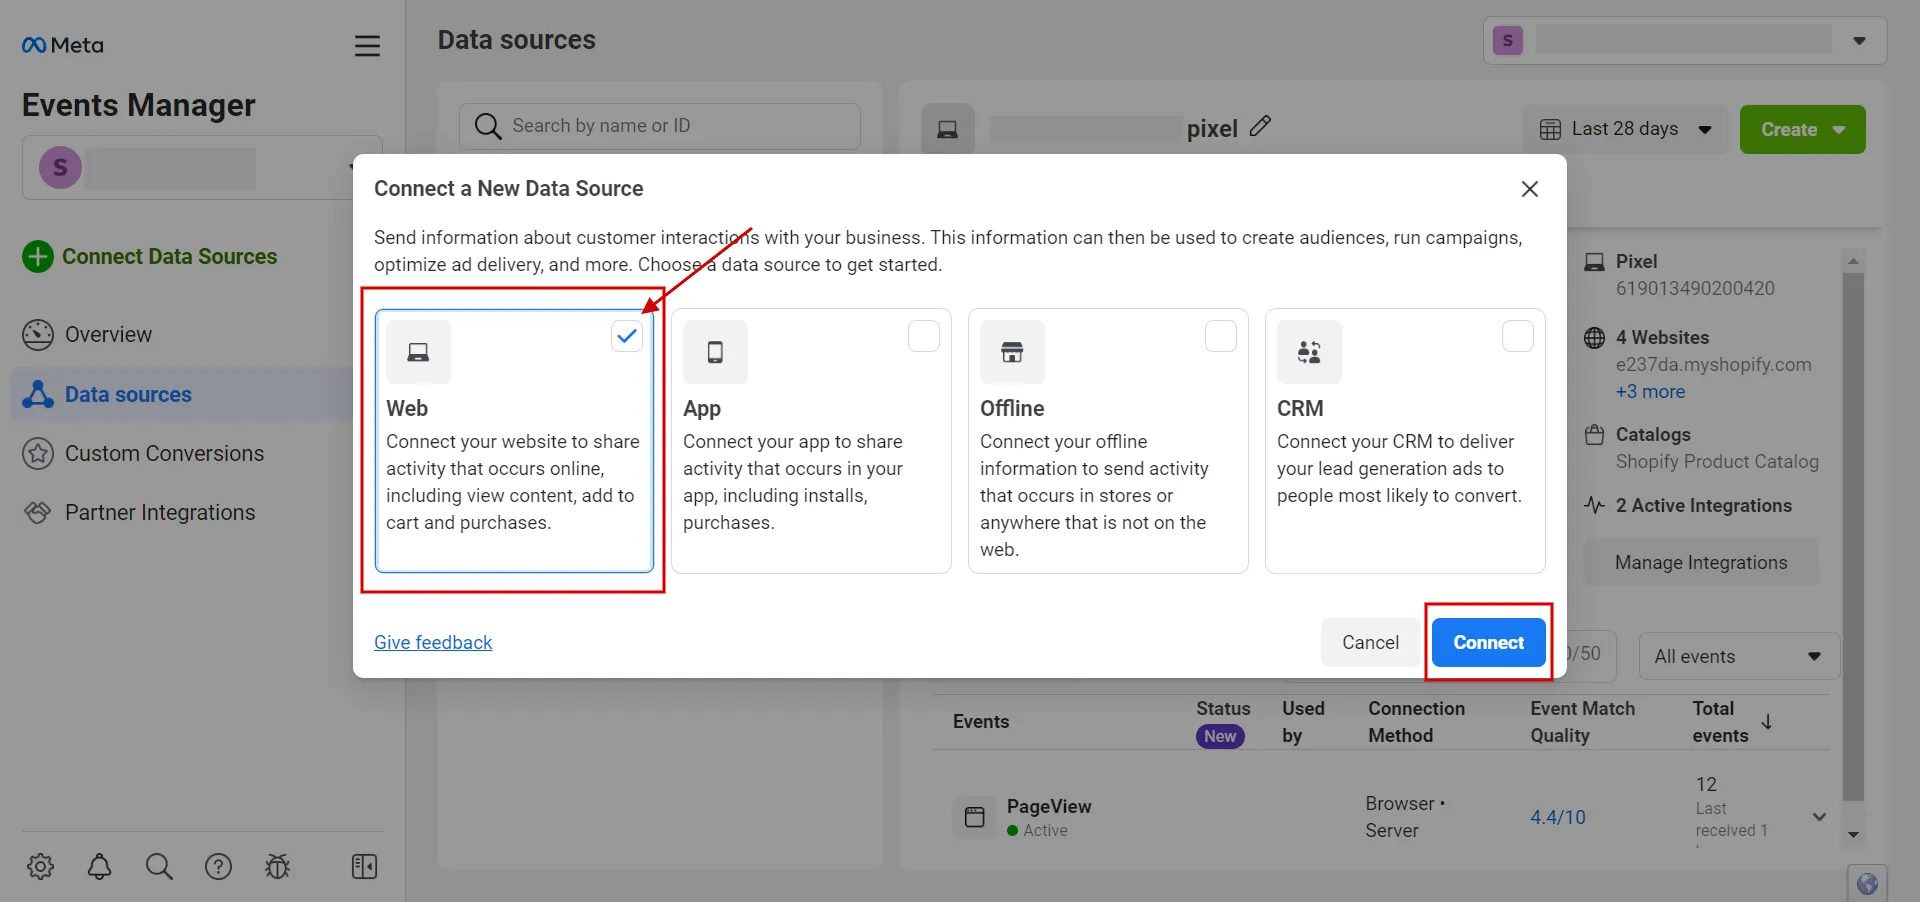
- Step 3: Select Web and click Connect.
- Step 4: Name your Pixel
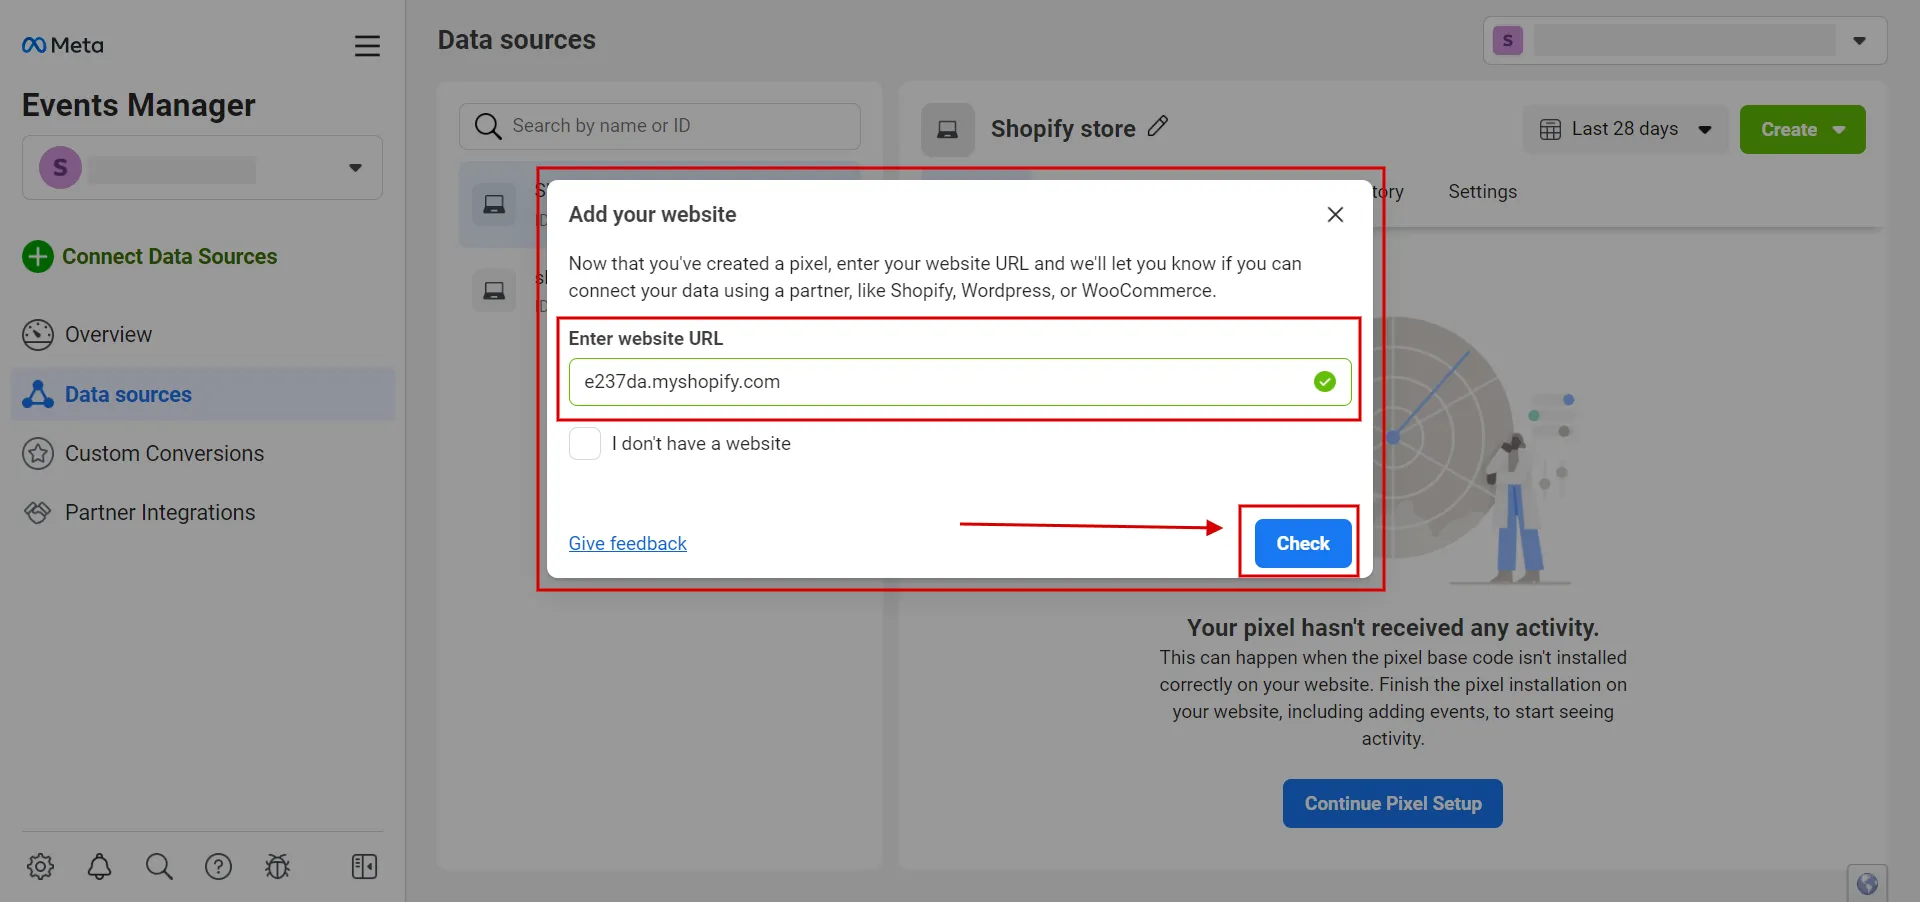
- Step 5: Enter your website URL
Add the URL link and wait for Facebook to check the activity.
- Step 6: Click Next to get Pixel.
Choose Conversion API and Meta Pixel, then click Next.
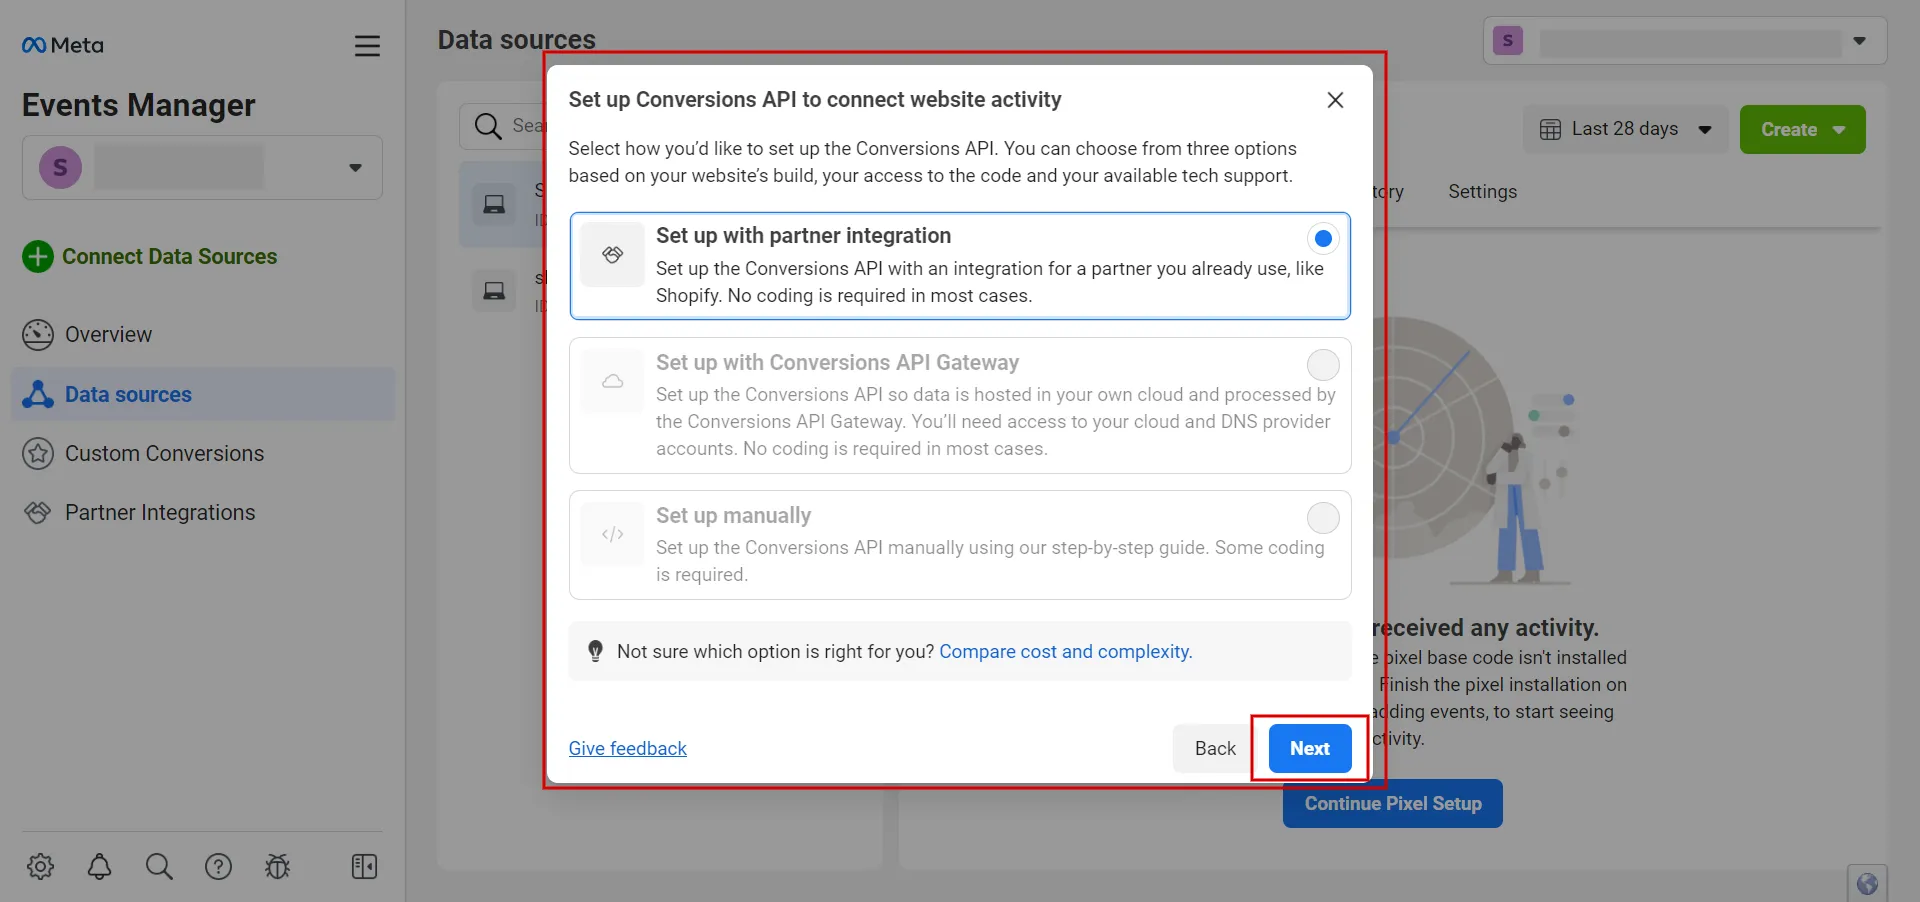
- Step 7: Set up with partner integration
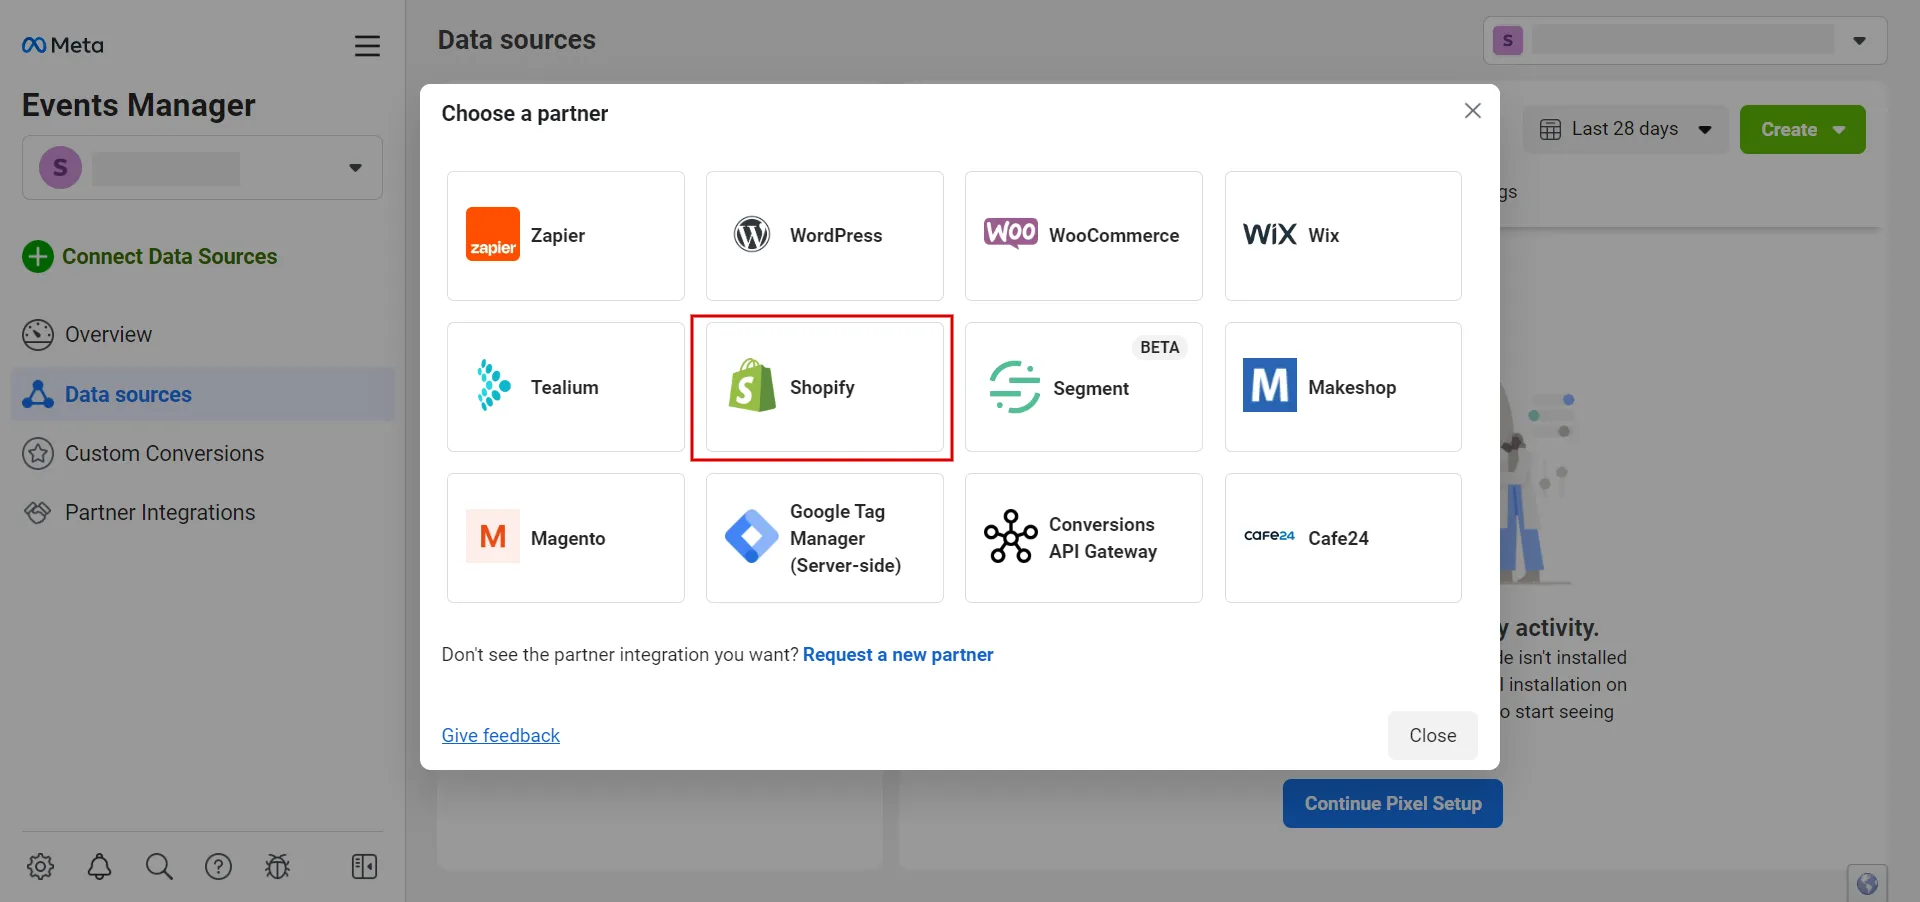
Then, choose Set up with partner integration and click Next.
Then, choose a Shopify partner.
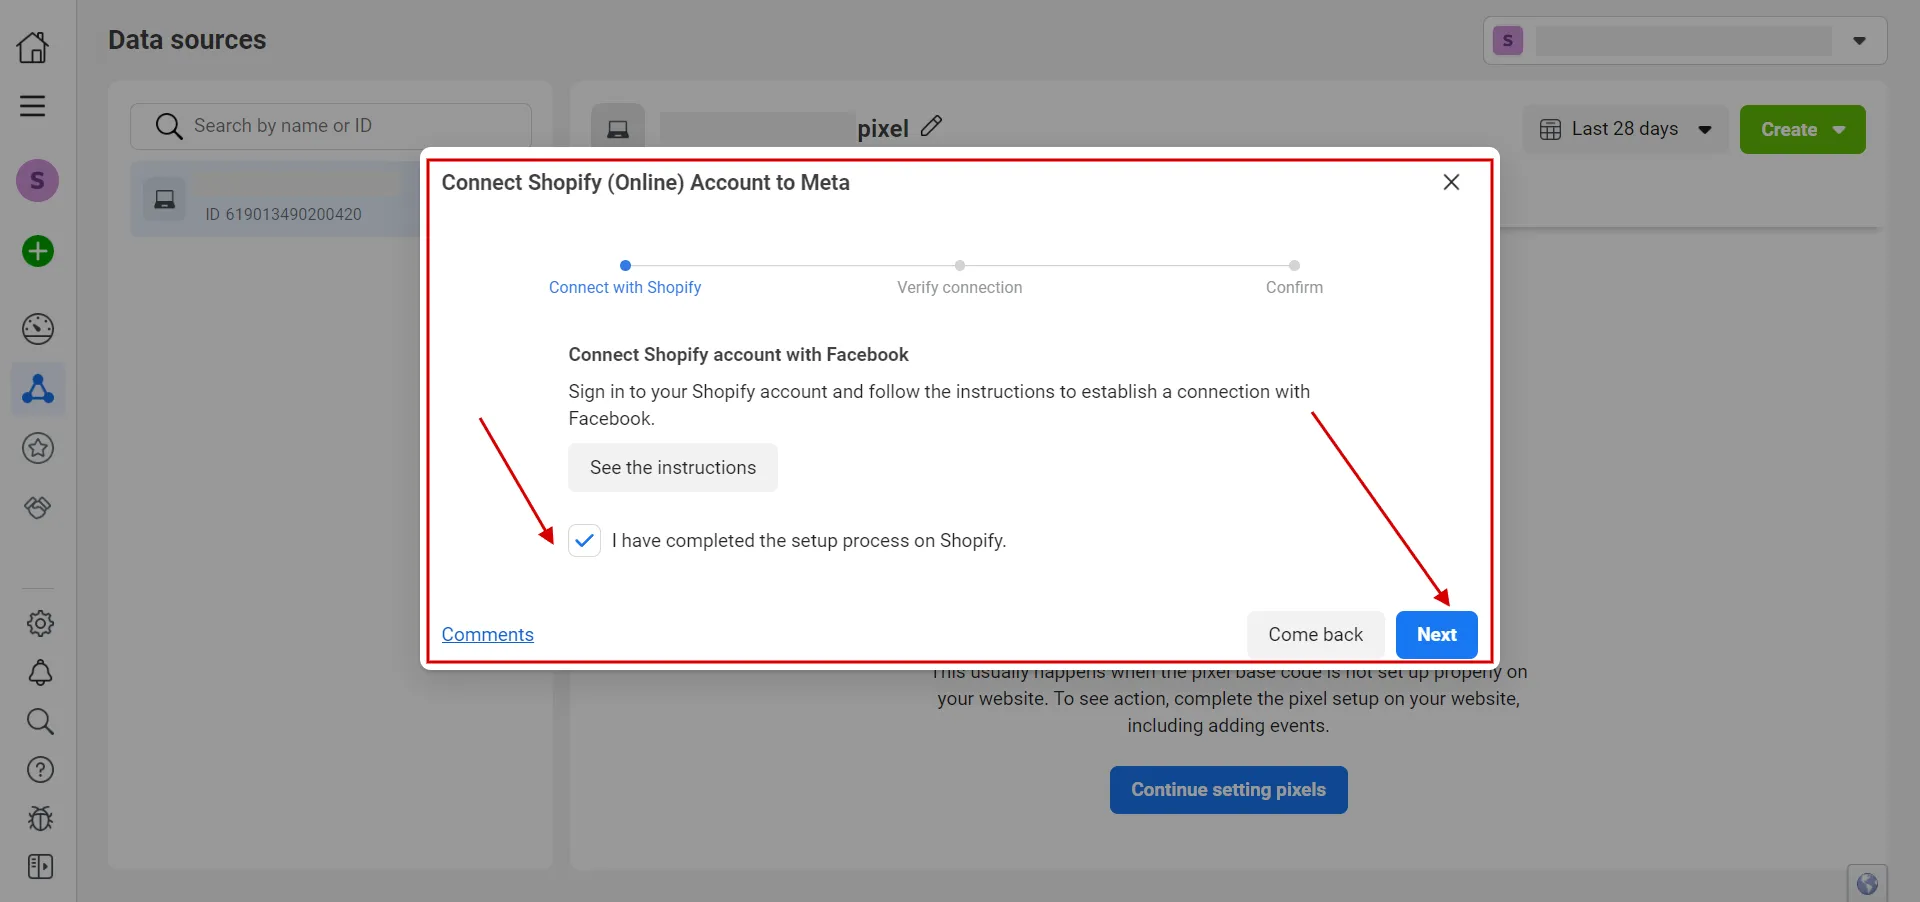
Then, connect your Shopify account to Meta.
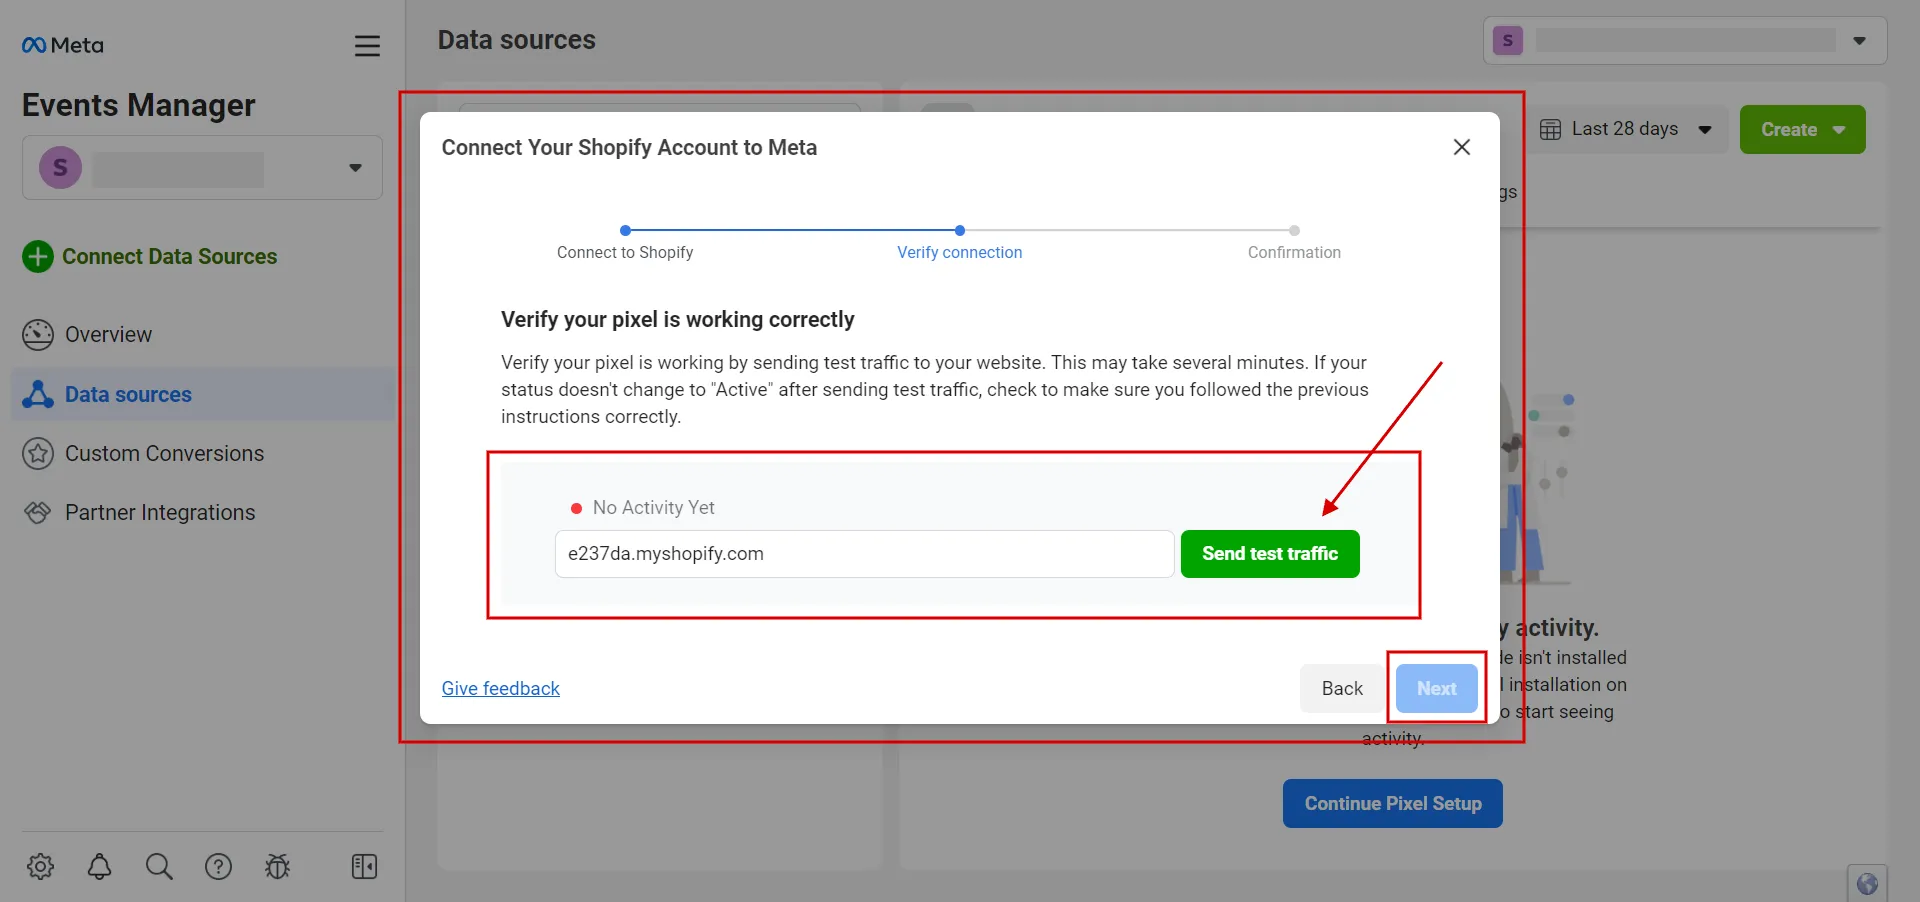
Next, verify that a pixel is working correctly
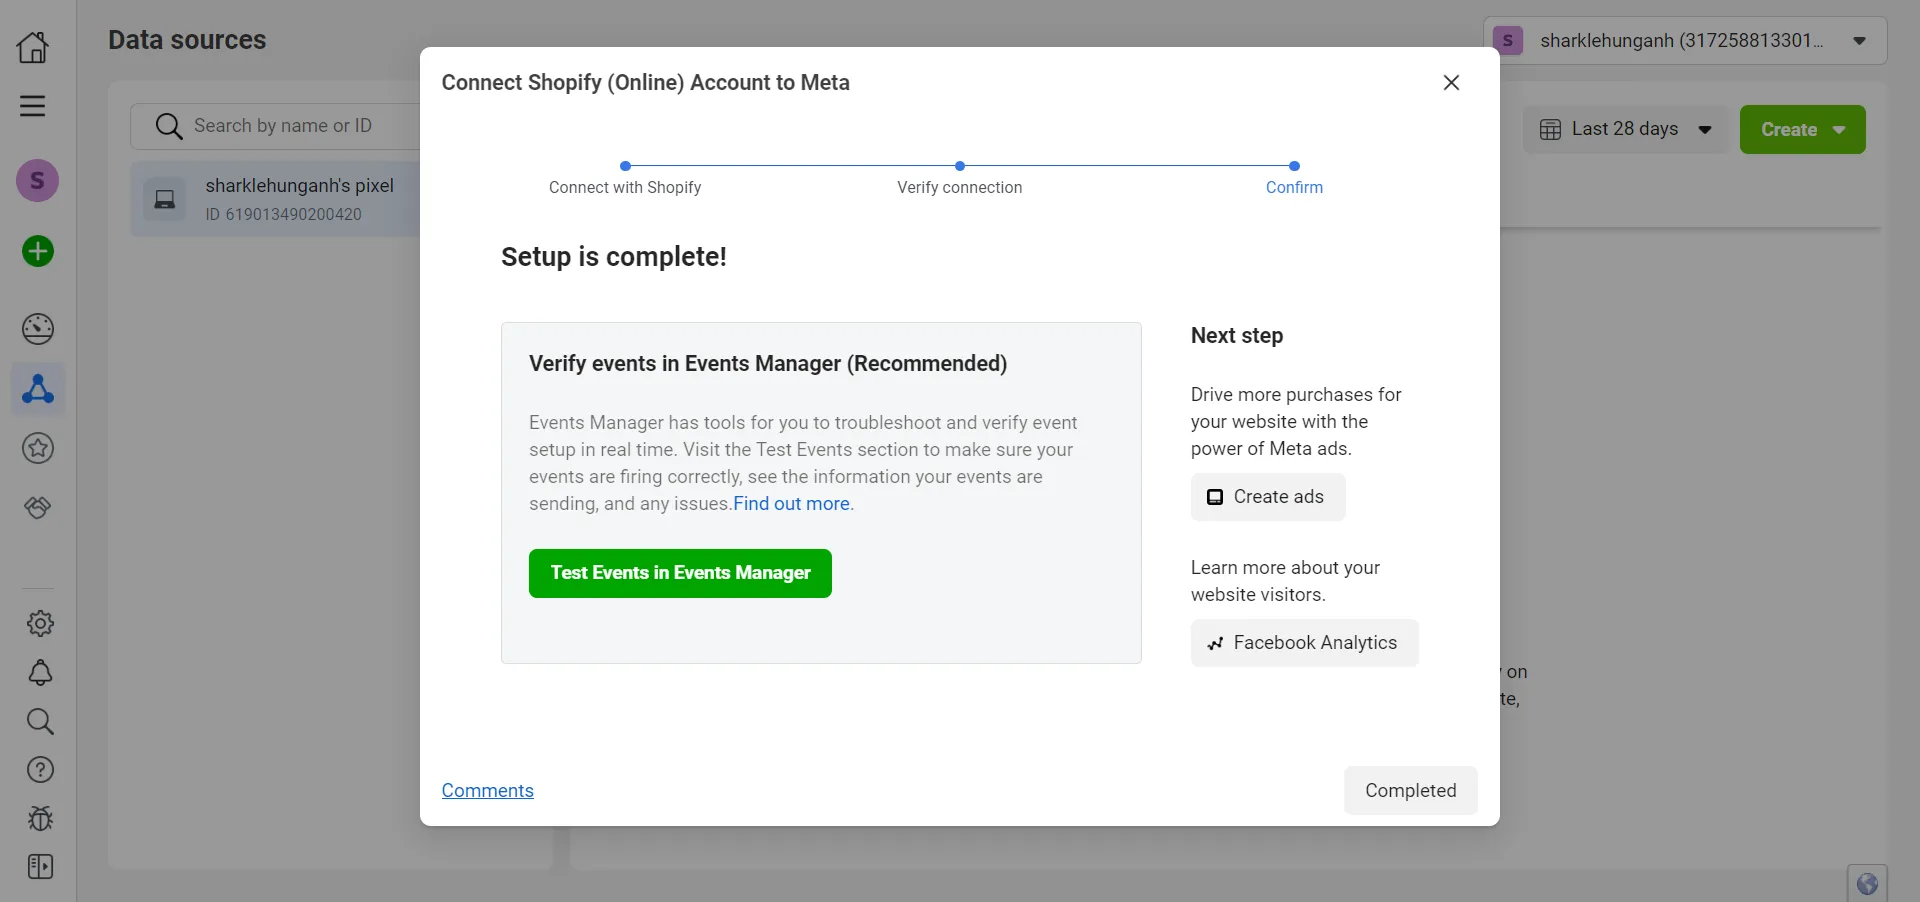
Finally, complete the Shopify Facebook integration.
Now you know how to create a Facebook meta pixel. Let’s discover how to add meta pixel to Shopify online store.
Learn more about Shopify Review – Is Shopify The Crown Jewel of The eCommerce World to understand what Shopify offers?
How to Add Meta Pixel to Shopify Online Store?
Note: Starting July 1, 2023, Facebook & Instagram app will take over control of Meta Pixel management from your Online Store Preferences.
A Meta pixel can be added when setting up Instagram & Facebook Shopping.
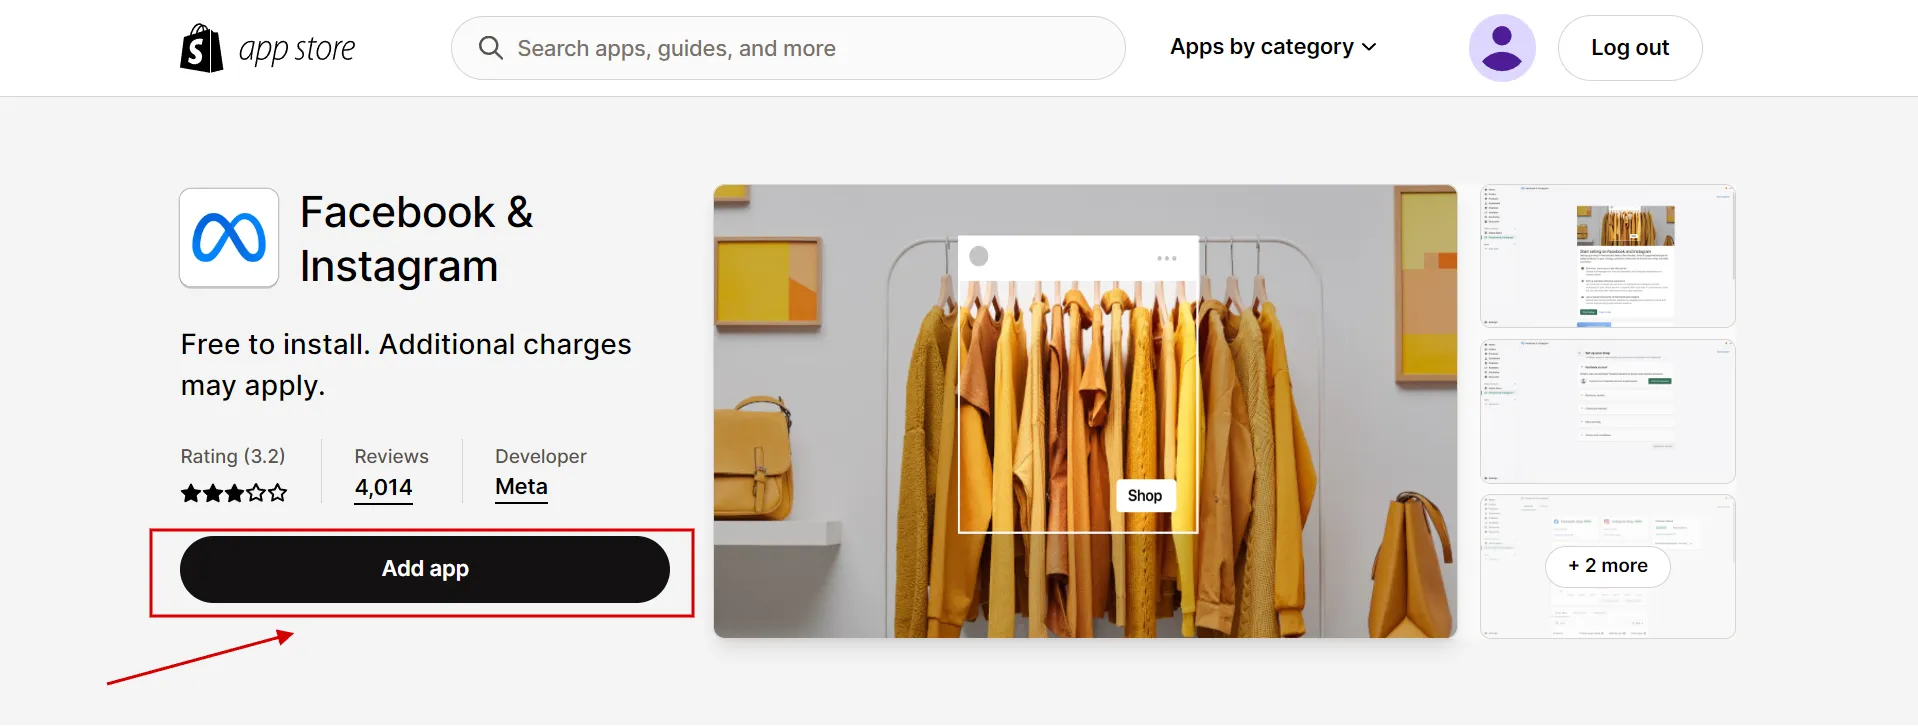
- Step 1: Install Facebook & Instagram sales channels.
Visit the Shopify App Store and search Facebook & Instagram, then click the Add App button.
Then click Add sales channels to install the app in Shopify.
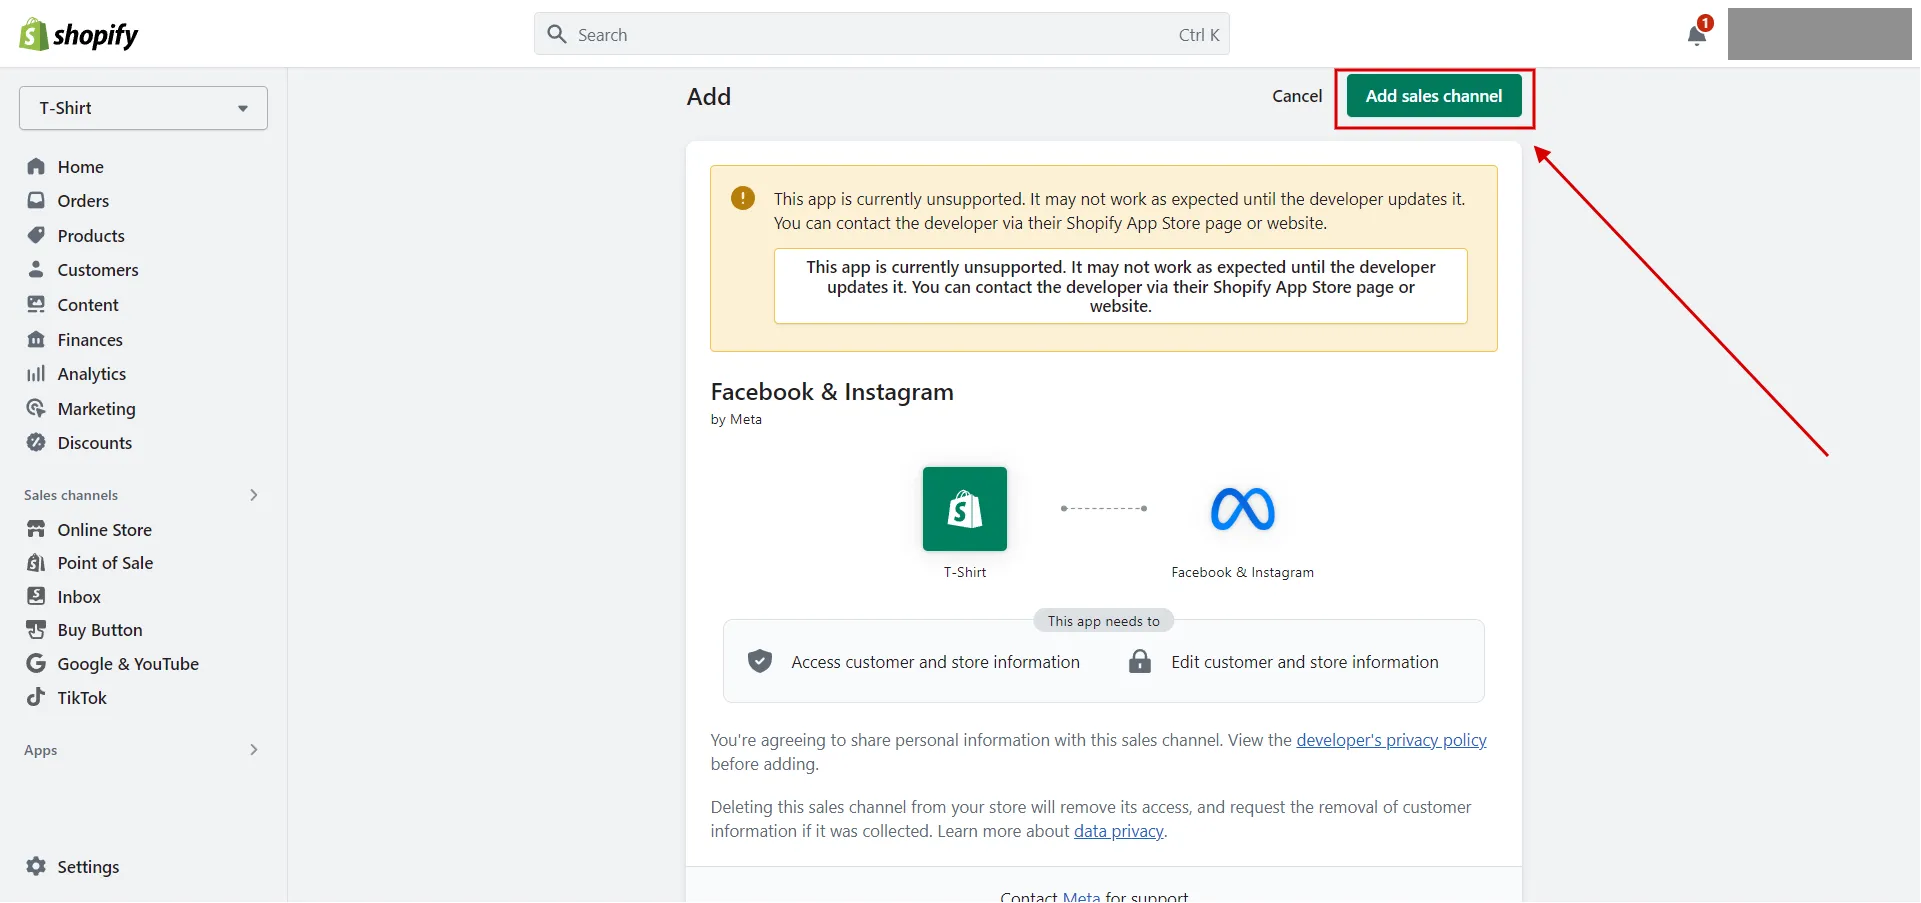
You can see Facebook & Instagram appear in the Sales channels tab.
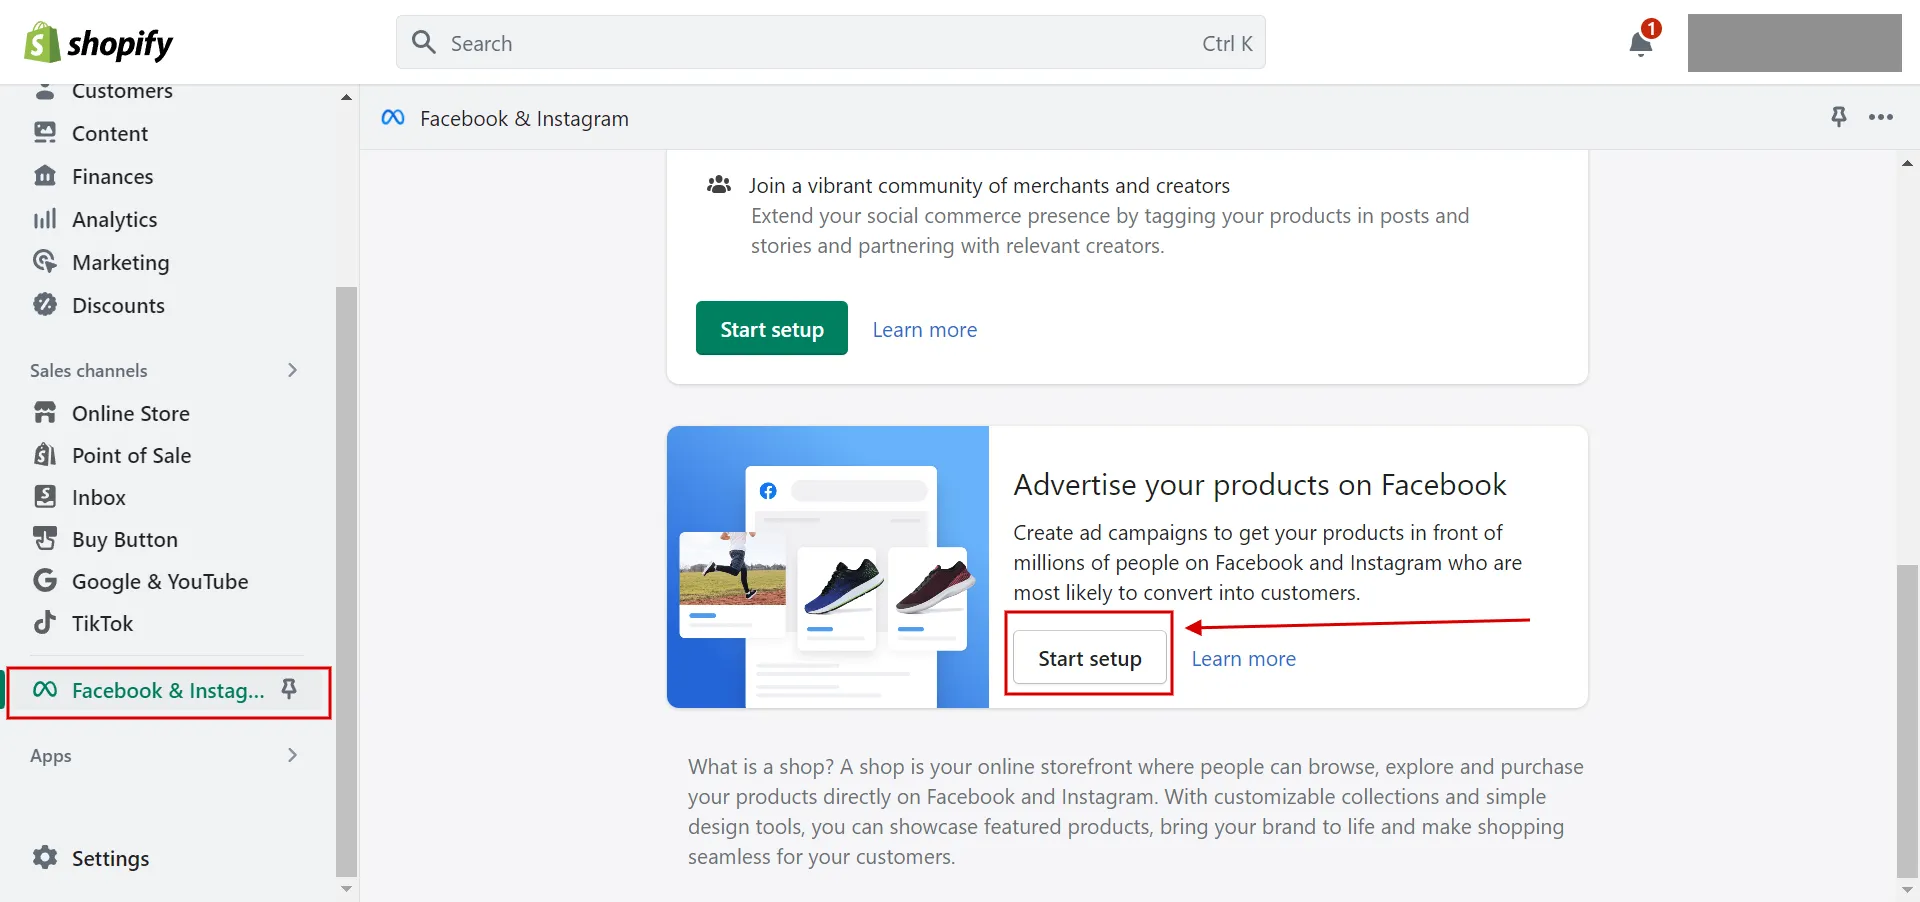
- Step 2: Set up Facebook sales channels.
Next, connect your Facebook and business accounts.
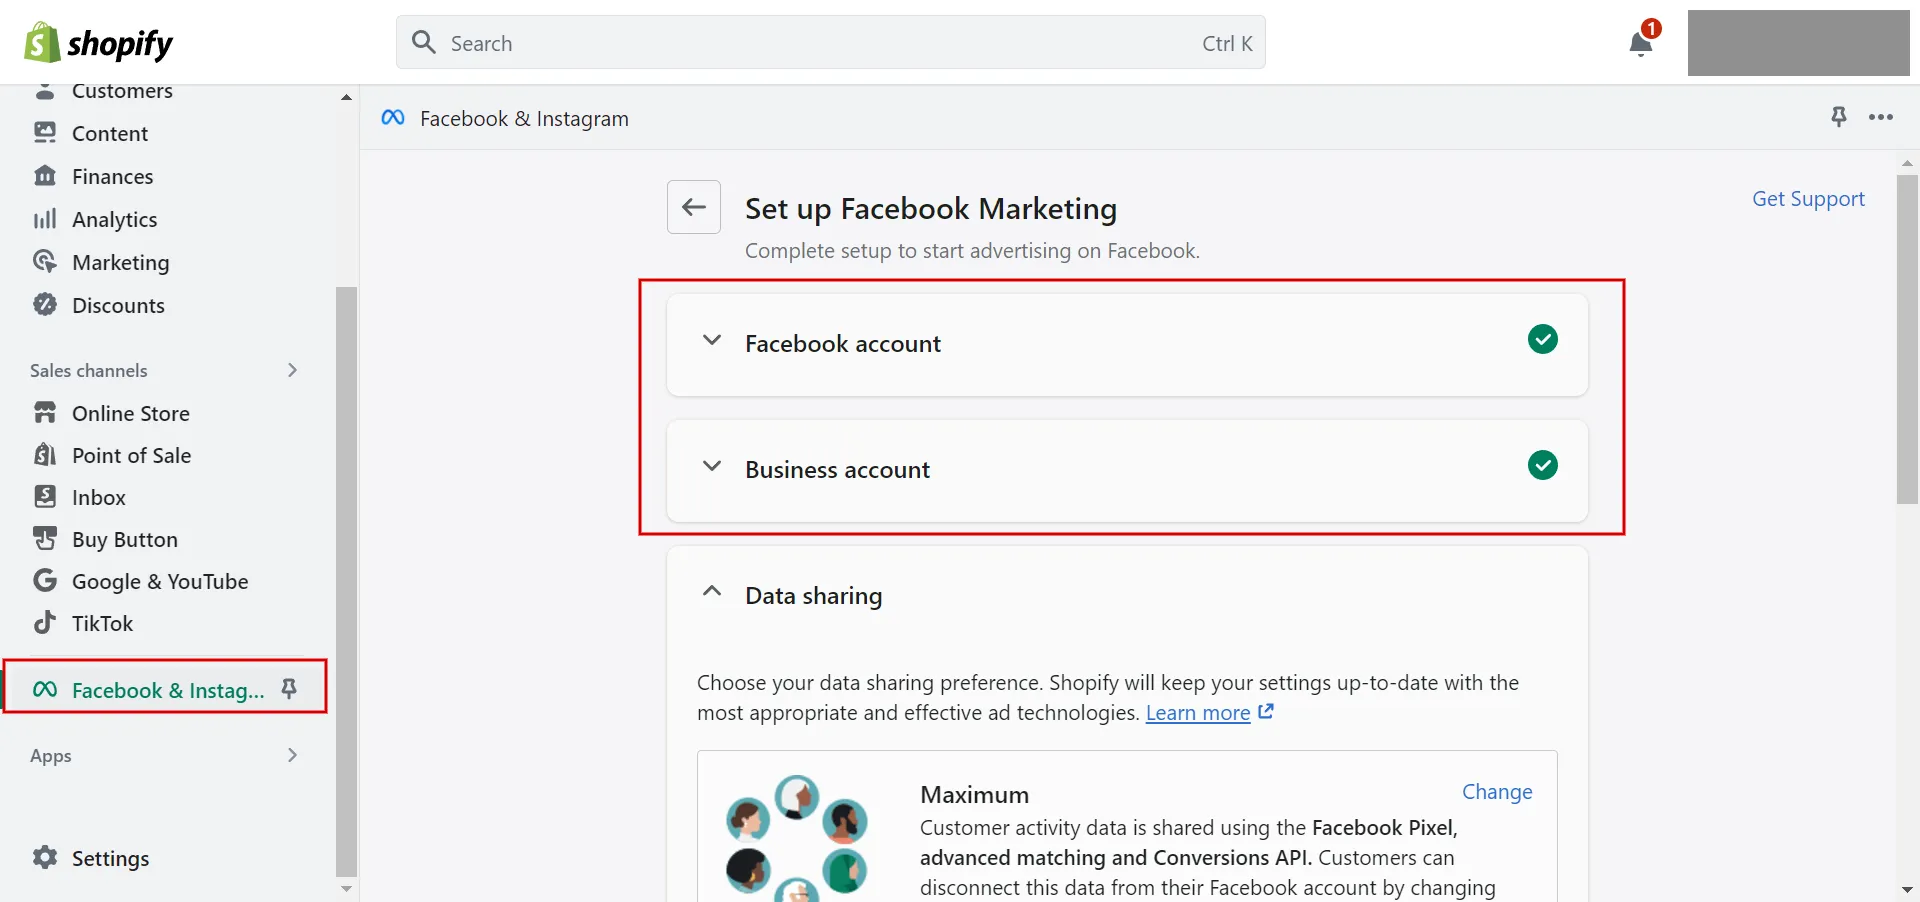
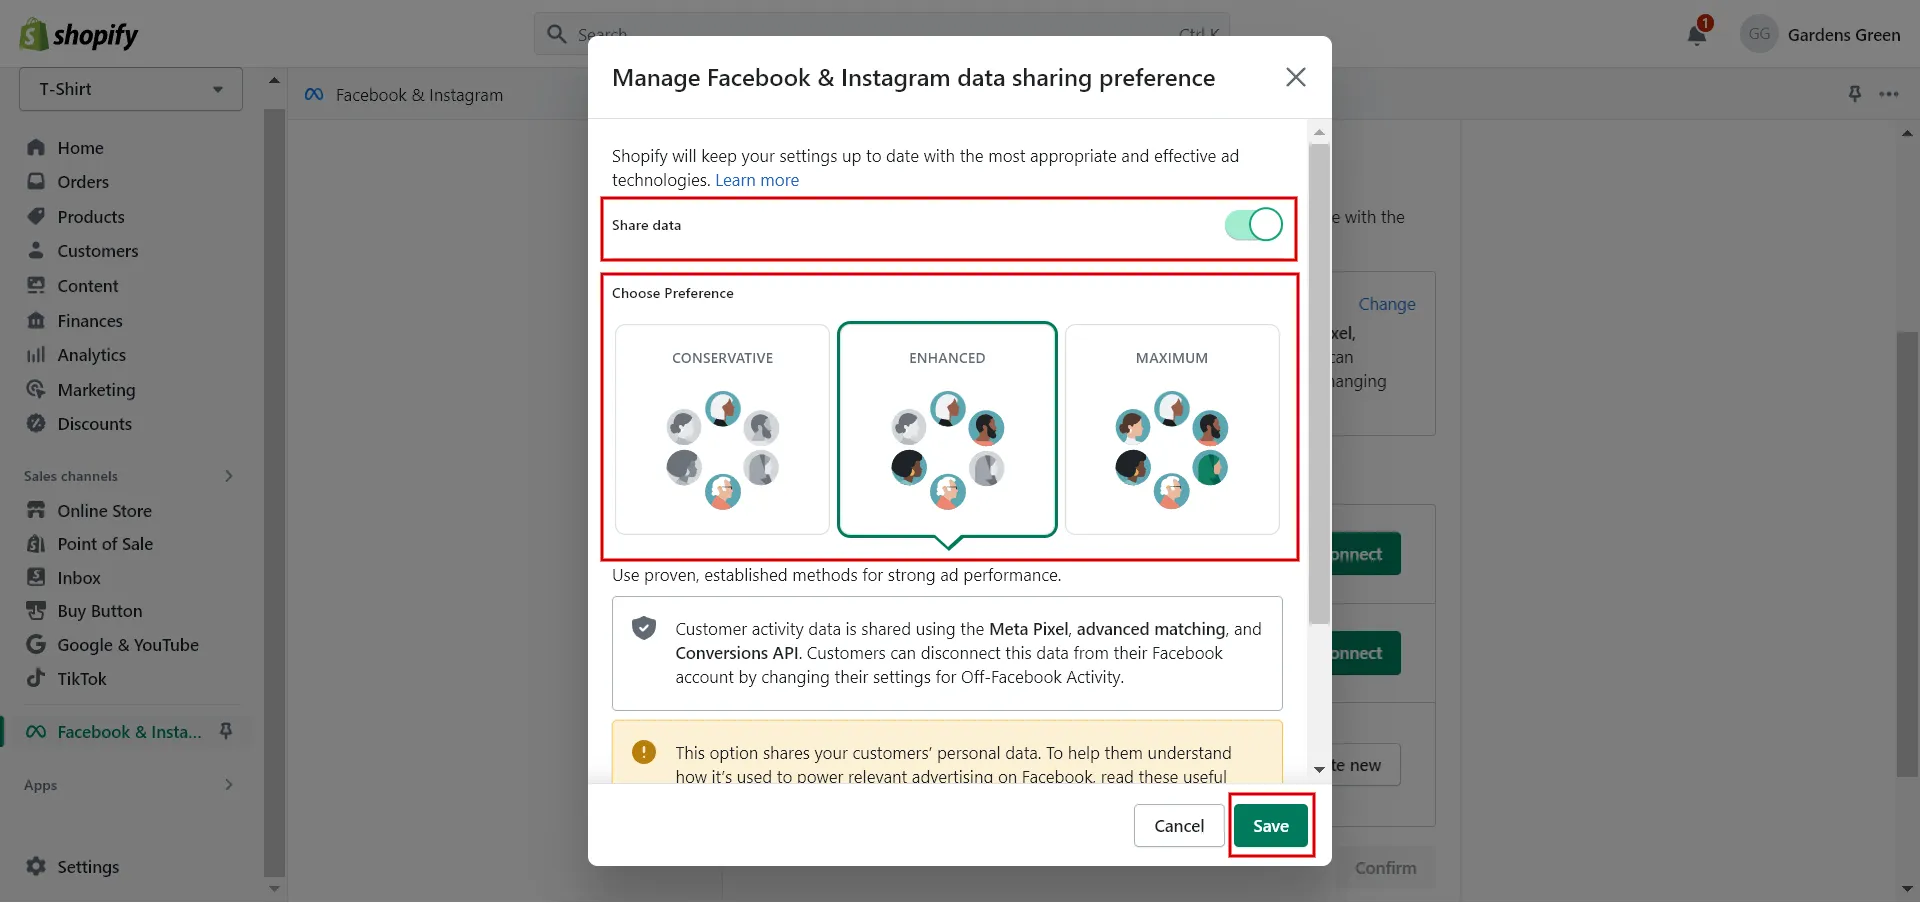
Next, choose Data Sharing Settings.
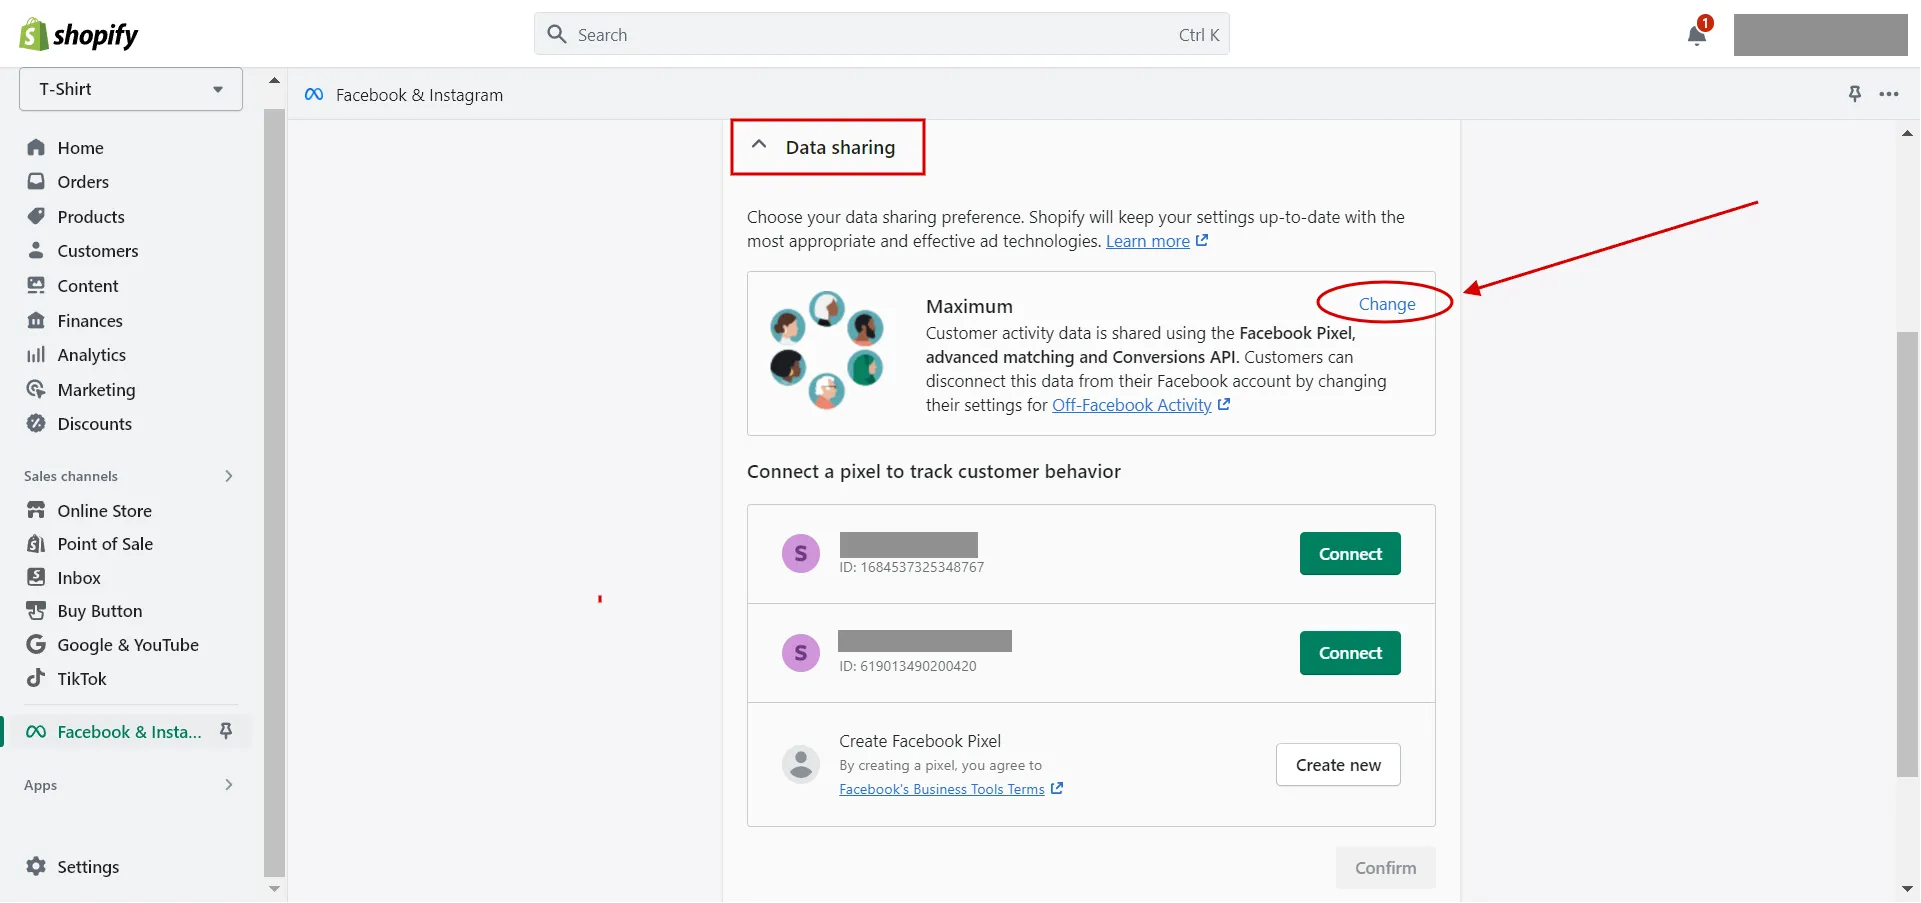
Then, click the Enable share data toggle and choose Preferences: Standard, Enhanced, or Maximum.
- Step 3: Connect a pixel.
Then, select a pixel from the list and click Confirm.
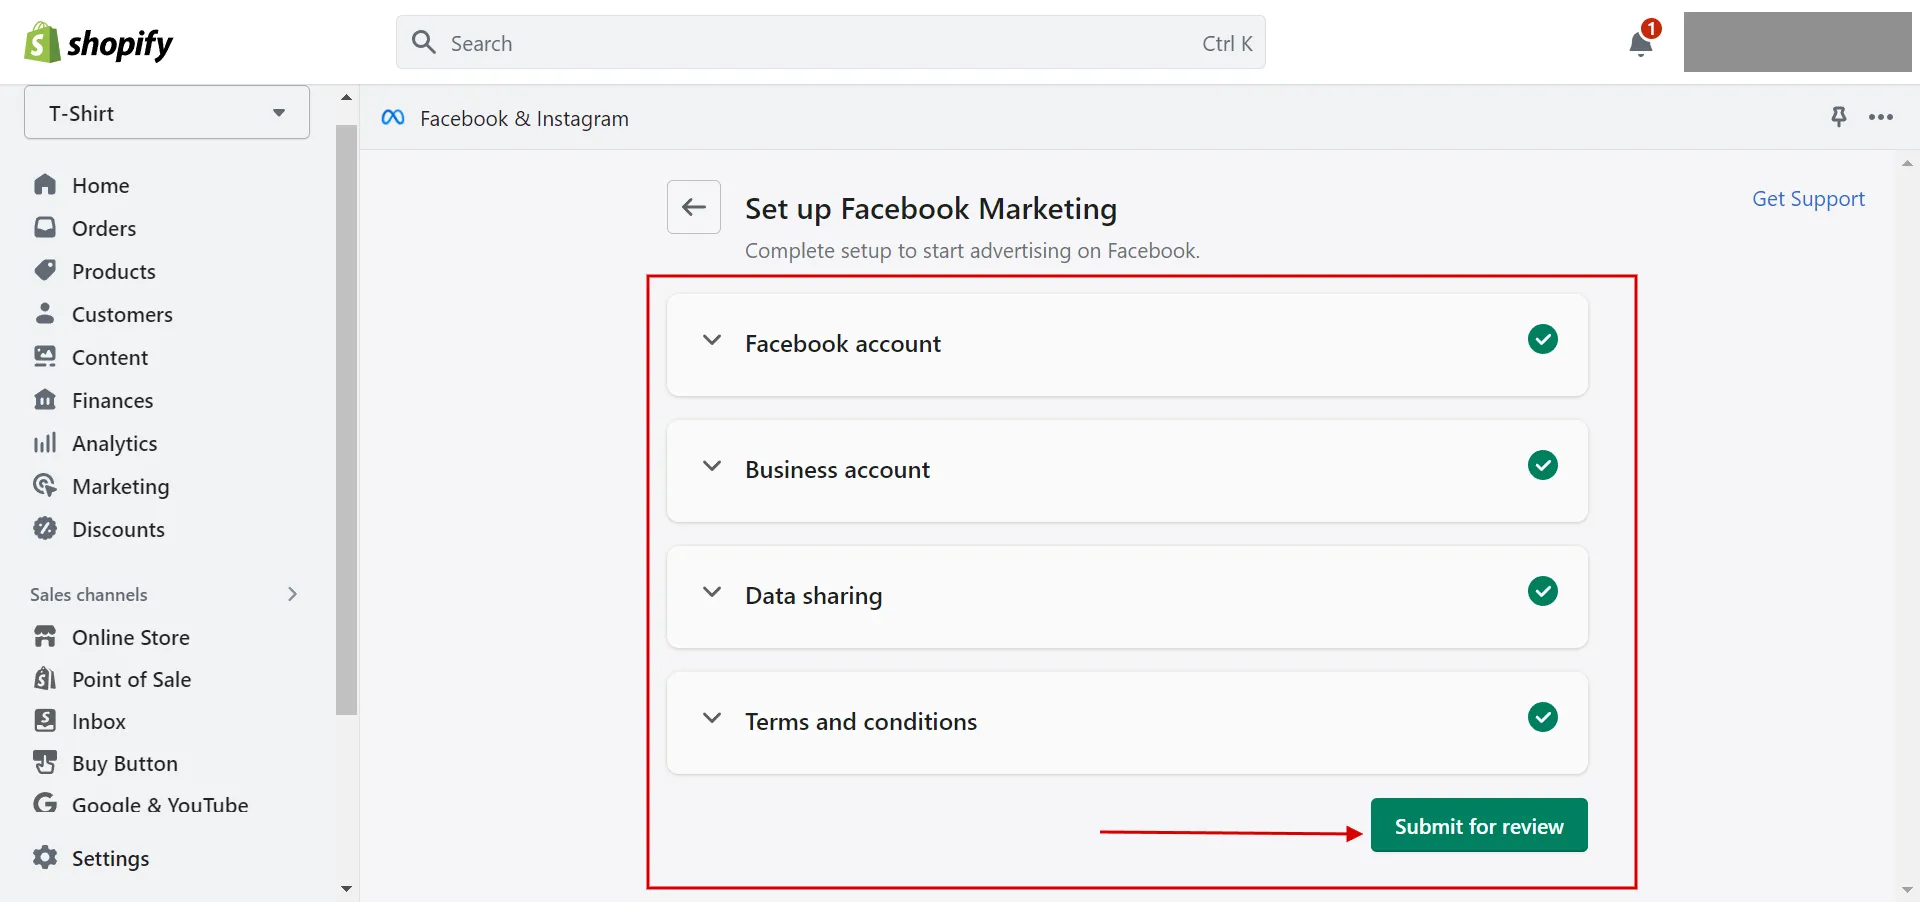
- Step 4: Submit for review.
When you’re finished setting up Facebook Marketing criteria, click Submit for Review.
This is how to add meta pixel to Shopify online store. In the next section, we will show you how to set up Facebook pixel for Shopify.
Learn more about How to Connect Shopify to Facebook – A Beginners’ Guide now!
How to Change Facebook Pixel for Shopify Online Store?
Follow our instructions on how to set up Facebook Pixel on Shopify.
- Step 1: Go to Sales channels
First, under Sales Channels, click Facebook & Instagram.
- Step 2: Click Settings.
Then, navigate to Settings > click Change in the Behavior will be tracked with this pixel tab.
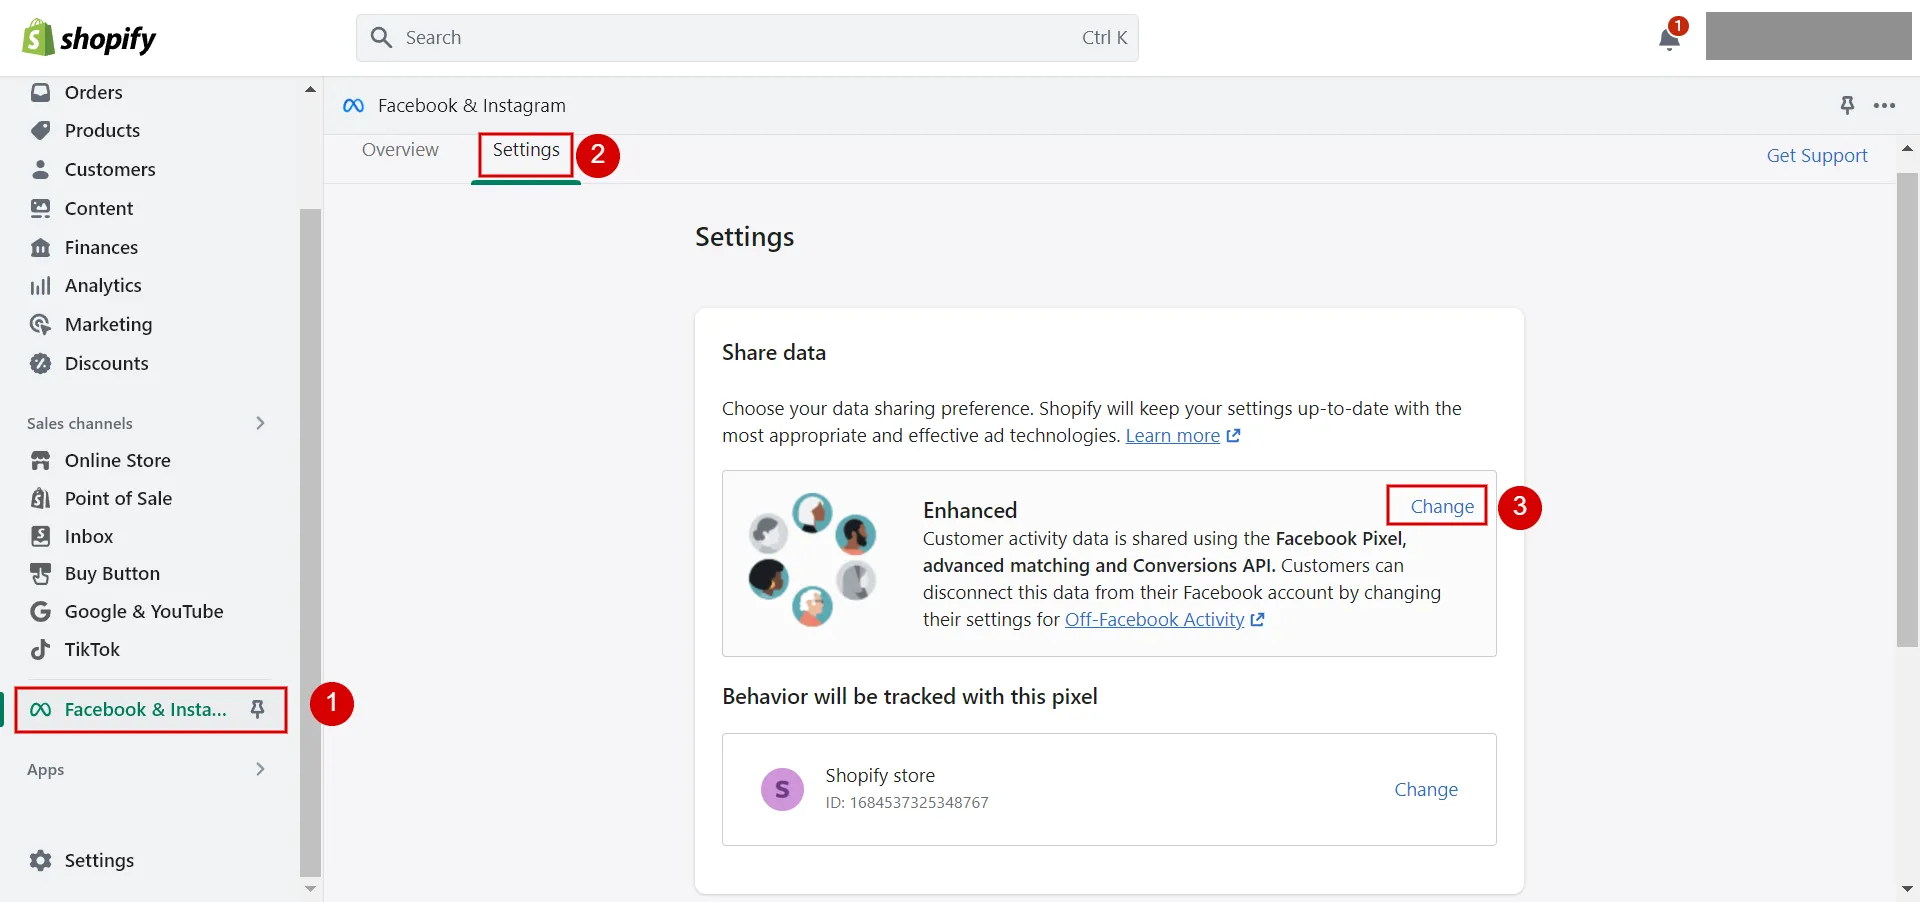
Next, choose to Connect the existing pixel or click Create New to add a new Facebook pixel.
This is how to add Facebook pixel to Shopify manually. In the next part, we will illustrate how to delete a Facebook pixel from Shopify.
Want to migrate to Shopify?
If you are intending to migrate to Shopify, LitExtension offers a great migration service that helps you transfer your data from the current eCommerce platform to a new one accurately and seamlessly with utmost security.
Meta Fixel Shopify – FAQs
[sp_easyaccordion id=”62036″]
Summing Up
Facebook Meta Pixel, a piece of code, monitors user activity on landing pages and e-commerce websites to provide users with more relevant ads in the future. We hope that our article “How to Add Meta Pixel to Shopify | Step-by-Step Guideline 2023” will assist you in adding a Pixel to a Shopify store easily and quickly.
LitExtension, the #1 Shopping Cart Migration Expert will support you in finding the solution for your online store. Read further articles on the LitExtension blog and engage with our eCommerce community for more inspiring concepts.