Adding HTML to your Shopify page can give you ultimate design control, allowing you to create a unique and visually stunning store that stands out from the competition. Here are some steps to help you personalize your Shopify store and provide a unique shopping experience for your customers. After this tutorial, you will know how to add HTML to Shopify page most effectively.
We – the LitExtension team, will guide you through the essential points:
- Everything you need to know about HTML Code
- How to add HTML to Shopify page – Step-by-step guide
- Additional tips and considerations when adding HTML to Shopify page
Let’s get started!
Want to Migrate to Shopify?
If you are intending to migrate to Shopify, LitExtension offers a great migration service that helps you transfer your data from the current eCommerce platform to a new one accurately, painlessly with utmost security.
Introduction to HTML code
Hypertext Markup Language, or HTML for short, is the backbone of every webpage. It includes website structures and content in the form of code strings to create web pages that look more interactive and engaging. In this part, we will explore the basics of HTML code, understand the purpose of HTML tags, and highlight the use of adding HTML to Shopify for better customization.

Definition of HTML Tags
HTML tags serve as the fundamental components of HTML code. They are enclosed in angle brackets (<>) and provide instructions to the web browser to structure and display the content. HTML tags consist of an opening tag and a closing tag. The opening tag is denoted by the angle brackets and the tag’s name, while the closing tag includes a forward slash (/) before the tag name.
An example of using the <a> tag is to indicate a paragraph. And the opening tag would be <a>, while the closing tag would be </a>. Any content between these tags will be displayed as a paragraph on the webpage.
HTML tags have various attributes that can be used to customize their behavior and appearance further. These attributes provide additional information or functionality to the tag and are specified within the opening tag. Details are written as name-value pairs, such as class= “example” or href= “https://example.com”.
Highlighting the use of HTML in customizing Shopify page
While Shopify provides pre-designed themes and templates, customizing the design of a Shopify store can be challenging. This is where HTML comes into play.
By knowing how to add HTML code to Shopify page, you can have ultimate design control and create a unique shopping experience for your customers. Whether you want to change the layout, add custom elements, or style-specific sections, HTML enables you to tailor your Shopify store to your specifications.
You can incorporate headings, paragraphs, images, links, lists, tables, and interactive forms into your Shopify page with HTML. Find out how to add HTML to Shopify page in the next section!

Step-by-Step Guide: How to Add HTML to Shopify Page
Now that you understand what HTML is, are you wondering how to add HTML to Shopify page? In this section, we will guide you with just a few simple steps to add HTML code to shopify and customize it according to your preferences. Let’s dive right into the tutorial!
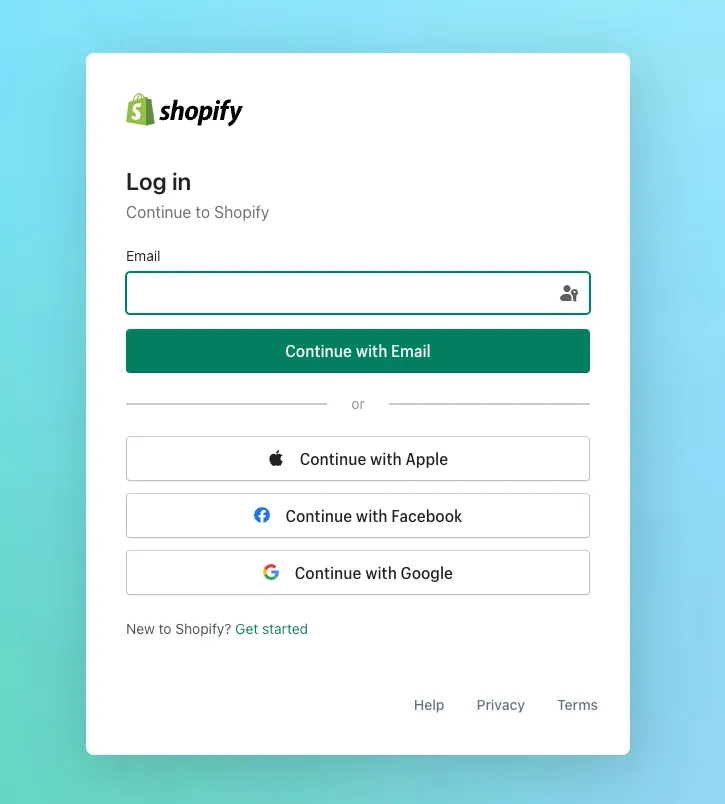
#Step 1: Log in to Shopify online store
Log in to your Shopify account and go to your Shopify online store.
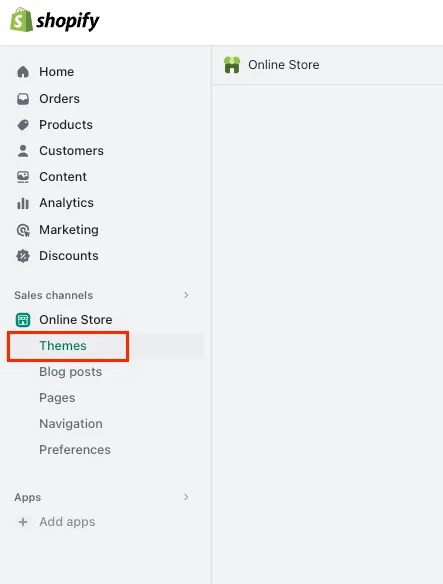
#Step 2: Go to Themes section
From the Shopify admin dashboard, go to the “Online Store” section > Themes.
#Step 3: Insert & Edit HTML code
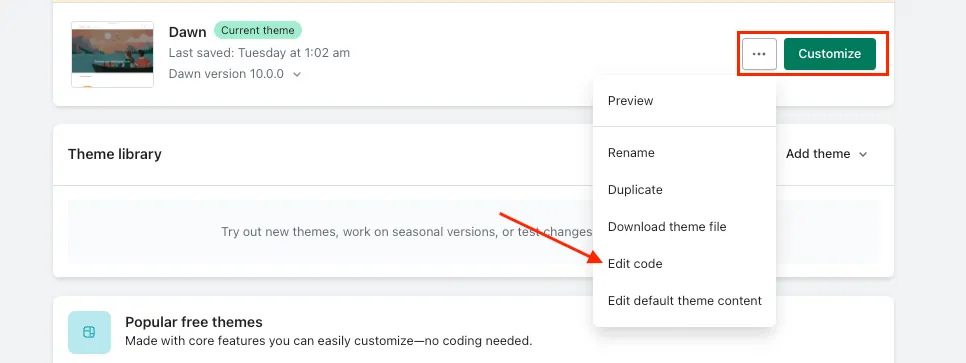
- #1 Find the Theme that you wish to add custom HTML code.
Go to “Actions” and Click “Edit code” to open the theme editor.
- #2 Once you enter the editor page, find the folder name that is relevant to your code.
For example, if you want to add a HTML tag to Shopify, specifically the header of your Homepage, then locate the “theme.liquid” file.
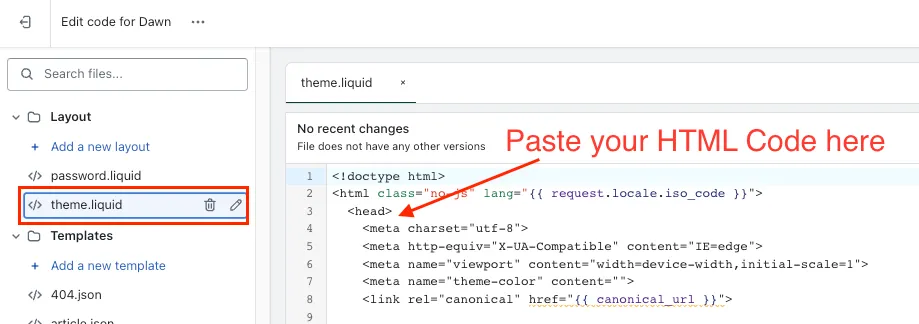
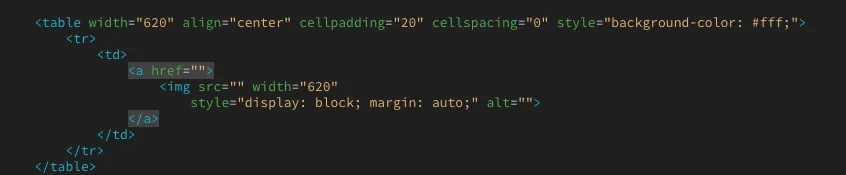
- #3 You can then paste the custom HTML Code right between the tags <head> </head>.
You can also edit any existing HTML code if necessary. Make sure to add the code correctly and double-check for errors or typos.
#Step 4: Preview and save the changes
After successfully adding HTML to Shopify, it’s essential to preview the changes and edit HTML Shopify if needed before making them live on your Shopify store.
- #1 Click the “Preview store” button within the theme editor.

- #2 If satisfied with the previewed changes, click “Save”.
The changes will now be visible to your customers when they visit your Shopify store.
Congratulations! You have learned how to add HTML to Shopify page in four simple steps. Repeat these steps to customize other pages or sections within your Shopify store.
Remember, adding HTML code gives you more control over your Shopify page’s design and functionality. Utilize this feature to craft a distinctive and captivating shopping experience for your clientele.
I hope the following articles will show you how to add HTML to product page Shopify:
- Shopify Products Page – A Complete Guide And Review
- How to Add Discount Code on Shopify
- How to Add Products to a Page on Shopify for Your Ideal Store
HTML Customization Best Practices
You should follow specific guidelines on how to add HTML to Shopify page to ensure that your website not only looks appealing but also operates smoothly. Let’s explore some of the essential best practices for HTML customization, as recommended by Shopify, and discover how to add HTML to Shopify page effectively.
#1. Follow Shopify’s guidelines for HTML usage
Shopify provides a comprehensive set of guidelines and recommendations for using HTML effectively. These guidelines ensure your customizations comply with Shopify’s platform standards and best practices. Following these guidelines will help guarantee that your website remains compatible with any updates or new features released by Shopify.
Here’re some key aspects to consider when following Shopify’s HTML guidelines include:
- Use semantic tags and hierarchize your HTML code to improve readability and maintainability.
- Consider accessibility when designing your website. You should ensure that your HTML code meets accessibility standards so that users with disabilities can easily navigate and interact with your website.
- Instead of inline styles, use external CSS files for styling. This allows for easier maintenance and enhances the overall performance of your website.
#2. Test & validate HTML code
Before deploying your website, it is essential to test and validate your HTML code thoroughly. This ensures that your website functions correctly across different browsers and devices. Check your website’s syntax with W3C Markup Validation Service to fix any issues affecting its functionality or appearance.

To ensure your website works well on all browsers, do cross-browser testing on Chrome, Firefox, Safari, and Internet Explorer. This testing process helps unveil browser-specific issues and allows you to implement appropriate fixes.
#3. Consider responsive design & mobile optimization
It’s imperative to optimize your website for mobile devices. Responsive design ensures an optimal viewing experience for users on smartphones and tablets.
To achieve effective mobile optimization, you can consider the following techniques:
- Using media queries: To improve the appearance of your website on different devices, use CSS media queries to modify the layout and styling depending on the screen size. This ensures that your website appears appropriately across various devices.
- Optimizing image sizes: Large image sizes can significantly impact the loading speed of your website on mobile devices. By optimizing image sizes and using responsive images, you can maintain a fast and engaging user experience.
- Touch-friendly elements: Make sure that buttons, links, and other interactive features are large enough and easily clickable on touchscreens. This enhances usability and navigation on mobile devices.
Utilizing these techniques for optimizing mobile devices can provide a smooth and user-friendly experience for desktop and mobile users.

Knowing how to add HTML to Shopify page is not enough. You should stay up-to-date with the latest advancements in HTML. Continuously assessing and improving your website is necessary to stay ahead of the competition.
Migration Made Easy With LitExtension!
If want to migrate to Shopify without lifting a finger, LitExtension offers a great All-In-One migration service with a dedicated Personal Assistant that helps you transfer your data to Shopify accurately, seamlessly, and securely.
How to Add HTML to Shopify Page – FAQs
[sp_easyaccordion id=”62639″]
Conclusion
In conclusion, this proven guide on “how to add HTML to Shopify page” provides valuable insights and step-by-step instructions for effectively customizing your website using HTML. By leveraging the power of HTML customization, you can enhance your Shopify page’s SEO potential and create an exceptional digital experience for your audience.
To get more helpful advice for your online stores, visit our LitExtension blog and sign up for our eCommerce community. If you’re considering switching to Shopify, LitExtension – the #1 Shopping Cart Migration Expert, is ready to assist you with the fastest and most affordable solution!