As you probably already know, the checkout page means a lot to every WooCommerce store owner. Every online store website requires customizing extra fields to meet specific customer needs. Today, let’s delve into our comprehensive guide on how to add extra field in WooCommerce checkout form.
We – the LitExtension team, will guide you through the essential points:
- Quick overview of WooCommerce checkout form
- Guide on how to add extra field in WooCommerce checkout form using plugins
- Step-by-step guide: How to add extra field in WooCommerce checkout form manually
- Review 5 best WooCommerce custom field plugins
Let’s begin with the tutorial!
Quick Overview of WooCommerce Checkout Form
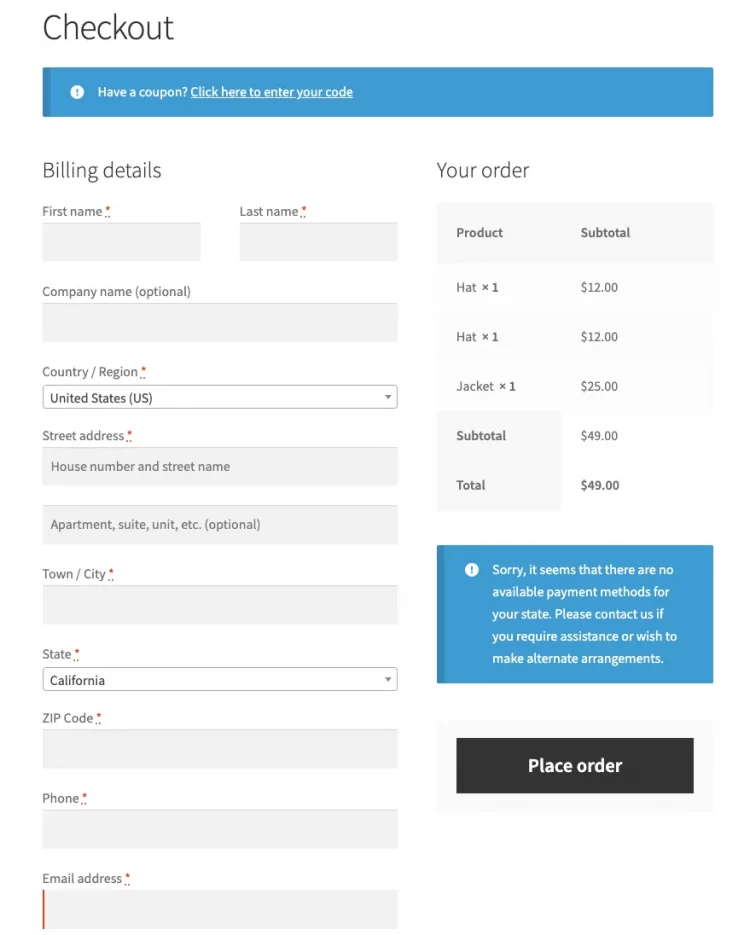
The checkout page is a fundamental component of any online store. It acts as a bridge between the shopping cart and the final payment gateway, facilitating seamless and secure transactions for customers.
At its core, the WooCommerce checkout form is a user-friendly and interactive interface that prompts customers to enter their shipping address, billing details, payment method, and any other relevant information required to fulfill the order.
First of all, let’s explore what is in a basic WooCommerce checkout form and how important is a WooCommerce extra field checkout!
What are the default fields in the WooCommerce checkout form?
In the default setup, the WooCommerce checkout form collects essential information from customers to process their orders smoothly and efficiently. The mandatory information includes:
- First name: The customer’s given name or personal identifier.
- Last name: The customer’s family name or surname.
- Company name: Optional field for business customers or organizations.
- Country: The customer’s country of residence or shipping destination.
- Address line 1: The primary address, such as house or building number and street name.
- Address line 2: Additional address information, if needed.
- Town/City: The city or town where the customer is located.
- Province/County/District: The regional or administrative division of the country.
- Postcode/ZIP: The postal code or ZIP code for accurate delivery.
- Phone: Contact number for communication or delivery purposes.
- Email address: The customer’s email for order updates and receipts.
- Order notes: Optional field for customers to leave special instructions or notes related to their order.
Although WooCommerce’s default checkout form is enough, knowing how to add extra field in WooCommerce checkout form helps store owners easily customize their checkout page based on their specific business requirements.
Why add extra fields to WooCommerce checkout?
Let’s find out three main reasons why you need to add custom fields to WooCommerce checkout!
- Personalized shopping experience: Custom fields allow you to tailor the checkout process to individual customer preferences, enhancing satisfaction and loyalty.
- Valuable customer insights: Gathering additional data provides valuable information about customer behavior and demographics, enabling you to improve marketing strategies.
- Streamlined order fulfillment: Special instructions and delivery details collected through custom fields ensure smooth and accurate order processing.
According to a cart abandonment report, 17% of shoppers are deterred by a complex checkout process. Customers will appreciate it if they don’t have to read and fill out too many things. So if you want to add WooCommerce extra field, consider the total number of required checkout fields should be from 7-8.
Let’s find out how to add extra field to WooCommerce checkout page in the next section!
Here are some helpful articles to help increase sales for your WooCommerce store:
How to Add Extra Field in WooCommerce Checkout Form Using a Plug-In?
Usually, there are two ways you can add extra fields to Woocommerce checkout, using a checkout field editor plugin or manually adding custom code to the checkout page.
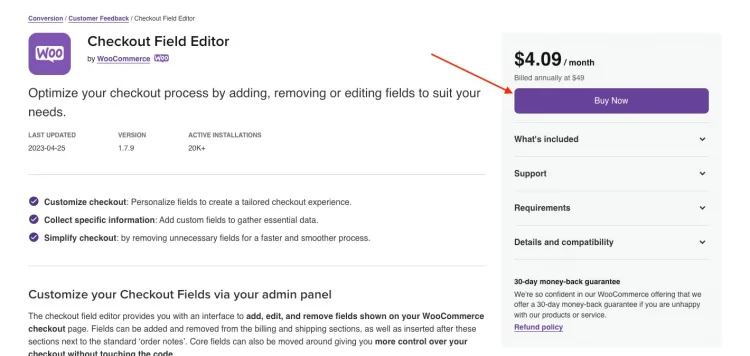
Are you wondering how to add extra field in WooCommerce checkout form with a plugin? We will show you the simplest way to do that – using the Checkout Field Editor Plugin by WooCommerce itself.
Stay until the end to discover more top plugins! Now let’s jump right in!
Step 1: Install and activate plugin
#1 Go to this Checkout Field Editor on WooCommerce Extension Store and register for the Checkout Field Editor plugin package of WooCommerce.
#2 Download the zip file to your computer.
#3 Then go to WordPress Admin Dashboard > Plugins > Add New and upload the downloaded Plugin file.
#4 Click Install Now and you have successfully activated the plugin to use on your WooCommerce store.
Step 2: Go to WooCommerce checkout fields section
After having the Checkout Field Editor plugin added, from your WordPress Admin Dashboard, go to WooCommerce > Checkout field.
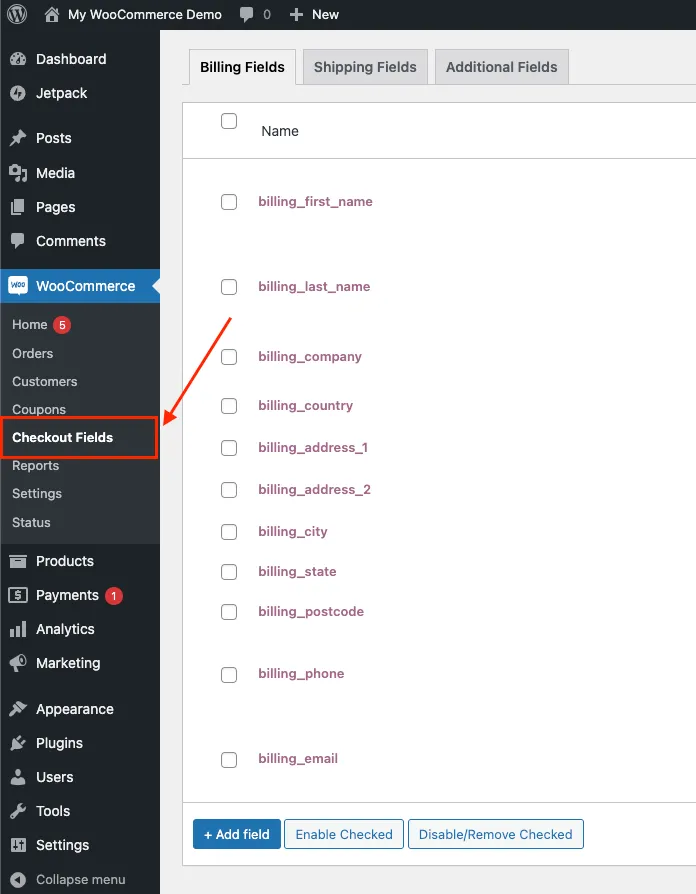
Here, you will find all the main fields related to the checkout process, which are highlighted in purple color.
Step 3: Choose the additional set of fields
Now, you’ll see three sets of fields you can edit: Billing, Shipping, and Additional.
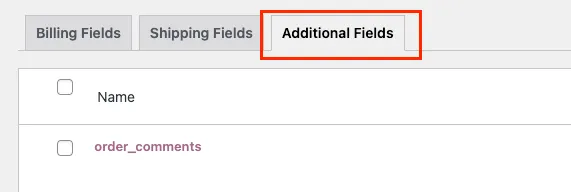
Select “Additional fields” to add custom fields to WooCommerce checkout. These extra fields will appear after the billing and shipping sections, next to the order notes.
Step 4: Add a new field
Click “Add Field” and a blank row will be added for you to customize a new custom field.

Step 5: Fill in the texts and preferences
In the new field settings, you’ll need to provide the following information:
- Name: Enter a unique name for the field (used as the meta key to save information).
- Type: Choose the field type from the supported options, such as text, password, textarea, select, multi-select, radio, checkbox, or date picker.
- Label: Add a label for the input that will be shown in the checkout.
- Placeholder / Option Values: For select boxes or radios, enter the options separated by a pipe (|). You can also set default choices or force users to select a valid option using the pipe.
- Position: Choose between left, right, or full width for CSS styling.
- Validation Rules: Select any validation rules you want to apply to this extra field, such as filling in the valid email address, using the exact number format, or users must fill in the required field.
Follow the steps number from 1 to 8 in the screenshot down below!
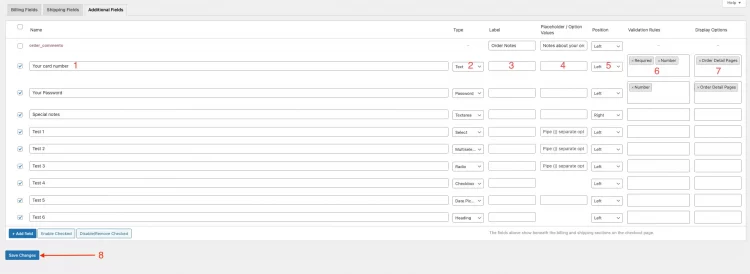
Step 6: Save the changes
You can also select the fields and click the “enable/disable checked” button to enable the field again or remove the fields that you don’t want to appear on the checkout page.
After checking everything is fine, click “Save Changes” to save your settings.
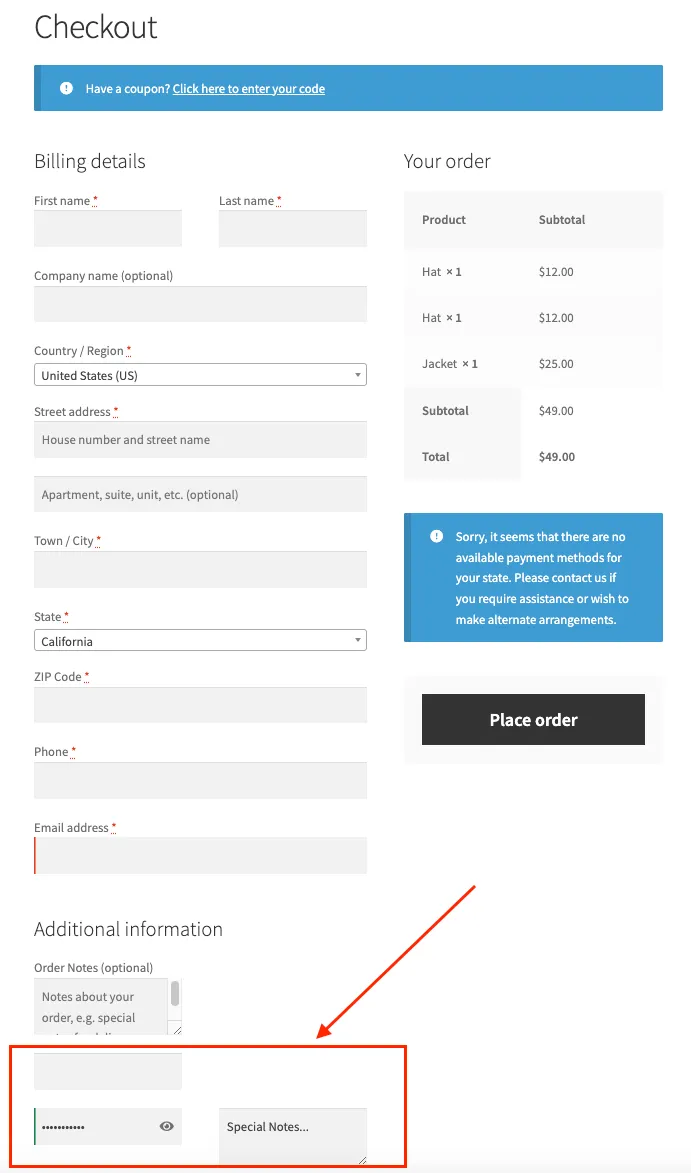
And that’s how to add extra field in WooCommerce checkout form using the “Checkout Field Editor” Plugin in six simple steps. Let’s take a look at the preview of the checkout page after adding extra fields:
How to Add Extra Field in WooCommerce Checkout Form Manually
If you already know to code, then this is the simple method for you. In this step-by-step guide, we will walk you through the process of how to add extra field in WooCommerce checkout form using the coding method. Let’s follow the steps below!
Step 1: Add custom field code to your theme file
To begin, copy the provided code and paste it into your theme’s functions.php file.
| <?php
add_action( ‘woocommerce_after_order_notes’, ‘my_custom_checkout_field’ ); function my_custom_checkout_field( $checkout ) { echo ‘<div id=”my_custom_checkout_field”><h2>’ . __(‘My Field’) . ‘</h2>’; woocommerce_form_field( ‘my_field_name’, array( ‘type’ => ‘text’, ‘class’ => array(‘my-field-class form-row-wide’), ‘label’ => __(‘Fill in this field’), ‘placeholder’ => __(‘Enter something’), ), $checkout->get_value( ‘my_field_name’ )); echo ‘</div>’; } |
Now as you scroll through your checkout page, you’ll see the custom checkout field located at the bottom of the checkout page.
Step 2: Add validation code
Next step, you need to validate the custom field data. Please utilize the following code:
| <?php
add_action( ‘woocommerce_after_order_notes’, ‘my_custom_checkout_field’ ); function my_custom_checkout_field( $checkout ) { /** * Process the checkout */ add_action(‘woocommerce_checkout_process’, ‘my_custom_checkout_field_process’); function my_custom_checkout_field_process() { // Check if set, if its not set add an error. if ( ! $_POST[‘my_field_name’] ) wc_add_notice( __( ‘Please enter something into this new shiny field.’ ), ‘error’ ); } |
Awesome! We’ve successfully added a new field to the checkout page and implemented the validation check.
Step 3: Add confirmation data code
Now, let’s verify whether the customer’s details entered in the custom field are being saved or not. You can achieve this using the following code:
| <?php
/** * Update the order meta with field value */ add_action( ‘woocommerce_checkout_update_order_meta’, ‘my_custom_checkout_field_update_order_meta’ ); function my_custom_checkout_field_update_order_meta( $order_id ) { if ( ! empty( $_POST[‘my_field_name’] ) ) { update_post_meta( $order_id, ‘My Field’, sanitize_text_field( $_POST[‘my_field_name’] ) ); } } |
And that’s three code samples, so you can add custom extra fields to your WooCommerce checkout form yourself without any external plugin support. Good luck with your coding!
With our detailed guide, you’ll master how to add extra field in WooCommerce checkout form in no time.
Review 5 WooCommerce Custom Fields Plugins
So now you know how to add extra field in WooCommerce checkout form in both different ways. As promised, at the end of this article, we will suggest the five best and most commonly used WooCommerce checkout field customizer plugins:
#1. Checkout Field Editor (Checkout Manager) for WooCommerce by ThemeHigh
#2. Checkout Field Manager (Checkout Manager) for WooCommerce by QuadLayers
#3. Flexible Checkout Fields for WooCommerce – WooCommerce Checkout Manager by WP Desk
#4. Checkout Field Editor for WooCommerce – Checkout Manager by Acowebs
#5. WooCommerce One Page Checkout by WooCommerce
With these plugins, you can also add, edit, delete, and rearrange existing checkout fields. Additionally, the developer offers a premium version with enhanced flexibility for customizing the checkout process.
Here comes an informative article that may help you choose the right plugins:
FAQs on How to Add Extra Field in WooCommerce Checkout Form
[sp_easyaccordion id=”63239″]
Wrapping-Up
In conclusion, customizing your WooCommerce store is a breeze when you know how to add extra field in WooCommerce checkout form. So, take advantage of this step-by-step guide to create a checkout experience that aligns perfectly with your business objectives. It’s time to embrace the opportunity to make your online store stand out and watch as your conversions and customer satisfaction soar!
Don’t miss out on valuable tips for optimizing your online stores – check out our LitExtension blog and join our vibrant eCommerce community.