ix lightbox lets you showcase videos, short notifications, images, and other content to your visitors visually. If you want to apply all these to your site, don’t miss an opportunity to learn how to add a lightbox in Wix with us!
In this blog, we’ll guide you on using the Wix lightbox form with the 4 simple steps without considering any coding skills. Keep reading to uncover:
- What is a lightbox in Wix
- How to add lightbox in Wix
- Essential tips and tricks when adding a lightbox in Wix
Are you ready to get started with us? Let’s dive into how to add a lightbox in Wix below.
Understand Lightbox In Wix
To use Wix lightbox URL on your site, you need to get everything about Wix lightboxes in detail. This helps you to master your lightbox’s design, timing, and copy. Here’s some essential knowledge about a Wix lightbox to consider.
What is a lightbox?
A lightbox is a Wix window overlay, firstly preventing your visitors from approaching your site’s content. It means that when a lightbox popup appears, the background can be dimmed, making all site objects not valid to interact. You can see these lightboxes anywhere on your site: in Wix headers, bottom or sides of pages, strips, and even in the center of your site.
You can use a lightbox in Wix to obtain visitors’ email addresses for marketing promotions for your brand on-site. This allows you to encourage your visitors to subscribe to your site and get product updates as soon as possible.
Common lightbox examples in Wix
Wix provides you with a range of lightbox styles to promote on your site. Here are some spot-on lightbox examples you can consider when adding a Wix lightbox URL.
- Promotion lightbox
In your online store, you can use a promotion lightbox to treat your customers with a special discount. Remember to keep its design clear, visual, and matching your brand image. You can add some objects or images to grab strong attention from your visitors.

- Contact

You can use a contact lightbox to confirm your professionalism in your business field. Let’s design a special pop-up letting your visitors contact experienced supporters for useful tips. This can help the visitors get proper solutions to tackle their problems effectively.
- Subscribe

A subscribe lightbox allows you to collect information from your followers, such as phone numbers, names, and emails. Thus, whenever you promote any new plan or campaign, you can easily announce them with all essential messages.
- Welcome

You can use a welcome lightbox popup to give a friendly greeting to your audiences, especially first-time visitors. Once your site gets an impressive welcome lightbox, the visitors’ return rate can be improved significantly. Therefore, keep welcome lightboxes clear and personalized all the time to make your brand outstanding.
That’s all essential information about Wix lightboxes to consider before adding any lightbox popup on the site.
How To Add A Lightbox In Wix In 4 Steps
Are you confused about adding a lightbox in Wix? Don’t worry. You are not alone. We’re here to guide you on how to add a lightbox in Wix, along with some useful tips to attain it effectively.
Step 1 – Select a lightbox template to add your site
In your Wix Dashboard, click the Edit Site to open your site in your Wix Editor.
Then, click the Add Elements button on the left bar to open the Add Elements tab.
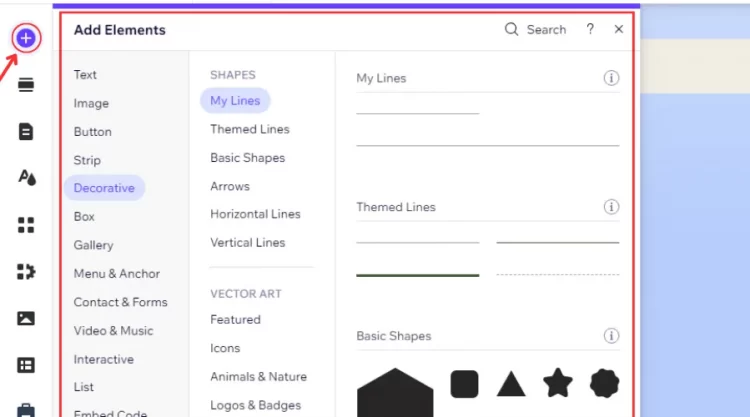
Next, click the Interactive, then hover over the Lightboxes box.
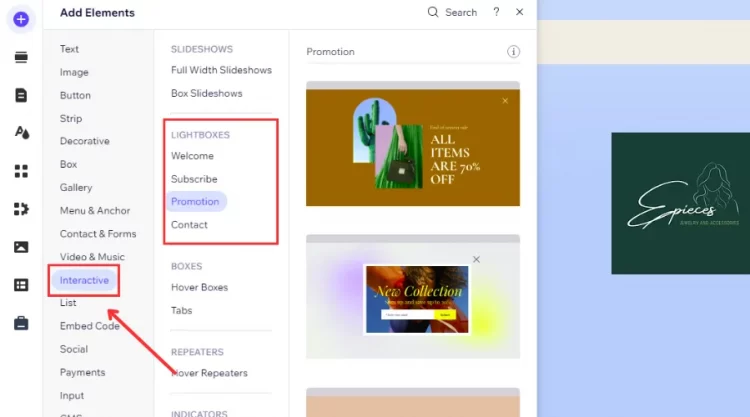
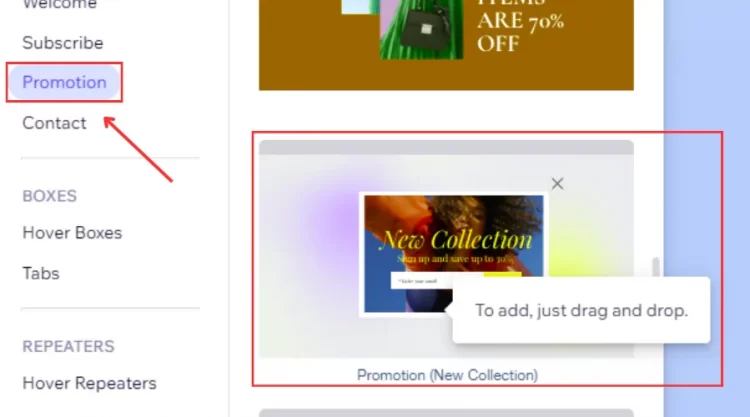
After that, click a lightbox category (ex. Promotion), then select the proper design to finish this step.
Step 2 – Customize your lightbox with elements
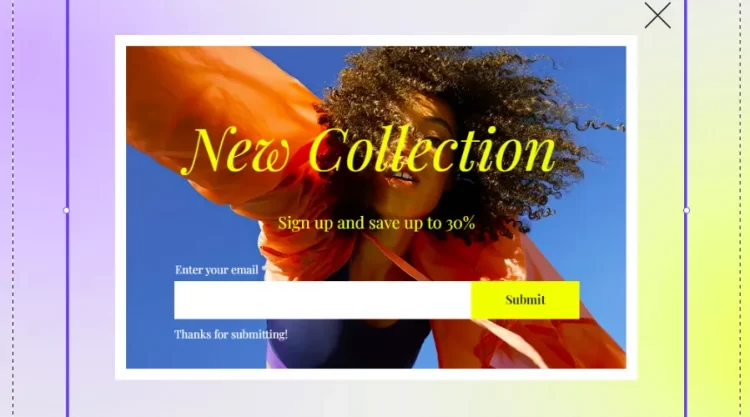
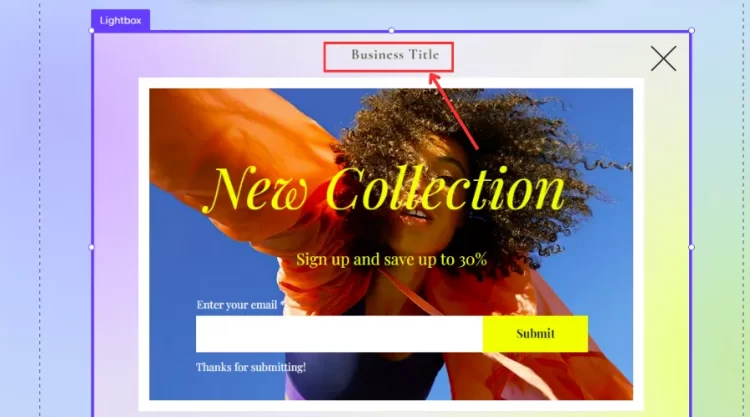
After ending the first step, a lightbox will be on your site.
To customize your lightbox with elements, click the Add Elements button to reach various element options.
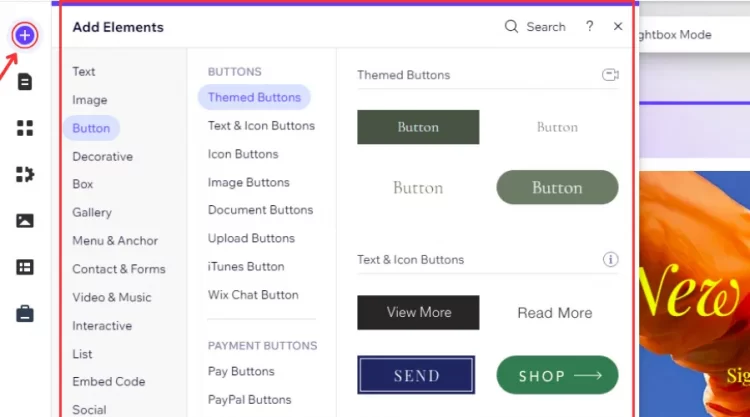
Then, click the element type (ex., Text or Button) to open each element’s categories.
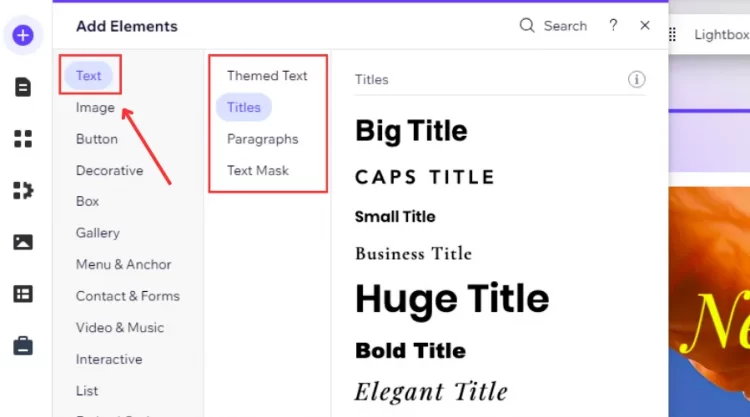
Next, click the targeted element and drop it on your lightbox to finish this step.
Step 3 – Set your lightbox trigger on your site
Firstly, click the lightbox on your site to open various relevant options.
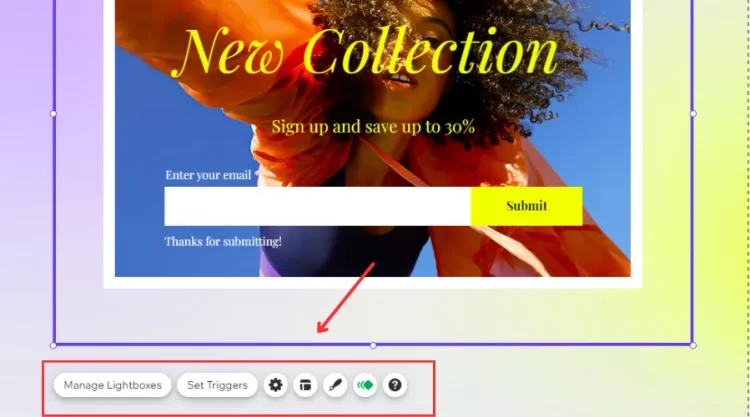
Then, click the Set Triggers to open the Lightbox Settings tab.
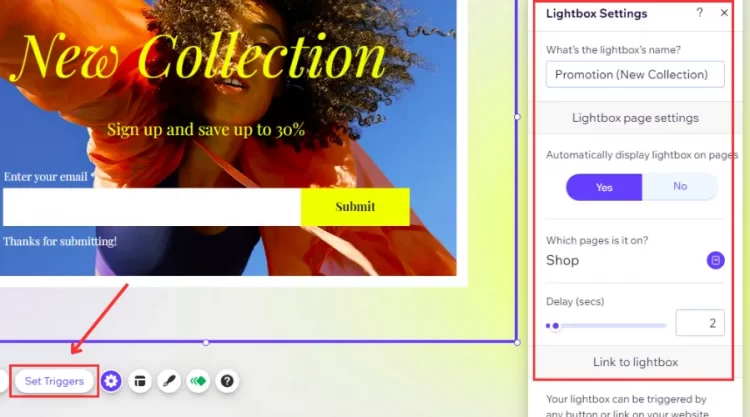
Finally, you have 2 options to display your lightbox to the visitors. Including:
- Option #1: If you want to display your lightbox when loading site pages, click the Yes button. Then, click the Which pages is it on? and Delay (secs) to modify relevant information.

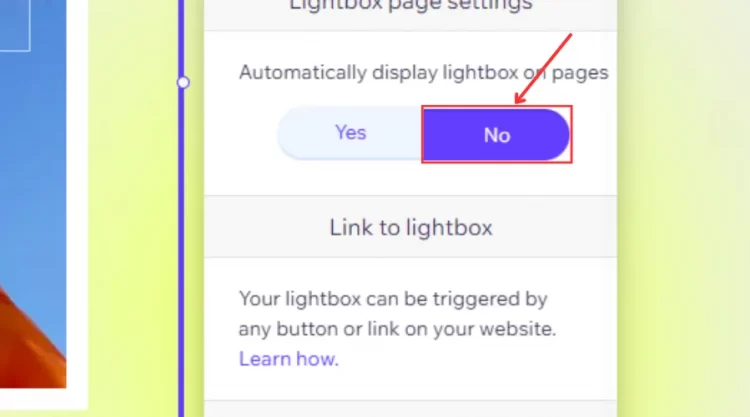
- Option #2: If you don’t want to display your lightbox on Wix pages, click the No button to finish.
Step 4 – Select how to close your lightbox to visitors
In the final step, you have 2 methods to set up how to close the lightbox to visitors. Including:
#1. Use Lightbox Settings
In the Lightbox Settings, move to the “How does lightbox close?” box.
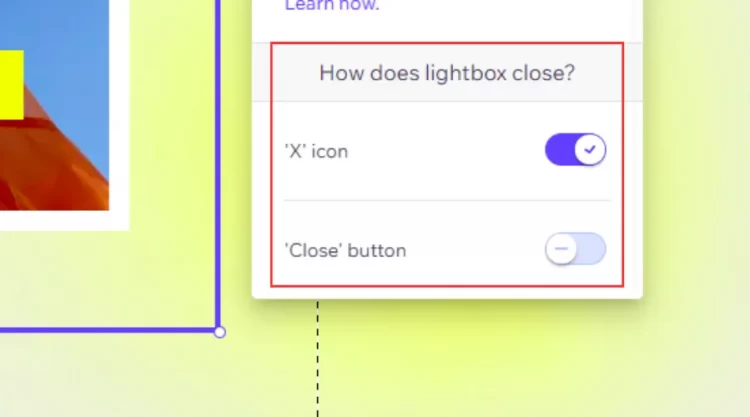
Then, you have 3 options to select, including:
- Option #1: Click the “X” icon to allow your visitors to close your lightbox with an X icon.
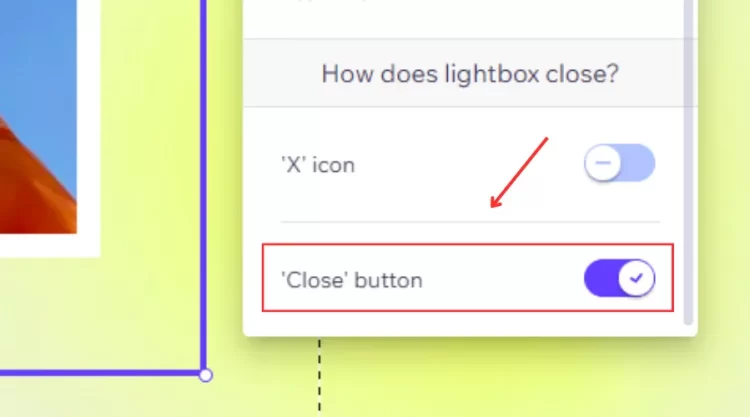
- Option #2: Click the “Close” button to exit it with a “Close” button on the popup.
- Option #3: If you want to select both the “X” icon and “Close” button, enable them on both boxes.
#2. Use Sep up Overlay
Firstly, click the lightbox’s surrounding area to open relevant options.
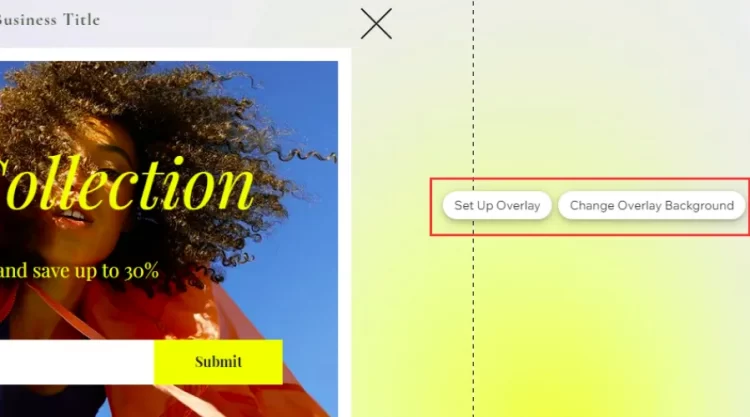
Next, click the Set Up Overlay to open the Overlay Settings tab

After that, select the Enable/Disable in the Clicking closes lightbox to close the lightbox from the overlay.
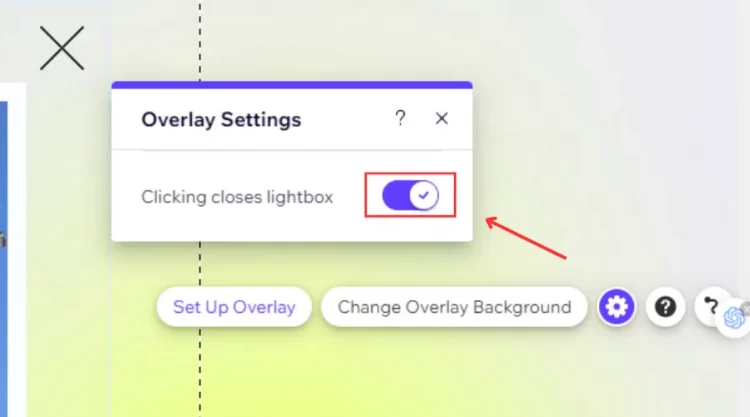
Finally, click the Save to confirm your process.
With our detailed guide on how to add a lightbox in Wix, we hope you can attain that easily.
To delete some unnecessary lightboxes in Wix, you can follow 3 detailed steps below:
- #1: Click the Page drop-down on the top bar in your Wix Editor.
- #2: Move to the Lightbox box and select the Settings icon.
- #3: Click the Delete to confirm your process.
Essential Tips & Tricks To Add A Lightbox In Wix
When adding Wix lightboxes in Wix, don’t ignore basic principles to enhance your adding process’s efficiency. To make the most out of your Wix lightbox popups, you should get some of our tips and tricks on how to add a lightbox in Wix below.
Keep your lightbox content simple and clear
To grab your visitors’ attention in the best way, always keep your lightbox content clear and easily readable anywhere on your site. You can promote a lightbox’s text and background in terms of color contrast, which is one of the simplest ways to gain your site’s impression in the public.
Organize your lightboxes visually
Using visual hierarchy in your text is highly recommended while designing Wix lightboxes. It means you should focus on the central message and then make it the most outstanding item in your design. Another idea is to use images to organize your lightbox popups on your site. This can make your lightboxes more colorful and visual in your visitors’ eyes.
Keep connected with your brand identity
When you adopt how to add a lightbox in Wix, remember to keep it aligned with the rest of your site’s structure, design, and content. To create these strong connections, you should consider all aspects, including color palette, general presence, and typography, before designing your lightboxes.
Make your lightbox with an outstanding CTA
Adding a button in your lightbox for CTA or other purposes is one of the smart ways to navigate your visitors to various sections on your site. Let’s use a dominant color and attach a specific text like “Join with us” for your CTA button to effectively engage your visitors’ interests.
Whether you are a beginner or a professional in designing objects on Wix, don’t forget to make your site’s presence outstanding with lightboxes.
How To Add A Lightbox In Wix – FAQs
[sp_easyaccordion id=”66439″]
Final Words
Our blog has shown you how to add a lightbox in Wix and suggested useful tips to adopt this practice. The most important thing to consider when adding a popup/lightbox is to keep your content simple and clear all the time. Once done right, you can effectively encourage your visitor’s engagement in marketing promotions for your business.
LitExtension, the #1 Shopping Cart Migration Expert, hopes you can adopt how to add a lightbox in Wix flexibly, depending on your products and demands. Let’s check our LitExtension Blog or join our Facebook Community Group for more useful tips.