If you’re performing cart to cart migration with LitExtension, Connector setup is a meat-and-potatoes step you must learn the ropes. It is a mediator helping to retrieve data and provide interaction between your stores.
In this article, LitExtension will revolve around a bunch of questions related to the Connector when you experience our data migration service:
- How to Install LitExtension Connector Files?
- How to Fix Connector Setup Issues?
- Why Do You Need Connectors When Re-platforming?
Need Help To Migrate Your Store?
LitExtension provides a well-optimized Cart to Cart migration service that will help you transfer all your data accurately, painlessly with utmost security.
How to Install LitExtension Connector Files?
To install the LitExtension connector, basically, you need to go through 3 steps:
- Download Connector to your computer.
- Upload the folder “le_connector” to your store’s root folder.
- Check the Connector file’s installation status.
The procedure of Connector setup is the same for macOS, Windows, and Linux users. You can use FileZilla or any FTP (File Transfer Protocol) app (WinSCP, FileFTP, CuteFTP) to upload the Connector.
If you are tired of reading these walls of text, check out a step-by-step demonstration of how to install Connector file by LitExtension – Shopping Cart Migration Expert.
Now, let’s go into more detail about each step to set up LitExtension Connector:
#Step 1: Download LitExtension Connector
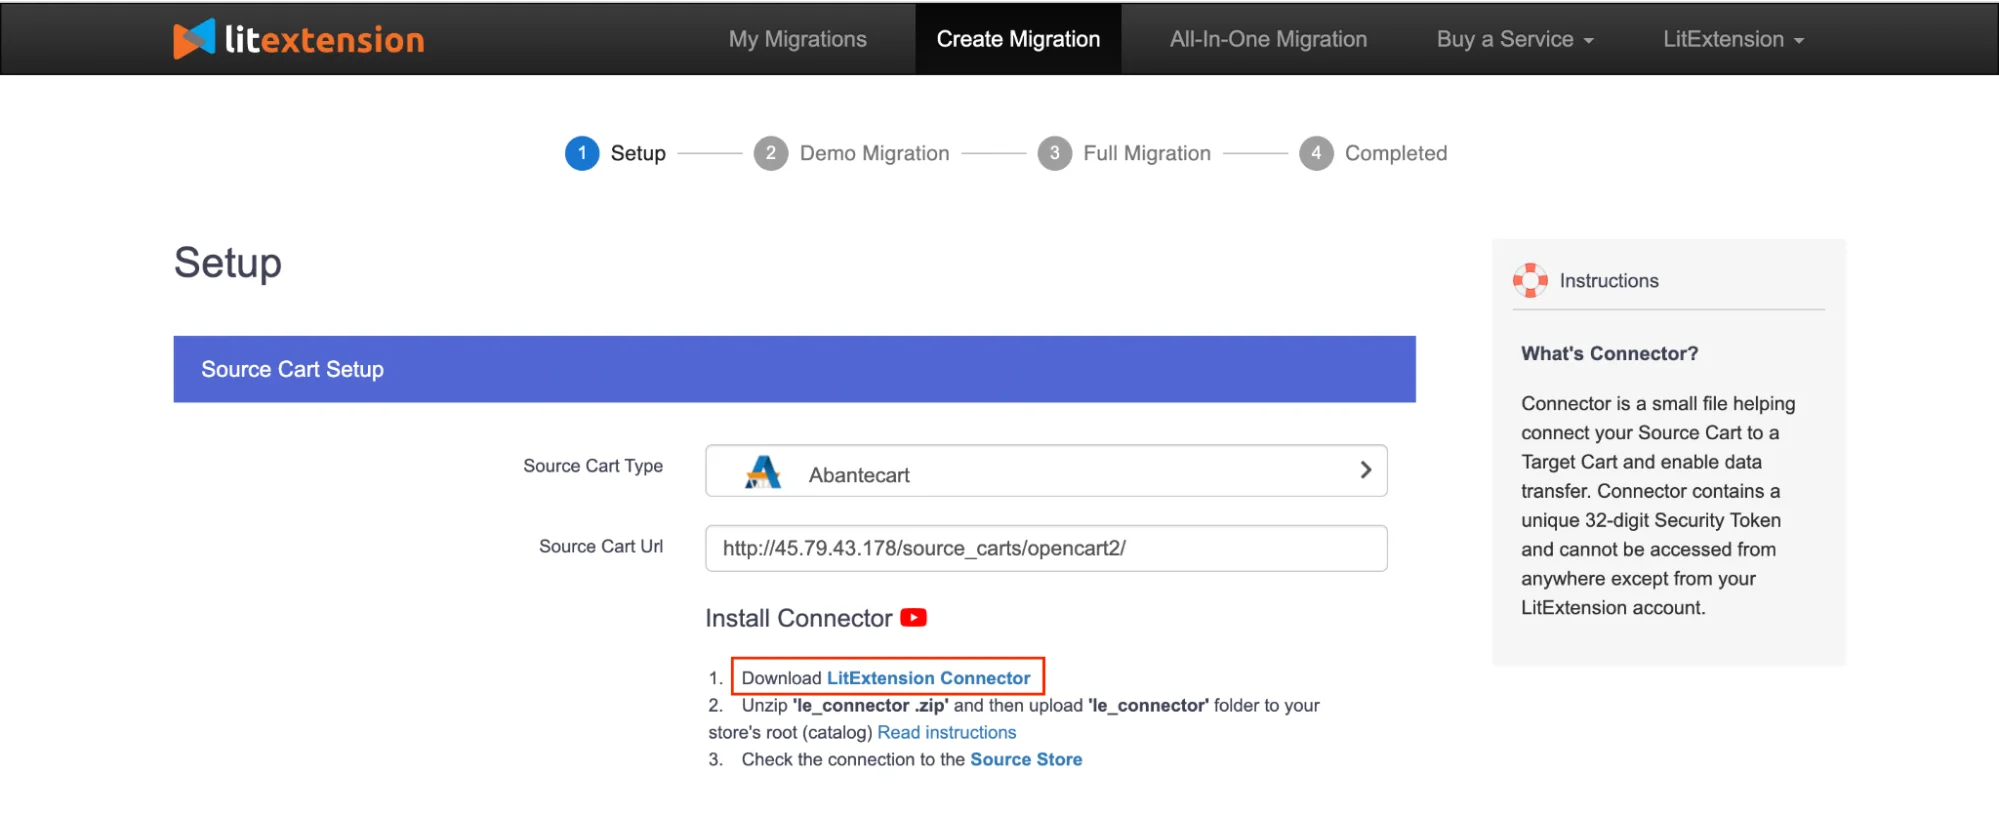
Firstly, at your Create Migration page, after filling Source/Target cart URL, download Connector by clicking “Download LitExtension Connector”. You will receive a zip file named ‘le_connector‘.

#Step 2: Upload Connector
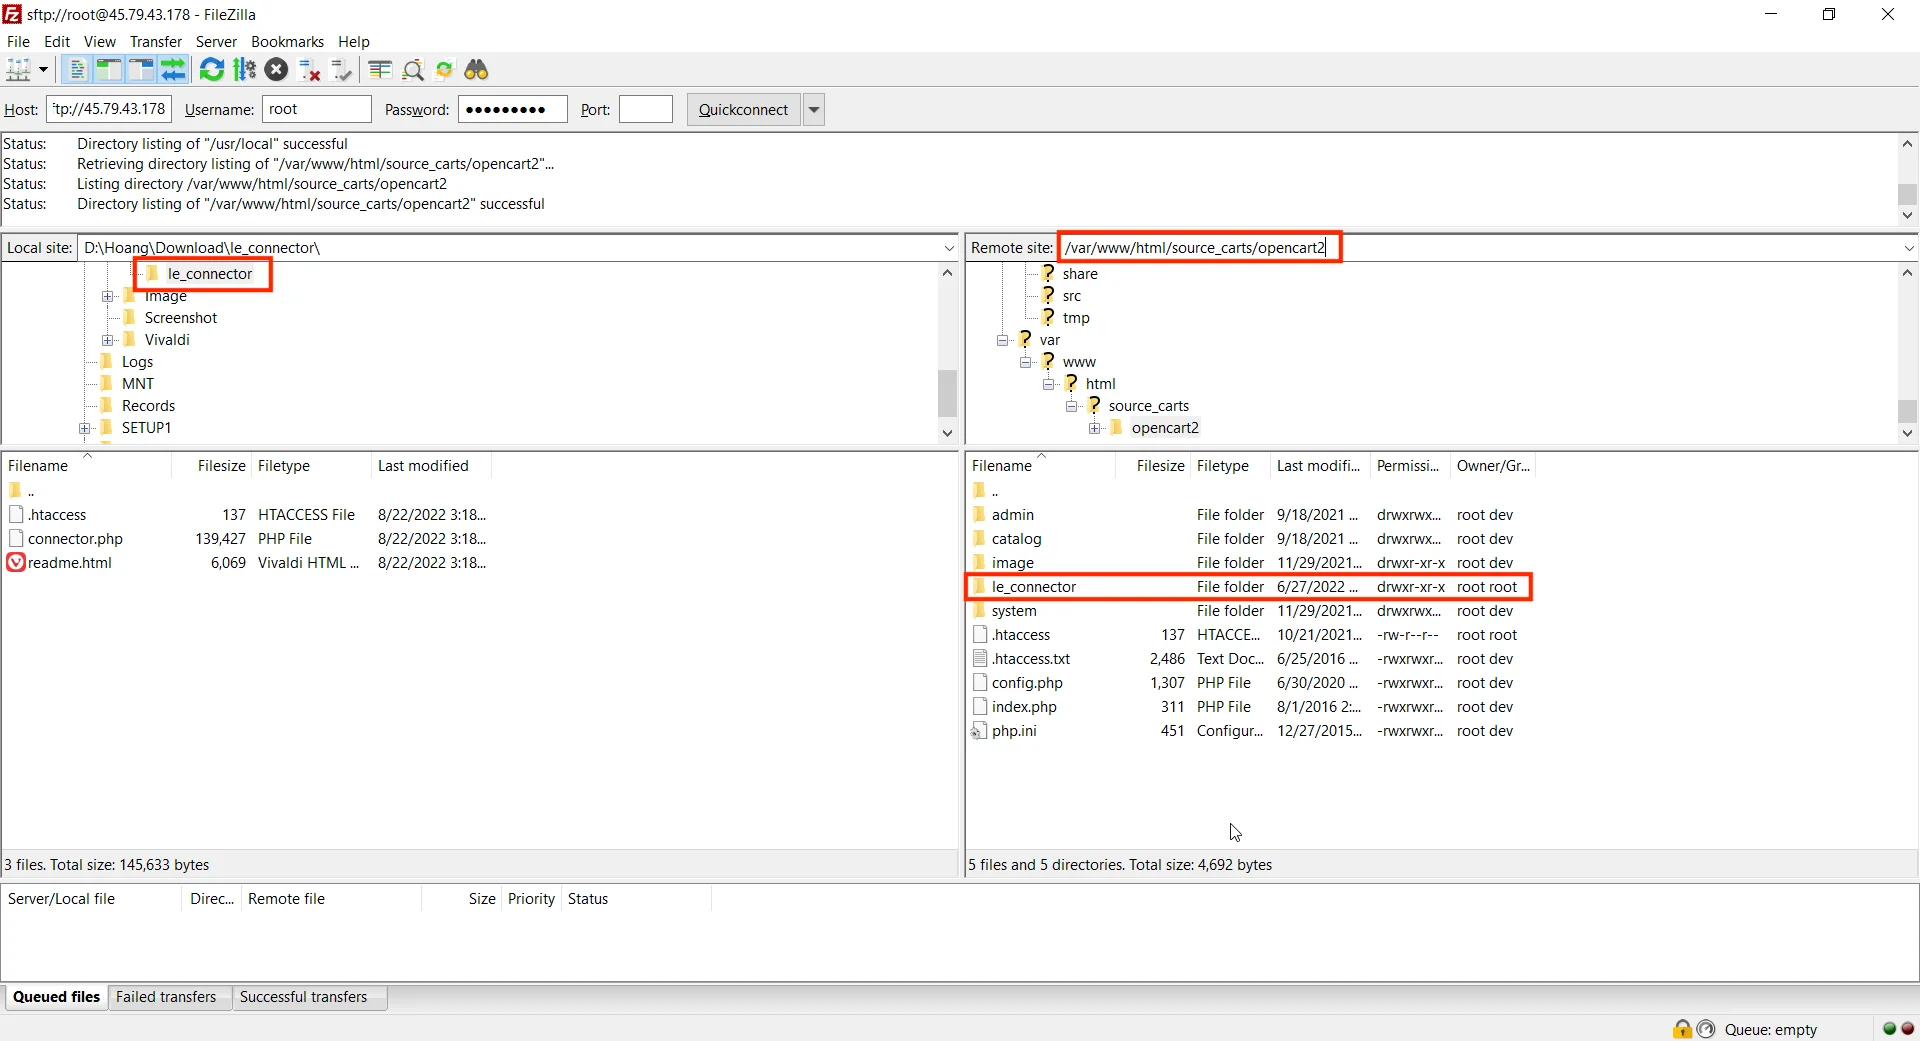
Extract and upload the folder ‘le_connector’ to your Source/Target store root folder via FTP. Whichever FTP client you are using (FileZilla, WinSCP, FileFTP, CuteFTP), enter the root folder of your store and paste the ‘le_connector’ folder you extracted from the zip file previously.
You can follow the guideline about root folder and how to find your store’s root folder here.
There are quite a few ways to upload a file to your server. How you upload your files will depend on your preference and your accessibility to the server.
So, in this tutorial blog post, we will explain how to upload LitExtension Connector using the FileZilla and File Manager.
FileZilla (FTP)
FileZilla is a good choice for uploading files because it utilizes port 21 and has a large file upload capacity.
Follow the following simple steps to for successful Connector setup:
- Connect to your server with FileZilla.
- Navigate to the folder ‘le_connector’, drag the file from “Local Site” to the “Remote Site”. The file will upload and you will see the file in the list of files in the directory when you drag the file to.
File Manager (browser-based)
When you are not at your computer but have access to a browser, using the File Manager is a good idea. Any location can access the File Manager. As a result, there is no need to set up software like FileZilla.
Here’s how you can upload Connector file:
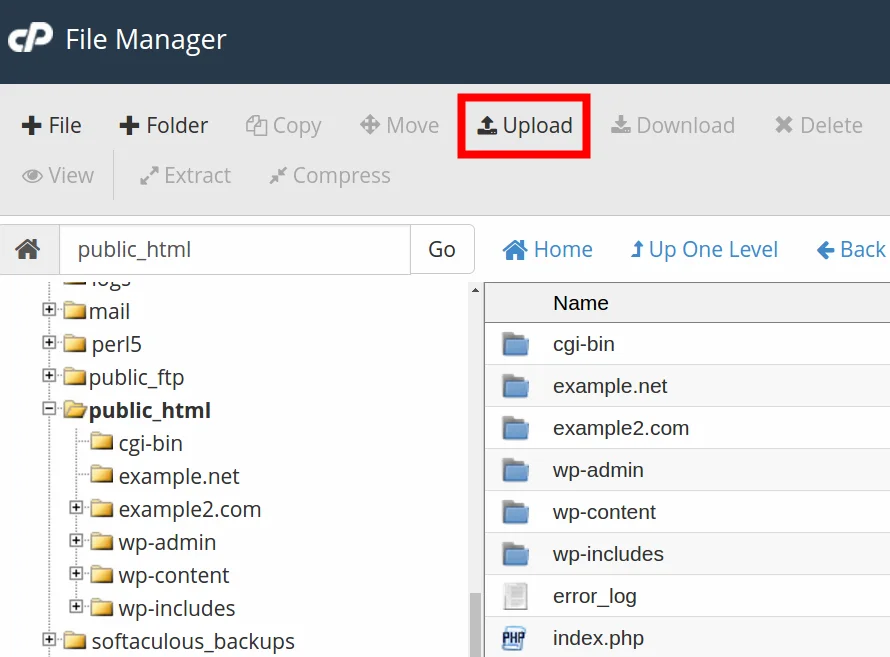
- Login into your cPanel. Click the File Manager button in the Files section
- Navigate to the directory you want to upload a file to and click the Upload link at the top of the File Manager. This will open an upload page in a new tab.
- Drag and drop your file into the window, or click Select File to browse your computer for the file you want to upload. Check the available box if you want to overwrite files that already exist in the upload folder.
- Your file will then upload. You will see a “100%” message when the upload completes.
- Click the Go Back link to return to the File Manager.
- Refresh your File Manager by clicking the Reload link at the top middle of the File Manager. You should then see the file listed in the File Manager now.
#Step 3: Check If the Connector Is Working
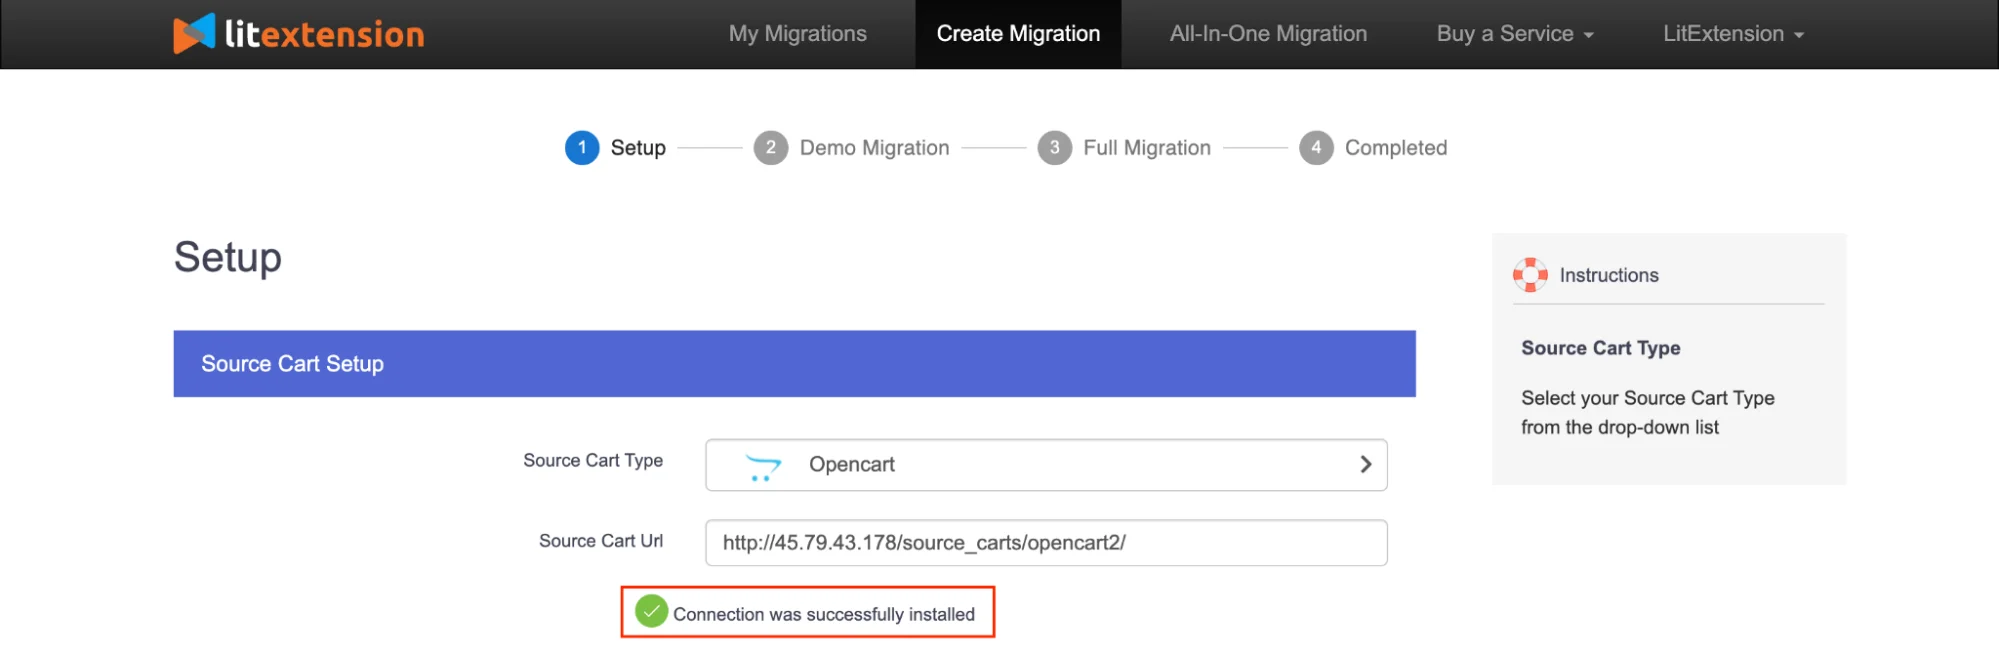
Now you go back to the Create Migration page and check if the connection files are installed correctly.
After installing, you can check the result automatically. Please fill out the URL store then click out the box. You will see the automatic message “Connection was successfully installed” as below if everything works fine. And you can proceed with the next step of your data migration.
In case the message doesn’t appear, you have to check whether the ‘le_connector‘ folder is placed correctly or not. Keep in mind to double check the root folder of your store or website. For further information, you can read our user guide for Connector.
Done! You have already installed LitExtension connector successfully. Hit next to finish your data migration with LitExtension!
If you find Connector demanding to set up, choosing LitExtension’s All-in-One Migration Package can be a silver bullet. In this package, our experts will perform the whole data migration process and ensure you get the best result in the shortest time!
How to Fix Connector Setup Issues?
1. I’m clicking on the link but no “Connector Installed” message shown.
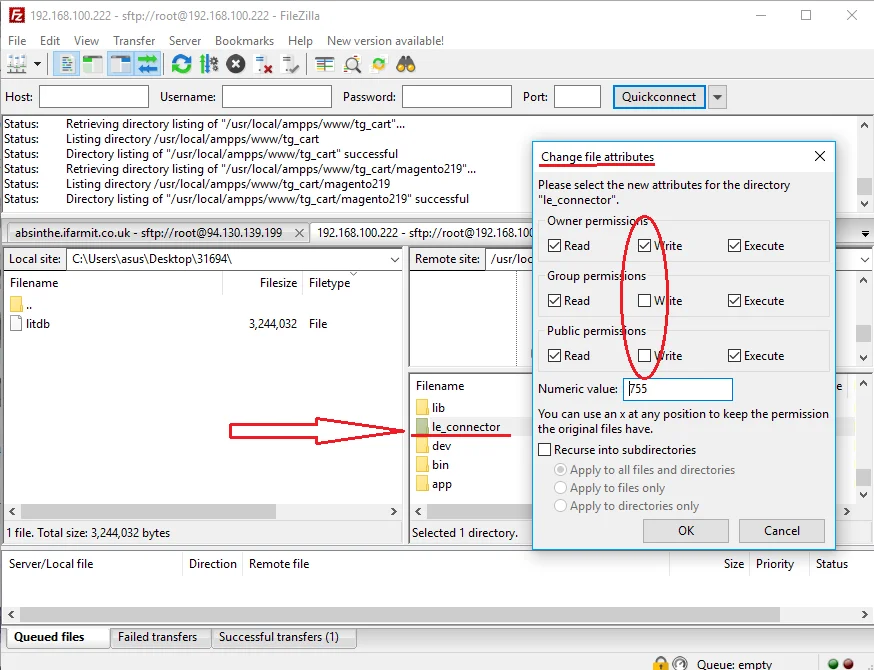
Solution: It could be due to your permission setting upon the uploaded files and folder. You can set permissions as follows:
- “connector.php” – 644 or 666, depending on your server configuration;

- “/le_connector” folder – 755 or 777, depending on your server configuration.
2. I’m clicking on the link but only get a “File Not Found” message.
Solution: Please double-check that you locate the “le_connector” folder in the right place on your website. You only need to upload “le_connector” to the webroot folder for the majority of shopping carts. The root folder of some carts, however, has been set to use a subfolder.
For example: Magento 2 can be configured to use both webroot or webroot/pub as root folder. So, you have to make sure you upload “le_connector” to the correct place.
3. I’m clicking on the link but just get a “File Not Found. Nginx Version ….” message.
Solution: If you are running Nginx as a webserver (instead of Apache), the above steps might not get the connector working immediately. Because Nginx normally does not allow access to all PHP files, and thus requires some additional configuration for this to work.
For more details, you can check out this article.
4. Oops, it still doesn’t work.
Solution: Don’t worry, we provide 24/7 live chat support and can absolutely give a helping hand for Connector setup, just click here to “Contact Us” for further assistance.
If you have any questions about our data migration process, please visit our extensive tutorials:
Why Do You Need Connector When Re-platforming?
When you perform a migration from cart to cart with LitExtension, you might be required to set up Connector. It is a small file helping connect your Source Cart to a Target Cart and enable data transfer.
You will have to download Connector as part of the data migration process if you’re migrating to or from an open-source shopping cart like OpenCart or Magento. This is due to the fact that open-source carts do not directly support data import or export.
Additionally, it differs from hosted carts like Shopify where you can connect your carts together using an API. Connector is thus a crucial bridge to join two shopping carts before migration.
Connector setup exists for data migration purposes only. It contains a unique 32-digit Security Token and cannot be accessed from anywhere except from your LitExtension account.
And once you finish the migration process, it is totally safe to delete the Connector.
LitExtension Connector Setup – FAQs
[sp_easyaccordion id=”44059″]
Conclusion
As the world-leading shopping cart migration expert, LitExtension can transfer all your data such as products, customers, and orders automatically, securely, and accurately with no technical skills required.
Hopefully, this article has given you enough guidance on successfully LitExtension Connector setup. Please bear in mind that Connector doesn’t have any effects on your store but is a bridge to connect your Source and Target store on data migration process only.
Our experts are 24/7 available to answer any questions you may have along the way. So, don’t hesitate to Contact Us via Support Ticket, Live Chat or a Phone Call if you need further information or support.
You can also join our Facebook Community to get the latest and useful eCommerce tips & news.