Organizing your products into categories can enhance the customer experience and make it easier to find what they’re looking for in your Shopify online store. However, if you are brand-new to Shopify, you might wonder how to add a category in Shopify.
In this blog post, we – LitExtension, go through the steps to create, edit and add Shopify categories and subcategories, including
- how to add a category in Shopify products
- how to add categories on Shopify using a CVS file
- and create Shopify categories by creating a collection
Before diving deeply into the detailed instructions, let’s first clarify what categories in Shopify mean.
What Is Shopify Category?
Shopify categories are divided into website categories (or collections) and product categories.
- Web categories help customers easily navigate the products.
- Product categories assist the Shopify platform in sorting and calculating automatically.
The table below compares Shopify categories vs collections (web category).
[wptb id=61198]
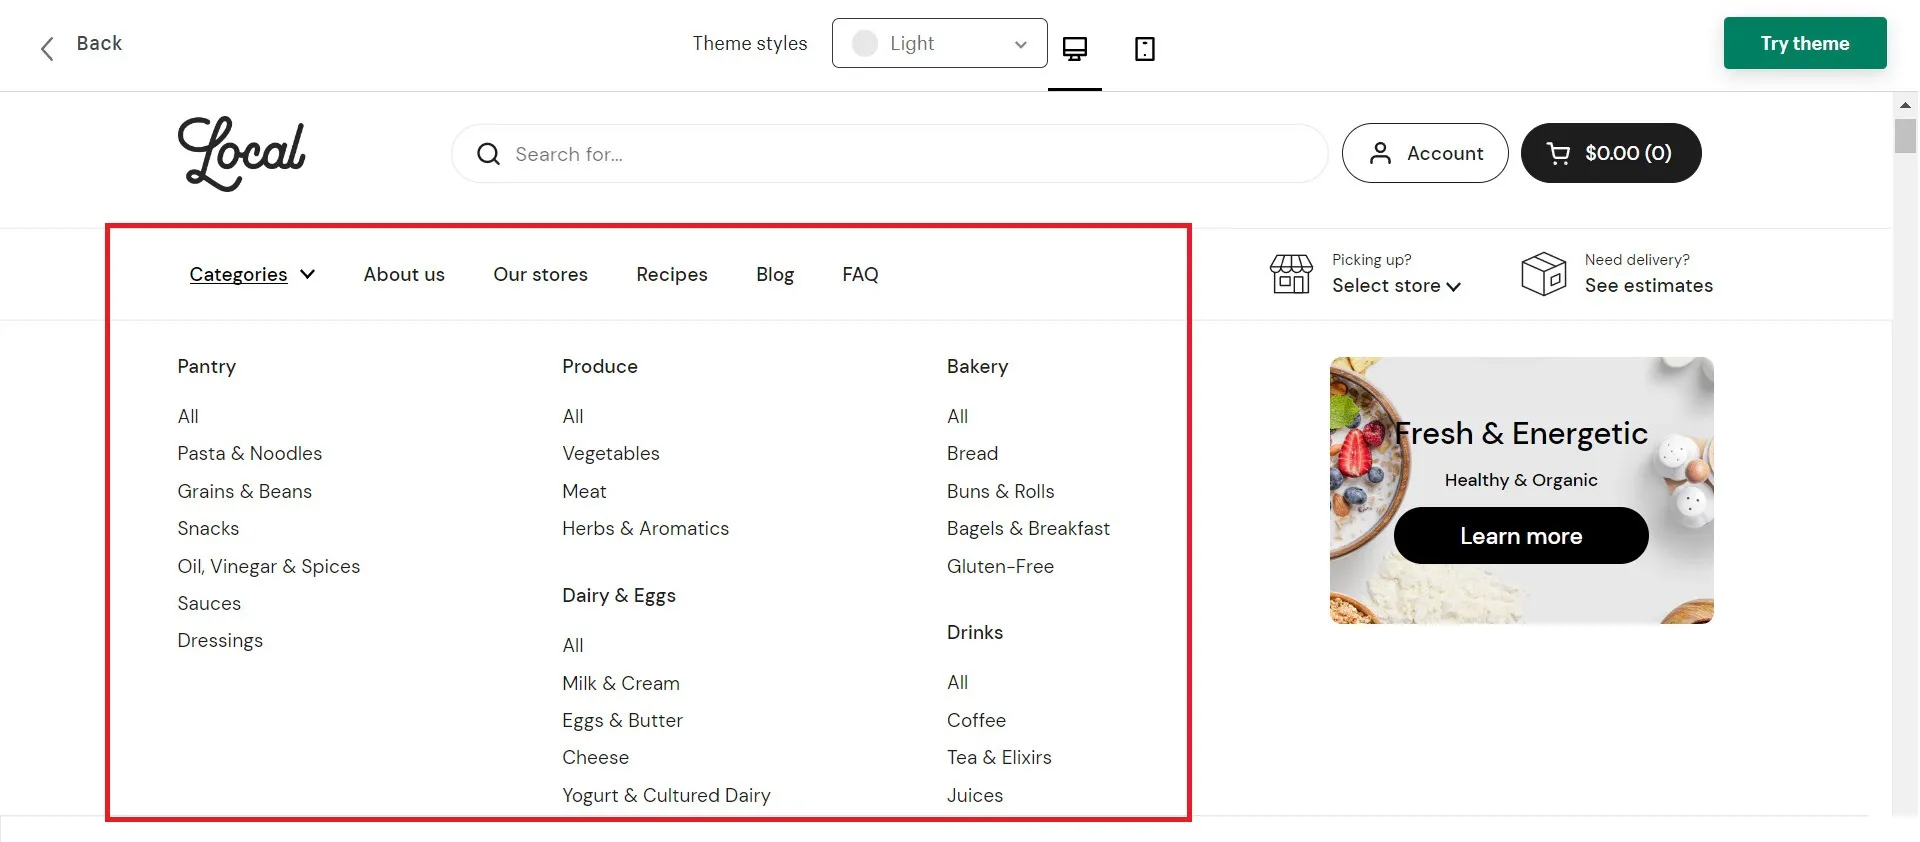
For example, you can check out the website category in the Local theme (a premium theme in the Shopify Theme Store). It has simple navigation and a well-organized Shopify category tree to ensure customers can find what they want quickly.
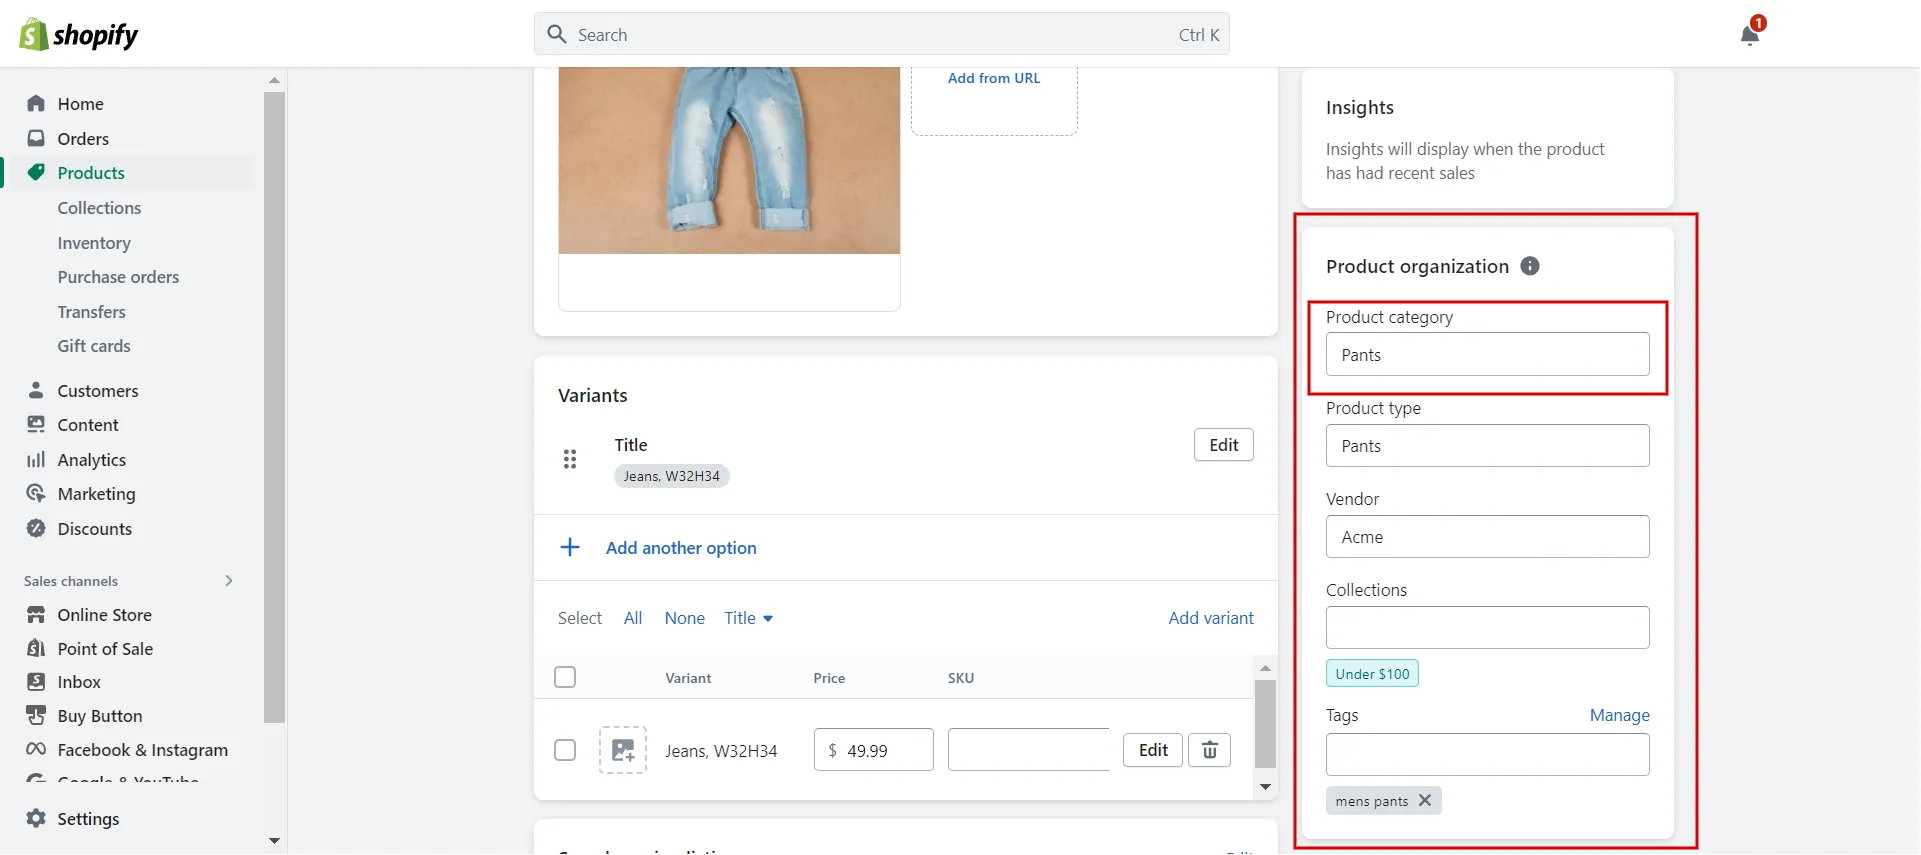
Besides, here is an example of a product category in Shopify: No. 173 – Apparel & Accessories > Clothing > Pants.
You can refer to the Shopify Product Taxonomy for the Shopify product category list.
Now you understand Shopify categories vs collections. Let’s discover how to add categories in Shopify using two methods: manually selecting them individually and importing them directly from a CSV file.
How to Add a Category in Shopify Products
In this section, we will go over how to manually add a category in Shopify, a product type, and especially how to create categories in Shopify Products tab bulkily.
#1 Add a product category in Shopify
To add a category in Shopify for your products, adhere to our instructions.
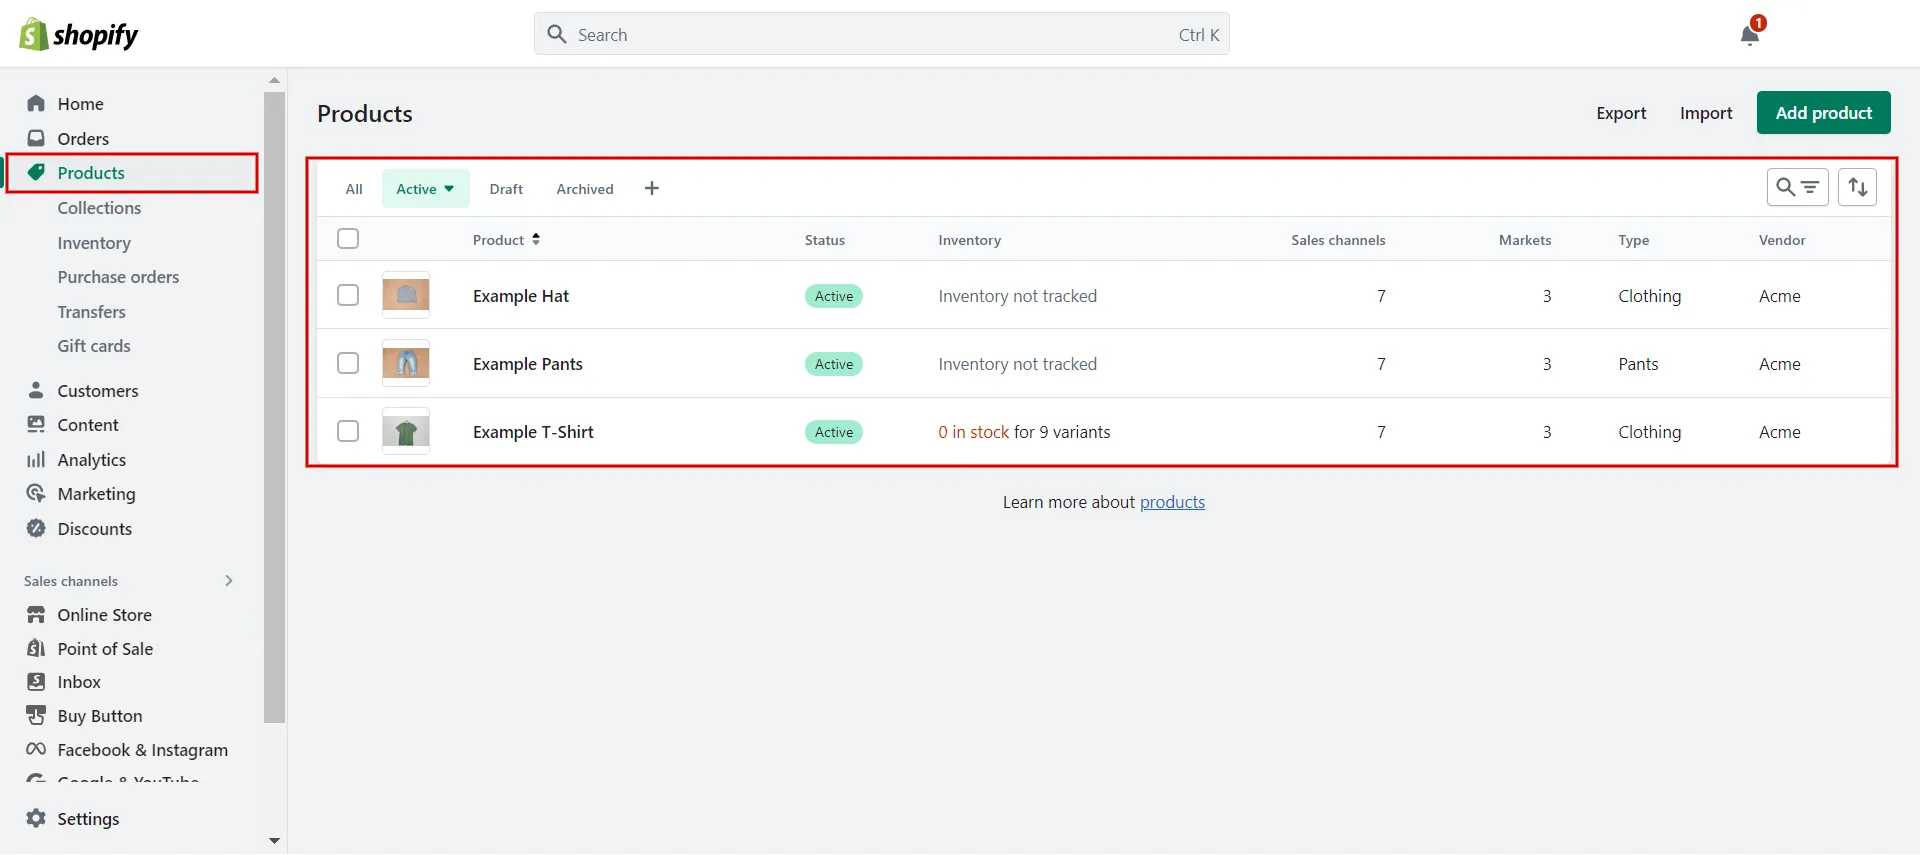
- Step 1: Choose Products in the Shopify admin > Select a product.
- Step 2: Complete the following in the Product Organization section:
- Type in the category of your product, and then choose the Shopify Product Category list’s most correct result.
- To discover your product category, click through all Shopify categories and subcategories.
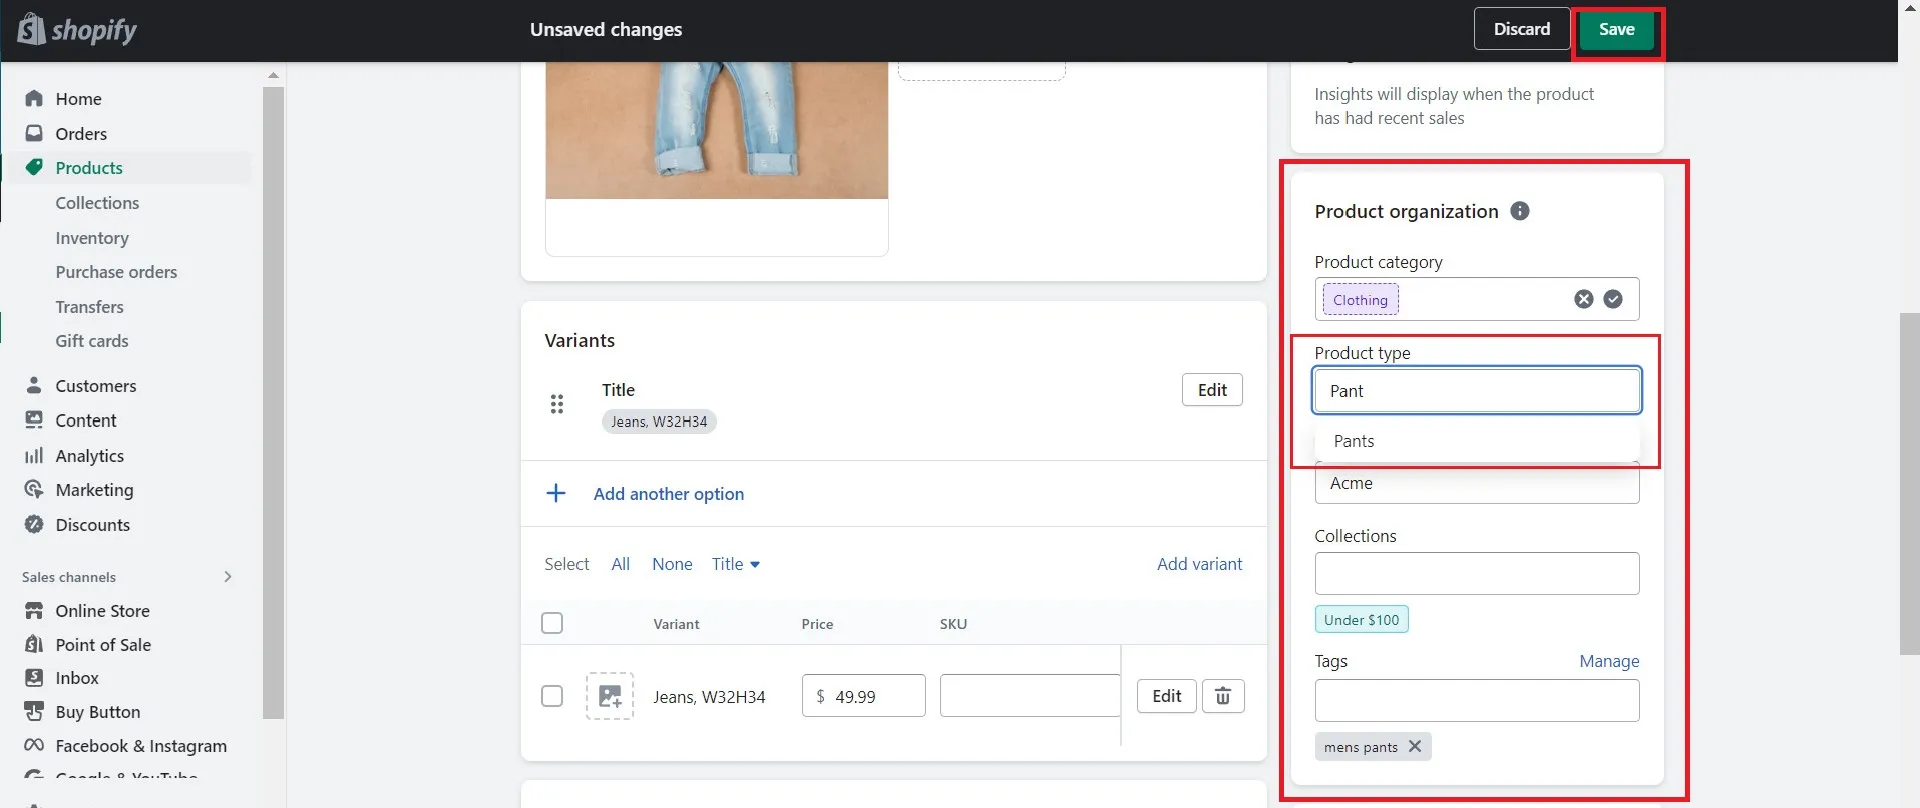
- Step 3: Save changes.

#2 Add a Shopify product type
How about adding Shopify product types? Doing so is similar to adding a product category in Shopify. Let’s look at this:
- Step 1: Navigate to Products and select a product.
- Step 2: Enter data in the Shopify Product Type field under the Product Organization section.
- Step 3: Click Save.
#3 Bulk edit categories to products
Suppose you choose not to edit a one-to-one product; here are the steps for editing product categories bulkily.
- Step 1: Click on Products (1). Choose every item you want to include as a category (2).
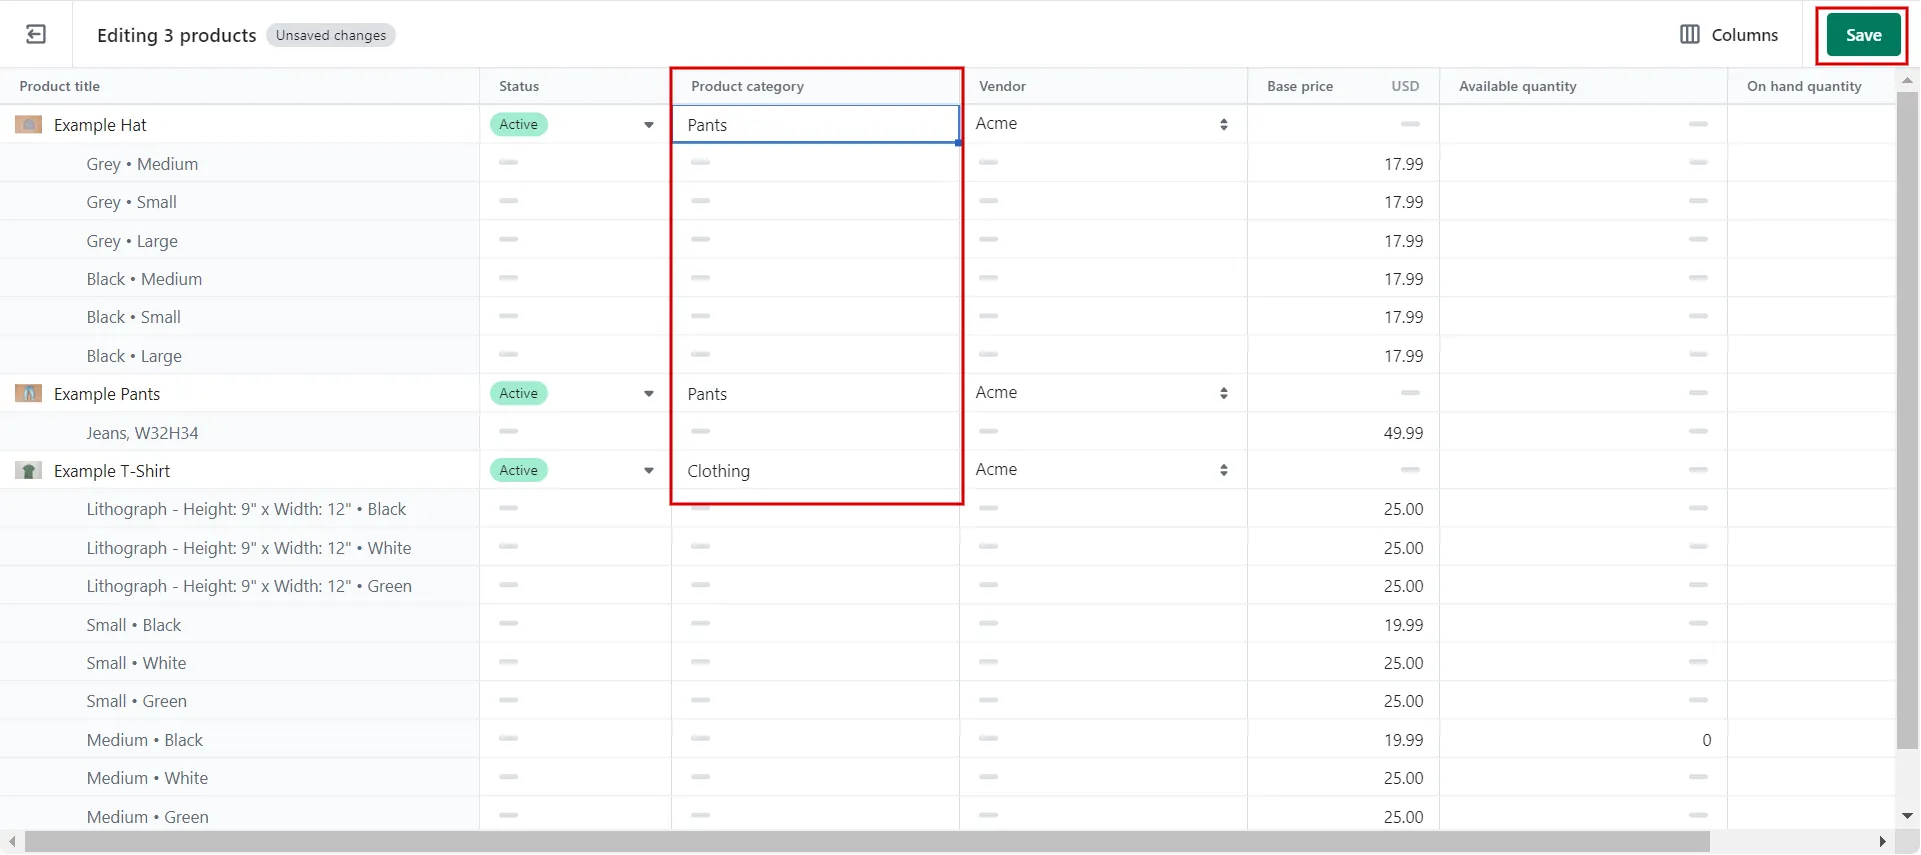
- Step 2: Select Bulk Edit (3).
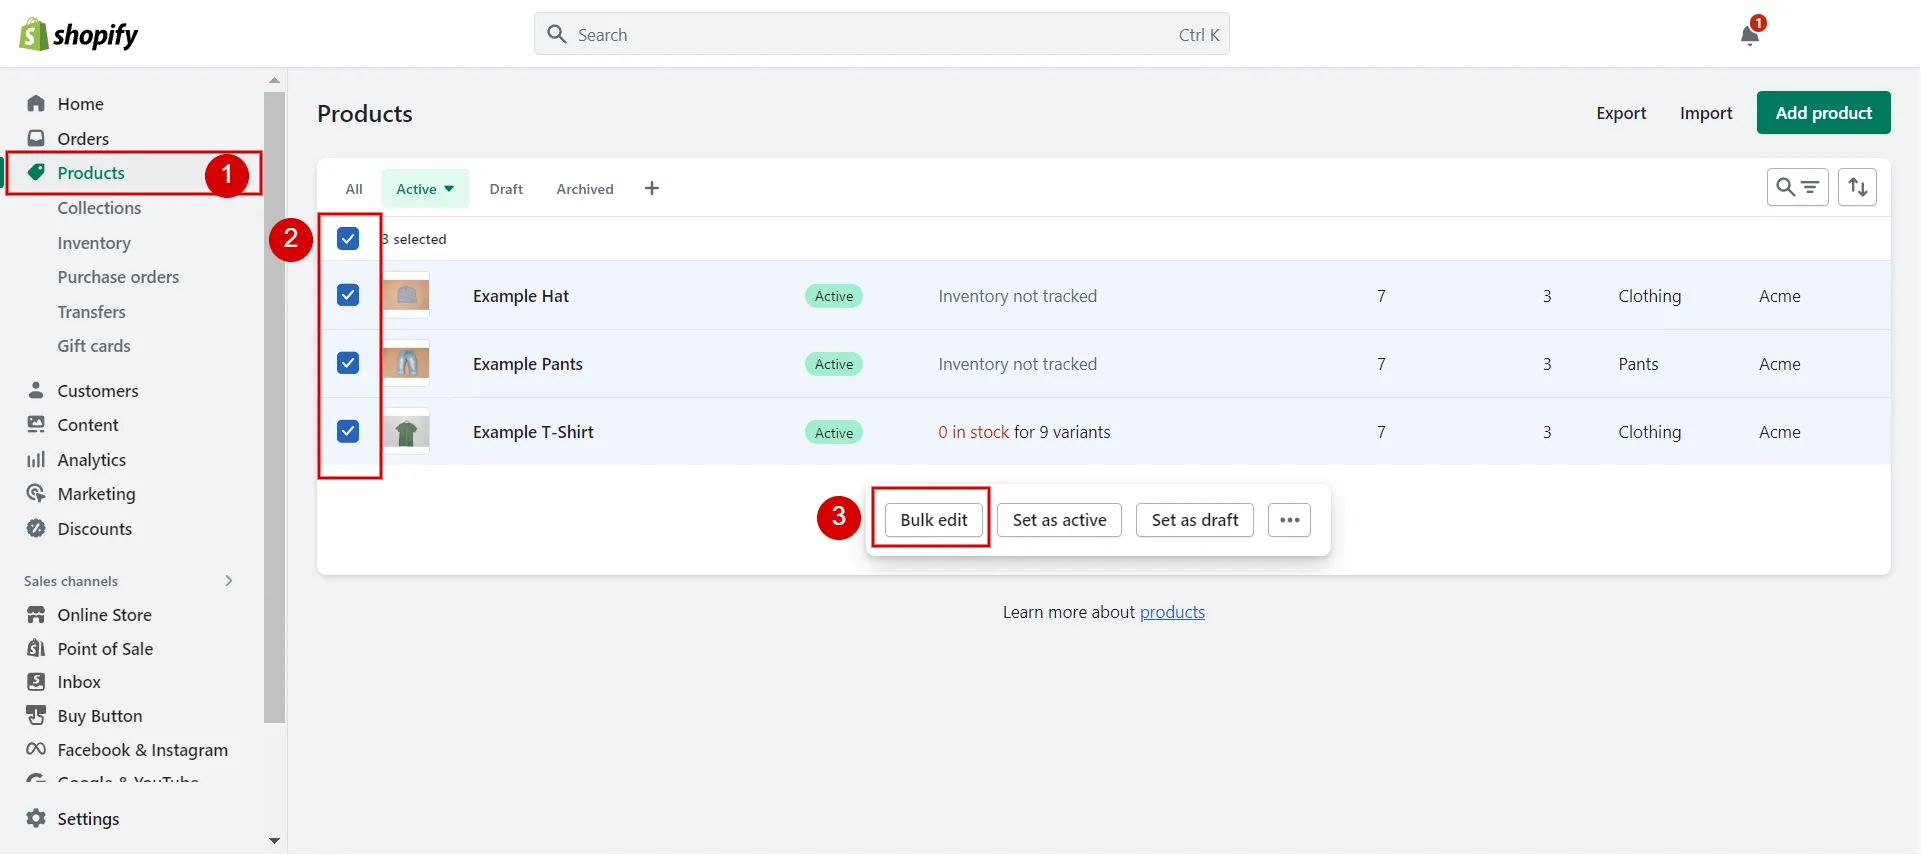
3. Step 3: Make changes and Save.
Utilizing CVS files is another way to add a category in Shopify products. In the following section, let’s look at the specifics.
How to Import Categories in Shopify using a CVS File
We recommend this method for those who have lots of products because it imports many products all at once, but you will need basic knowledge of Excel and HTML to fill out all the product information appropriately.
Here are the step-by-step guidelines to import products’ categories:
- Step 1: Prepare a CSV file
- Make a CVS file containing the details of your products, including a column for the Product Category.
- Type the ID or path of the product category in the Product Category column. Note: The Shopify Product Taxonomy contains the ID and the path.
- Save the file.

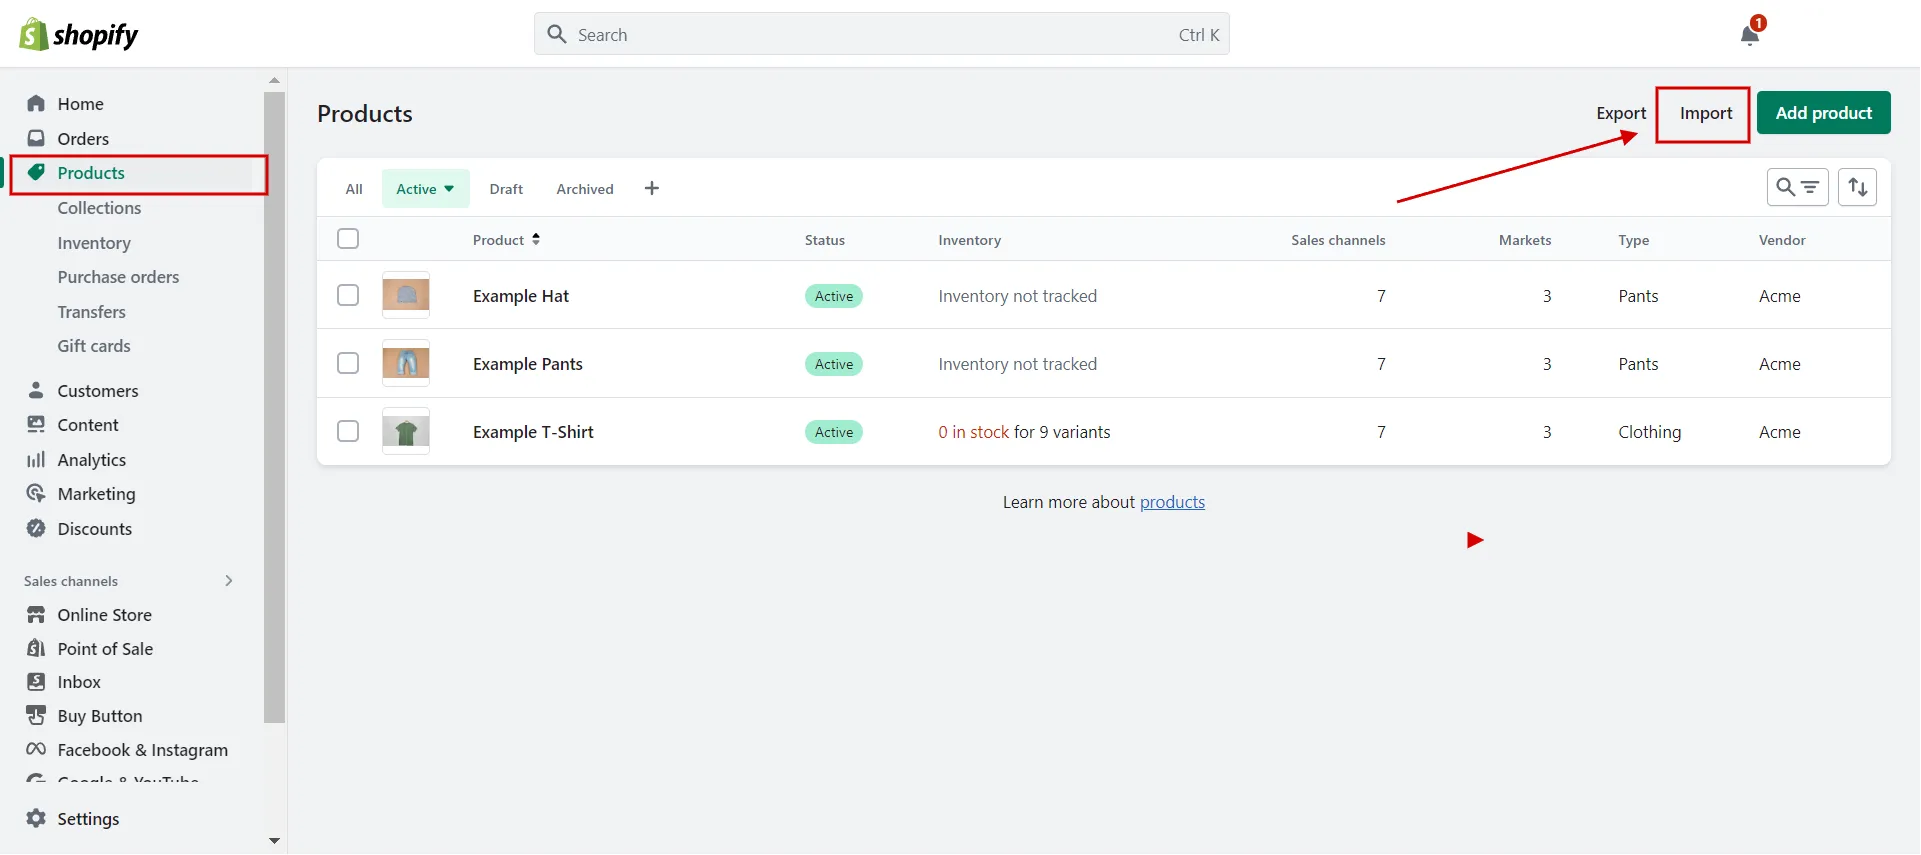
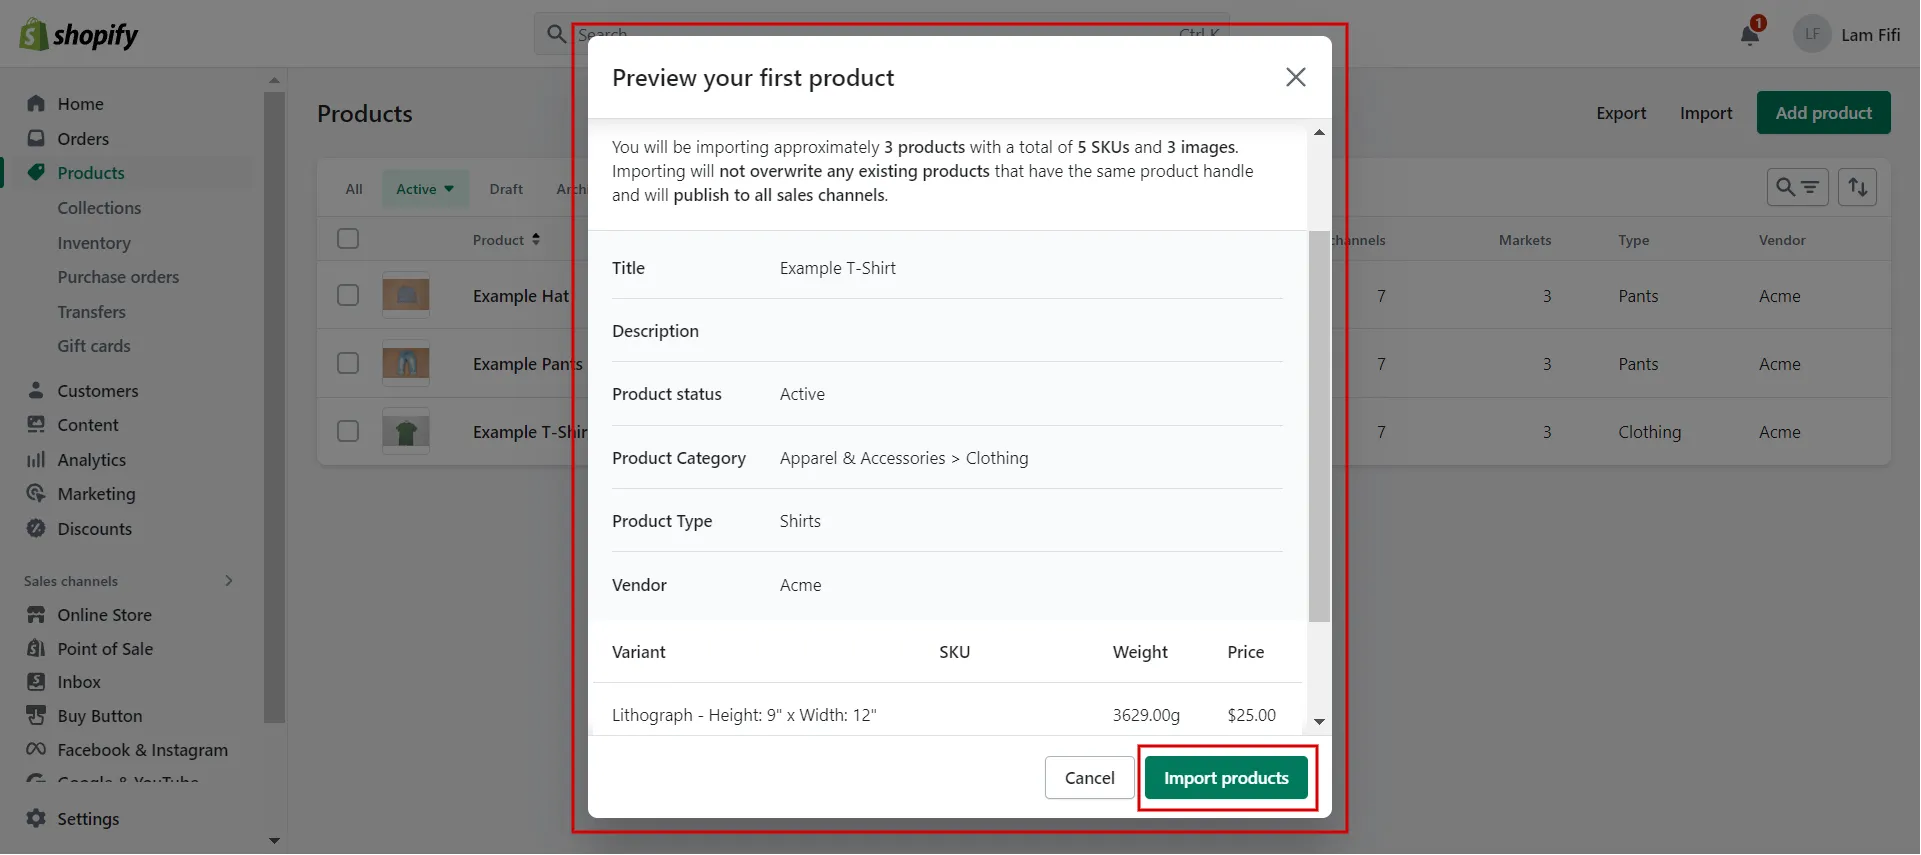
2. Step 2: Import a CSV file
-
- Choose Products in the Shopify admin.
- Select Import.
3. Choose the CSV file to import.
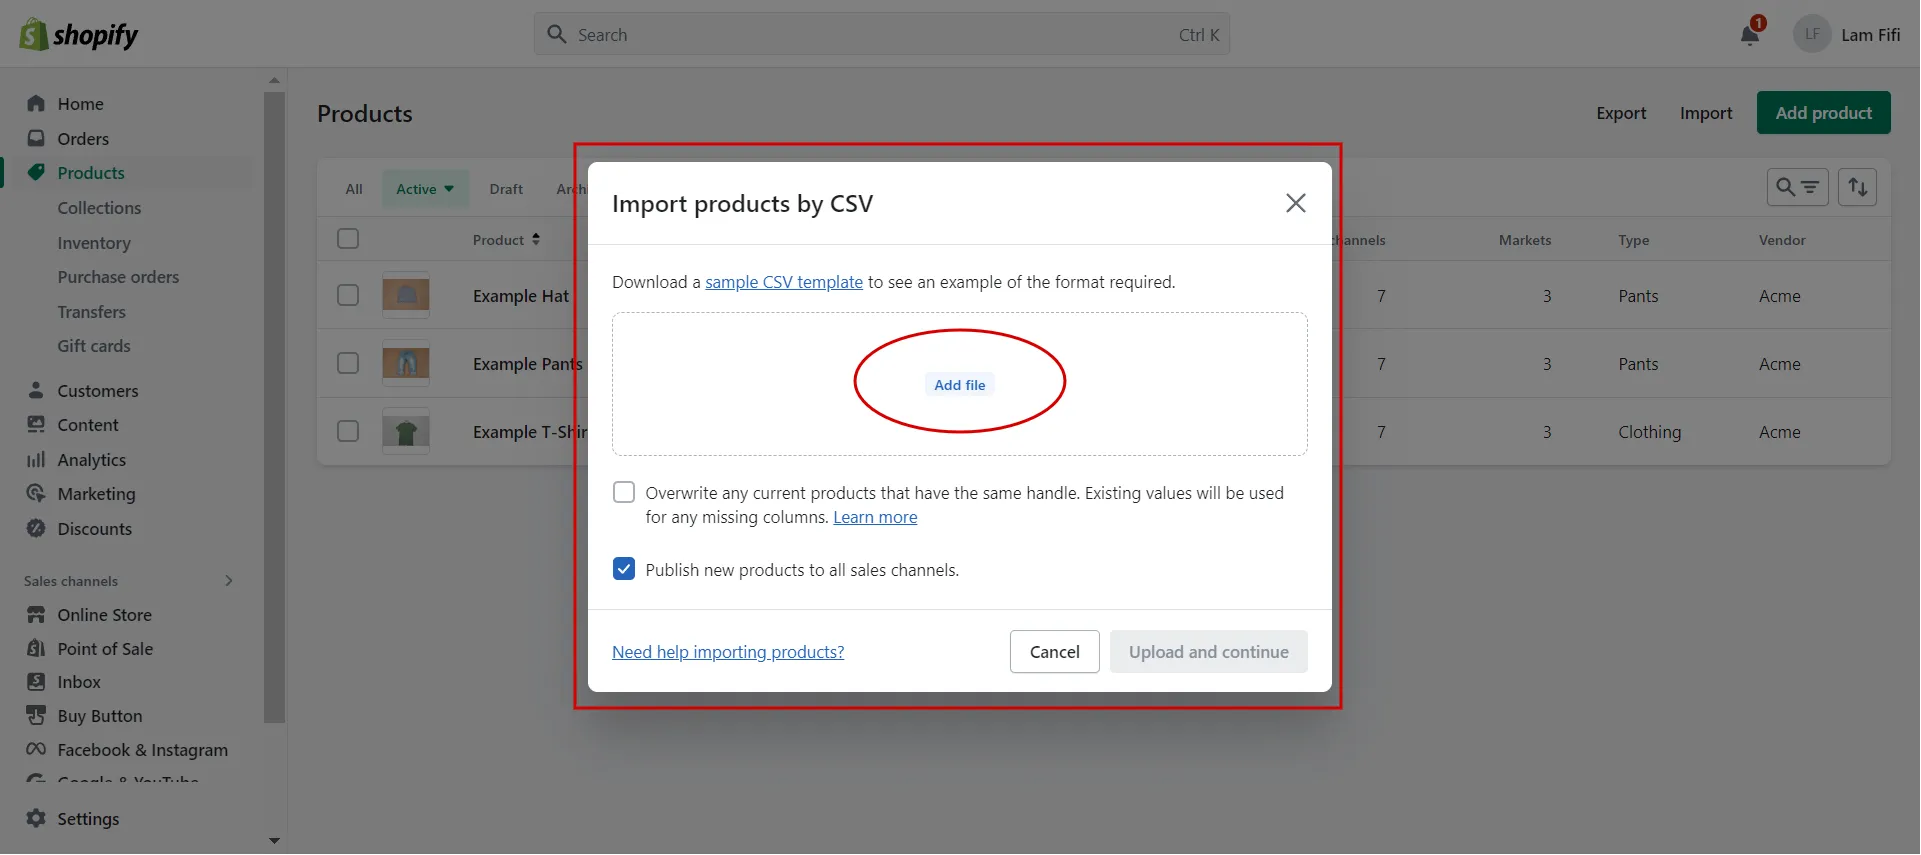
3. Step 3: Check the import parameters to ensure they are correct, then click Import Products to add the products, Shopify categories, and subcategories.
From now on, you know how to add a category in Shopify for your products. The following section will cover how to add products to collection on Shopify.
Want to migrate to Shopify?
If you are intending to migrate to Shopify, LitExtension offers a great migration service that helps you transfer your data from the current eCommerce platform to a new one accurately, painlessly with utmost security.
How to Add a Category in Shopify by Creating a Collection
You need to carry out the following actions to add a new web category known as Shopify collections:
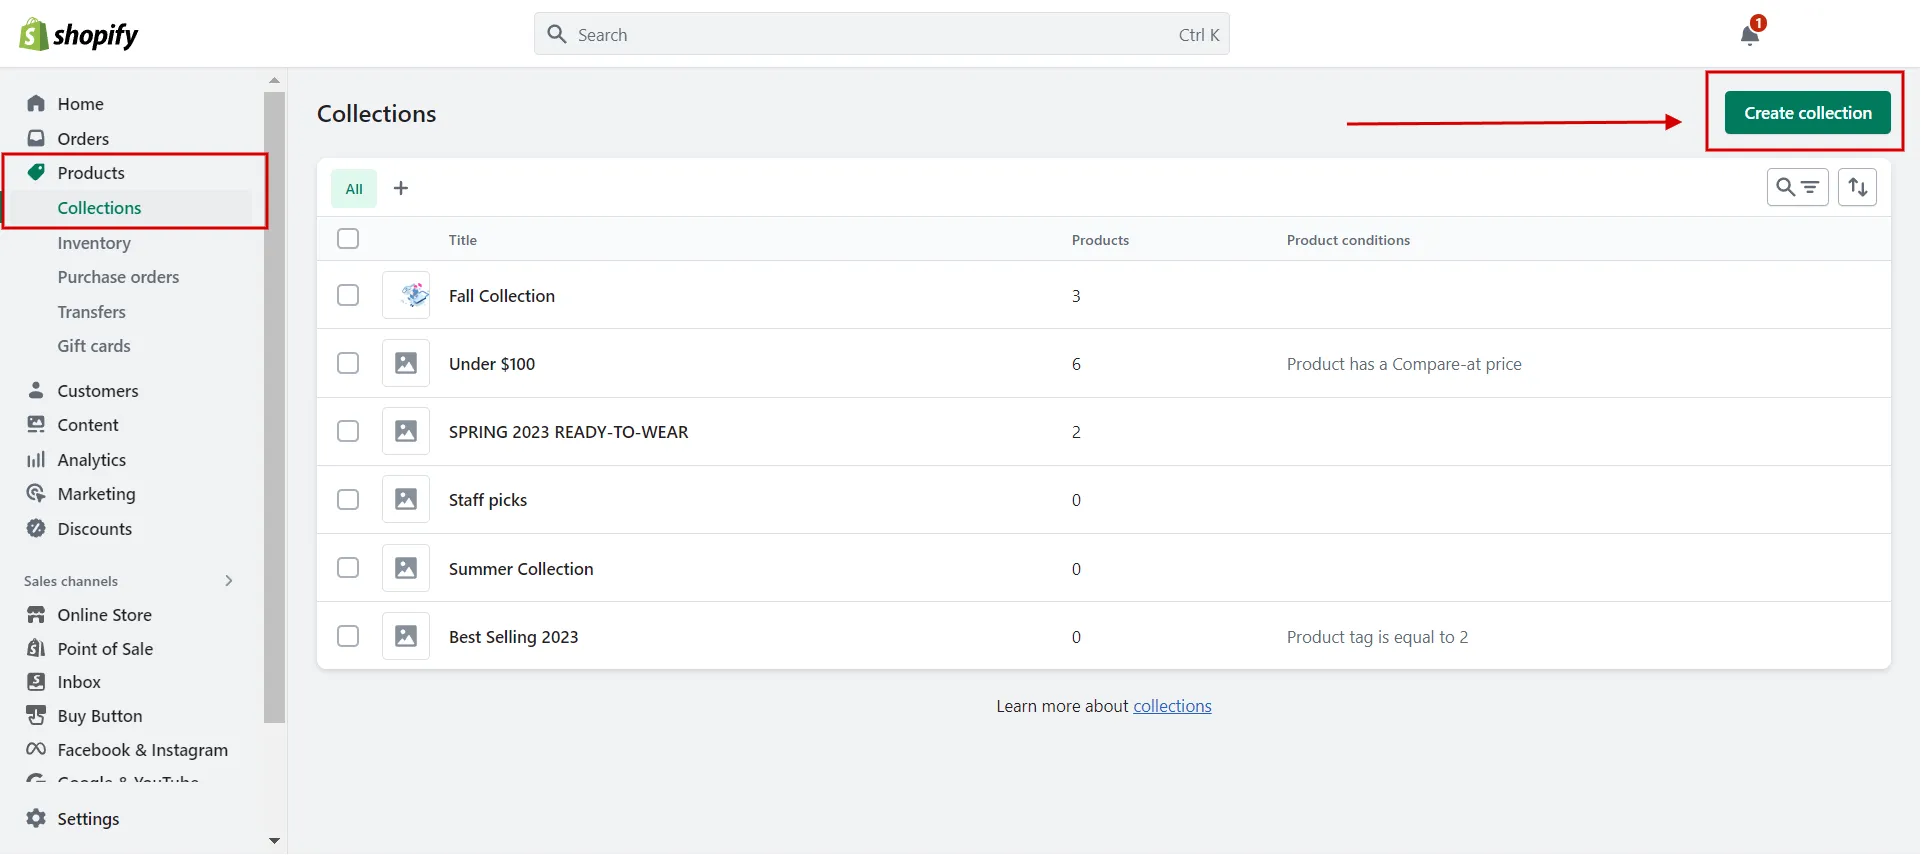
- Step 1: Navigate to Products > Collection > Create Collection.
- Step 2: Fill in the details: title, description, and featured image.
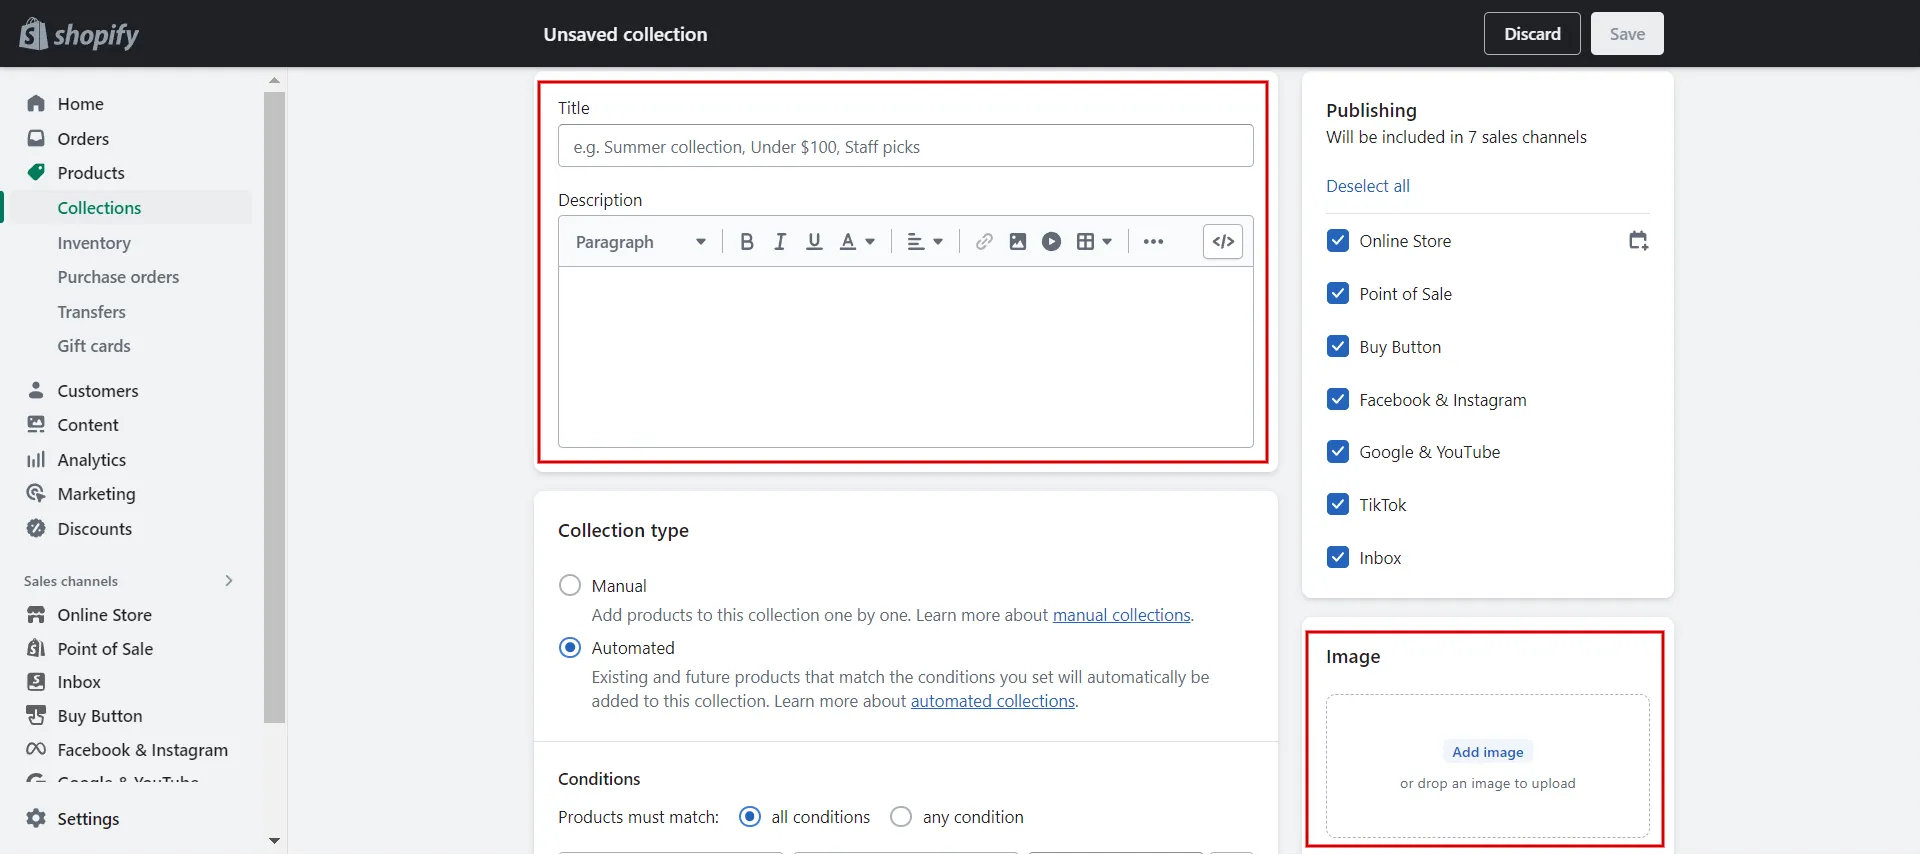
- Step 3: Choose Conditions type.
- Manually select products.
- Automatically add products based on conditions. Choose a criterion from the list, such as Product Title, Product Type, Product Category, etc., and then enter the relevant information.
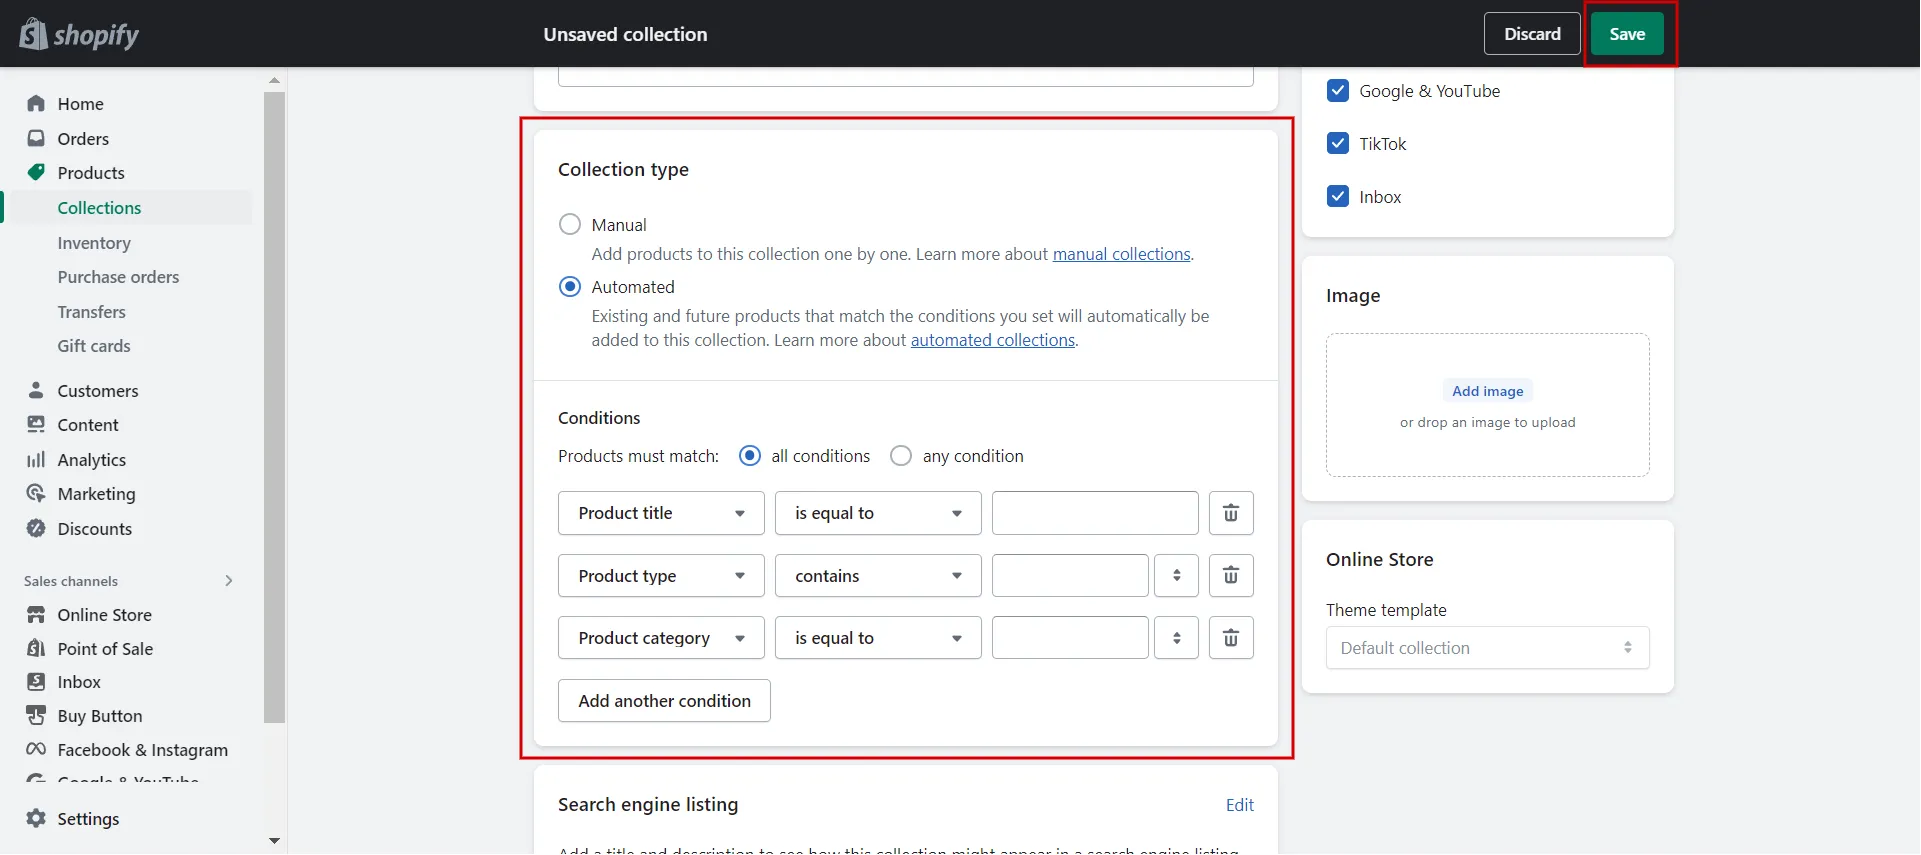
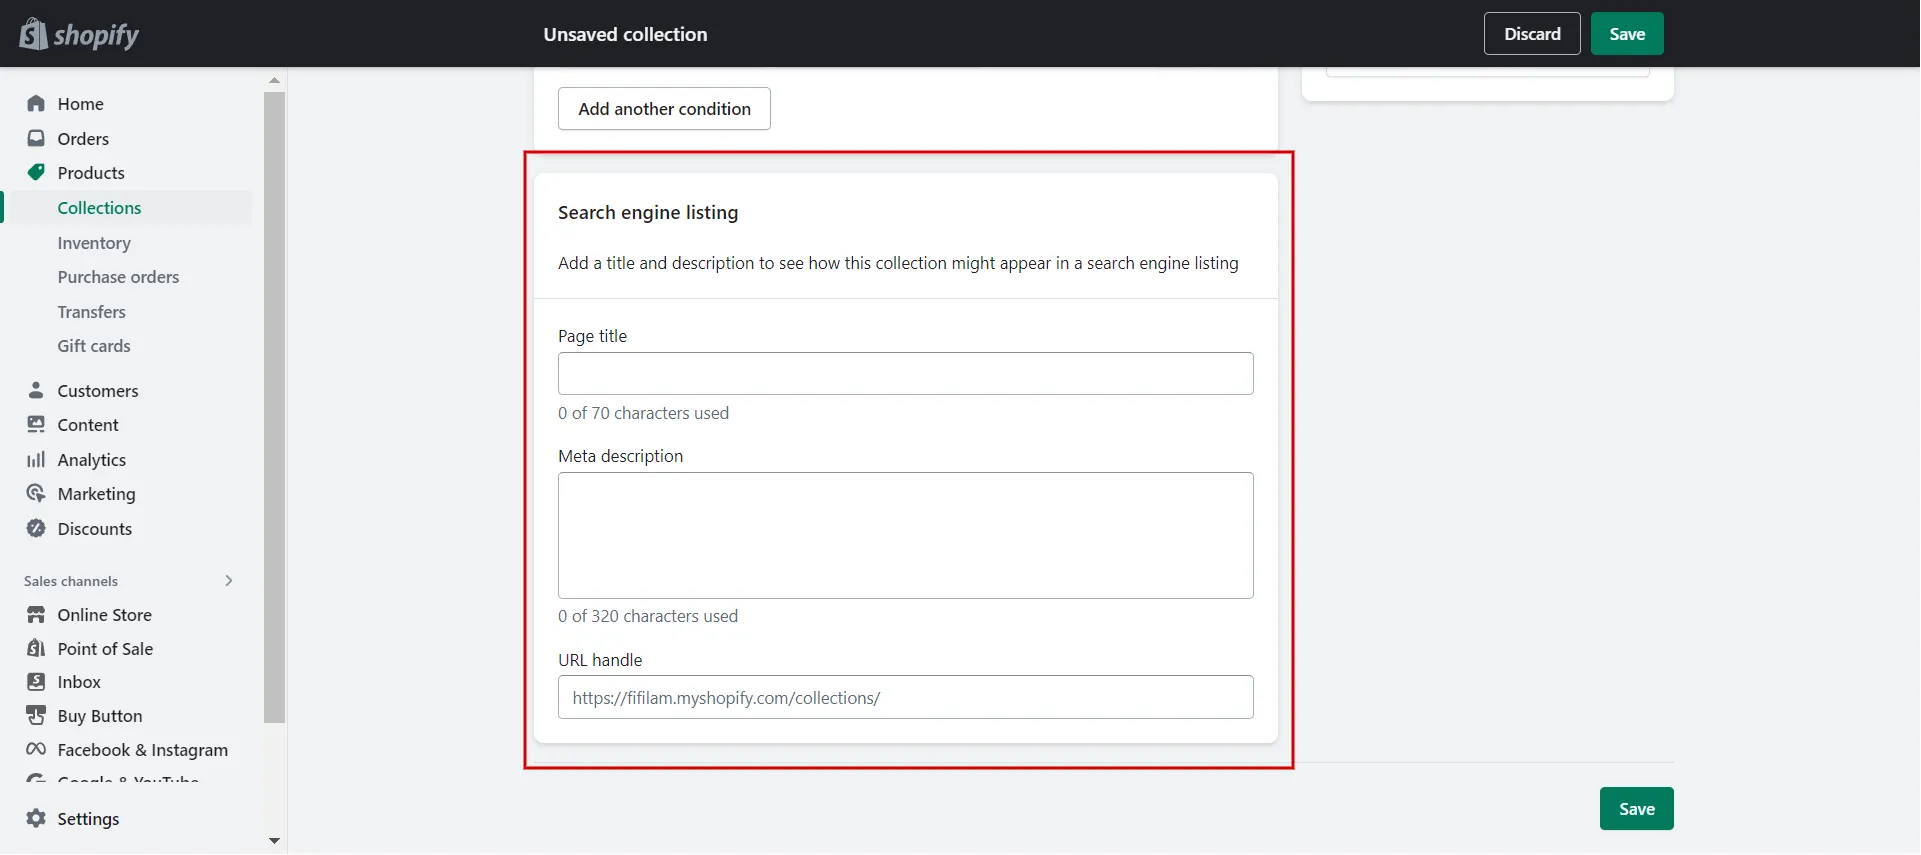
- Step 4: Fill in the Search Engine Listing for the Collection.
- Step 5: Hit the Save button at the bottom right.
So this is the way to add a web category in Shopify. In the next section, we mention some tips to add a category in Shopify quickly. Check it out!
Get more insight about Shopify:
- How to Add Products to Featured Collection on Shopify.
- Shopify Tips – 10 tips to double Shopify sales!
- Shopify Tutorial – Discover key steps to get instant sales.
Pro-Tips for Add a Category in Shopify
We have some notes for you when adding Shopify categories that will help you complete the process quickly and effectively.
- Product categories
- Ensure proper tax and shipping estimates.
- Evaluate and update product categories frequently to keep them current and accurate.
- Web categories:
- Create details names.
- Assist with a clear and simple navigation structure on your storefront.
- Highlight product collections or promotions.
- Use analytics to make your categories more precise.
- Make use of the categories Shopify Store app.
[wptb id=61200]
Add a Category in Shopify | FAQs
[sp_easyaccordion id=”61196″]
Final Words
Both categories may be added to your Shopify store, making it more straightforward for customers to browse and locate what they want, and Shopify handles all the product-related data, like tax or shipping costs. We have addressed your inquiry regarding how to add categories in Shopify using the procedures described in this article.
LitExtension, the #1 Shopping Cart Migration Expert hopes that our article, “How to Add a Category in Shopify,” will assist you in making Shopify categories and subcategories appropriate for your store’s requirements and enhance customers’ buying experiences. Read more blogs on the LitExtension blog and interact with our eCommerce community for more intriguing ideas.