If you feel like your current platform’s limitations are holding you back from scaling your online business, maybe it’s time for a BigCommerce migration. But how to migrate to BigCommerce, and what are the required steps?
Don’t panic! We’ve got you covered with this comprehensive guide, including:
- An overview of BigCommerce migration;
- The 3 popular methods to migrate to BigCommerce;
- How to migrate to BigCommerce properly;
- What kind of data can be migrated to BigCommerce;
Let’s dive right in!
BigCommerce Migration Overview
Before we dive into the detailed guide on migrating to BigCommerce, let us help you have a better understanding of BigCommerce migration first.
What is BigCommerce?
BigCommerce is a hosted eCommerce platform popular for its ease of use and robust set of built-in sales & marketing features.
When you sign up for a BigCommerce account, you’ll get an admin dashboard packed with all the needed features to set up and promote your store. This includes adding products, managing customers, handling orders, accepting payments, etc.
As per data by BuiltWith, BigCommerce is currently powering 42,000+ web stores and is loved for its stability and flexibility.
💡 Check out our unbiased BigCommerce Review for in-depth & unbiased information on BigCommerce’s pricing, features, pros and cons.
What is BigCommerce migration? Why migrate to BigCommerce?
BigCommerce migration is the process of moving your online store from a different eCommerce platform to BigCommerce. This involves transferring essential components of your store, including:
- Product data: Details of your products, like descriptions, images, prices, and stock levels.
- Customer information: Details about your customers, such as names, contact information, and purchase history.
- Order history: Records of past orders, including order statuses and transaction details.
- Any additional content from your current platform, like collection pages, blog posts, etc.
But why migrate to BigCommerce? Well, consider performing the migration if you want to:
- Manage your online store easily with a drag-and-drop editor and an intuitive dashboard.
- Extend your store’s functionalities with robust eCommerce features
- Easily add up to 600 variants per product – something that is rarely possible with most platforms.
- Save extra transaction fees. BigCommerce doesn’t charge you extra transaction fees for not using their payment gateway.
- Leverage over 1,000 apps on the BigCommerce App Store to optimize your store for traffic and conversions.
- Fully customize URLs, edit robot.txt file, and CDN to optimize your store for search engines/
Possible Methods to Perform BigCommerce Migration
BigCommerce migration can be performed in various methods. You can manually migrate the store by yourself, hire an expert to do so, or go with migration service providers.
Method 1: Transfer data manually
This method involves manually exporting data from your current platform and importing it into BigCommerce. You’ll handle product data, customer information, order history, and any other relevant content.
Though you can save costs, the manual method requires a good understanding of both BigCommerce and the current platforms’ data structures.
[wptb id=70760]
Method 2: Hire a BigCommerce expert
As its name already suggests, this method involves hiring a BigCommerce expert who specializes in eCommerce migrations.
The experts will then manage the entire migration process, from data export to import, ensuring that all your store’s requested data is accurately transferred to BigCommerce.
Though you can browse expert marketplaces like UpWork and Fiverr, we highly recommend you choose an expert on BigCommerce’s Expert Marketplace for more guaranteed quality.
You can hire a BigCommerce expert to handle the migration
Alt: bigcommerce expert marketplace
Nevertheless, you should note that hiring an expert can get very pricey, especially if you have lots of custom requests.
[wptb id=70762]
Method 3: Utilize LitExtension’s migration services
Because the manual method costs a lot of time while the second method costs an arm and leg, the majority of merchants choose to do BigCommerce migration with reputed migration services like LitExtension.
We have 10+ years of experience handling 280,000+ successful migrations between 140+ eCommerce platforms.
At LitExtension, we offer both automated tools for self-service migration and a comprehensive All-in-One migration package, where you have a Personal Assistant to handle the entire process.
Due to the scope of this blog, we’ll show you how to migrate to BigCommerce using the LitExtension automatic tool.
[wptb id=70764]
3 Stages to Migrate to BigCommerce With LitExtension
Now that you have a better grasp of BigCommerce migration and some popular methods to perform the switch, let’s explore how to migrate to BigCommerce using LitExtension’s automatic migration tool.
Stage 1: Prepare for your BigCommerce migration
Backup your current store’s database
Though LitExtension’s migration services won’t interfere with any of your data, for safety reasons, we always advise merchants to do a full backup of their current store’s database. This will come in handy in case you encounter data loss or damage during the migration process.
Depending on your platform, the data you can back up will be different. We suggest backing up your whole store. But if you can’t, ensure you back up crucial data like products, customers, orders, etc.
You can export them to CSV files and save the files securely on your PC.
Set up a BigCommerce store
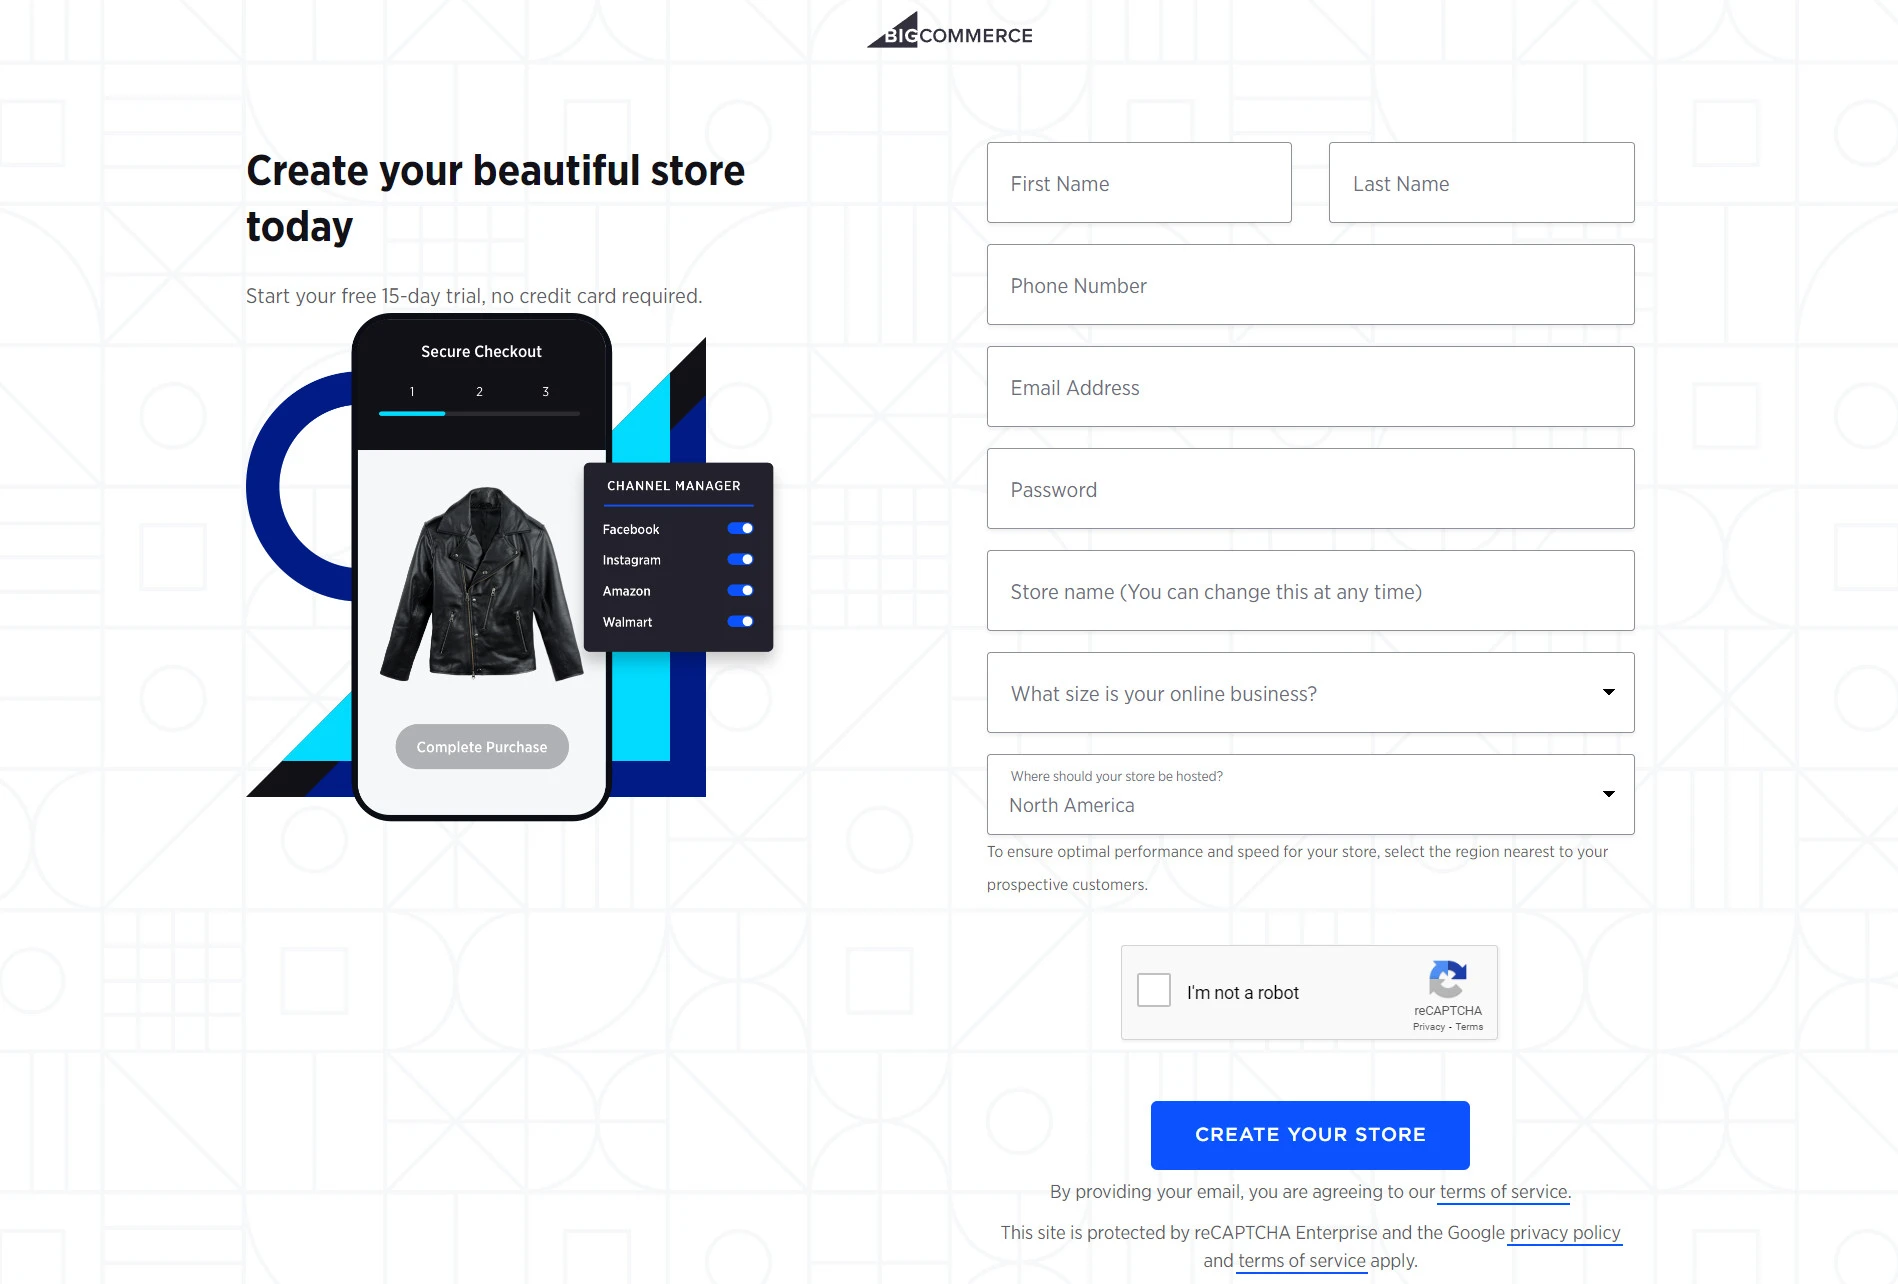
After you back up your store database, the next thing to do is set up a BigCommerce store.
- Sign up for a BigCommerce account via https://www.bigcommerce.com/start-your-trial/
- Fill in all your store’s important information to proceed.
- Choose a BigCommerce pricing plan that best suits your demand and budget.
Spend some time to get a better hang of BigCommerce’s dashboard and user interface. Or else, check out our A-Z BigCommerce Tutorial for a detailed guide on setting up a functional BigCommerce store.
Stage 2: Transfer data to BigCommerce
After you have backed up your current data and set up a new BigCommerce store, let’s get to the main part of BigCommerce migration – transferring data to BigCommerce using LitExtension’s migration services.
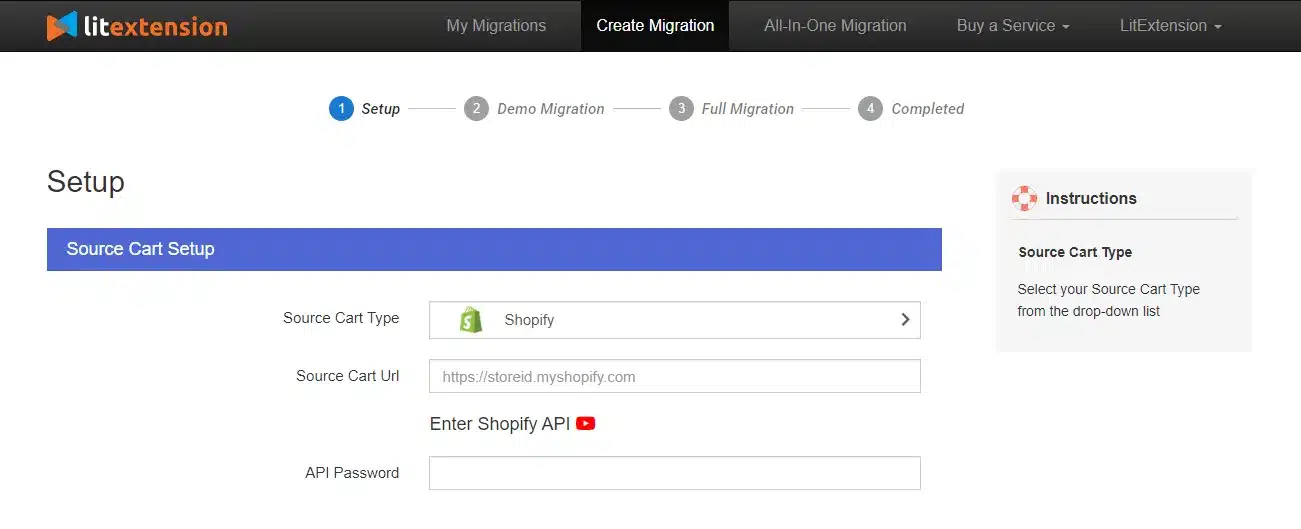
Step 1: Configure Source & Target cart
First, sign up for a free LitExtension account. Then, log in to your newly signed-up account and click Create Migration.
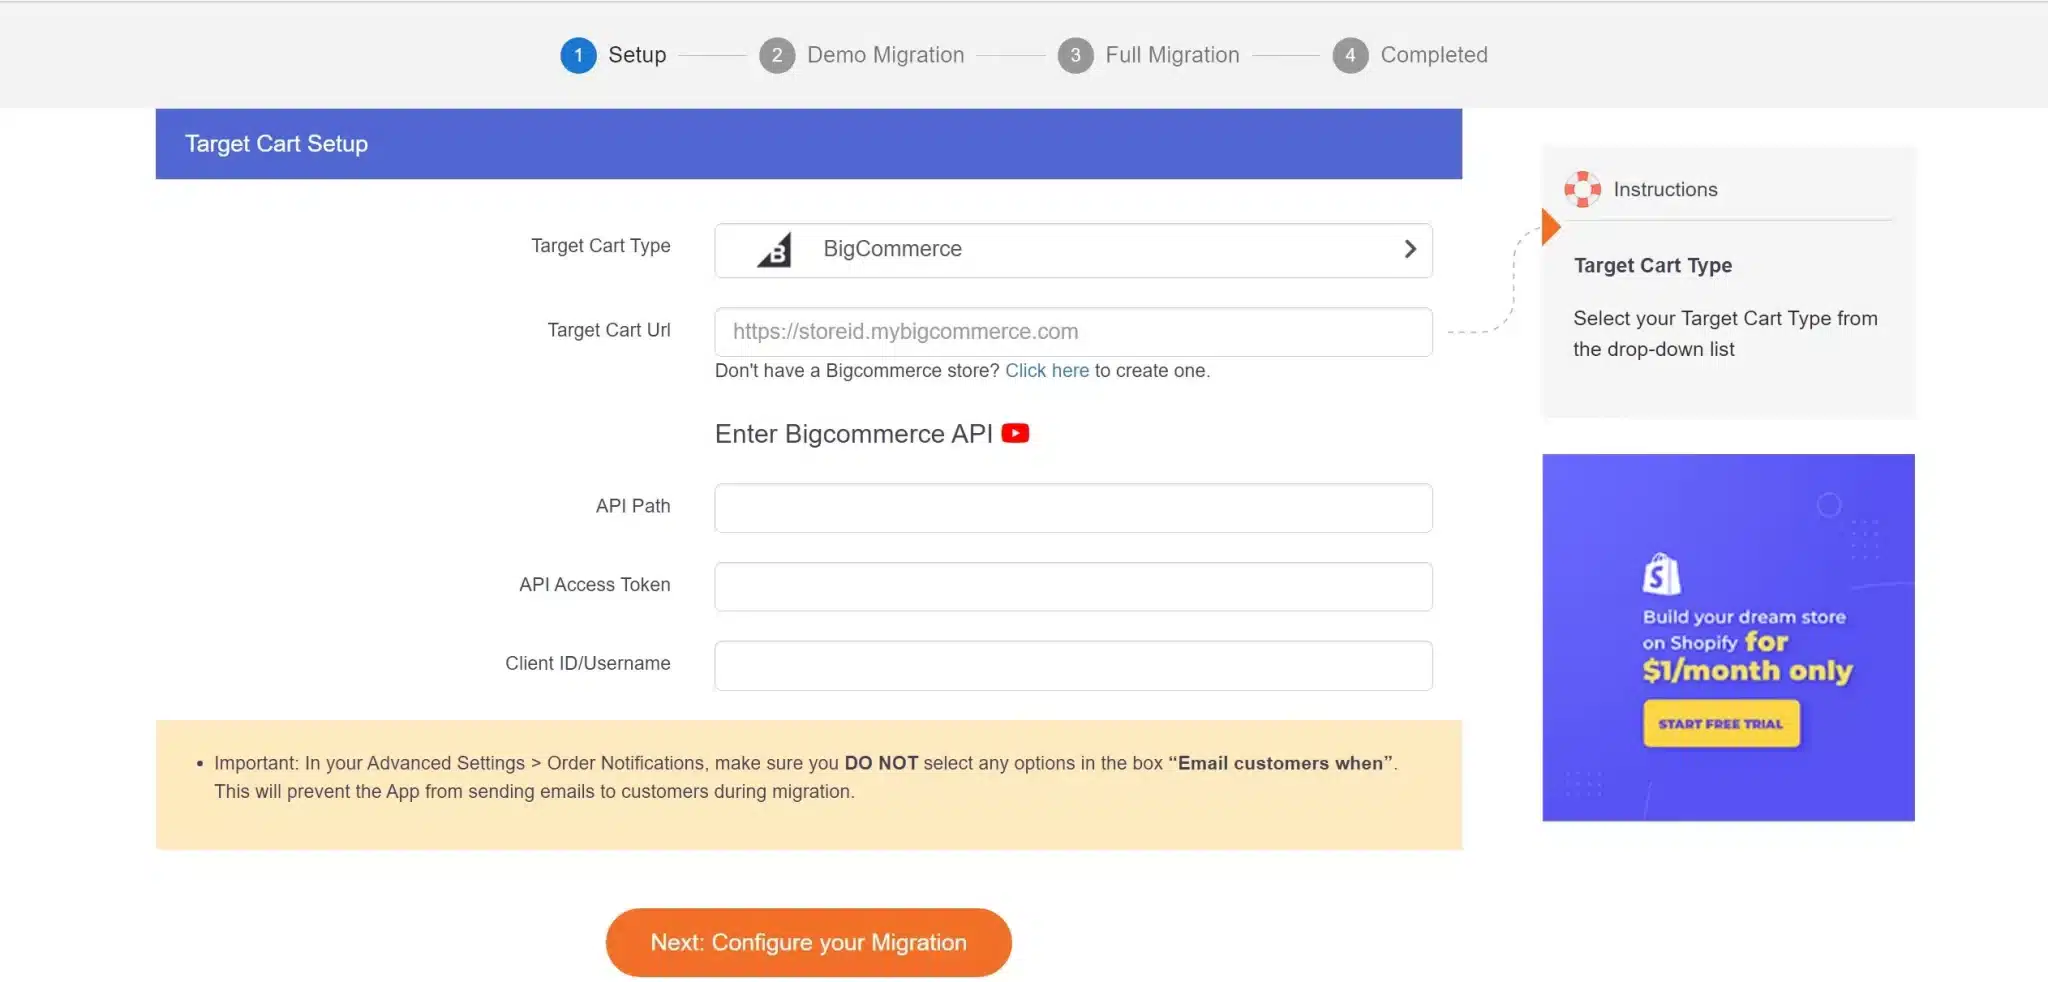
Afterward, you will be required to set up your Source Cart and Target Cart. The source cart is your current eCommerce platform, and the target cart is the platform you migrate to, which is BigCommerce.
In this guide, we will set Shopify as the Source Cart Type. Simply go to the migration setup page and fill in the necessary information, including your Shopify store URL and Shopify API password.
For the Target Cart Type, follow the same steps by selecting BigCommerce from the drop-down list. Then, provide your store URL, API Path and token, and Client ID/Username.
After successfully setting up your Source and Target Cart Type, let’s continue this BigCommerce migration checklist by choosing the entities you want to migrate to BigCommerce.
Step 2: Choose migration entities
With LitExtension’s automatic BigCommerce migration tool, you can transfer your store’s products, customers, orders, and many other entities, which we will detail later in this article.
You can choose to migrate some specific entities; however, it’s recommended that you tick them all for a more comprehensive migration.
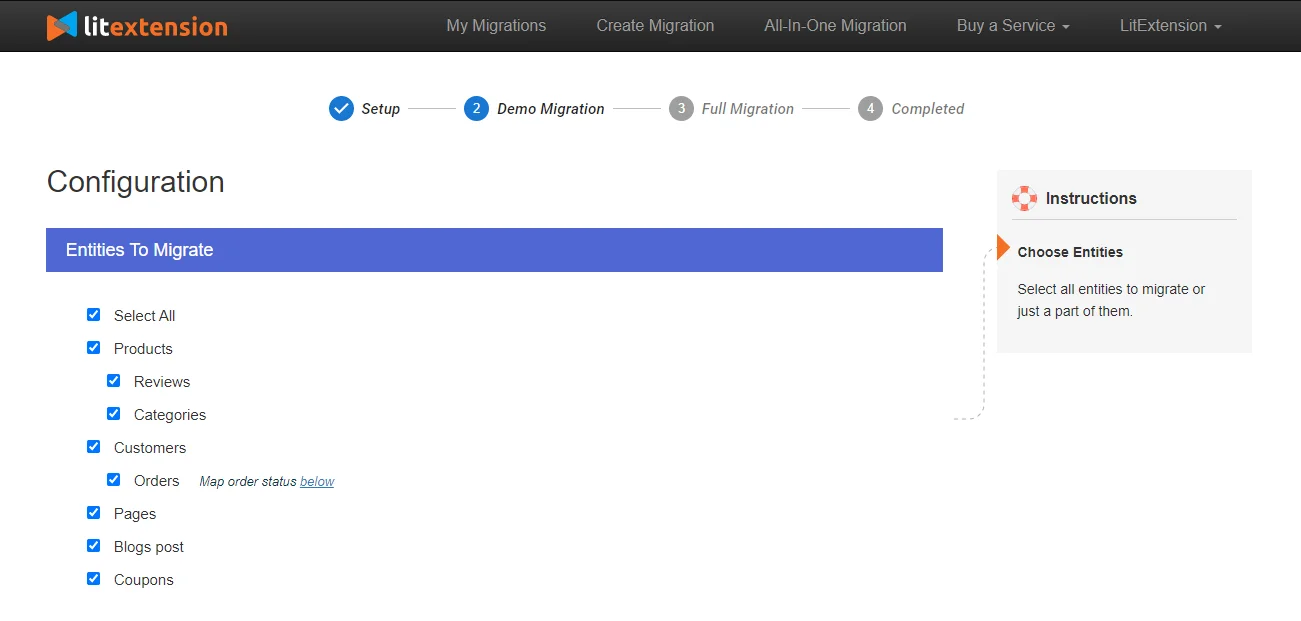
What’s awesome about our automatic tool is that you’ll get to choose Additional Options to refine your migration quality. Here are the three options that are most commonly selected by our clients:
- Preserve Order IDs on your BigCommerce store after the migration so you can immediately pick up where you left off.
- Create 301 redirects for your previous products and categories URLs from your Source Store to BigCommerce to help preserve your hard-earned SEO effort.
- Strip all the HTML tags from your category, product names, and descriptions so they will display properly on your BigCommerce store.
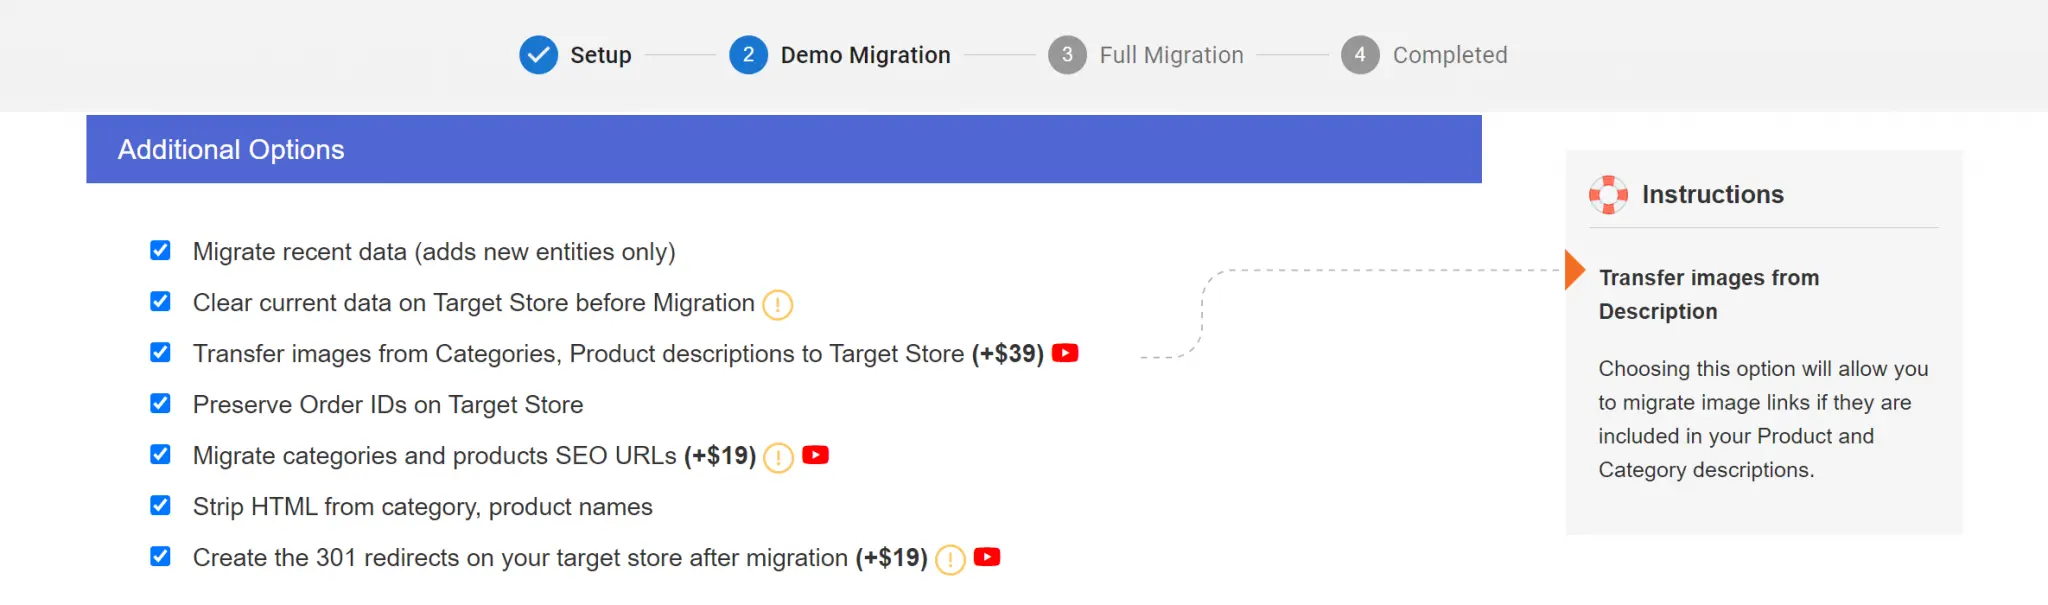
| 👀 Saving tips?
Did you consider ticking all the options or almost all of them? If so, we highly recommend that you choose our BigCommerce All-in-One migration package. This is because, with the AIO package, all additional options are completely free. |
Step 3: Perform full migration
After you have chosen the entities to migrate, let’s perform the BigCommerce demo migration.
Though you can skip the demo migration, we highly advise you to take it to test out the water before initiating the real process. This will give you a sense of how the migration works and whether you want to make any custom changes.
If you are satisfied with the demo, you can proceed with the full BigCommerce migration. When the migration begins, it will run seamlessly and securely on LitExtension’s server. Therefore, you don’t have to keep your browser on.
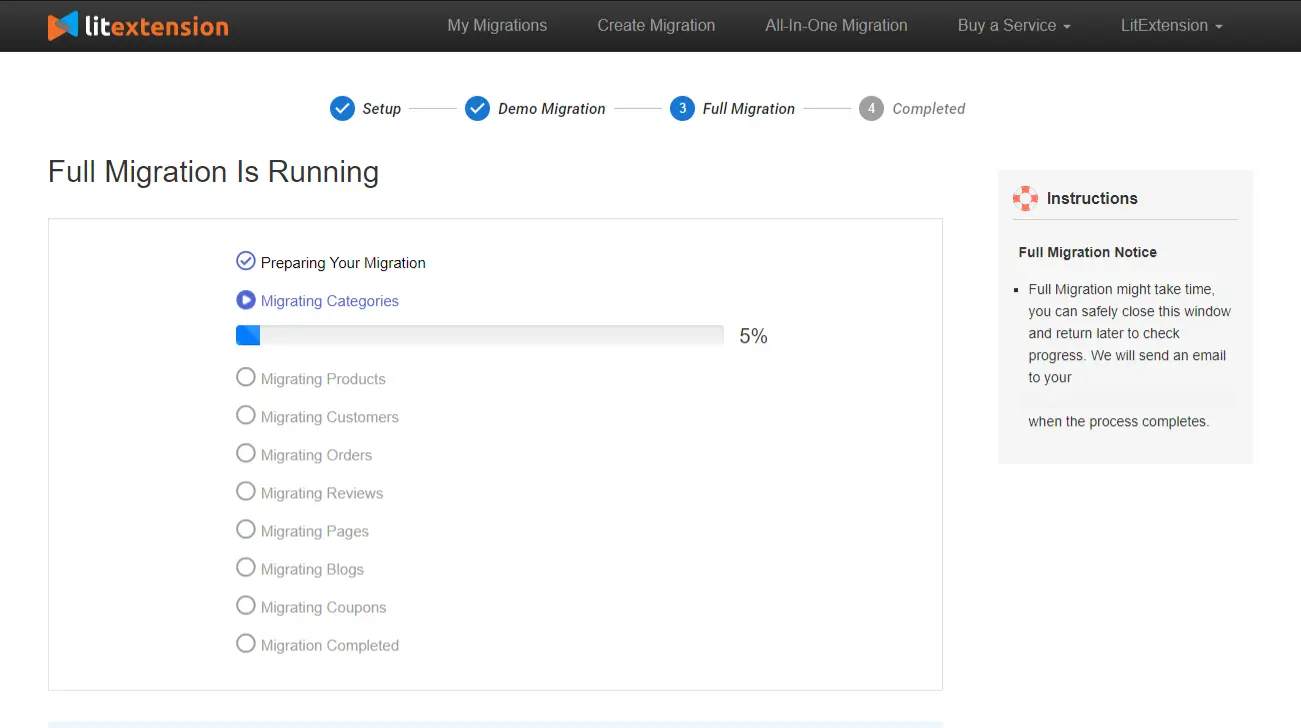
After the migration has been completed, you will be notified via the email you use to sign up for the LitExtension account. So remember to check your mailbox.
Stage 3: Set up your BigCommerce store after migration
After successfully migrating your eCommerce store to BigCommerce, it’s important to ensure a smooth transition and optimize your new store for conversions.
Here is a list of things that need to be done for your reference:
- Ensure that all the data you choose to migrate, including product information, customer data, order history, etc., have been accurately migrated to your BigCommerce store.
- Once you’re confident about the migration accuracy, the next step is to update your Domain Name System (DNS) settings. This process involves pointing your domain name to the new BigCommerce store.
- Select a BigCommerce theme and customize it to reflect your brand’s identity through logos, color schemes, and font styles.
- Set up shipping methods and rates for your BigCommerce store.
- Set up payment gateways that cater to your target audience’s preferences and ensure secure, seamless transactions.
- Don’t forget to add necessary BigCommerce apps to extend your BigCommerce store functionalities.
- Finally, remember to place a test order on your BigCommerce store. This step is crucial to ensure that your customers’ entire shopping process, from product selection to checkout and payment, is functioning smoothly.
| 💡Check out our BigCommerce Tutorial for detailed steps, tips, and tricks on launching and scaling your BigCommerce store to success. |
A List of Data Can Be Migrated to BigCommerce
As a top-notch migration service p in the market, LitExtension empowers you to migrate any data you can think of to BigCommerce.
Here is a list of them all for your better reference:
[wptb id=70758]
Frequently Asked Questions
[sp_easyaccordion id=”70756″]
Final Thoughts
Thanks to BigCommerce’s stability and scalability, BigCommerce migration can be a real lifesaver if you feel like reaching a dead end with your current platform. And for that, we hope our guide can help you have enough insights to take action and perform a seamless shift to BigCommerce.
Don’t forget to dive into LitExtension’s blog and join our active Facebook Community to get inspiration, tips, and tricks from 15,000+ global entrepreneurs.