Are you worried about what BigCommerce entails when transferring data from your current website to this platform? If so, this BigCommerce migration checklist will provide you with all the necessary things to consider for the process.
In our blog, we will instruct you on all 3 stages of the BigCommerce migration process:
Right now, let’s find out more about replatforming steps on BigCommerce with us below!
BigCommerce Migration Made Easy With LitExtension
Our team of experts can safely transfer your business data, products, customers, and orders to unlock more growth in this promising eCommerce platform. Let us provide a customized migration for you!
Why Should You Migrate To BigCommerce?
BigCommerce is a hosted eCommerce platform that delivers powerful tools to run an online store with simple customizations. You only need to sign up for a BigCommerce account, plus some personalizations. Now, it’s time for your business on this platform.
For a deeper understanding of how to work on BigCommerce, let’s refer to our BigCommerce review blog.
Nevertheless, it might be a challenge to transfer anything between distinctive platforms. If there are any mistakes, your store’s performance will surely fail in the public sight. That’s when the eCommerce migration checklist becomes more critical. With this detailed BigCommerce migration checklist, we believe that you can easily attain a smooth store switch to BigCommerce.
BigCommerce Migration Checklist – A Comprehensive Guideline
To help you have a smooth BigCommerce migration, LitExtension – #1 Shopping Cart Migration Expert has crafted a full BigCommerce migration checklist below. With our detailed guide, we believe you will easily transfer your current store to BigCommerce without making any unexpected mistakes.
Stage 1 – Pre-migration process
1. Evaluate your current site
Start your BigCommerce migration checklist by having a comprehensive overview of your current eCommerce site. It means that you need to check all details, ranging from its structure to data flows, to display in the visitors’ sight.
Besides that, don’t forget to assess any migration-relating element, special integrations, or even third-party apps available to support your process. If you can optimize the functions of these factors, it is a great start for a BigCommerce migration.
2. Define migration goals
After having clear evaluations above, let’s continue with defining your site migration goals. Basically, the platform migration meaning aims to bring more fine results for your current eCommerce store. Thus, it is necessary to set up specific expectations to guide business owners in easily completing eCommerce replatforming steps.
We also recommend you establish a particular timeline for all migration stages to ensure your store’s status is accessible during any temporary website downtime. Let’s prepare backup plans or run testing phases for some unexpected problems.
3. Back up database
To follow the database migration checklist; you need to have a database backup to prevent information loss effectively. Let’s check our guide on how to back up BigCommerce for the finest results.
Besides that, the data folder should be under the CSV format, with basic data such as:
- Category names
- Product descriptions
- Product options
- Inventory tracking
In case the product descriptions cover PDF files or embedded images, you need to re-add those after your migration. Moreover, don’t forget to get relevant archive files for translations, themes, and external integrations to enhance database protection in any issues.
Depending on your current platform, you will conduct this process distinctively. That’s why you should refer to BigCommerce migration official documents from other platforms like Shopify, or Magento to have the best experience.
4. Review a proper BigCommerce plan
Then, assess in-depth BigCommerce plans, comprising their outstanding features and monthly/annual costs. We mean that you should review your store’s size to pick a proper plan, which will bring positive impacts to your business growth in the future.
Currently, BigCommerce offers 3 pricing tiers for eCommerce merchants, including:
- Standard: $39/month
- Plus: $105/month
- Pro: $399/month
If you select to pay annually, you can get a 25% discount compared to the monthly payment. In case you are not sure what BigCommerce brings can satisfy your demands, let’s try a 15-day trial to run some test orders with no fee.
5. Register for a BigCommerce account
To start your business on BigCommerce, a new account is a must-have. All you need to do is provide an email address and complete the relevant fields to successfully register for a BigCommerce account.
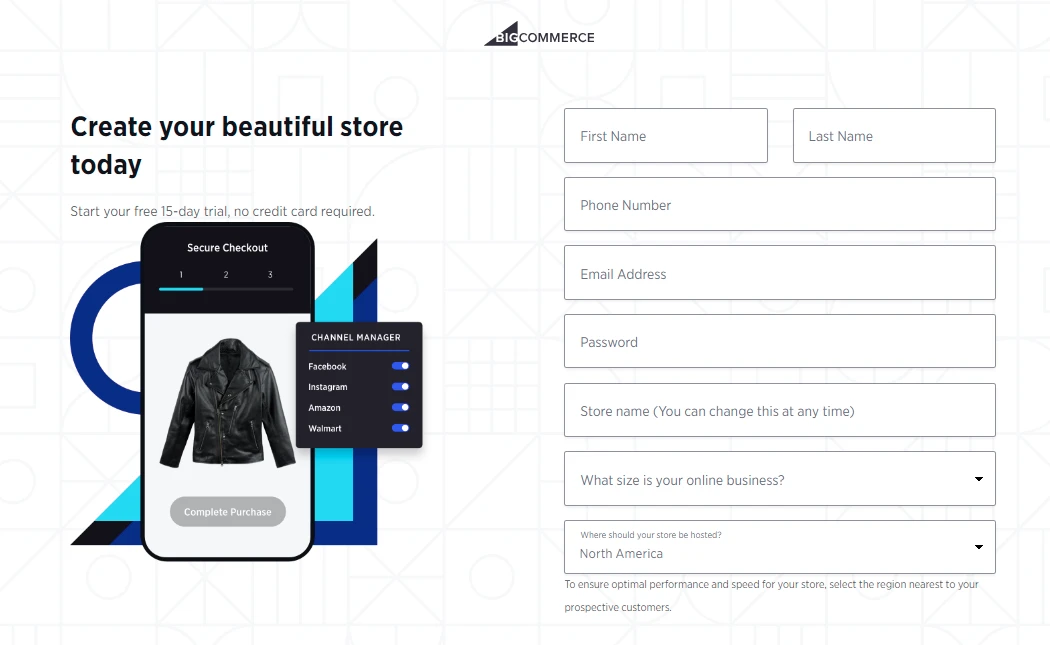
After that, let’s wait for 5 seconds to navigate a Log-in window, then fill in verification codes to create a store on BigCommerce. Right now, your BigCommerce dashboard is ready to operate for any eCommerce migration services.
Stage 2 – Migration process
6. Configure migrated data
First, we should have a full list of everything that we need to switch, like orders, products, customers, eCommerce categories, and marketing content. Some important eCommerce elements to consider include inventory, shipping profiles, transaction rates, and payment gateways.
From our experience, there are some kinds of data below that appear in the BigCommerce migration checklist:
- Pages (eg. home, contact, about, product, 404 error, and shipping policy)
- Blogs
- Products
- Customers
- Order-relating fields (inventory, shipping, transactions, etc.)
- Gift cards, discounts, store credits, and certificates.
7. Get a migration method
About a migration method, we will list the 5 following options:
- Use CSV files: It is ideal to transfer basic data fields but not complicated ones.
- Get eCommerce migration services from a third party: Some solutions provide dedicated tools to attain replatforming steps on eCommerce platforms like Magento or WooCommerce.
- Transfer data manually: Users can copy the current site’s content, and then paste it on BigCommerce (preferred a small amount).
- Hire a BigCommerce Partner: Experts can help you reach multi-site integrations effectively.
- Get the service of a BigCommerce Partner using the API: It offers a flexible method but requires a high custom integration ability.
Being one of the leading solution providers promoting the switching process among platforms, LitExtension – #1 Shopping Cart Migration Expert is currently a professional BigCommerce Partner. With over 13 experience years in this field, we can launch a comprehensive service to support your BigCommerce migration successfully.
For our All-In-One Migration Package, we ensure that your migration project will always be followed by a Personal Assistant (PA). This is especially effective in tackling any issue immediately, which helps you restrict unexpected incidents for your online store.
8. Import data to BigCommerce
Based on each migration method, let’s start importing the identified data into your BigCommerce store properly. To ensure an error-free process, you need to follow all relevant instructions, as well as additional technical requirements. Besides that, don’t forget to customize data fields on the new platform to optimize the original structure effectively.
Save Time Import Store Data to BigCommerce
Trusted specialists streamline migrations that actualize ambitions.
9. Review the results
Assessing the results after importing data is also an integral step of the BigCommerce migration checklist. Indeed, this can help you to address problems promptly to ensure the completeness of the transferred database.
Below are some important data fields you should consider in this case:
- SKUs and product IDs
- Headers and title tags
- MFG Part Numbers
- Meta Descriptions
10. Conduct your URL redirect strategy
Whether you follow any migration method, 301 redirects will be created for your current store’s product and category URLs. It is great for business owners to update their URL structure to be more friendly to search engines while redirecting the URLs to the new pages in BigCommerce.
In case you redirect pages manually, let’s enter the new URL for each BigCommerce page. With dynamic redirects, you can run through the products, categories, or blog entries that are easily accessible to your customers. To activate 301 redirects on BigCommerce, you need to register for a paid plan.

If you are not ensured to apply this process on your own, let’s take the assistance of a BigCommerce Partner. With a highly skilled team and professional services, you can save much time and avoid risks of non-compatibility.
11. Migrate product categories
BigCommerce allows you to migrate product categories directly from other platforms. All you need to do is add the respective product paths in each category field of the BigCommerce import file.
Stage 3 – Post-migration process
12. Customize your BigCommerce theme
Once completing BigCommerce checkout for your site’s data fields, it’s time to have the store theme customization. To enhance your site’s identity, you should decide on a layout that matches both your brand image and products.

Currently, there is a broad range of BigCommerce templates, including free and paid ones. That’s why you can easily select any option to make your site outstanding in the public. After installing one for your new store, let’s start adjusting relevant elements like colors, image sizes, layouts, or fonts.
13. Check product categories
After having the product category migration above, it’s important to check all relevant fields to ensure a high compatibility between both platforms. From the BigCommerce Dashboard, you can navigate Product Categories to start evaluating all products’ current displays. This step allows you to rearrange categories, toggle their status, or control the assigned products.
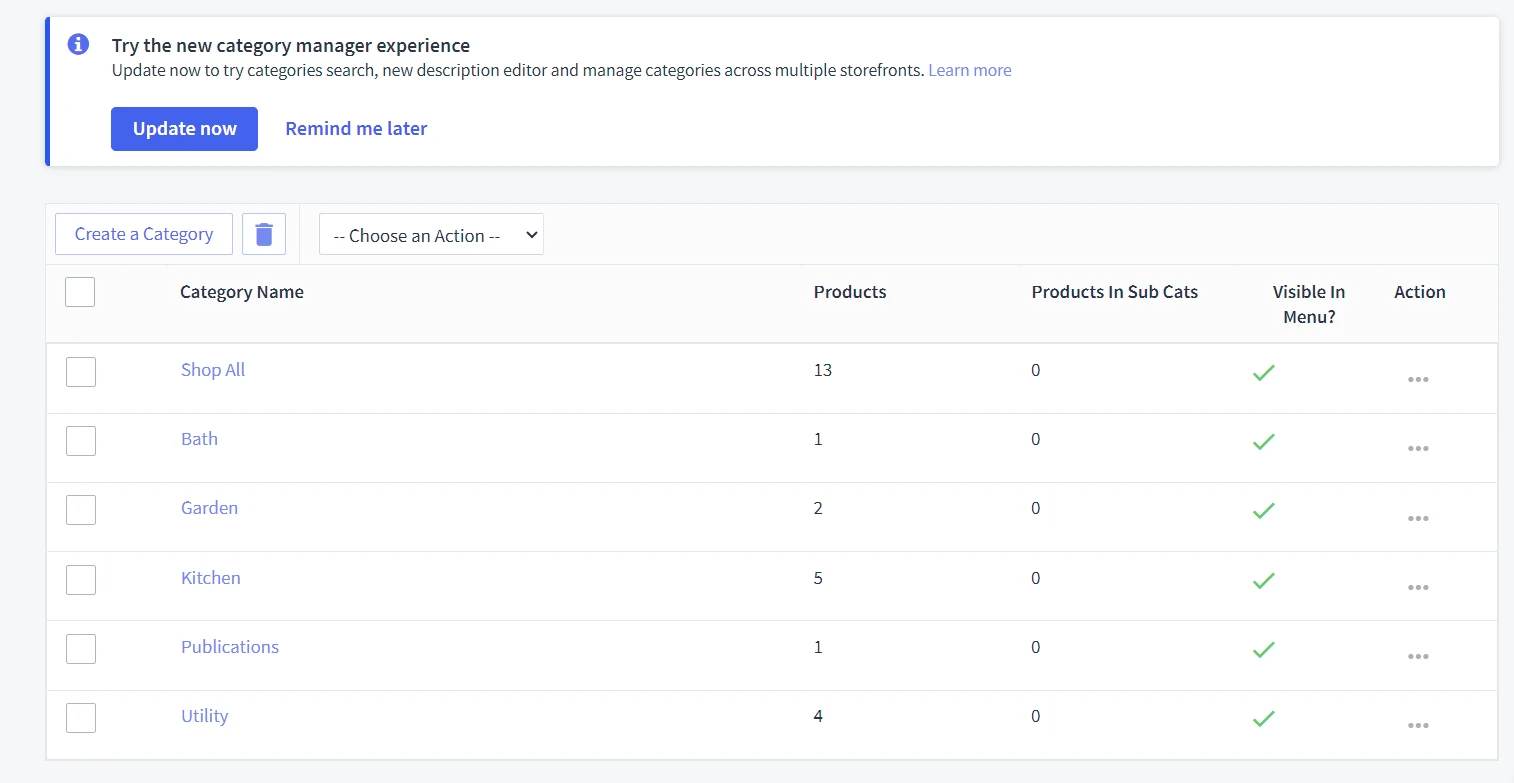
In case some categories don’t appear on your BigCommerce storefront, there might be due to several potential reasons below:
- Mistakes in assigning the category to another channel
- Customer groups/display settings can not be configured correctly
- The database needs to be refreshed
- The visibility status is not be enabled
Let’s check all concerns to tackle problems effectively.
14. Configure the shipping settings
Within BigCommerce’s shipping settings, you need to consider the following important fields to optimize your sale value effectively:
- Where you ship from (shipping origin address): It is used to calculate shipping quotes and identify proper shipping carriers.
- Where you ship to (shipping zones): In BigCommerce, users can configure shipping zones as one/a group of countries, ZIP/postcodes, or one/several states. This can be beneficial for both local and cross-border merchants.
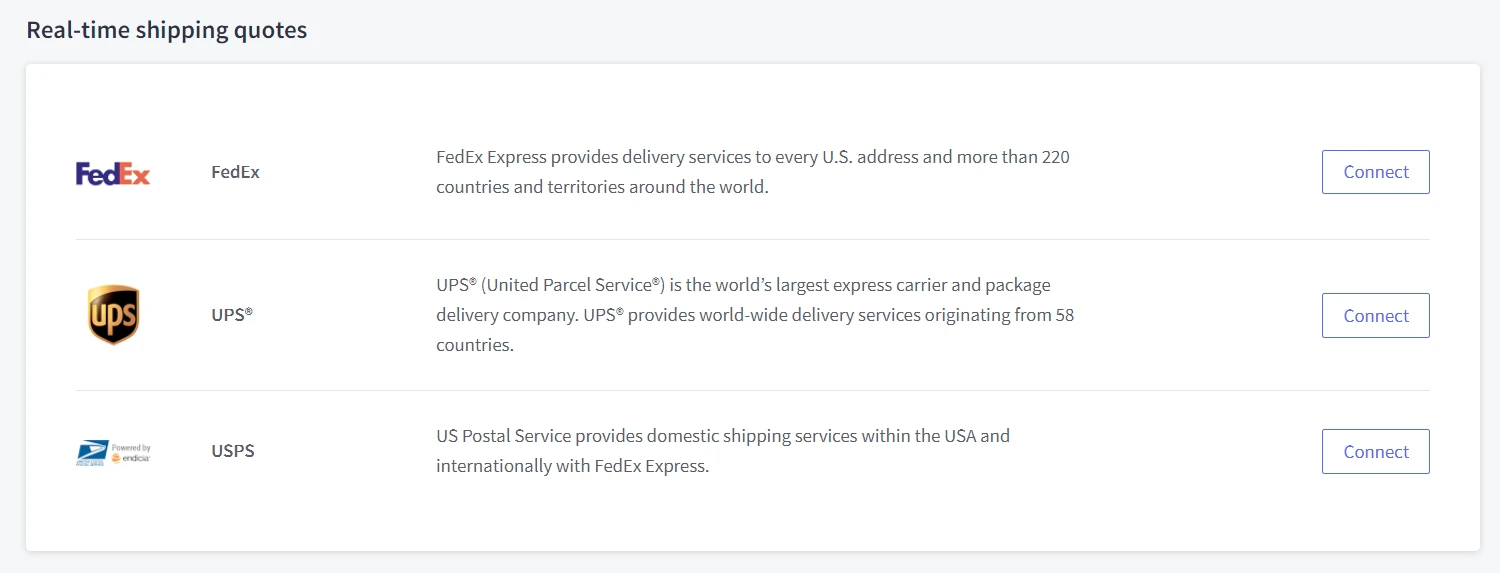
- Shipping methods: With BigCommerce standard plans, you can establish 2 groups of rates, including static and real-time shipping quotes.
15. Set up the taxes
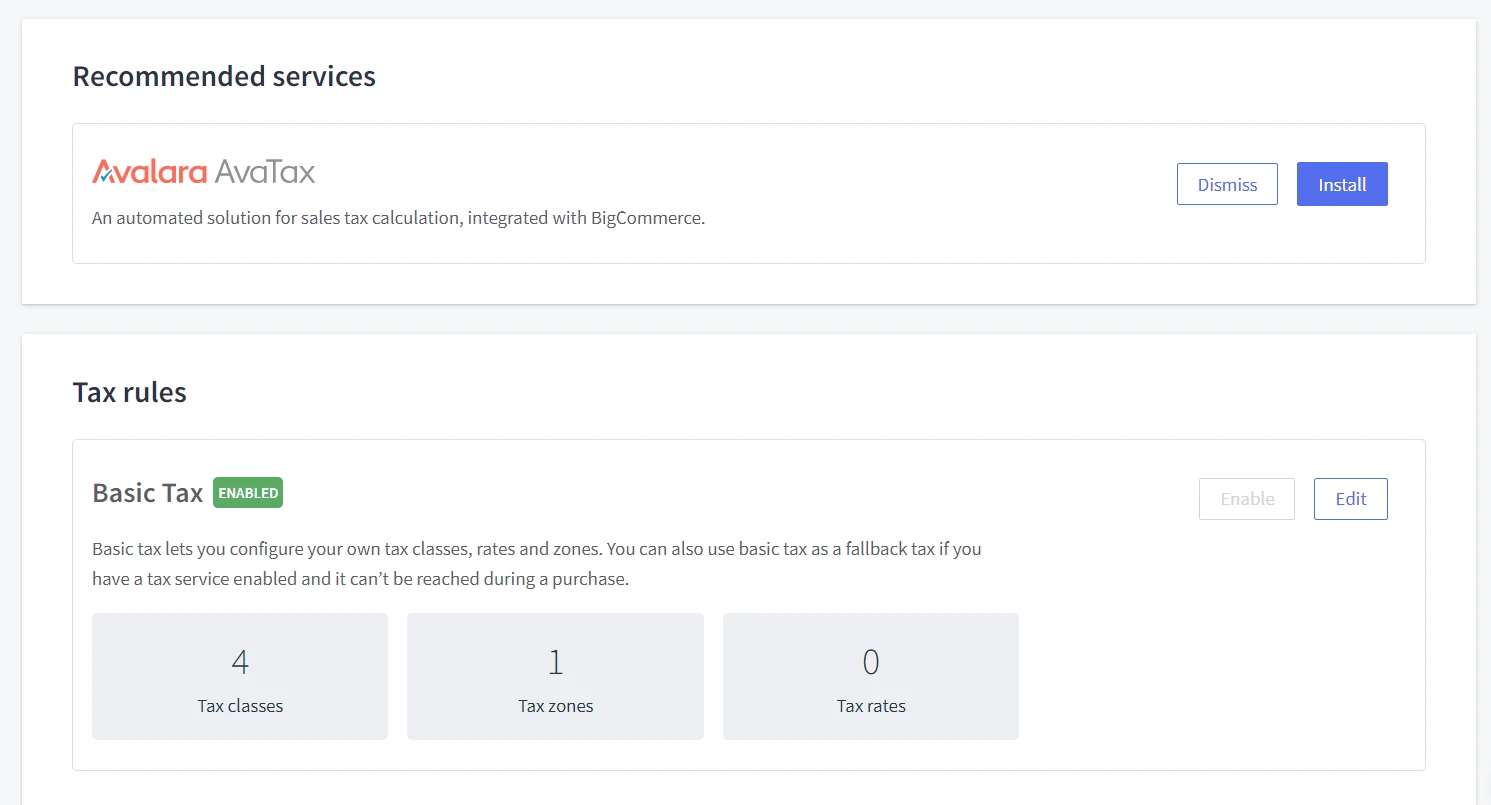
The tax-managing functionality in BigCommerce allows you to easily estimate the total of taxes that you need to remit to the relevant government authorities. We recommend you use Automatic Tax Setup to cover each order’s tax automatically, as well as optimize the time for this requirement.
16. Purchase an SSL certificate
In all steps of the BigCommerce migration checklist, it’s important to check whether your store is under the protection of an SSL certificate or not. Normally, all BigCommerce stores are outfitted with a free SSL certificate (Encryption Everywhere). However, to enhance the safety of your store’s data, we suggest activating other paid SSL certificates.
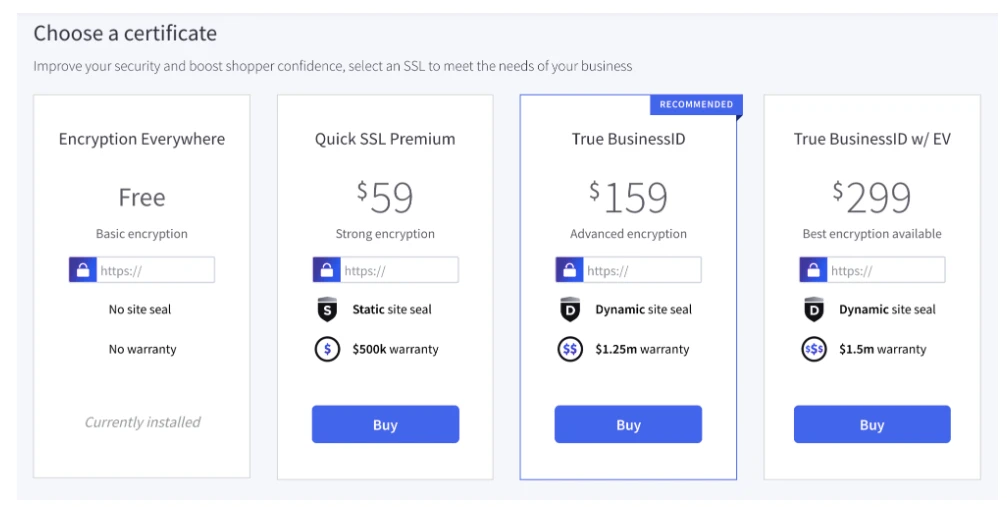
With each SSL plan, your BigCommerce site will be offered additional features like extended validation, site seals, or advanced purchase protection. Besides that, you can use a third-party SSL certificate (available on Pro and Enterprise plans).
17. Set up the payment options
During the BigCommerce checkout process, your customers need to opt for a proper payment method available on your online store. This platform allows the customers to reach vast options, aiming to satisfy their different demands.
Basically, there are 4 payment groups to consider, including:
- Credit card processors: PayPal, PayPal powered by Braintree, Stripe, and Adyen
- Buy now, pay later: Affirm, and PayPal Pay Later
- Accelerated checkout: Bolt and Link
- Digital wallets: Visa Click to Pay, Apple Pay, Amazon Pay, Venmo and Google Pay
18. Have order tests
To ensure the finest results for the final orders, we recommend you display at least one order test. Some important fields you need to evaluate are order processing, email notifications, inventory, shipping, and taxes. In case there are any mistakes, you can make proper modifications immediately.
As an actual shopper, visit your BigCommerc store and complete all steps to place any order. From the BigCommerce Dashboard, navigate to View Store to start your shopping journey on your storefront.
19. Transfer your domain
The final step of this BigCommerce migration checklist is to switch your domain. You can purchase a new domain or transfer the domain to connect your current store with BigCommerce. Before minimizing lost traffic after having a domain transfer, let’s consider some common mistakes below to have good preparation:
- Verify both a new and old domain in the Google Search Console
- Build a 404 error page and create 301 redirects during the transfer
- Summit both the old and new sitemaps to Google
- Take the assistance of the Change of Address tool in Google Search Console
BigCommerce Migration Checklist – FAQs
[sp_easyaccordion id=”70058″]
Conclusion
Our blog has just prepared a complete BigCommerce migration checklist to help you run your new store on this platform for success. If you are struggling with migrating, let’s take the assistance of LitExtension to optimize your site’s performance effectively. Contact us anytime you need.
LitExtension, the #1 Shopping Cart Migration Expert, hopes you have a wonderful experience with BigCommerce migration. Check out our LitExtension Blog or join our Facebook Community Group for more insights.
