
How to Add Products to Shopify: Step-by-Step Guide
If you’re just getting started and wondering how to add products to Shopify, this guide walks you through the key methods, step by step:
- Manually through the Shopify admin
- Using the mobile app
- Importing products with a CSV file
- Adding products via apps
We’ll keep it simple and practical, so you can get your store ready to sell, without the guesswork. Let’s get started.
How to Add Products to Shopify Manually
If you’re adding products one by one, Shopify’s admin makes it easy to enter all the key details in a clear workflow. Follow these steps to get your product live.
Step 1: Add a new product
From your Shopify admin, go to the left-hand menu and click Products (1).
Then, in the top right corner, click the Add product button (2).
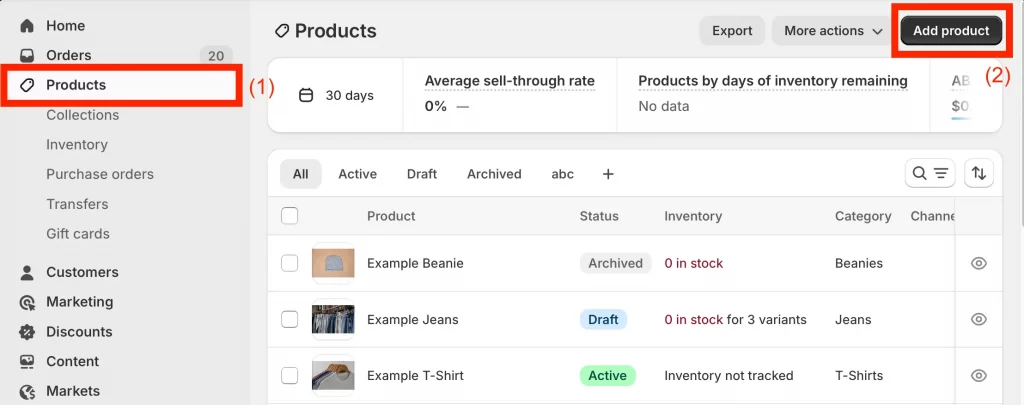
This will open a new product page where you can enter all the details, like name, description, price, images, inventory, and more.
Step 2: Add a product title and description
Start by entering a clear and recognizable product title. Keep it simple and descriptive, for example, “Unisex Short Sleeve Green T-Shirt”
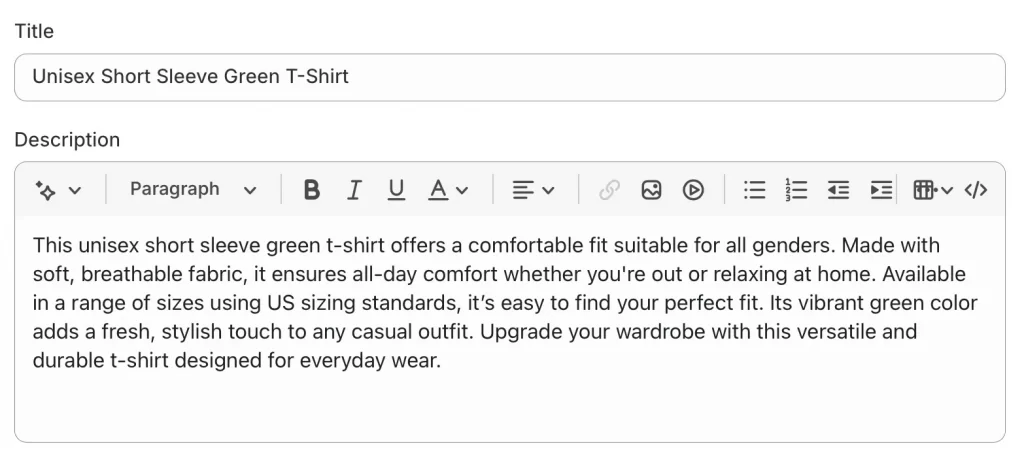
Then move down to the Description box. This is where you can describe your product’s features, materials, use cases, and any other information customers should know before making a purchase. You can use headings, bullet points, or short paragraphs to make it easy to scan.
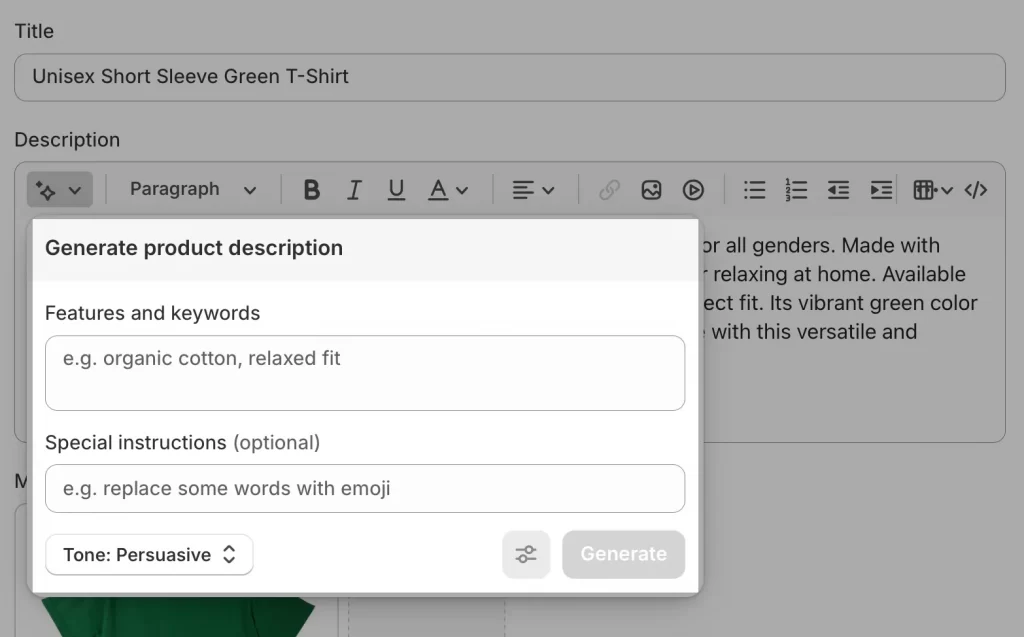
If you’re not sure where to start, you can use Shopify Magic, a built-in AI tool that helps you generate product descriptions automatically. Simply enter a few keywords, such as “organic cotton” or “relaxed fit,” and select a tone that aligns with your brand.
Even if you use Shopify Magic, always review and personalize the final copy to match your product and brand voice.
For tips and templates to write product copy that converts, see our guide on how to write Shopify product descriptions that sell.
Step 3: Upload product images or media
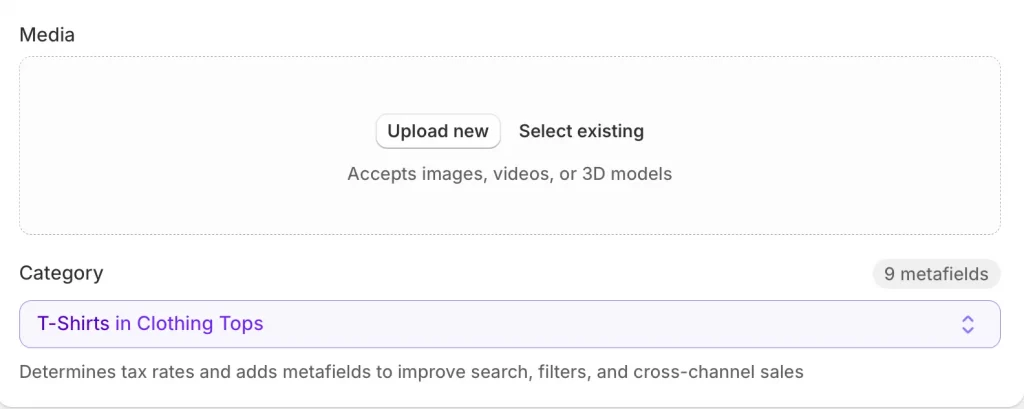
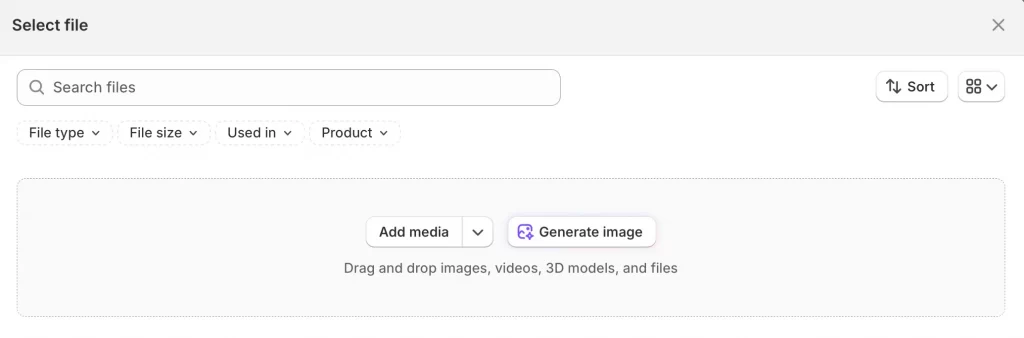
Next, scroll down to the Media section. This is where you upload photos, videos, or even 3D models of your product. Click Upload new to add files from your device, or choose Select existing to reuse files already in your Shopify library.
After you upload your image, it will appear in a preview slot. You can drag images to change the display order, or add multiple views to show different angles.
If you’re selecting from your existing files, Shopify gives you the option to filter by file type (image, video, etc.).
Below the Media section, you’ll also see a Category dropdown.
Shopify may automatically suggest a product category based on your title or description. You can leave the suggested one, choose a different one, or skip it for now.
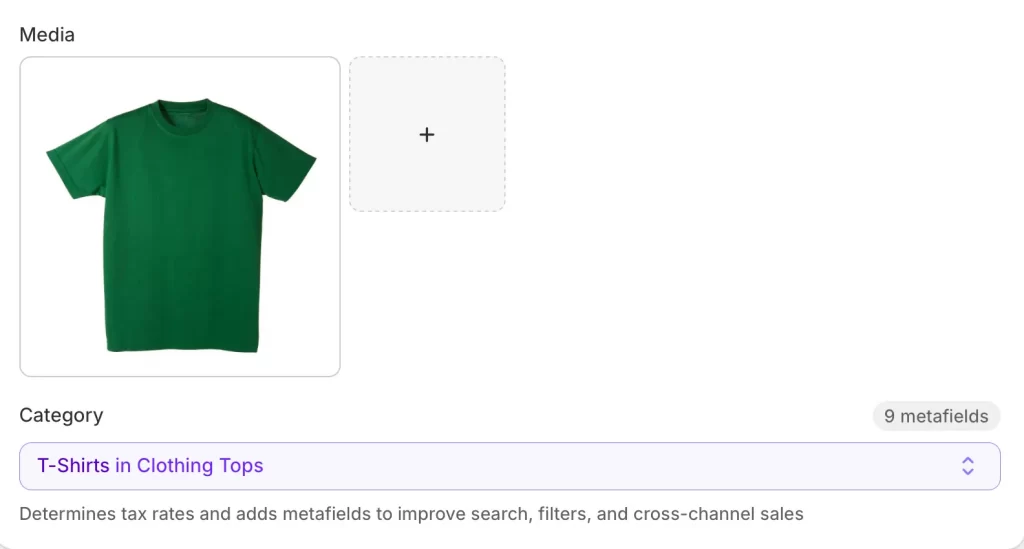
Note: Category affects tax rates and how your products appear in filters and third-party sales channels.
Tip from LitOS: Consider image best practices and alt text to help search and accessibility.
Step 4: Set the price for your Shopify product
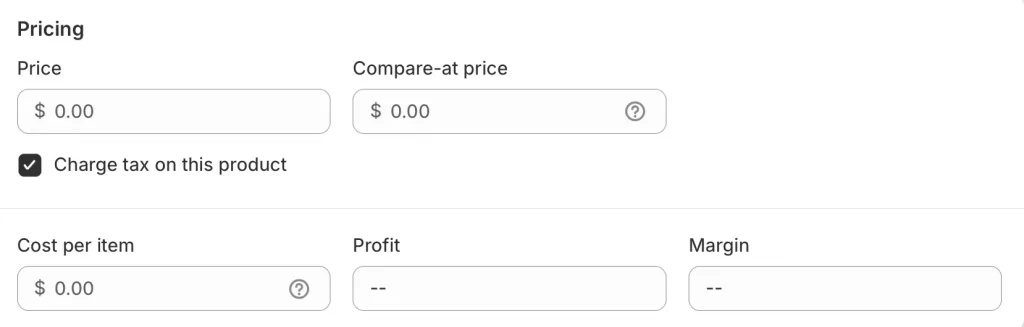
Scroll down to the Pricing section. Here you’ll enter how much customers will pay, whether the product is taxable, and how much it costs you to source.
Here’s what each field means:
- Price: This is the retail price customers will see on your storefront.
- Compare-at price (optional): Use this to show a discount (e.g. was $30, now $25).
- Charge tax on this product: Leave this checked if the product is taxable in your region.
- Cost per item: This represents your internal cost (e.g., the amount you paid the supplier). It won’t be shown to customers, but Shopify uses it to calculate profit and margin.
If you’re running a promotion and need to know how to add a free product in Shopify, just set the price to $0.00 in the Pricing section. You can also limit visibility or add conditions with a discount code.
Let’s say you’re selling a green t-shirt:
- Price: $25.00
- Compare-at price: $30.00 (shows as a sale)
- Cost per item: $10.00
Shopify will calculate:
- Profit: $15.00
- Margin: 60%
If you’re offering a discount, always enter the original price as the ‘Compare-at’ price and the sale price under ‘Price’.
Step 5: Manage Inventory
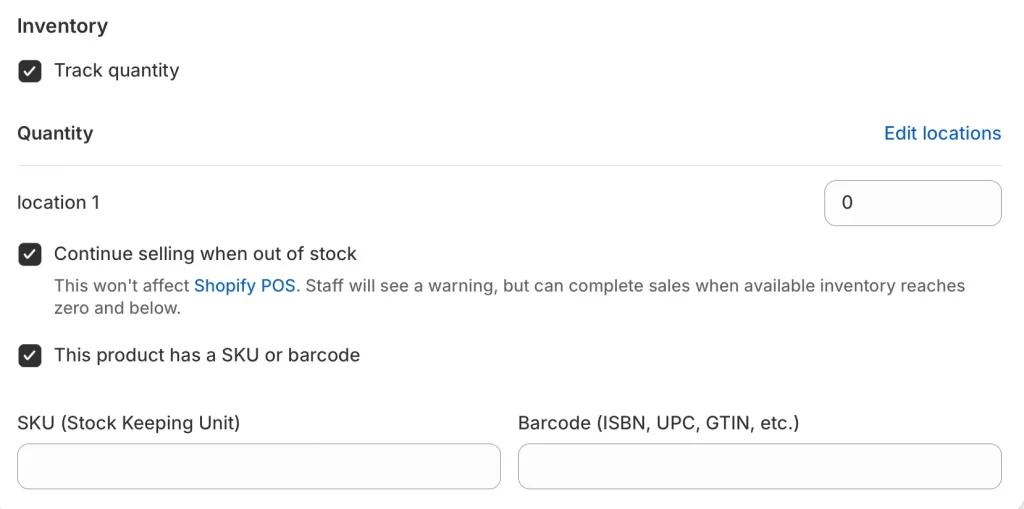
In the Inventory section, you can set how Shopify tracks product quantity, where your stock is located, and whether to allow sales when you’re out of stock.
Key fields explained:
- Track quantity: Check this to let Shopify automatically count how many items you have left.
- Quantity: Enter how many units are in stock.
- Continue selling when out of stock: Use this if you allow backorders (not recommended for physical items unless you’re printing on demand).
- SKU or barcode: Use this if you manage inventory across systems or scan products with a barcode scanner.
- Locations: If you fulfill from multiple locations (like warehouses or stores), click Edit locations to assign where stock is kept.
If you want a deeper walkthrough of inventory settings and multi-location stock, read our how to track inventory on Shopify guide.
Suppose that you have 100 green t-shirts in stock at your warehouse:
- Check Track quantity
- Set Quantity = 100
- Leave Continue selling when out of stock unchecked
- Enter SKU (e.g. “TSH-GRN-M”) if you use internal codes
You should always double-check your stock count before going live since selling out too early or overselling can hurt customer trust.
Step 6: Set Shipping information
If your product is physical and needs to be shipped, check the box labeled This is a physical product. This tells Shopify to collect shipping information at checkout.
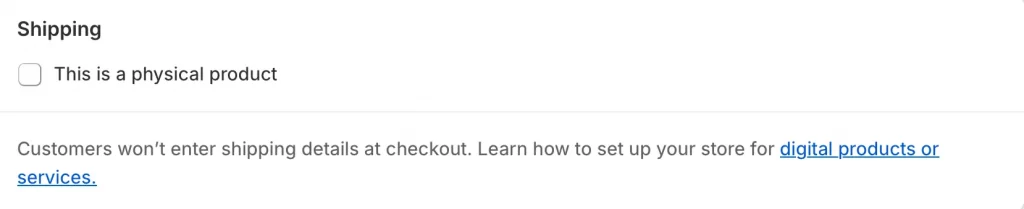
If you’re selling a service or a digital product, leave the box unchecked. Shopify will skip shipping fields at checkout.

After checking the box, you’ll need to fill:
- Weight: This is required for calculating shipping rates accurately.
- Country/region of origin: This is useful for customs and international shipping purposes.
- HS (Harmonized System) code: Optional, but helpful if you’re selling globally.
For physical items, you should fill in accurate weight and origin details to ensure your customers see correct shipping rates and delivery options.
Step 7: Add Shopify product variants (if needed)
If your product comes in different versions, like colors, sizes, or materials, you can add them as variants so customers can select what they want from a dropdown.
Click “Add options like size or color” in the Variants section to begin.
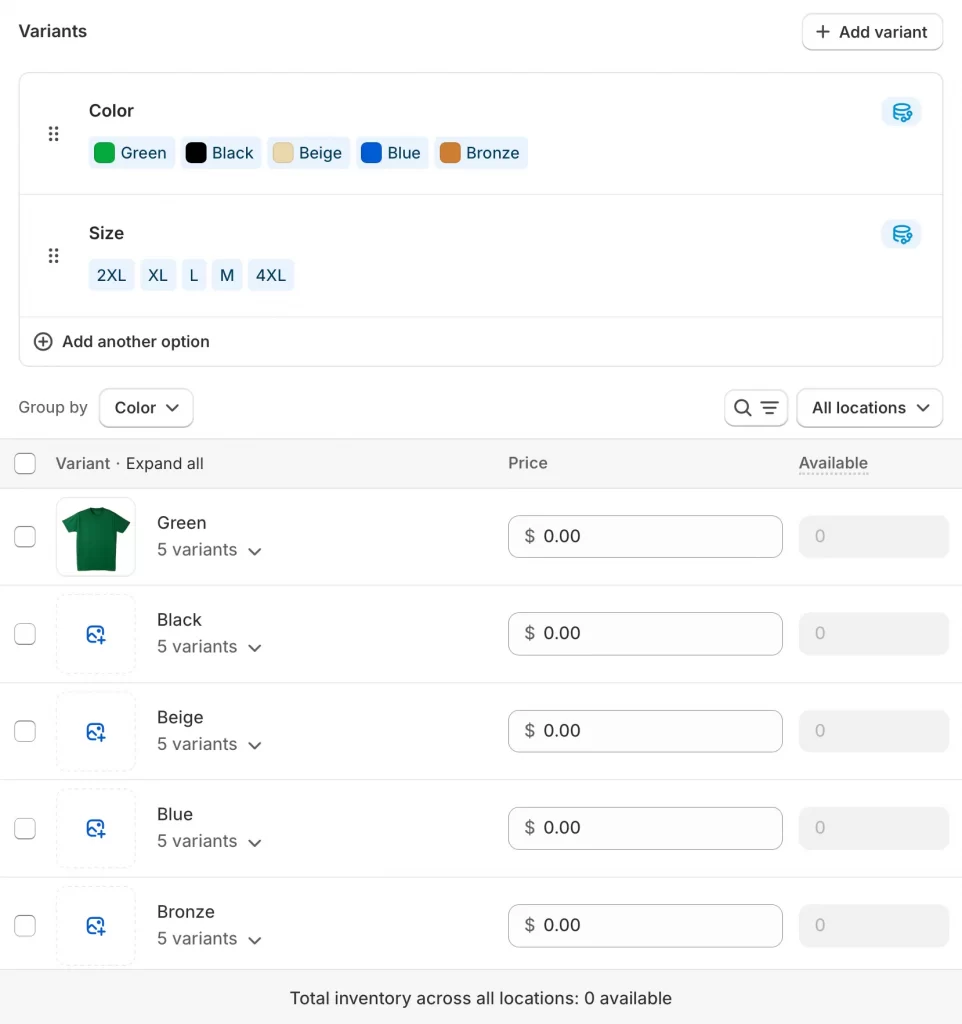
You can create up to 3 options (e.g. Color, Size, Fabric), and Shopify will automatically generate all the combinations.
Each variant can have its own settings:
- Price
- Inventory quantity
- Cost per item
- SKU / Barcode
- Image
- HS code (for international shipping)
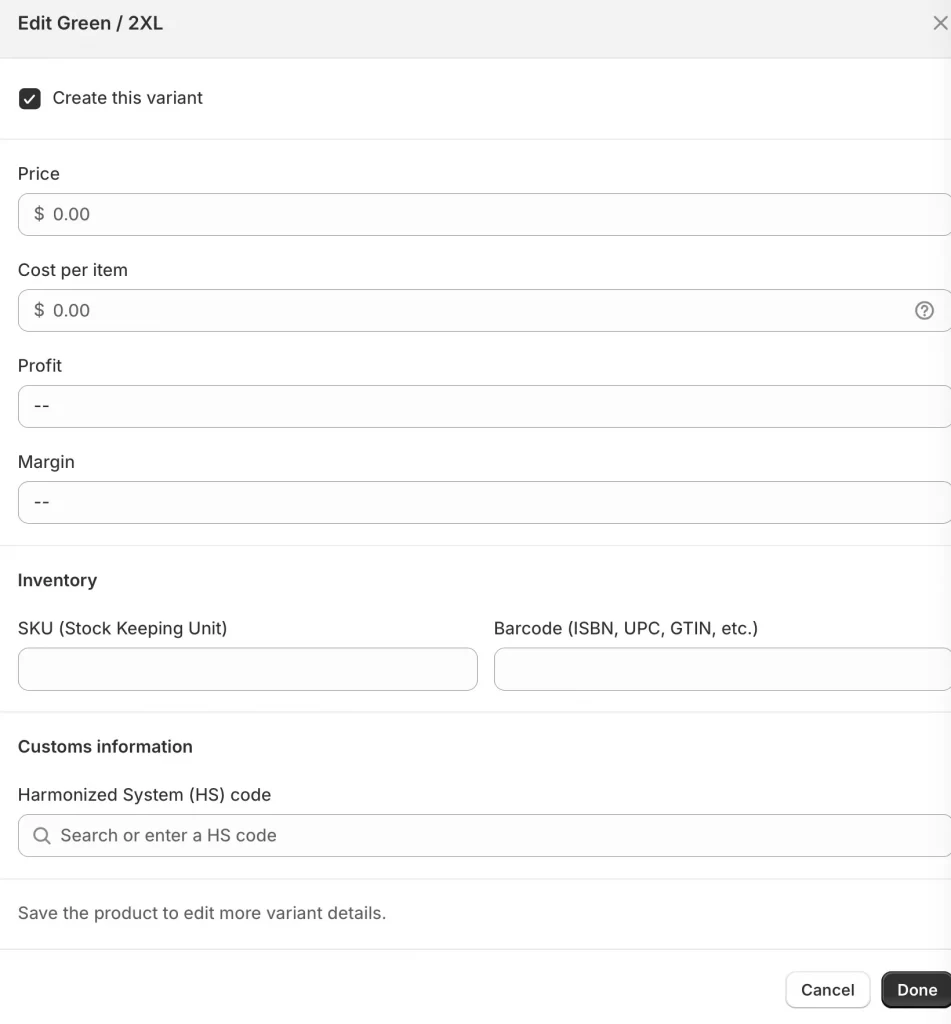
To edit these, click on any variant in the list. You can then set different prices or inventory levels for each one, which is perfect for managing color/size stock. You can even upload a unique image for each variant, so the product photo updates when a customer selects a different option.
If your product uses sizes, add a size chart so customers choose the right fit, here’s how to add a size chart in Shopify.
Step 8: Organize the product
In the Product organization section, you can group and label your product so it’s easier to manage in your admin and easier for customers to find on your storefront.
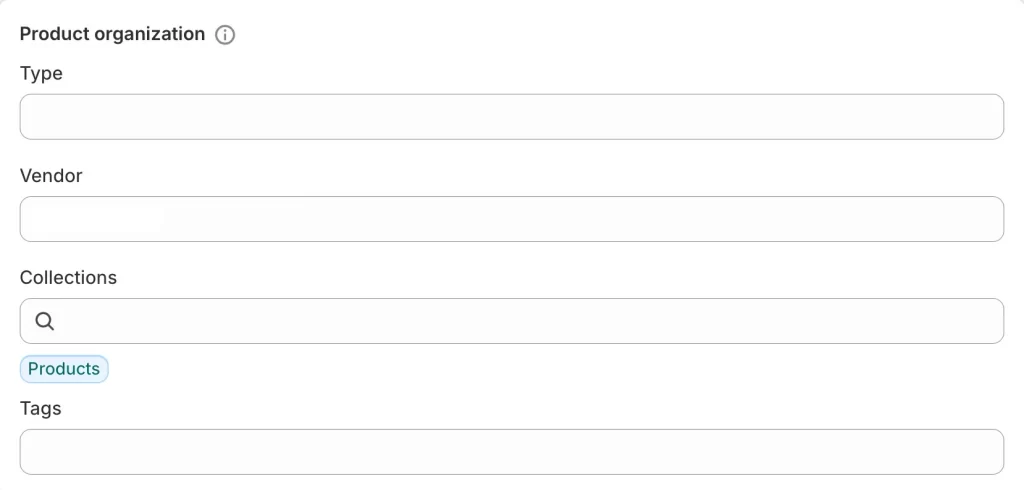
Here’s what each field means:
- Type: This is a broad category for internal organization (e.g. “T-Shirt” or “Mug”). It can be used in filters or reports, but customers don’t see it by default.
- Vendor: Usually the brand or supplier of the product. If you’re a reseller or managing multiple brands, this helps you filter products later.
- Collections: This is where your product will appear on your storefront. You can manually add it to one or more collections here.
- Tags: These are optional labels that help with filtering, search, or automated collections. For example, you might tag a green t-shirt with summer, sale, or eco-friendly.
Note: Shopify won’t automatically assign a product to collections unless you’ve set up automated collection rules in advance. Otherwise, you’ll need to manually assign each product to the right collection under the Collections field.
You should definitely take a moment here to think about how you want customers to browse and find this product in your store.
Step 9: Customize search engine listing
This is how your product will appear on Google and other search engines, so it’s worth spending a few extra seconds here.
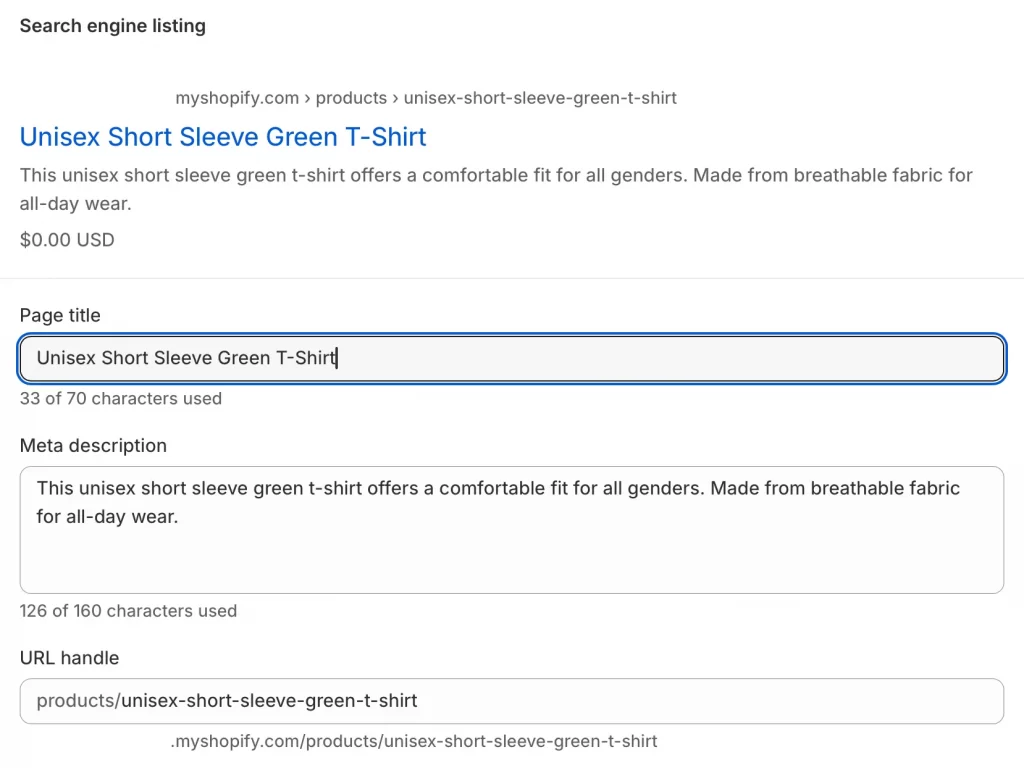
- Page title: This is the clickable blue link on Google. It should include your main keyword and be under 70 characters.
- Meta description: A short summary that appears under your link in search results. Shopify allows up to 160 characters. Keep it clear, benefit-focused, and use keywords naturally.
- URL handle: Keep this clean and simple. Use dashes instead of spaces, and stick to your main keywords. Shopify auto-generates this from your title, but you can edit it.
You can always revisit and update this later based on SEO insights or if you change your product title.
Step 10: Set product status and channel availability
Once everything is ready, choose where and when this product goes live
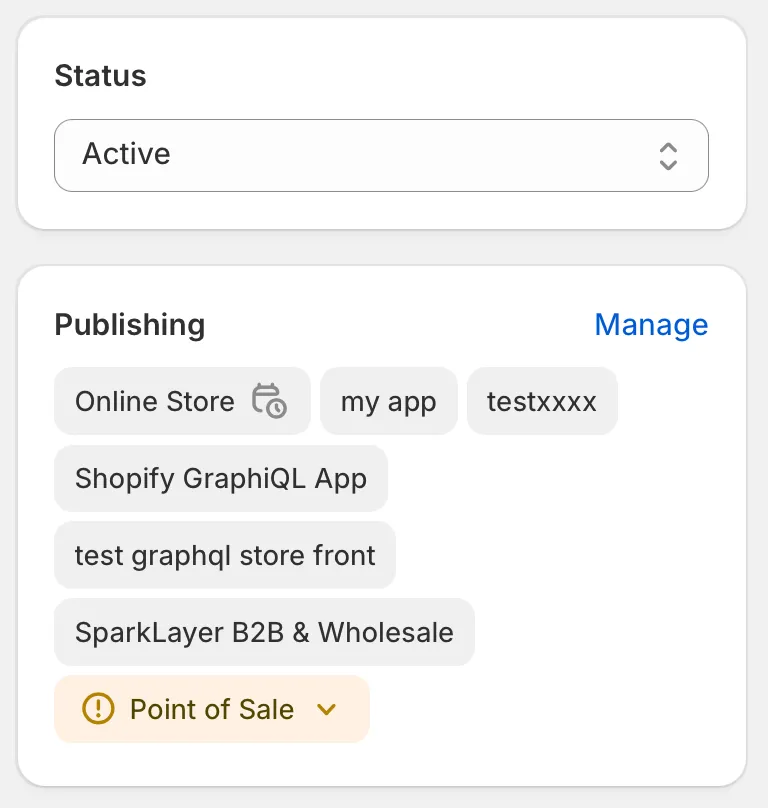
For Status:
- Active: The product is visible (if published to at least one channel).
- Draft: Hidden from all sales channels until you’re ready.
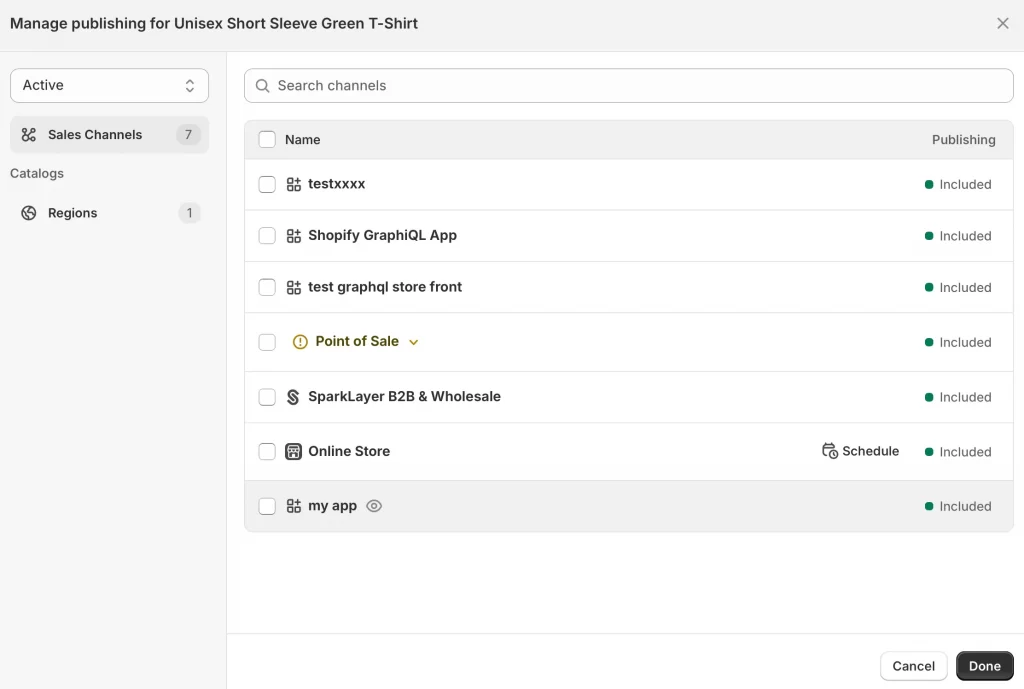
For Publishing, you can choose which sales channels should display the product.
- Examples: Online Store, Point of Sale, B2B & Wholesale, Custom Apps
- You can also schedule the Online Store launch if needed.
If you’re running multiple channels (such as retail and B2B), let’s ensure the right variant/pricing rules apply for each.
Step 11: Save and review the product
Click Save at the top or bottom of the page. Once saved, Shopify will confirm your product was successfully added. From here, you can:
- Add another product
- View all active listings
- Or continue setting up logistics (like packaging and shipping)

I recommend using the Preview button to see how your product page looks on your live storefront. It’s a quick way to double-check your images, variants, and pricing before sharing the product with customers.
After saving, your new product will appear in your Shopify product list under the Products tab. You can use this view to sort, filter, or bulk-manage all of your listings.
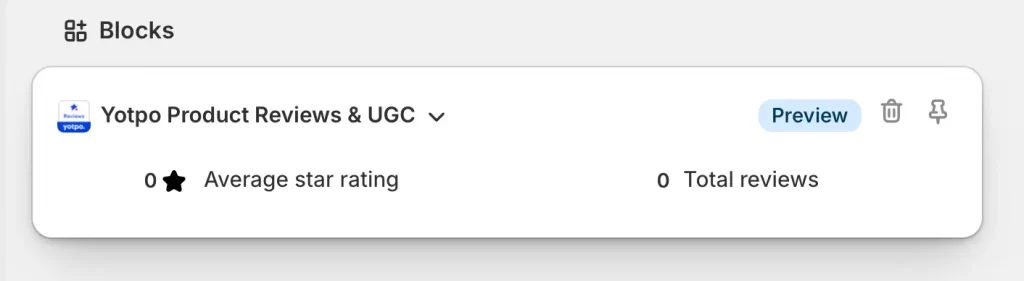
Step 12: Add review blocks (optional but recommended)
If you’re using a review app, Shopify may automatically add a review block to each product page (but only when you save the product and finish Step 11 above). You’ll typically see this under the product in the Blocks section (as shown below), displaying star ratings and total reviews.
If you see it, great! You’re all set. If not, you’ll want to:
- Go to Online Store > Themes > Customize
- Open your Product template
- Use the left sidebar to add a block
- Select your review app
- Drag it into the desired position on the page
This ensures your social proof is visible and helps boost trust and conversions.
You’re done for now! Your product is now live and ready for customers. You can also duplicate existing products in the Shopify admin to speed up similar product uploads, especially if they share layout, variants, or pricing.
And that’s all for how to add products to Shopify via Shopify admin dashboard on desktop.
Note: To make sure everything runs smoothly after a customer places an order, you can track and manage purchases through the Shopify Order Status page. This page lets you and your customers stay updated on order progress, payment details, and shipping status, helping improve transparency and trust in your store.
How to Add Products to Shopify via Shopify Mobile App
You can also add products on the go using the Shopify mobile app. Open the app on your iPhone or Android device, then:
- Tap the Products icon in the bottom menu
- Tap the + button and choose Add product
- Enter the product title, description, price, images, and any other details (like inventory or shipping info)
- When you’re done, tap ✓ on Android or Save on iPhone to finish
This is a quick way to upload new items or make edits without needing a desktop. That’s how to add products to Shopify via mobile app.
How to Import Products in Bulk Using CSV
If you’re adding many products at once or moving from another platform, Shopify’s CSV import tool helps you upload your catalog efficiently.
Step 1: Download Shopify’s CSV template
In your Shopify admin, go to the Products section. Click the Import button in the top right.
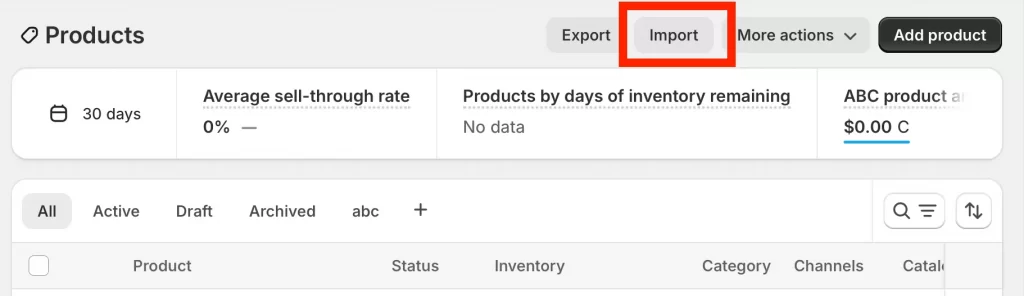
In the pop-up window, click Download a sample CSV template. This file contains the correct column structure required for bulk importing products into Shopify.
Step 2: Fill out your product data
Open the CSV file and enter your product information in the appropriate columns. Be sure to keep column headers intact, and pay special attention to fields like Handle, Title, Body (HTML), Vendor, Option1 Name, Option1 Value, Variant SKU, and Variant Price. Shopify uses the handle to group variants and match updates.
Shopify can automatically assign a product category based on your product title and description if left blank. But you can also manually specify it using accepted category values from Shopify’s taxonomy.
Step 3: Upload the CSV file to Shopify
Back in your admin, return to Products > Import. Click Add file, choose your completed CSV, and decide if you want to:
- Overwrite products with matching handles (if updating existing listings)
- Publish new products to all sales channels (enabled by default)
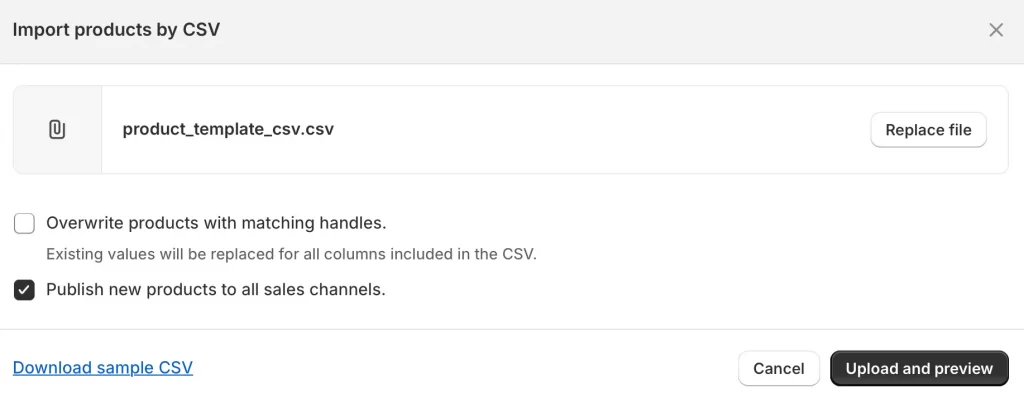
Then click Upload and preview.
Step 4: Review and fix any errors
Shopify will show you a preview of the first product, including title, description, product category, variants, and prices. You can now double-check for formatting issues. If something looks off (e.g. wrong column mapping), click the option to change the order of column headings or edit your CSV and reupload.
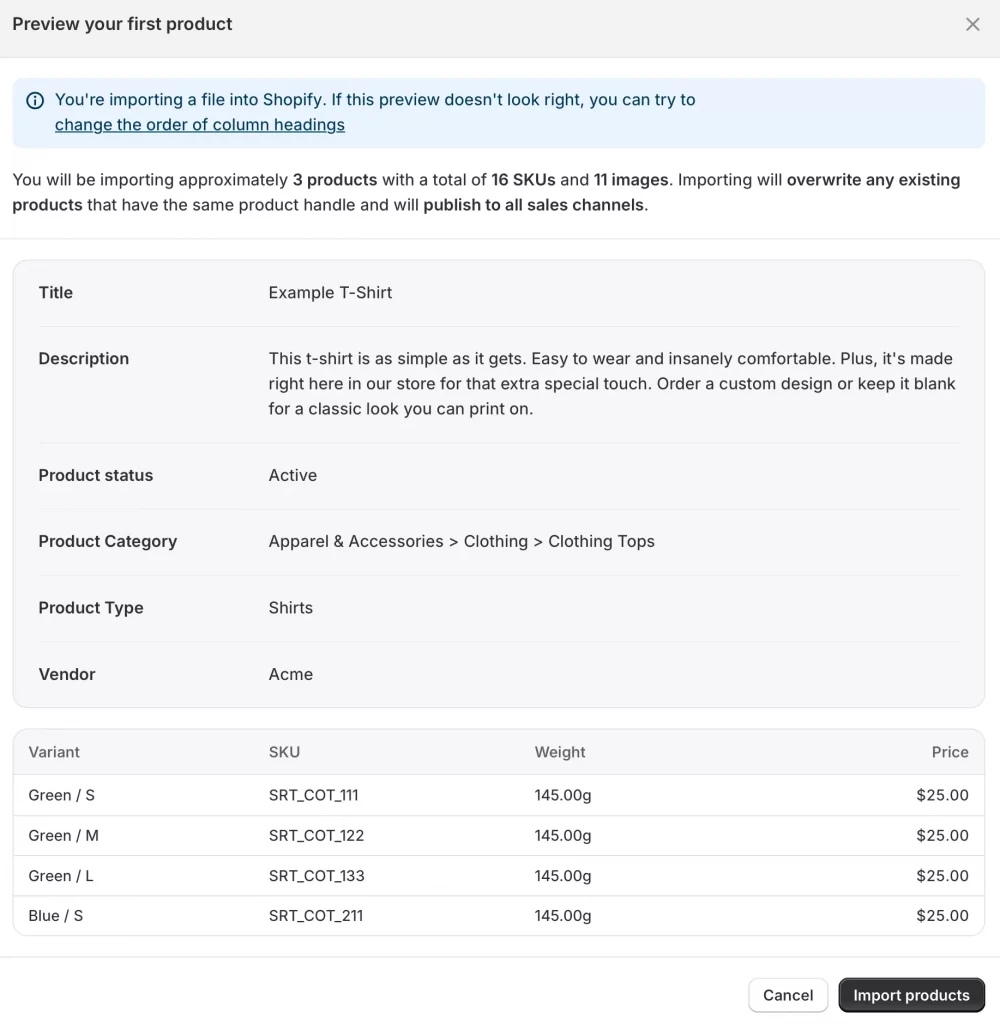
Once everything looks correct, click Import products to complete the upload.
Need help visualizing the CSV upload process? We recommend this step-by-step video tutorial by LitExtension:
It walks you through everything, from downloading the sample file to reviewing the upload results. That’s how to add products to Shopify using CSV files.
How to Add Products via Shopify Apps
If you’re migrating from another platform or managing products from external sources, Shopify apps can help streamline the process. Many apps are designed to import or sync product data directly into your store. Here’s how to do it using an app like LitExtension Store Migration as an example.
Step 1: Install a product source app
Go to the Shopify App Store and search for an app that fits your needs. For instance, if you’re migrating from WooCommerce, Magento, or BigCommerce, you can install the LitExtension Store Migration app to import your product data.
Step 2: Import or sync products
Open the app and follow its prompts to connect your source platform or product feed. In the case of LitExtension, you can select Products during the migration setup to bring over your entire product catalog.
If you’re wondering how to add products to Shopify from other websites, like migrating from WooCommerce or importing supplier catalogs, apps like LitExtension or bulk CSV tools can automate the process for you.
Step 3: Edit product info in Shopify (optional)
After the products are added, go to your Products section in the Shopify admin. Here, you can edit titles, descriptions, pricing, images, product types, or tags to fit your brand’s presentation.
Step 4: Keep products updated
Some apps offer real-time syncing or scheduled updates to keep inventory levels, pricing, and product details consistent. Still, you should make sure to review the app’s settings and enable automatic updates if supported.
How to Add Products to Shopify: FAQs
How do I add products to my Shopify page?
To add products to your Shopify store, go to Products in your Shopify admin and click Add product. Fill in the product details, upload images, and click Save. You can also use the Shopify mobile app or import products in bulk via CSV or third-party apps.
How do I add products to my inventory on Shopify?
When you add a product in the Shopify admin, you'll see an Inventory section. Here you can enter the available quantity, choose your inventory tracking settings, and assign inventory locations.
Is there a limit to how many products I can add to Shopify?
No, Shopify does not limit the number of products you can add. You can list thousands of products, even tens of thousands. However, performance may vary slightly depending on your theme and app usage at scale.
Can I add variants later after saving the product on Shopify?
Yes, you can edit an existing product and add or change variants at any time. Simply open the product in the admin, scroll to the Variants section, and click Add variant to include options like size, color, or material.
How do I manage inventory across multiple locations in Shopify?
Shopify allows you to track inventory at different locations, such as warehouses or retail stores. To manage this, go to Settings > Locations, add your locations, then assign inventory quantities for each product under the Inventory section.
Key Takeaways
Knowing how to add products to Shopify is one of the most important steps in getting your store ready to sell. You can add products one by one, import a full catalog using a CSV file, or use apps to sync items from other platforms or suppliers. Just make sure each product is clearly organized, accurately described, and optimized for search.
Need help managing a larger catalog or migrating from another platform? At LitOS, we help growing brands streamline product setup, organize collections, and launch storefronts built to scale.

