eCommerce business is on the rise and Shopify reaps the benefits. If you are looking to establish an online store, go for Shopify now. Owning a growing online store, you may come to times when you have to find the best solution to manage your customers’ data. One of the best ways for managing customers is to create a group of specific customers.
So, why do you need to create your list of Shopify customer groups?
- Promotion: Customer groups can be combined with discounts to offer promotions to specific customer groups.
- Marketing: Customer groups also help you target specific subscribers when you send marketing emails with Shopify Email.
- Sales boosting: Segmenting your customers will help you perform targeting and improve personalization on your online store. Store owners can set unique pricing for different groups. They need to be able to segment each group and market to them differently. For example, you can easily offer better conditions to customers having engaged in wholesale.
- Customer managing: Easily navigating to the right customers even on your Shopify app when you tap the search button.
If you are a Shopify user, this shouldn’t be a problem. Shopify supports customer group creation no matter which plans you are subscribed to.
Keep reading this article to know how easy it is to create and remove Shopify customer groups!
How to create Shopify customer groups?
Although searching is useful to find a single customer profile, filtering allows you to see all the customers that match one or more criteria. Basically, to create Shopify customer groups, you need to filter and search for particular customers that you want to group then save the search results.
Below are the detailed steps!
1. From your Shopify admin, go to Customers section, then select Filter.
2. Enter the search term in the Filter box.
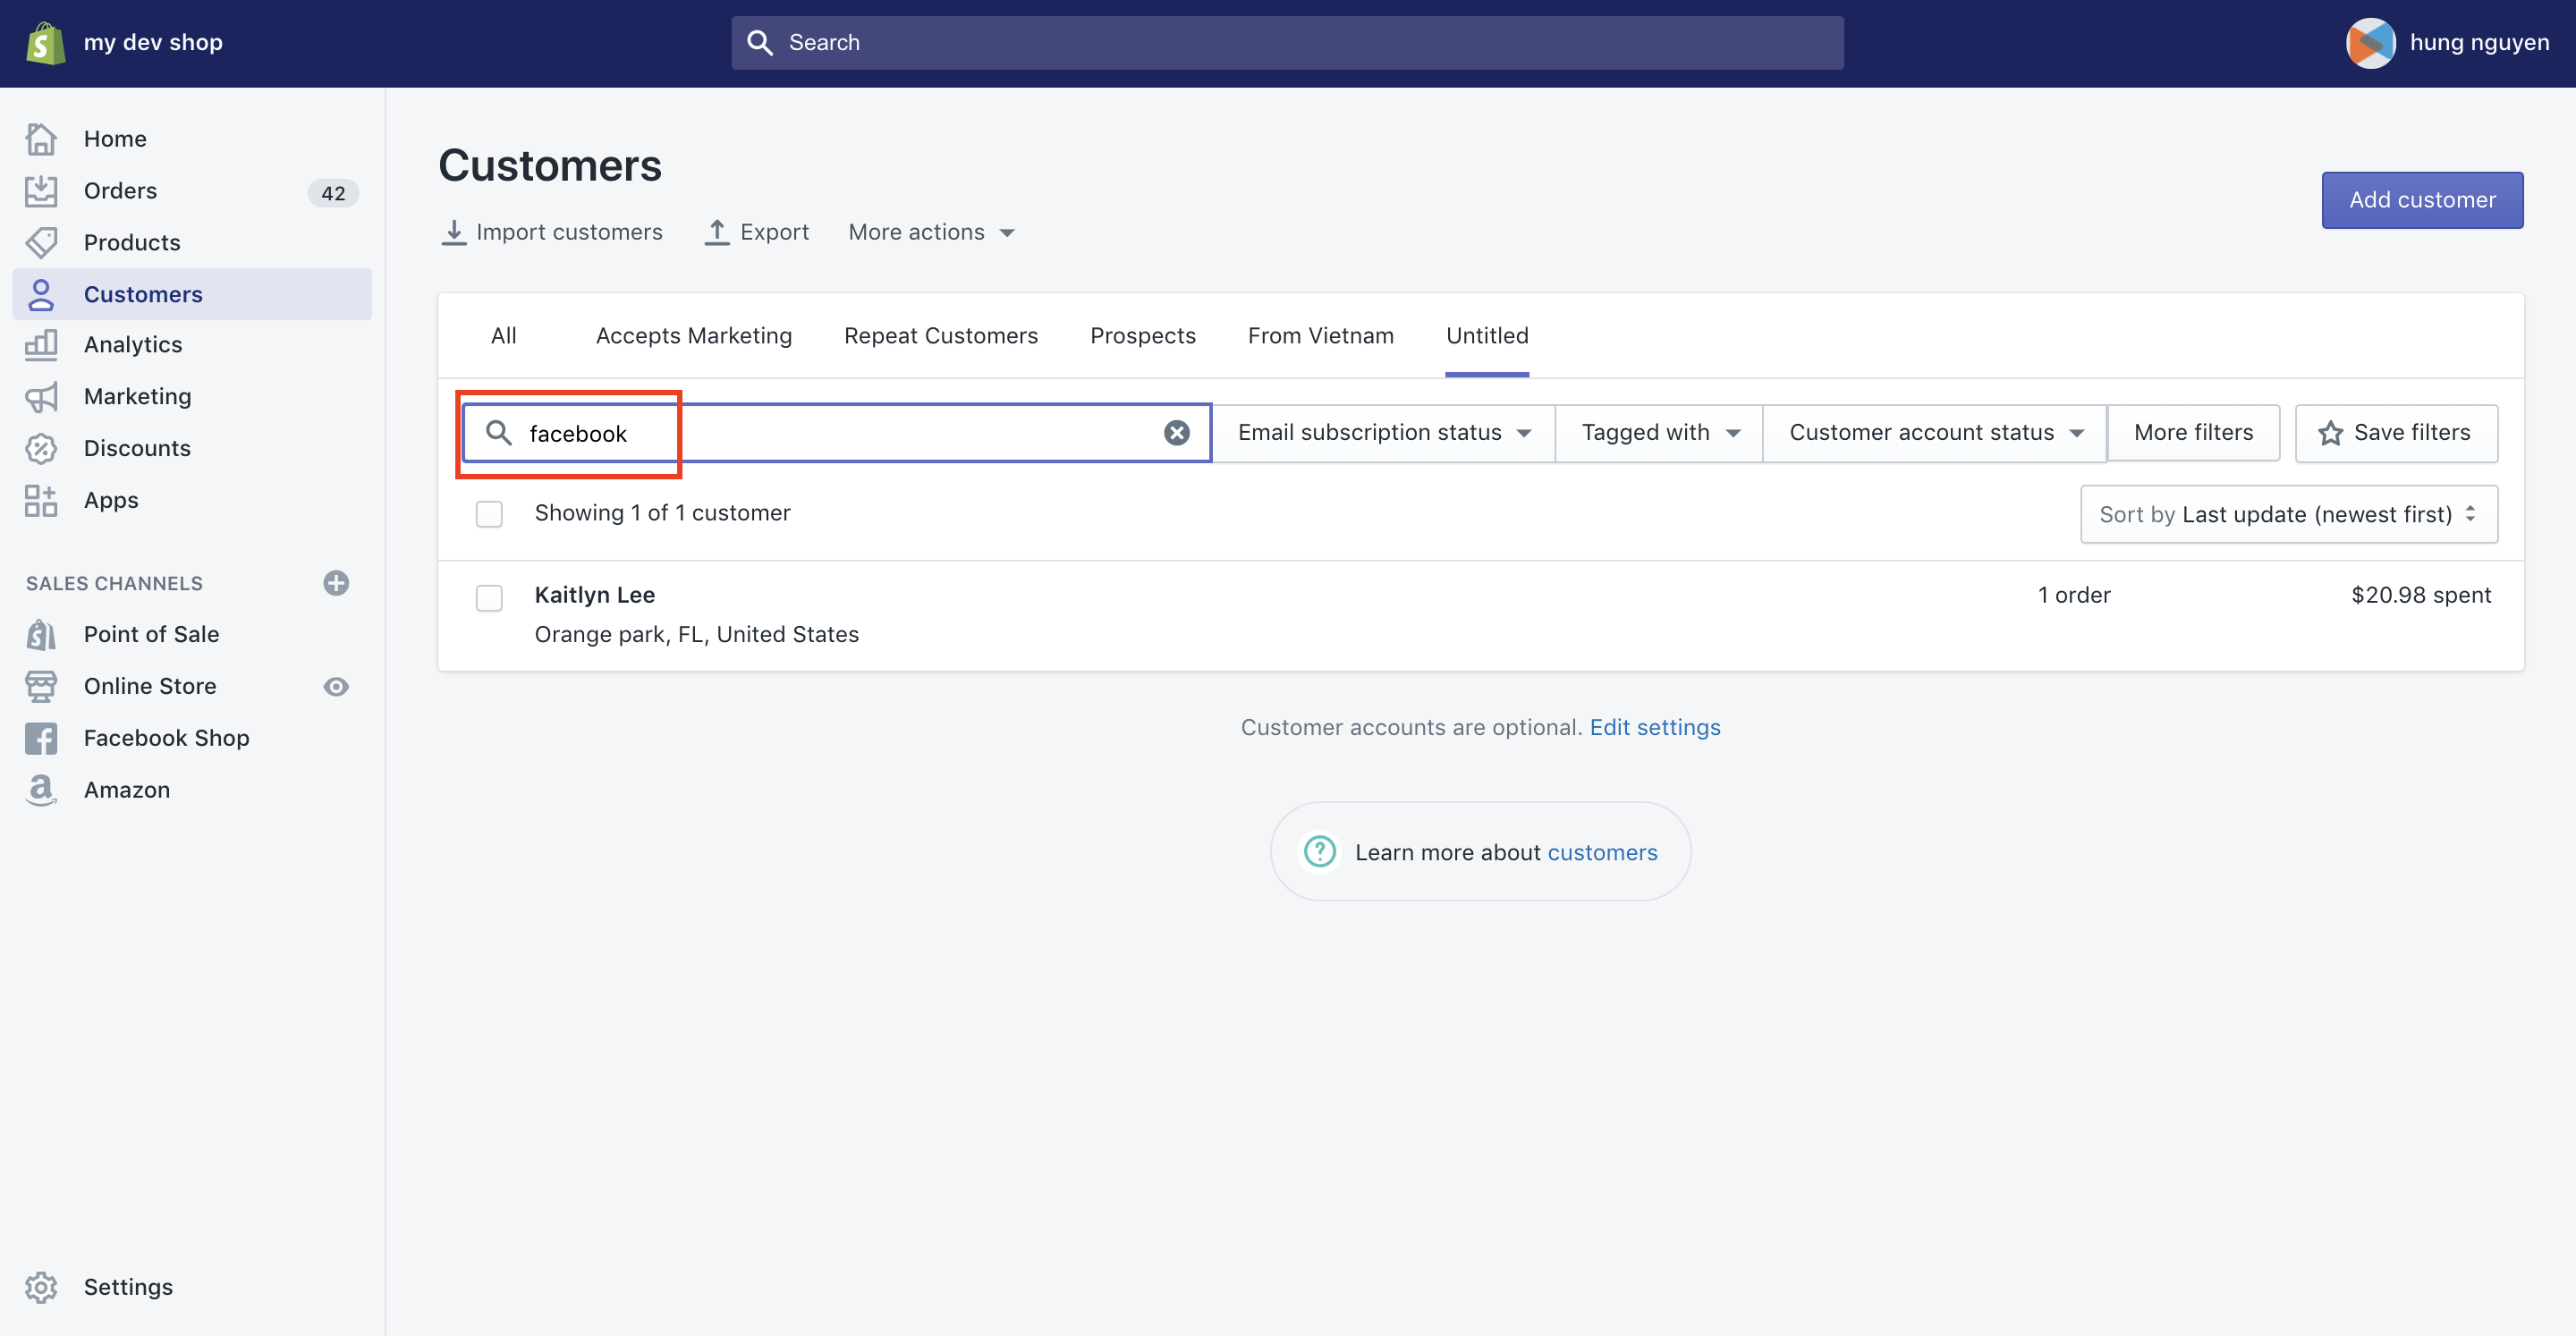
3. You need to apply one or more filters or perform a customer profile search. After that, click on ‘Save filters’ button.
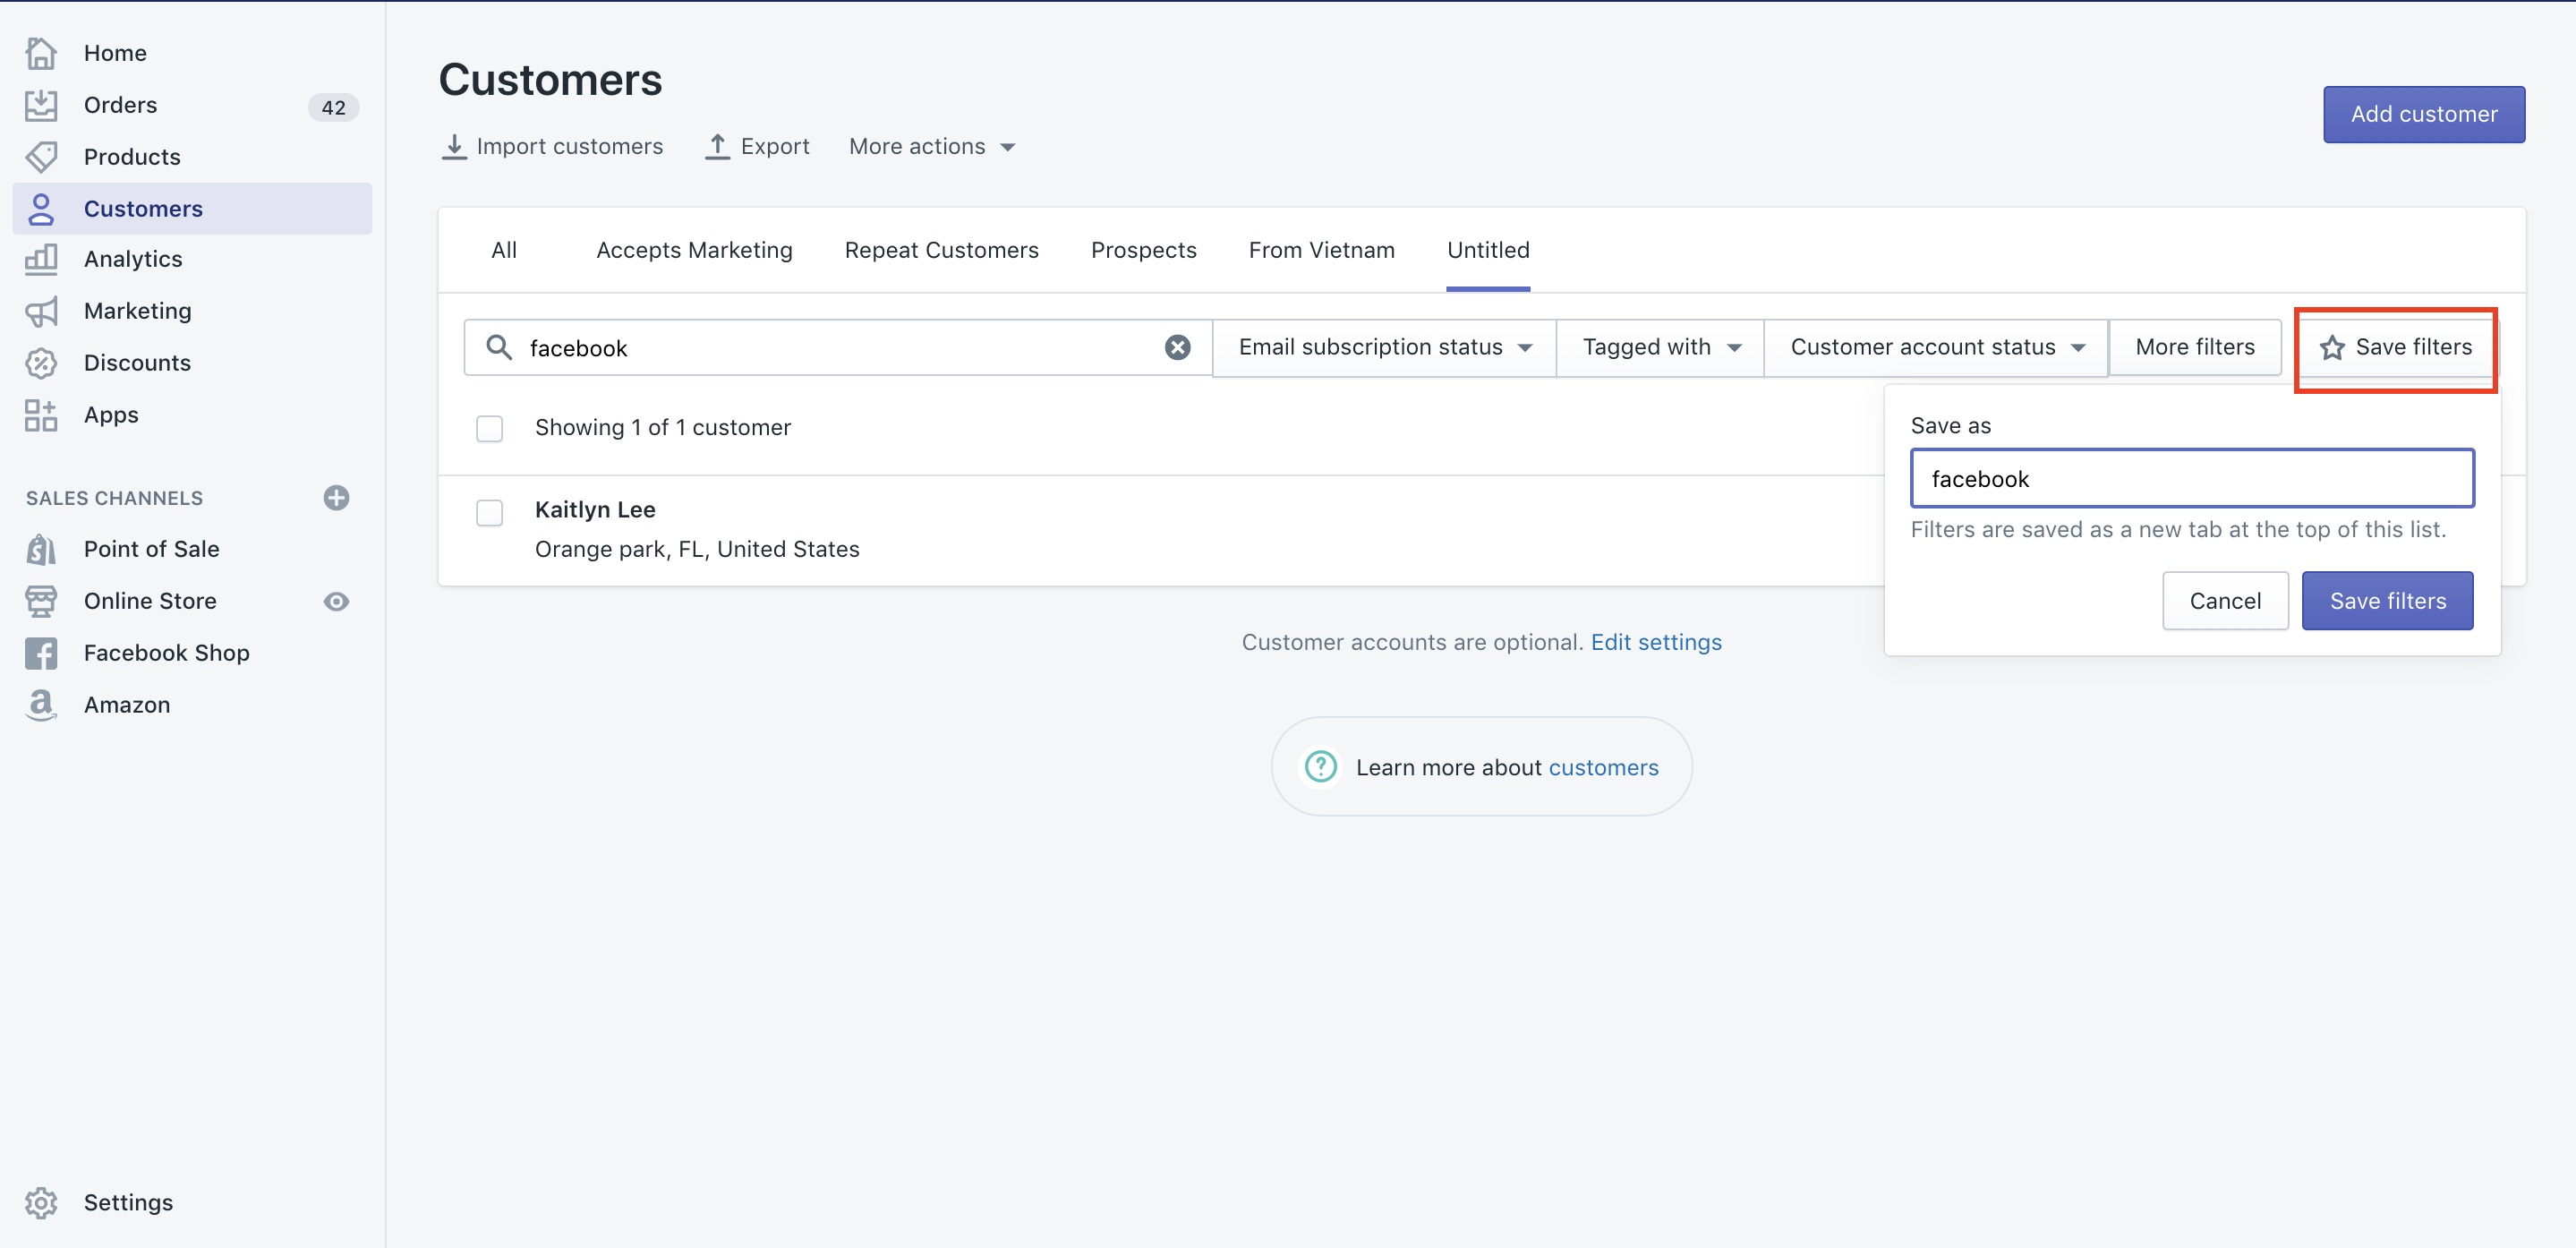
4. In the Save as dialog, enter a name for the filter or search result.
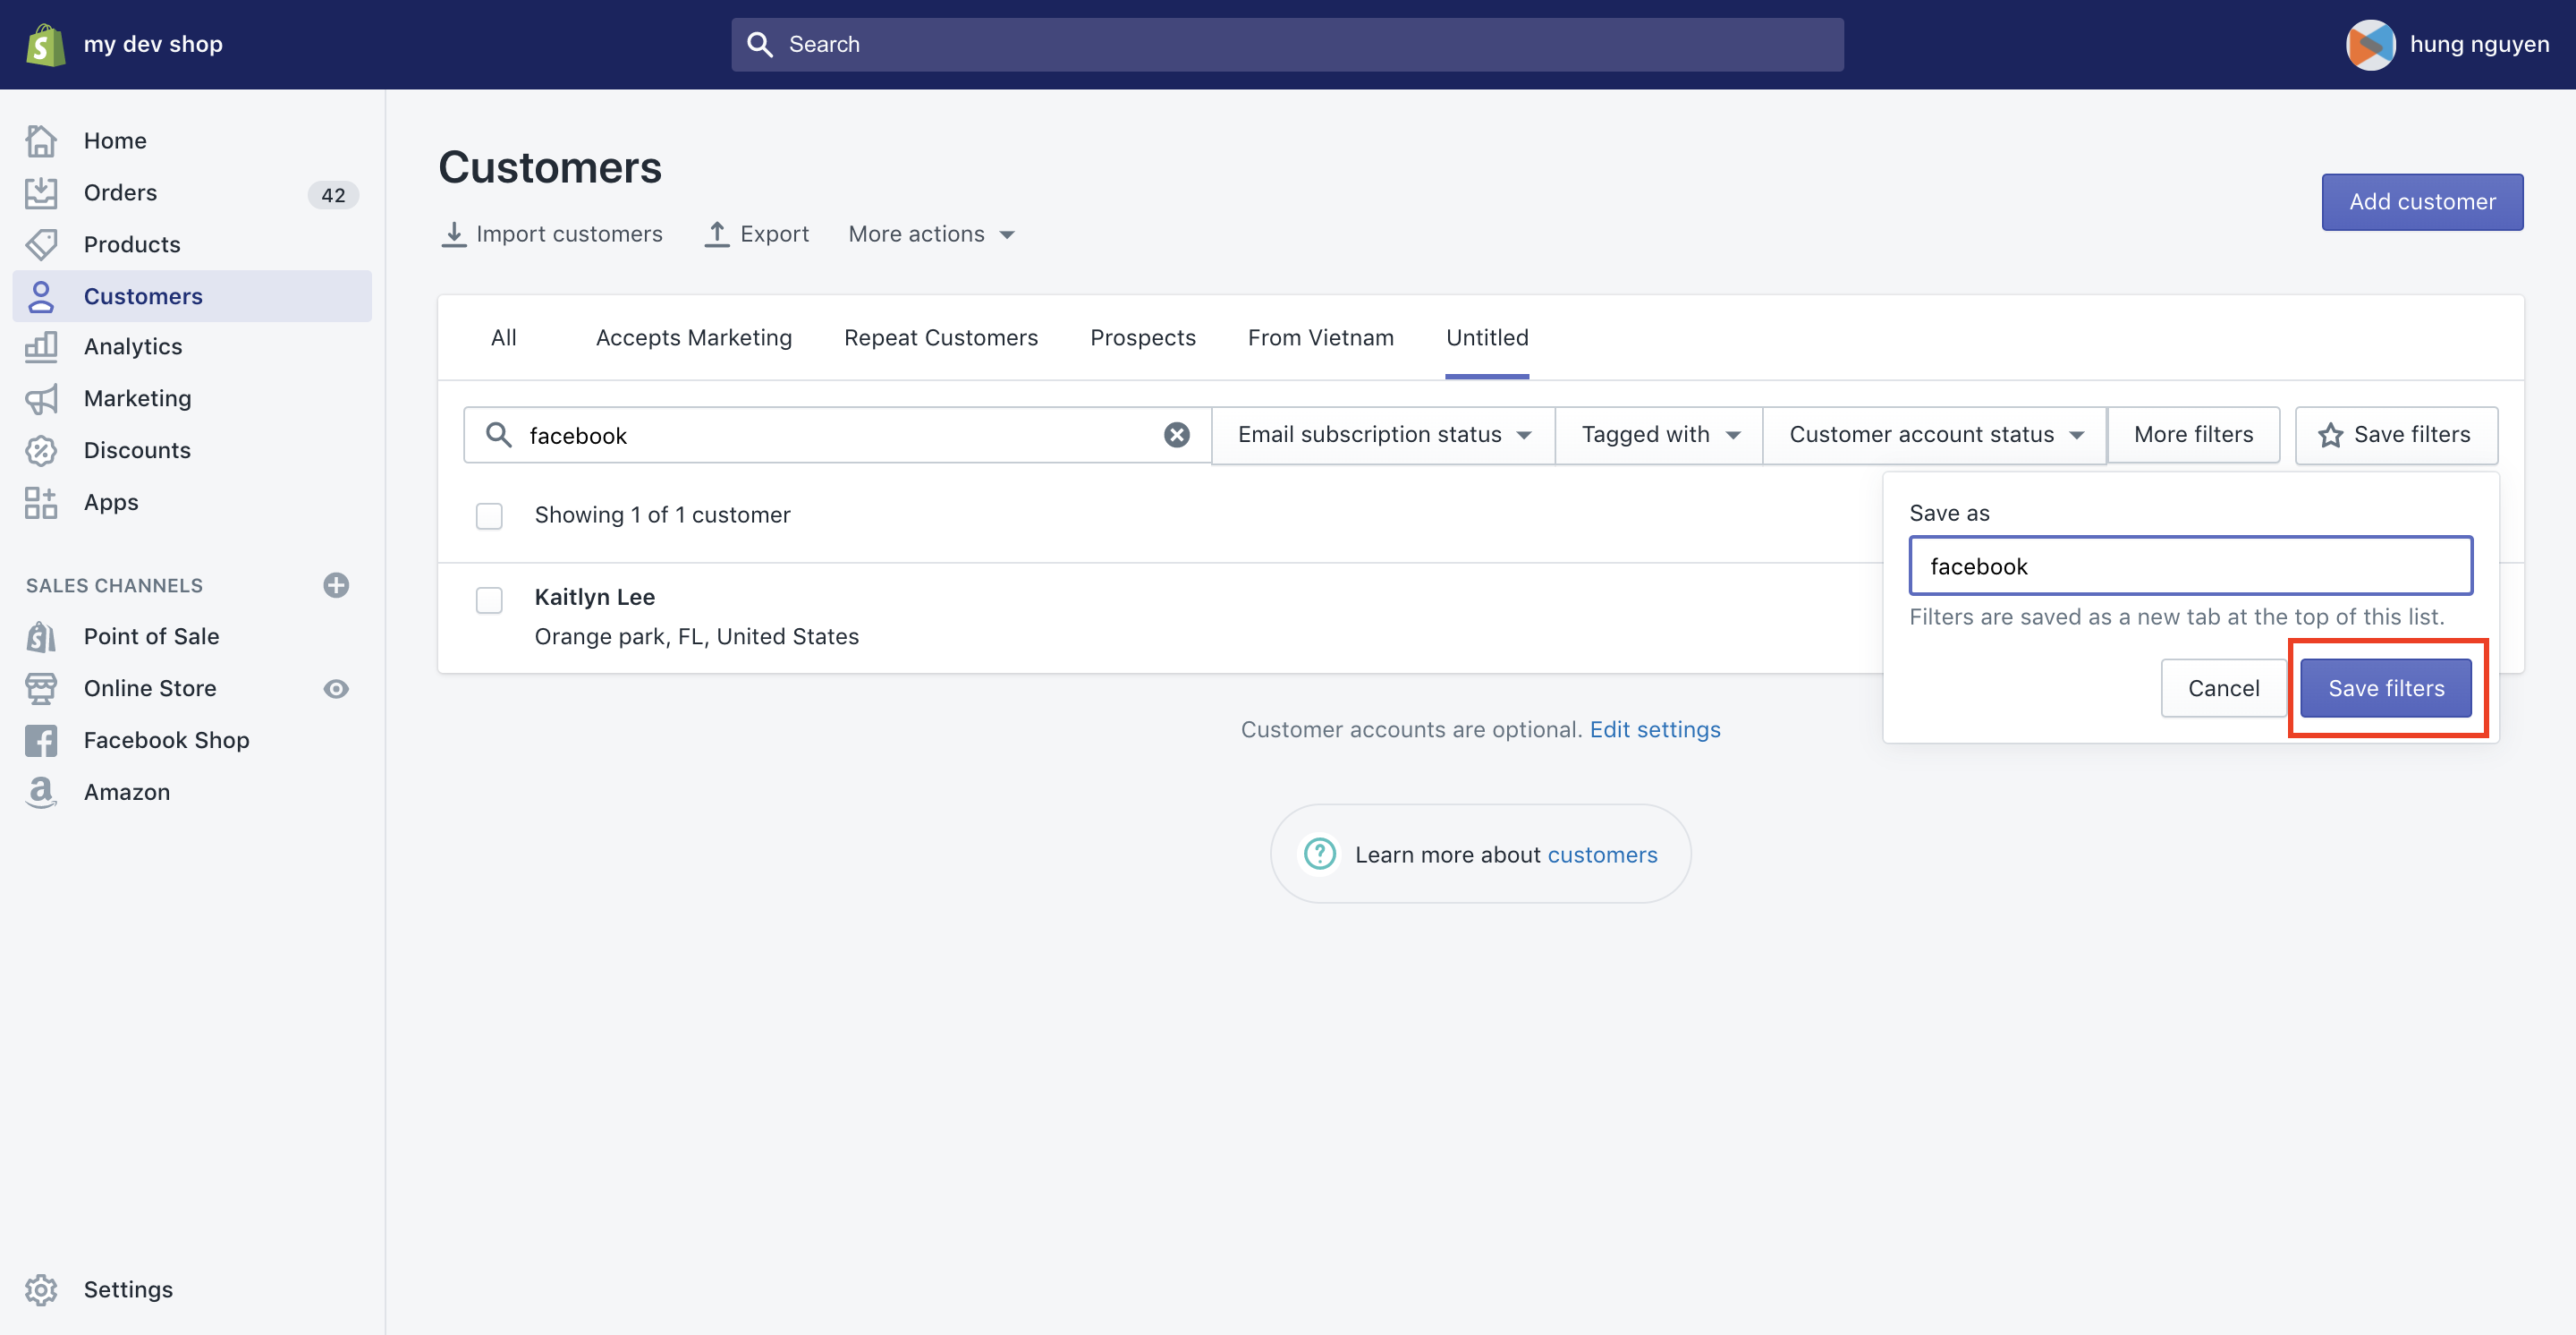
5. Click ‘Save filters’ to save the search and create a tab at the top of your customer list.
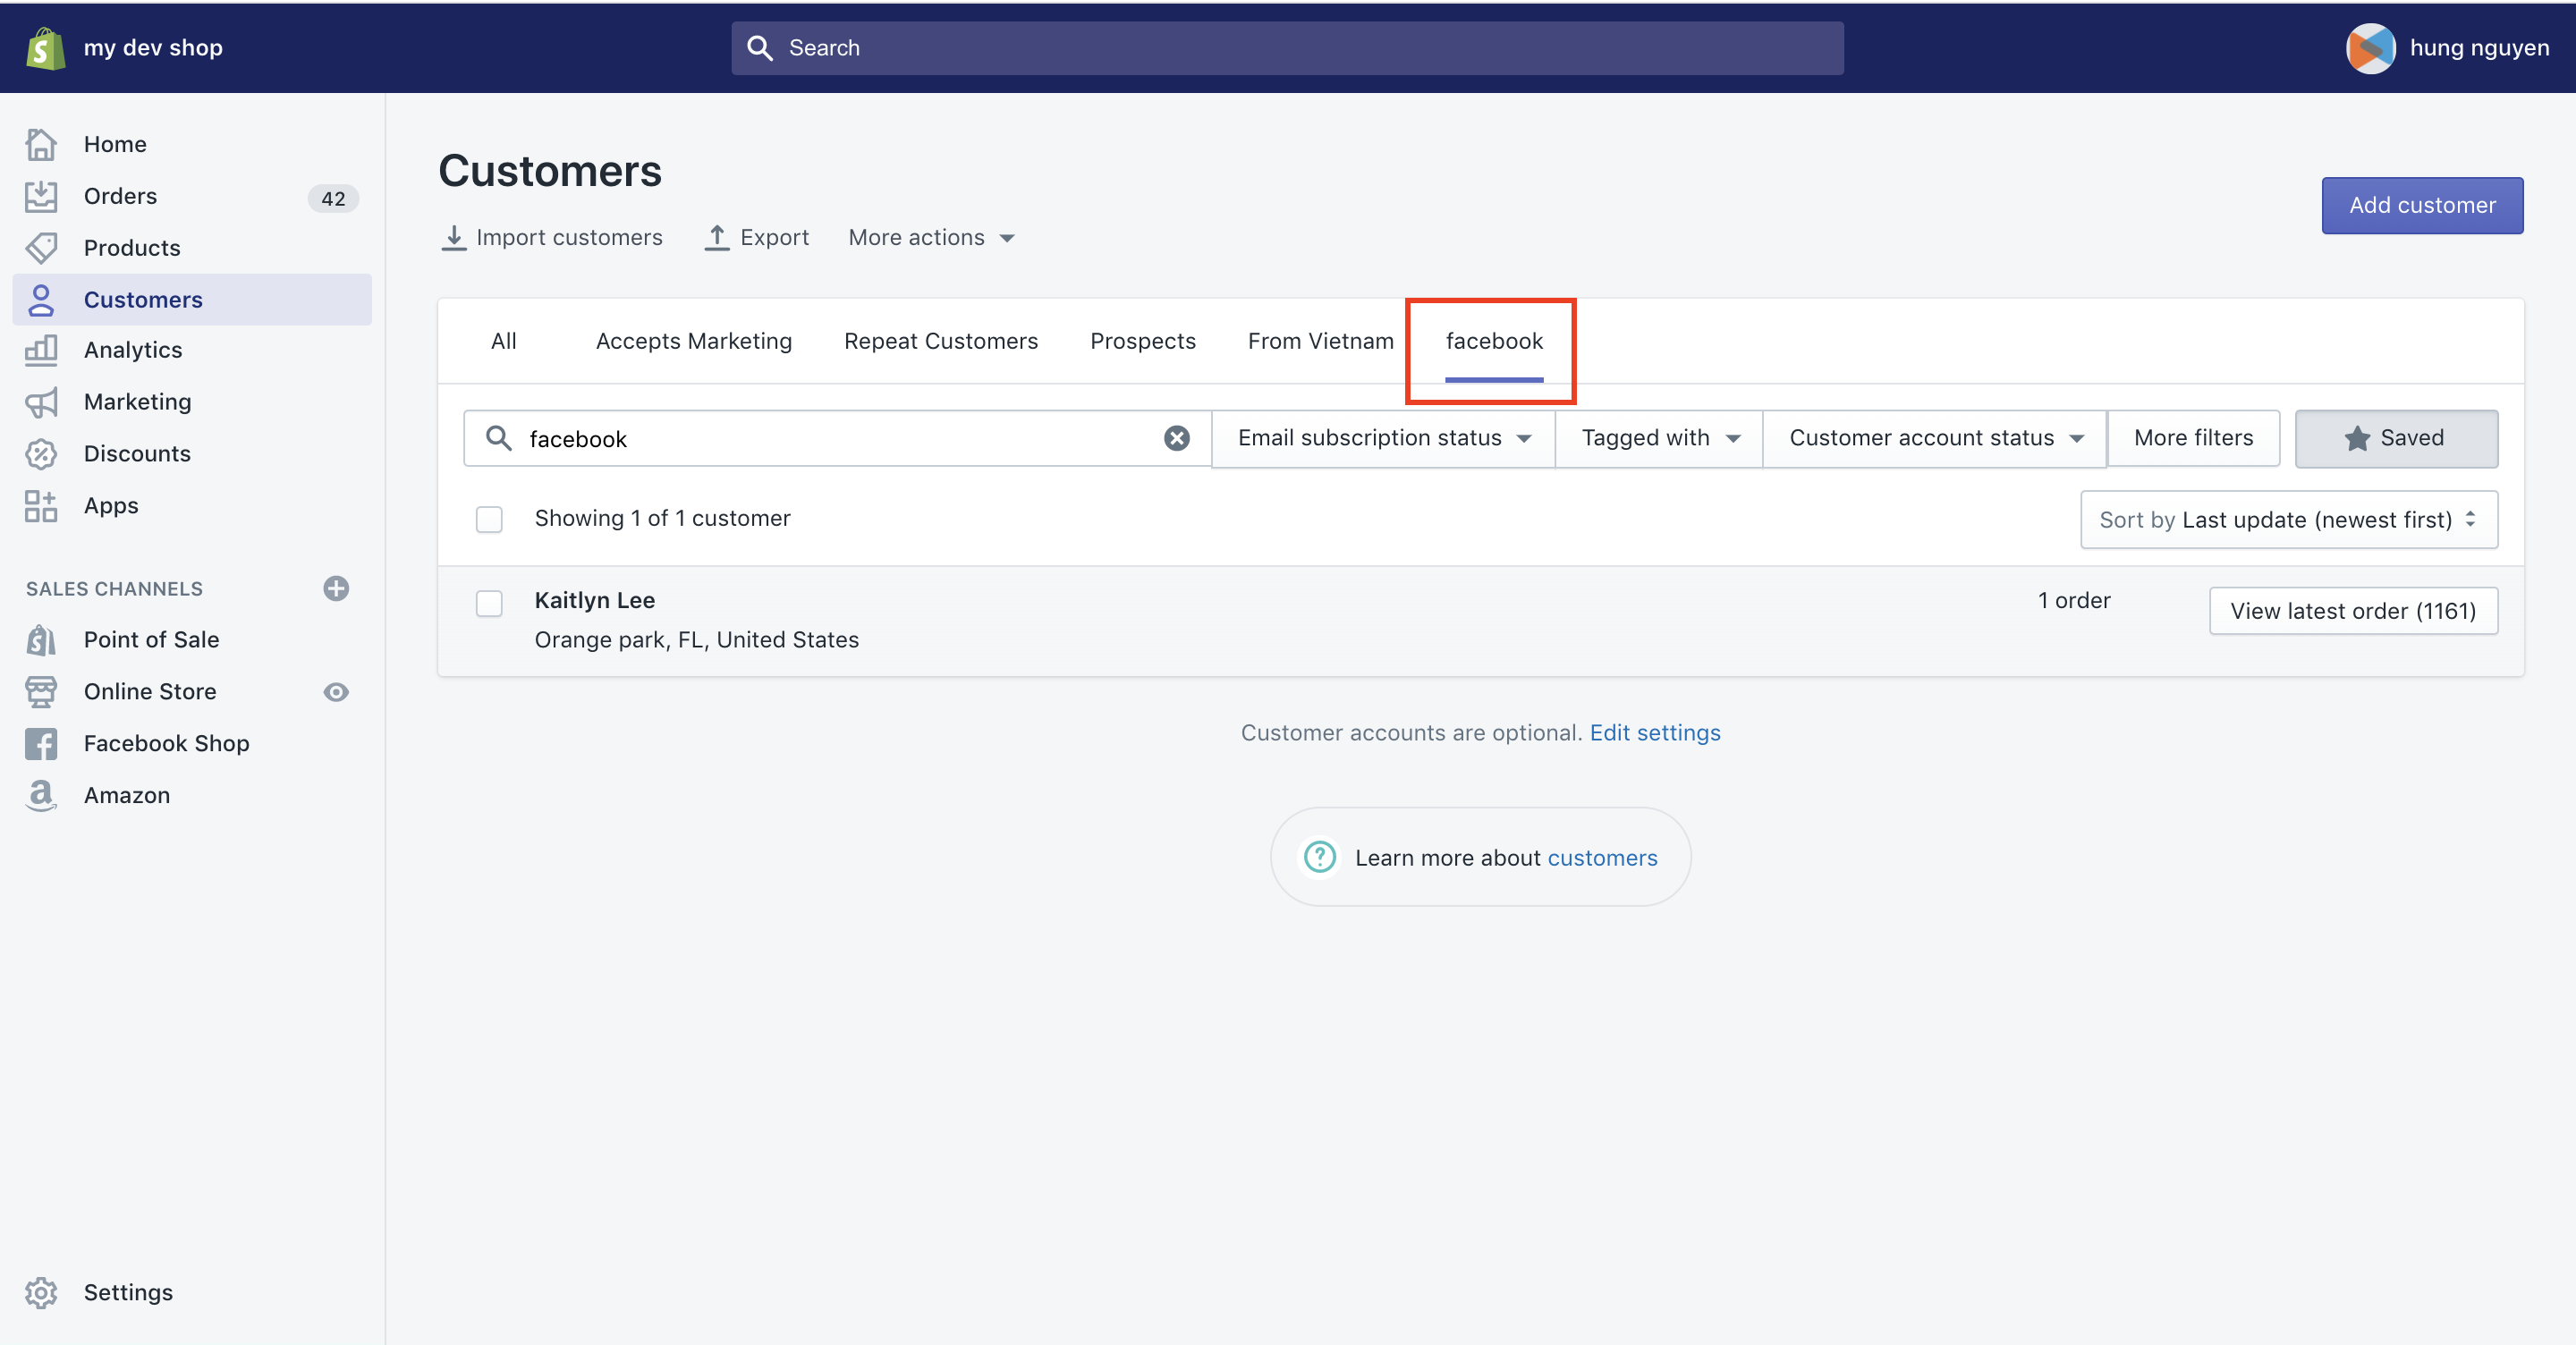
After you perform a search or apply filters, you can save the list of results in your Shopify Admin. This creates a new filter tab at the top of your customer list. You can use the filter tabs to quickly sort your customers into groups. Your saved searches also show in the Shopify app when you tap the search button.
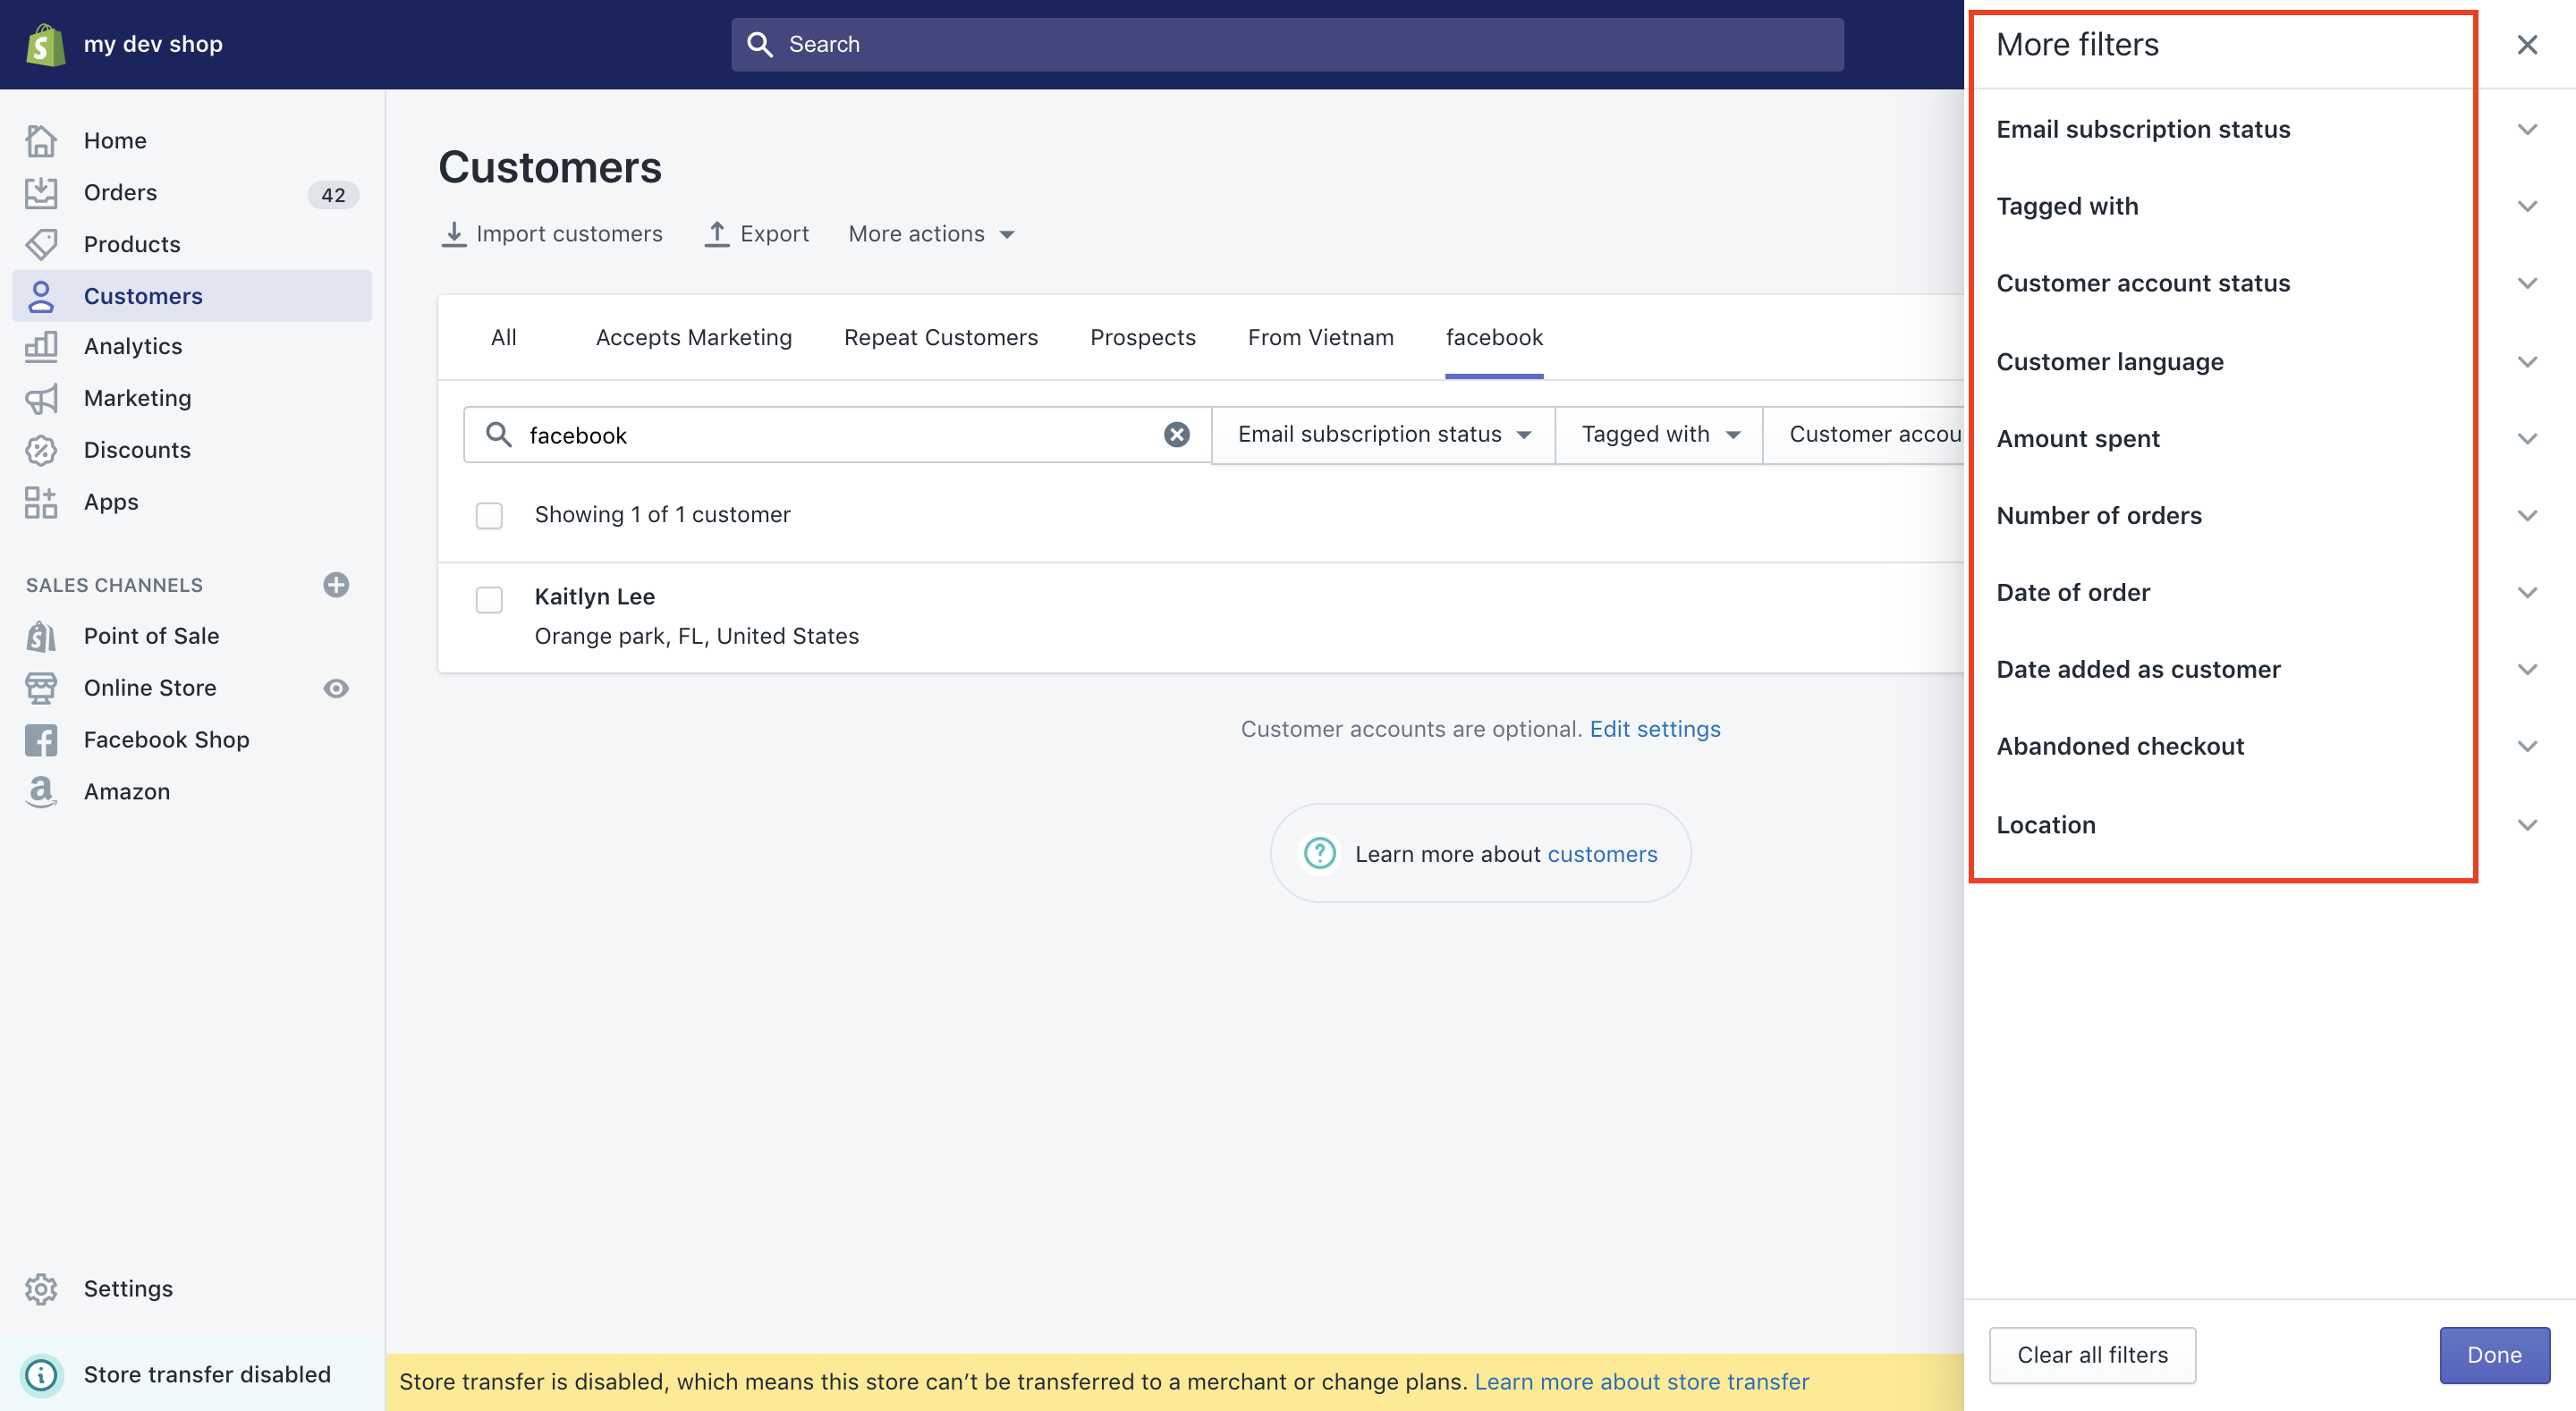
From your Shopify admin, you can filter customer profiles by:
- whether they accept email marketing
- tags
- customer account status (such as active or disabled)
- amount spent in your store
- number of orders placed
- date of last order
- date added as customer
- date of abandoned checkouts
- location by country
Select the filter and conditions that you want, as well as a value. To remove filters, click “Clear” under a specific filter, or click “Clear all filters”.
How to remove customers from a customer group?
Customer groups update automatically, so customers will be added and removed from groups depending on the search or filter terms used to create the customer group. However, store owners are not able to manually assign customer groups to a customer. The only way to do so is to add tags to a specific customer.
The same thing applies when you want to remove customer form groups. You can remove one particular customer from a group by removing the tags that designate the customer to that one specific group.
Conclusion
Customer groups are a great way to manage your customers effectively. The process is super simple and once you get to grips with the tags and filtering, you will absolutely love this feature.
If you have already had customer groups on your current store and you are planning to move those to Shopify, LitExtension – #1 Shopping Cart Migration Expert can give you a helping hand. We ensure to keep the connection of your customer data from your current store to Shopify. If you have any questions, please contact us! Let’s join our community to get more eCommerce knowledge.