All amazing websites have one thing in common. It is the perfect balance of visual design, typography, and whitespace. However, what most website owners heavily weigh in on is just the use of images, colours, videos, icons etc. and completely ignore their typography.
Many WordPress beginners never explore any other fonts other than the default ones that WordPress has to offer. Though WordPress has a pretty decent collection of default fonts, it can be useful at times to go outside the box and look for custom that might make your website shine even brighter.
If you wish to know about custom fonts and how to add them, we have got you covered. This guide will make it super easy and by the end of it, you’ll know from where to get custom fonts and how to install them on your WordPress.
We will cover the following aspects in this complete guide to custom fonts for WordPress:
- Impact of fonts on your website
- Where can you find appropriate fonts for free?
- 2 methods of installing a custom font.
Without further ado, let dive in!
It’s not just aesthetics!
There is no doubt that a beautiful font or type can make your website look more elegant and awesome, however, fonts impact your website and user experience in many more ways.
Fonts have aesthetical value, a good-looking website will appeal to users easily. Simultaneously, fonts can also increase the readability of the text which can be a massive metric for a great user experience. If you use a certain type of font across your website, it also reinforces your brand image. Fonts can influence what kind of perception people have about you, how effectively you communicate, and how you want users to feel about your website.
It is important that you give the necessary attention to the fonts that you use while you are building a website. It is best to have 2 font types for your entire website. Installing multiple custom fonts might slow down your website, thus it is important you use fonts from credible sources and libraries.
This brings us to our next section. Where can you get high-quality fonts for free?
Where to find custom fonts for WordPress?
There exist hundreds of websites where you can look for free fonts. However, most of these websites have very low-quality fonts which either are not designed properly or can slow down your website. Looking for the right font can take hours at times since you have to endlessly scroll through low-standard fonts.
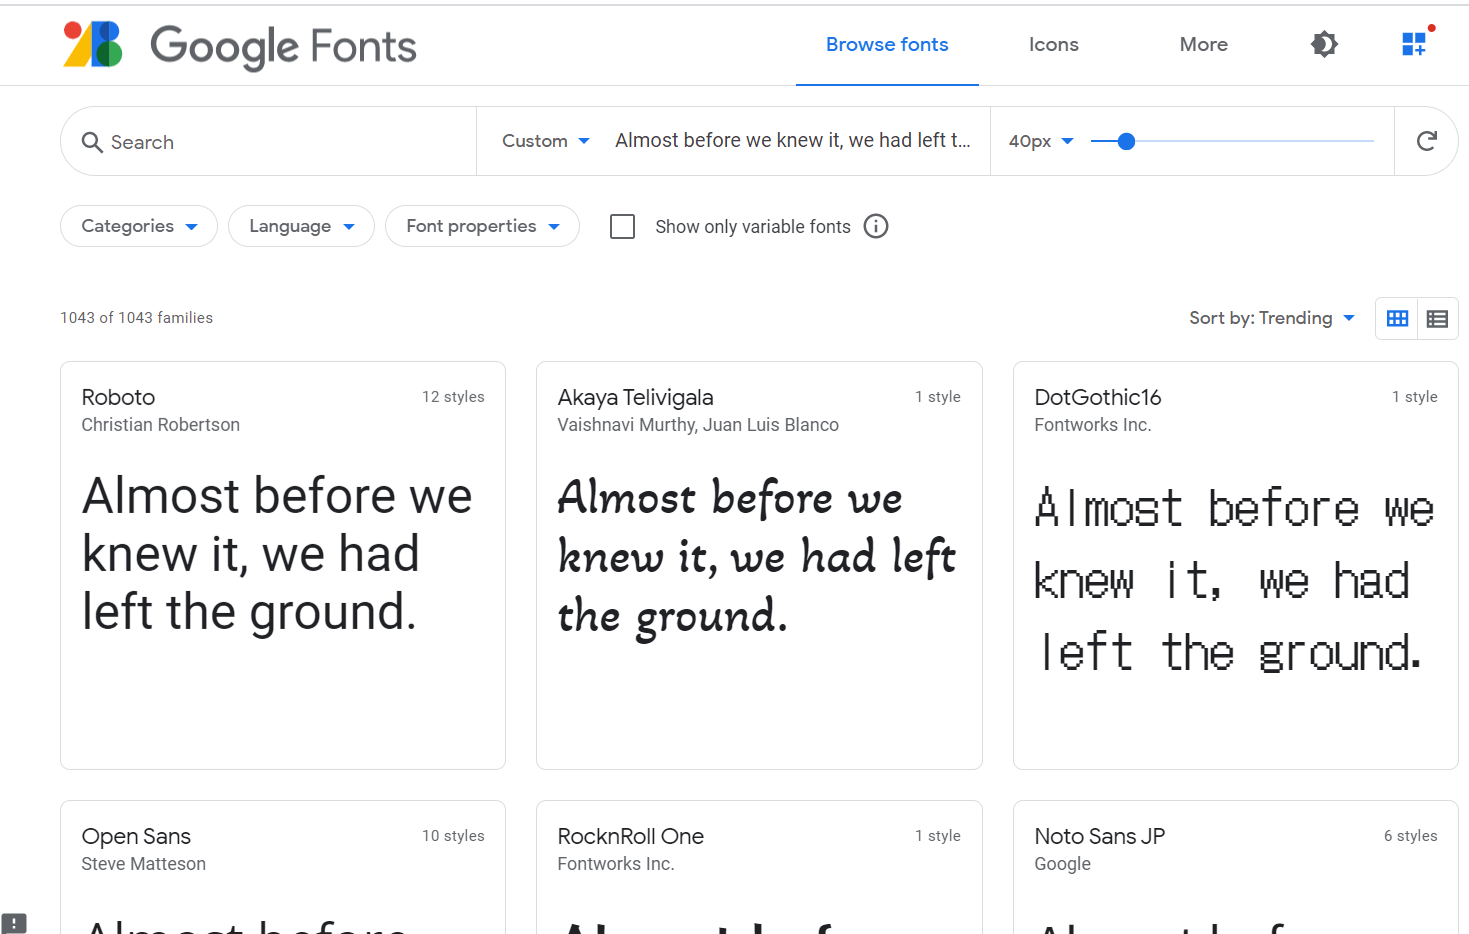
One of the best places to get a free awesome font is Google Fonts. It is a repository of more than 990 font families and they maintain a high standard for quality. They have fonts in various languages.
In case you don’t find the font you desire, the next place to go is Adobe Fonts which was previously known as Typekit. Adobe Fonts have a free version where you get access to limited fonts but they also have a premium collection which you can access by subscribing to their premium plan.
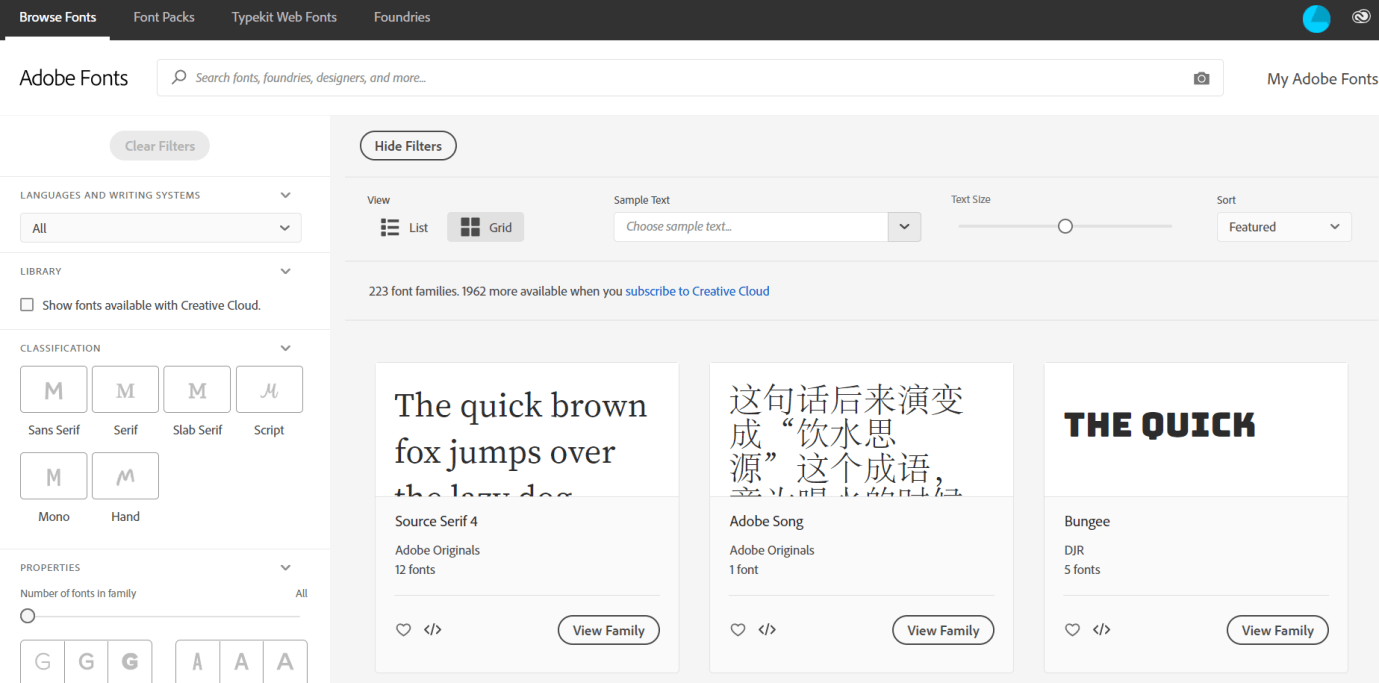
You can also go to the following website to find beautiful and high-quality fonts:
- Fonts.com
- Fontsquirrel.com
- Fontfabric.com
Once you have the font you want, it’s time to learn how to install it on your WordPress website.
Method 1: Install using a plugin
This is perhaps the easiest way to install a custom font. WordPress’s website can be equipped with a plugin to get the job done within a few simple clicks. In case you wish to install a font from Google Fonts then there are a few great plugins for WordPress.
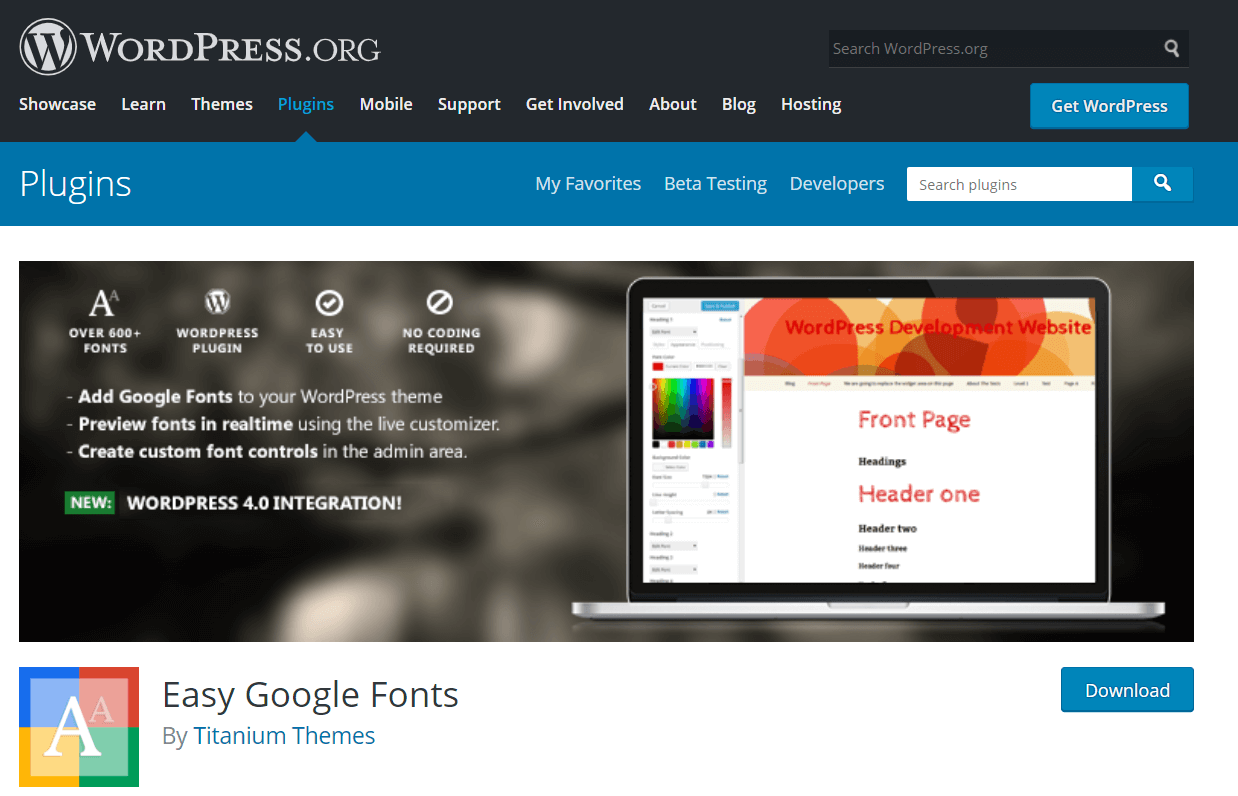
Easy Google Fonts is a great plugin for the task. Once you download the plugin, simply install the plugin. After activating the plugin, go to Appearance > Customizer. Here you can see a new Typography section.
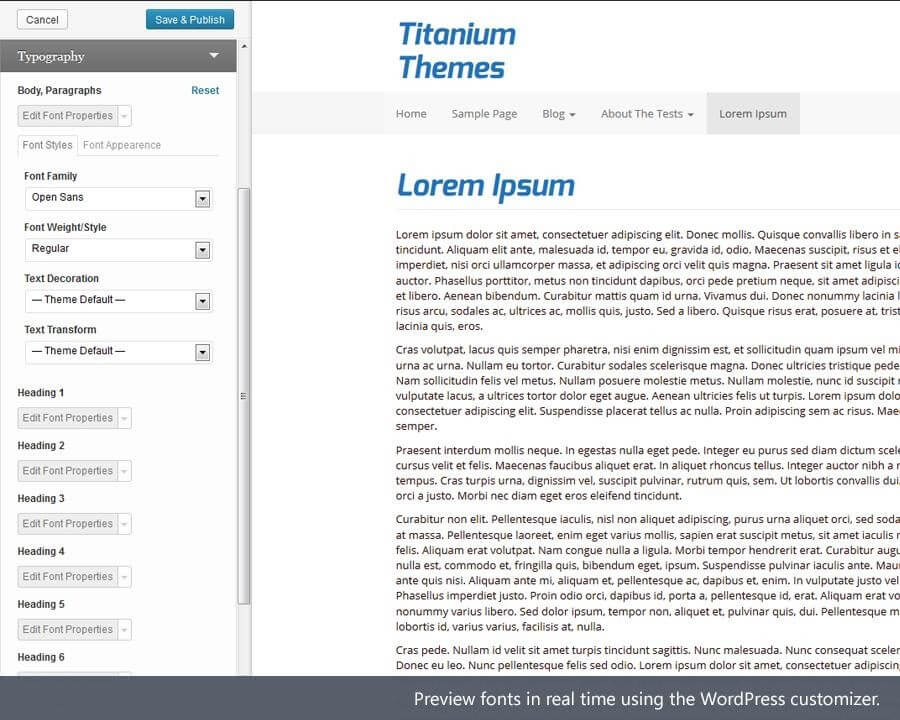
Within this option, you can change fonts for different sections of your website, like heading, subheading, body, etc. You can choose any Google font and customize it font style, font size, padding, margin, etc.
Another amazing plugin to install Google Fonts is ‘Fonts Plugin’. They also offer Adobe Fonts (Typekit) integration. In case you have a custom font other than from Google Font and Adobe Fonts, you can use ‘Custom Fonts’ plugin, which lets you upload any font directly to the settings of website builders like Astra / Beaver Builder / Elementor.
Method 2: Embed in your theme file (includes CSS3 @font-face)
Embedding a font in your theme file is a manual process and is not as intimidating as it sounds. It’s actually quite simple, all you need to do is follow the steps given here.
In case you need to install a font from Google Fonts then simply go to the website and select the font you wish to install.
On the screen, click on the option (+Select this style) and then click on the icon on top right corner.
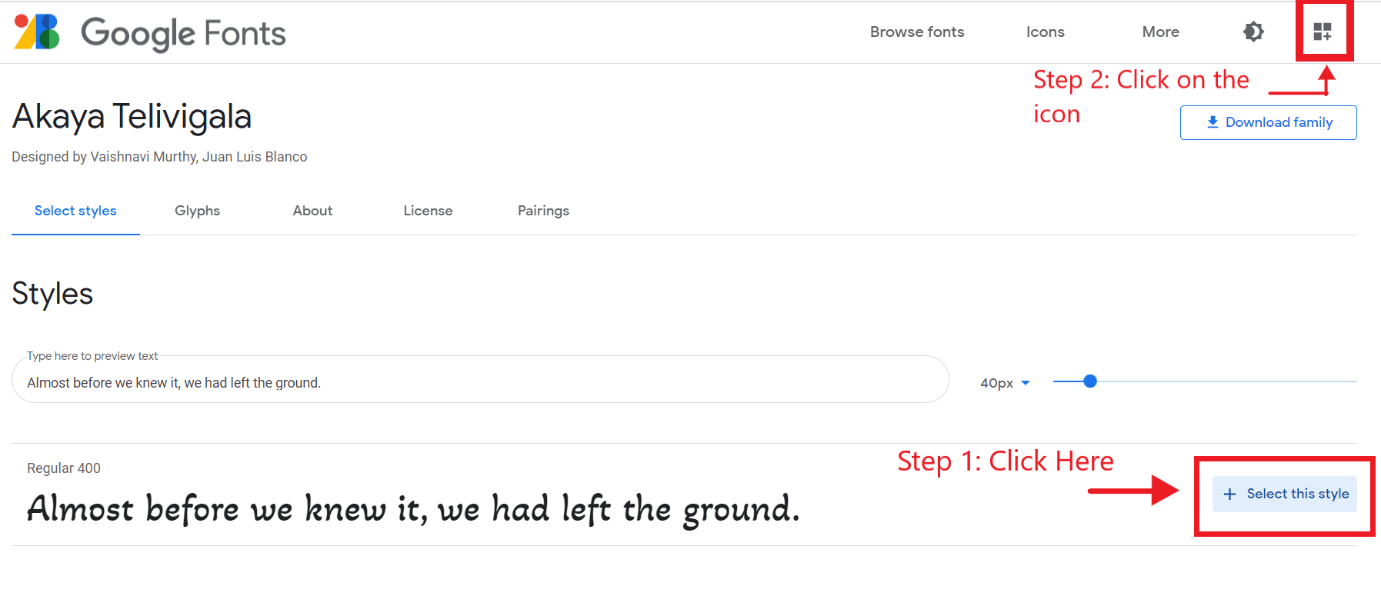
This will open a sidebar where you can see the code of the font which you can use to embed on your website. Copy this code.
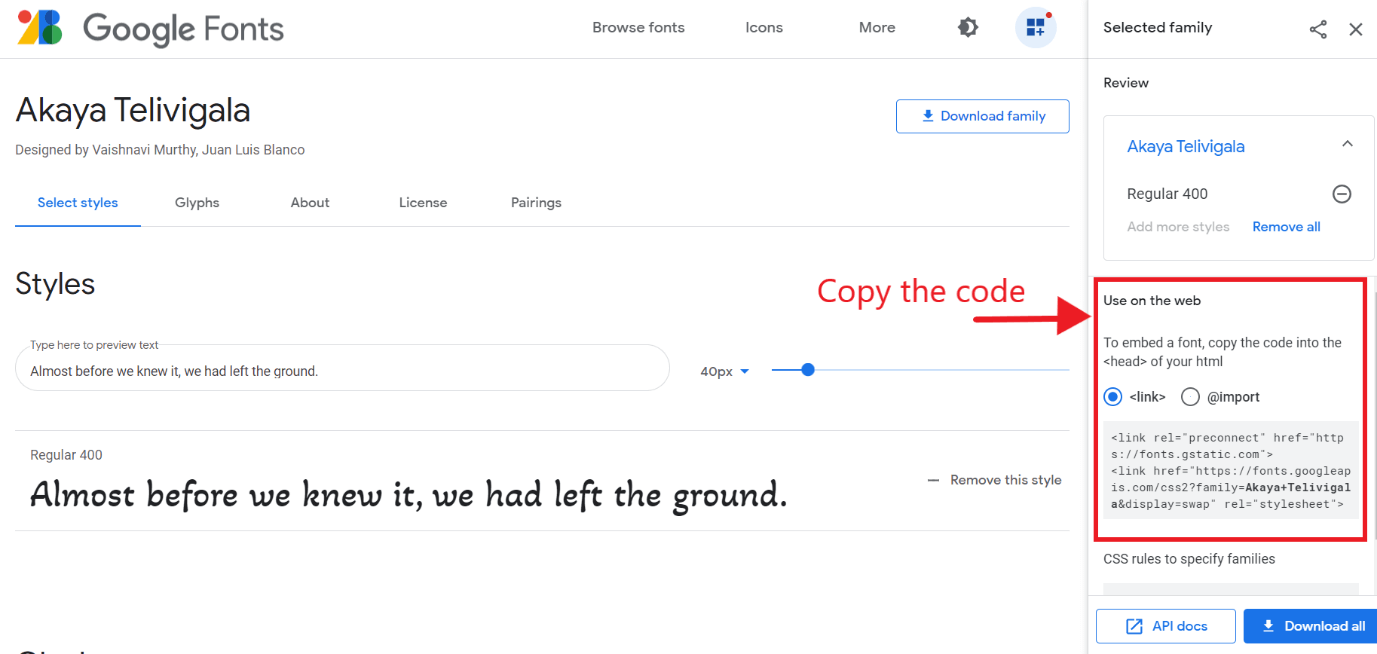
Now simply go to the header.php file of your theme and paste this code within the <Head> Tag of the header.php file.
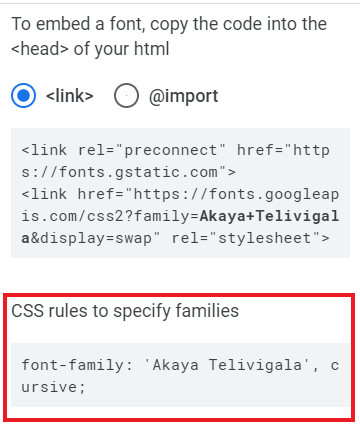
You also need to edit your theme’s stylesheet and in order to use the font. You can specify which parts of your website will use the font by using the CSS code, which is also given on the same sidebar on Google Fonts.
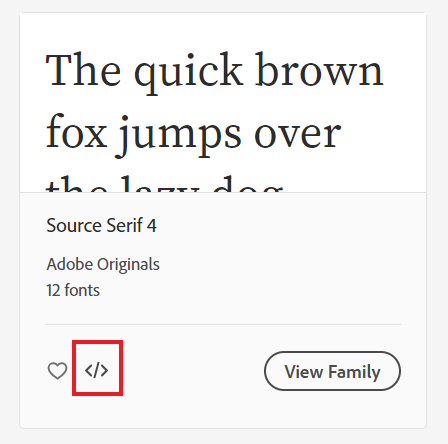
In case you wish to install a font from Adobe Font (Typekit) then you simply need to click on the button shown below to get the code and then follow the similar process as shown above.
Conclusion
These two are the most fundamental ways of uploading a custom font to your WordPress website. Do not shy away from giving a little style to your website, try and explore fonts on the sources we discussed and figure out which one suits best for you and your brand.
Remember, a font is not just about visual aesthetics, but it serves other purposes also. You can greatly enhance the user experience of your website by simply using an appealing and readable font.
We hope this guide started you on your journey to making a stylish website.
If you have any questions, please contact us by email or live chat, you can also join our community for more helpful information.