Customizing the checkout page of your WooCommerce online store can significantly impact your customers’ shopping experience and boost conversions. With WooCommerce’s flexible platform, you can tailor the checkout page to suit your brand’s identity and optimize the user journey. This article will provide you with different ways to customize WooCommerce checkout page, equipping you with the knowledge to create a seamless and engaging checkout experience for your customers.
In this article, you will learn:
- Add custom fields & change the checkout fields’ position
- Remove (hide) WooCommerce checkout fields
- Create Required/ Optional fields in WooCommerce checkout sections
- Add custom messages at the checkout
Additionally, stay till the end of this article to uncover why you should customize WooCommerce checkout page and 5 tips to increase checkout page conversion.
Now, let’s get started!
Want to migrate to WooCommerce?
If you are intending to migrate to WooCommerce, LitExtension offers a great migration service that helps you transfer your data from the current eCommerce platform to a new one accurately, painlessly with utmost security.
How to Customize WooCommerce Checkout Page?
By default, WooCommerce offers a checkout page for standard physical products. If you sell other types of items, like digital products, you may need to change WooCommerce checkout page.
To make a custom WooCommerce checkout page, you need to use WooCommerce checkout add-ons.
We’ve used several WooCommerce plugins and found that the Flexible Checkout Fields is among the best option for your business. This third-party software offers powerful yet easy-to-use functions. So in this tutorial, we are going to use this plugin to customize WooCommerce checkout page.
Before learning how to customize WooCommerce checkout page with Flexible Checkout Fields plugin, you need to install and activate it on your site.
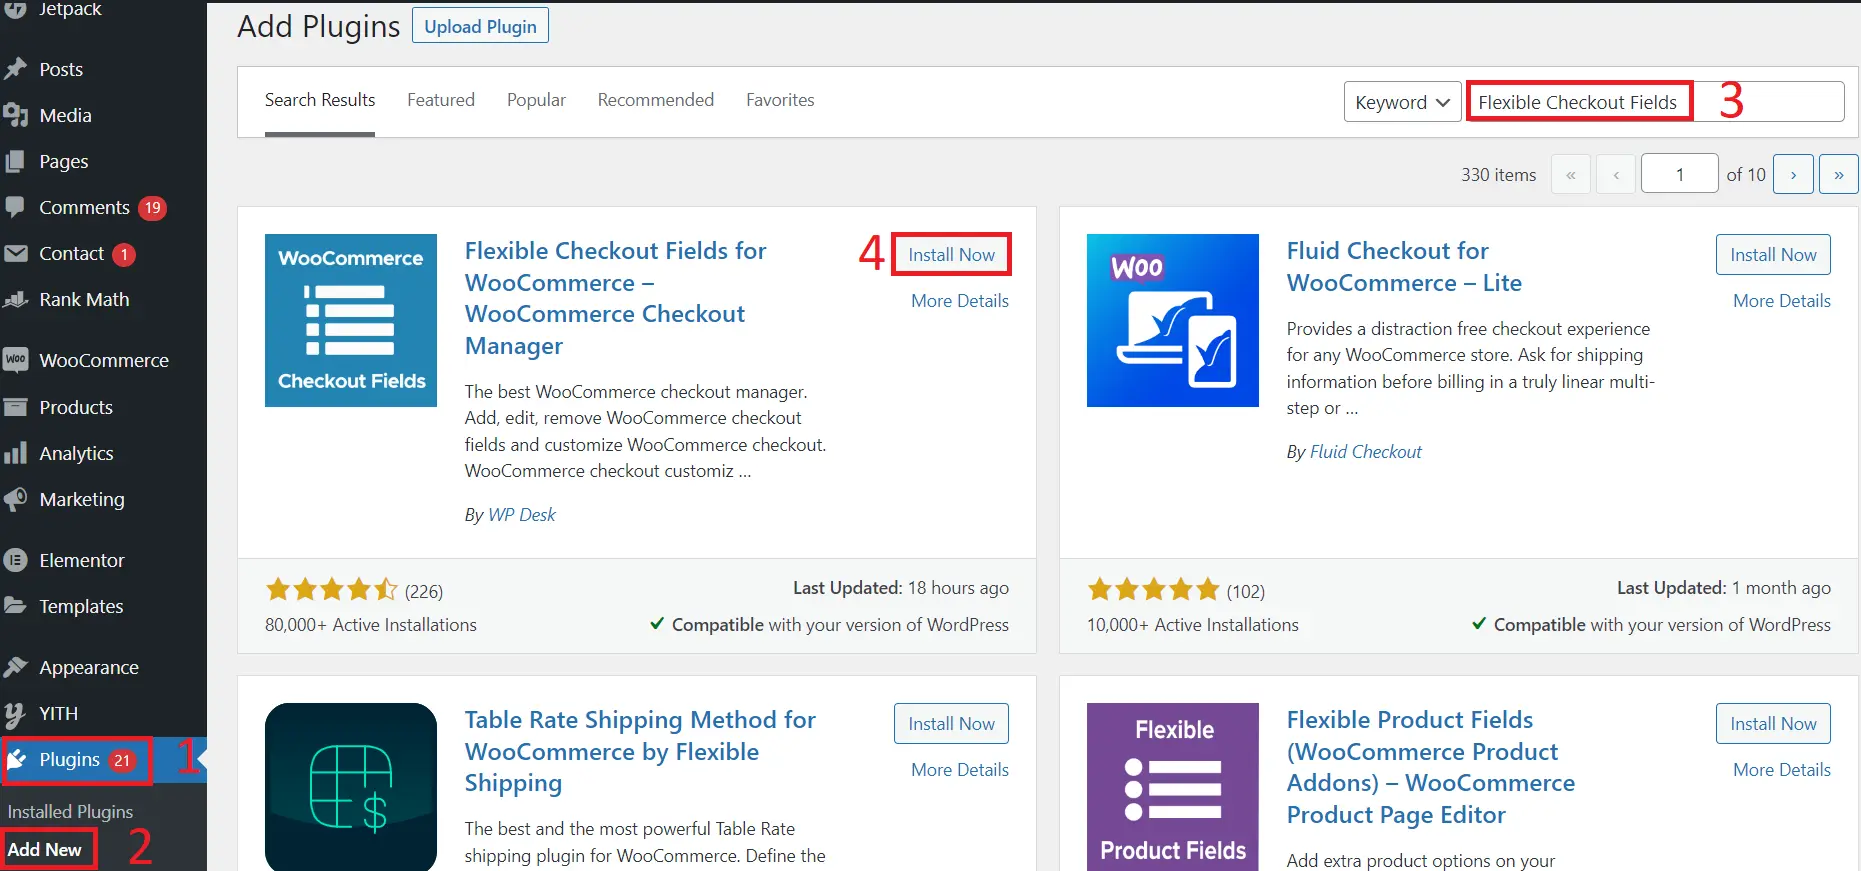
- From your WordPress menu, click Plugins > Add New.
- Then, enter the plugin name in the search bar to search for the plugin
- And lastly, click Install Now > Activate to enable the plugin on your WooCommerce site.
Other WooCommerce resources you might be interested in:
- WooCommerce Review – Full Features Review & How to Setup WooCommerce?
- WooCommerce Pricing: Is WooCommerce Completely Free?
- The Guide to WooCommerce Shipping: How to Set It Up?
Add custom fields & Change the checkout fields’ position
Adding custom fields to the WooCommerce checkout page allows you to collect additional information from customers during the checkout process tailored to your specific business needs. This can help improve customer satisfaction and streamline the order fulfillment process.
To add custom fields to the checkout page in WooCommerce, refer to the guide below:
- First, from your WordPress dashboard, select WooCommerce > click Checkout Fields:
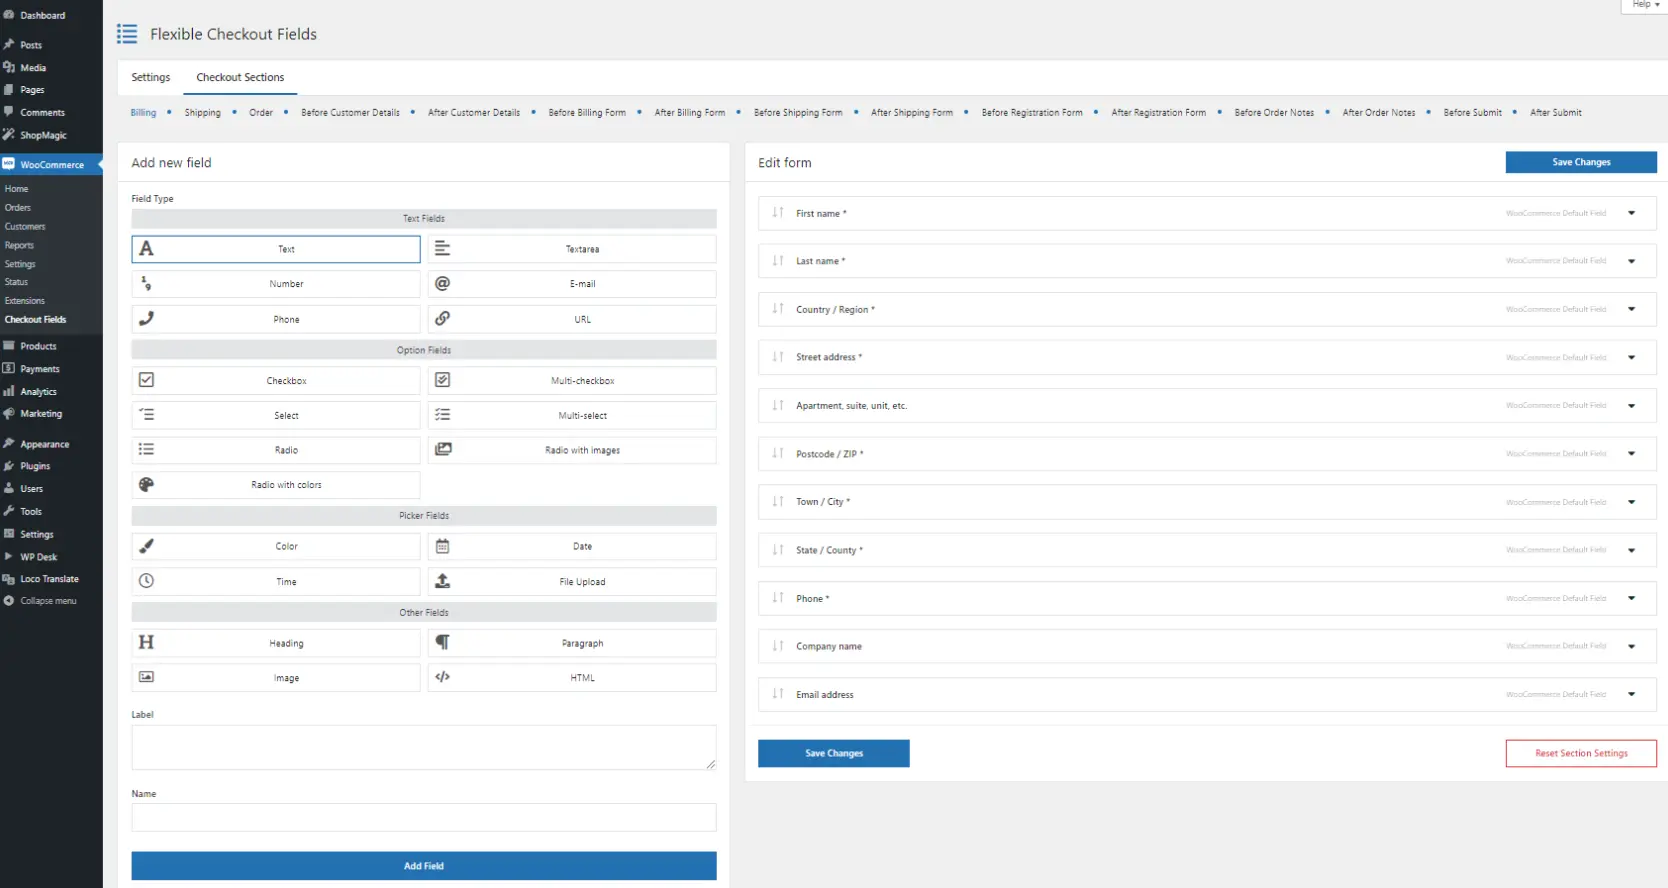
- As you can see in the settings pages, you can include new fields to your WooCommerce checkout page template with some clicks as follow:
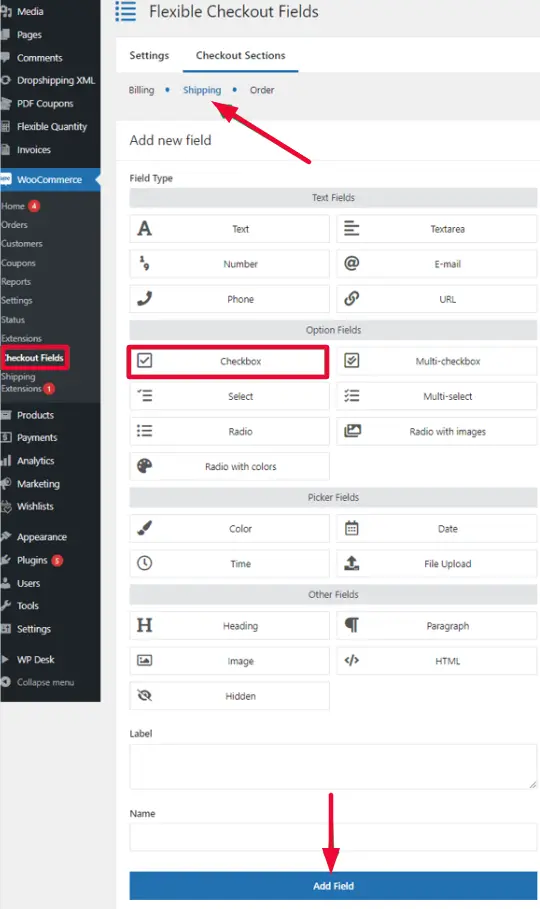
- You can add various elements to your WooCommerce custom checkout page, including Billing, Shipping, and Order.
- Additionally, you can easily change the checkout field’s position by dragging a field and dropping it to a new place on your WooCommerce checkout page.
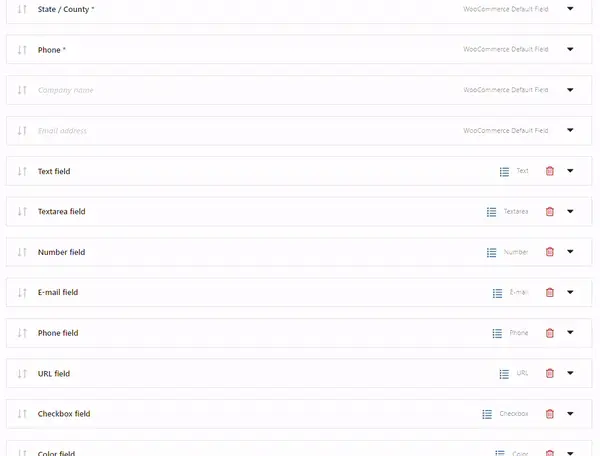
- Lastly, after finishing, remember to save your changes and preview your WooCommerce custom checkout page.
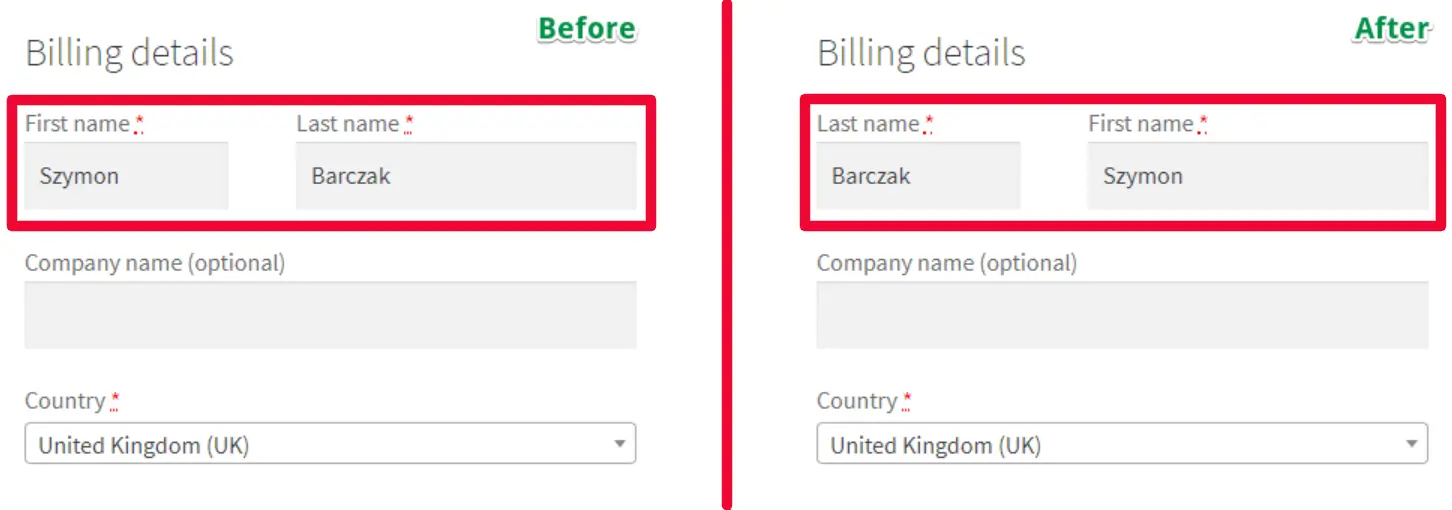
But, from our experience, you shouldn’t include too many custom field options. Although you will have more customer information, it can lengthen the checkout process. This can increase abandoned carts, leading to unnecessary sales losses.
Remove (hide) WooCommerce checkout fields
If certain fields on the WooCommerce checkout page are not necessary or relevant to your online business, you can hide or remove them by following the steps below:
- First, select the checkout field you want to hide and uncheck the option Enable field.
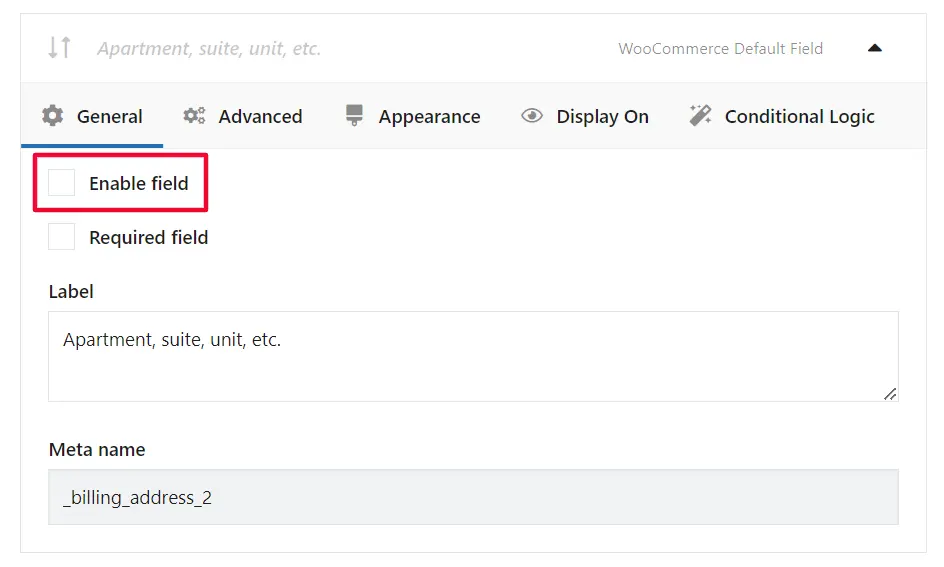
- Then, save your changes
Set Required/ Optional fields in WooCommerce checkout sections
By default, WooCommerce sets some fields as required on the checkout page. However, you may want to make certain fields optional or change the requirement status of others.
- Simply check both the Enable field and Required field option in the field’s settings to make a WooCommerce checkout field required:
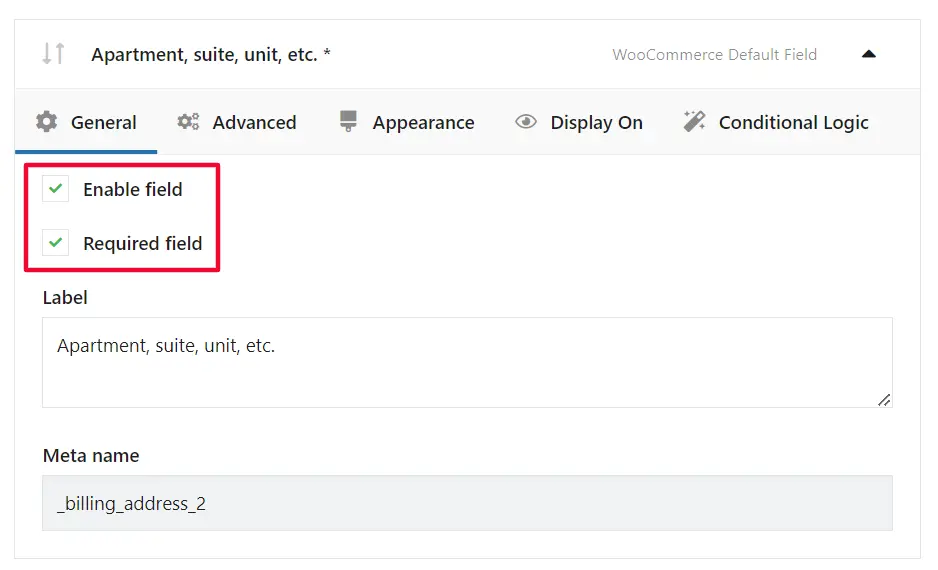
- If you want to change it to optional, uncheck the Required field option.
Add custom messages at the checkout
You can add custom messages at various stages of the checkout process to provide important information or communicate specific instructions to customers.
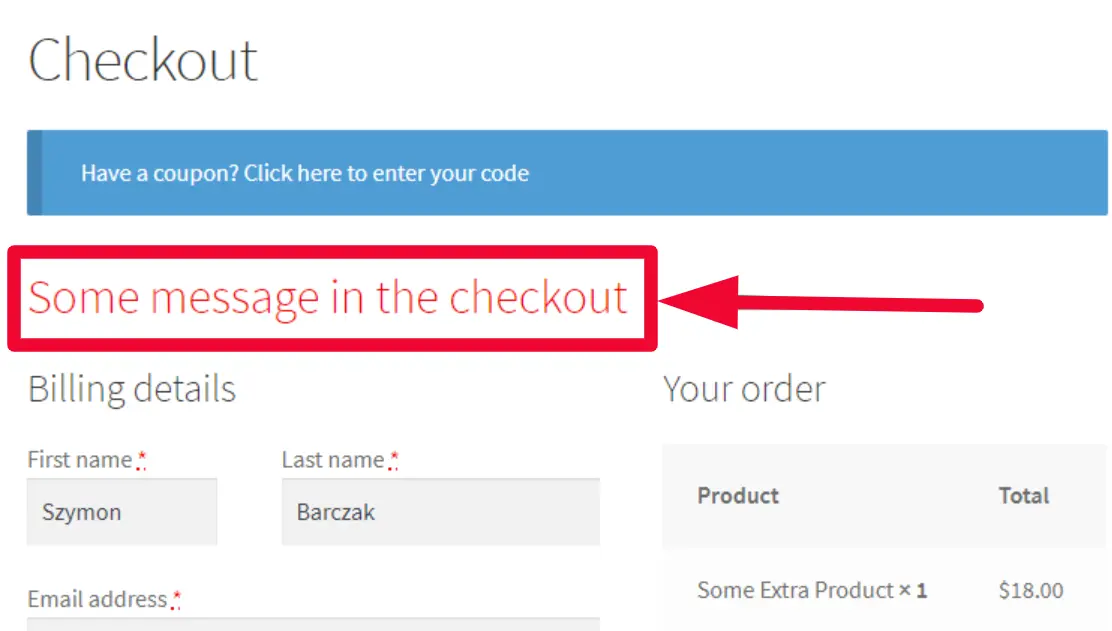
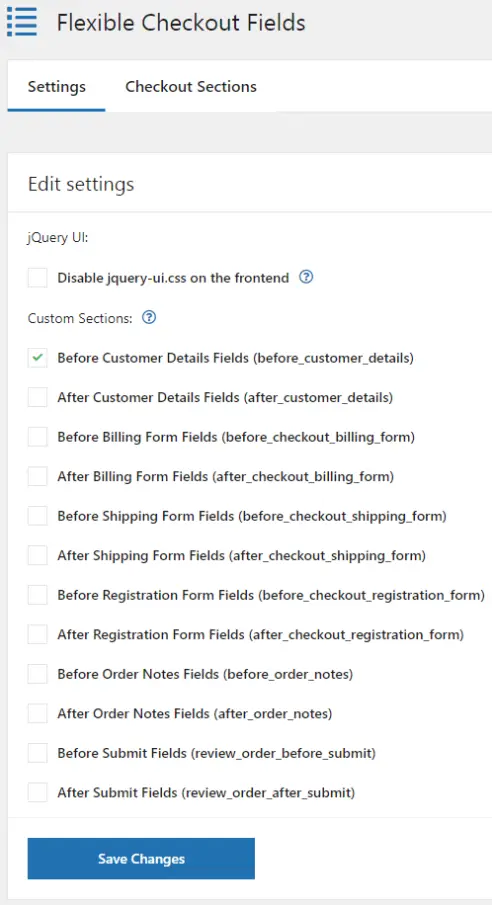
- In the Settings section of the Flexible Checkout Fields plugin, mark the Before Customer Details custom section option.
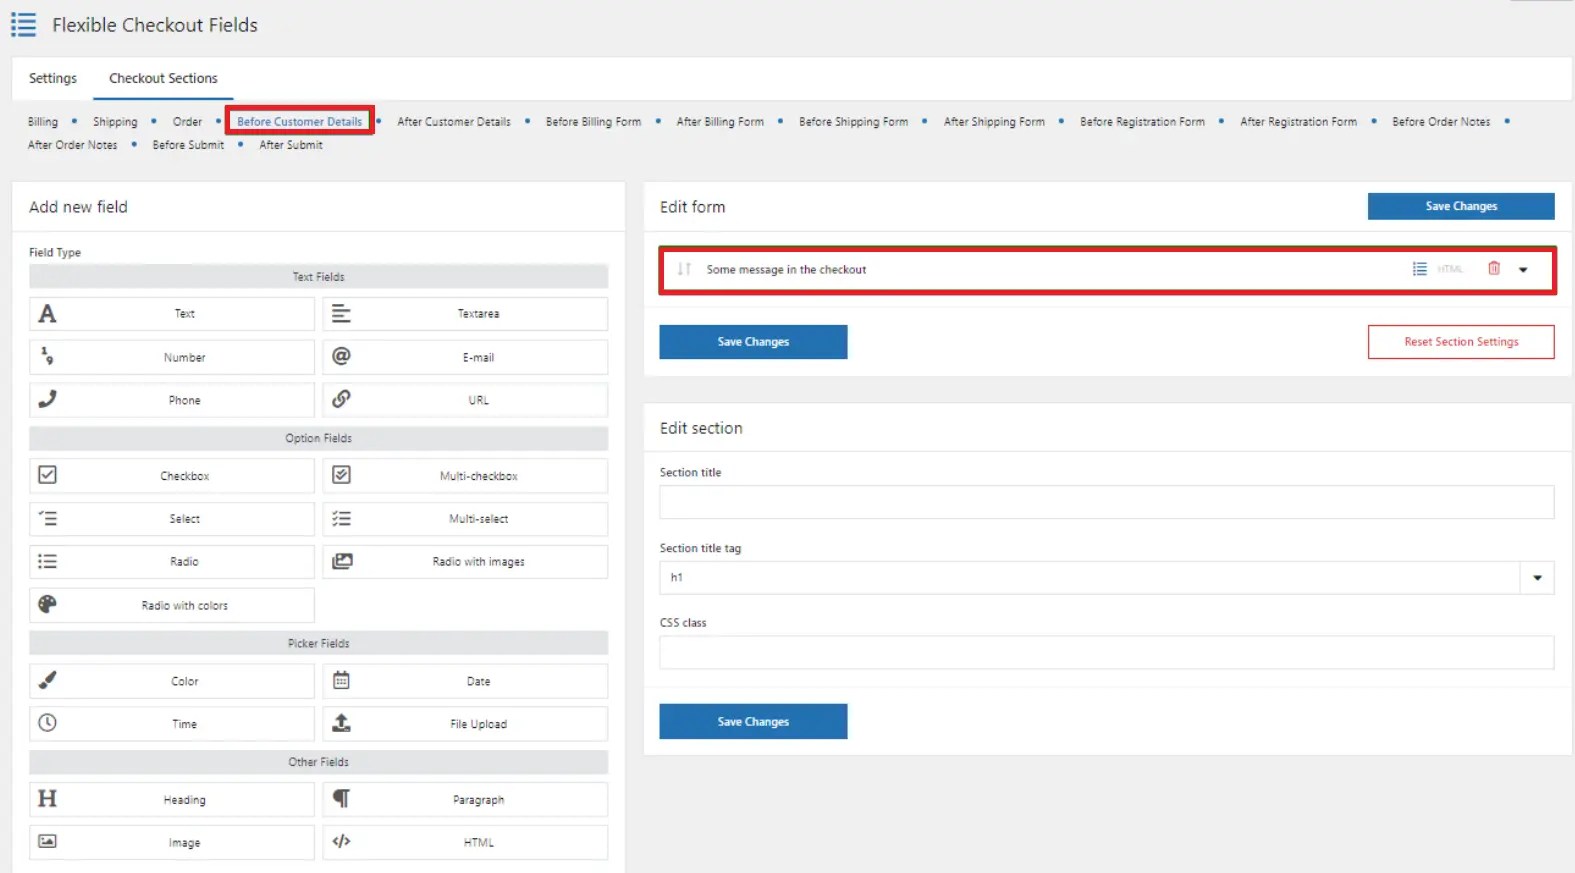
- Then, navigate to the Before Customer Details tab and add a field.
- Finally, hit the Save Changes button to update your custom WooCommerce checkout page.
Following these detailed steps, you can customize your WooCommerce checkout page to suit your business requirements. Our advice is that remember to save your changes and test the checkout page to ensure everything is functioning as expected.
Want to Migrate to WooCommerce?
On another platform but want to switch to WooCommerce to have complete control over your site? Let LitExtension help! We provide a well-optimized cart-to-cart migration service that will transfer all your data to WooCommerce quickly, accurately, and painlessly with utmost security.
Why Should You Customize WooCommerce Checkout Page
Customizing your WooCommerce checkout page offers several benefits that can greatly impact your online store’s success:
Better checkout experience
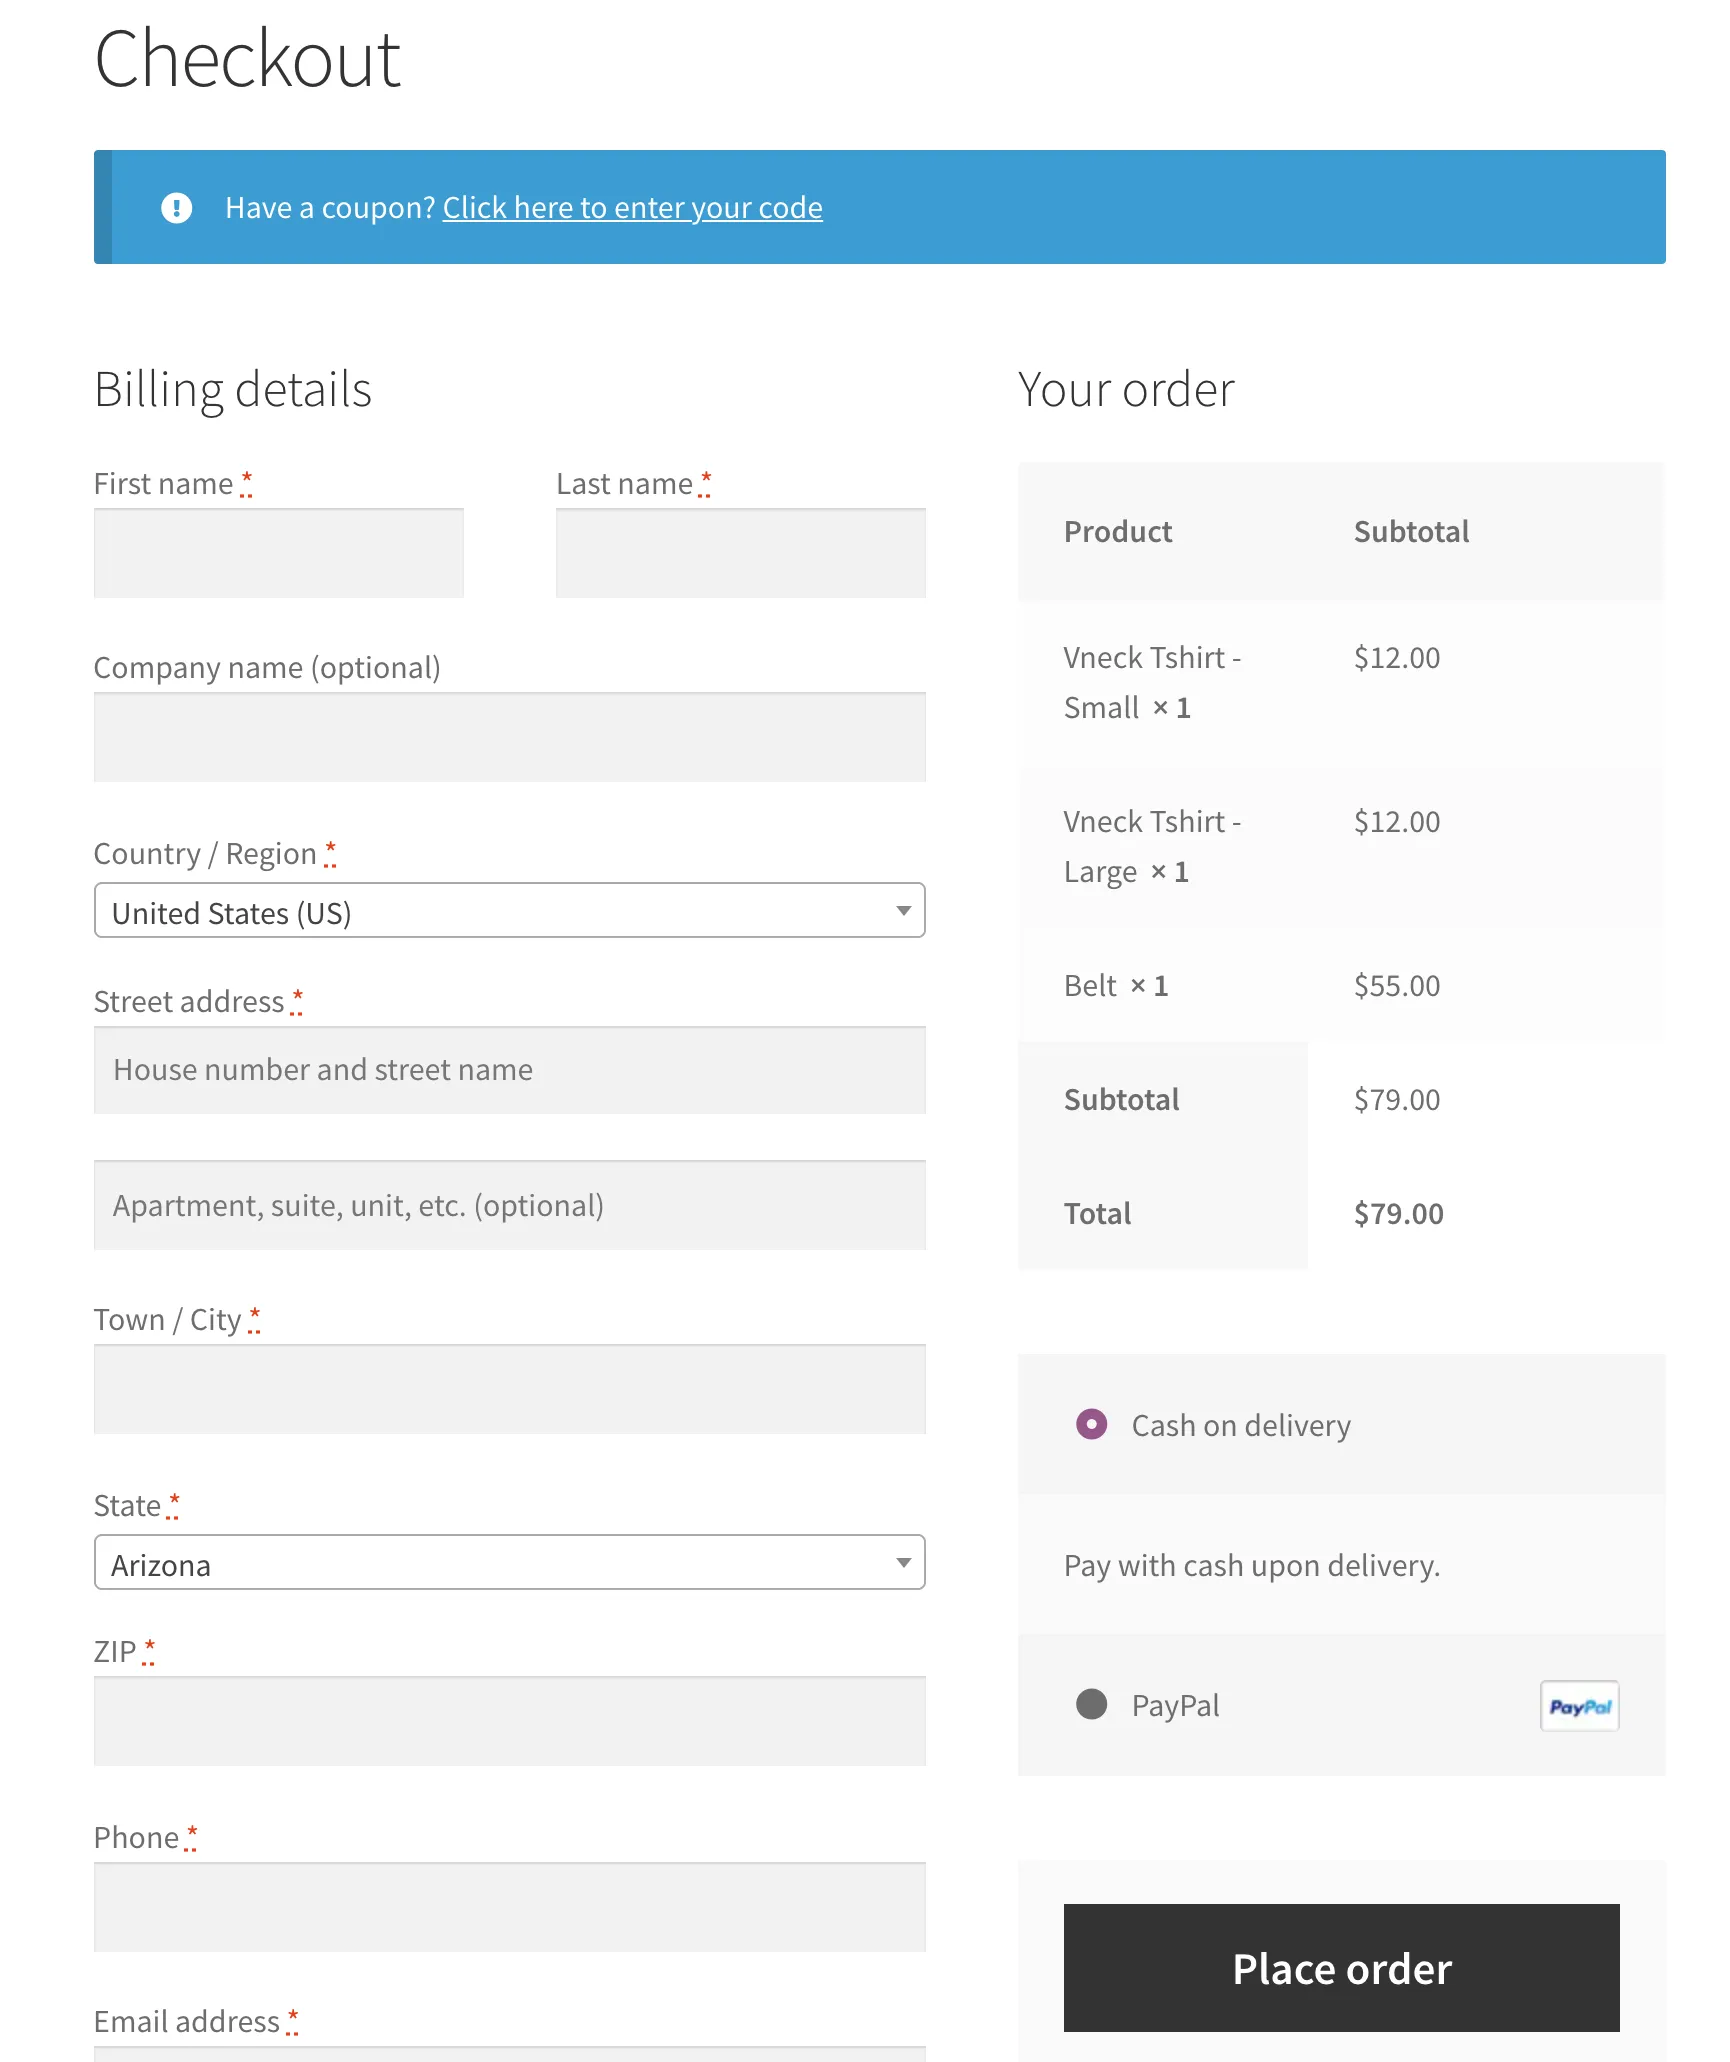
A customized checkout page simplifies the process, reduces friction, and enhances user-friendliness. By removing unnecessary steps and streamlining form fields, you create a seamless and intuitive experience for customers, increasing their satisfaction and reducing cart abandonment.
Improved conversion rate
A well-designed and optimized checkout page with compelling visuals, persuasive copy, and clear call-to-action instills confidence in customers and motivates them to complete their purchases. This leads to higher conversion rates, converting more visitors into paying customers and increasing overall sales.
Increased average order value
Customization allows you to strategically incorporate upselling and cross-selling opportunities directly on the checkout page. By showcasing relevant products, limited-time discounts, or promotional offers, you can entice customers to add more items to their carts, increasing the average order value and maximizing revenue.
5 Tips to Increase Checkout Page Conversion
By default, the built-in WooCommerce checkout setting isn’t optimized for conversions and boosting sales.
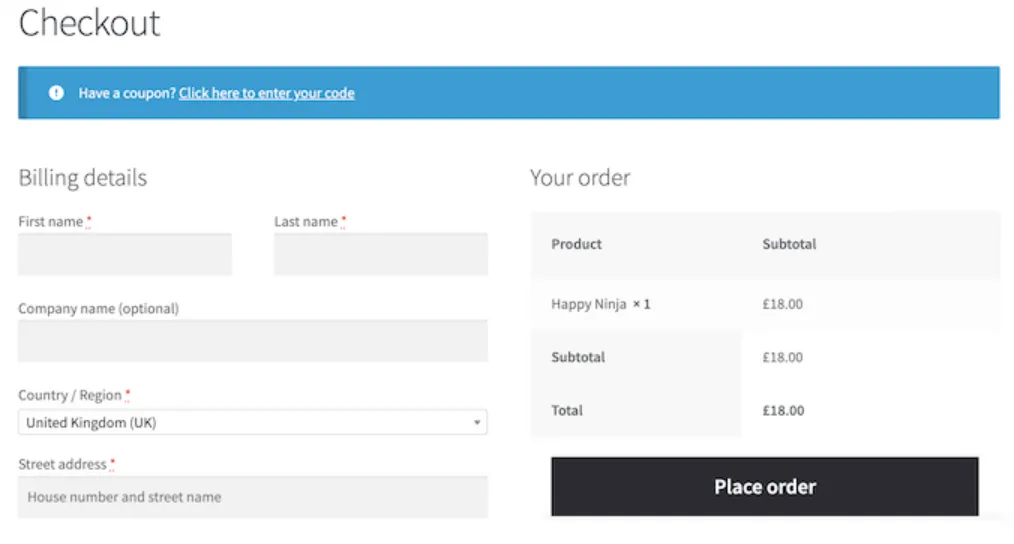
Therefore, try the five tips below to increase checkout page conversion and improve the overall user experience.
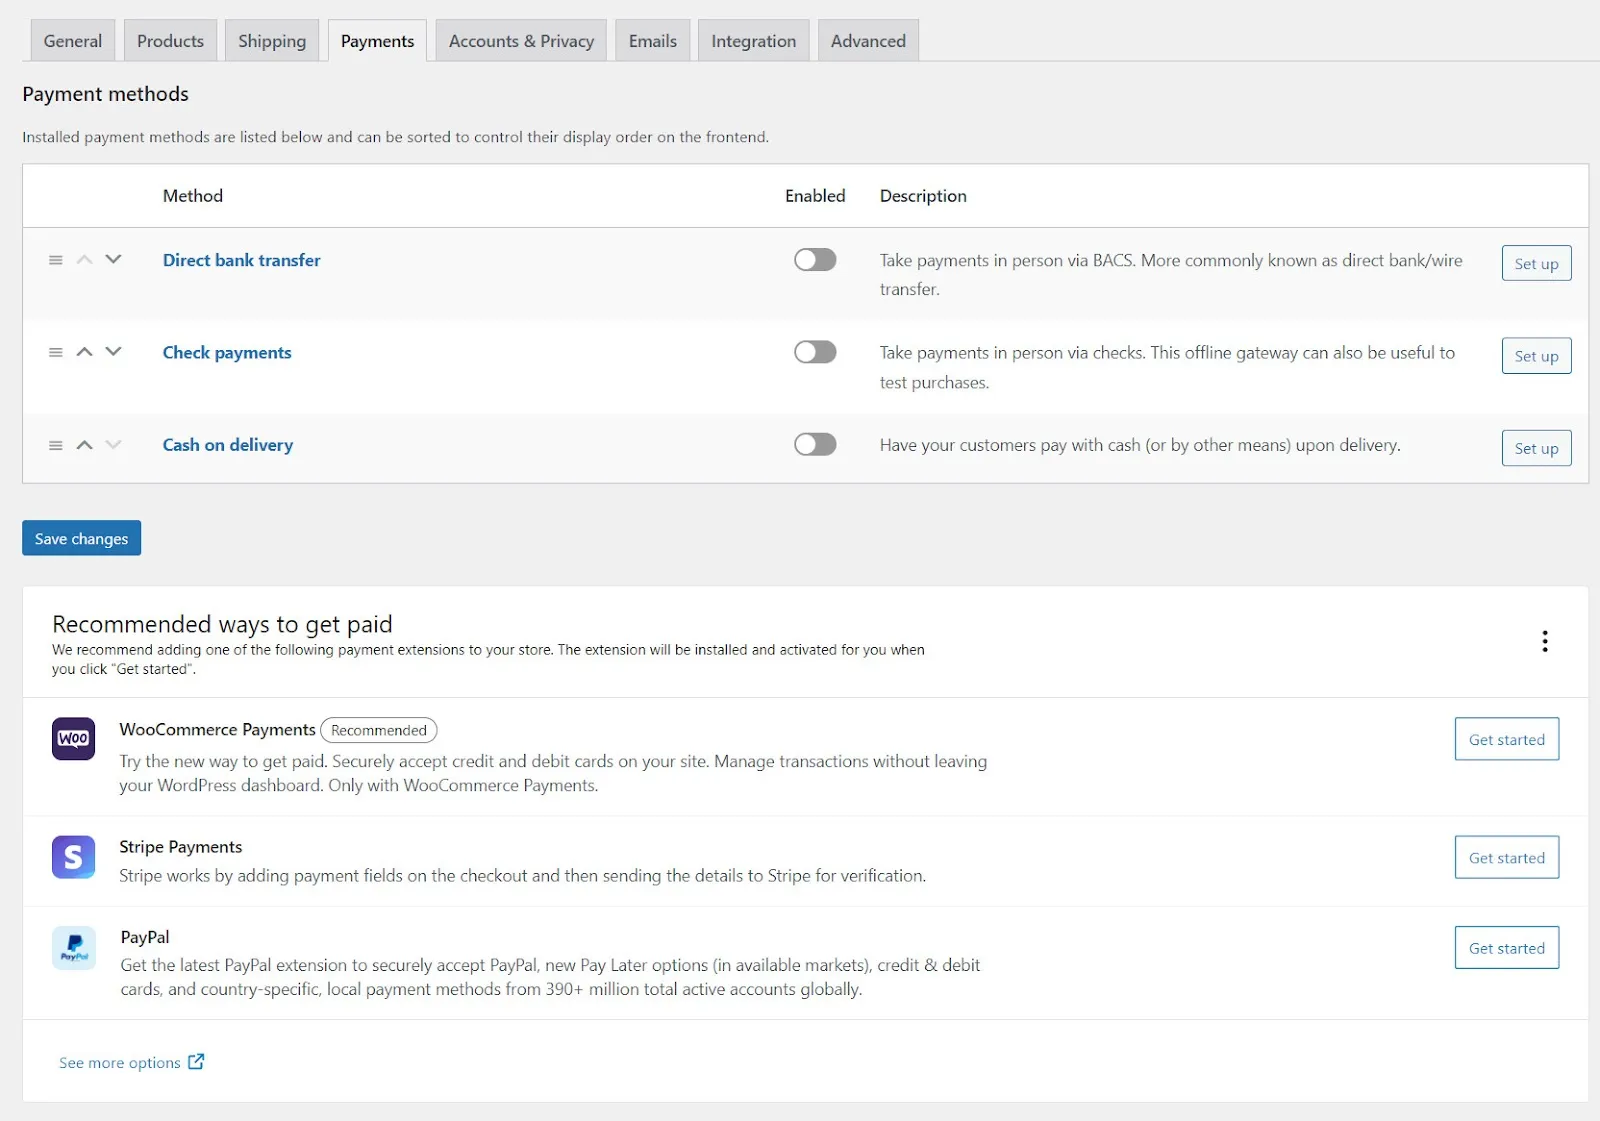
#1. Offer more payment options
Providing a variety of payment options caters to different customer preferences and increases the likelihood of completing the purchase. Include popular payment methods such as credit cards, PayPal, Apple Pay, or digital wallets to accommodate a wider range of customers.
#2. Remove unnecessary fields
Streamline the checkout process by eliminating any unnecessary form fields. Minimize the information customers must provide, keeping it concise and relevant to the transaction. This reduces friction and saves time, encouraging customers to proceed with their purchase.
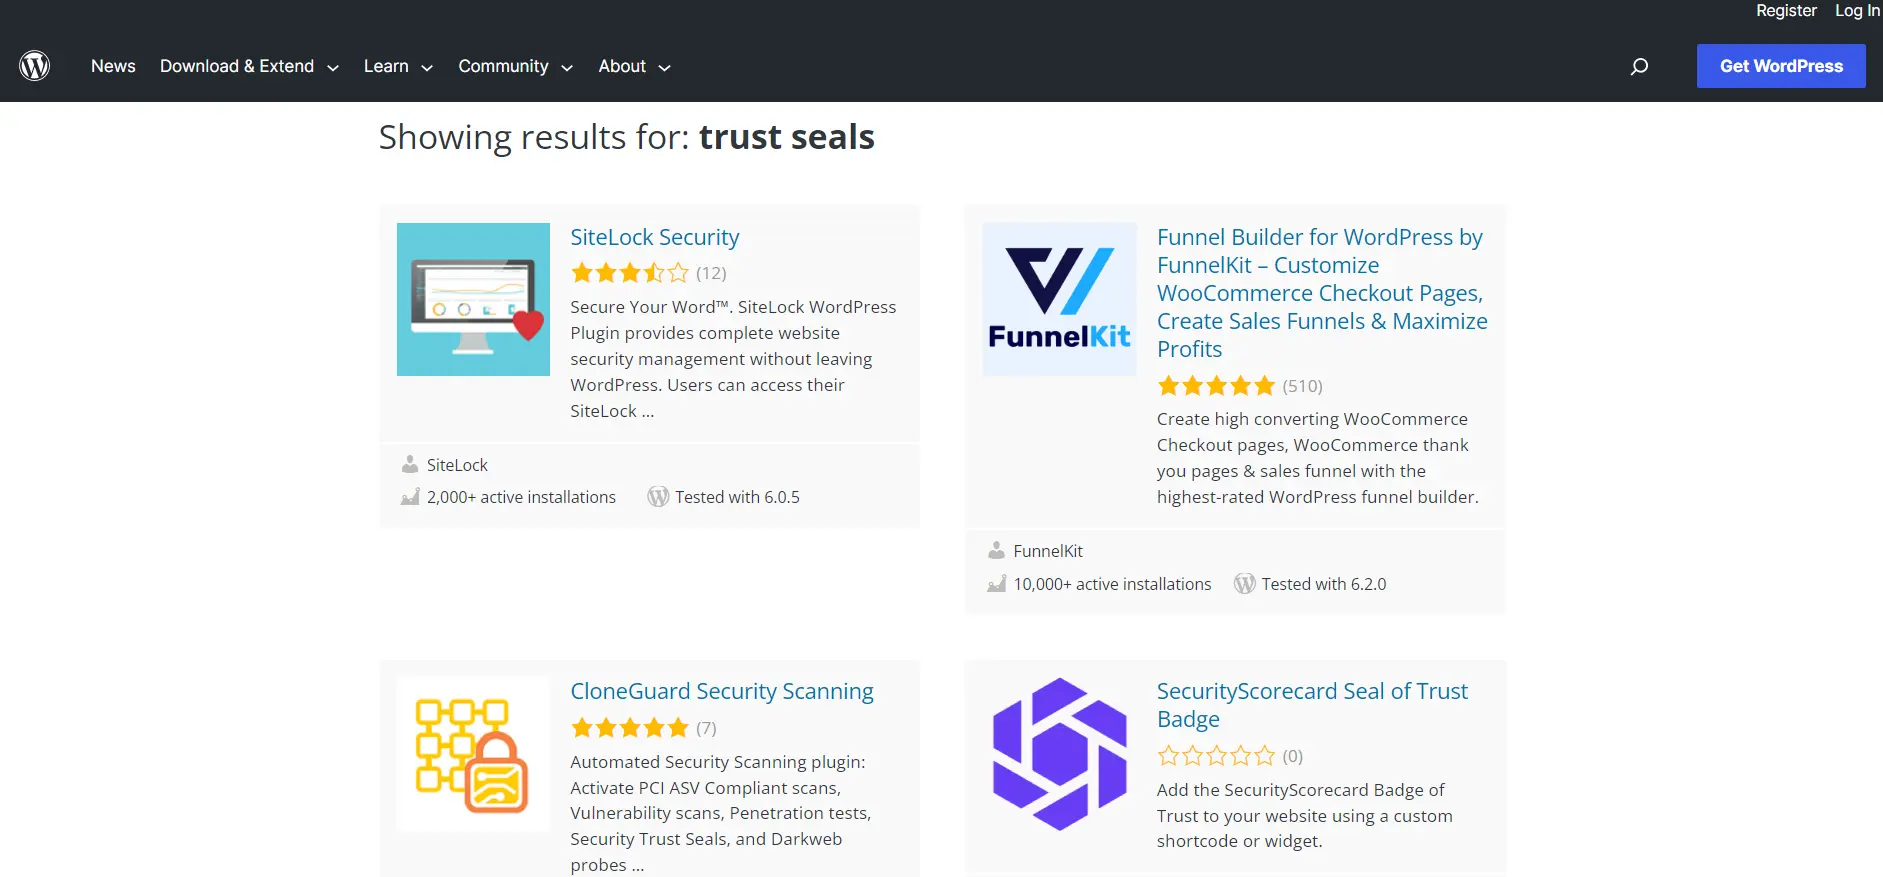
#3. Include security and trust seals
Displaying security badges, trust seals, or SSL certificates on your checkout page reassures customers that their sensitive information is protected. These visual cues instill confidence, alleviate concerns about data security, and build trust, which is crucial for increasing conversion rates. Some WooCommerce trust badge plugins you can try are SiteLock Security, CloneGuard Security Scanning, etc.
#4. Avoid extra or hidden fees at checkout
Transparency is key to a positive checkout experience. Communicate all costs, including shipping fees and taxes, upfront and avoid surprising customers with additional charges during the checkout process. Being transparent about pricing builds trust and prevents customers from abandoning their carts due to unexpected costs.
#5. Allow guest checkout
While user accounts can offer convenience for future purchases, making account creation mandatory can deter customers. Provide a guest checkout option that allows online customers to checkout without creating an account on your store.
Alternatively, simplify the account creation process by requesting only essential information, offering social media login options, or allowing users to save their details for future visits.
With these useful tips, you can optimize your checkout page, reduce friction, and enhance the overall user experience. Creating a seamless and user-friendly checkout process encourages customers to complete their purchases, ultimately boosting conversion rates and driving greater revenue for your online store.
Other checkout options that you should know about:
- How Does Shop Pay Work and How It Benefits Your Shopify Store
- Shopify Payments Review & Set up in 4 Steps
- How BigCommerce Payment Gateways Work
Customize WooCommerce Checkout Page – FAQs
[sp_easyaccordion id=”59443″]
Conclusion on How to Customize WooCommerce Checkout Page
In conclusion, knowing how to edit WooCommerce checkout page is beneficial because it is a powerful way to enhance the user experience, improve conversion rates, and increase the average order value. By offering more payment options, removing unnecessary fields, instilling trust with security seals, avoiding hidden fees, and simplifying the account creation process, you can create a seamless and user-friendly checkout process.
With these customization strategies, you can transform your WooCommerce checkout page into a high-performing tool that maximizes sales and leaves a lasting impression on your customers.
Last but not least, you can join our community and follow our eCommerce blog to stay up to date on eCommerce trends and useful tips and tricks!