If you are looking for an effective data switching solution from Ecwid to Shopify, keep reading because you are in the right place. With 6 simple steps, your new online store will be ready to create value after performing Ecwid to Shopify migration.
- Step 1. Back up your Ecwid website
- Step 2. Create a new Shopify store
- Step 3. Set up Source Cart and Target Cart
- Step 4. Select entities you want to migrate
- Step 5. Migrate Ecwid to Shopify
- Step 6. Perform post-migration checklist
Don’t worry if you do not have a technical base. In this article, LitExtension – #1 Shopping Cart Migration Solution is here to provide you with step-by-step guidance to successfully perform Ecwid to Shopify data migration without any technical hassles.
Break Free from Ecwid Barriers on Shopify
Shopify’s continuous improvements support scalability and flexibility as your business grows. Our accredited migration team streamlines the transition seamlessly.
How to Migrate from Ecwid to Shopify
Migrate Ecwid to Shopify – What to Prepare?
Preparation before the data migration is a crucial step for you to experience a perfect Ecwid to Shopify switch. At this stage, you will need to back up the data from your current store and set up a new Shopify website.
#1. Backup data on Ecwid
Before making any changes to your own store, we believe that backing up business data is of great importance to prevent data loss and potential problems. Therefore, preparing a file of your store database is the first thing you should do before migrating data from Ecwid to Shopify.
You can export your Ecwid store’s products, customers, orders, and gift cards on your own. Check it out at the Ecwid help center for detailed instructions.
However, with LitExtension, you don’t have to worry about this step because we guarantee not to distort your current store’s database.
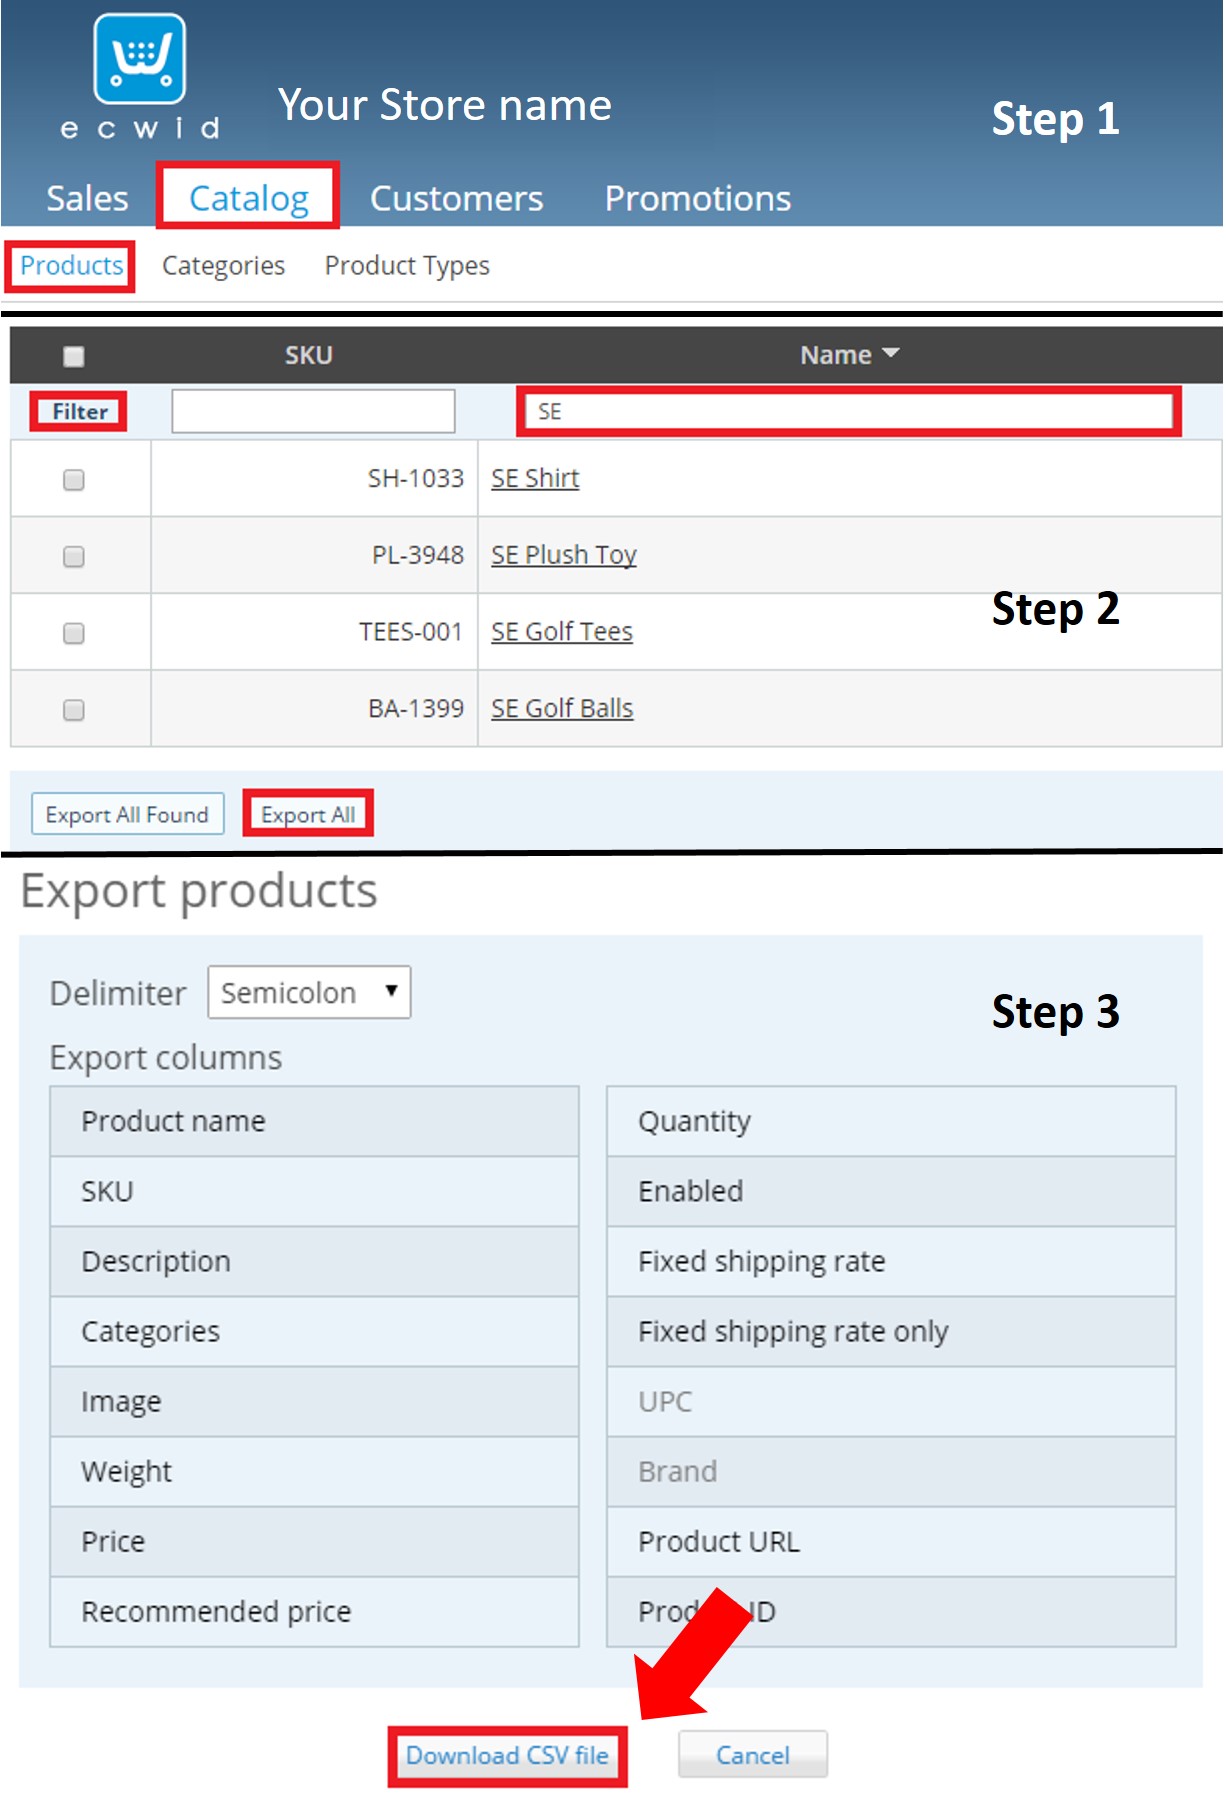
Here is a brief guideline to create an Ecwid store backup.
- Select the data you want to export in your Ecwid store’s Control panel.
- Modify the options to export all the data or just the selected entities.
- Press the “Download CSV file” button to save the database backup of your current store.
#2. Create a new Shopify store
After saving the backbone of your business, it’s time to set up a new Shopify store to place all your data after migrating from Ecwid.
If you are looking for a video tutorial that guides you through every basic step to build a Shopify account from scratch, check this out for visualized instructions:
If you don’t have time to watch our full video, let’s scan this summary to quickly create a new store on Shopify:
- Firstly, get access to Shopify.com and select “Start free trial” to enter your email address and store name.
- Then, answer some questions so that Shopify can know more about you. However, this step isn’t important so you can skip and move on.
- After that, fill in some more information to complete your store, including business address, postal code, phone,…
Finally, click the “Enter my store” button and your preparation is done! Don’t leave this page as we will show you how to effortlessly perform your Ecwid to Shopify migration process in the next part.
How to Migrate from Ecwid to Shopify in 3 Steps
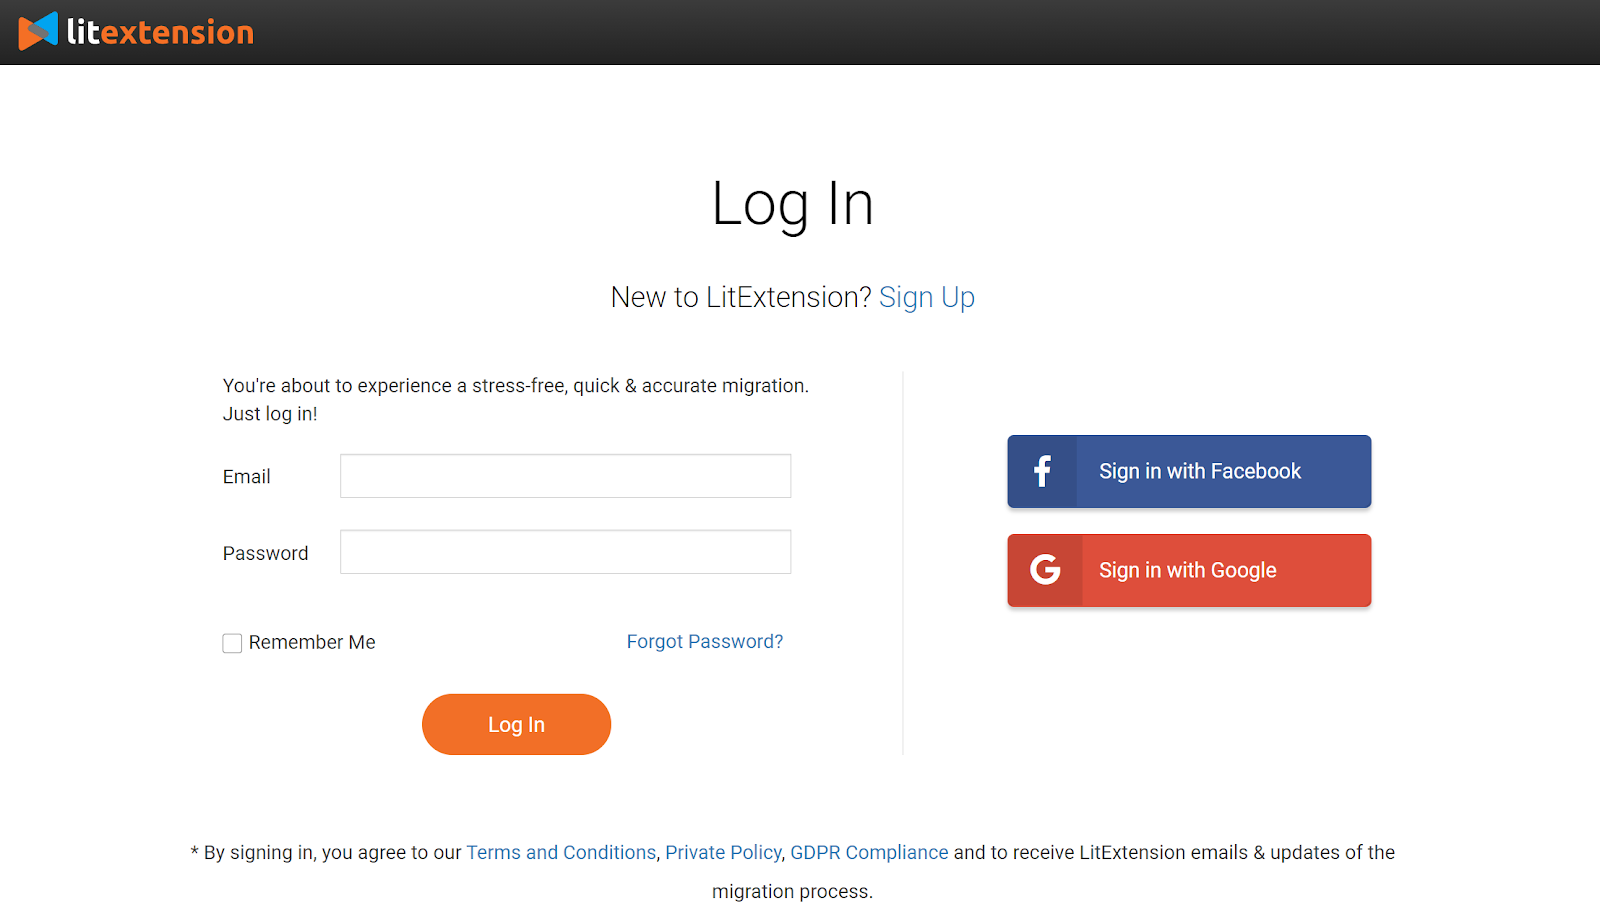
To begin with, you need to get access to the LitExtension website and Create a new account or Sign in if you already have one. In addition, you can also use your personal email address or Facebook account to get access to our migration service.
#1 Set up Source Cart and Target Cart
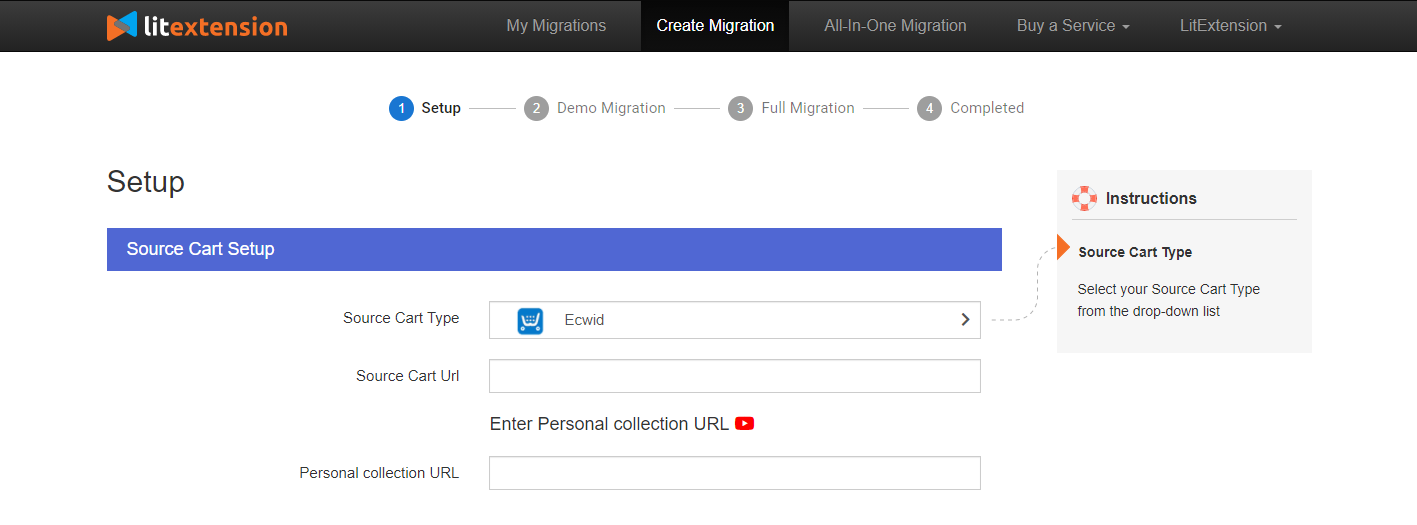
After registering on LitExtension, select “Create new migration” to start setting up all the necessary information for your data transfer.
First, choose Ecwid as your Source Cart Type in the drop-down list. Then, copy your Ecwid store’s URL and paste it to the Source Cart URL bar.
Then, you will need to enter the Personal collection URL of your Ecwid store. Look at the wizard instruction on the right-hand side and follow our guide to enable your current store’s API.
However, remember that you must activate a paid plan (Venture, Business, or Unlimited) to use Ecwid API for the migration.
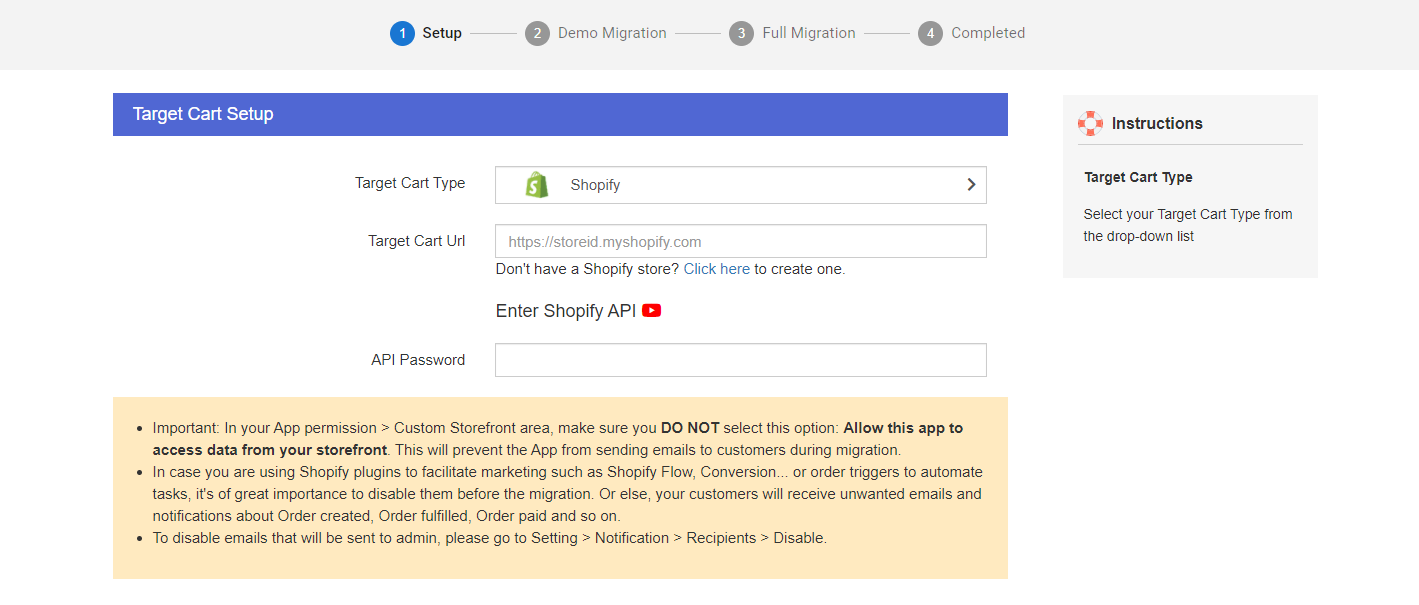
Next, select Shopify as your Target Cart type and provides the address of your new store. Similar to Ecwid, Shopify is a hosted cart that requires you to generate API Password.
Most importantly, make sure that the option “Allow this app to access data from your storefront” is not selected. If not, your customers will receive unwanted emails notifying them that the migration is proceeding.
Now, hit Next and jump into the upcoming task of your migration process.
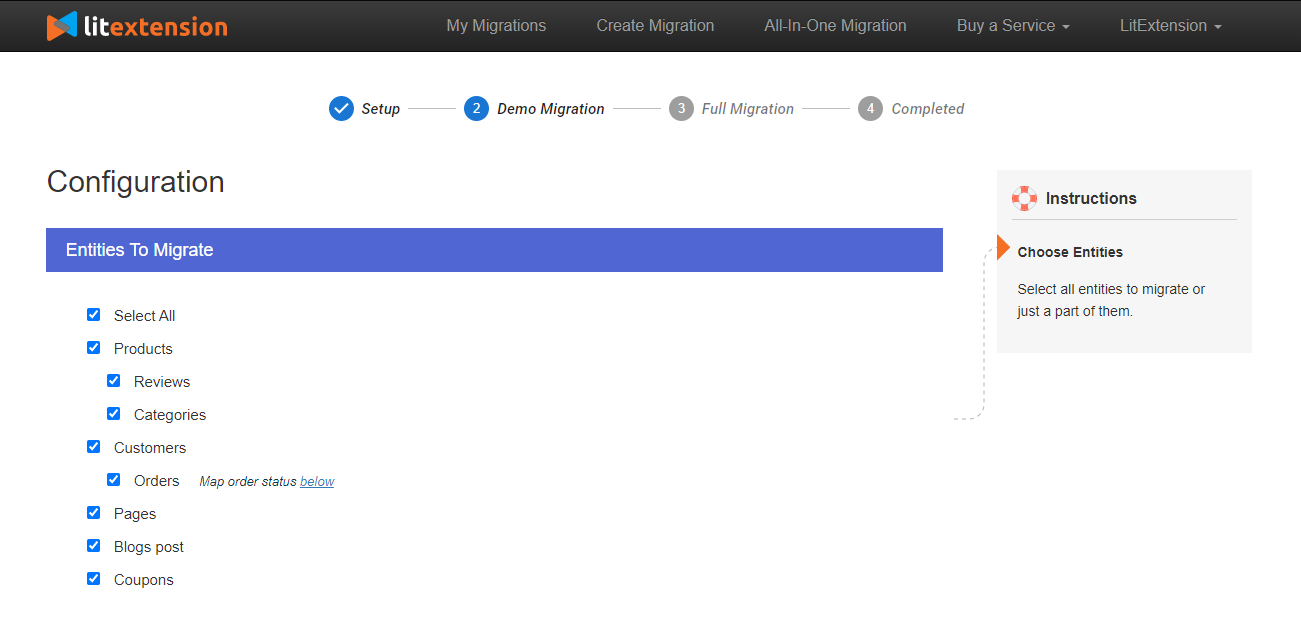
#2 Select entities you want to migrate
This step requires you to configure your migration process. You can either select all the data or put a tick on some entities you want to transfer (Products, Customers, Orders, etc).
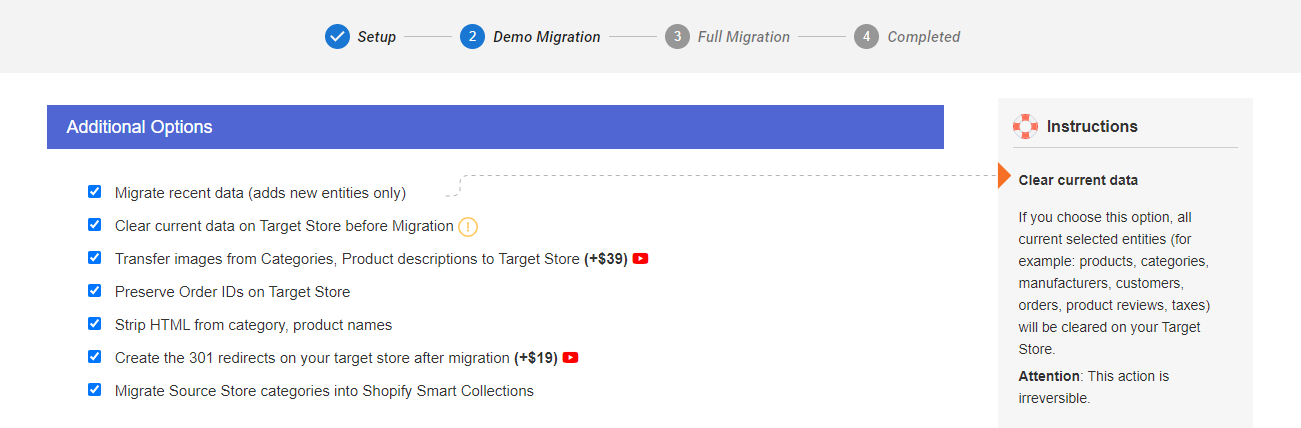
Also, we provide you Additional Options that extend your store functionalities and prevent possible technical errors during the data transfer process. For instance, you are able to Create 301 Redirects, Preserve Order IDs on Target Store, Migrate SEO URLs, etc.
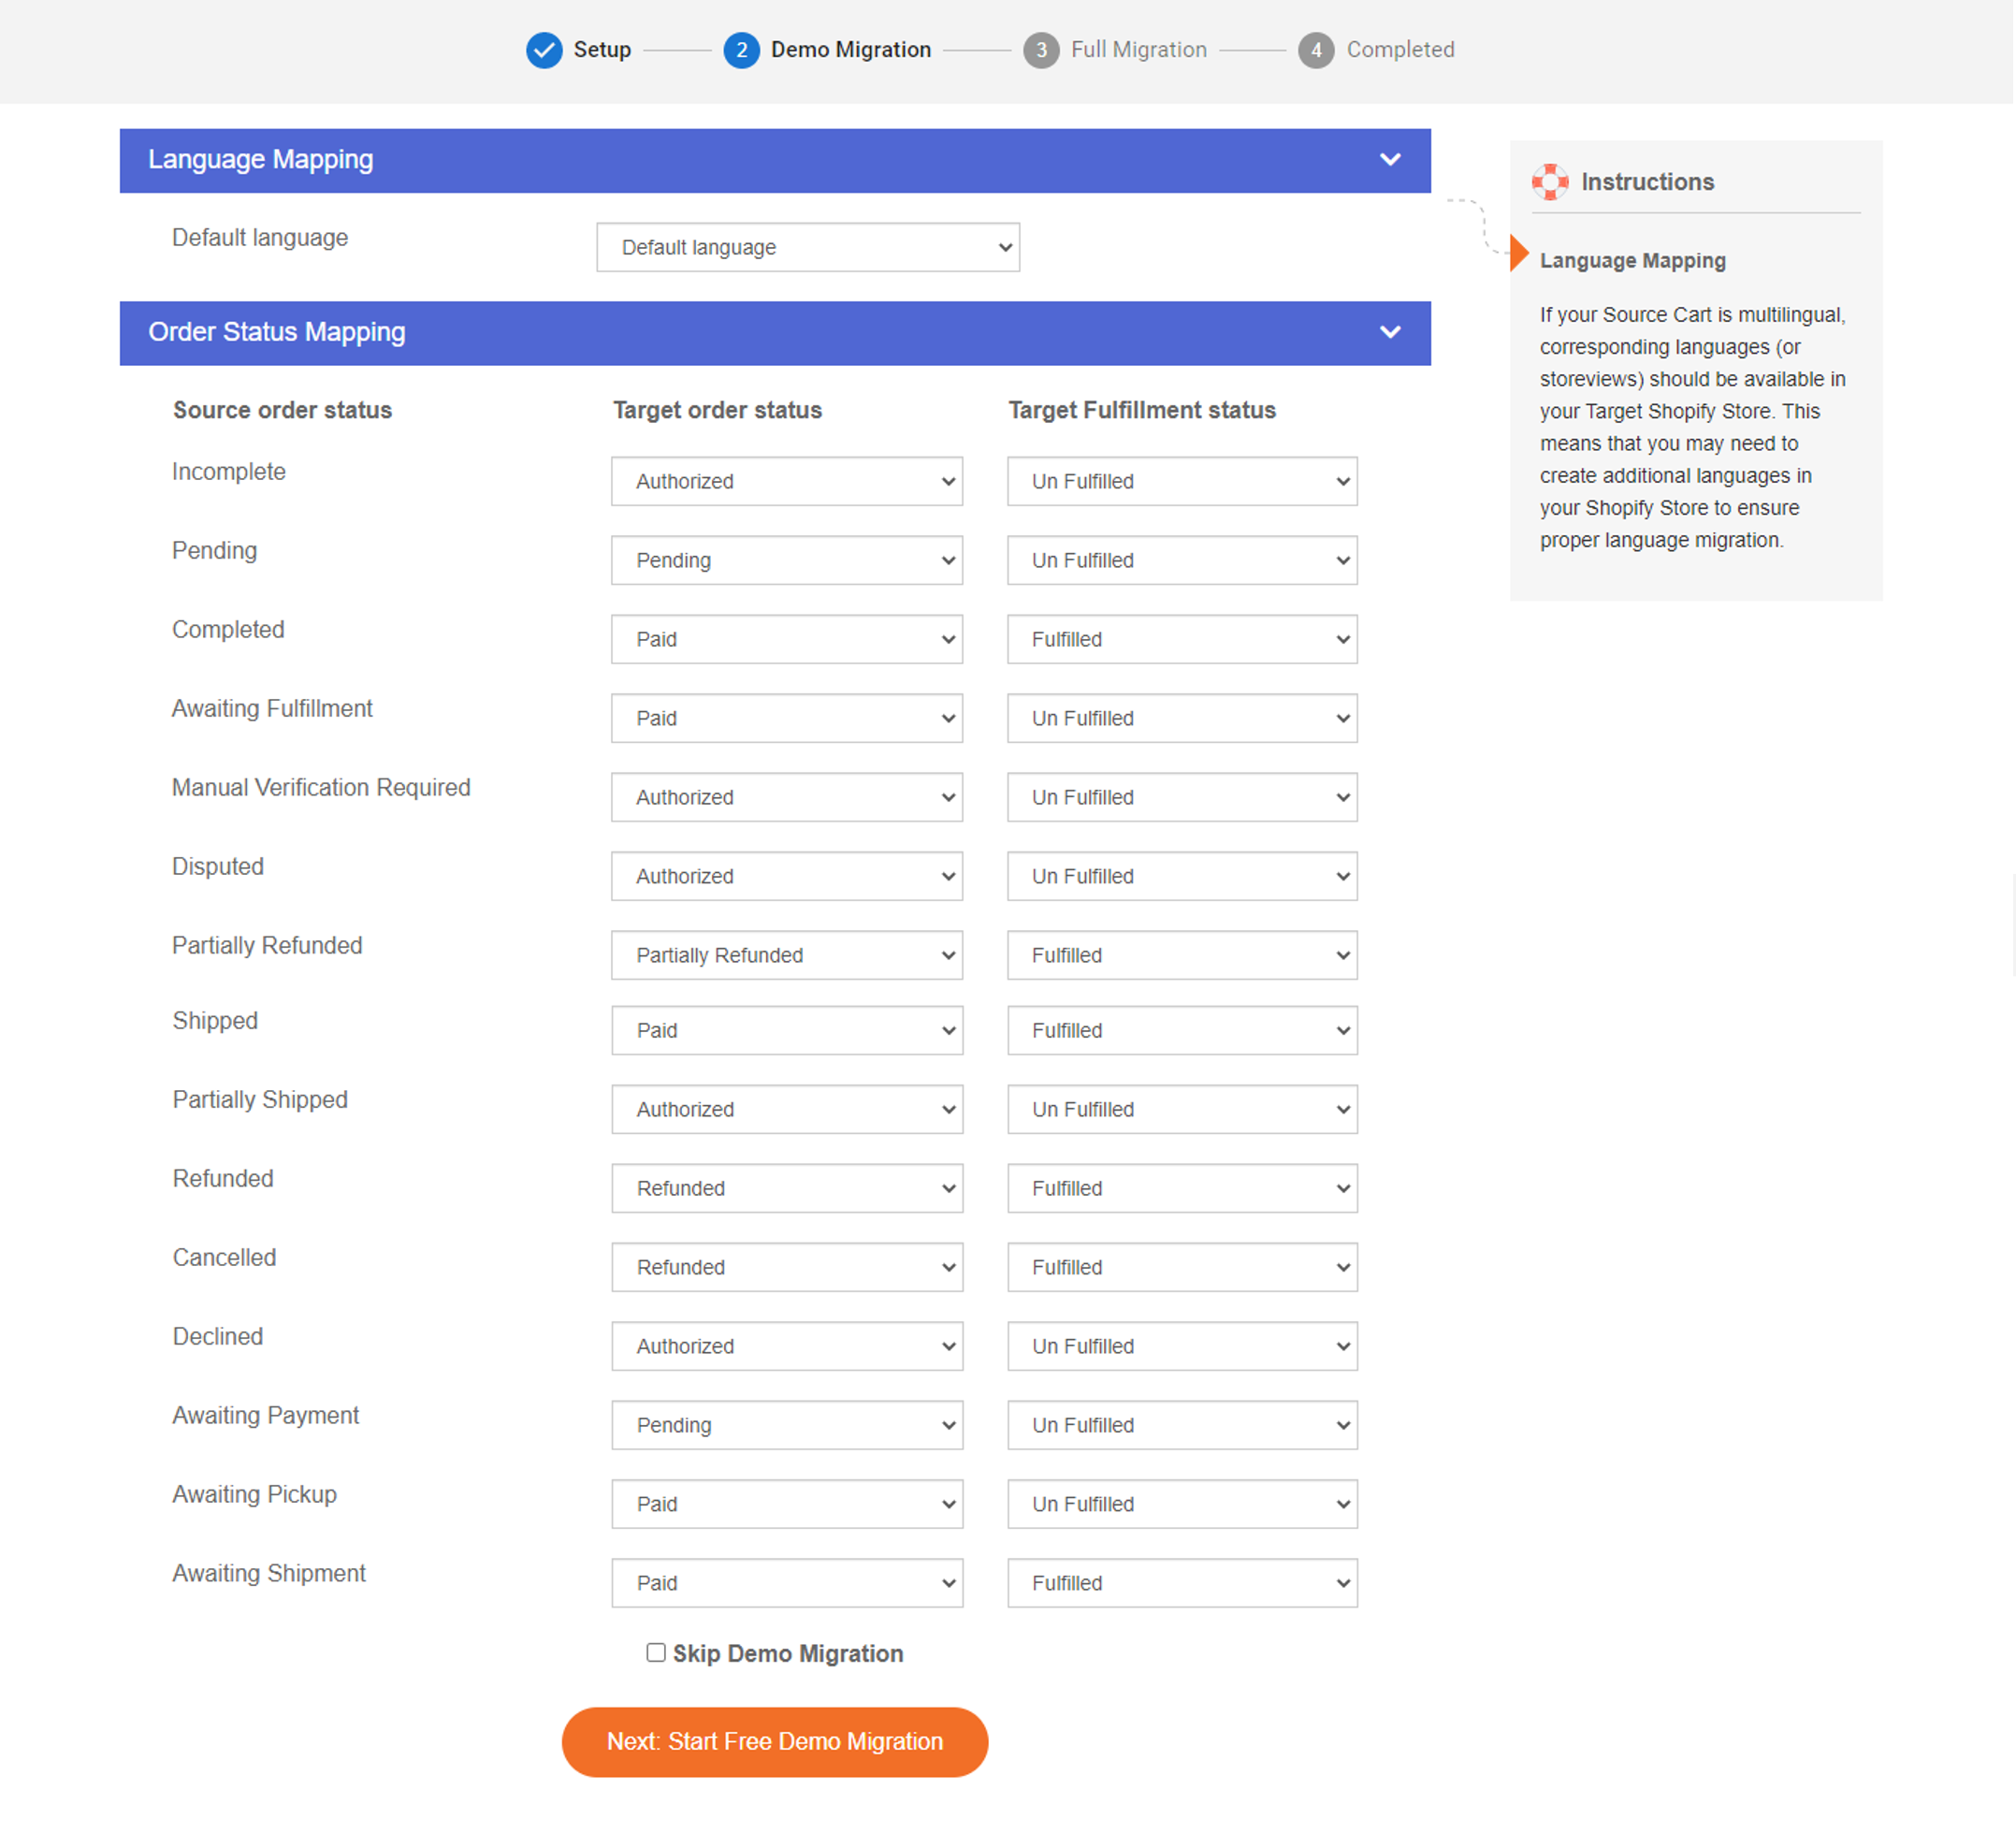
Especially, you can map language and order status right in this step because each platform has its own way of defaulting. As our additional function, order statuses mapping lets you indicate how you want to migrate orders with specific statuses.
#3 Migrate Ecwid to Shopify
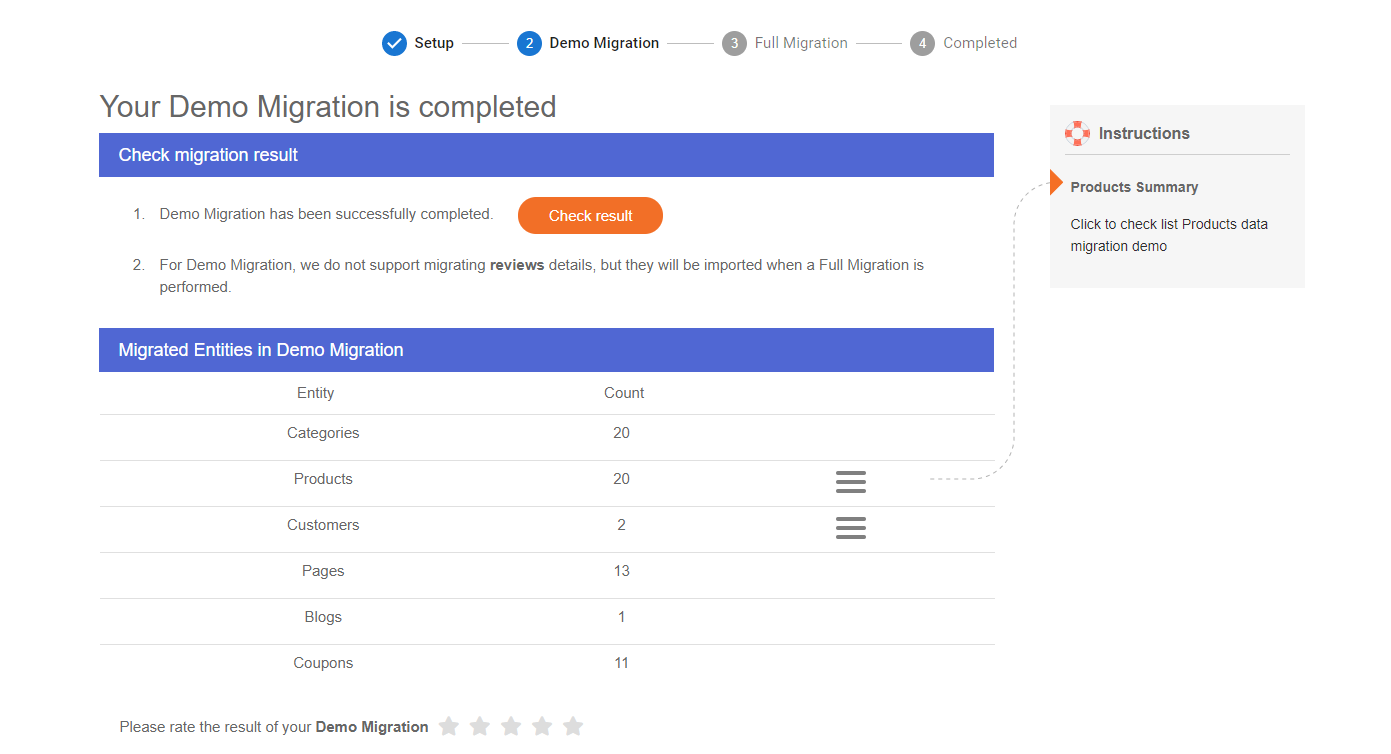
Woo-hoo! This is the end of the migration process. We suggest you try a free demo showing a part of the migration results. By doing this, you can make sure that the data transfer from Ecwid to Shopify is well-performed before running the full migration.
Then, it’s time to start running full migration from Ecwid to Shopify to move all the entities from your current store to the new one. You can see the same procedure as the demo migration. However, it takes a little bit longer to complete this stage.
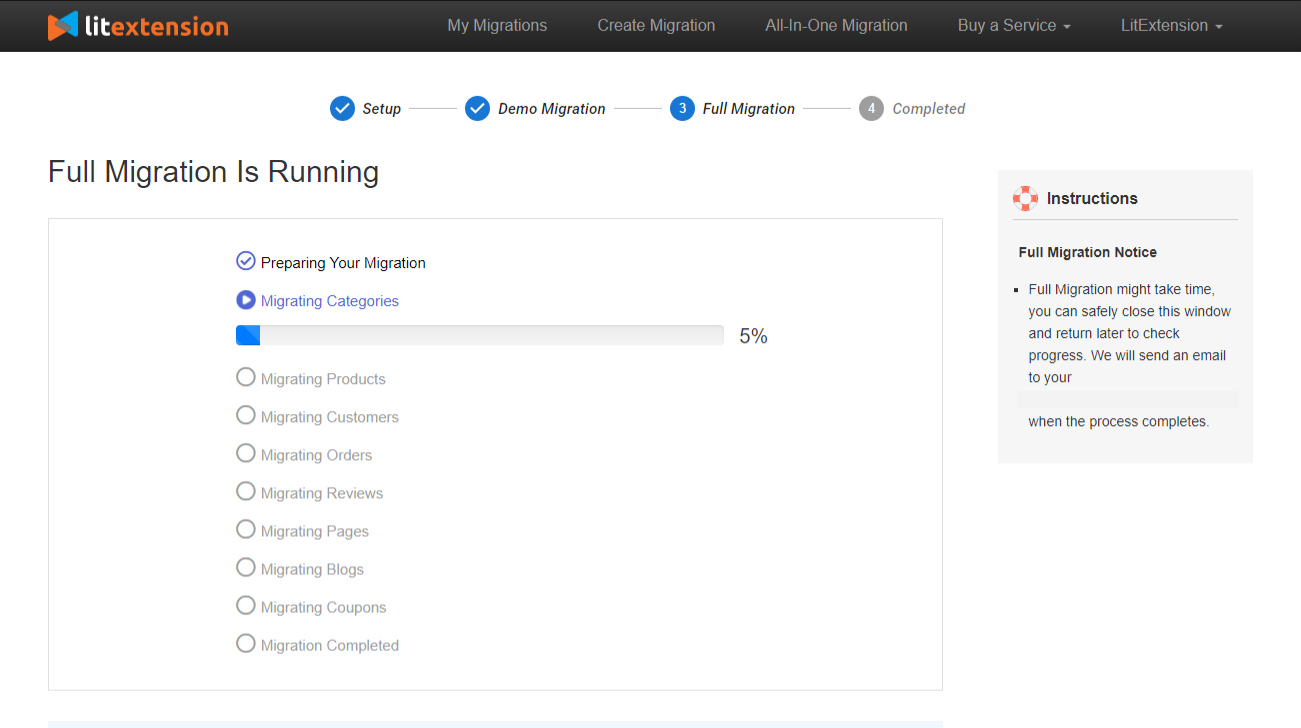
Take yourself a cup of a favorite drink while waiting because the migration process is about to finish within a few minutes. The estimated time to get the work done depends on the number of entities you want to transfer.
You can rest assured to turn off the Internet connection because the data-switching process is cloud-based. When completed, you will receive an email notifying that all the data was successfully placed and your Shopify store is ready to set up.

Save Time Migrating Your Store to Shopify
Trusted specialists streamline migrations that actualize ambitions.
Ecwid to Shopify: Post-migration Activities
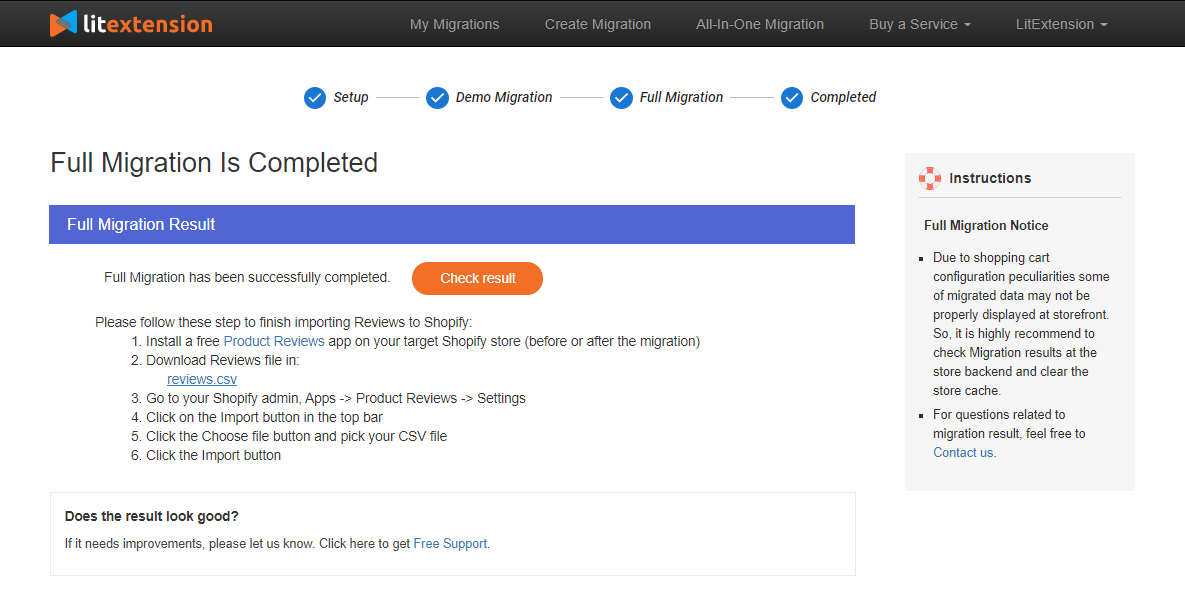
#1 Check migration result
Checking results on your Shopify store after full migration is a vital step in our process. By doing this, you can make sure that everything has been put in the right position as expected.
You will need to check on both the front-end and back-end of your Shopify store. If anything wrong occurs after the migration process, contact our support team immediately to configure these errors as soon as possible.
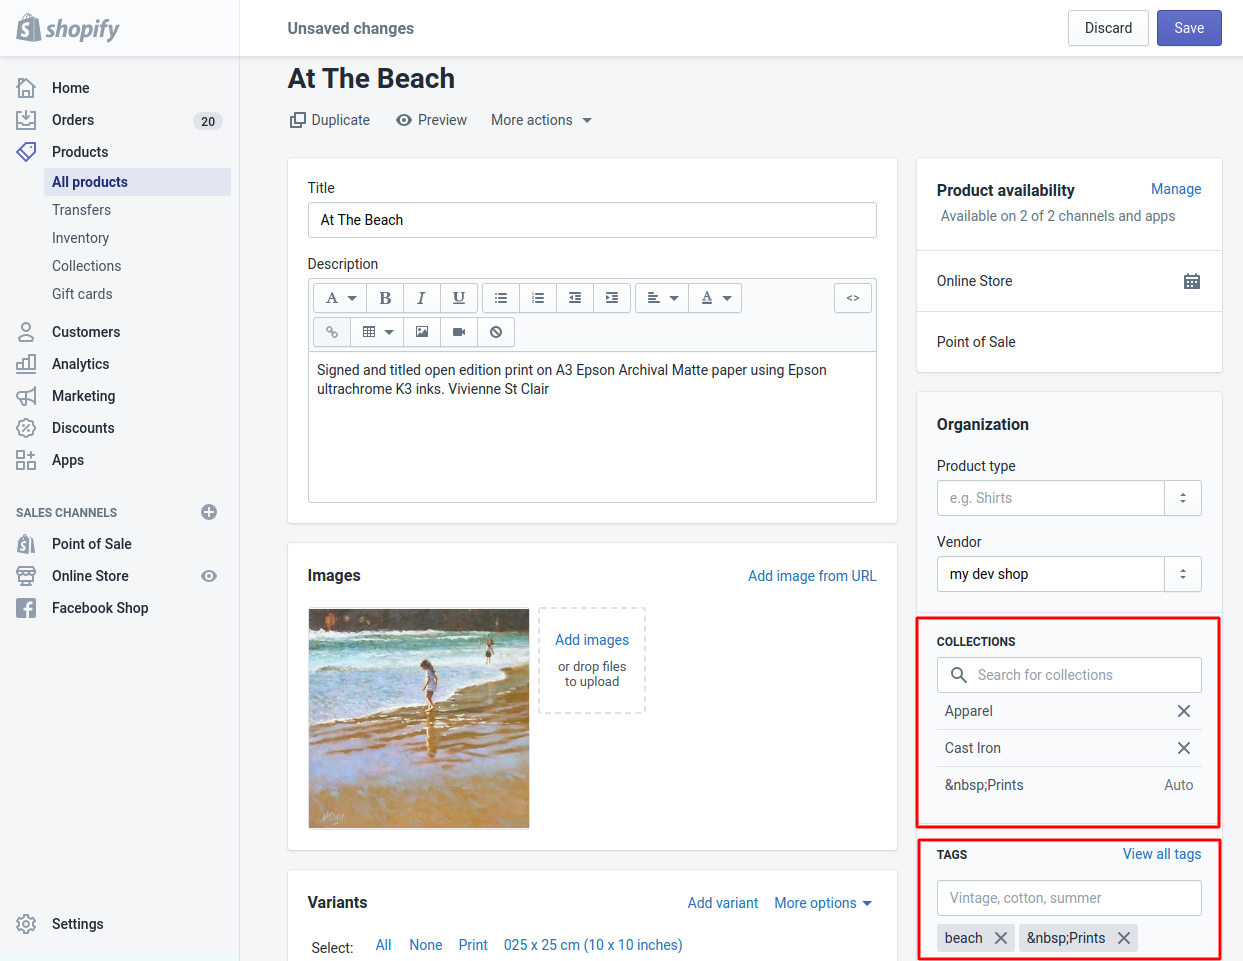
Note:
- Don’t worry if you cannot find any categories and subcategories in your new store. Instead, Shopify correspondingly names these entities as collections and product tags.
#2 Complete Shopify store setup
Your final task is to customize your new store on your own after seamlessly moving all the entities from Ecwid to Shopify with LitExtension. All the post-migration activities will contribute to the performance of your online business.
Below is the checklist that we recommend you to follow:
- Choose a theme: Make sure to choose the best Shopify themes for your business and create a stunning storefront that can boost your conversion.
- Change DNS and Switch Domain: After the migration process is completed, there are 3 common situations related to DNS and domain that you must deal with. Or else, your Shopify store will face some errors because the existing domain will be invalid. If you find this task difficult, LitExtension is willing to tackle the problem for you.
- Set up essential eCommerce functions: Don’t forget to add some features like Shopify shipping, inventory management, payment,… so that your store can work efficiently.
- Run Recent Data Migration: While your Shopify store is set up, your old site keeps receiving new orders and customers because LitExtension doesn’t make any changes to your Source Cart. Therefore, we offer the Recent Data Migration Service that helps to transfer all these newly appearing entities to your Target Site free and unlimited within 3 months after the full migration.
- Test your front store as a customer: Upload some products to check if they are displayed in the store as you want. In addition, you can try placing an order to make sure that the transaction is comfortable for your customers.
If you want to have a detailed look at how to perform each post-migration activity, check out this article for more information. These are all you need to successfully launch your new business on Shopify.
Ecwid to Shopify Migration Overview
#1. Why move to Shopify?
Shopify is a prevalent eCommerce website builder providing an impressive range of options you need to customize your store.
Therefore, it is a great option for newcomers and big sellers. Shopify offers a 3-day free trial and paid plans from $19 to $299 per month (if billed annually).

Ecwid, on the other hand, is a plugin aiming at creating selling channel integration for SMEs.
Especially, Ecwid also operates as an eCommerce platform allowing you to start your business at no charge with a free plan. Or else, you can spend from $15 to $99 monthly for extra functionalities of other paid plans.
Both Ecwid and Shopify are strong and competitive in the eCommerce industry. However, Shopify offers superior functionalities for large-scale selling. For example, SEO features and various plan options for high-volume traffic. Meanwhile, Ecwid understands the demand for small online stores.
As a result, migrating from Ecwid to Shopify is essential when it comes to managing customer base and sales improvement from business expansion.
Apart from Ecwid, LitExtension also supports migration services from multiple platforms to Shopify. Read on:
#2. How many ways to move Ecwid to Shopify?
You can choose among three ways to migrate your store from one platform to a more robust one.
If you have the technical know-how, you can manually re-platform your business. It costs nothing, however, it may take months to complete this process. This is because the process involves manual data export and import, you may need to configure your store database to ensure platform compatibility.
Hiring a freelancer or website developer is the second option for you. You can hand over all the tasks to the professionals. In other words, you must pay a huge cost to find a reliable partner having an in-depth understanding of both shopping carts. Or else, you may be at risk of data corruption or business data leaking.
Finally, you can choose to migrate all the entities from Ecwid to Shopify with LitExtension – Shopping Cart Migration Expert. Here we provide an automated solution for merchants to expand their business at a minimal cost and high security.
How to Migrate from Ecwid to Shopify – Recap
In conclusion, you can easily migrate from Ecwid to Shopify in 6 simple steps with LitExtension:
1. Back up your Ecwid website: Export your Ecwid information to avoid data lost during the migration
2. Create a new Shopify store: Don’t forget to get your new website up and running before moving from Ecwid to Shopify
3. Set up Source Cart and Target Cart: Fill in the essential information about your Source Cart and Target Cart
4. Select entities to migrate: Choose all the data you want to transfer from Ecwid to Shopify. Feel free to further enhance your migration capabilities with Additional Options.
5. Migrate from Ecwid to Shopify: Now that everything is ready, it’s time to import to Ecwid from Shopify.
6. Perform necessary after-migration activities: Remember to check the result after migration and perform some essential tasks to ensure your Shopify site works smoothly.
Migrate from Ecwid to Shopify – FAQs
[sp_easyaccordion id=”58451″]
Final Words
Switching business data from Ecwid to Shopify is getting more and more attention because of its huge advantages. To meet your increasing demand, LitExtension provides an automated service to help you effortlessly transfer all the data to your new store.
To ease the complexity, you can totally perform the migration process on your own within three simple steps. In the event of any problems, we do hope that this article will somehow help you.
If you find this process too complicated, check out our All-in-one package. This A-to-Z service is a perfect choice for you because we will handle the whole process. Moreover, we will map the database and configure technical errors for you.
Don’t hesitate to contact LitExtension for more support. We are always eager to solve all your problems! Let’s check out LitExtension blog and join our community to get more eCommerce knowledge.
Other migration pairs that LitExtension support: