Magento officially announced that they’re no longer supporting Magento 1 and encouraging merchants to perform the difficult task of upgrading their stores to the latest version as soon as possible. If you decide not to go through the challenging migration process, your site and customer data are at risk as there will be no further security updates and quality fixes. Additionally, many of the Magento 1 extensions that you currently rely on would be outdated and you will not have access to new essential features.
Whether you’re using Magento 1 or Magento 2 for your online business, you might consider moving your website to a more user-friendly shopping cart. And WooCommerce would be a worth-considering option, as this platform is much more easier to use and also the most popular eCommerce platform in the world with a larger community.
In this article, we will provide you with step-by-step instructions on how to export Magento files to WooCommerce. Let’s get started!
Backup Data Before the Import Process
It is a must to pay great attention to the data backup process, as it can ensure the security of your business-critical data when unwanted contingency happens or in case the migration doesn’t go smoothly. The below instructions will guide you to accomplish this significant task.
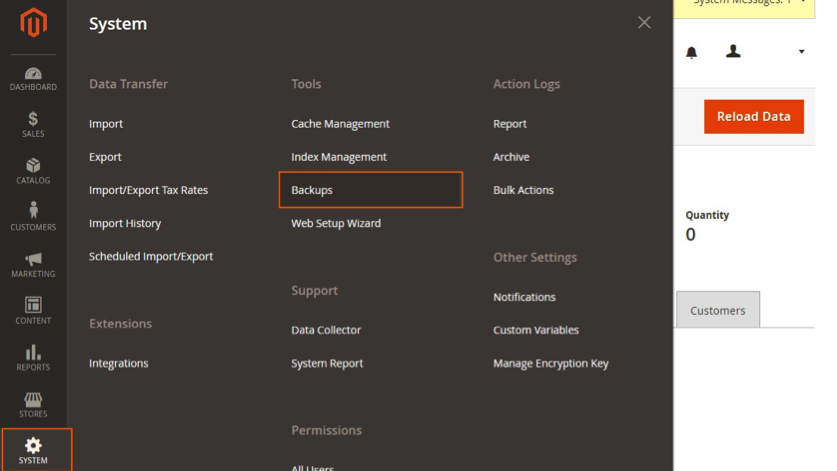
1. Log in to your Magento Admin Panel and click System -> Tools -> Backups.
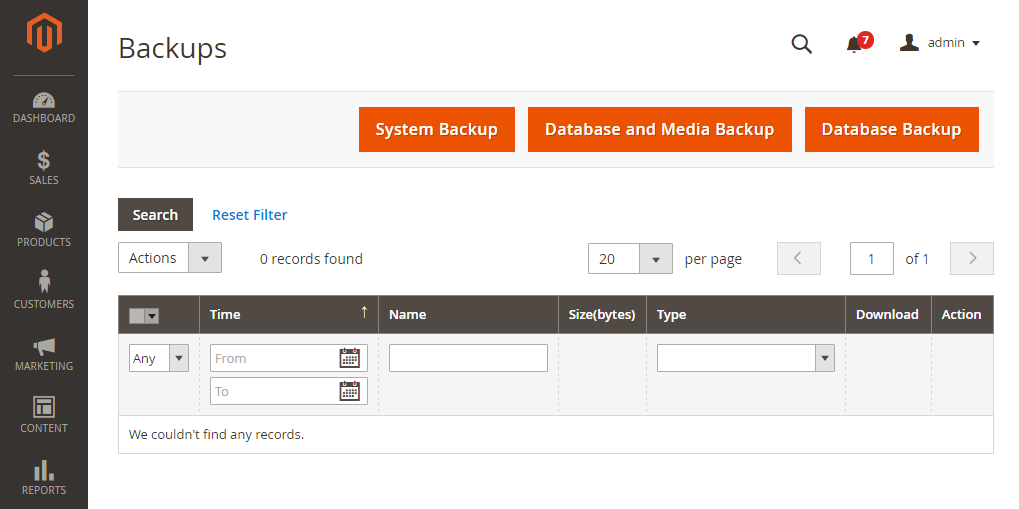
2. Depending on the type of Magento backup you need to create, select one of the following data backup types:
- System Backup: create a complete backup of the database and the file system. You can also back up the media folder in the process.
- Database and Media Backup: create a backup of the database and the media file.
- Database Backup: create a backup of the database.
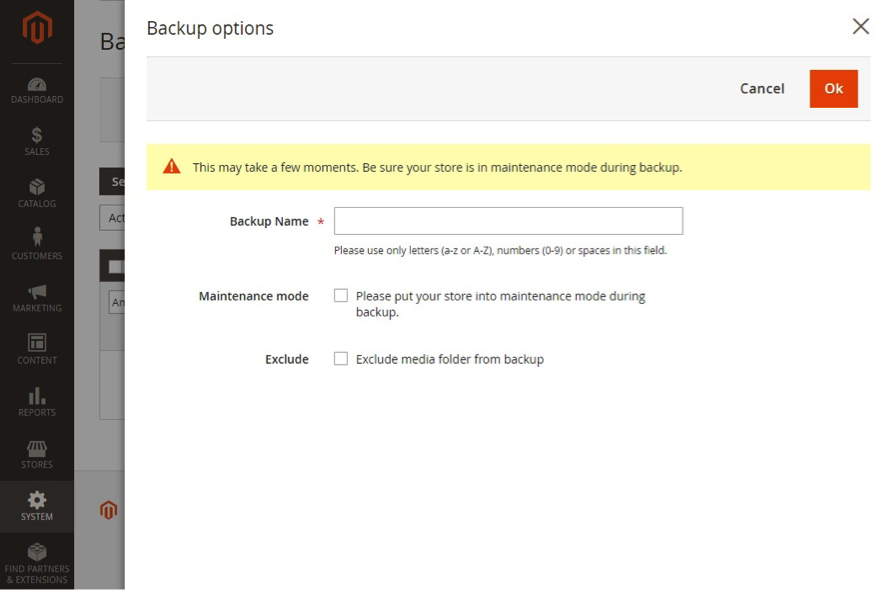
3. A warning box will appear after that, read it carefully then click OK to proceed to the next step.
4. If you want to put your store into maintenance mode during the Magento backup process, select the check box. You will receive a notification when the backup process is complete.
For more information about the backup process, check out this detailed How To Do Magento Backup Before Magento Migration.
How to Export CSV files from Magento?
Export Products & Customers
Magento 1
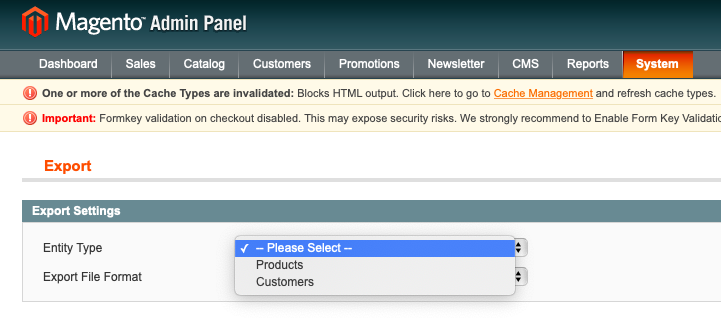
1. Go to System -> Import/Export -> Export.
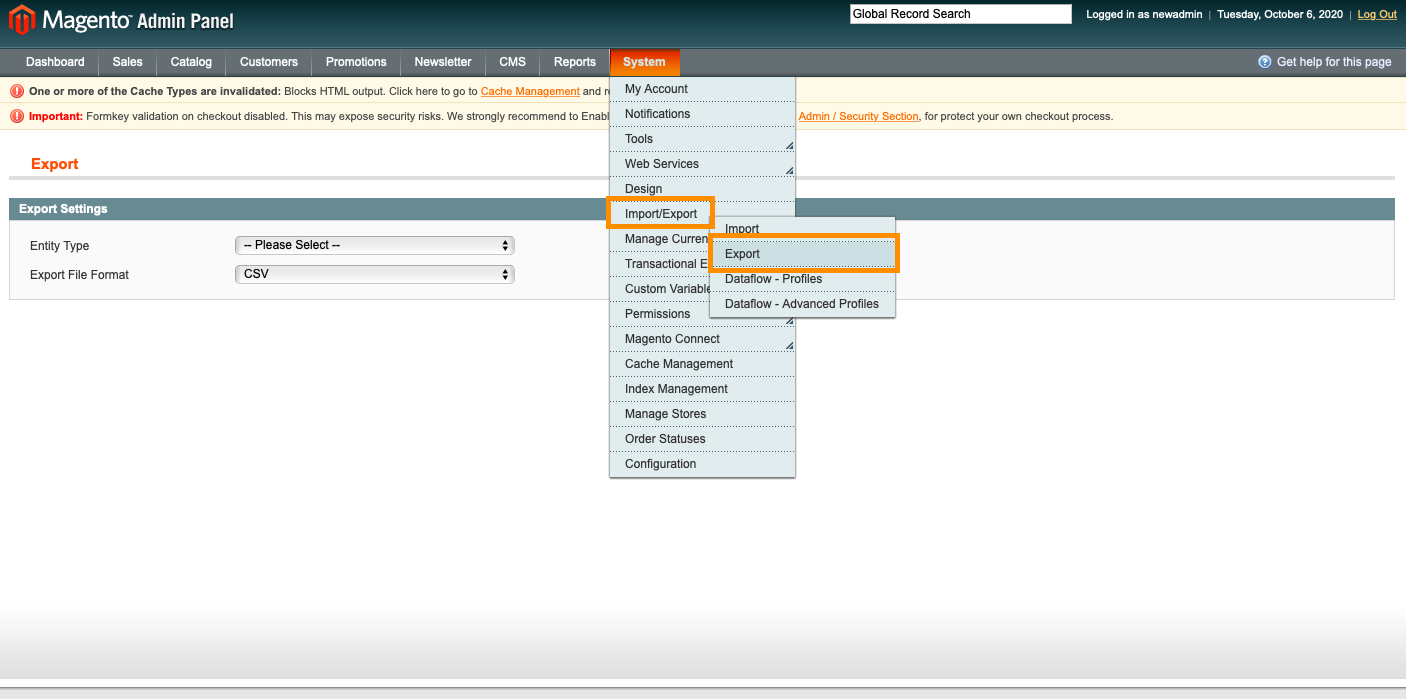
2. In the Export Settings section, specify the following:
- Choose Entity Type
- Accept the default Export File Format of “CSV”
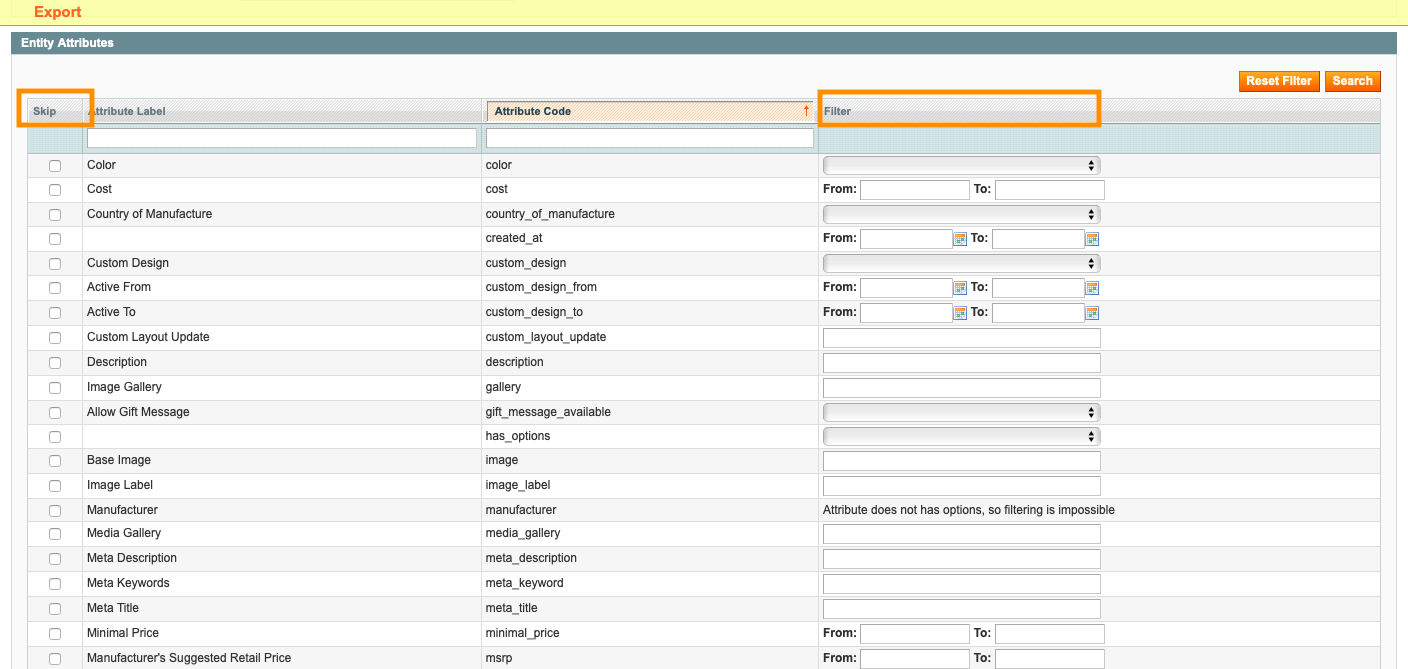
3. After that, the table Entity Attributes table will appear at the bottom. This section can be used to include or exclude data according to the entity attribute values.
- To export only records with specific attribute values, select the required values in the Filter column.
- To exclude an attribute from your report, choose the Skip checkbox at the beginning of the row.
4. Scroll down and click the Continue button. Look for the file in the download location for your web browser.
Magento 2
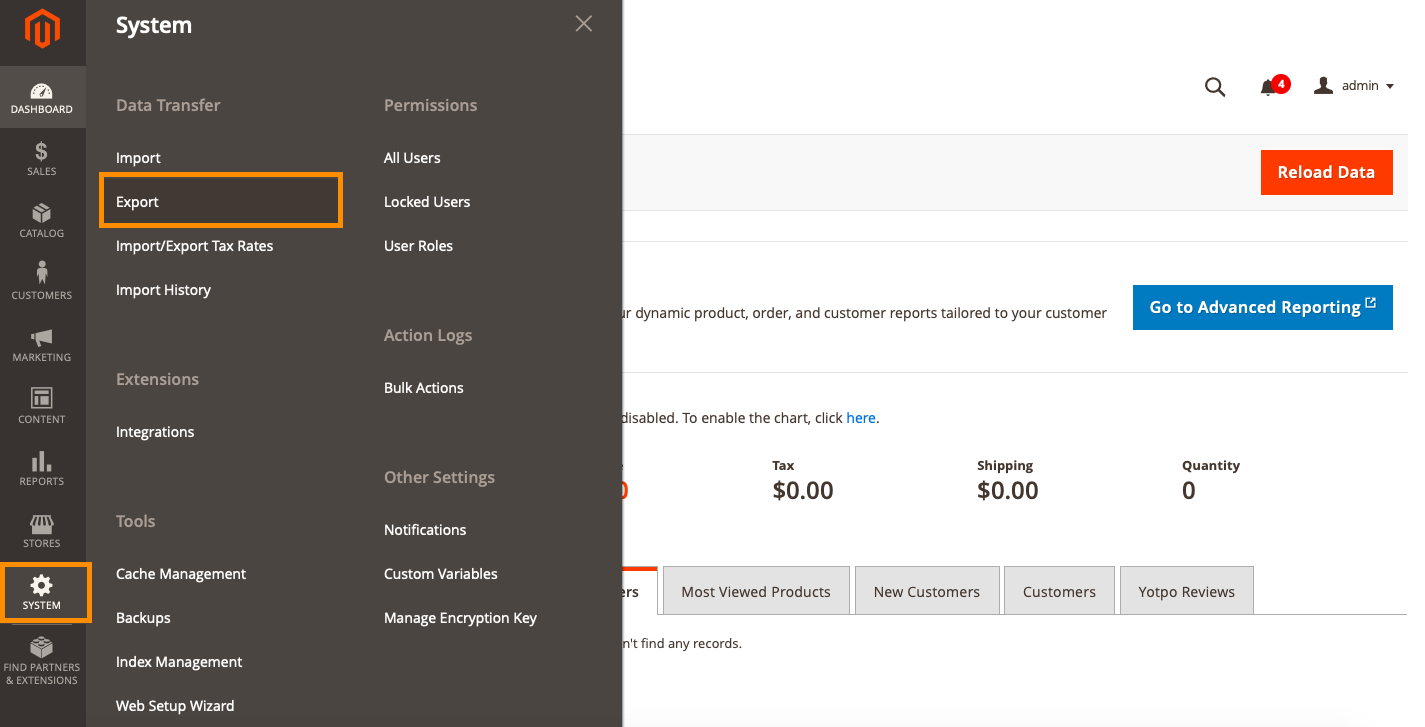
1. On your Magento 2 Admin sidebar, go to System -> Data Transfer -> Export.
2. In the Export Settings section, set Entity Type to one of the following:
- Products
- Customers Main File
- Customers Addresses
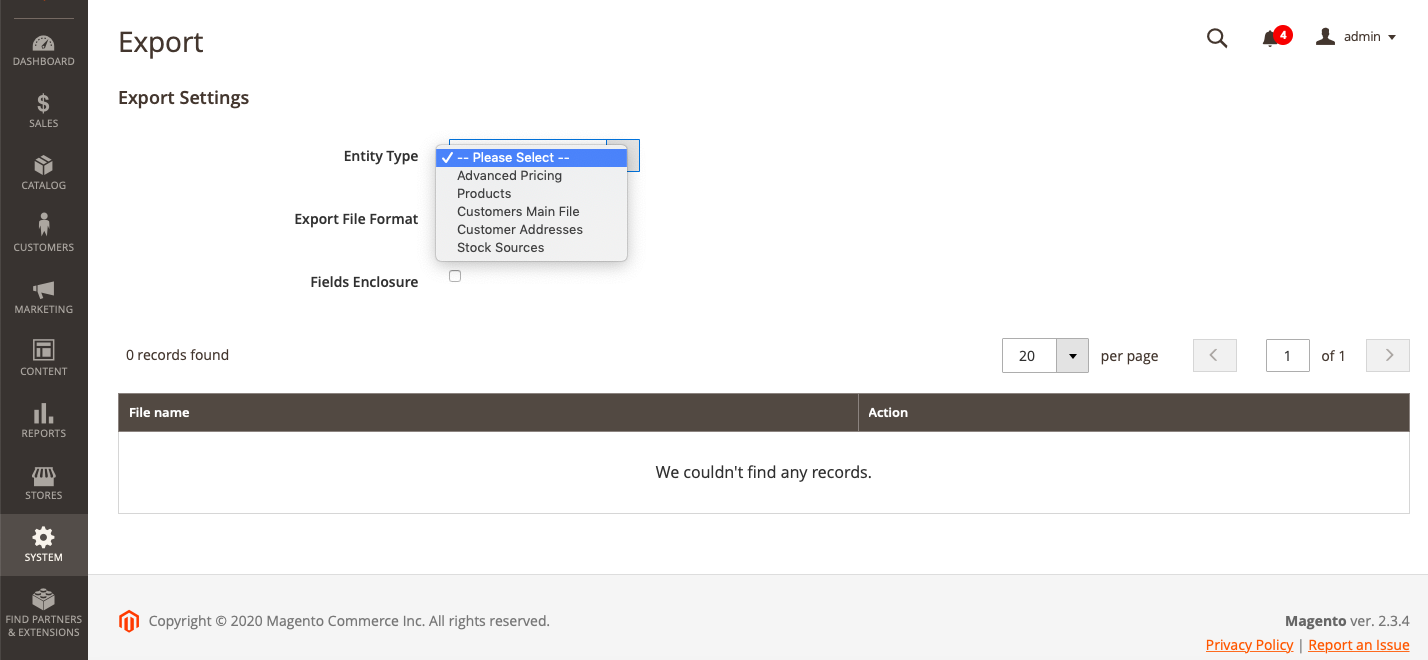
3. Select the Export File Format as CSV (the default option).
4. Check the Fields Enclosure box if you want to enclose any special characters that might be found in the data as an ‘escape sequence’.

5. Change the display of the entity attributes if necessary. The Entity Attributes section lists all the available attributes in alphabetical order. You can use the standard grid controls to search for specific attributes and to sort the list.

6. The Entity Attributes section can be used to include or exclude data according to the entity attribute values.
- To include specific attribute values, select the required values in the Filter column.
- To omit an attribute from your report, choose the Exclude checkbox to the left of the attribute.
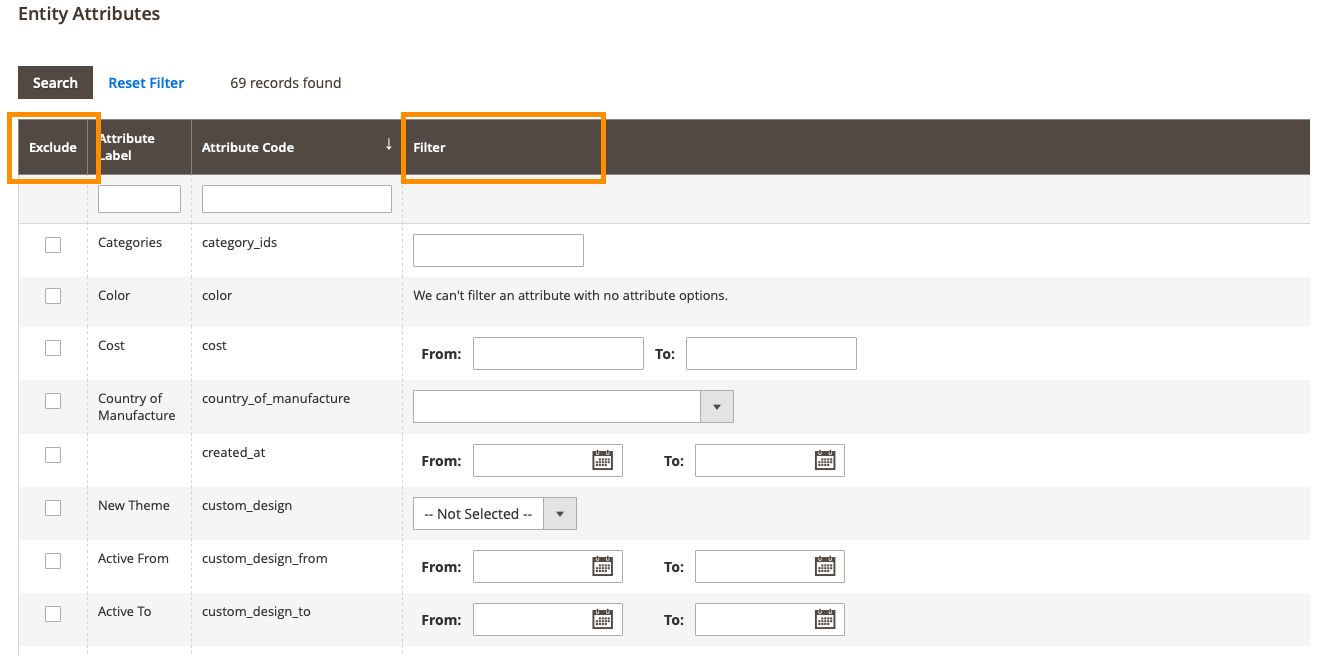
7. After that, scroll down and click Continue in the lower-right corner of the page.
8. Upon completion of the task, look for the file in the download location of your web browser. Now you can save or open the exported file as a spreadsheet.
Export Orders
1. In your Magento Admin Panel, go to Sales -> Orders.
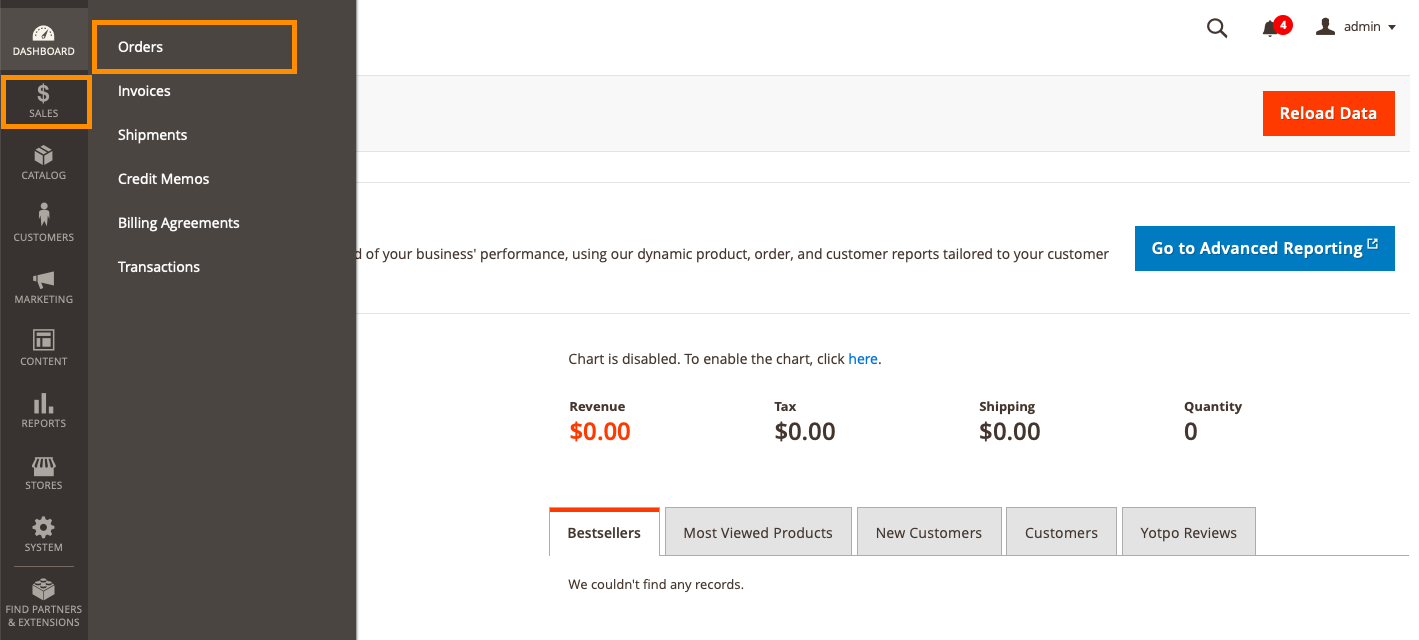
Please note that in order to export all your order data, click the Reset Filter or Clear All button to clear any unnecessary filters.
2. From the Export to drop-down list, choose CSV file.
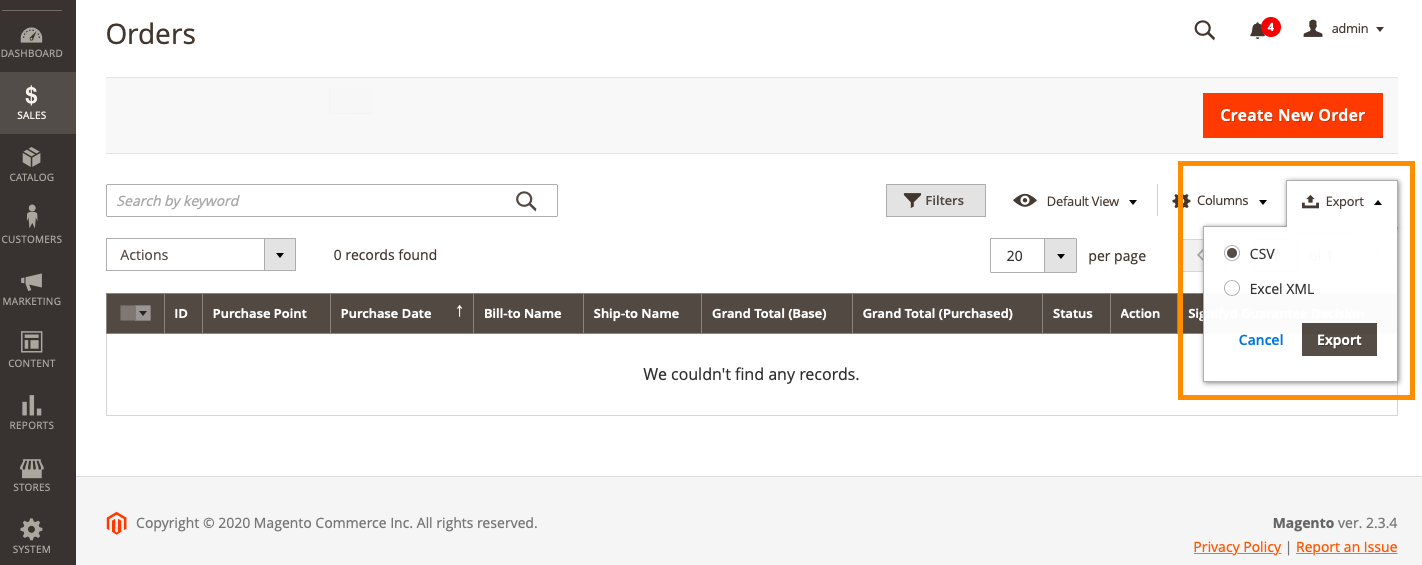
3. Click Export. After that, check the order details to make sure that everything was completed smoothly.
How to Import CSV files to WooCommerce?
1. Go to: WooCommerce > Products.
2. Select Import at the top. The Upload CSV File screen displays.
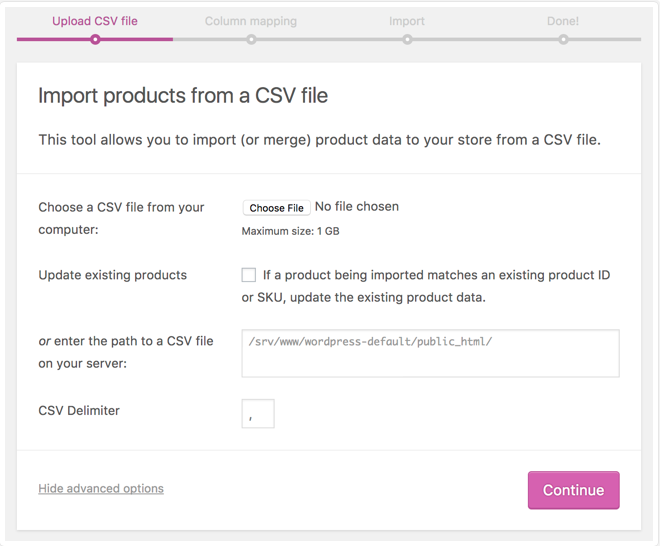
3. Select Choose File and the CSV file you wish to use.
CSV delimiter (Advanced option): Generally CSV elements are separated by a comma. If you are using a different delimiter in your file, you can set it here.
4, Click Continue.
The Column Mapping screen displays, and WooCommerce automatically attempts to match or “map” the Column Name from your CSV to Fields.
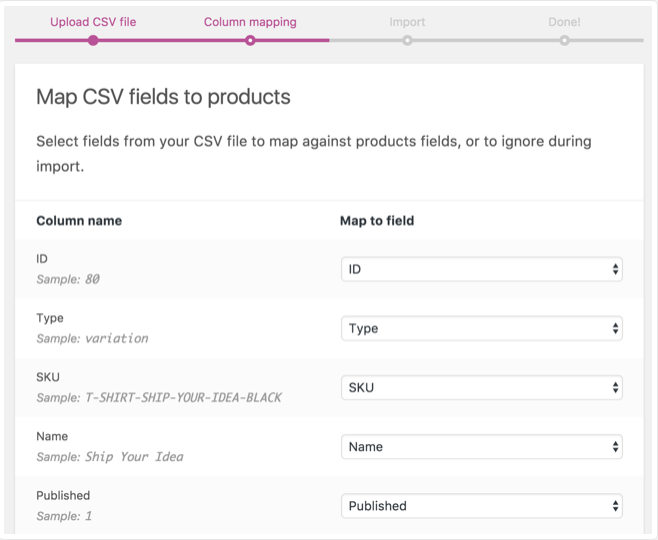
5. Use dropdown menus on the right side to adjust fields or indicate ‘Do not import’.
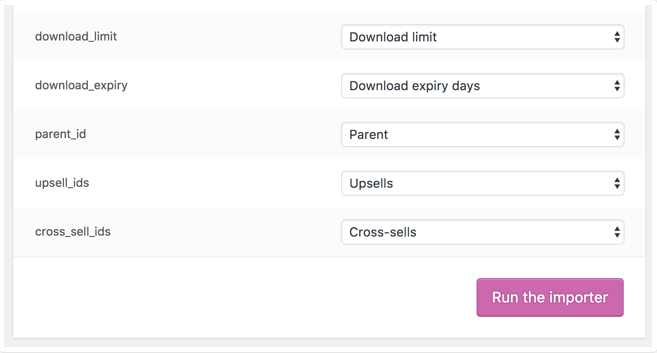
*Please note that any unrecognized columns will not be imported by default.
6. Select Run the Importer. Wait until the Importer is finished and do not refresh or touch the browser while in progress.
After that, you can follow the same procedure for the rest of your CSV files.
If you require more advanced WooCommerce import capabilities, we recommend WP All Import, which works with any CSV or XML file, imports images, and can easily import data to plugin and theme fields or anywhere else you need it.”
Final Words
Through this article, we believe that now you can clearly understand how to export Magento files to WooCommerce. However, this process can cause you a great deal of time and effort, as you will have to compare the database structure of both platforms to ensure a proper import. There’s also a high chance of unexpected errors you might encounter throughout the process.
If you are looking for an optimal solution for your store transfer, LitExtension is there for you. With our service, all of your important data will be migrated to your new WooCommerce store automatically, accurately and securely.
Our support team is available 24/7, do not hesitate to contact us if you have any questions. Let’s join our community to get more eCommerce knowledge.