Wondering how to add Google Analytics to a website?
If so, you’re landing on the right place. In this blog, LitExtension – #1 Shopping Cart Migration Expert will provide a step-by-step guide on:
- What is Google Analytics?
- Why do you need Google Analytics?
- How to add Google Analytics to your website?
- Best practices for using Google Analytics
Let’s discover together!
What is Google Analytics?
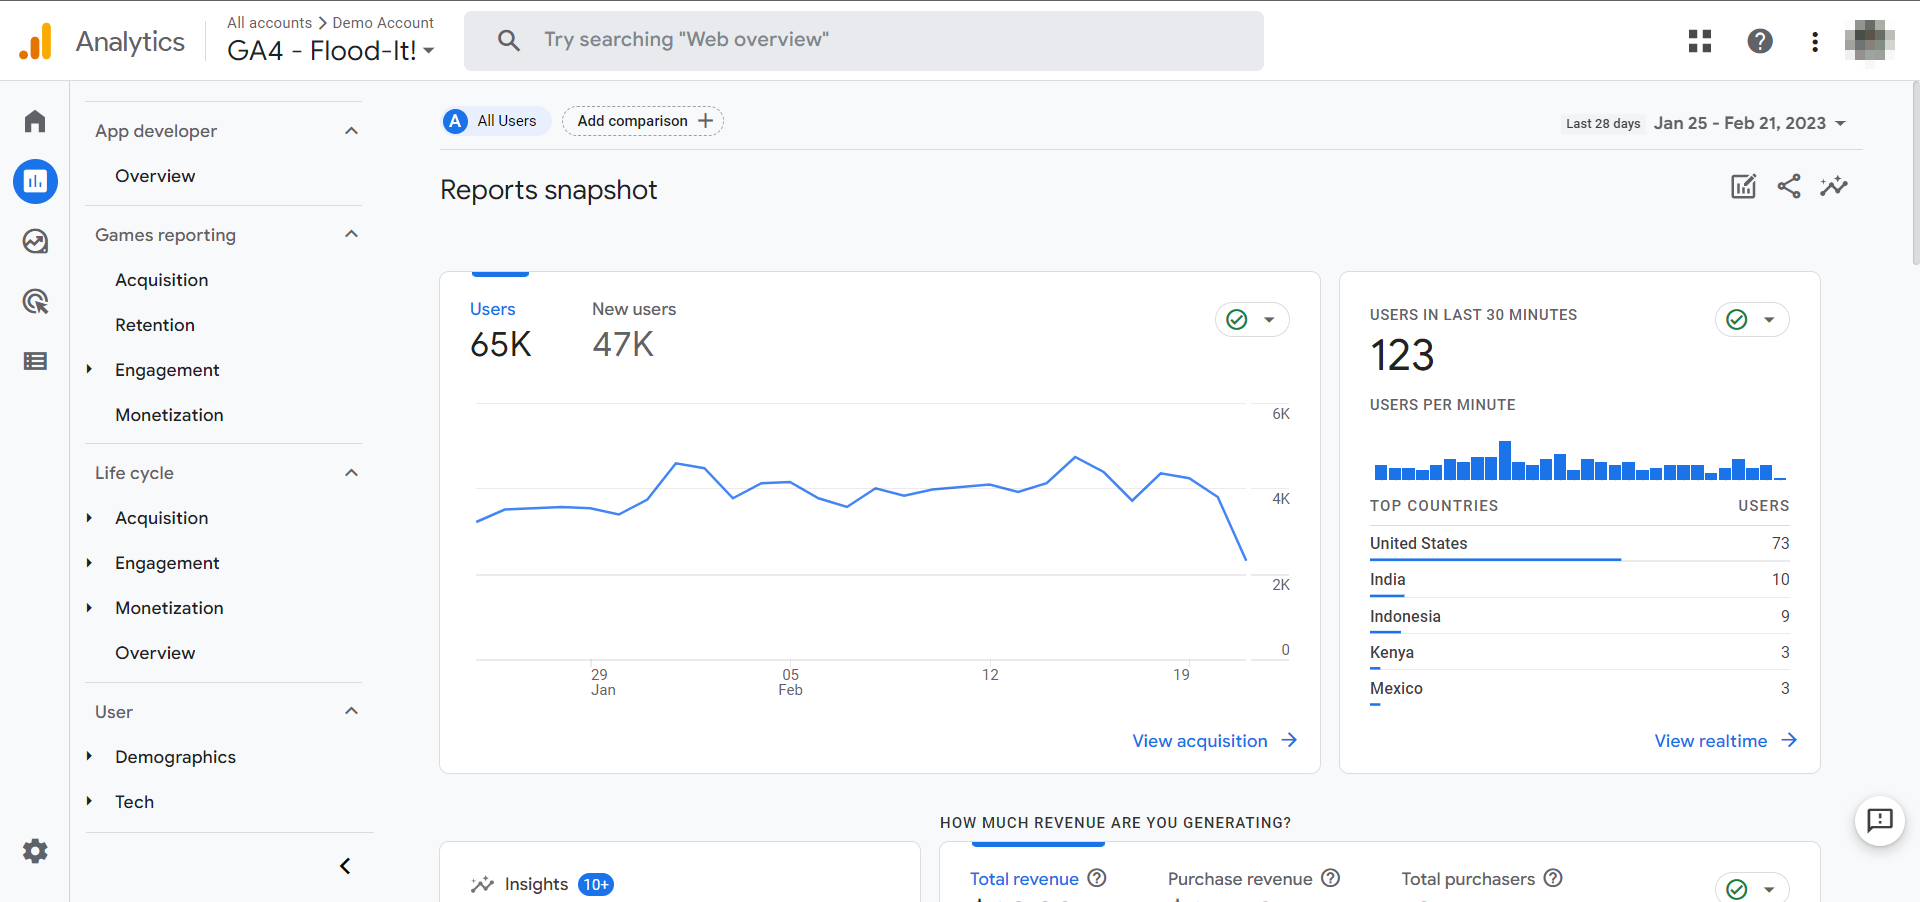
Google Analytics is a web analytics service provided by Google that allows website owners to track and analyze their website traffic. It provides valuable insights into website visitors’ behavior, such as how they arrived on the website, which pages they viewed, how long they spent on each page, and whether they completed any desired actions, such as filling out a form or making a purchase.
Google Analytics uses a tracking code installed on each page of a website to collect data on website visitors. This data is then processed by Google Analytics and presented in easy-to-read reports that website owners can use to optimize their websites for success.
By analyzing website traffic and user behavior, website owners can make data-driven decisions to improve their website’s performance and achieve their goals.
Google Analytics is a free service, though paid versions are available with additional features and support.

Why Should You Add Google Analytics To Your Website?
Adding Google Analytics to your website can provide numerous benefits and valuable insights. Here are some of them:
- Understand your audience: Google Analytics provides detailed information about your website visitors, such as demographics, interests, and behavior. This information can help you understand your audience better and tailor your website content to their preferences.
- Measure website performance: Google Analytics can track website performance metrics such as traffic, bounce rate, and time on page. By analyzing this data, you can identify areas for improvement and optimize your website for better performance.
- Track conversion rates: If you have specific goals for your website, such as filling out a form or making a purchase, Google Analytics can track the conversion rate of these goals. This information can help you optimize your website to increase conversion rates.
- Make data-driven decisions: By analyzing the data from Google Analytics, you can make data-driven decisions about your website content, design, and marketing strategies.
- Monitor your marketing campaigns: Google Analytics can track the effectiveness of your marketing campaigns, such as email campaigns or social media ads. By analyzing this data, you can optimize your marketing efforts to achieve better results.
How to Add Google Analytics to a Website?
Integrating Google Analytics is crucial if you’re a website owner who wants to optimize your website for success. However, adding Google Analytics to a website can be confusing and overwhelming, especially for those without technical expertise.
Looking for a guide on how to add Google Analytics to a website? Here are 5 simple steps you should follow to start tracking your performance with Google Analytics.
Step 1: Create a Google Analytics account
Firstly, you need to create a Google Analytics account. Follow the following steps to do so:
- Go to the Google Analytics website (analytics.google.com) and click on the “Start for free” button.
- Sign in to your Google account or create a new account if you don’t have one.
- Fill out the required information, including the name of your account, your website, and the URL.
- Choose the industry category that best describes your website and the time zone you’re in.
- Select the data-sharing options that suit your preferences.
- Review and accept the terms and conditions of using Google Analytics.
- Click on the “Create” button to complete the sign-up process.
Once your account is created, you’ll be taken to the Google Analytics dashboard, where you can set up your property and tracking code, which we’ll show you next.
Step 2: Set up your property
After creating your Google Analytics account, the next thing to do is set up your property properly:
- Sign in to your Google Analytics account.
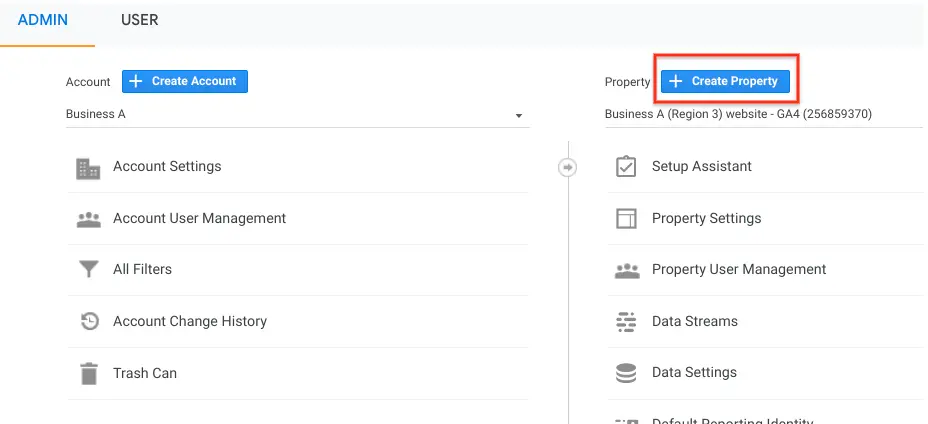
- Click on the Admin button at the bottom left of the sidebar.
- Under the Account column, select the account you want to create a new property.
- Under the Property column, click on the dropdown menu and select “Create Property“

- Give your property a name (e.g: My Clothing Shop, Clothing Inc, etc.) and decide on your reporting currency and time zone.
- Hit Next to select your industry category and business size.
- And lastly, click on Create and accept the Terms of Service and Data Processing Amendment of Google Analytics. And your property is all set!
Step 3: Create view filters
Next up, you will have to create and manage the view filters of your Google Analytics.
Well-structured filters will help you measure the metrics that are most important to your business. For instance, if most of your customers are from the US, you should create a filter that helps dedicatedly analyze the traffic and behavior of the US customer segment.
And here’s how to do so:
Create view filter on the account level
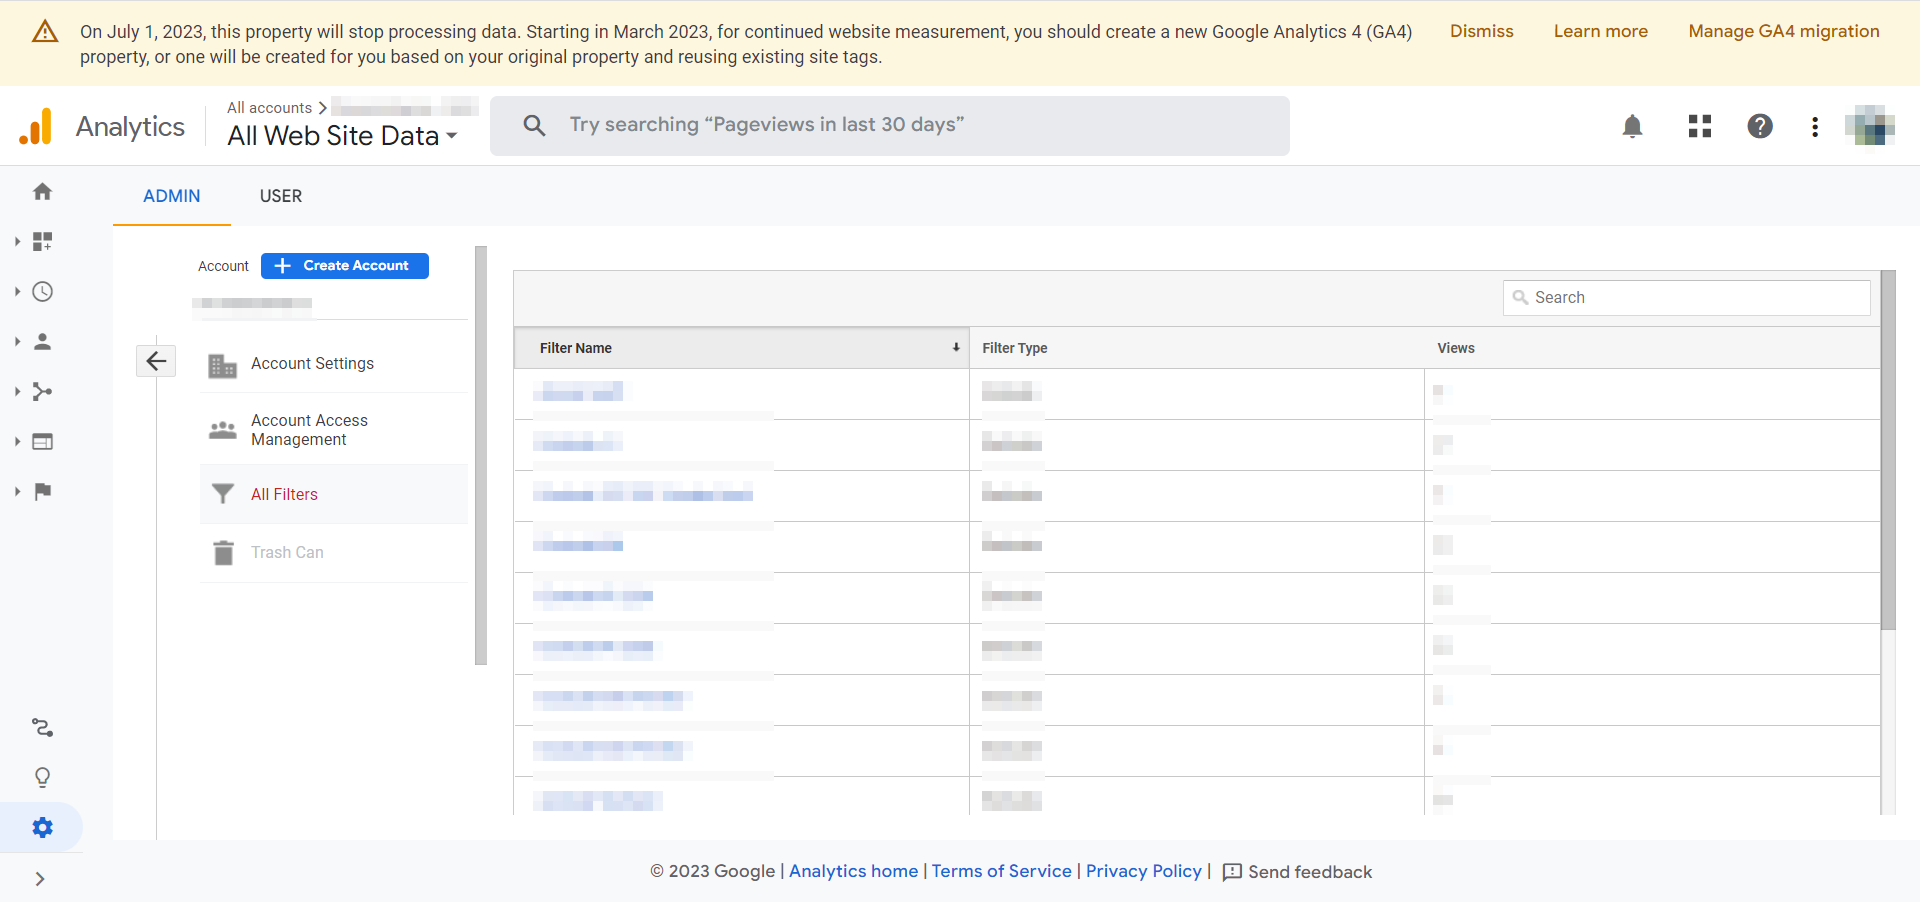
- On your main dashboard, click on Admin, and head to the account you want to create the filter in.
- At the Account column, click All Filters.
- Click + Add Filter (If this option isn’t visible to you, you might not have the permission to do so).
- Select Create new filter
- Give your filter a name
- Then you can select Predefined to choose filter types pre-built for you or Custom to build a custom filter for your custom tracking needs.
- In the Available views list, pick the views you want to apply the filter to, and click Add.
- Finally, click Save.
Create view filter on the view level
- Click on Admin, and navigate to the view you want to create the filter in.
- At the View column, click All Filters.
- Click + Add Filter (If this option isn’t visible to you, you might not have the permission to do so).
- Give your filter a name
- Then you can select Predefined to choose filter types pre-built for you or Custom to build a custom filter for your custom tracking needs.
- In the Available views list, pick the views you want to apply the filter to, and click Add.
- Finally, click Save.

Step 4: Add the tracking code to your website
To add Google Analytics tracking code to your website, the first thing you have to do is find your tracking ID – a unique ID code created for your Google Analytics account only.
Follow the following steps to find your ID tracking code:
- Log in to your Google Analytics account
- Navigate to the bottom of the left-hand navigation bar, click Admin
- Head to the Account section and pick an account from the drop-down menu
- Head to the Property section and select a property from the drop-down menu
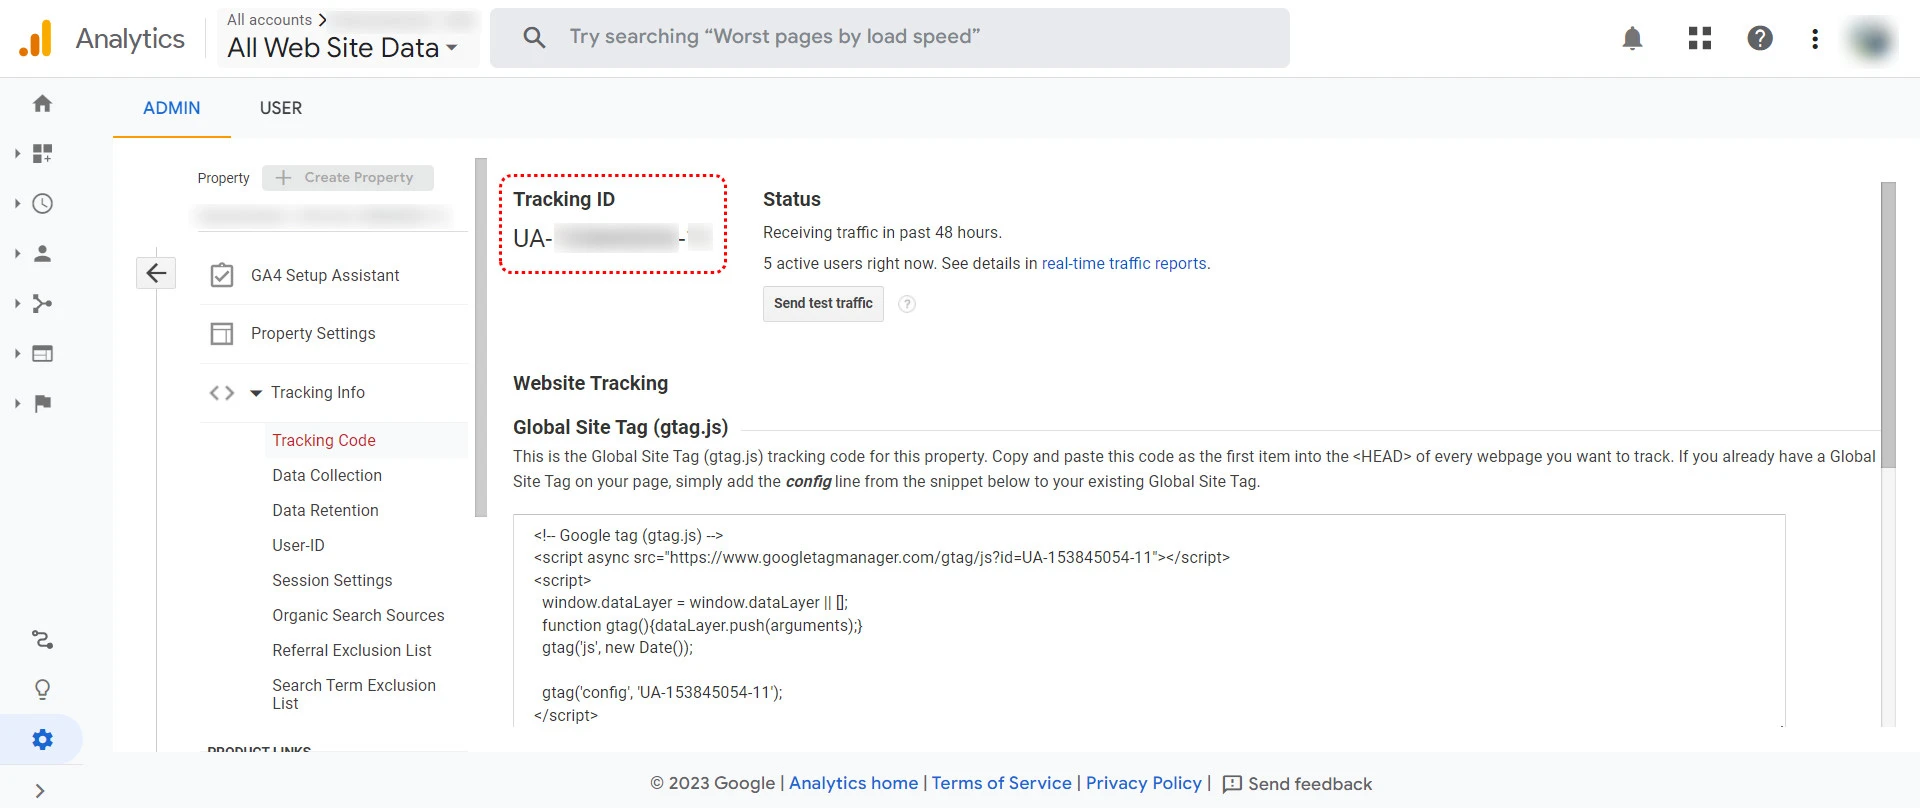
- On the Property section, navigate to Tracking Info > Tracking Code
- You’ll see your unique tracking ID shown at the top of the screen under format UA-XXXXXXXXX-XX

Now that you’ve found your tracking ID, the next thing to do is get your tracking code snippet, which you can find on the admin tab as the Global Site Tag (gtag.js). Particularly, the gtag.js is the code for this particular property, which you have to copy and paste to all the pages you want to track on your site.
Navigate to the website tracking section under the tracking ID, you’ll see a tag code snippet as shown below:

Lastly, paste the code snippet immediately after the <head> tag on any page on your website that you want to track with Google Analytics.
With that being said, if you use hosted solutions like Shopify, BigCommerce, or Wix, these platforms can integrate with the Google Analytics app and automatically add the tracking ID to your site.
Shopify, BigCommerce, and Wix can do more than just integrate with Google Analytics. Check out these articles and find out what else they have to offer:
- Shopify Review – Is Shopify The Crown Jewel of The eCommerce World?
- Wix eCommerce Review – A Full Package For Your Online Business
- BigCommerce Review – One Of The Best Platforms For Scaling-up Businesses!
Step 5: Verify your tracking code
After adding the tracking code to your website, you should track whether it works or not. Log in to your Google Analytics account, go to the “Reporting” section of your Google Analytics account, and navigate to “Real-Time” > “Overview“. If your tracking code is installed correctly, you should be able to see real-time data such as active users, page views, and events.
Best Practices for Using Google Analytics
Google Analytics is a powerful tool for tracking and analyzing website traffic, and there are several best practices that can help you make the most of this tool. And here are 4 of them:
- Set up goals: Goals are an important feature of Google Analytics that allows you to track specific actions on your website, such as form submissions, clicks on a particular button, or purchases. By setting up goals, you can measure the effectiveness of your website and identify areas for improvement.
- Use filters: Google Analytics provides a variety of filters that allow you to exclude certain data from your reports. For example, you may want to exclude internal traffic from your reports or filter out spam traffic. Using filters can help ensure that your reports are accurate and actionable.
- Analyze your data regularly: Regular data analysis is crucial to making informed decisions about your website. Set up a regular reporting schedule, and use the reports to identify trends and patterns. This can help you adjust your website to improve its performance.
- Customize your dashboard: Google Analytics provides a lot of data, and it can be overwhelming to try to digest it all at once. Take advantage of the dashboard customization options to focus on the metrics that are most important to you. This will help you stay focused and make it easier to identify trends and patterns.
How to Add Google Analytics to a Website – FAQs
[sp_easyaccordion id=”55087″]
Know how to add Google Analytics to a website yet?
In conclusion, adding Google Analytics to your website is a crucial step in understanding your website’s performance and making data-driven decisions. By following the detailed instructions outlined in this blog, you can create a Google Analytics account, set up a property, and start tracking data on your website.
Additionally, by following best practices for using Google Analytics, such as setting up goals, analyzing data regularly, and customizing your dashboard, you can gain deeper insights into your website’s performance and make informed decisions about improving it.
If you like this topic, please check out our LitExtension blog to find more articles like this. And don’t forget to visit our Facebook Community to connect with thousands of e-merchants across the world.
In case you have any questions or inquiries, our 24/7 customer support is always there to help. We are available via live chat, email, and phone calls, so don’t hesitate to contact us if you need assistance.