Wondering how to add Google Analytics to Shopify to know where most of your traffic is coming from and how customers interact with your store? You’re landing in the right place.
As experts in the field, we’re here at LitExtension – #1 Shopping Cart Migration Expert only makes decisions with enough data. And Google Analytics is more than helpful since it helps us properly optimize this blog site you’re reading to improve your experience constantly.
Therefore, today we’re glad to give you a guide through all you need to know about how to install google analytics on Shopify:
- How to add Google Analytics to Shopify?
- How to track additional Google Analytics events?
- Google Analytics vs Shopify Analytics – Why are they important for Shopify stores?
Let’s dive right in!
How to Add Google Analytics to Shopify Website?
Technically, as of writing this article, there are four main steps you need to follow if you want to add Google Analytics to your Shopify site:
- Step 1: Sign up for Google Analytics
- Step 2: Create a Google Analytics property
- Next step is to Create view filters
- Step 4: Find your tracking code and add it to Shopify
Now let us walk you through the details of each step!
Step 1: Sign up for Google Analytics
Feel free to skip this step if you already have a Google Analytics account. Otherwise, you need to create a Google Analytics account first. It’sIt’s quite simple to do so:
- Open Google Analytics on your browser and click Start for Free button.
- Log in to your current Google account or create a new one.
- Fill out all the required info. This includes your account’s name, website, and URL.
- Select the industry category best portraying your Shopify website and your time zone.
- Choose the data-sharing options that suit your preferences.
- Accept Google Analytics terms and conditions.
- Click Create button, and you’re done.
After creating your account, you’ll be brought to your Google Analytics dashboard. Herein, you have to set up your property and tracking code before adding the code to your Shopify store – which we’ll show you next.
Step 2: Create a Google Analytics property
Now that you’ve just created a Google Analytics account, let us show you how to set up your Google Analytics property the right way:
- Log in to your Google Analytics account.
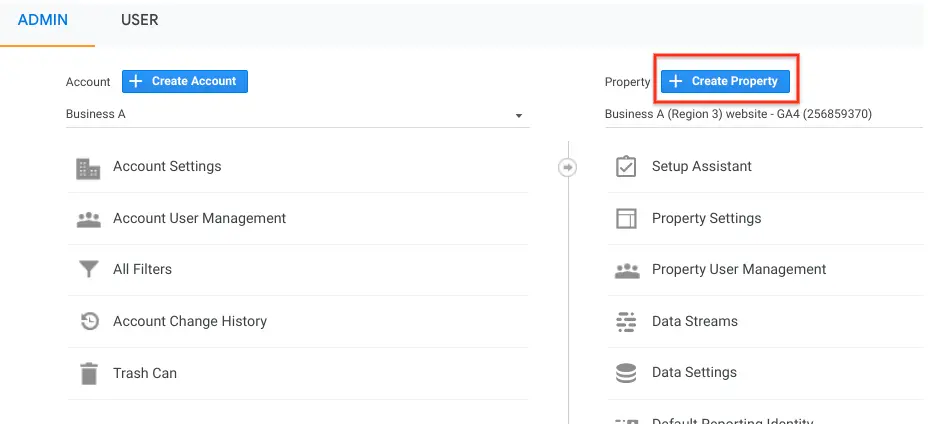
- Select the Admin button at the bottom left of the navigation sidebar.
- Under the Account column, pick the account you want to create a new property.
- Under the Property column, click the dropdown menu and choose Create Property.
After that, follow these steps to continue the steps on how to add Google Analytics to Shopify:
- Name your property and determine your reporting currency and time zone.
- Click Next to pick your industry and business size.
- Click Create and accept the Terms of Service and Data Processing Amendment of Google Analytics.
Step 3: Create view filters
Afterward, you have to create your view filters. From our experience, this is a vital step, as properly-set filters will help you monitor your data most accurately.
For example, you should create a view filter excluding IP from your company. Or, if most of your shoppers are from the United States, we highly recommend you create a filter for the US visitor segment only. This will help you have better insights into your most important segment.
Here are the steps to do so:
#1 Create view filter on the account level
- Click Admin, and navigate to the account you want to create the filter in.
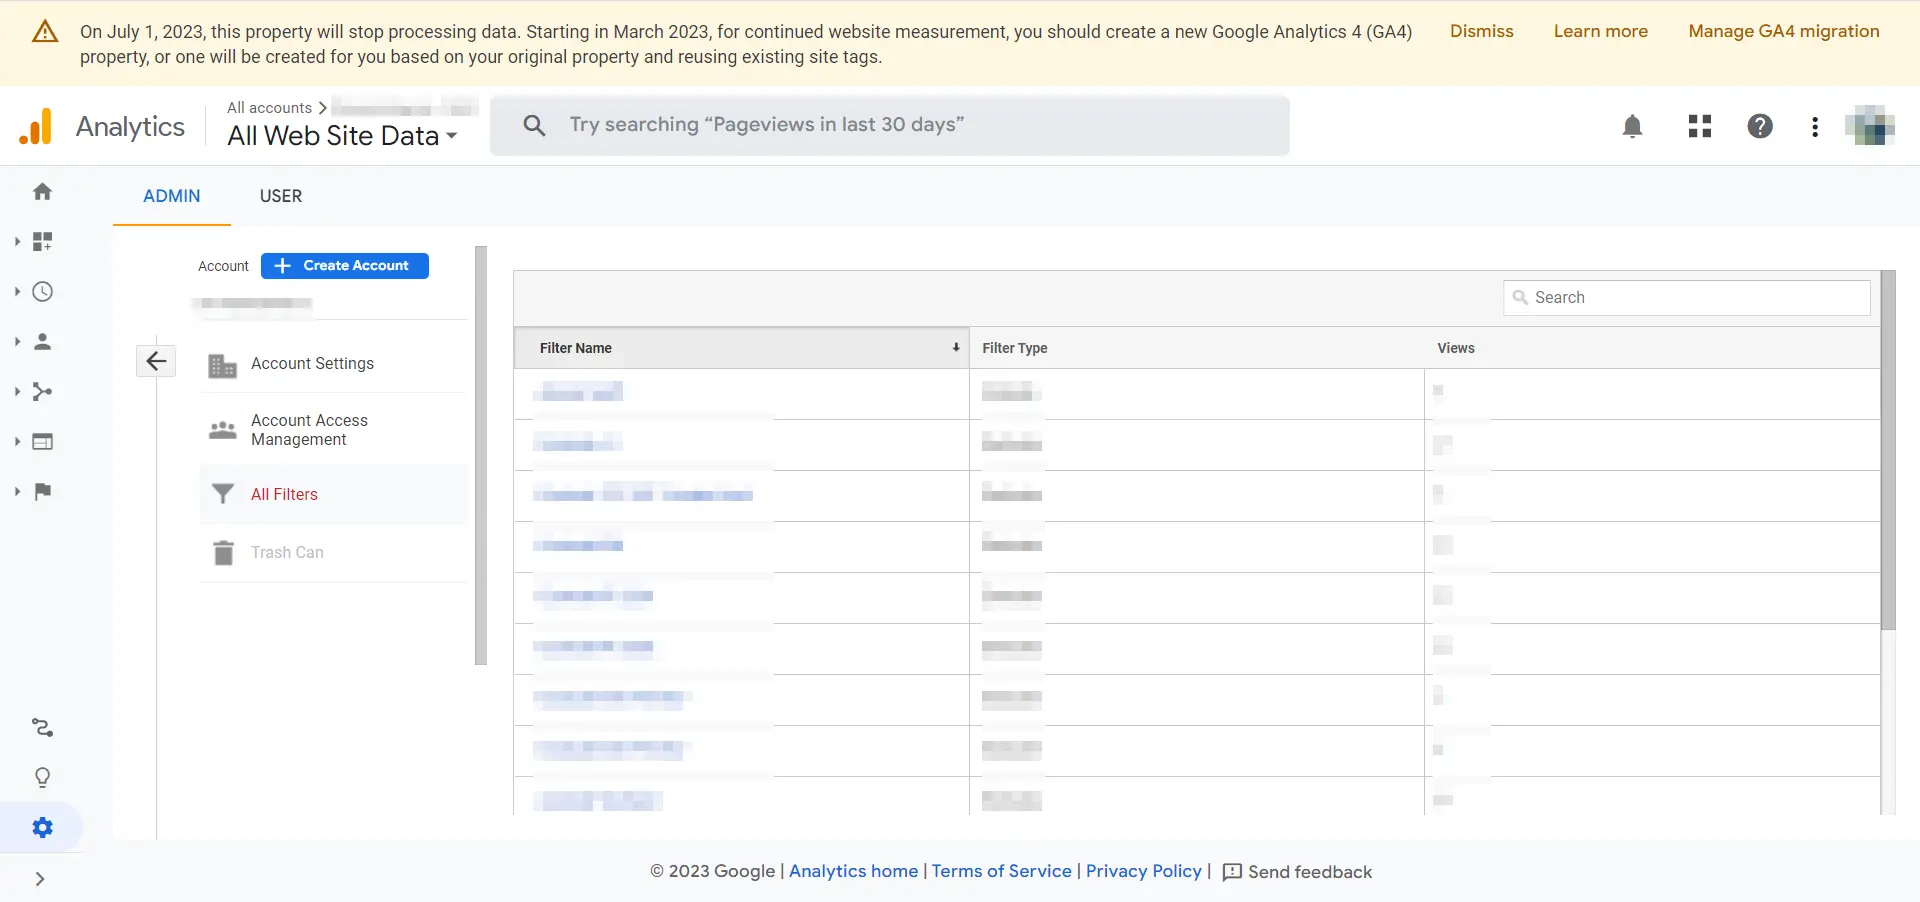
- In the Account column, select All Filters.
- Hit + Add Filter (If this option isn’t visible to you, you don’t have the required permission)
- Click Create new filter
- Name your filter
- Click Predefined to choose Google Analytics’ pre-built filter or Custom to build a filter for your own tracking need.
- Under the Available views list, select the views you wish to apply the filter to > click Add.
- Click Save.
#2 Create view filter on the view level
- Click on Admin, and navigate to the view you want to create the filter in.
- At the View column, click All Filters.
- From this step forward, follow the same steps as creating a view filter on the account level.
Step 4: Find your tracking code and add it to Shopify
The last step of how to add Google Analytics to Shopify is finding your tracking ID and pasting it to your Shopify website.
To find your Google Analytics ID tracking code:
- Click Admin
- Navigate to Account section and select an account from the drop-down menu
- Go to Property section and click a property from the drop-down menu
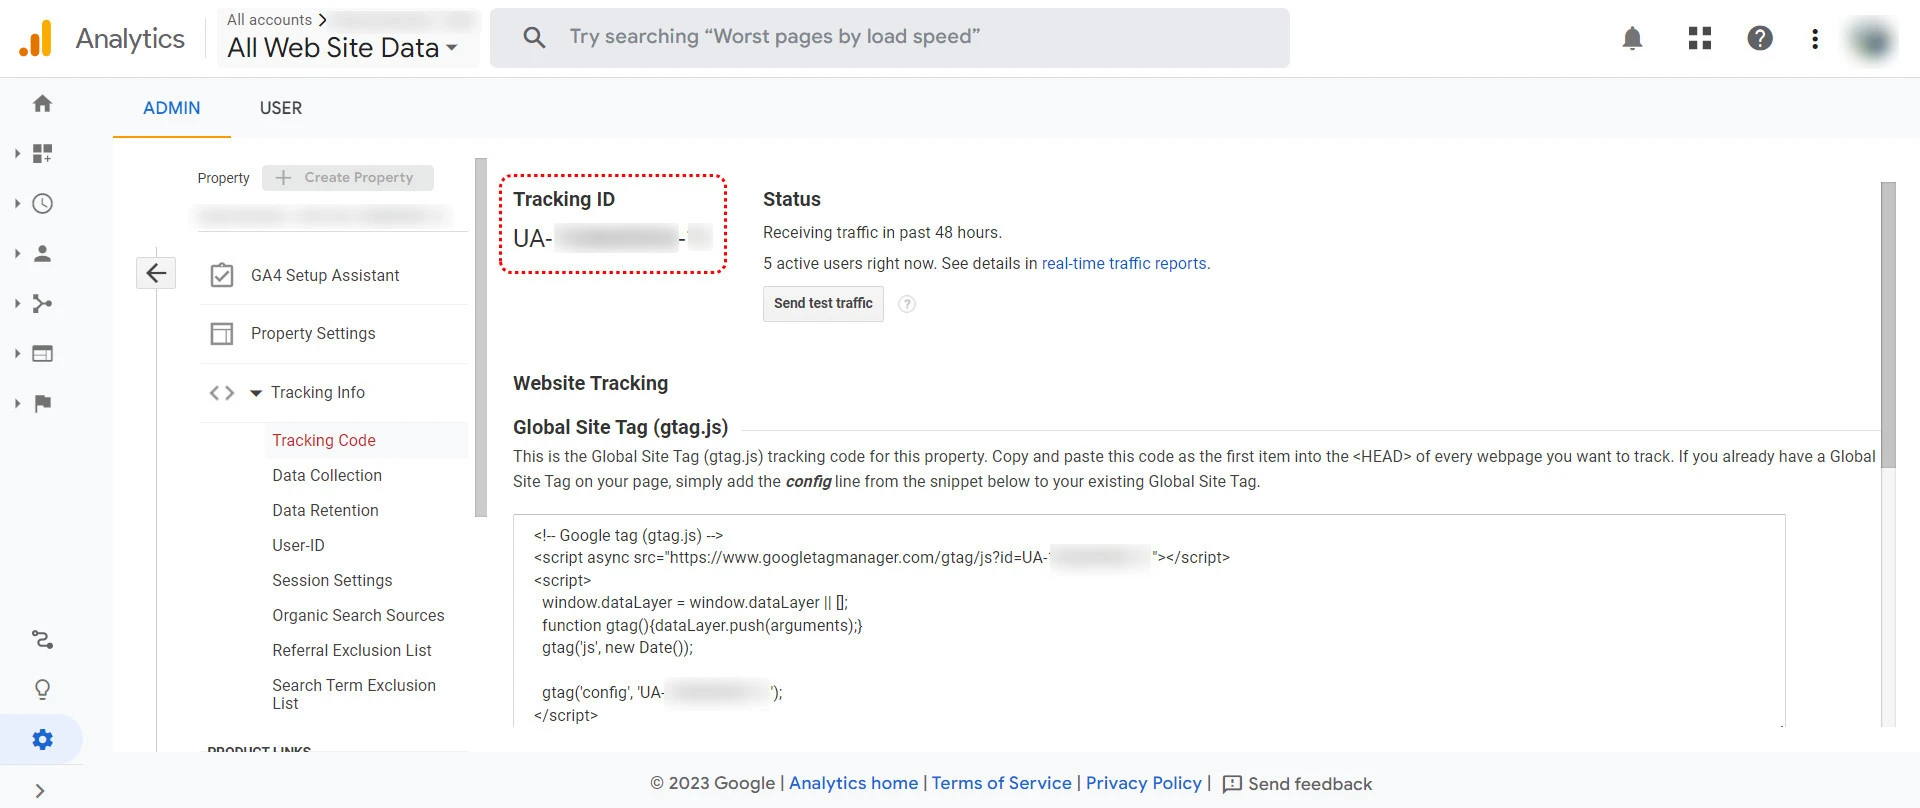
- Under the Property section, go to Tracking Info > Tracking Code
- You’ll see your unique tracking ID shown at the top of the screen under the format UA-XXXXXXXXX-XX
Now that you have the tracking ID code, let us show you how to add Google Analytics tracking code to Shopify in the following steps:
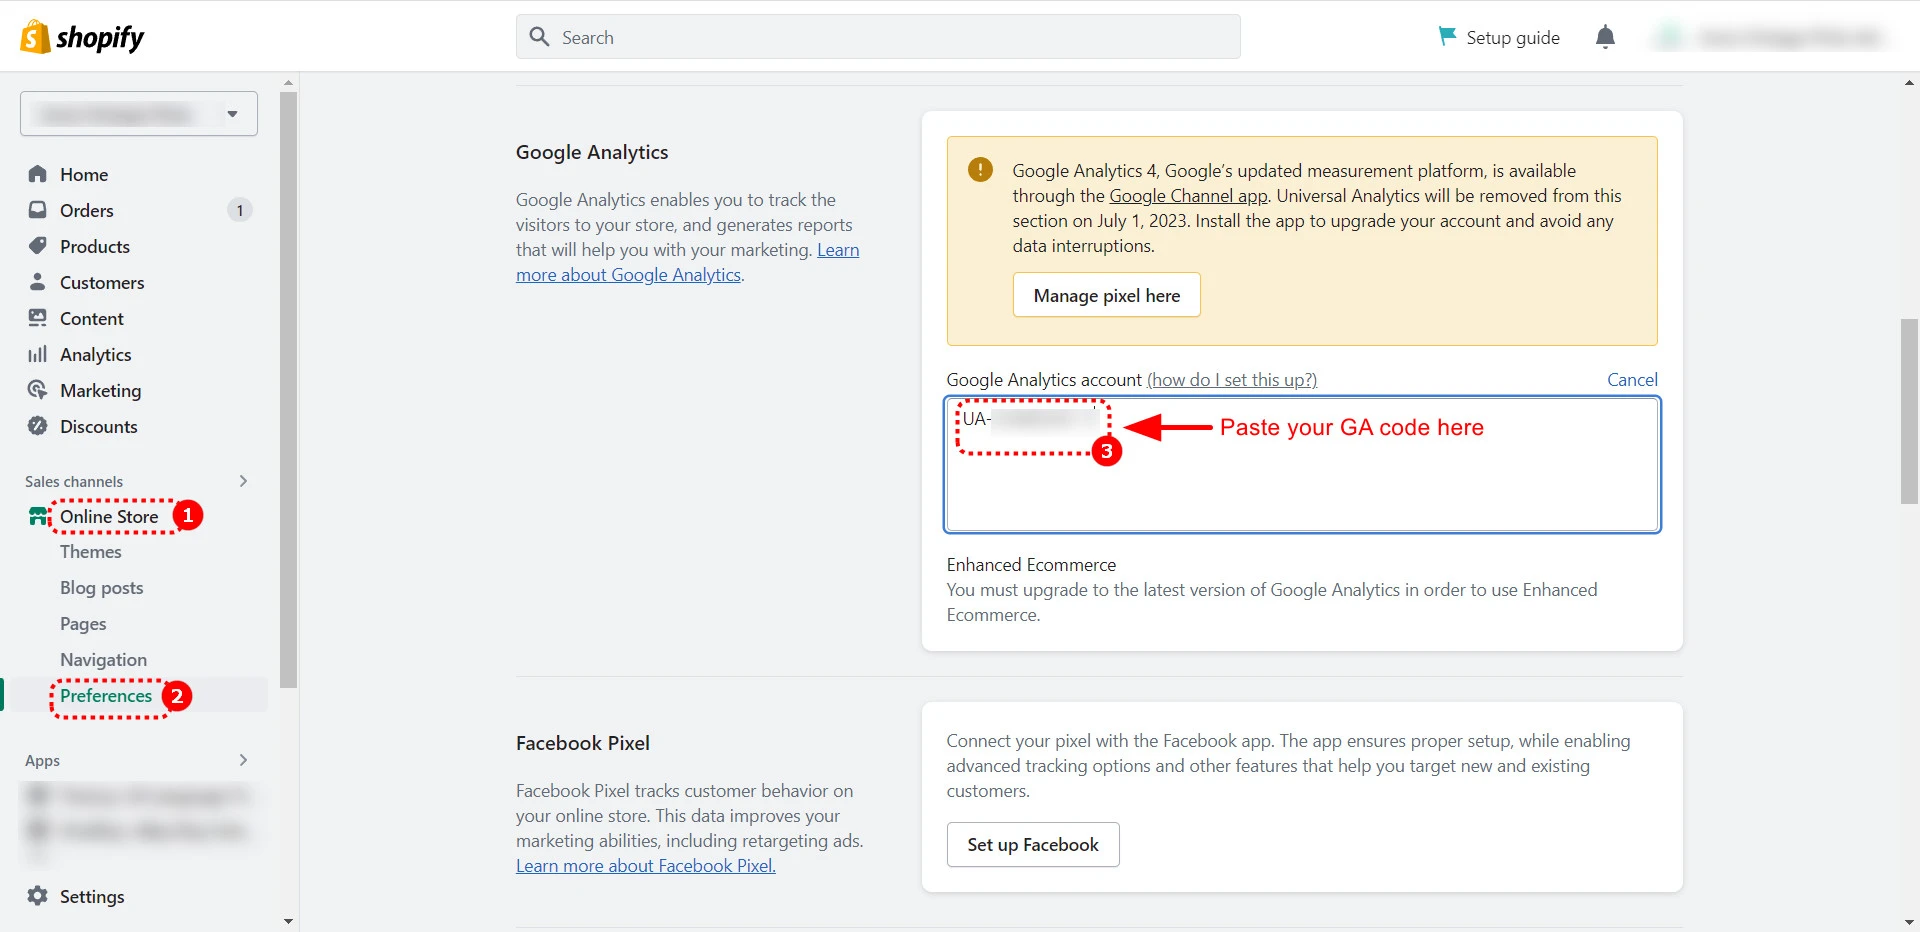
- Log in to your Shopify store > Click Online Store.
- Select Preferences
- Navigate to Google Analytics section > Paste the code above to the Google Analytics account box and you’re all set.
What Metrics to Track With Google Analytics?
After adding Google Analytics to Shopify, your eCommerce events are auto-tracked with Google Analytics:
- page_view: when a visitor views one of your Shopify pages
- search: when a visitor searches for products using the search bar
- view_item: when a visitor views an item
- add_to_cart: when a visitor adds an item to their cart
- begin_checkout: when a visitor initiates the checkout process
- add_payment_info: when a visitor types in their payment info
- purchase: when a visitor completes their checkout process
Besides the events above, if you need to track additional events using Google Analytics, you need to tweak your theme code and use the gtag.js API to fire events to your GA account.
Such advanced tracking customizations require additional Google Analytics JavaScript coding. So if you’re not comfortable with coding, consider hiring a Shopify expert to do so.
Additionally, here are a few basic metrics you should track better to understand your website’s traffic structure and audience:
- Audience: who visits your website, where they come from, their gender, what device they use to access your Shopify store, etc.
- Acquisition: you can track which sources they come from (e.g.: organic search, paid ads, affiliate, etc.)
- Behavior: which pages do your potential customers visit most, how do they interact with your pages, etc?
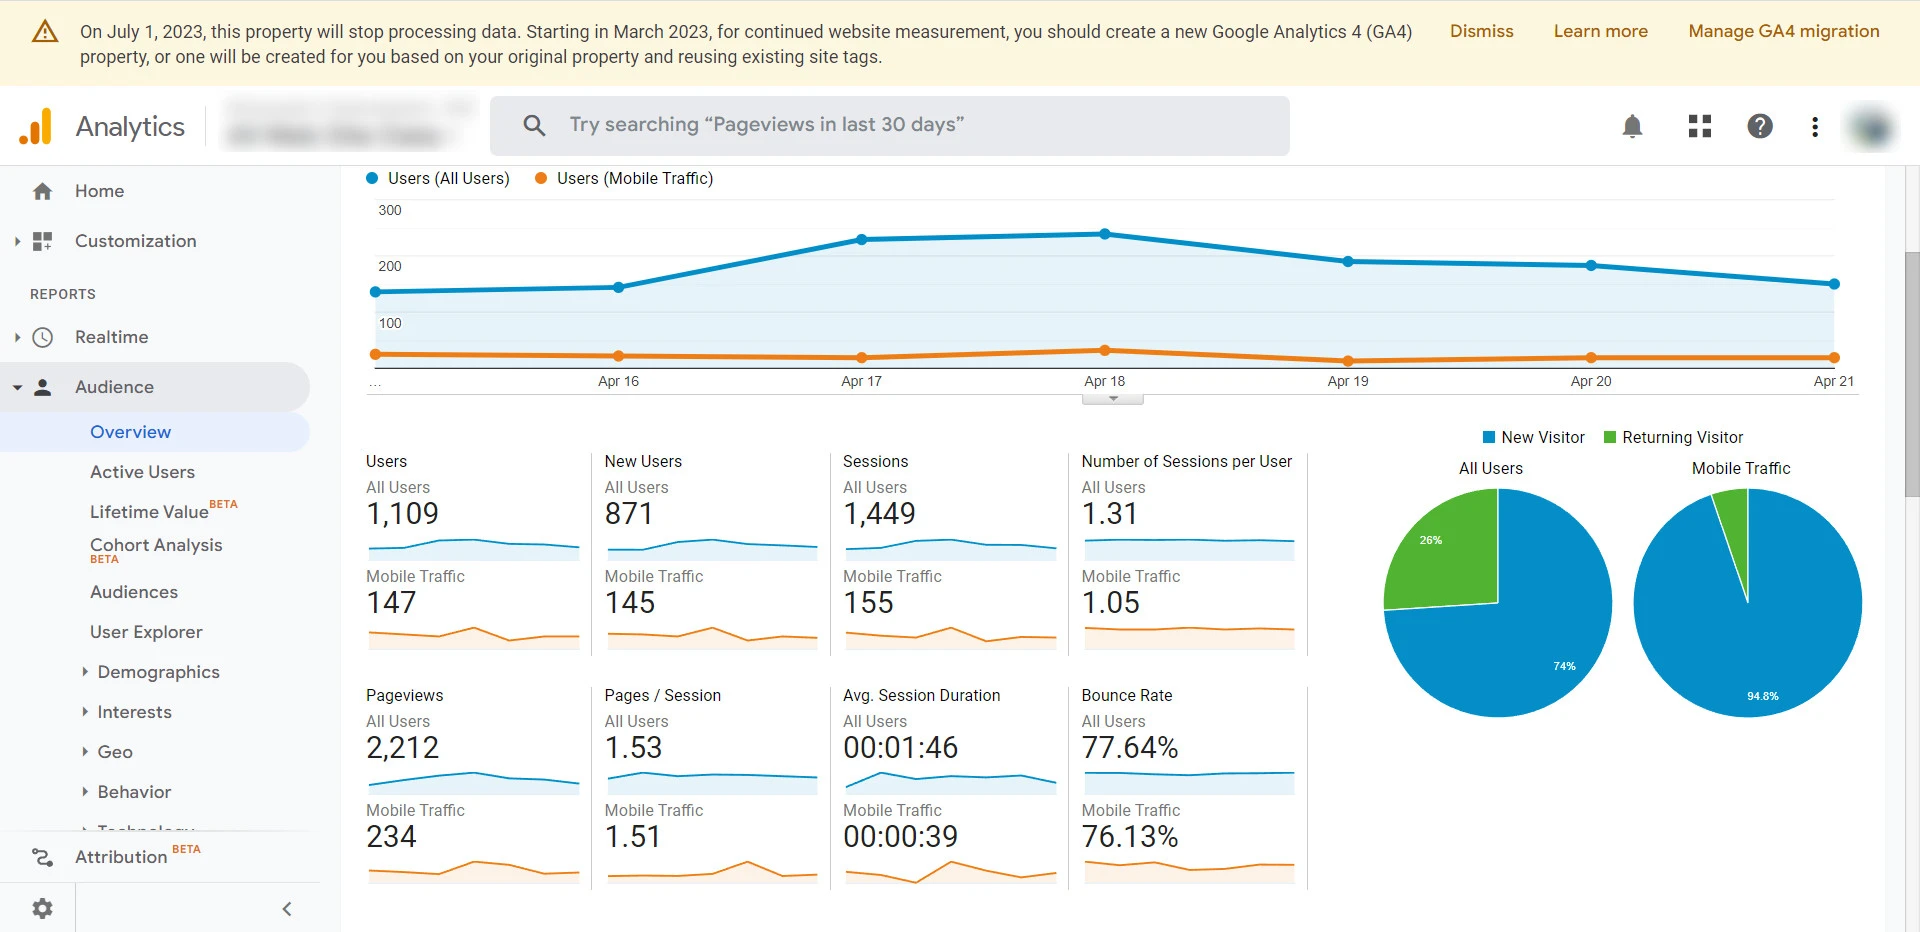
For instance, looking at the screenshot below, we can tell that most of our visitors are from desktop devices. So whenever we optimize our website, we optimize it for desktop devices first.
Google Analytics vs Shopify Analytics – Why Are They Important for Shopify Store?
What is Google Analytics?
Google Analytics is a powerful web analytics service offered by Google that can help you track and analyze your website traffic. It allows you to measure the performance of your online marketing campaigns, identify visitor behavior, and track conversion rates.
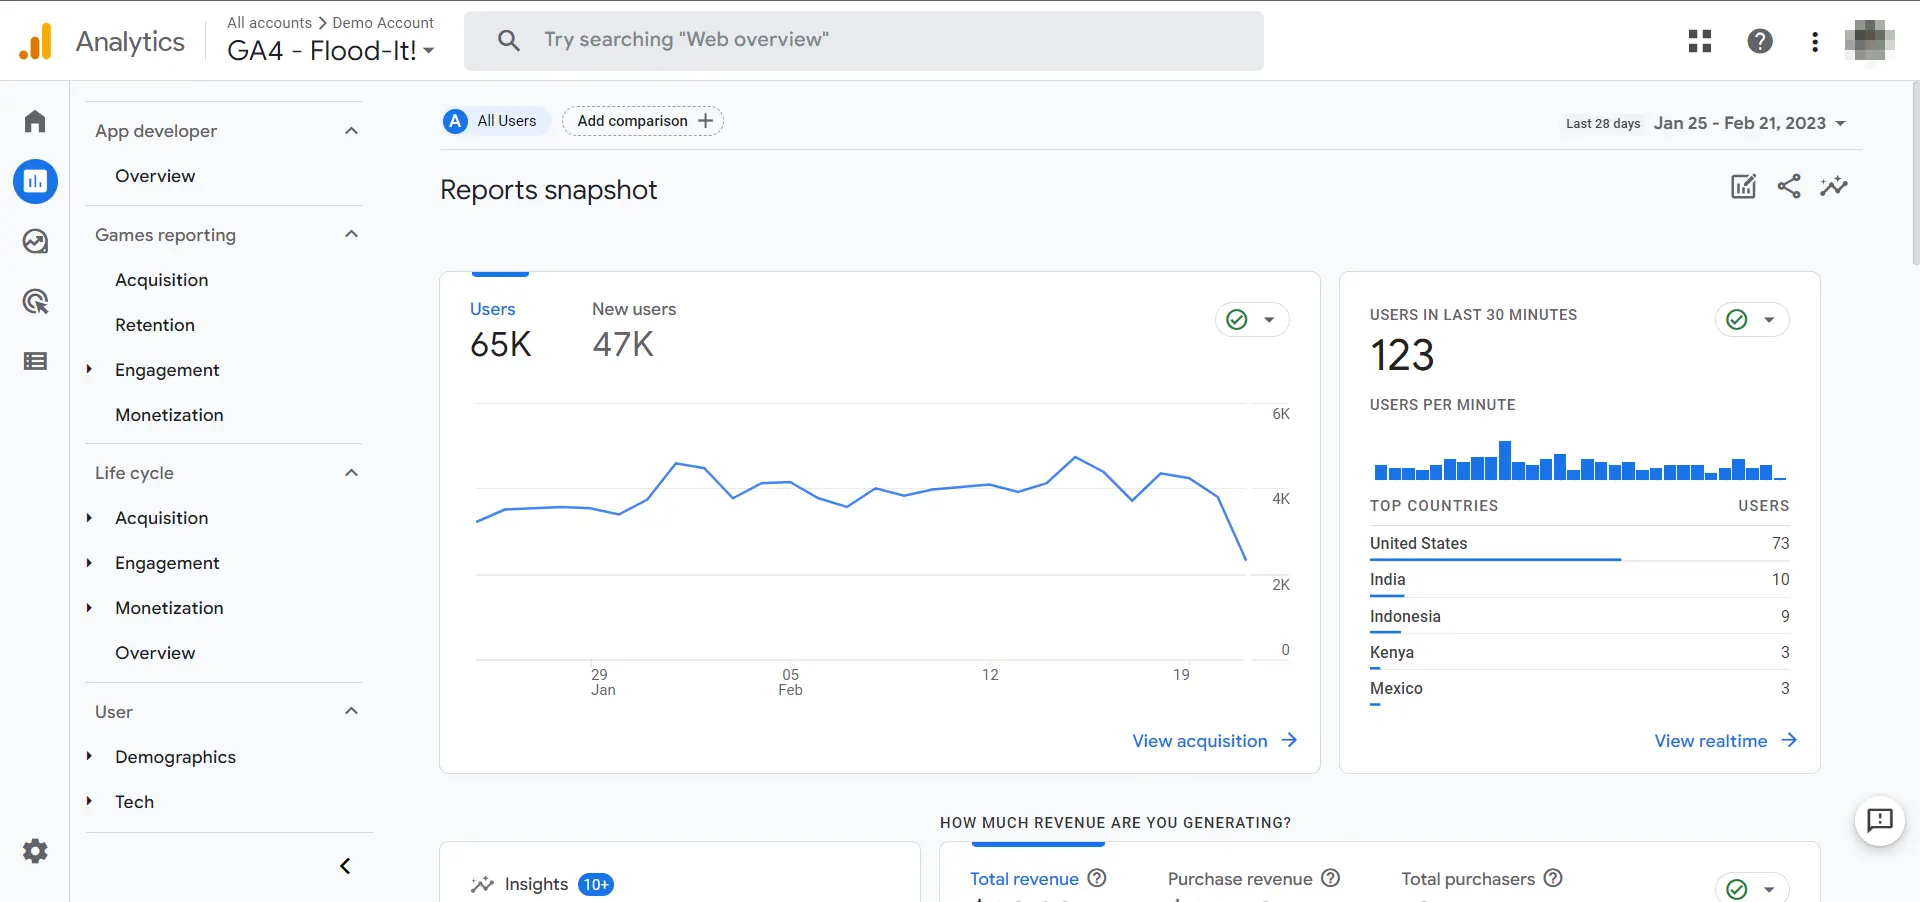
With Google Analytics, you can gain valuable insights into how users interact with your website, including which pages are most popular, how long visitors stay on the site, and where they are coming from.
The platform also provides detailed reports and dashboards, which you can customize to meet your tracking needs.
What is Shopify Analytics?
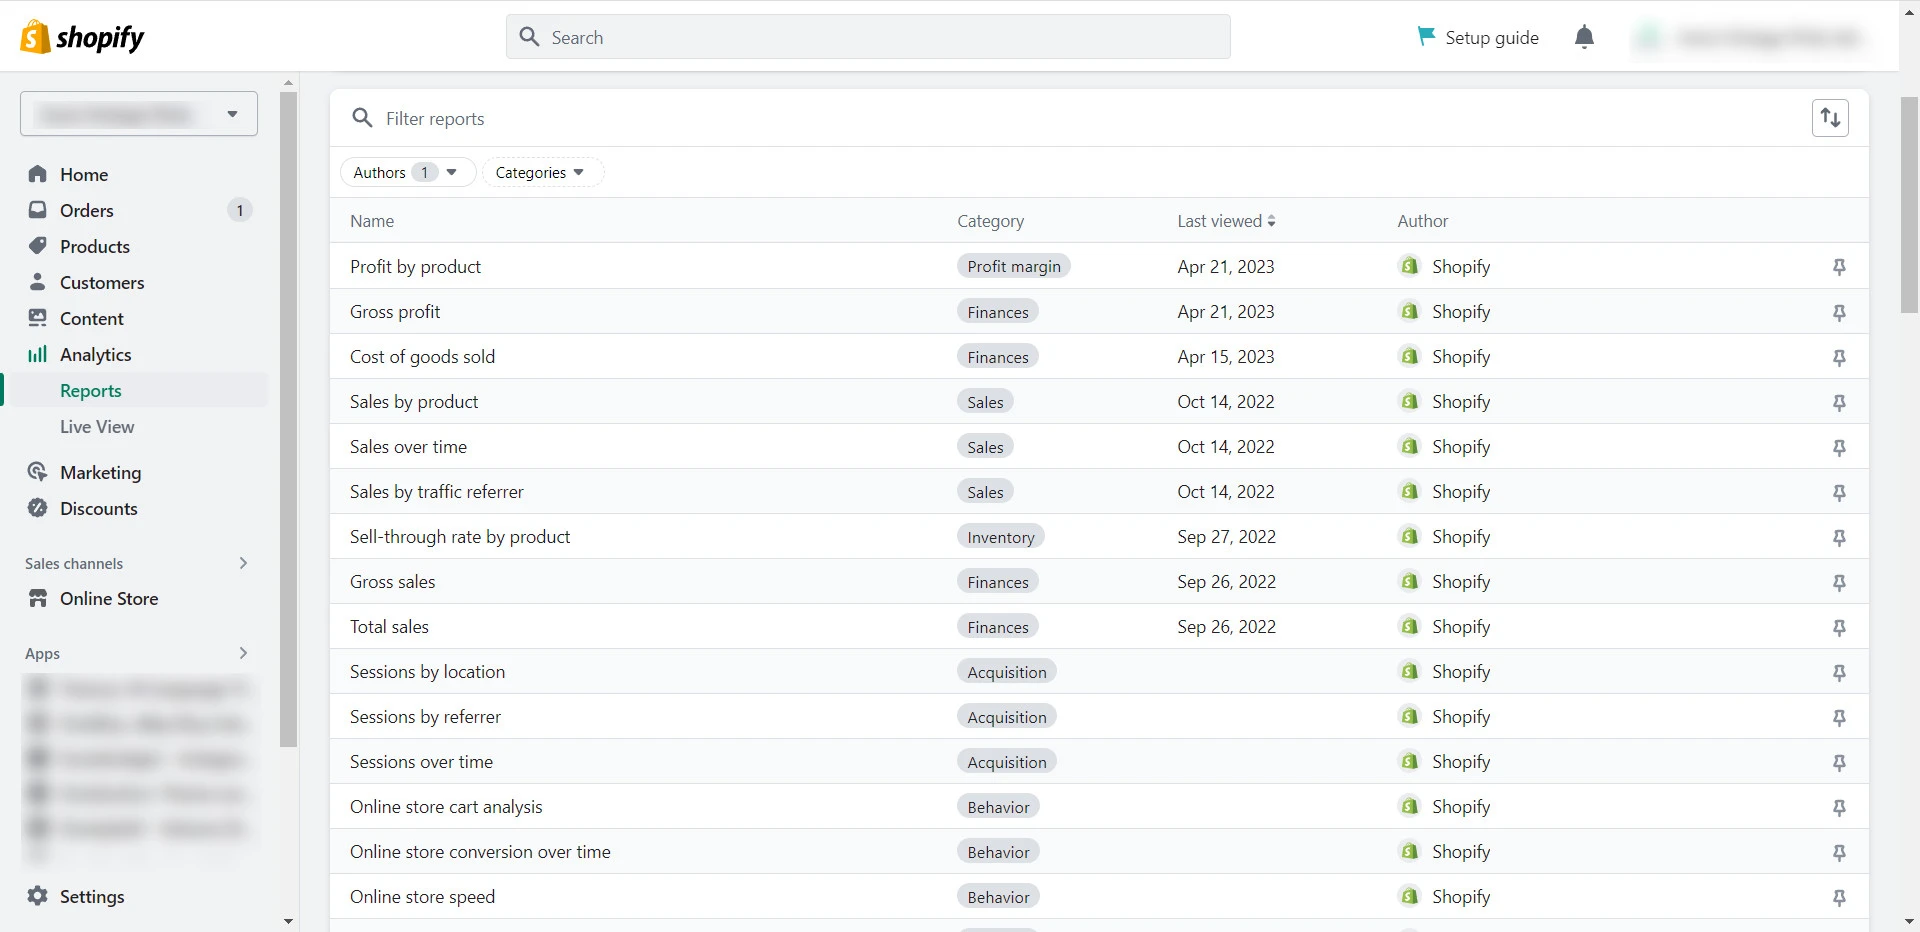
Shopify Analytics, on the other hand, is different from Google Analytics in terms of the metrics it can track and its purposes. While Google Analytics provides more in-depth data about your customers’ on-site behavior, Shopify Analytics is sales-focused.
With Shopify Analytics, you can track metrics such as your gross profit, gross profit margin, orders, revenues, etc.
A newbie who wants more information about Shopify? Check out our honest Shopify Review for the platform’s pros & cons and what makes it the world’s most popular eCommerce platform.
Why is tracking analytics important for Shopify stores?
Tracking analytics is essential if you want to gain a comprehensive understanding of your store’s performance. By utilizing both Google Analytics and Shopify Analytics, you can gather valuable insights into your customers’ behavior and make data-driven decisions:
- Provides a complete picture of customer behavior: Shopify Analytics offers information about customer shopping behavior and purchasing history, while Google Analytics provides insights into website traffic sources, visitor behavior, and demographics. These platforms can give you a complete picture of customer behavior across multiple channels.
- Measures the effectiveness of marketing efforts: Both Shopify and Google Analytics offer tools to track the performance of various marketing campaigns and channels. You can use this data to identify which efforts generate the most revenue and ROI.
- Provides real-time sales and revenue data: Shopify Analytics provides real-time sales and revenue data, while Google Analytics provides data on conversion rates and revenue per session. With this data, you can make informed decisions about your inventory management, pricing, and product offerings.
- Identifies website issues: By analyzing website analytics, you can identify and fix issues that affect website performance, such as slow loading times or high bounce rates.
How to Add Google Analytics to Shopify: FAQs
[sp_easyaccordion id=”57220″]
Bottom Lines
All in all, Google Analytics is a helpful tool to help fuel your Shopify store’s success. And we hope after reading this guide, you can know how to add Google Analytics to Shopify and make more well-informed decisions that bring impact.
Remember to check out other insightful articles on LitExtension’s blog and join our Facebook Community to stay updated with the latest eCommerce news.
You might be interested in reading: