How to change URL on Wix site is a job that requires a well-informed approach, whether you’re trying to make your site more visible to search engines, improve the user experience, or keep up with changing content and branding strategies.
In this article, we – LitExtension, guide you on how to change URL on Wix, including
- Understanding the importance of URLs on Wix
- How to change URL on Wix Editor
- Steps to remove URL on Wix
- Bonus: How to set up a 301 redirect on Wix
Join us as we review the essential steps and things to think about to help you handle your website’s URLs smartly and effectively.
In Case The Migration Process Too Complicated
Want to switch to another eCommerce platform without a finger lifted? LitExtension offers a great All-In-One migration service that helps you transfer your data to a new eCommerce platform accurately, seamlessly and securely.
Understanding the Importance of URLs on Wix
URLs are an essential part of your online personality when it comes to your Wix site. A well-structured URL that makes sense helps with both search engine performance and the user experience. As your site changes, you might need to change the URLs to show better how the content or brand has changed.
1. Why would you need to change a URL on Wix?
You might want to change the URL on your Wix site for a few reasons. It could be to improve SEO, make room for a new way of organizing information, or make the site easier to use.
2. What you need to know about changing your page’s URL
Before you start the process, you should know what Wix’s rules and limits are for URL changes.
If you change your page’s URL, the new URL is viewed as a new page, and your old page will no longer work. This means any links to the old page’s URL you shared on social media will no longer work, and your SEO results for the old page will be lost. This is because search engines always see a new page when the URL changes.
You have to set up a 301 change from the old URL to the new URL to keep your links working and move the SEO to the new page.
3. URL paths you can’t use on Wix
When you change the URL of a site page, you should think about the URL paths. Some URL paths can’t be used for your pages because they are reserved for Wix apps or SEO.
Here are examples of URL paths you should avoid:
- apps
- _api
- robots.txt
- sitemap.xml
- feed.xml
- sites
- events (when using the Wix Events app)
- event-details (when using the Wix Events app)
If you try to use these URL routes, you’ll get an error message saying that the URL isn’t working.
Now you know the vital thing about URLs on Wix before figuring out how to change URL on Wix in 2 methods: Wix Editor and Domain. Keep reading with us!
Need Help to Migrate Your Store?
LitExtension provides a well-optimized Cart to Cart migration service that will help you transfer all your data accurately and painlessly with utmost security.
How to Change URL on Wix Editor?
It’s important to remember to be careful when changing URLs and to use SEO best practices to keep your website running well and giving users a good experience.
Changing the URL of a page on Wix is easy to do using the Wix Editor. Here’s how to change URL on Wix App Editor step by step:
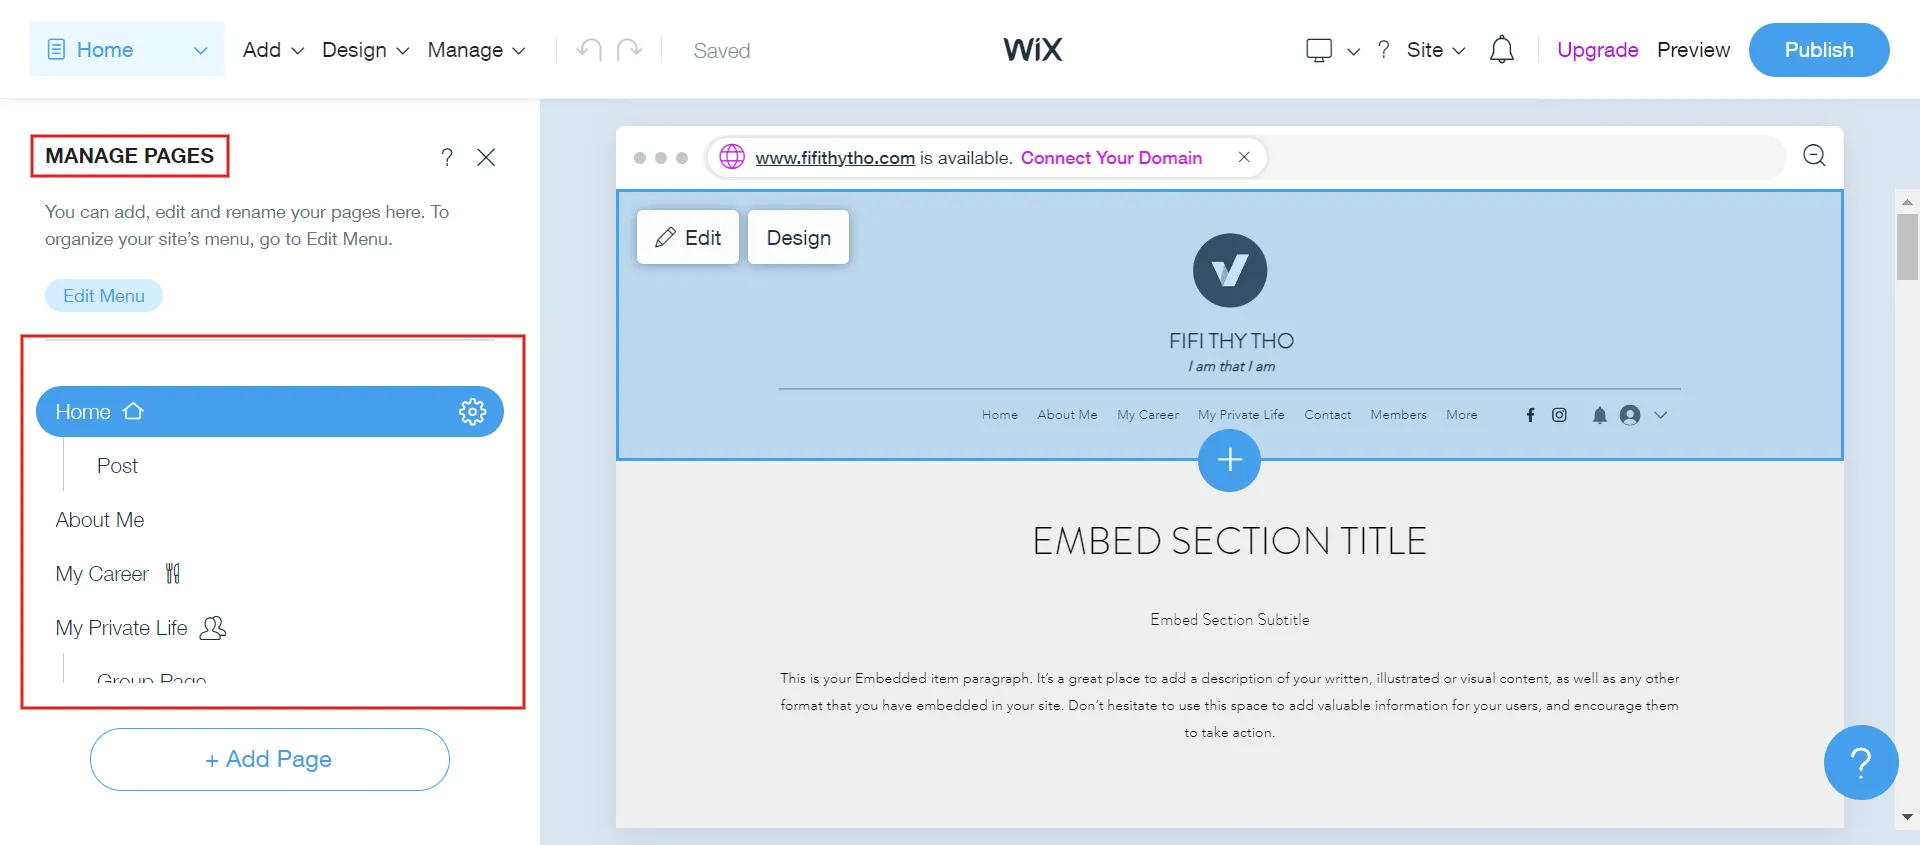
Step 1: Manage Pages > Choose the relevant page
In Wix Editor, you see Manage Pages displayed in the left-hand tab. Next, identify the page for which you want to change the URL.
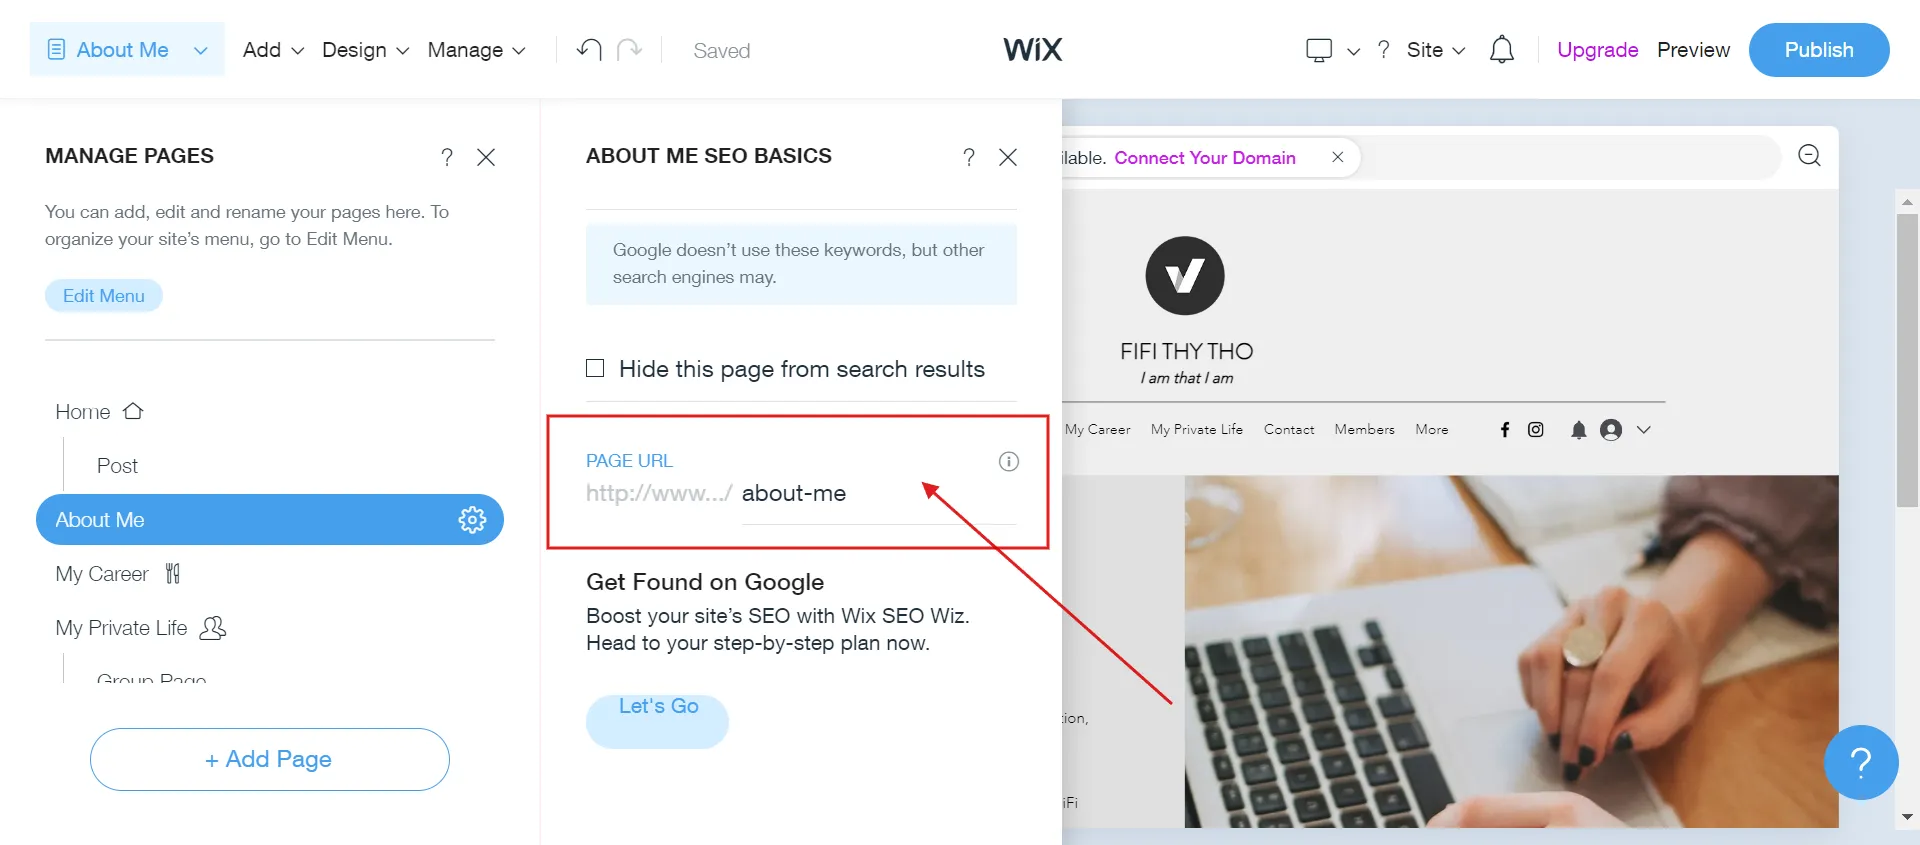
Step 2: Click Show More > SEO Basics
Find the Show More (gear icon) associated with the page you’re editing. Clicking on this will reveal additional options.
Within the expanded options, click SEO Basics. This will take you to the settings related to your page’s search engine optimization.

Step 3: Enter your page’s chosen URL
Under the “Page URL” section, you can input your desired URL for the page. Make sure the new URL is meaningful and relevant to the content.
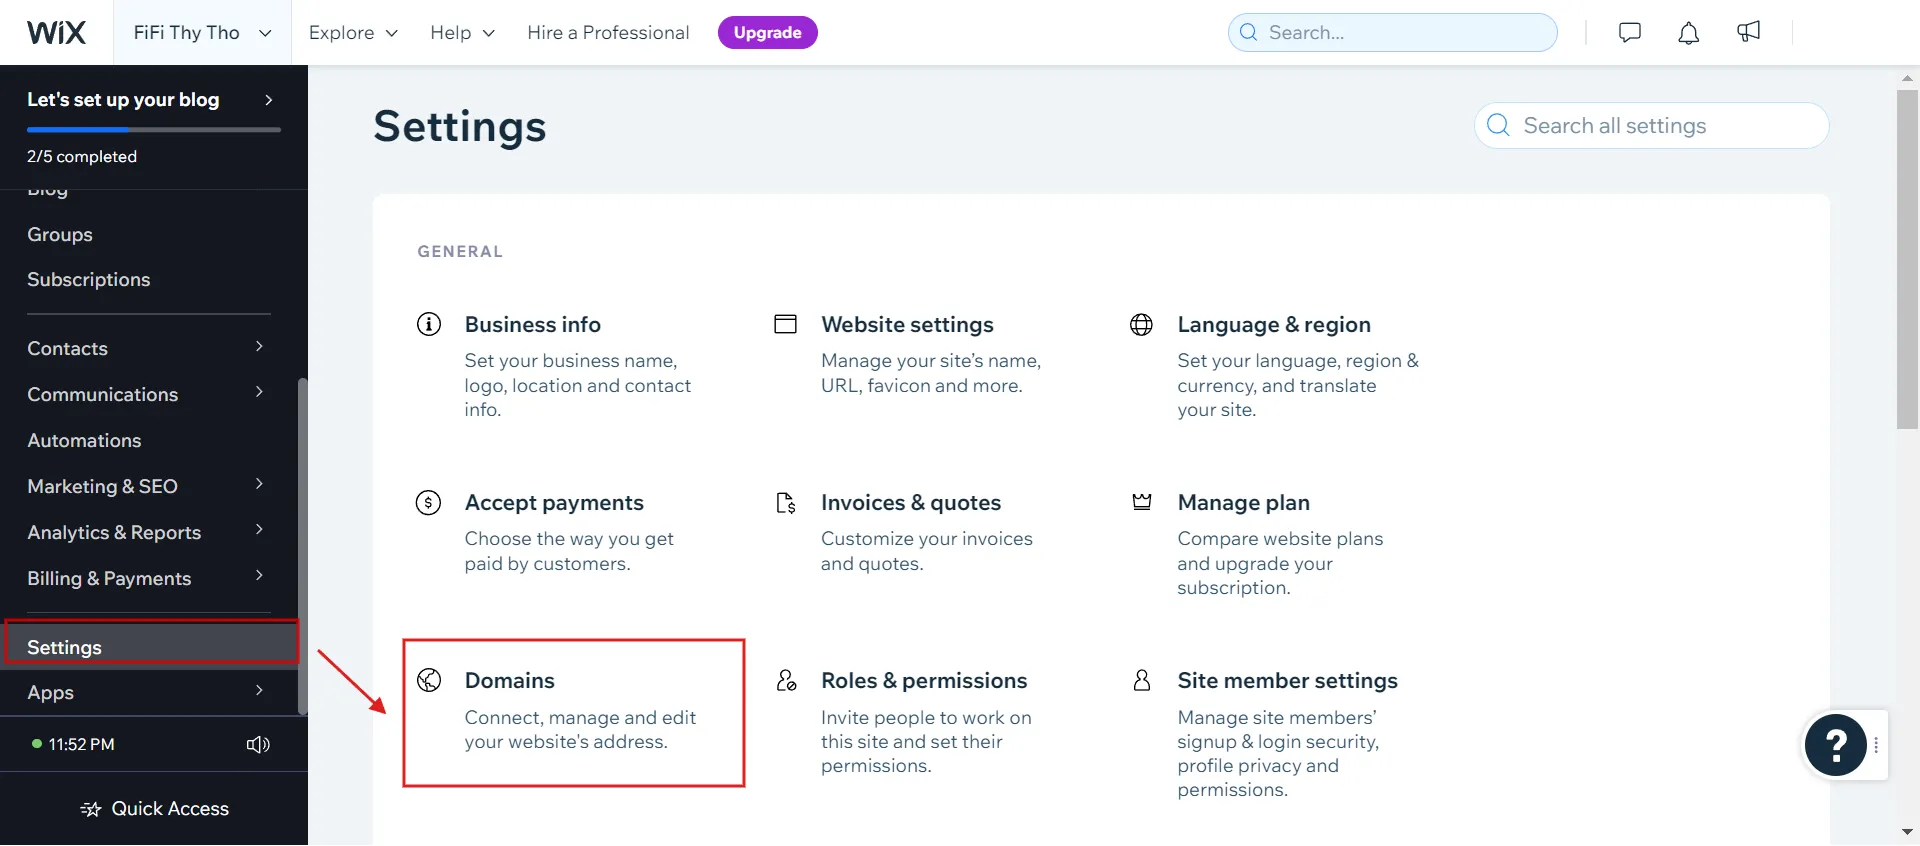
Access your Wix account’s homepage, then navigate to Settings > Domains. This is where you can manage your domain names.
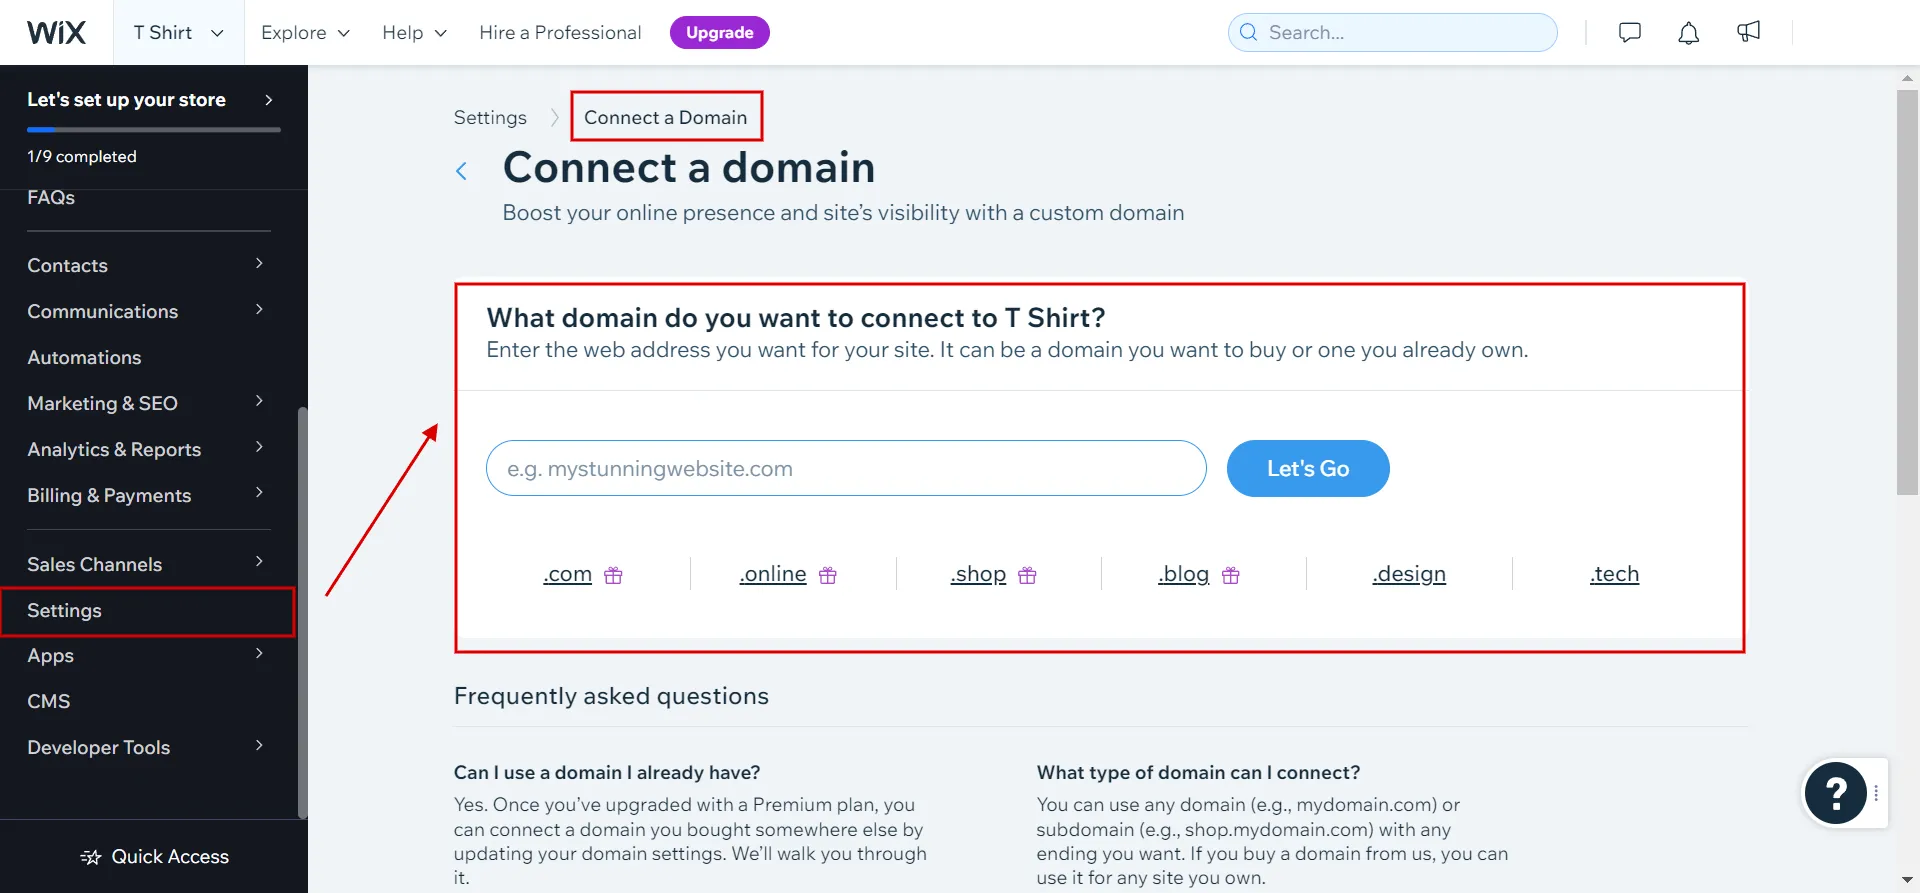
Next, in the Connect a Domain section, type in the URL you want for your site. It could be a domain you already own or want to buy.

Step 2: Choose a new domain
Choose from the options to buy a new domain, connect an existing one you own, or transfer a domain to Wix.
- If you don’t already own a domain, you can buy one directly through Wix.
- You can connect your domain to your Wix site if you own a domain from a different provider.
- You can initiate the transfer process if you want to transfer an existing domain to Wix.
Step 3: Assign the new domain.
Go to the Domains section in your Wix account once you have the new domain. Find the new domain and select the option to assign it to your Wix site.
Step 4: Follow the setup process
Wix will help you set up the new domain. This may require checking who owns the domain and setting up DNS settings.
When you change your name settings, it can take a while for those changes to appear everywhere on the internet. This process is called DNS propagation.
Step 5: Verify the new URL
Once DNS propagation is done, you can use the new domain name to visit your Wix site. Check the new URL to make sure that everything is still working.
Now you know how to change website name on Wix by updating your domain name. The next part will show you how to remove Wix from URL name.
Whether you want to change your website’s brand or just want a more memorable name, you should know how to change domain name on Wix in a friendly and transparent way.
How to Remove Wix from URL?
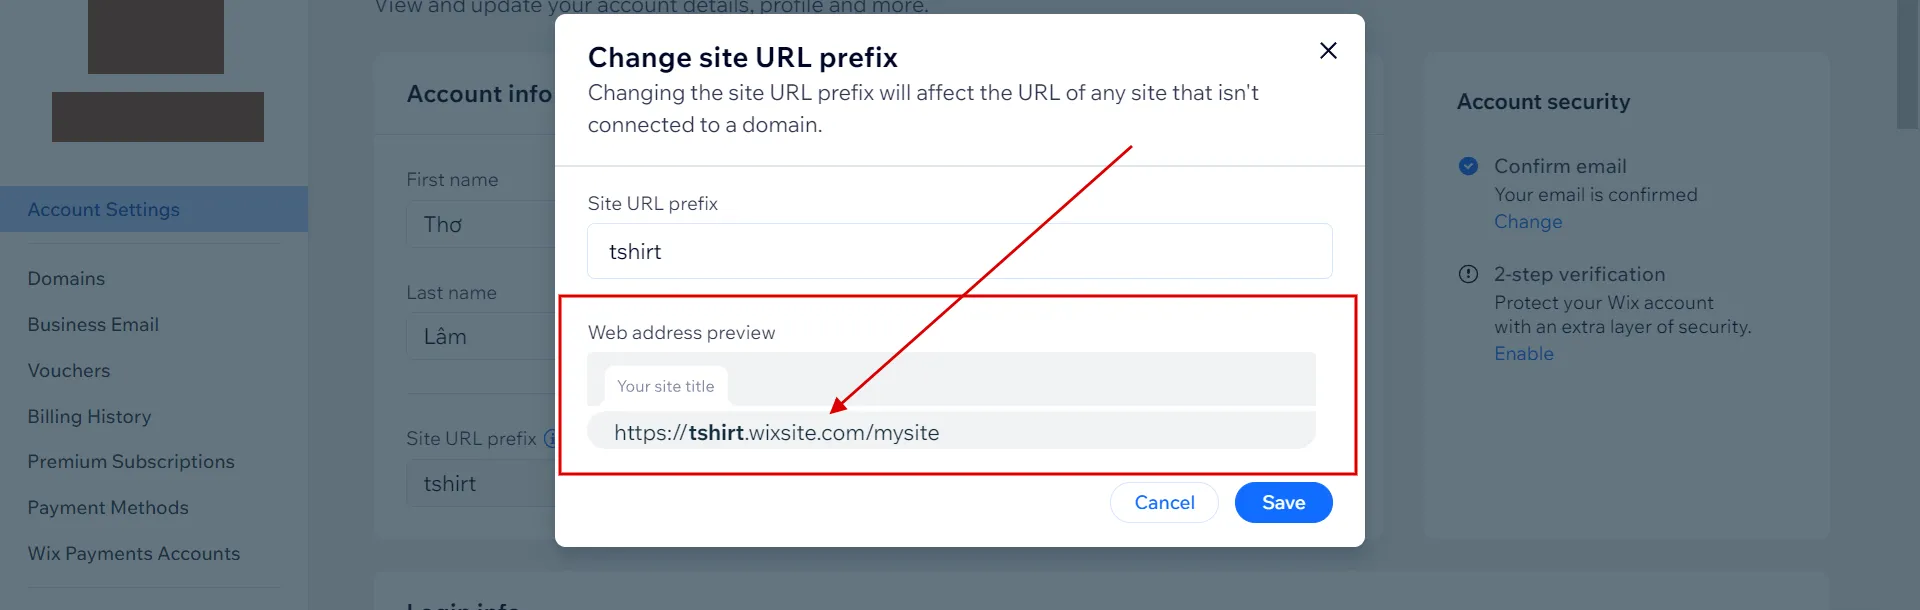
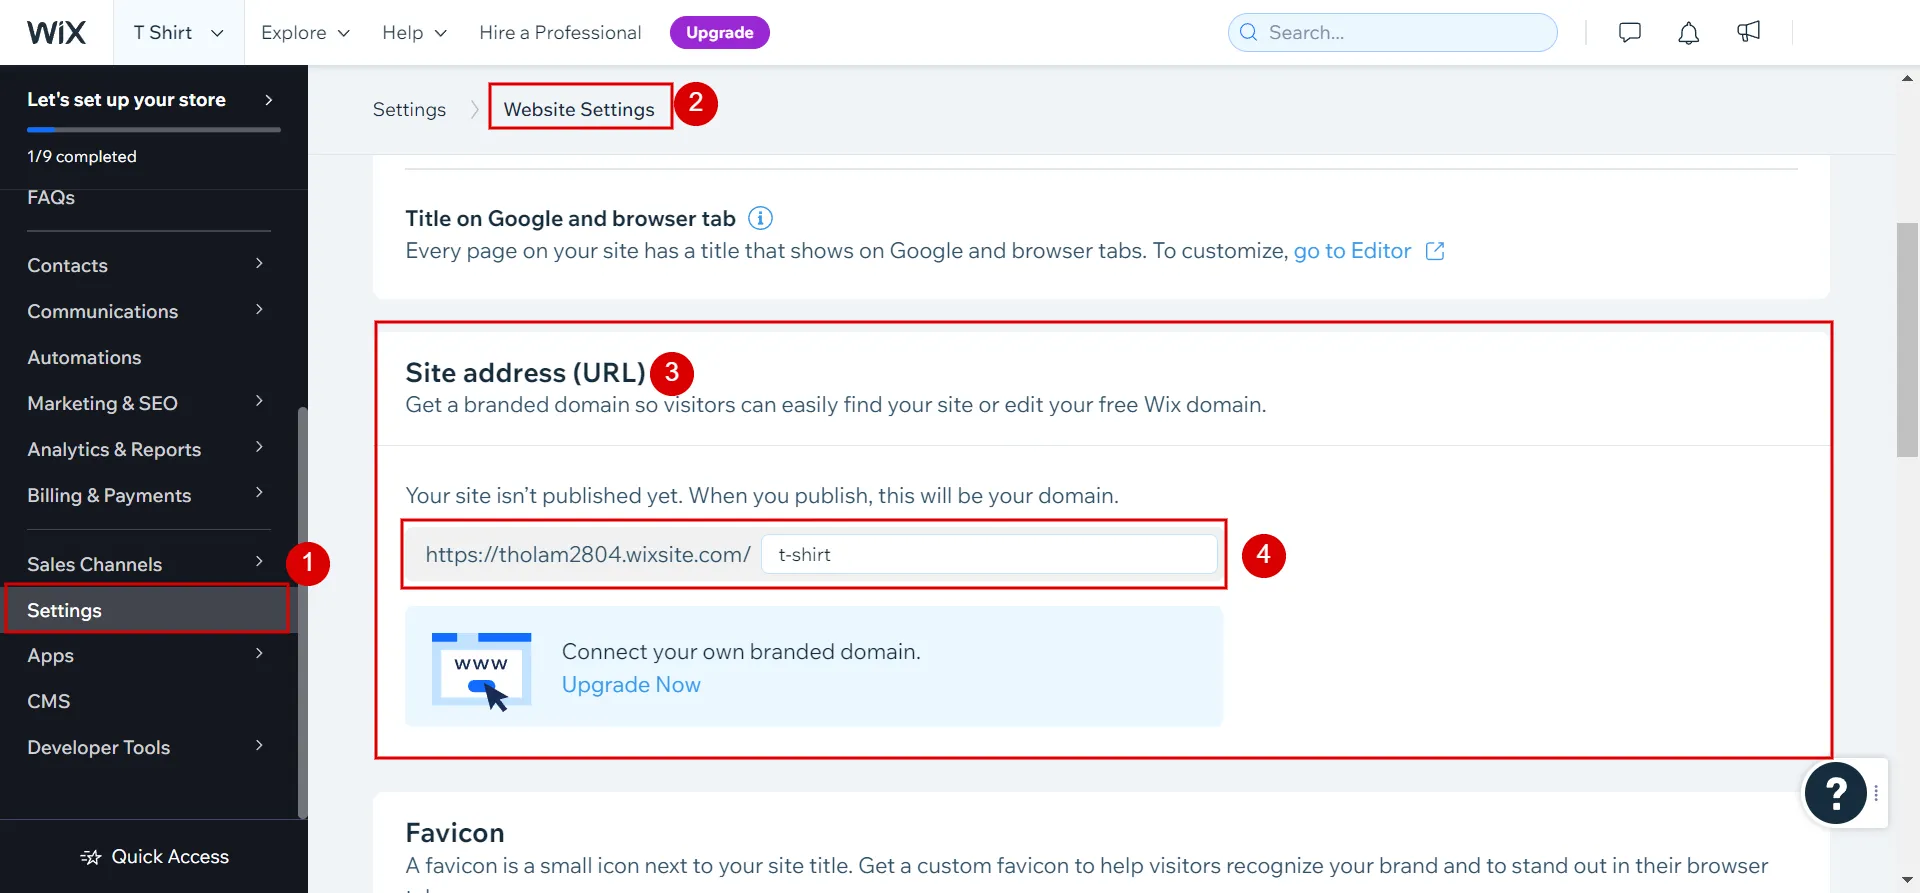
When you first launch your site, you get a free Wix URL that looks like this: accountname.wixsite.com/site-name.
Go to Settings (1) > Website Settings (2) > Site address (URL) (3) > add value in the field (4), then you get your free Wix URL.
If you wonder how to remove Wix from URL, here is a step-by-step guide:
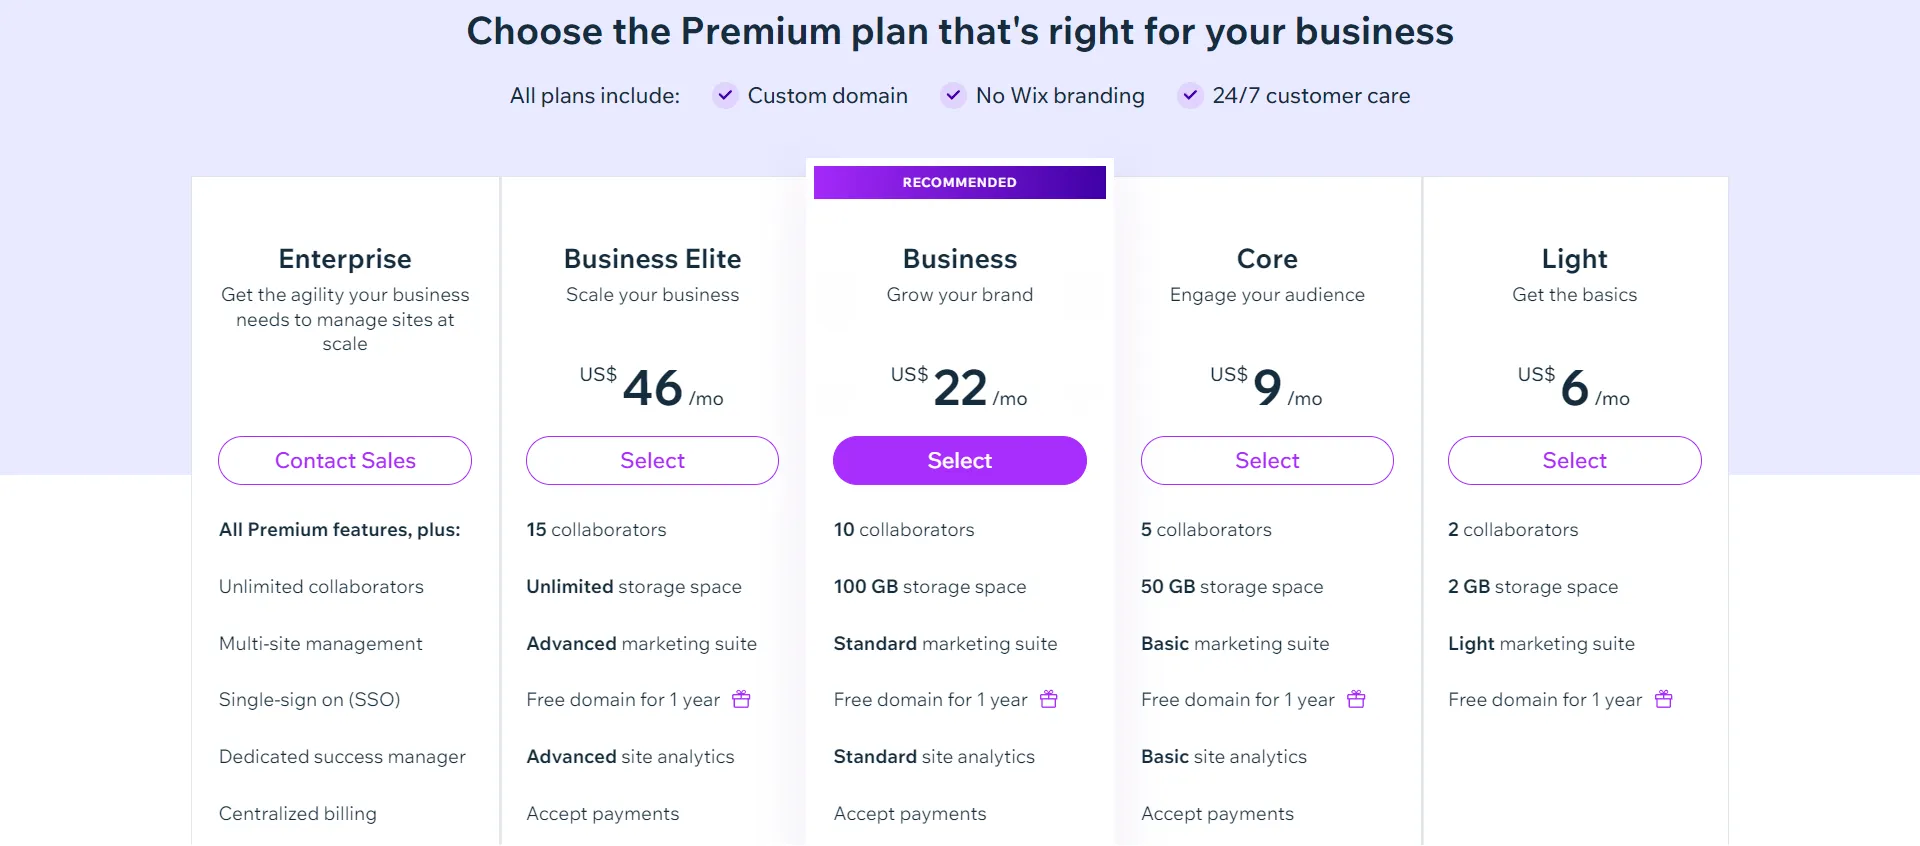
Step 1: Upgrade to a Premium plan
To get rid of Wix from your URL, you’ll have to switch to a paid plan. This lets you link your website to a custom name.
Step 2: Purchase a domain
To be continue, choose a domain registrar where you want to buy a unique domain name. A URL could be www.yourbusinessname.com.
Step 3: Connect your domain to Wix
Go to the Settings tab on your Wix homepage and click Domains > Connect a Domain > Connect a domain you already own.
Step 4: Update DNS settings
Depending on where you registered your name, you may need to change your DNS settings so that they point to Wix’s servers. Wix will give you the information you need to do this.
Step 5: Set the primary domain
Once your domain is connected and the DNS settings have been changed, go back to Settings > Domains. Pick your newly connected name and make it your site’s primary domain.
Step 6: Republish your site
Republish your Wix site after making the custom name the main one. This ensures that your site’s URL is now the custom domain you picked without the Wix subdomain.
Now, you know how to change URL on Wix by taking off the Wix on the free URL.
When changing URLs or domains, you must set up 301 redirects to maintain your site’s SEO value and user experience. It ensures that guests are sent smoothly to the correct pages and that search engines know about the changes. We’ll talk about how to set up a 301 redirect on Wix in the next part.
Bonus: How to Set up a 301 Redirect on Wix
Setting up a 301 redirect on Wix is crucial when changing URLs or domains to ensure a smooth transition for users and search engines. Here’s a step-by-step guide on how to do it:
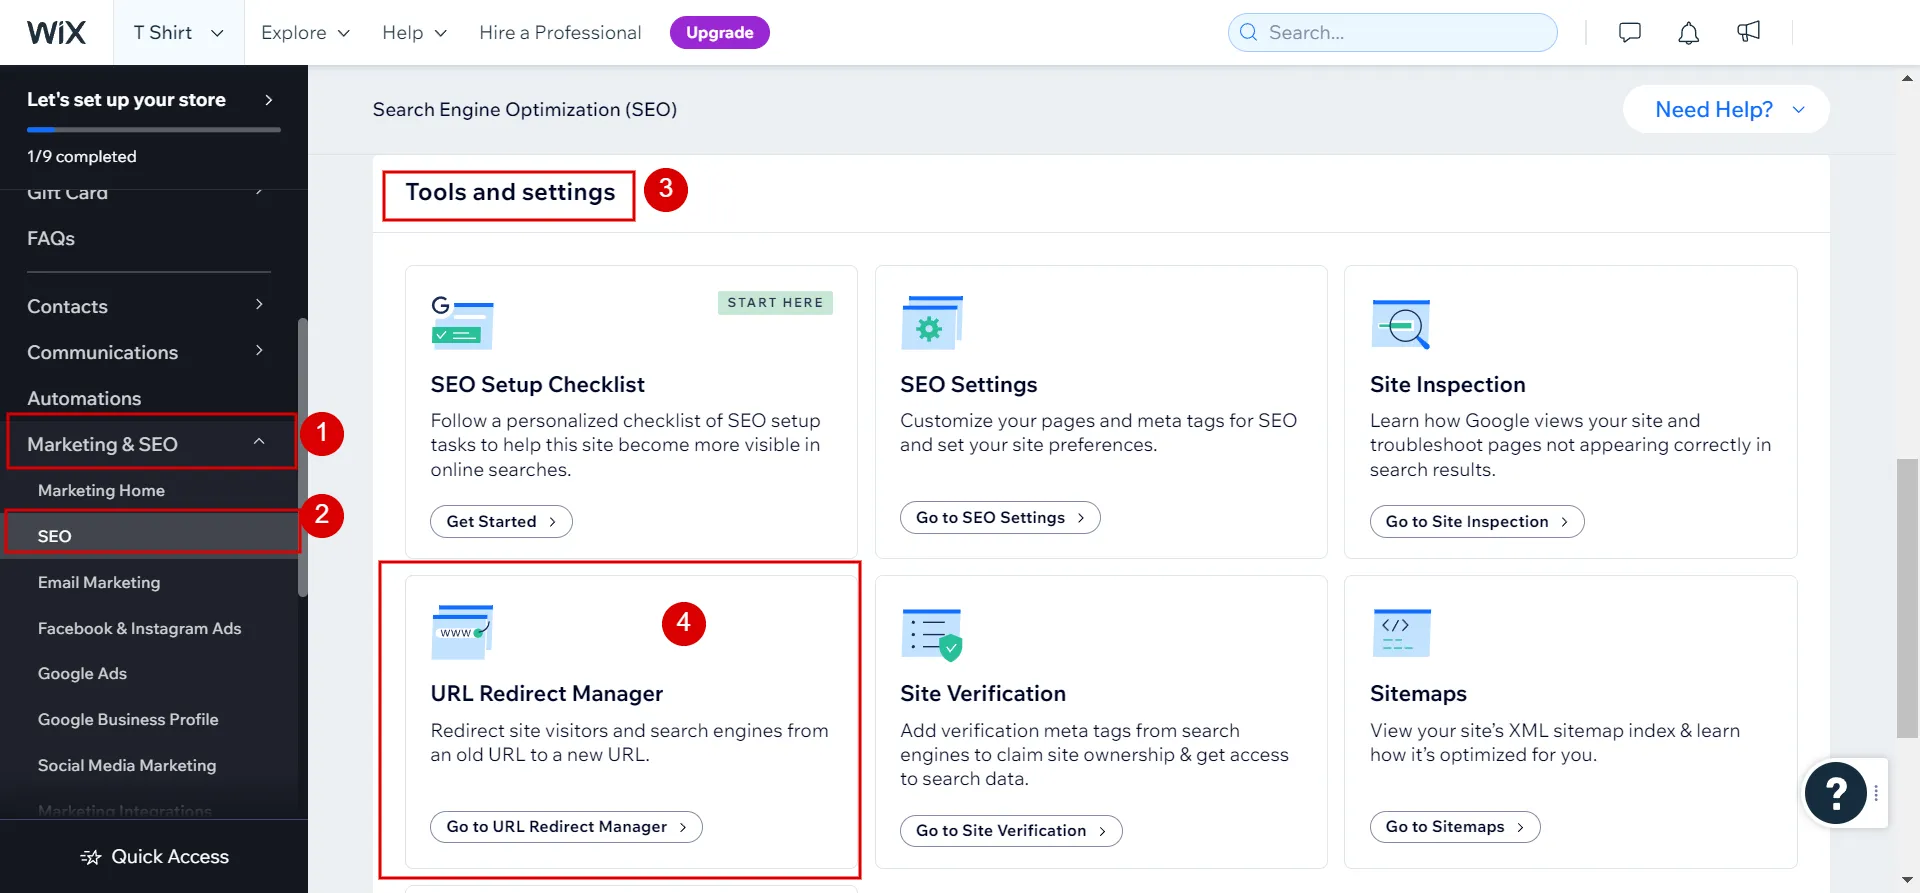
Step 1: Navigate to SEO dashboard > URL Redirect Manager
Access the dashboard of your Wix website and navigate to the Marketing & SEO (1) > SEO (2) tab.
Then, under Tools and Settings (3), locate and click URL Redirect Manager (4) to open the redirect settings.
Step 2: Create a new redirect
In the URL Redirect Manager, you’ll see an option to Create New Redirect. Click on it to start setting up the 301 redirect.

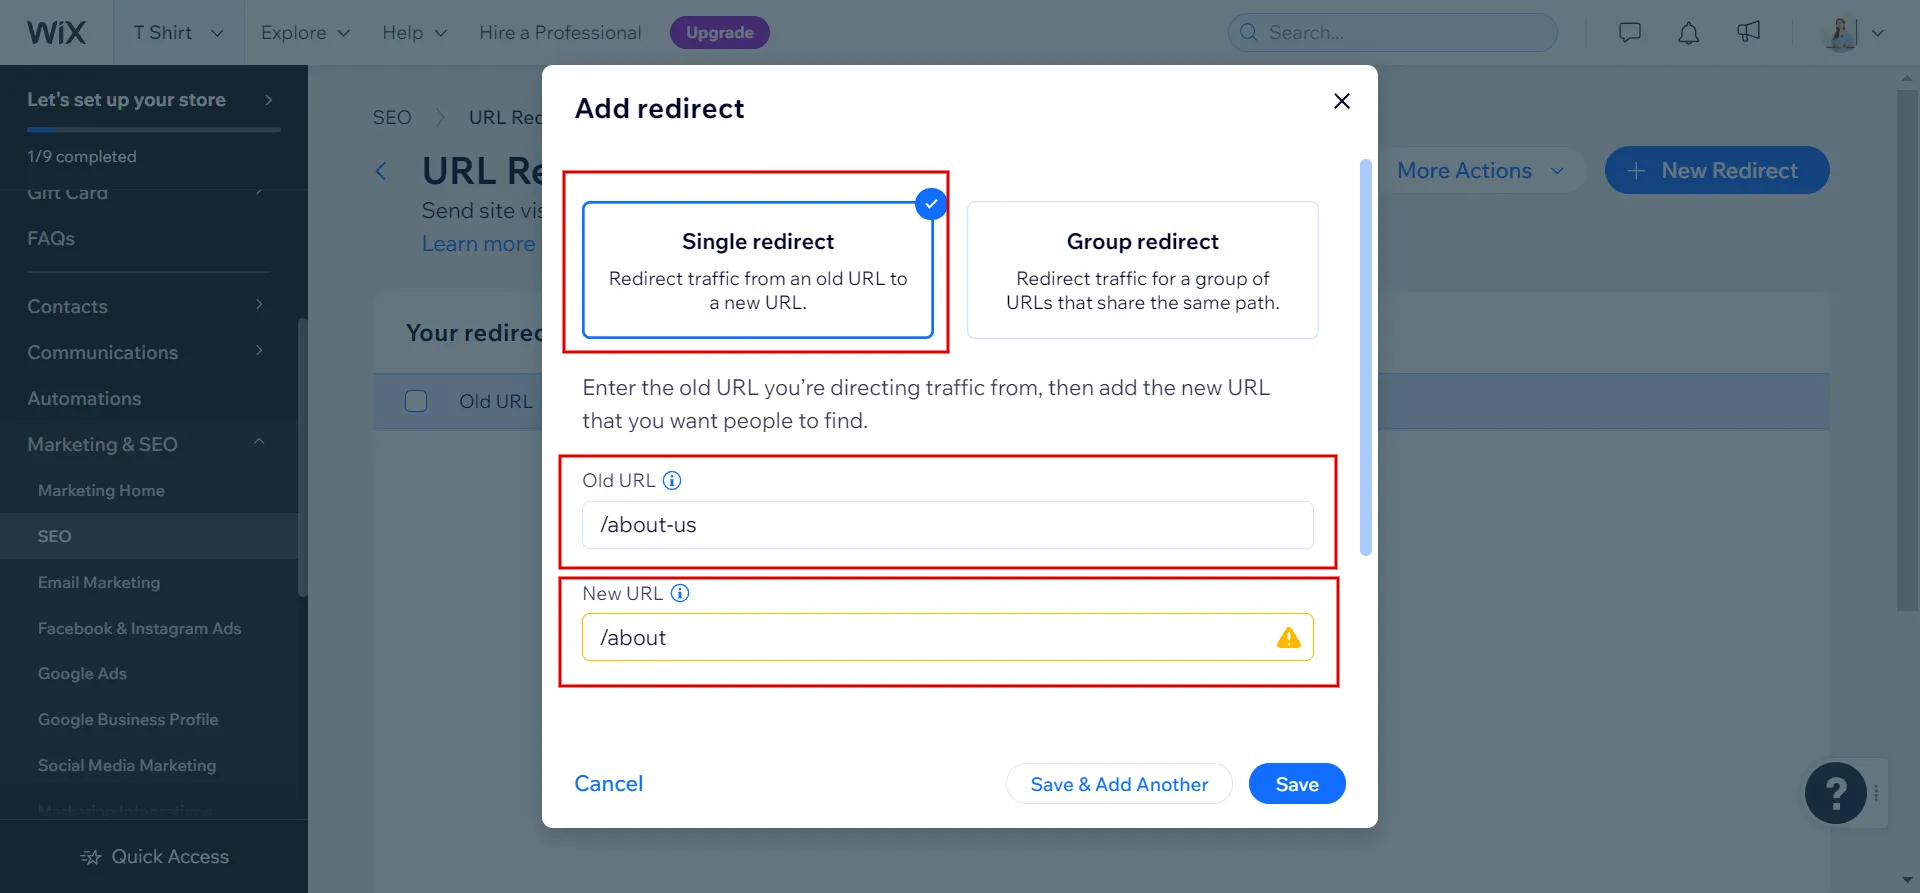
Step 3: Choose redirect type
After that, choose the option for a single redirect. Under Old URL, enter the URL you want to redirect. Under New URL, enter the URL to which you want to redirect.
Step 4: Select 301 permanent redirect
Choose the 301 – Permanent Redirect option. This tells search engines that the change is permanent and helps preserve SEO rankings.
Step 5: Select Save & Close
Depending on your needs, you can add more redirects or simply select Save & Close to finalize the process.
After setting up the redirect, test it by entering the old URL in a web browser. It should automatically redirect to the new URL you’ve specified.
Want more information about Wix? Check out the following pieces to learn about this eCommerce platform:
How to Change URL on Wix – FAQs
[sp_easyaccordion id=”64715″]
Final Words
Changing the URLs on your Wix site needs careful thought and an understanding of what will happen as a result. Hopefully, our article today has successfully guided you through the steps on how to change URL on Wix to fit your changing content and design needs.
LitExtension, the #1 Shopping Cart Migration Expert, has the most accessible and affordable option for Shopify eCommerce. Our LitExtension blog and eCommerce community can give you more tips on how to run your online store successfully.