You may occasionally update the design of your Shopify store to make it stand out and draw customers in. How do you edit theme settings on Shopify to update the new look of your online store? Luckily, Shopify themes enable you to alter the appearance and feel of your storefront in various options.
In this article, we – LitExtension, will go over some main points to assist you in updating your Shopify online store, as follows:
- how to edit theme settings on Shopify generally
- how to customize theme settings in Shopify
- and undo & redo changes in Shopify theme settings
Let’s clarify Shopify theme settings first before discussing the specific guidelines.
Understand Shopify Theme Settings
Shopify theme settings allow you to change your online store’s colors, logo, typography, buttons, social media links, cart, checkout settings, etc.
Your entire online store will be affected when you change Shopify theme settings.
Thus, before adjusting Shopify themes, you should read some recommendations:
- Remember to duplicate Shopify theme file. This backup will be helpful if you make a mistake and need to start over.
- Be aware of the available level of support.
- Understand the conditions and the process of uploading images.
Note that while you can do minor customizations with Shopify’s default theme (Dawn or Debut theme), you’ll be limited if you want to make your store more unique.
Furthermore, you are not required to use the first theme you select. You can always switch Shopify themes and store 20 of the best Shopify themes in your library. You can even build a theme from scratch if you need something special.
How to Edit Theme Settings on Shopify Generally
Follow our step-by-step instructions to edit theme settings on Shopify in general.
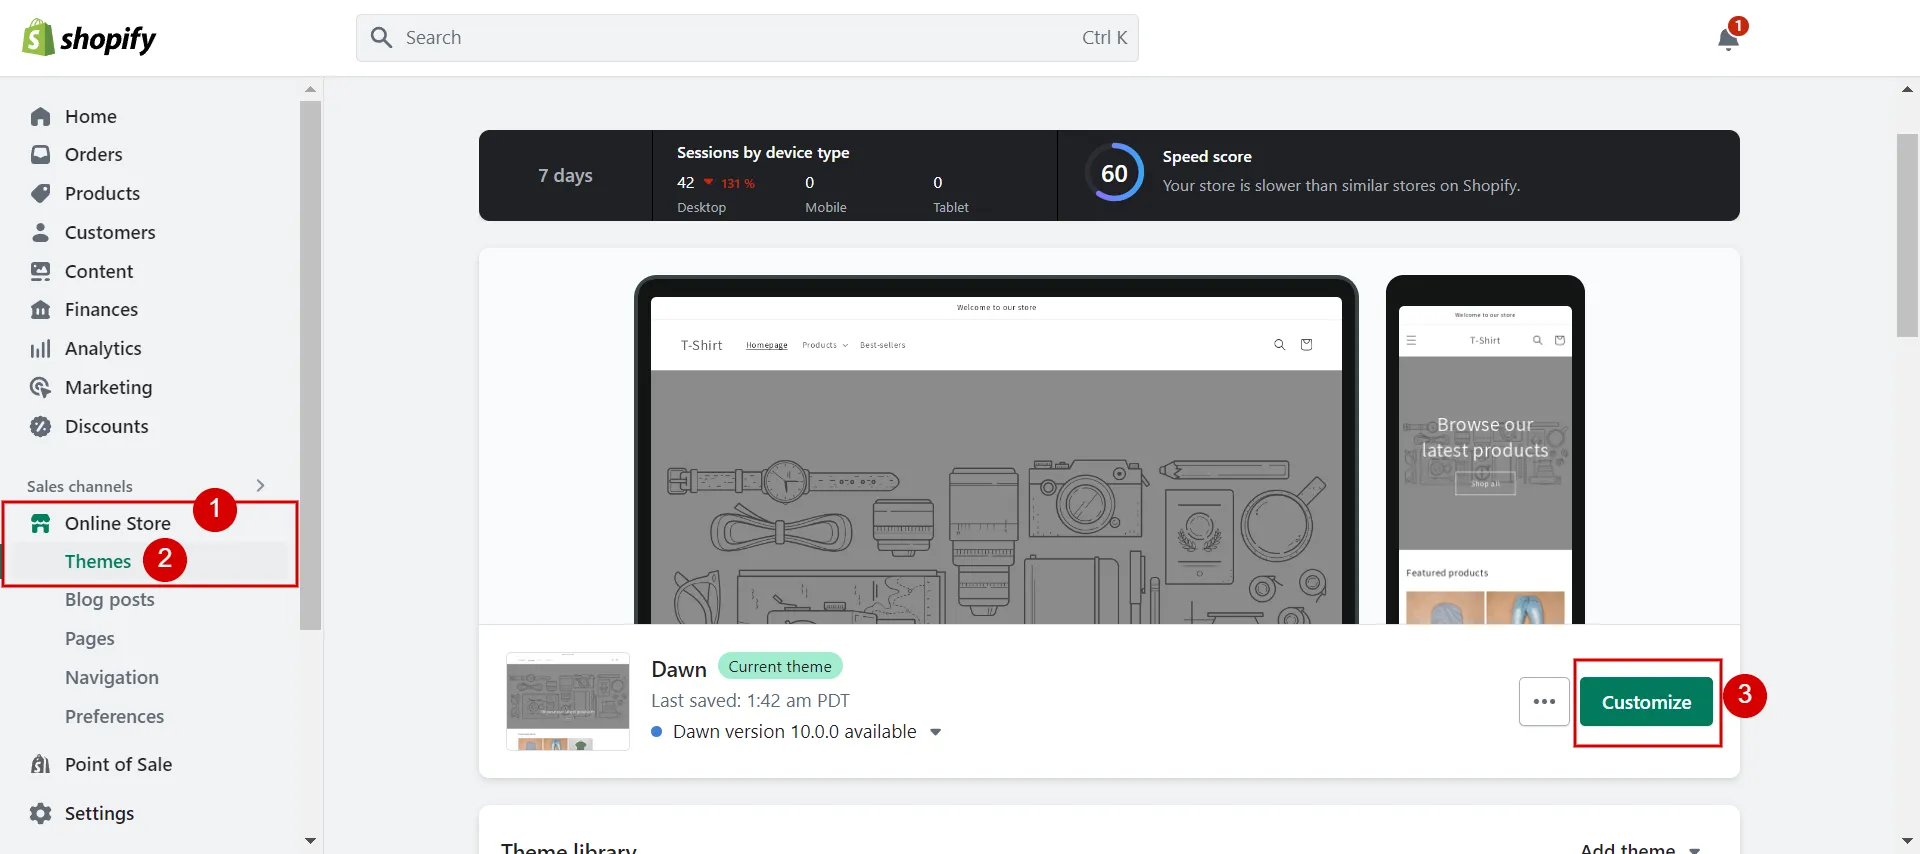
- Step 1: Navigate to Online Store (1) > Themes (2) > Customize (3) the current theme.
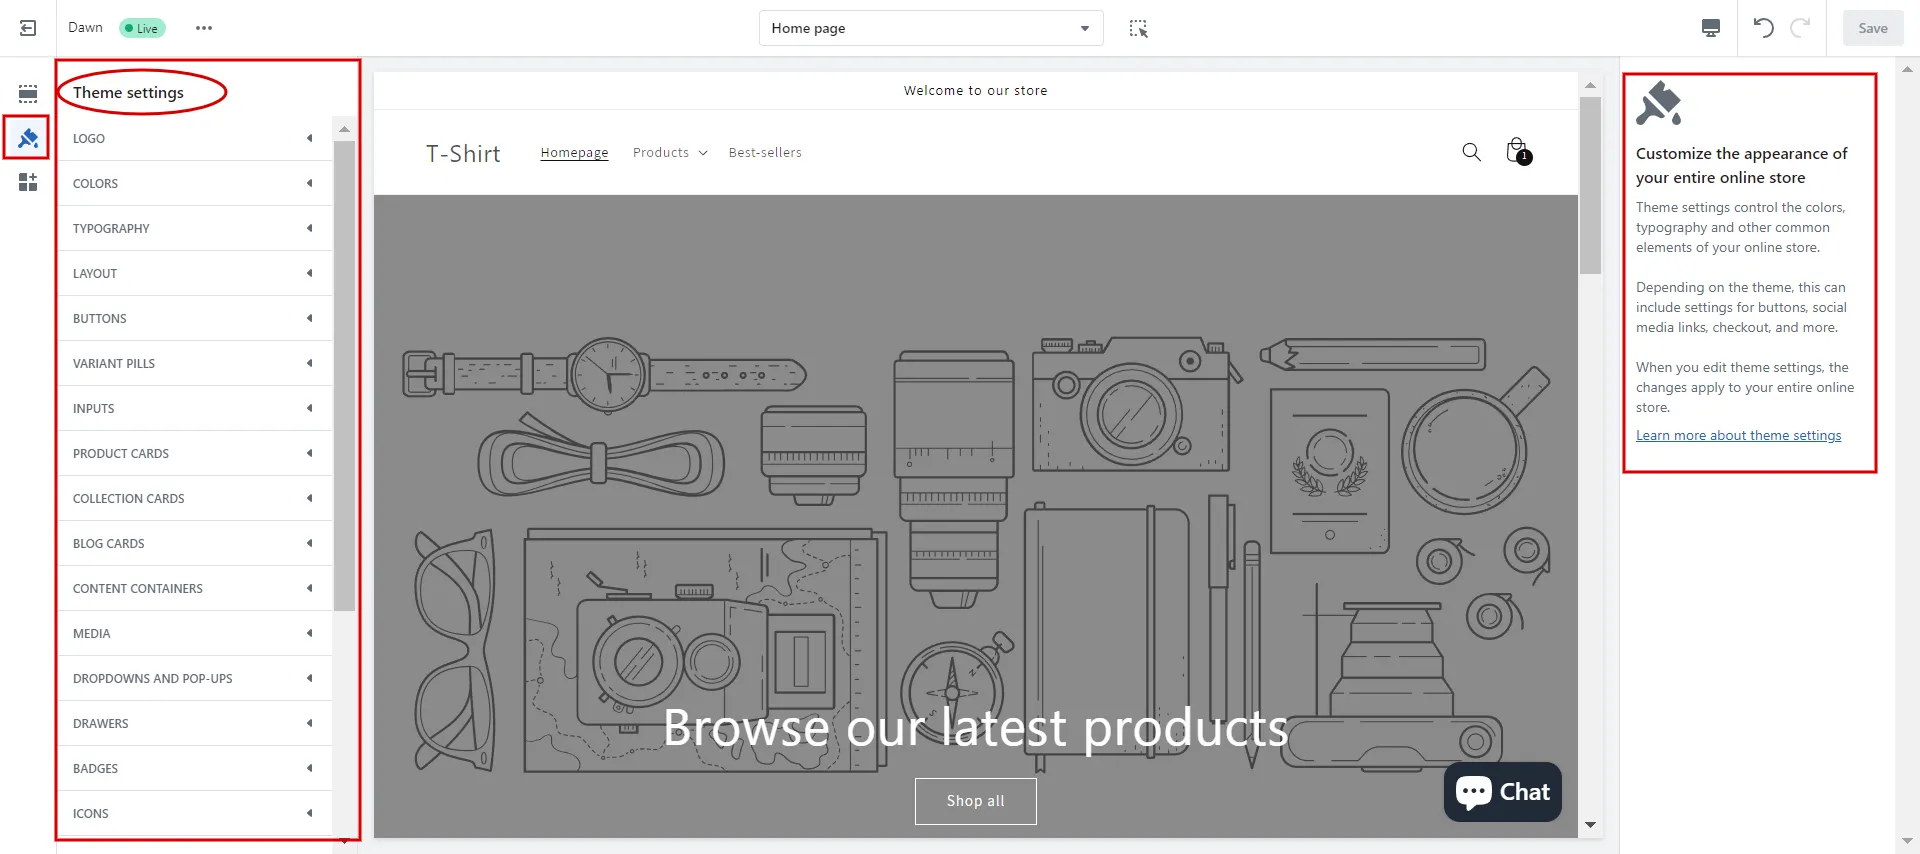
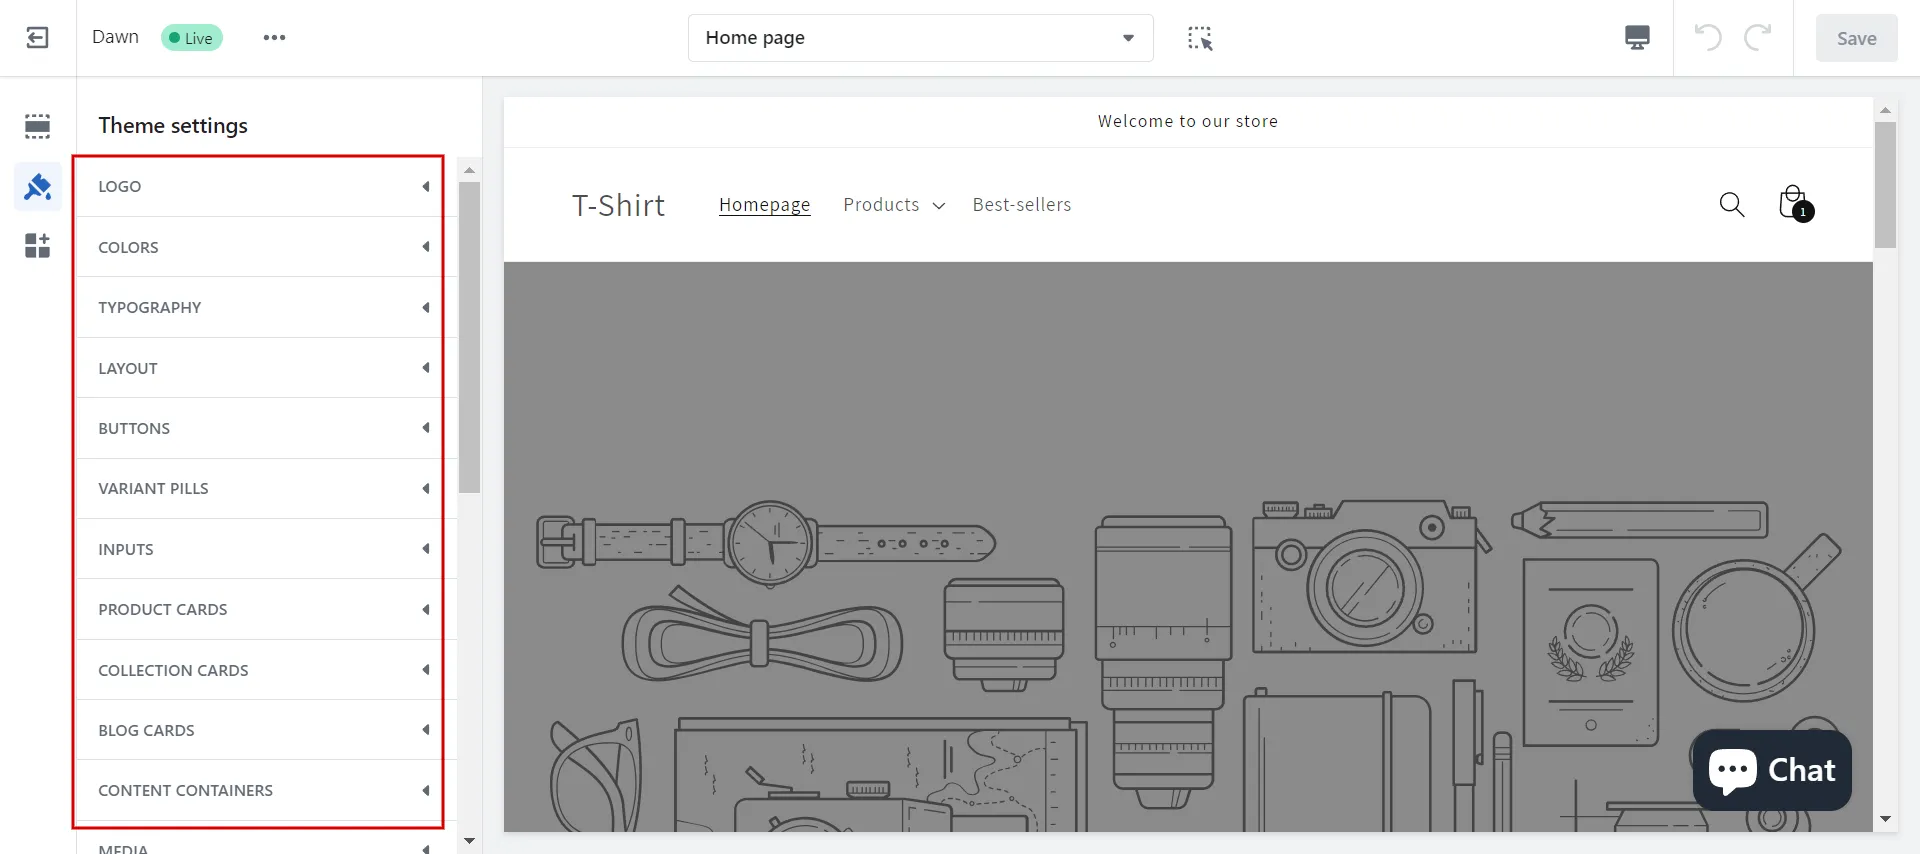
- Step 2: In the Shopify Theme Editor, choose Theme Settings.

- Step 3: Make any changes to your online store’s typography, colors, social media links, and checkout settings.
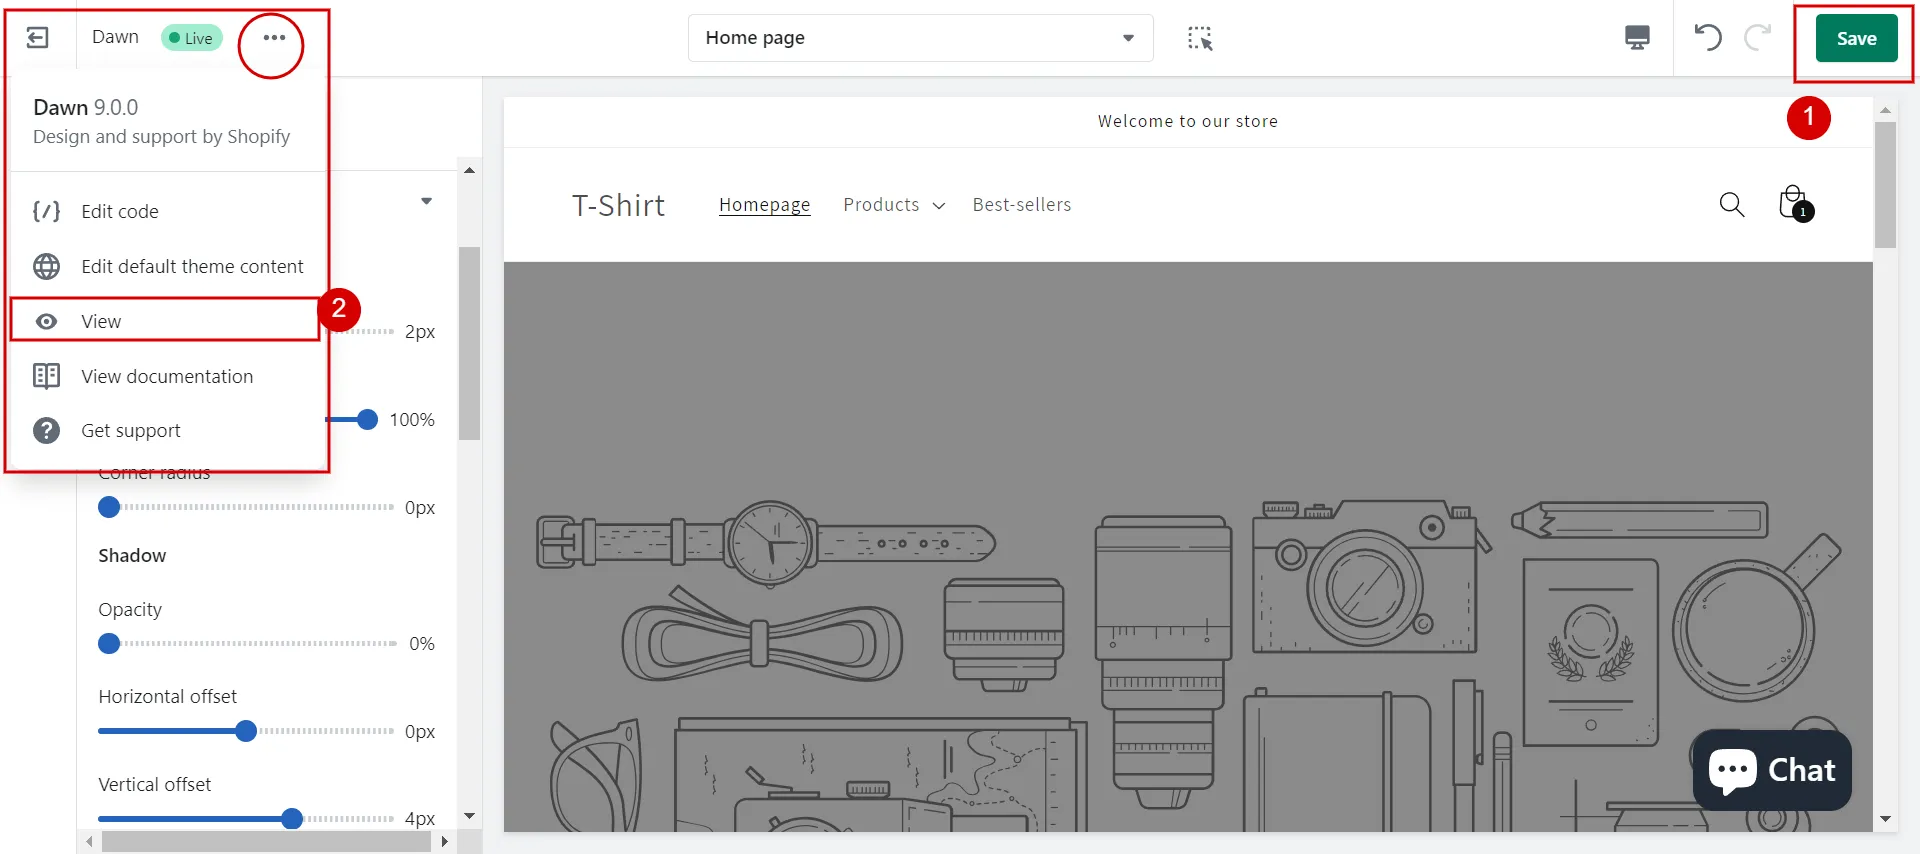
- Step 4: Preview and Save changes.
You know how to edit theme settings on Shopify generally. Let’s dive deep into the details guides.
Learn more about How to Custom Shopify Themes, a complete beginner guide!
How to Customize Theme Settings in Shopify
Your options will vary significantly based on your chosen theme. In this section, we take the Shopify Dawn theme as an example to show you how to edit Shopify themes settings.
#1 Edit Logo & Favicon
- Step 1: In Theme settings, click Logo.
- Step 2: Click Select image, then do one of the following:
- Choose a logo image you have already uploaded to your gallery.
- Choose Add Images to upload an image from your local computer.
- Explore free images to search and select a free image.
3. Step 3: Add alt text to your logo image:
-
- Select Edit alt text.
- Add a brief description.
- Choose Save.
To change the logo’s width after uploading it, move the slider to the pixel setting.
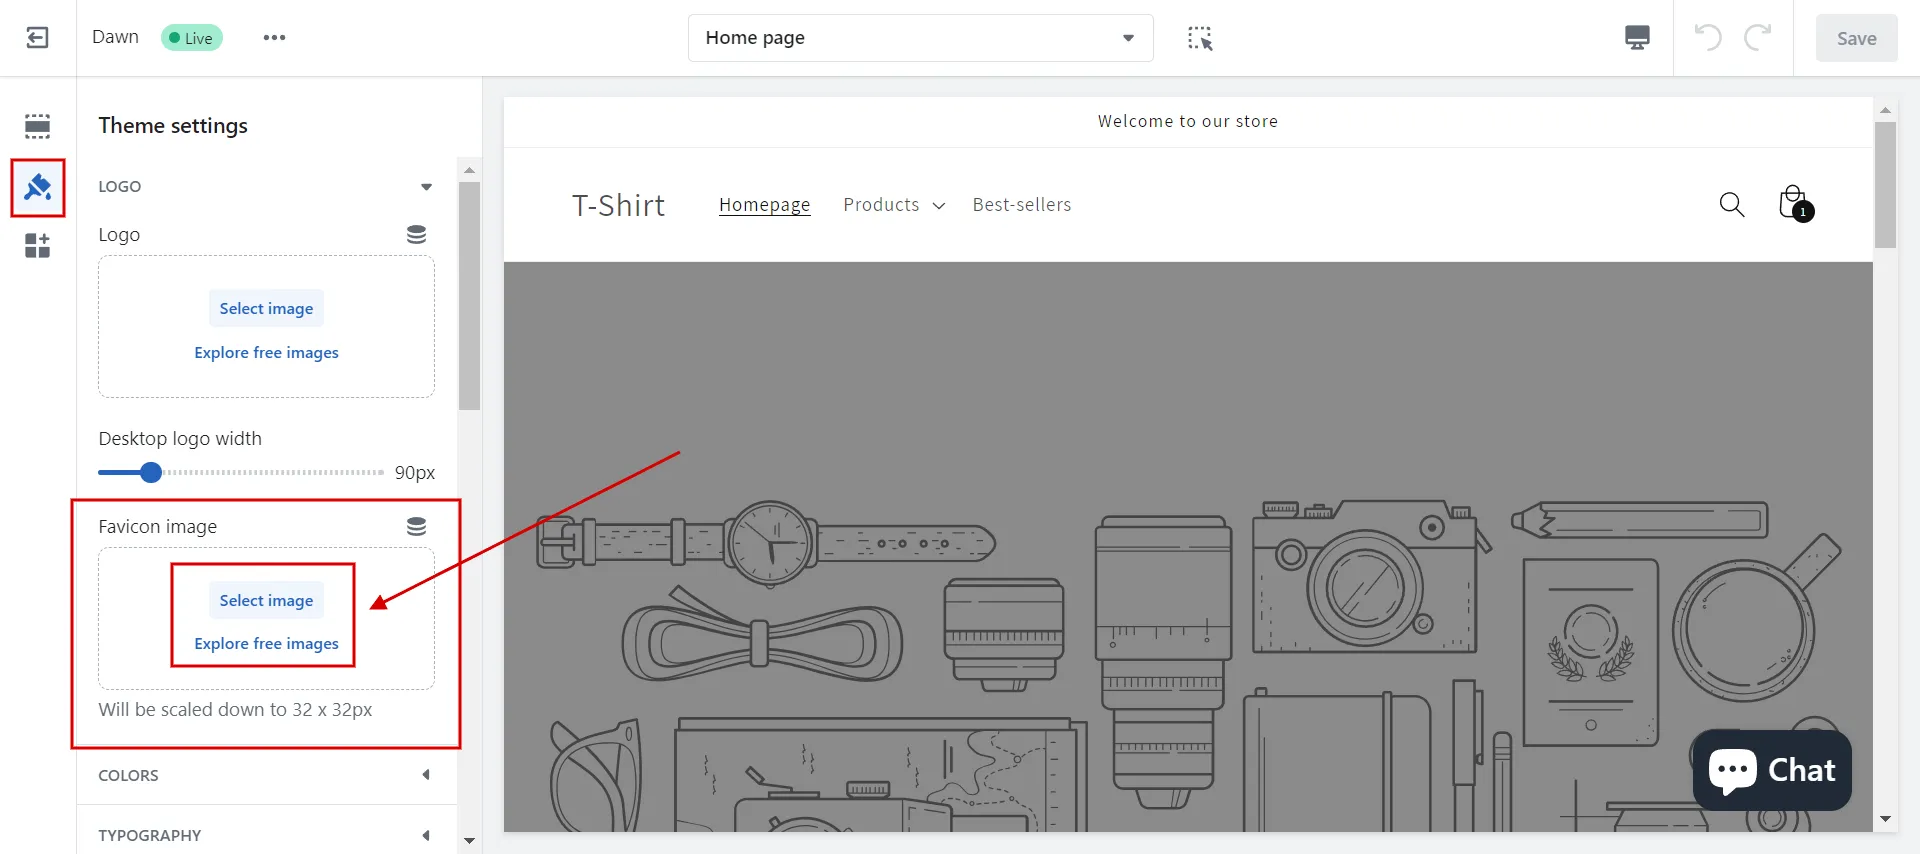
Note: Apply the same procedures to Favicon.
#2 Edit Colors
Your online store’s various sections can use up to 21 color schemes you can design.
Follow our instructions on how to change theme colors Shopify.
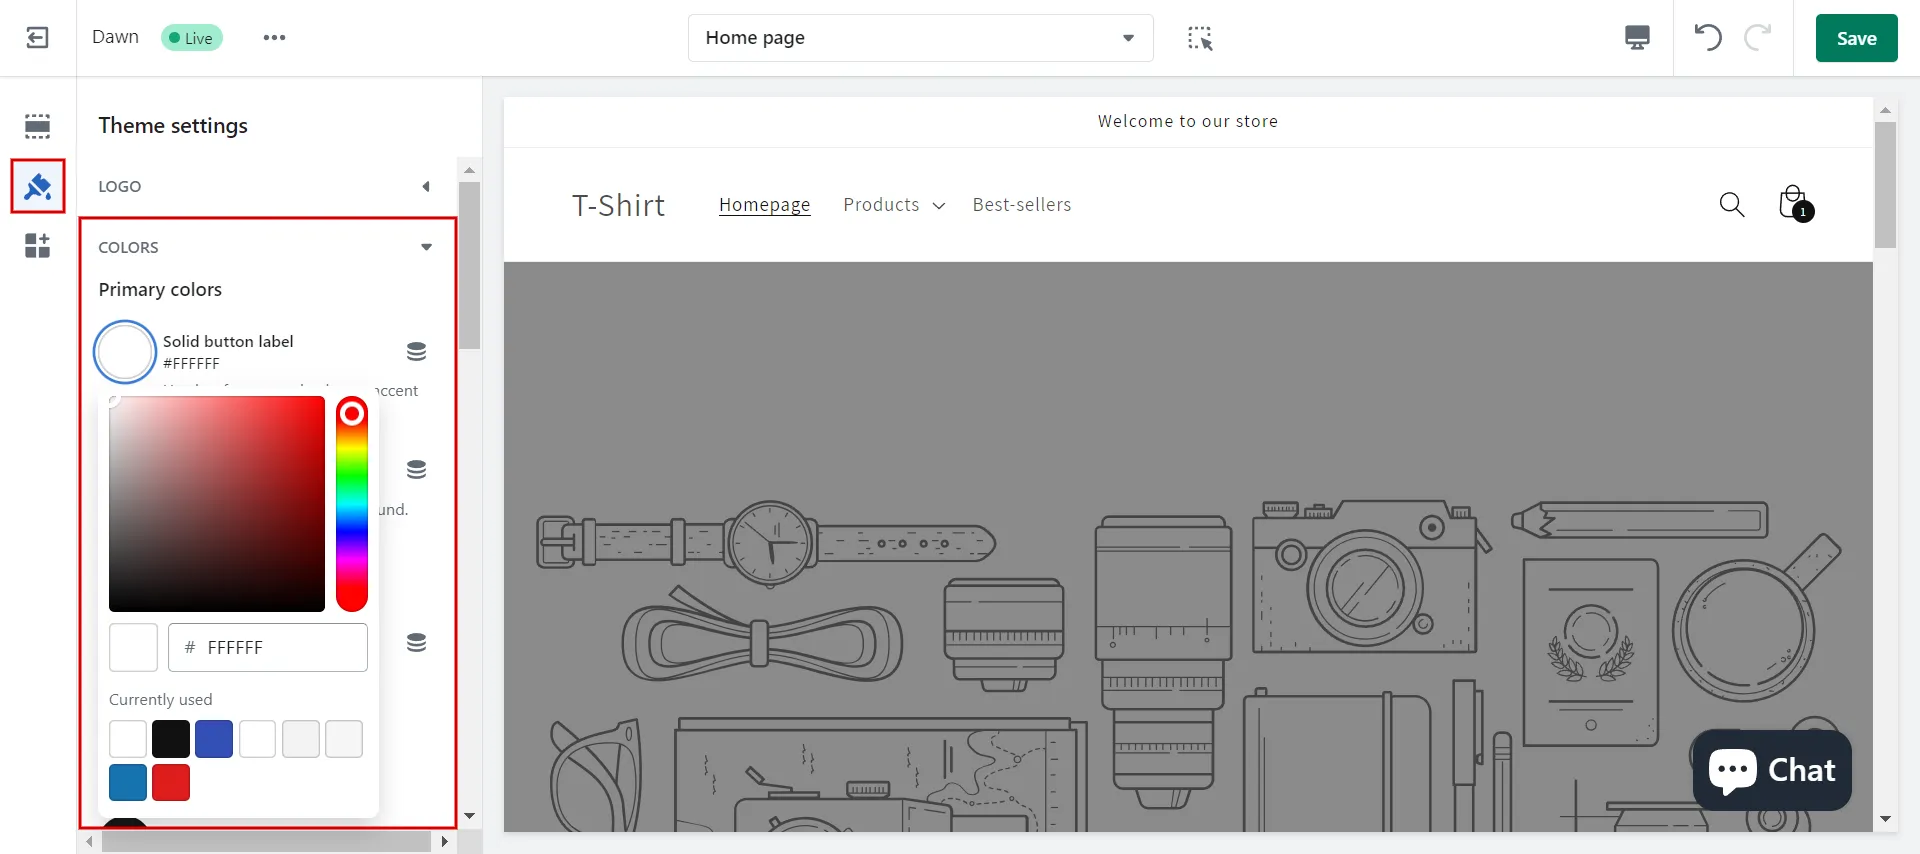
- Step 1: In Theme settings, click Colors.
- Step 2: To add a new color scheme, click add scheme or select an existing one.
- Step 3: Click the color swatch for the content type color.
- Step 4: Enter a hexadecimal color code or use the color picker to set your color. Remove the hex code from the text field to change the color to transparent.
- Step 5: Click Save.
#3 Customize Typography
You can customize the font style and size for your heading and body text on your online store. Here are the guidelines for altering typography and font sizes.
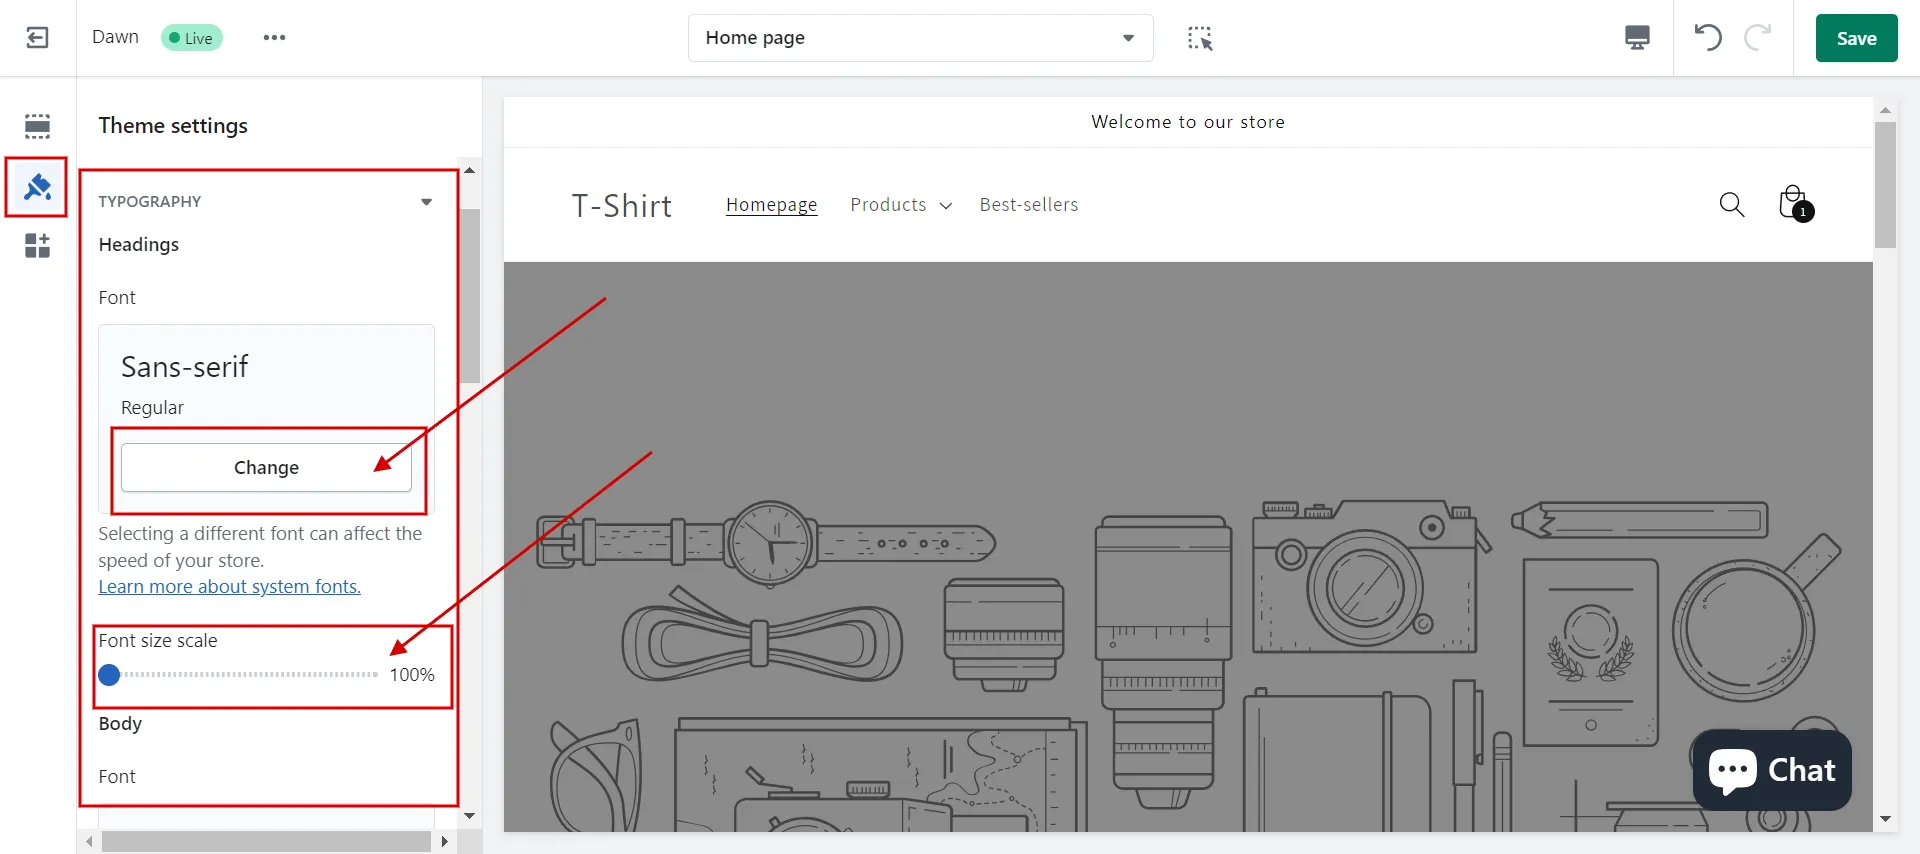
- Step 1: In Shopify settings, click Typography.
- Step 2: Hit Change to use the font picker for heading and body.
- Step 3: Use the search field to look through the available fonts or select Load more.
- Step 4: Click Select after picking the desired font name.
- Step 5: Use the Font size scale to change the font size for heading (min 100% – max 150%) and body (min 100% – max 130%).
- Step 6: Click Save.
#4 Change Layout
You can specify a maximum width for your online store’s display using the layout, as follows:
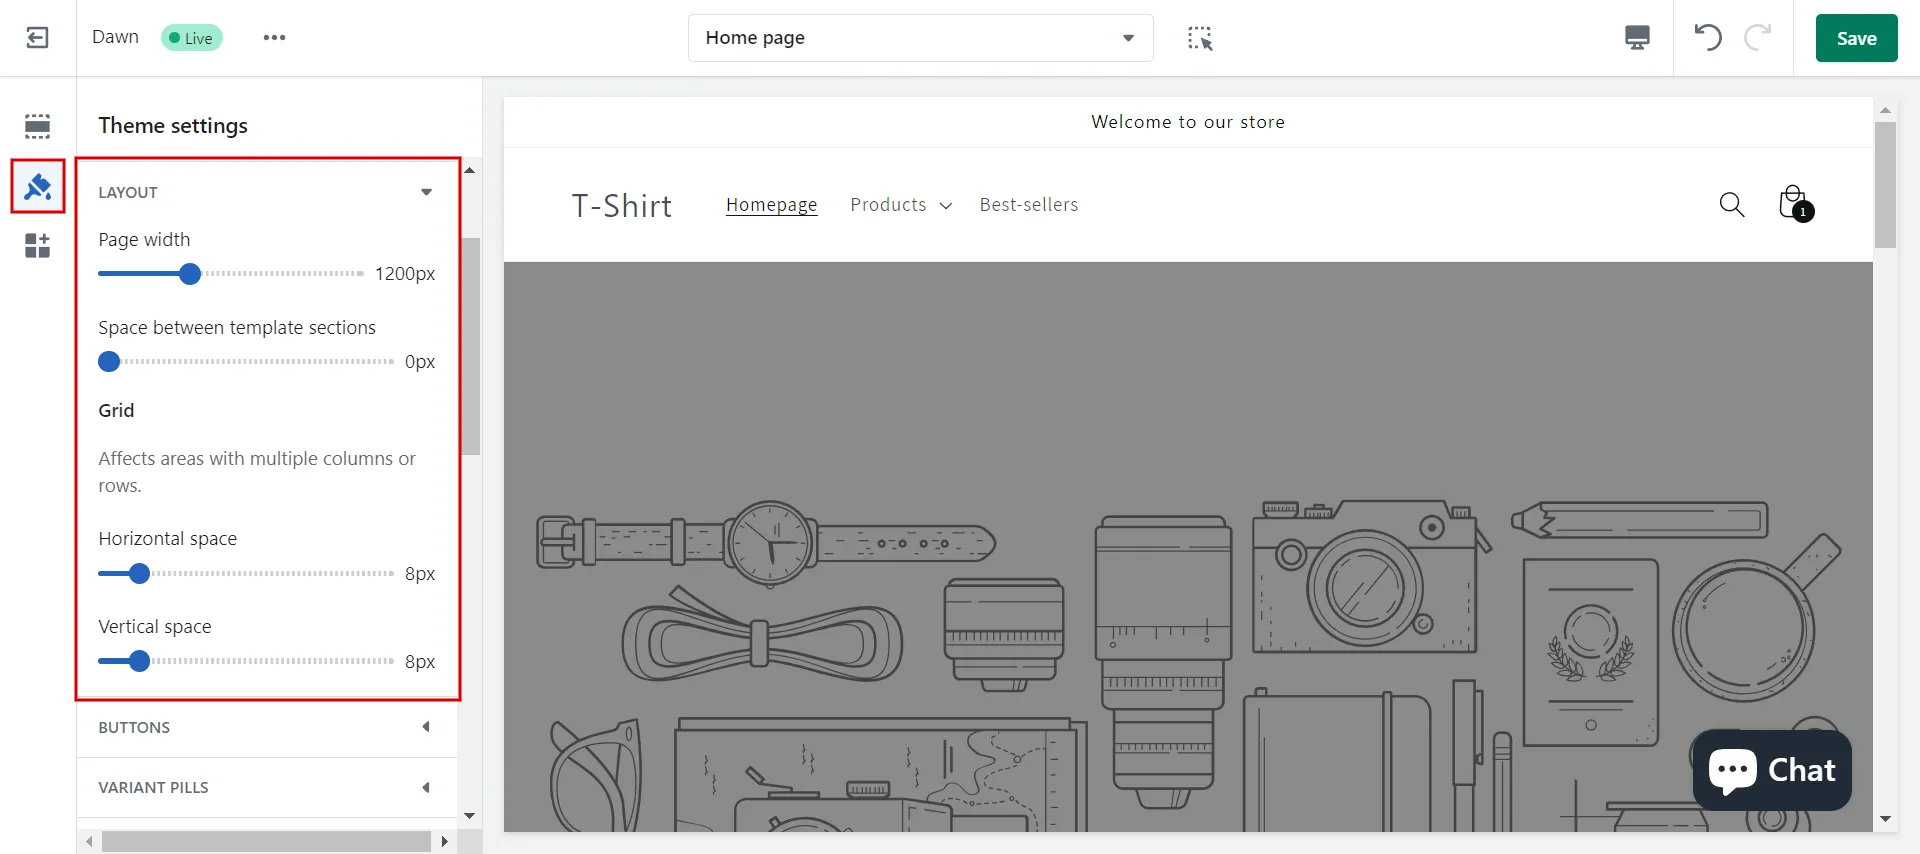
- Step 1: In Theme settings, click Layout.
- Step 2: Choose between a page width of 1000 pixels or 1600 pixels using the range slider (1600 pixels is the default setting).
- Optional: Use the range slider to add vertical space between sections (Maximum: 100px).
- Optional: To add space between grid content, use the horizontal and vertical space range sliders if your layout is a grid.
- Step 3: Click Save.
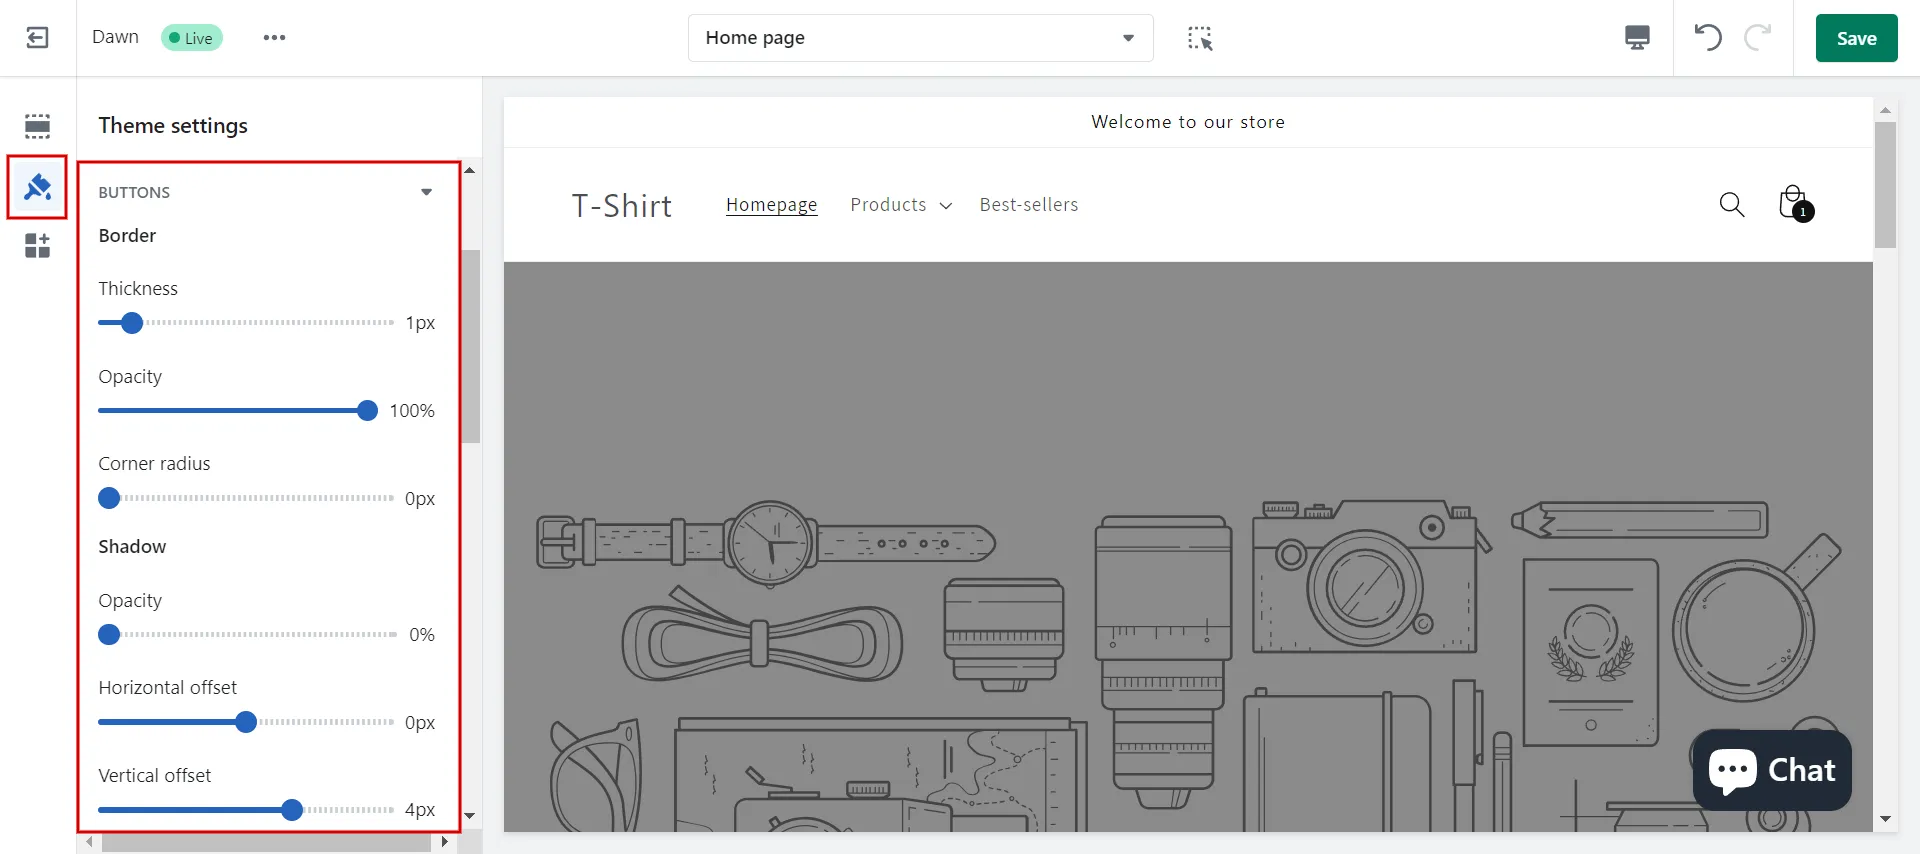
#5 Adjust Buttons, Variant pills, Inputs, Drawers
Some interactive content types, like drawers, buttons, variants, and quantity inputs, allow you to change the borders and shadows.
[wptb id=61629]
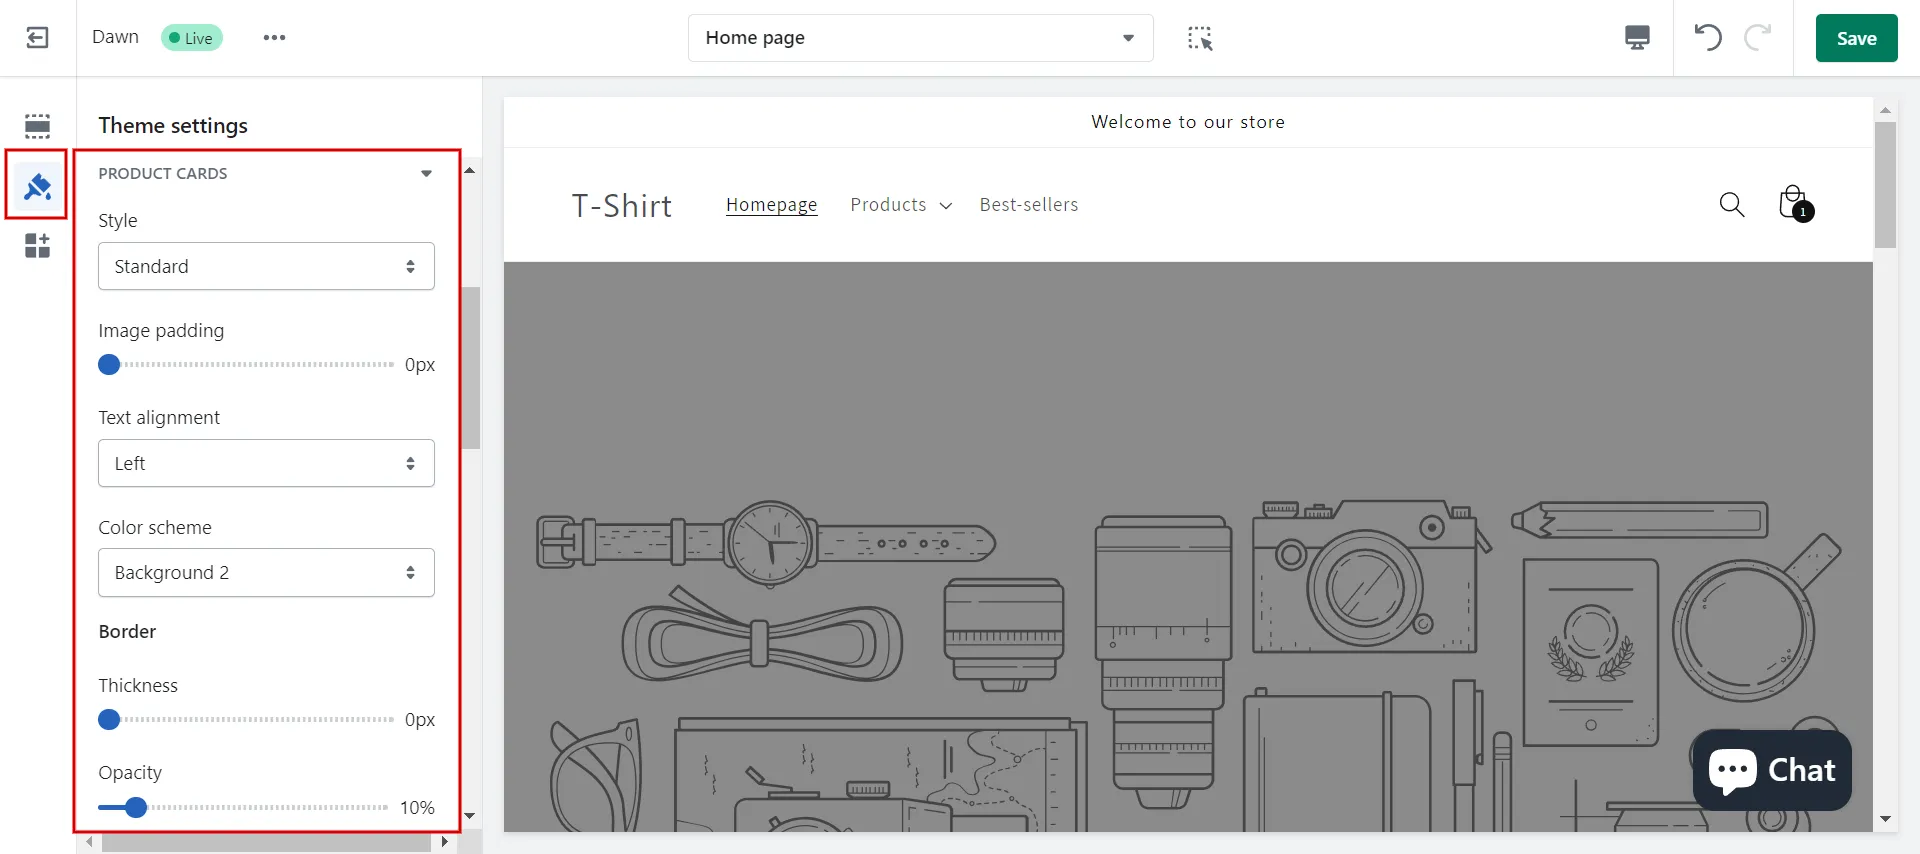
#6 Customize Cards
The settings for product cards, collection cards, and blog cards let you alter the appearance of each type of sectioned separate area. You can alter these cards’ color, alignment, image padding, borders, and shadows.
- Step 1: In Theme settings, click Product Cards, Collection Cards, or Blog Cards.
- Step 2: Select a card Style in drop-down menu.
- Step 3: Use the sliding scale to add image padding. Your card images will have more space now.
- Step 4: Set the Text alignment using the dropdown menu. Pick from left, center (the default), or right.
- Step 5: Choose a Color scheme.
- Step 6: Alter Border by using the sliding scales.
- Step 7: Edit Shadow by using the sliding scales.
- Step 8: Click Save.
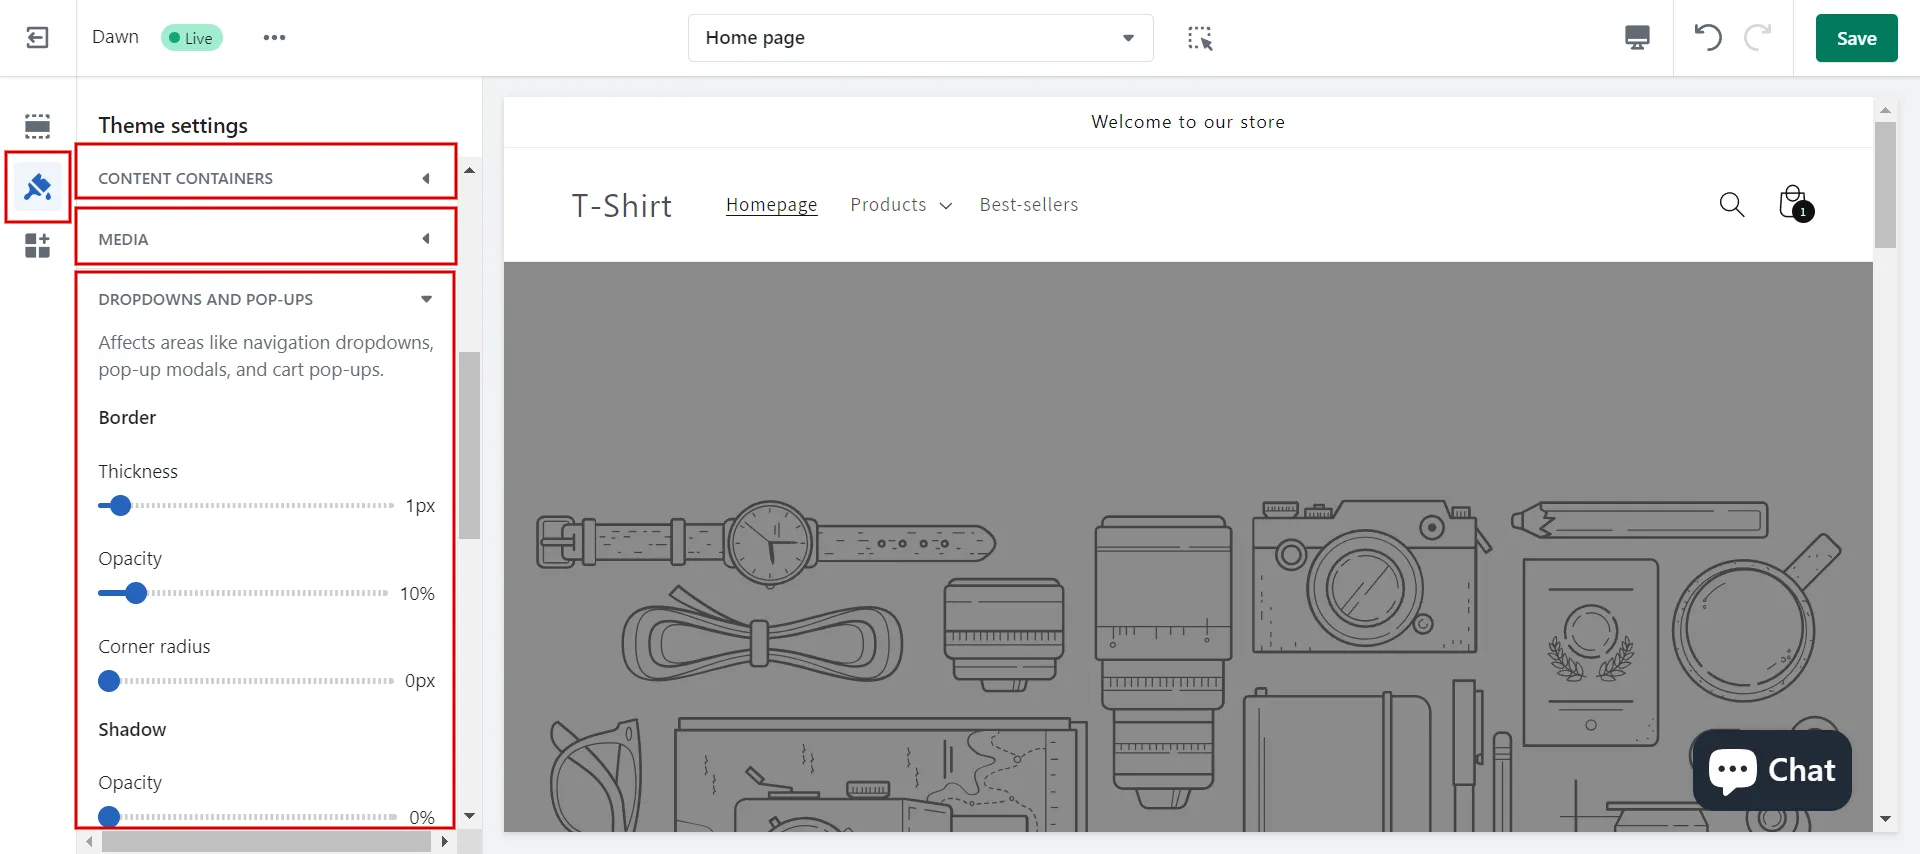
#7 Adjust Content containers, Media, Dropdowns and pop-ups
Containers are the text portions of content sections, such as a slideshow’s text box, an image banner, or the columns in sections with multiple columns.
Media is a section of visual elements, like a product image or an image in an Image with Text section.
Dropdowns and pop-ups include navigation dropdowns, pop-up modals, and cart pop-ups.
Here are some quick instructions for modifying the Border and Shadow of content containers, media, dropdowns and pop-ups.
- Step 1: Click Content containers / Media / Dropdowns and pop-ups in Theme settings.
- Step 2: Change Border by using the sliding scales.
- Step 3: Change Shadow by using the sliding scales. (Reduce the opacity to 0% to delete the shadow.)
- Step 4: Click Save.
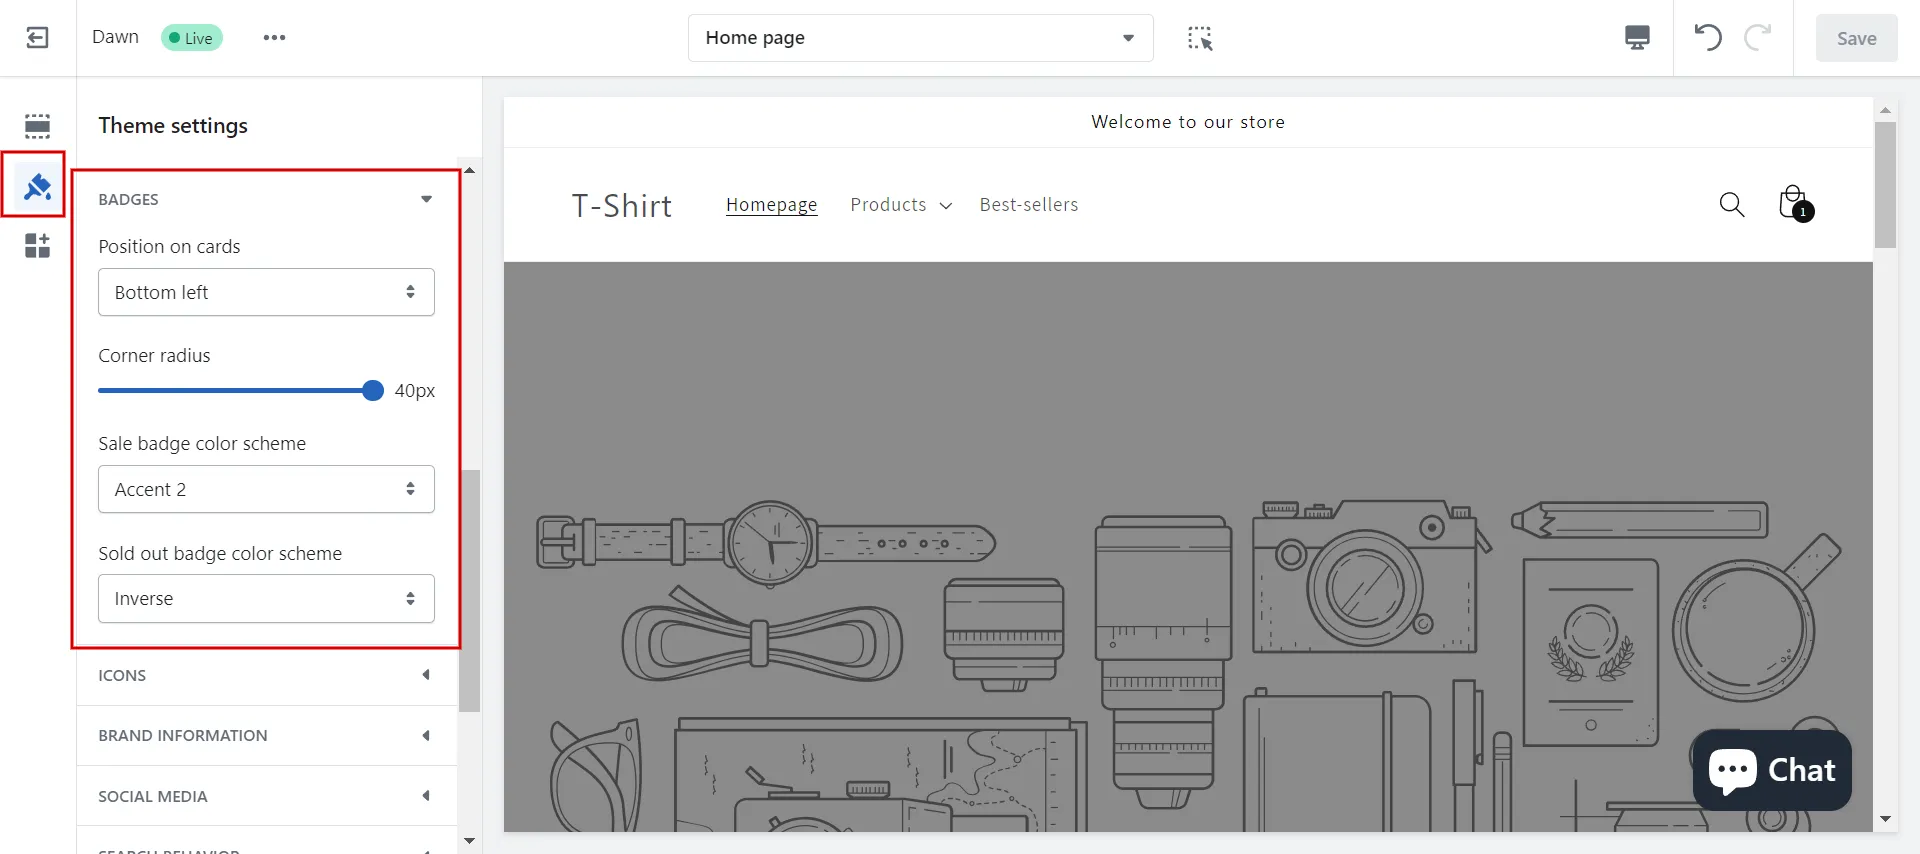
#8 Edit Badges, Icons
When the price decreases, or the inventory level reaches 0, sale and sold-out badges are automatically added to your product images. You can change the placement, shape, and color of your badges as follows:
- Step 1: In Theme settings, click Badges.
- Step 2: Choose the badge position within the product cards: the top left, top right, bottom left (default), or bottom right.
- Step 3: Choose rounded corners with the sliding scale. When the corner radius is set to 0, square badge edges are produced; badge edges are rounded when the radius increases.
- Step 4: Select a Color scheme for your badges.
- Step 5: Click Save.
Small images known as icons can be added to certain blocks or sections. You can choose the color scheme for your icons in the theme settings.
- Step 1: In Theme settings, click Icons
- Step 2: Choose the icon color between Accent 1, Accent 2, Outline button, or text color for your store icons.
- Step 3: Click Save.
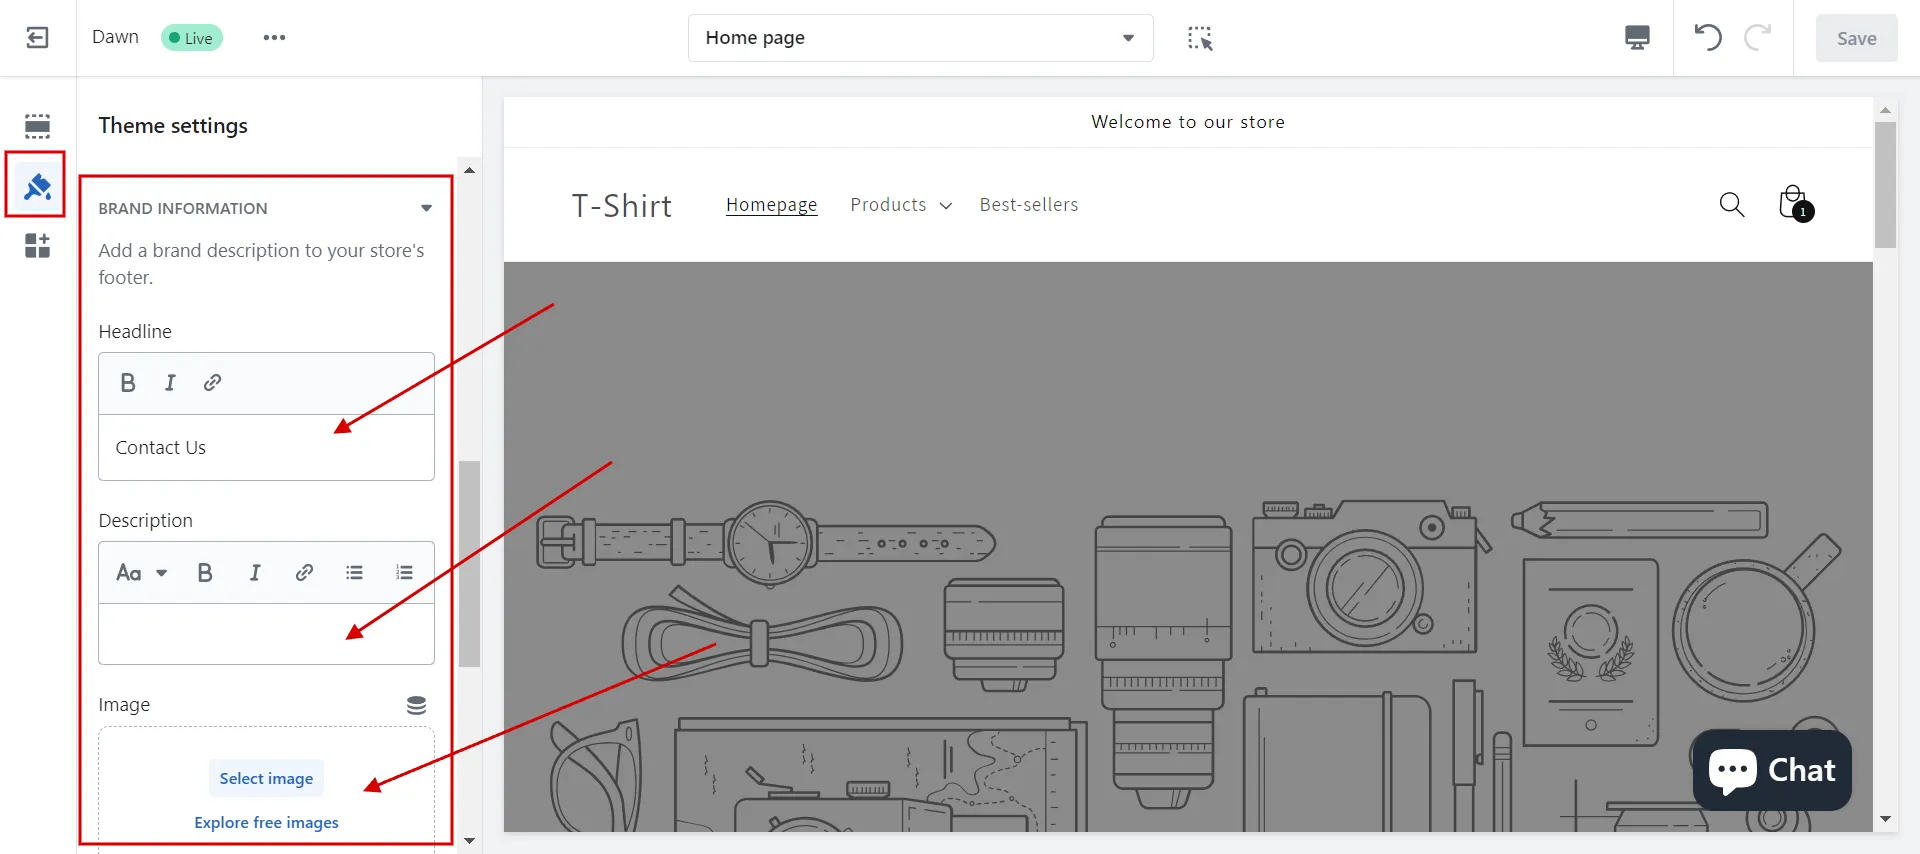
#9 Edit Brand information
You may provide details about your brand. Below are the step-by-step guidelines.
- Step 1: In Theme settings, click Brand information.
- Step 2: Add a headline.
- Step 3: Add a description.
- Step 4: Choose Select image and do one of the following:
- Click Select to use an image you uploaded to your Shopify gallery.
- Click Upload to use an image from your local computer.
- Click Free images to search and select a free image.
- Step 5: Toggle the slider to the desired pixel width in the Image width area.
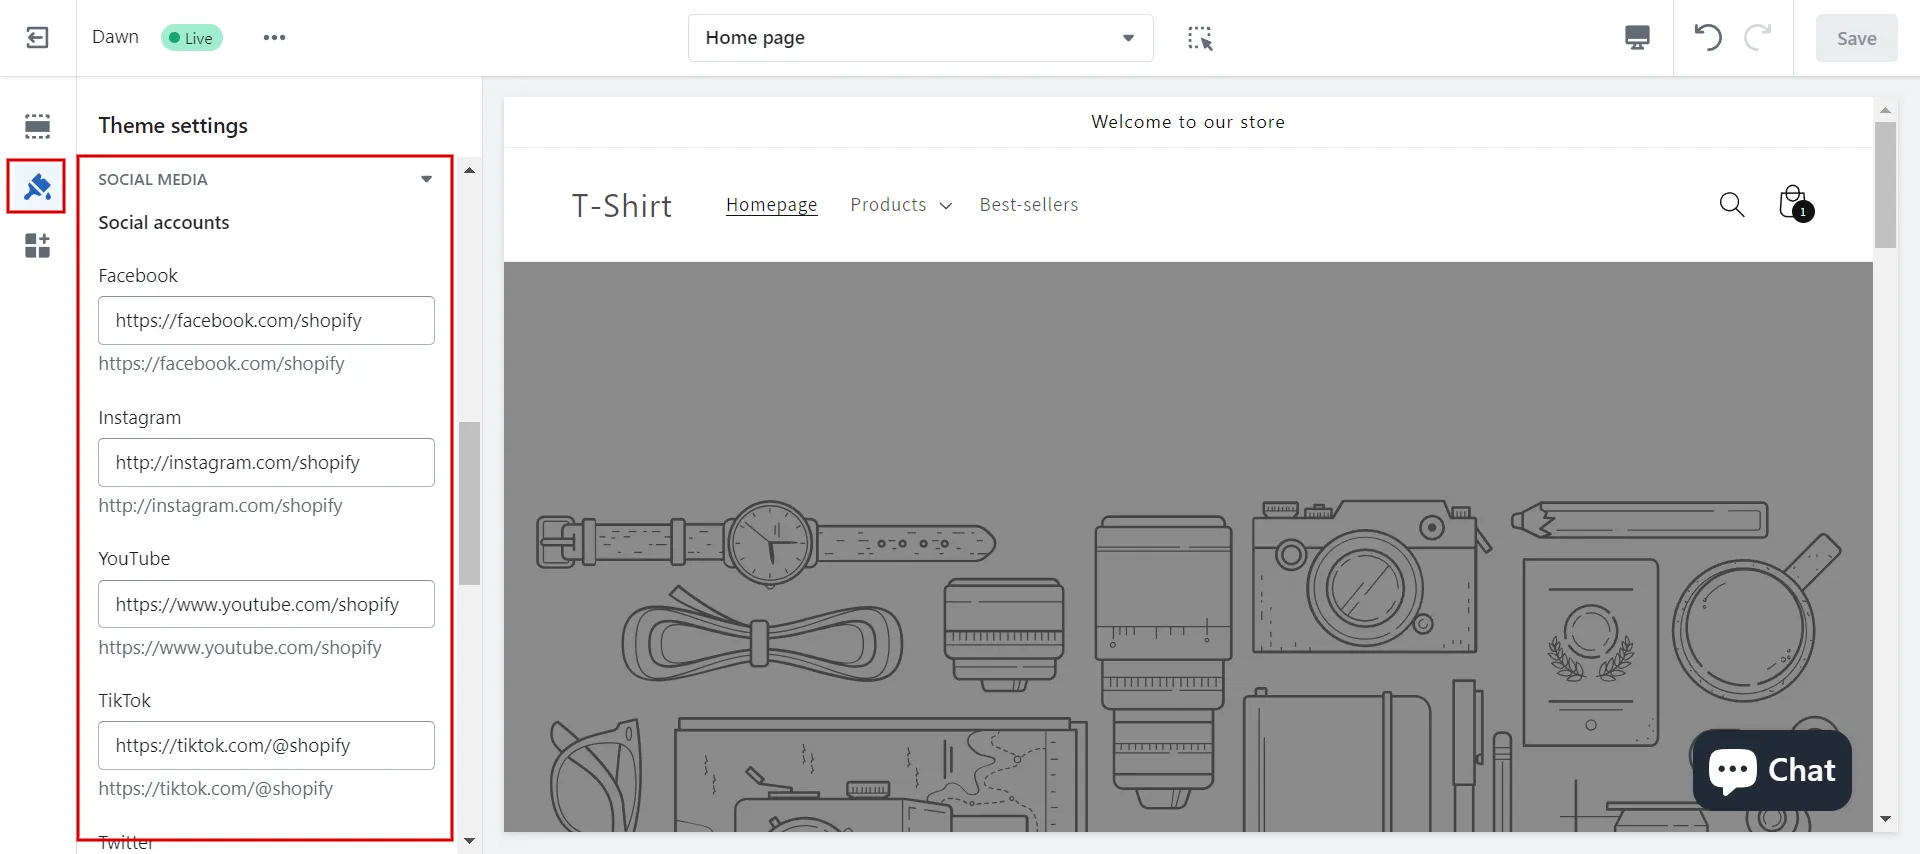
#10 Customize Social media
Links to your social media accounts, plus social sharing buttons, can be added to your products and blog posts. Do the following steps.
- Step 1: In Theme settings, click Social media.
- Step 2: Enter the total links to your social media accounts in the spaces provided under Accounts (https://instagram.com/Shopify.)
- Step 3: Click Save.
#11 Activate Search behavior, Currency format
The following search behaviors are customizable:
- Enable search suggestions – Turn on or off search suggestions.
- Show product vendor – Display or hide product vendors in search suggestions.
- Show product price – Display or hide product prices in search suggestions.
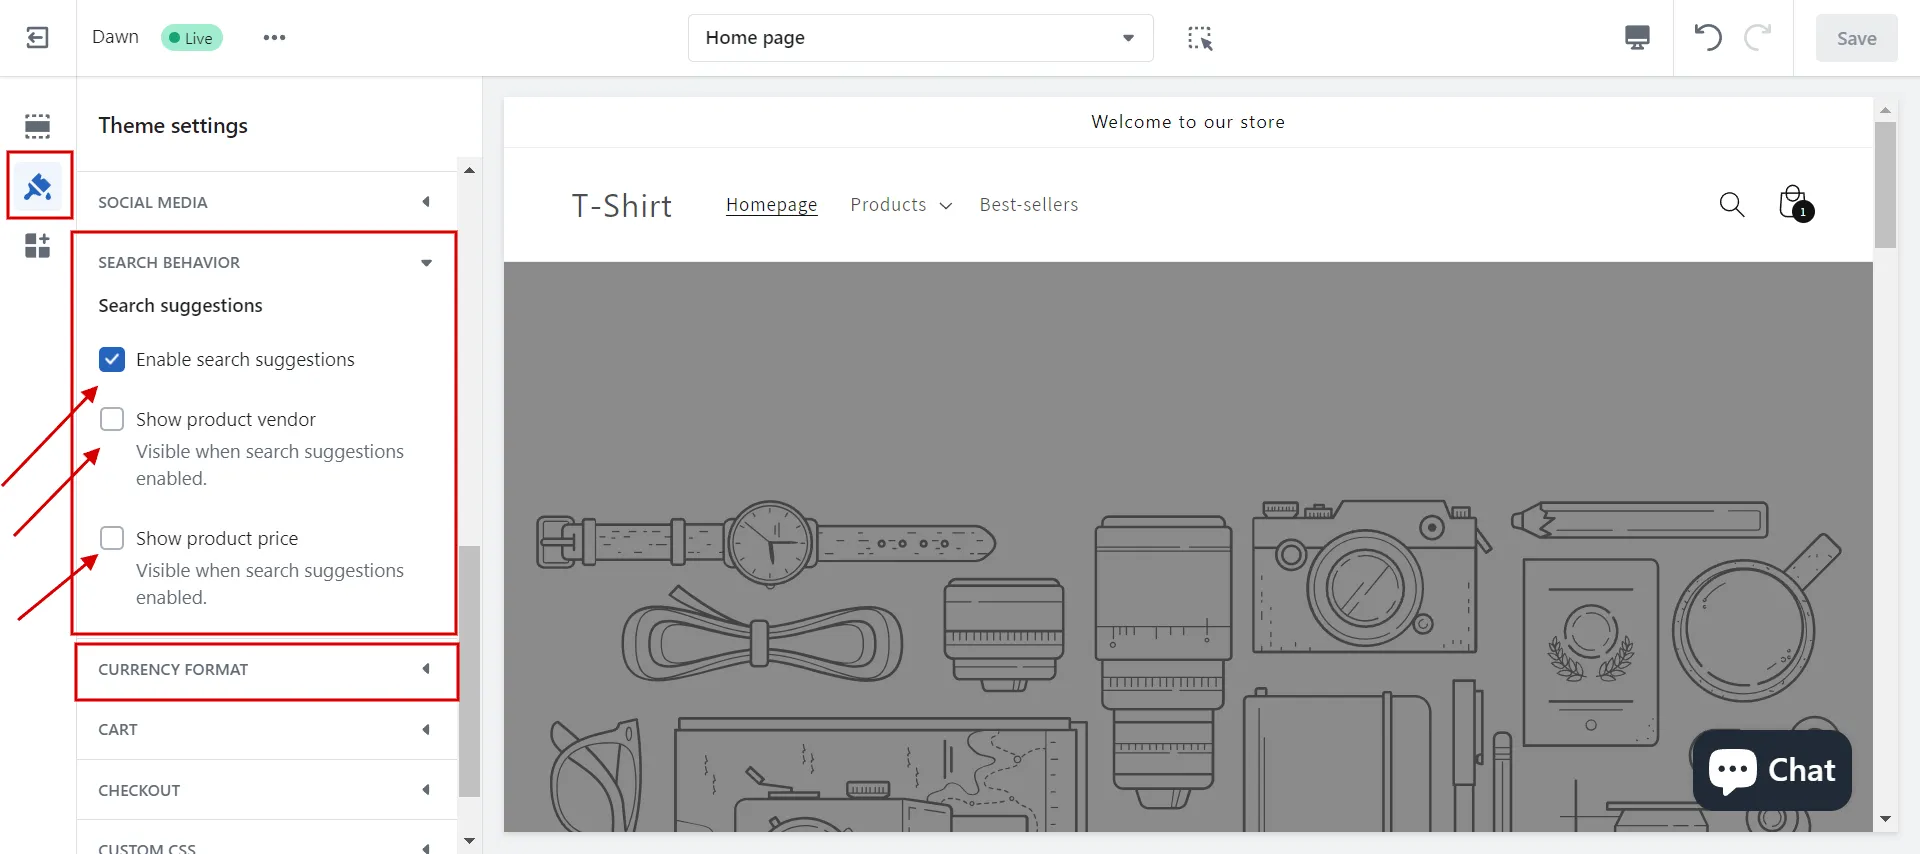
You can decide whether or not the prices for products, carts, and checkouts always display currency codes as follows:
- Step 1: In Theme settings, click Currency format.
- Step 2: Check box Show currency codes to enable currency codes.
- Step 3: Click Save.
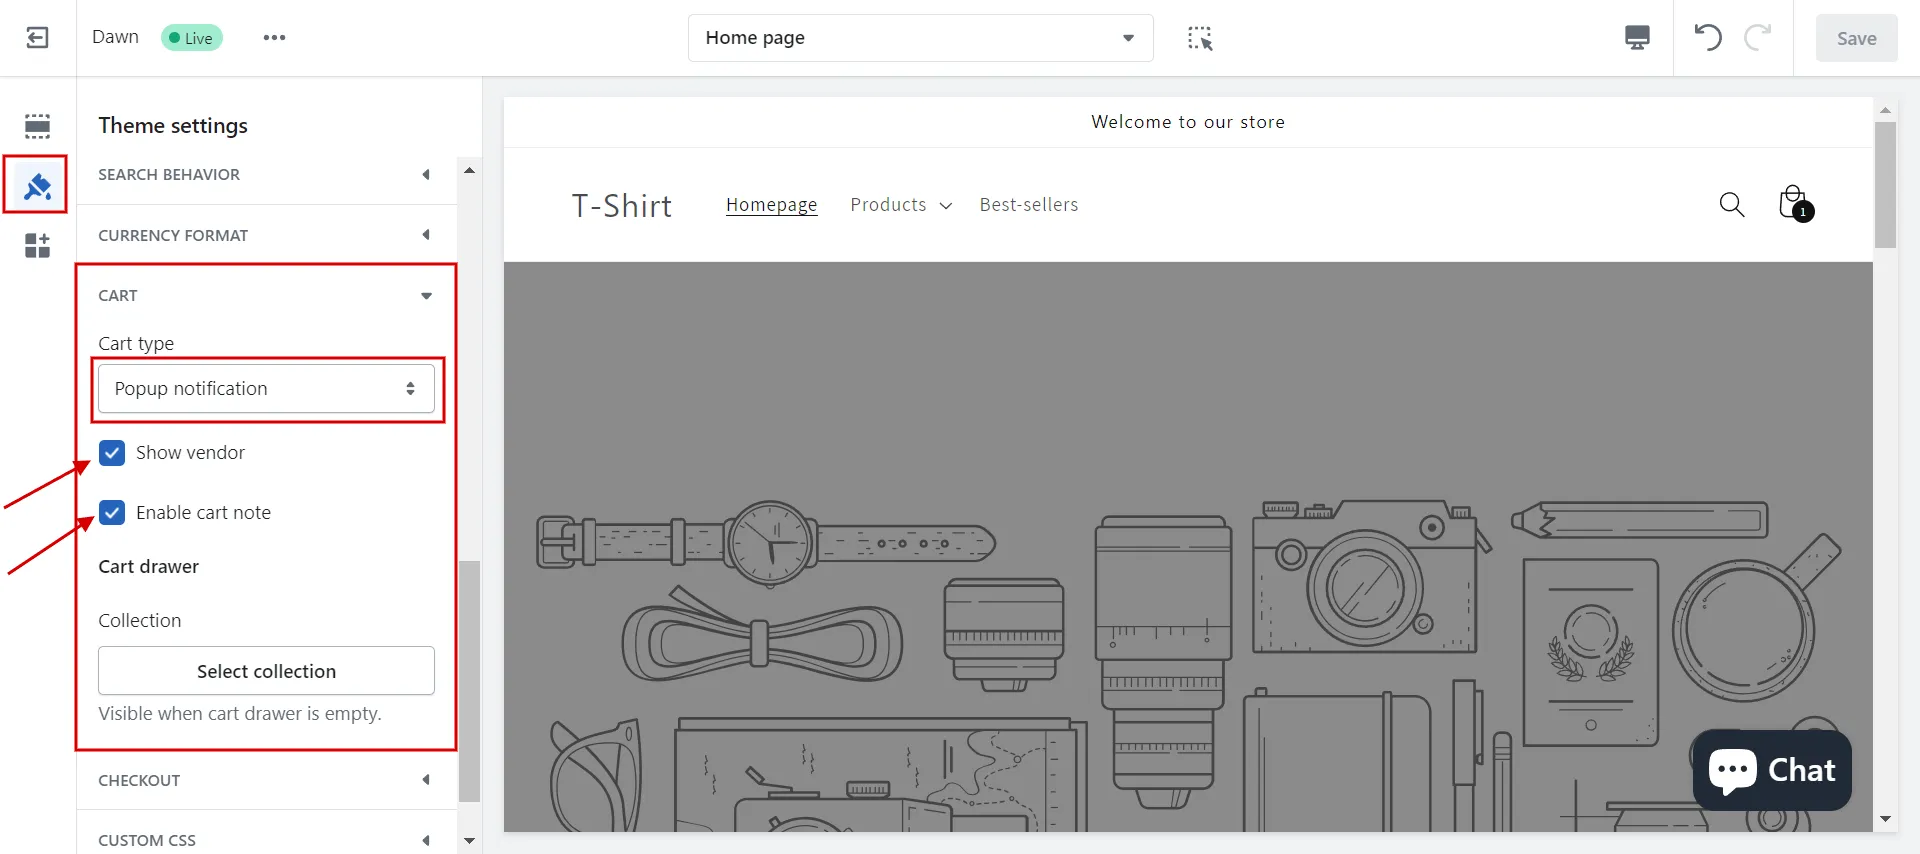
#12 Adjust Cart
Now, let’s move to the Cart section. To do so, follow these below steps:
- Step 1: In Theme settings, click Cart.
- Step 2: Select a cart style in drop-down menu: drawer, page, or pop-up notification.
- Optional: Check box Show vender to display the vendor items in a customer’s cart.
- Optional: Check box Enable cart note to allow customers to make special requests or add extra order information.
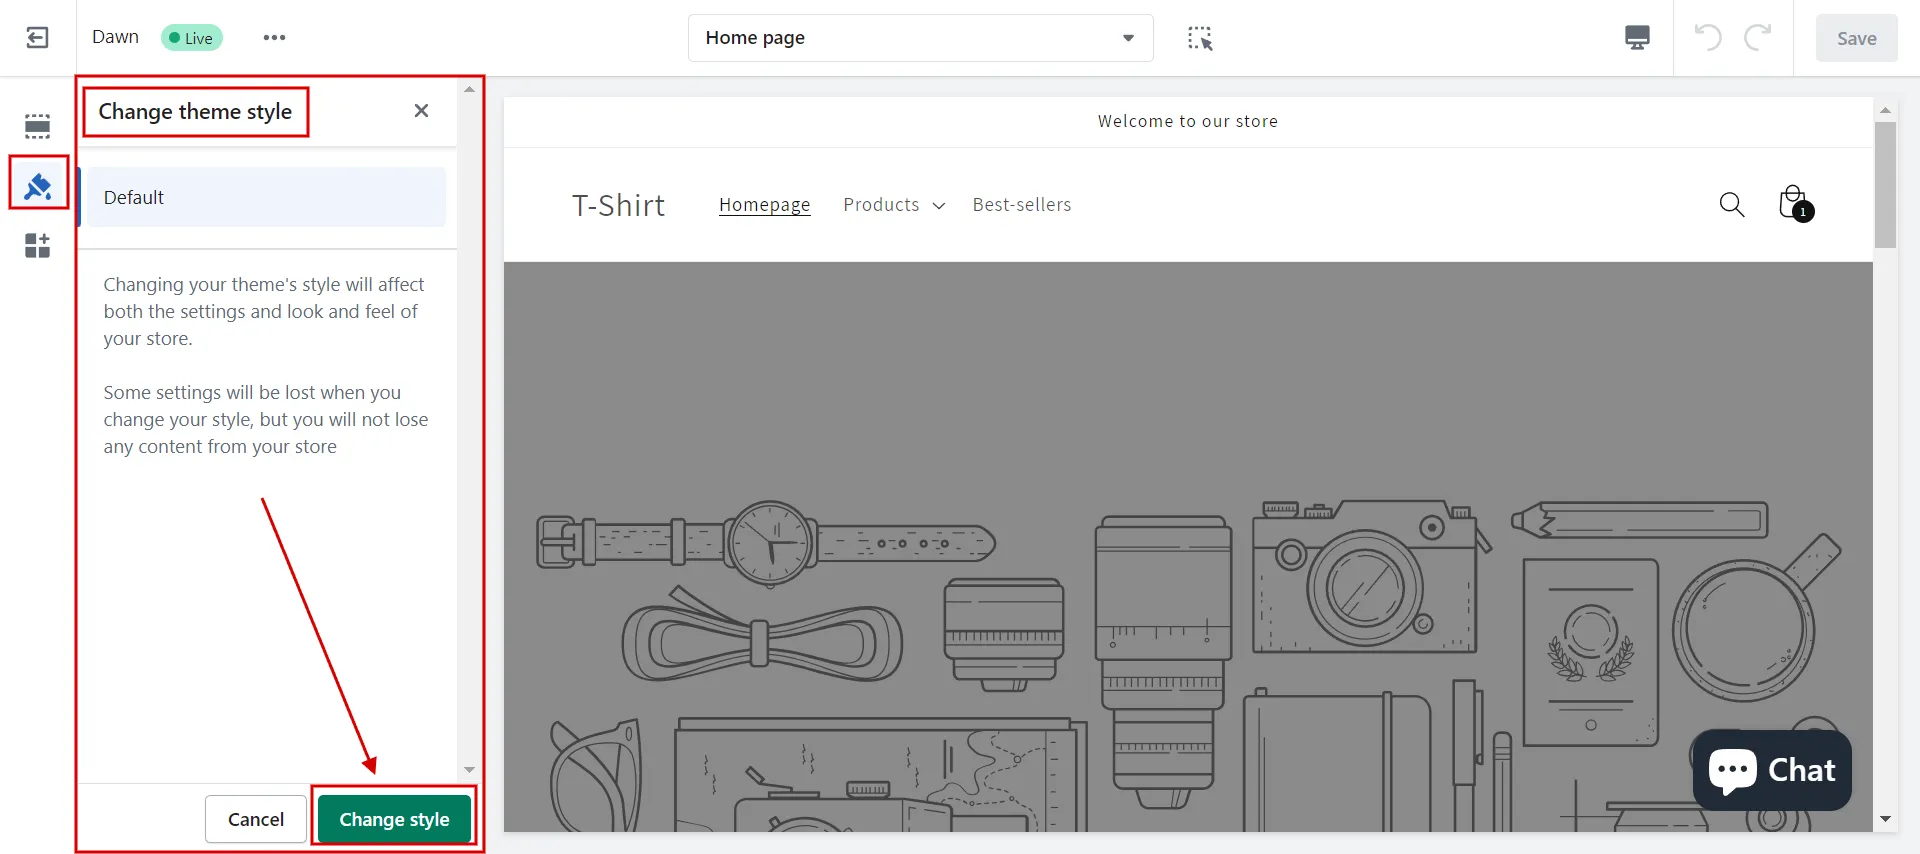
#13 Customize theme styles
Last on our guide on how to edit theme settings on Shopify is to customize the theme style.
- Step 1: In Theme settings, click Styles.
- Step 2: Choose your theme’s style options using the dropdown menus. The options you have depend on the theme you’re using.
- Step 3: Click Save.
Now you know how to edit theme settings on Shopify. Let’s move on to undo and redo changes in the next section.
Learn more about How To Change Themes on Shopify in Simple Steps!
How to Undo & Redo Changes in Theme Settings
Shopify theme editor toolbar contains the Undo and Redo buttons.
- Redo button brings back a change that you undid.
- Undo button reverses your most recent change.

Sometimes, you should click the Undo button:
- add, re-arrange, and remove sections.
- apply fonts, colors, and other settings on the Shopify Settings tab.
- restore a theme style.
LitExtension’s Shopify store development services can cater to all your eCommerce needs. Check it out!
Want to migrate to Shopify?
If you are intending to migrate to Shopify, LitExtension offers a great migration service that helps you transfer your data from the current eCommerce platform to a new one accurately and seamlessly with utmost security.
Edit Theme Settings on Shopify – FAQs
[sp_easyaccordion id=”61625″]
Wrap-Up
Knowing all the options will enable you to edit theme settings on Shopify, and build a Shopify store that is distinctive, memorable, and optimized for conversion.
LitExtension, the #1 Shopping Cart Migration Expert offers you various solutions at an affordable cost to optimize your eCommerce business. For more advice on managing your online store, visit our LitExtension blog and eCommerce community.