If you plan to make money by selling photos, you’ll definitely be interested in learning how to start your business photography with Shopify. Discover what steps you need to take to open your Shopify photography store and learn essential tips for driving traffic to your website and boosting sales.
Nowadays, Shopify represents one of the leading solutions for setting up an eCommerce store. This service provides an array of advanced features and convenient functionality that lets non-tech-savvy users rely on premade templates to create a professional-looking storefront that will allow them to sell their photos worldwide.
Need Help To Migrate To Shopify?
If you intend to migrate to Shopify, LitExtension offers a great migration service that helps transfer your data from the current eCommerce platform to a new one accurately, painlessly with utmost security.
Guide on Starting your Business Photography with Shopify
Shopify is among the leading eCommerce platforms worldwide for photographers and other creatives It offers a broad range of features for facilitating sales, flexible cooperation conditions, and a user-friendly UI.
Being a SaaS (software-as-a-service) eCommerce website builder, it offers everything you need to put together and launch an e-store with zero coding knowledge, which is the perfect option for photographers since they don’t have to dive into the technical aspects related to creating multiple Shopify stores.
Discover more about Shopify:
Step 1. Create a Shopify Account
For starters, you need to create an account on the official Shopify website. Before you begin paying for the platform’s full functionality, you can test out its main features by signing up for the 3-day free trial version.
Next, you’ll need to type in your email address and password. Additionally, the platform will ask you to create a name for your online store. Once all the fields are completed, press the “Create your store” button so that you can move on to the next step.
You’ll have to provide additional information, including your name, contacts, address, and country of residence. You’ll also be asked mandatory questions about your product that you have to answer.
Step 2. Create Pages for Your Store
Create all the necessary pages for your online photography store. To do so, use the Online Store > Pages tab. The available templates will ensure you can create most standard pages quickly without having to start from scratch.
About Page. This is one of your main pages, as it lets visitors know who you are, what you’re offering, who can benefit from your services or products, etc. There are multiple ways you can go about naming this page, including “About Us”, “Our Story”, and so on.
Contact Page. This is an essential page even if your store allows purchasing images straight on the platform. Customers should always be able to message you in some way if they have any questions or issues.
Policy Page. This page is where you need to describe your terms of cooperation. You should also provide copyright information related to all photos purchased from your store, describe the return policy if you have one, and provide other important details like what clients need to account for when purchasing your images.
FAQ Page. Write down a list of all frequently received questions and answers to them. This will help customers deal with some issues related to purchasing photos online on their own without disturbing you personally.
Step 3. Personalize the Design of Your Online Store
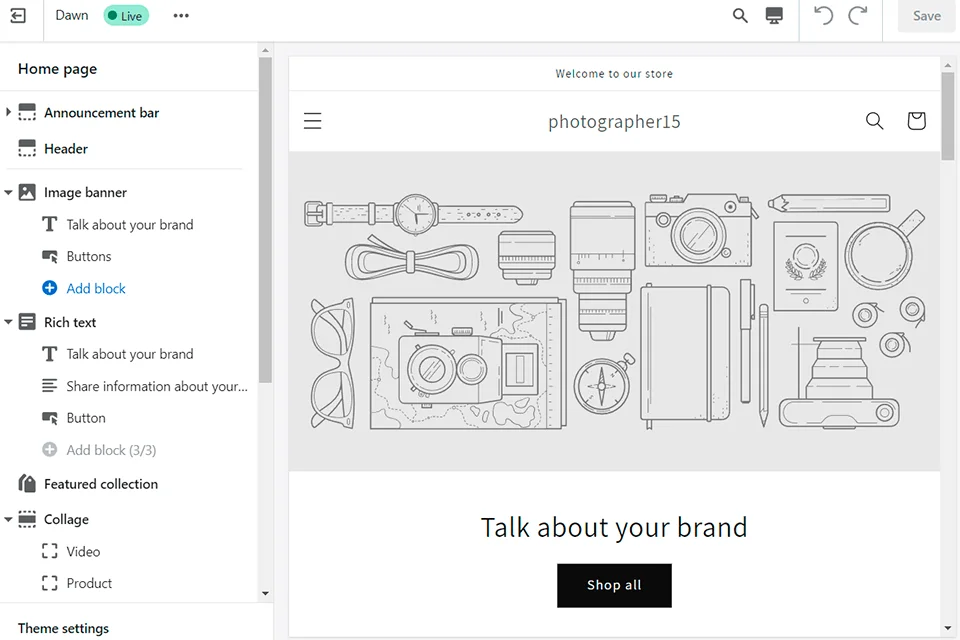
The Shopify website offers 110+ free and paid website design templates to all its users. Before you purchase one of them, you can try it out to see whether a particular theme is to your liking.
After choosing the main theme, you can customize it to ensure it matches your vision and brand perfectly. The platform allows you to upload logos and choose color schemes and fonts. Other than that, Shopify provides features that let you create pages (for instance, the landing page), pick the number of products displayed on a single page, add interactive elements (for instance, a carousel slider on the main page), and much more.
Step 4. Optimize Images for Selling
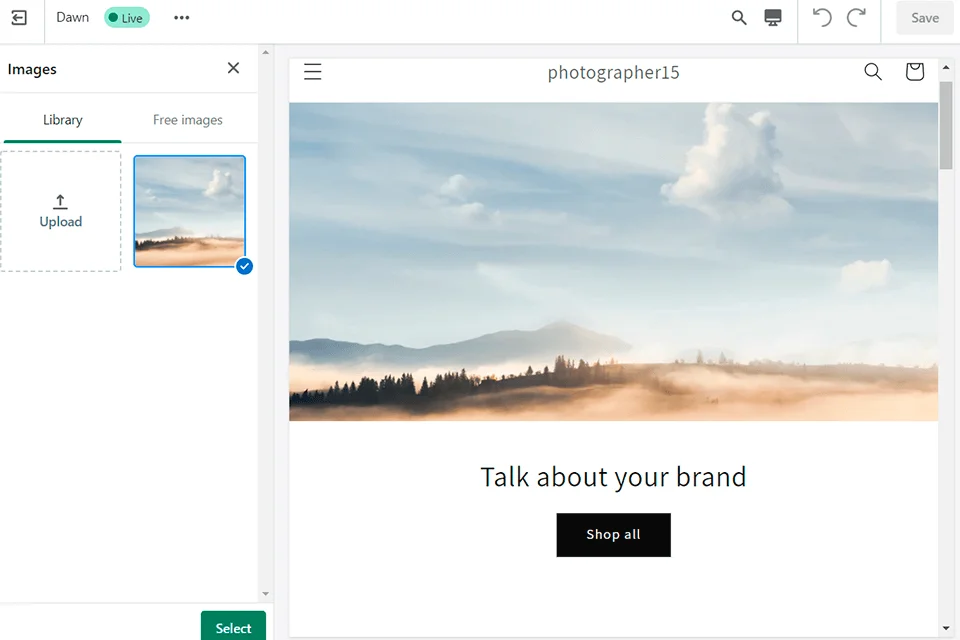
Before you start adding photos to your online store, make sure they satisfy all the platform’s requirements. Adjust the images to the recommended standards to secure fast page loading times and high-quality display results.
Pay special attention to these 4 factors:
- Format. Shopify invites you to upload photos in JPG format, which is one of the most popular options for images.
- Size. Use a resolution of 2048x2048px for optimal loading times.
- Unified style. Shopify photography stores look best when all products have a single style or genre. Such an approach will help you stand out from the competition and ensure clients recognize your work instantly.
- Text. Ensure you supplement your images with alt text, captions, and descriptions to allow Google to register and recommend your photos to clients who are searching for the exact type of image you’re selling.
Making these adjustments is simpler if you use an advanced photo editor, backed up by AI to streamline workflows and guarantee consistency across images. Harnessing this type of tool is particularly sensible if you don’t have extensive editing experience, and you still want to launch a store that converts successfully.
Before uploading, consider using AI tools to upscale the image resolution and quality if needed. Once you’ve made sure your photos satisfy Shopify’s recommendations, you can start uploading them, which is the next stage covered in this Shopify tutorial.
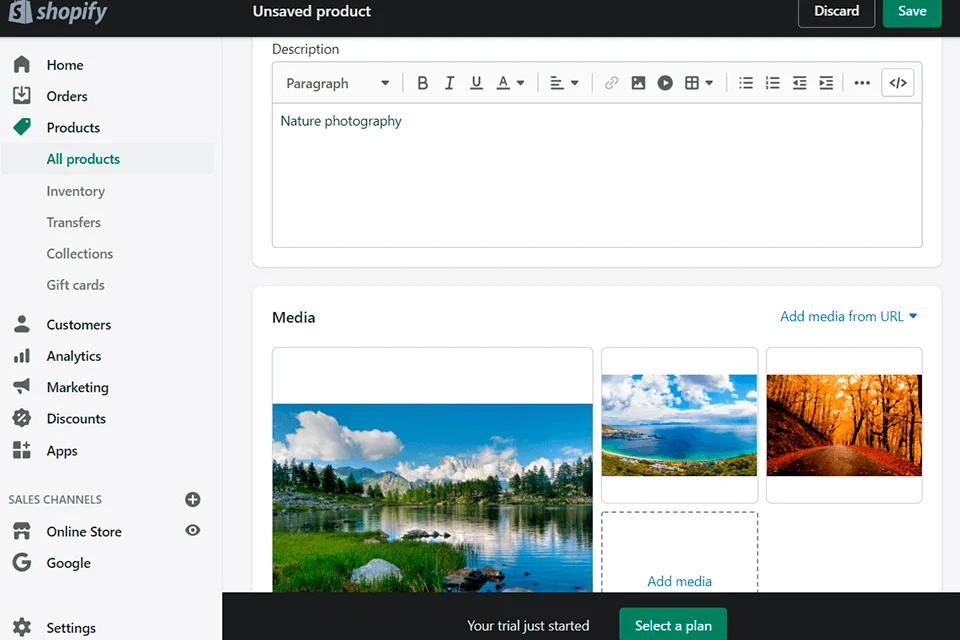
Step 5. Upload Photos for Sale
After you’re done configuring your online store, it’s time to add the photos you’re going to sell. Upload miniature versions of your images while possibly adding watermarks to protect your intellectual property even further. Add descriptions. When you’re in the Shipping section, remove the checkmark from the This is a physical product and save the listing.
To ensure smooth business operations, consider using a photography invoice template. This will help you create professional invoices to send to clients after they purchase your photos. Also, to ensure users can easily download all images they purchase, you’ll have to install the free Digital Downloads app that can be found in the Shopify App Store. This application provides a download link to all clients that paid for one of your photos.
Step 6. Set Payment Gateways
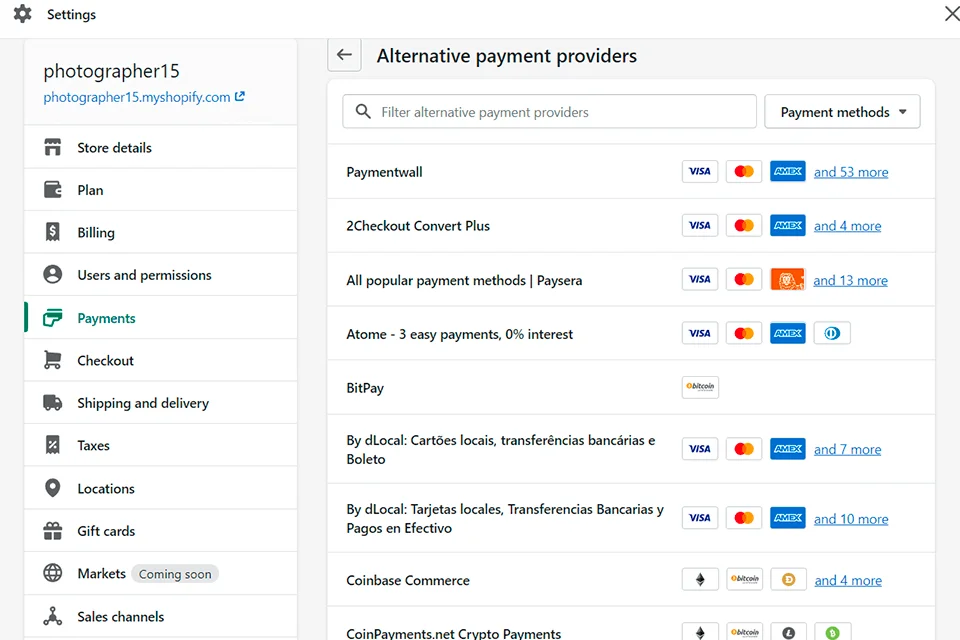
Now, it’s time to determine what payment methods customers can use to purchase your images. Shopify offers over one hundred options for you to pick from, including PayPal, Facebook Pay, Amazon Pay, Apple Pay, and so on. The platform even provides more unique payment gateways like cryptocurrency.
Lastly, Shopify is supplied with a proprietary gateway. Its main advantage is that all transactions are processed without additional fees, which isn’t the case with other payment systems. You can adjust the payment options by going to Settings > Payments section.
Step 7. Add a Domain
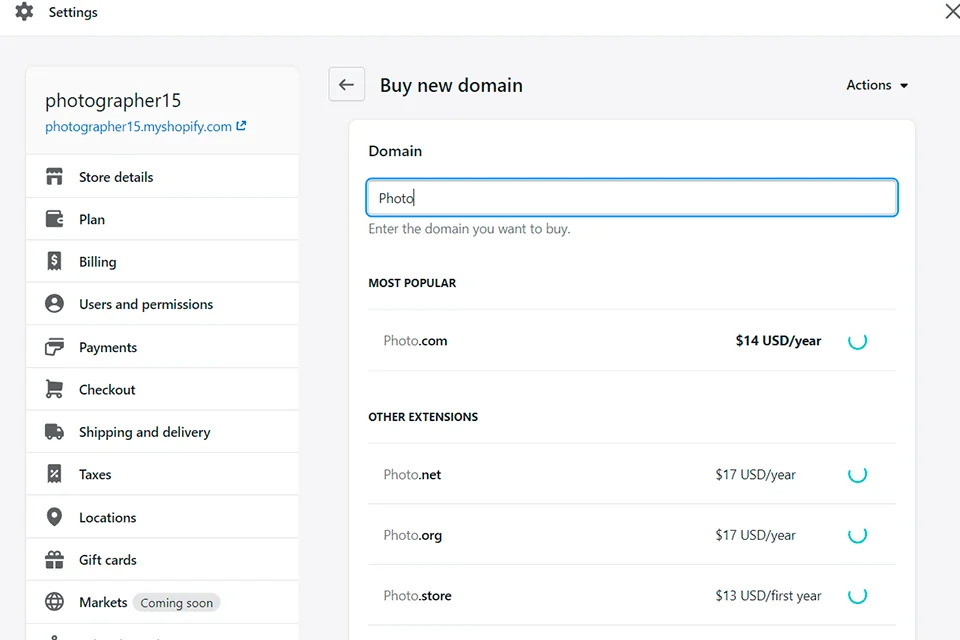
If you want to know how to start your business photography with Shopify successfully, you need to pick a domain name that will characterize your e-store and instantly let visitors know what it has to offer. Ideally, it will be identical or in line with the store’s name.
You can purchase a domain name in one of two ways: on the Shopify platform or a relevant third-party website. In the first case, the domain will automatically connect to your photography store. You can add and control your domains by visiting the Online Store > Domains section. If you’re purchasing a domain from a third party, then you’ll also have to pay to set it up and connect it to Shopify.
Step 8. Install Essential Plugins for Photographers
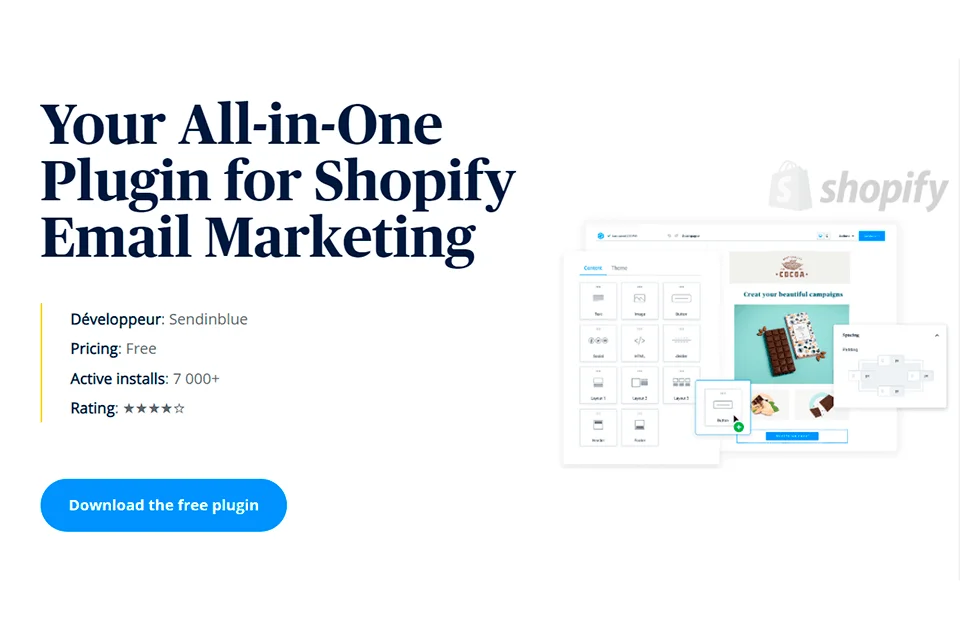
The reason why Shopify is among the best places to sell photos online is that it allows you to connect an array of specialized applications. As a photographer, you can choose plugins that enable you to protect your products, increase website visibility, and perform other crucial tasks.
For instance, the aforementioned Digital Downloads application allows you to create download links for clients that purchase your photos. Meanwhile, Photolock can add additional protection for your images to prevent unsanctioned downloads, export through the website’s code, etc.
If you want to check out the full list of potential plugins, go to the Store section. It’s divided into free and paid categories, making it easy to find the plugins you need to make your photography e-store perfect.
Step 9. Launch the E-Store
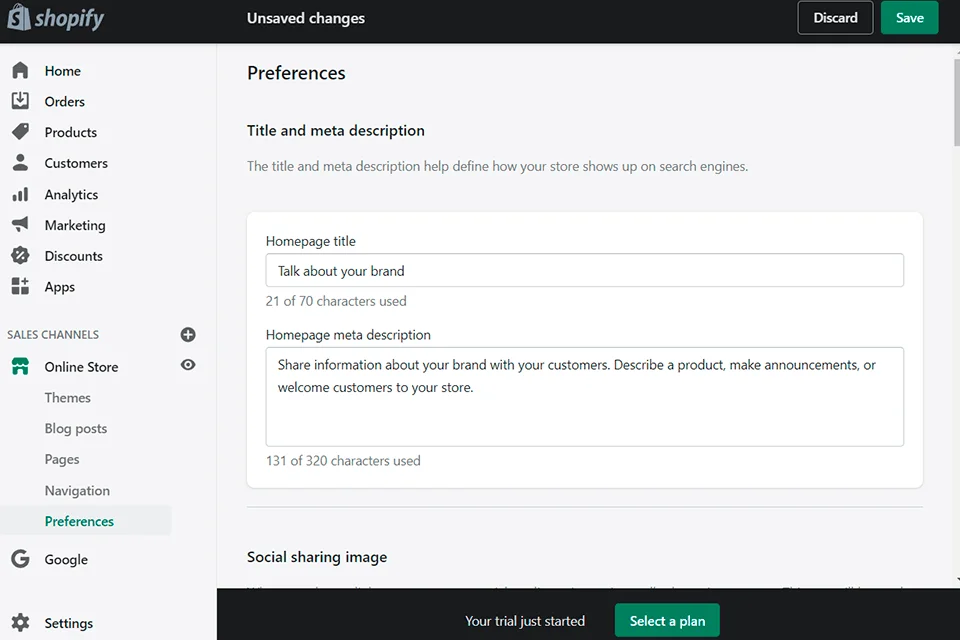
Before you finally launch the store, Shopify will provide several additional settings that you can either adjust or skip (for instance, shipping). You can begin selling your photos once you’ve turned off password protection in the Online Store > Preferences menu.
If you’re experiencing any issues when trying to launch the store or change some settings, you can reach out to Shopify’s client support and receive a response in the shortest timeframe possible.
Step 10. Promote your Photography Store
Now that your online photography store has been launched, it’s time to drive traffic to your website to stimulate sales. The most obvious and important method for this purpose is search engine optimization.
SEO includes determining relevant keywords, using them, selecting correct URLs, and so on. You can employ a free tool, for instance, Ubbersuggest, to find keywords that clients use for finding specific images.
There’s also a plethora of other ways to attract potential clients to your photography e-store that will provide even better results when used together. For instance, you can attract traffic by using social media for photographers, blogs, PPC marketing, targeted advertising, etc.
Further reading:
- Shopify store examples – 50+ successful stores on Shopify.
- How to sell digital products on Shopify – A complete guideline.
Final Words
Overall, we hope that with these steps, you will know how to start your business photography successfully. We hope your Shopify photography business blooms in 2023!
If you are currently using other eCommerce platforms, why don’t you go for Shopify to enjoy striking photography features? LitExtension – #1 Shopping Cart Migration Expert is here to help! With 200,000+ successful migrations for 100,000+ worldwide customers, LitExtension can transfer all your data, including products and customers’ orders, seamlessly and accurately.
For further information, please check out other articles on LitExtension blog and join our Facebook Community for exchanging and updating eCommerce news.