If you made it to this Shopify tutorial, I bet that you are interested in the platform or even building a digital store on it.
In this article by LitExtension – #1 Shopping Cart Migration Expert, I’ll walk you through an in-depth tutorial to use Shopify (based on my personal experience with this platform) with the following points:
- A brief introduction of Shopify for beginners
- Shopify tutorial – How to start a Shopify store
- Shopify tutorial – How to sell on Shopify with cost-efficiency
Want to Migrate Your Store and Grow on Shopify?
Having decided that your current platform is not the perfect fit? Switch to Shopify now and rocket your sales with powerful eCommerce functionalities and an extensive selection of apps.
Shopify Tutorial: How To Create A Shopify Store
In this part of my Shopify tutorial, let’s go through 9 fundamental steps on how to use Shopify that I’ve summarized based on my 2-year experience working with this platform.
- 💡 Step 1: Create a Shopify account
- 💡 Step 2: Explore the dashboard
- 💡 Step 3: Choose a storefront theme
- 💡 Step 4: Add your sales channels and products
- 💡 Step 5: Configure essential settings (payments, shipping, etc.)
- 💡 Step 6: Test your store
- 💡 Step 7: Add a custom domain
- 💡 Step 8: Optimize the store with Shopify apps
- 💡 Step 9: Pick a plan and start the business!
In case you prefer a visual approach to this Shopify tutorial, don’t forget to check out our video:
Without further ado, let’s jump right into our Shopify tutorial!
Step 1: Create a Shopify account
The very first step of this tutorial is to create an account on Shopify. You can enjoy a 3-day Shopify trial for free or a 3-month trial for just $1/month. At the Shopify page, fill in your email address and click “Start free trial”.
 Once you’re in, this platform will ask you to fill in personal information via a few pages.
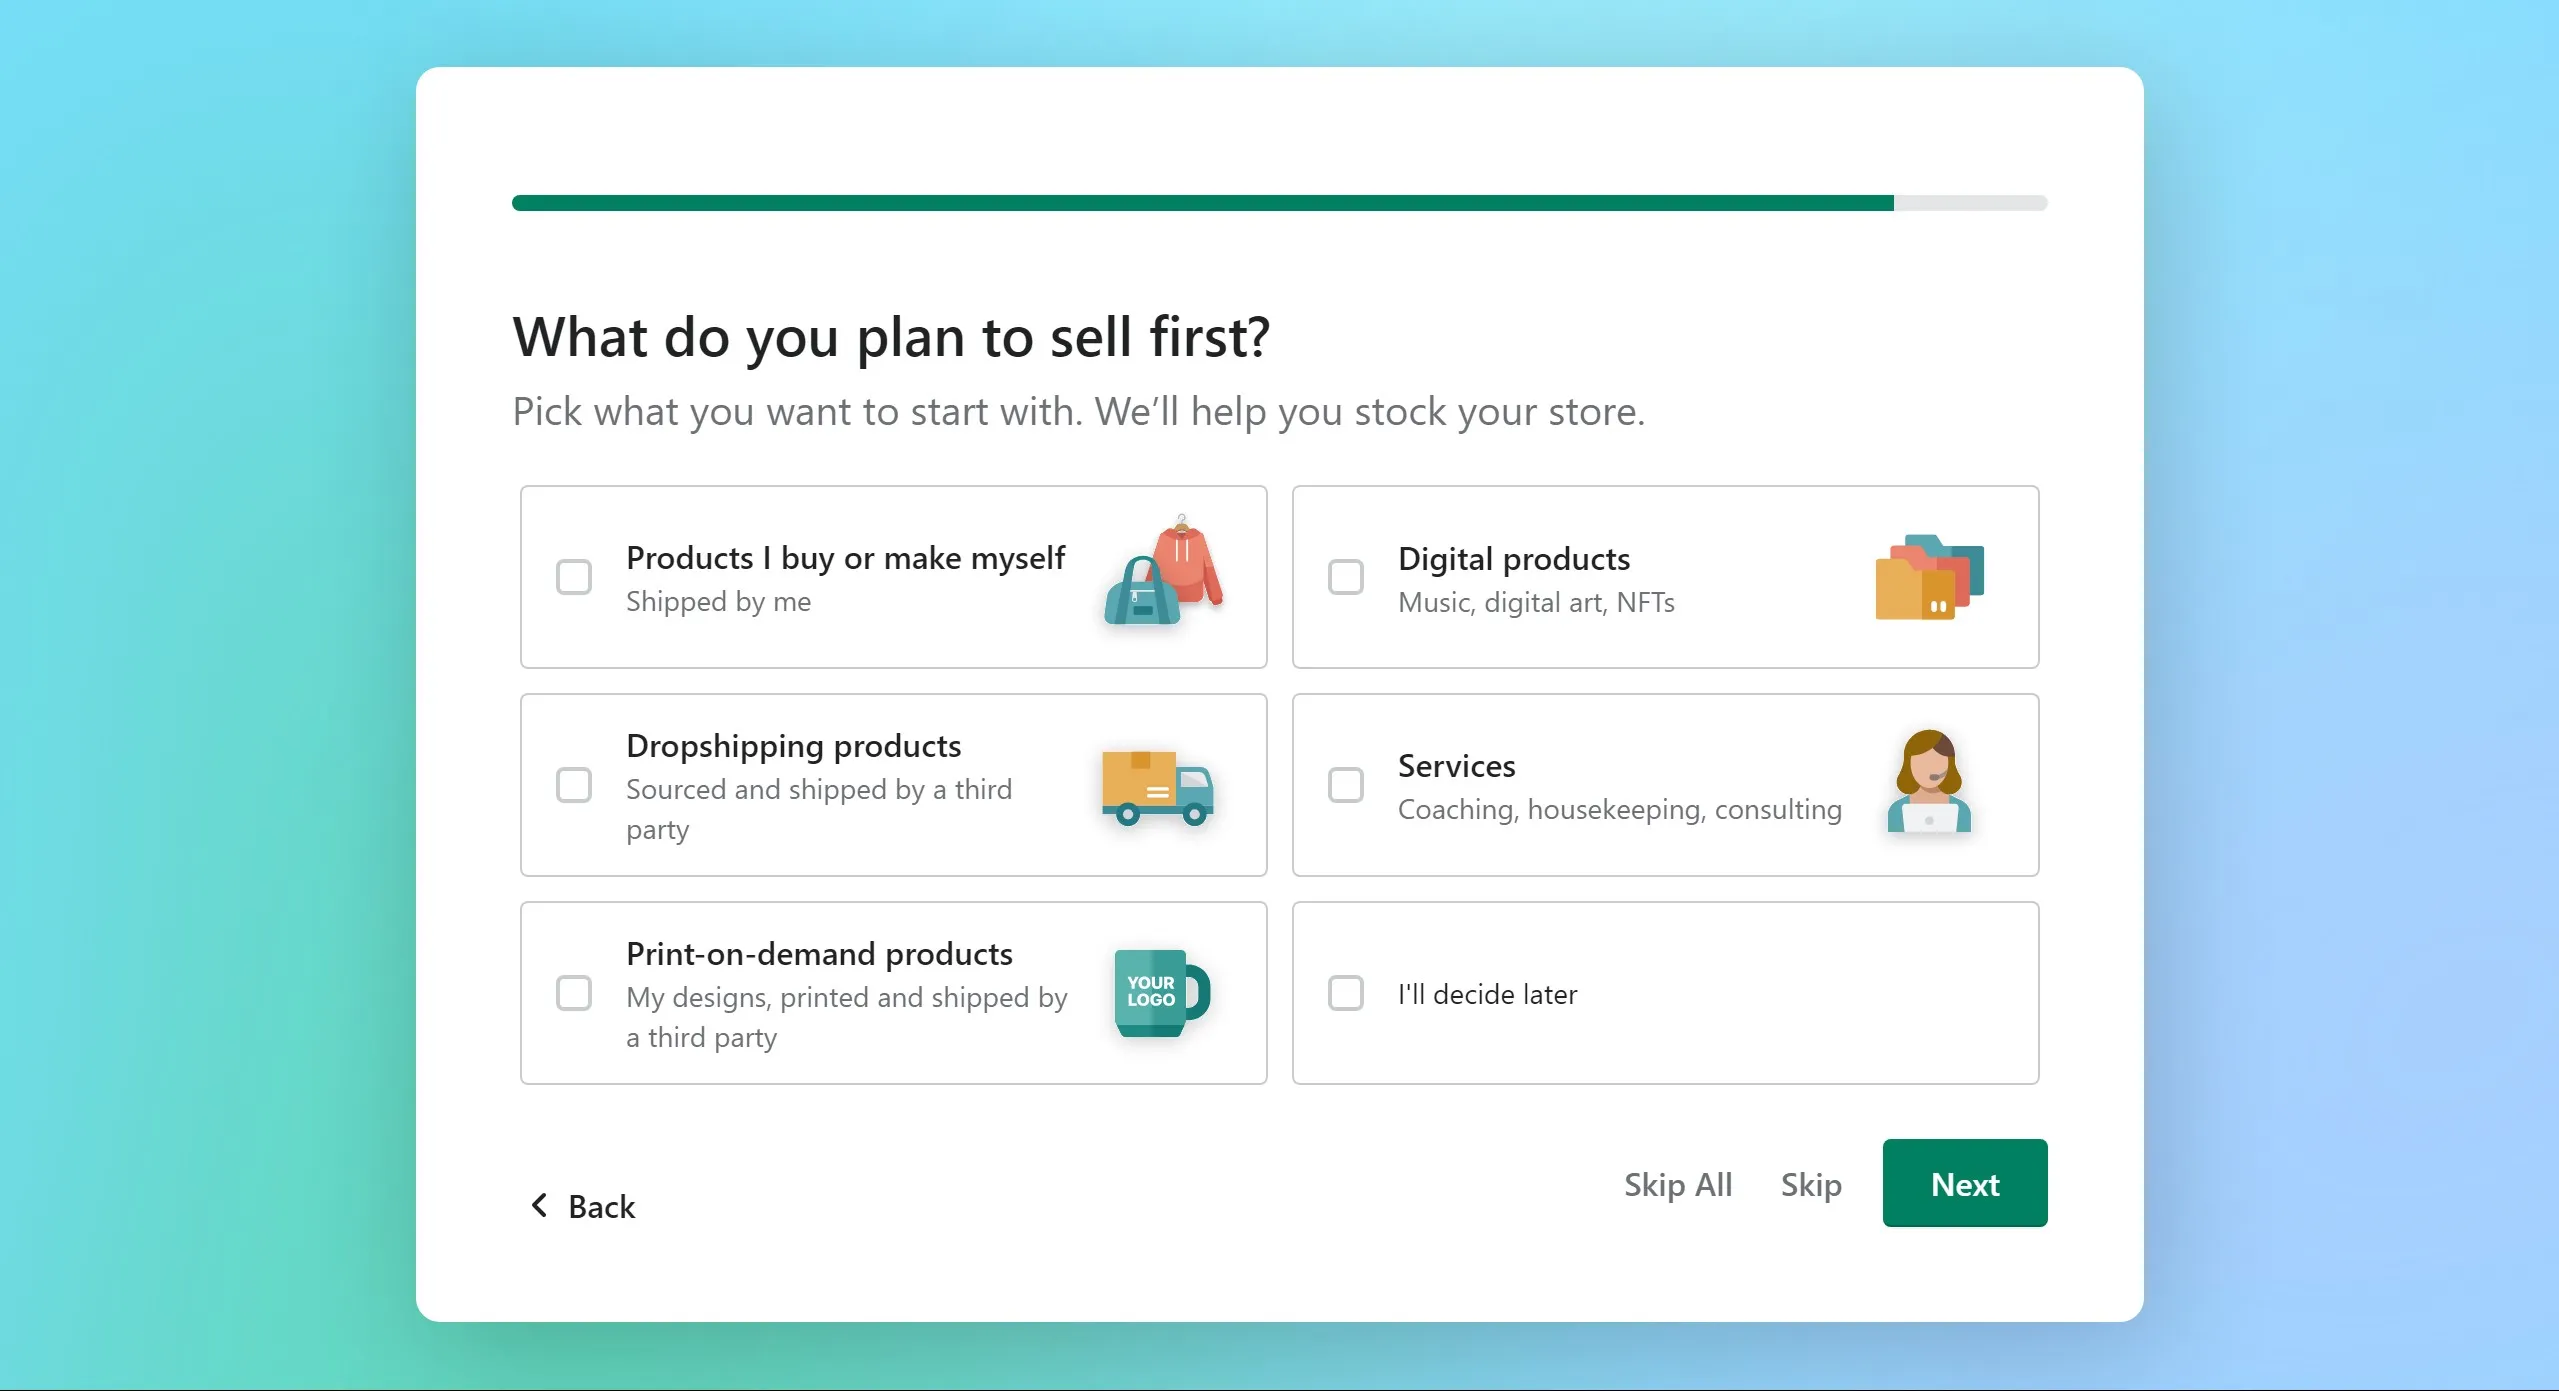
Some required information is the email address, store name, and current location. You also need to provide your business intentions, including what you are selling on Shopify, which industry you are in, and why you set up the store.
Now that your account is ready, let’s move on to the next step of this tutorial.
📢 Attention! Your one-time opportunity to fully experience Shopify with only $1 for the first 3 months!
Is the 3-day free trial too short to decide if Shopify is the perfect destination for your business? Opt right in for the exclusive Shopify offer and enjoy this platform for $1 for the first three months.
During this extended trial session, feel free to:
- Fully create a storefront with Shopify Dawn theme
- Set up a functional eCommerce website with payments gateways, checkout process, and delivery options
- Check if your store performs smoothly with test orders.
and many more things to do!
Get the full Shopify checklist: Trial store customization & completion here.
Step 2: Explore the dashboard
Once the required information is complete, let’s move on to the next step of my guide.
Click on Enter my store, and this platform will navigate you to the Admin screen. Most actions in this Shopify tutorial appear on this screen, and here is what the process should look like:

As shown in the image, the Admin page enables you to:
- list products
- set up payments and shipping
- keep track of your store’s analytics
- choose a theme and customize the store.
It seems to be a lot of fillings, but once you have it done, I believe your online shop will run perfectly in the coming months.
Step 3: Choose a storefront theme
Each Shopify business is a unique destination, and what gives your website a distinctive appearance is the Shopify themes. Therefore, if you are looking for a guide on how to start a Shopify store, it’s important to consider this element.
Based on my testing of the product, there are more than 100 well-designed website templates for you to choose from its large Theme Store. Moreover, you can source the themes from other marketplaces or providers easily because they are all-time available.

As you may be overwhelmed by a lot of Shopify templates out there, I have compiled a detailed list of the best Shopify themes, which you can check and pick a proper one for your store. And if you are on a budget, don’t forget to check out my selection of 9 best free Shopify themes.
From the Admin view, there is a default theme in the first place, but later you can make adjustments from the free or paid theme collections. However, before immediately choosing a theme, my advice is that you should have a moment to check for demos, previews, and feedback from other users. You know what? You can easily change themes on Shopify!
How to add a Shopify theme to your store?
If you’ve chosen a suitable website design for your business, the next step in this Shopify tutorial is adding that layout to your website.
After that, go to Online Store > Themes > Add themes. From here, you will be redirected to the Shopify Theme Store to select the best template for your online presence.

You are able to add as many themes as you want to test and review, but please note that you can Publish only one of them at a time. Therefore, in the scope of this Shopify tutorial, I highly recommend that you try several website templates before selecting the best one for your business.
Looking for inspiration? Take a look at my suggestion of the best Shopify themes below!
How to customize your Shopify theme?
If you want to take your business to another level, feel free to further customize your Shopify theme. A lot of options are available to start customizing, and you can start by clicking on the Customize button.
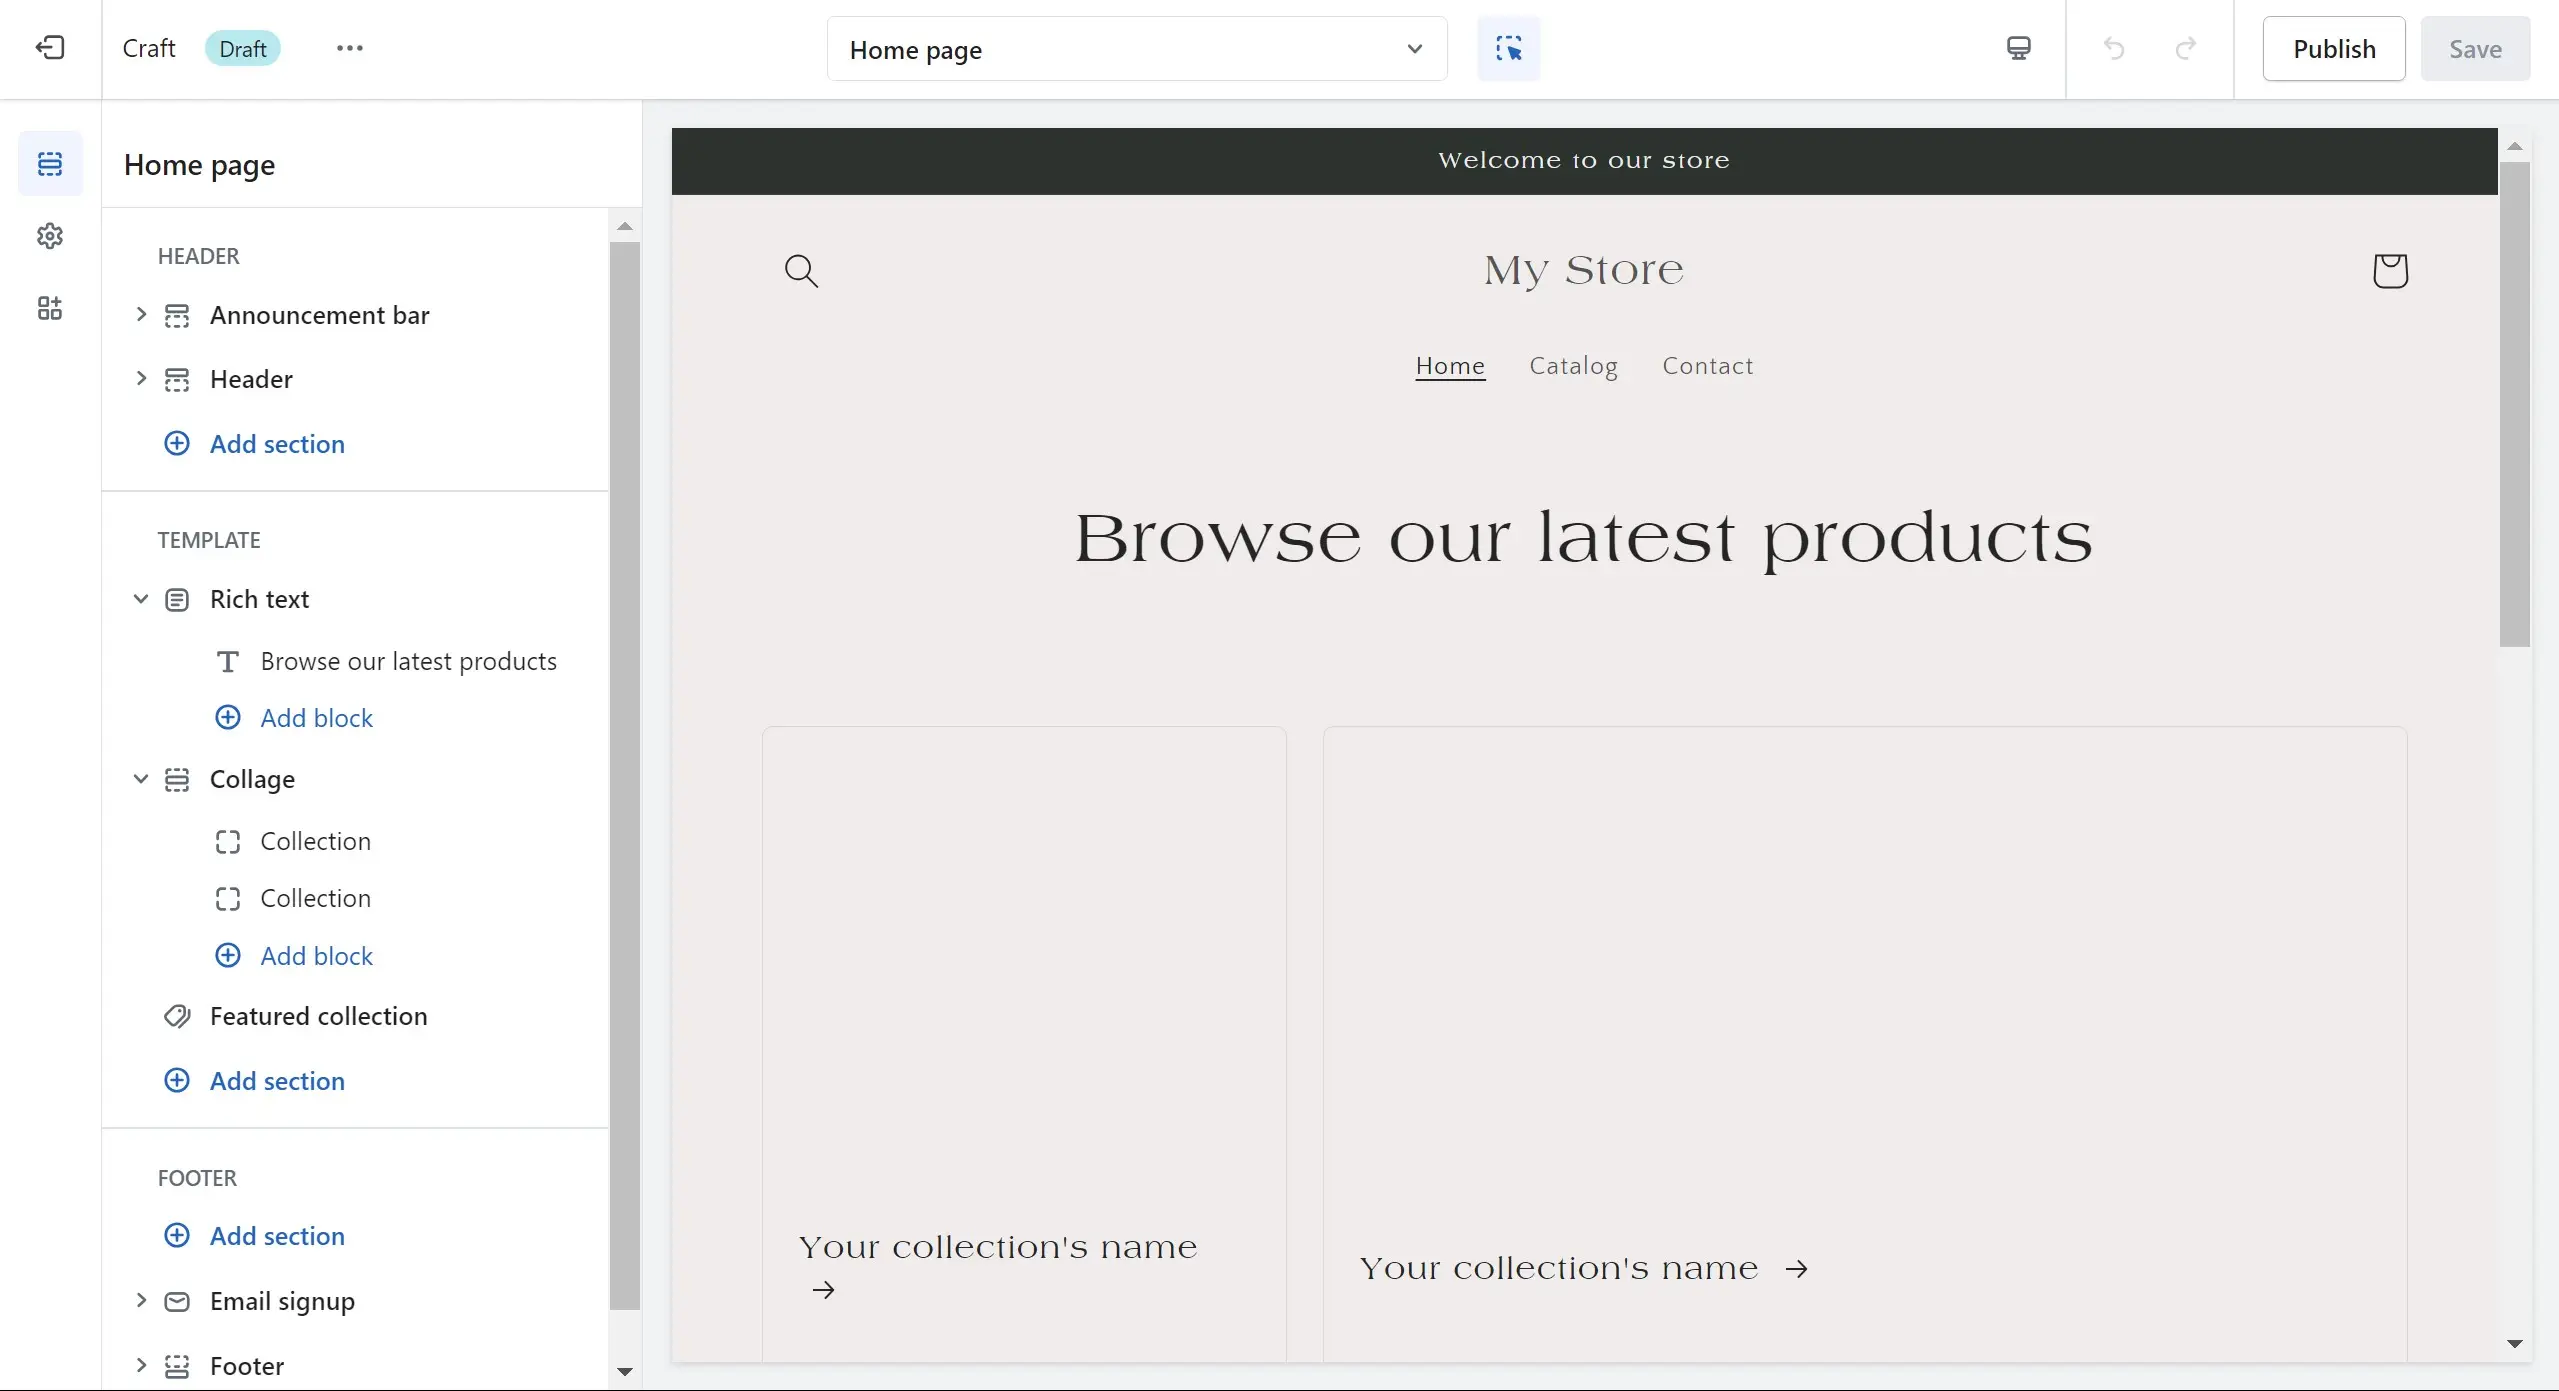
Here, you can freely add new sections to your Shopify page, change text typeface and color by editing theme settings, change Shopify logo, and so on. Additionally, if you want to further customize your online presence, feel free to use Shopify Liquid.
and more! In case you need changes that require HTML or CSS, and you do not have high-tech skills, then consider hiring a Shopify Expert.
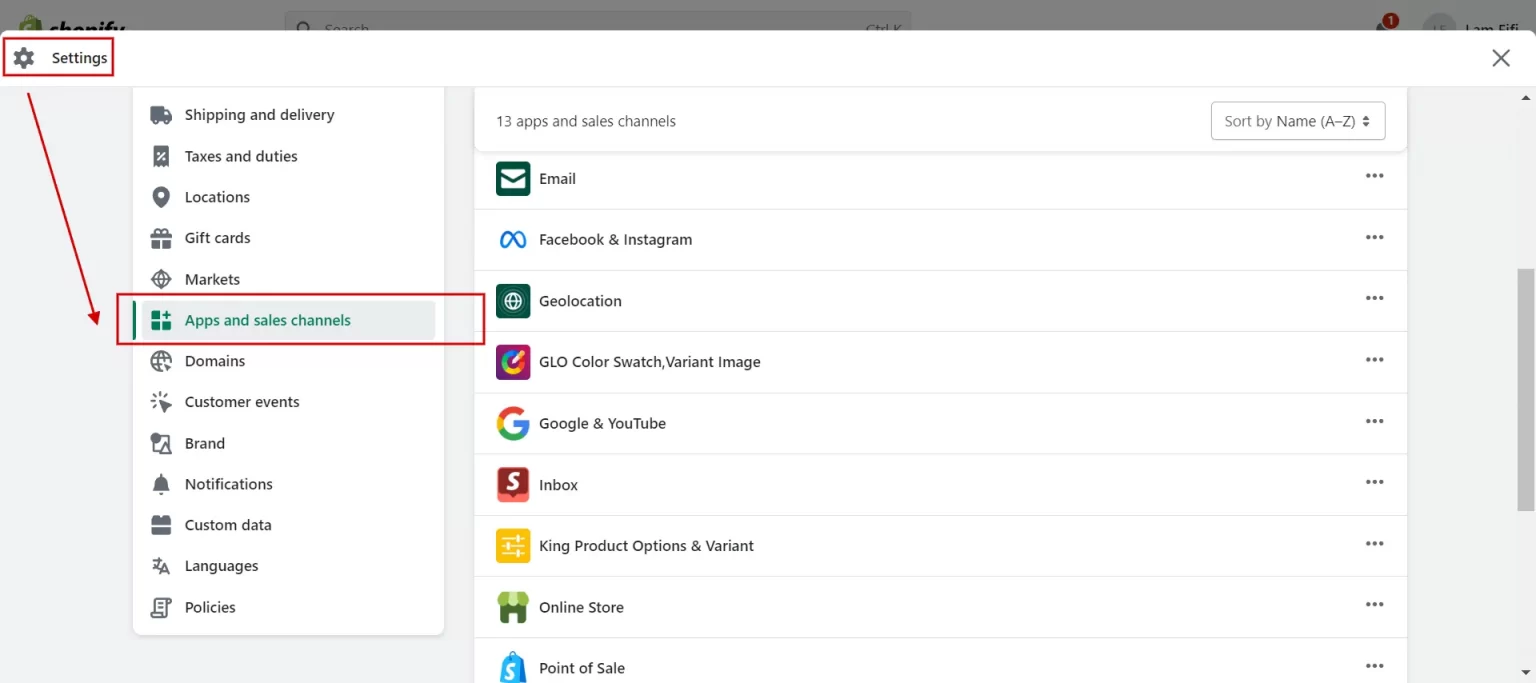
Step 4: Add your sales channels and products
Shopify allows merchants to sell through websites, social media channels, eCommerce marketplaces, and, excitingly enough, in person.
Now, before adding any items, let’s learn how to set up your main sales channels first.
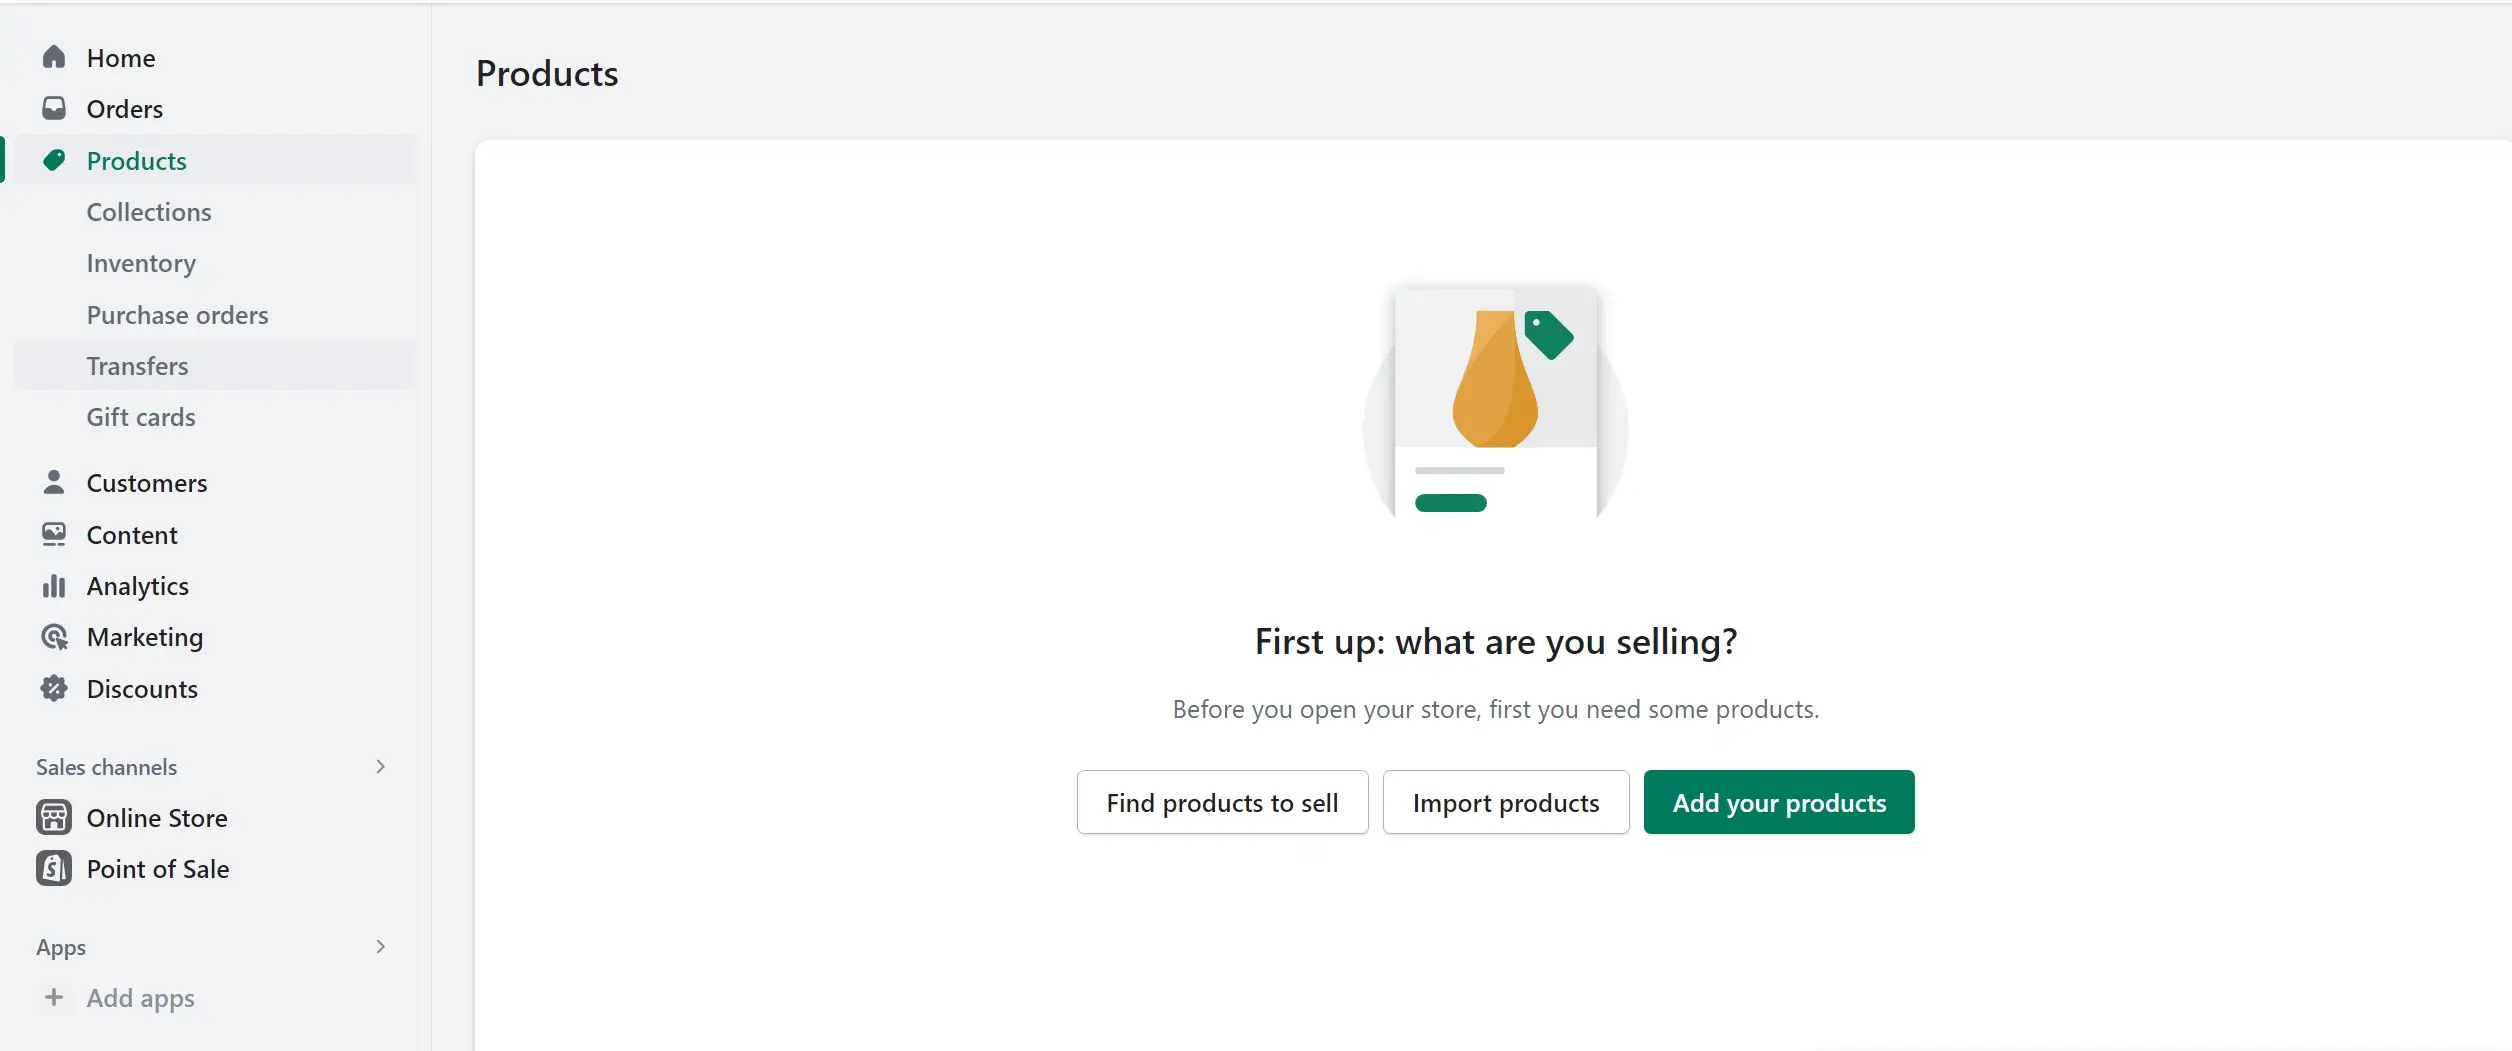
In this step of my Shopify tutorial, I will describe how to easily import products to Shopify.
On the Admin page, click on Products > All Products > Add Products. This section will store all of the information that you want customers to see. You are able to add product variants, upload product photos, descriptions, etc., to further describe your items.
To help customers easily proceed with their search, when adding product information, my advice is that you should not ignore Shopify SEO. You can also refer to our ultimate Shopify speed optimization.
For instance, when adding the first item, go to the Search engine listing preview section and choose Edit website SEO.
From here, Shopify will ask you to fill in the Page title, Description, and URL & handle.
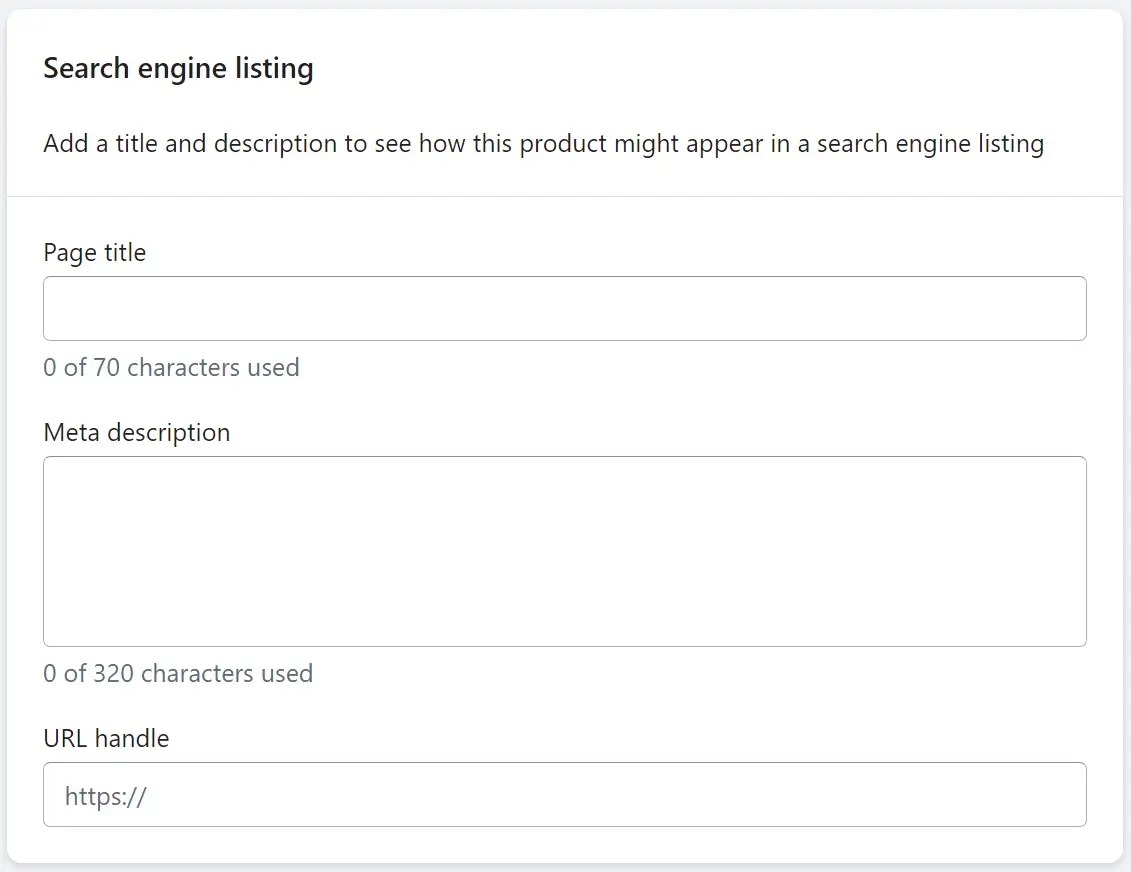
First, the descriptive title you enter will display as a link among the search results. Then, you need to add the product description that includes the main keywords. The last thing is to modify and create URL redirects.
However, setting up the product page is beyond that. If you want to customize it further, don’t forget to check out this article about Shopify products page!
Step 5: Configure essential settings (payments, shipping, etc.)
In most Shopify tutorials, you will encounter this essential settings instruction which enables you to deliver your package smoothly to customers.
Now, go to the Settings page and let me briefly explain the 6 most important elements for you.
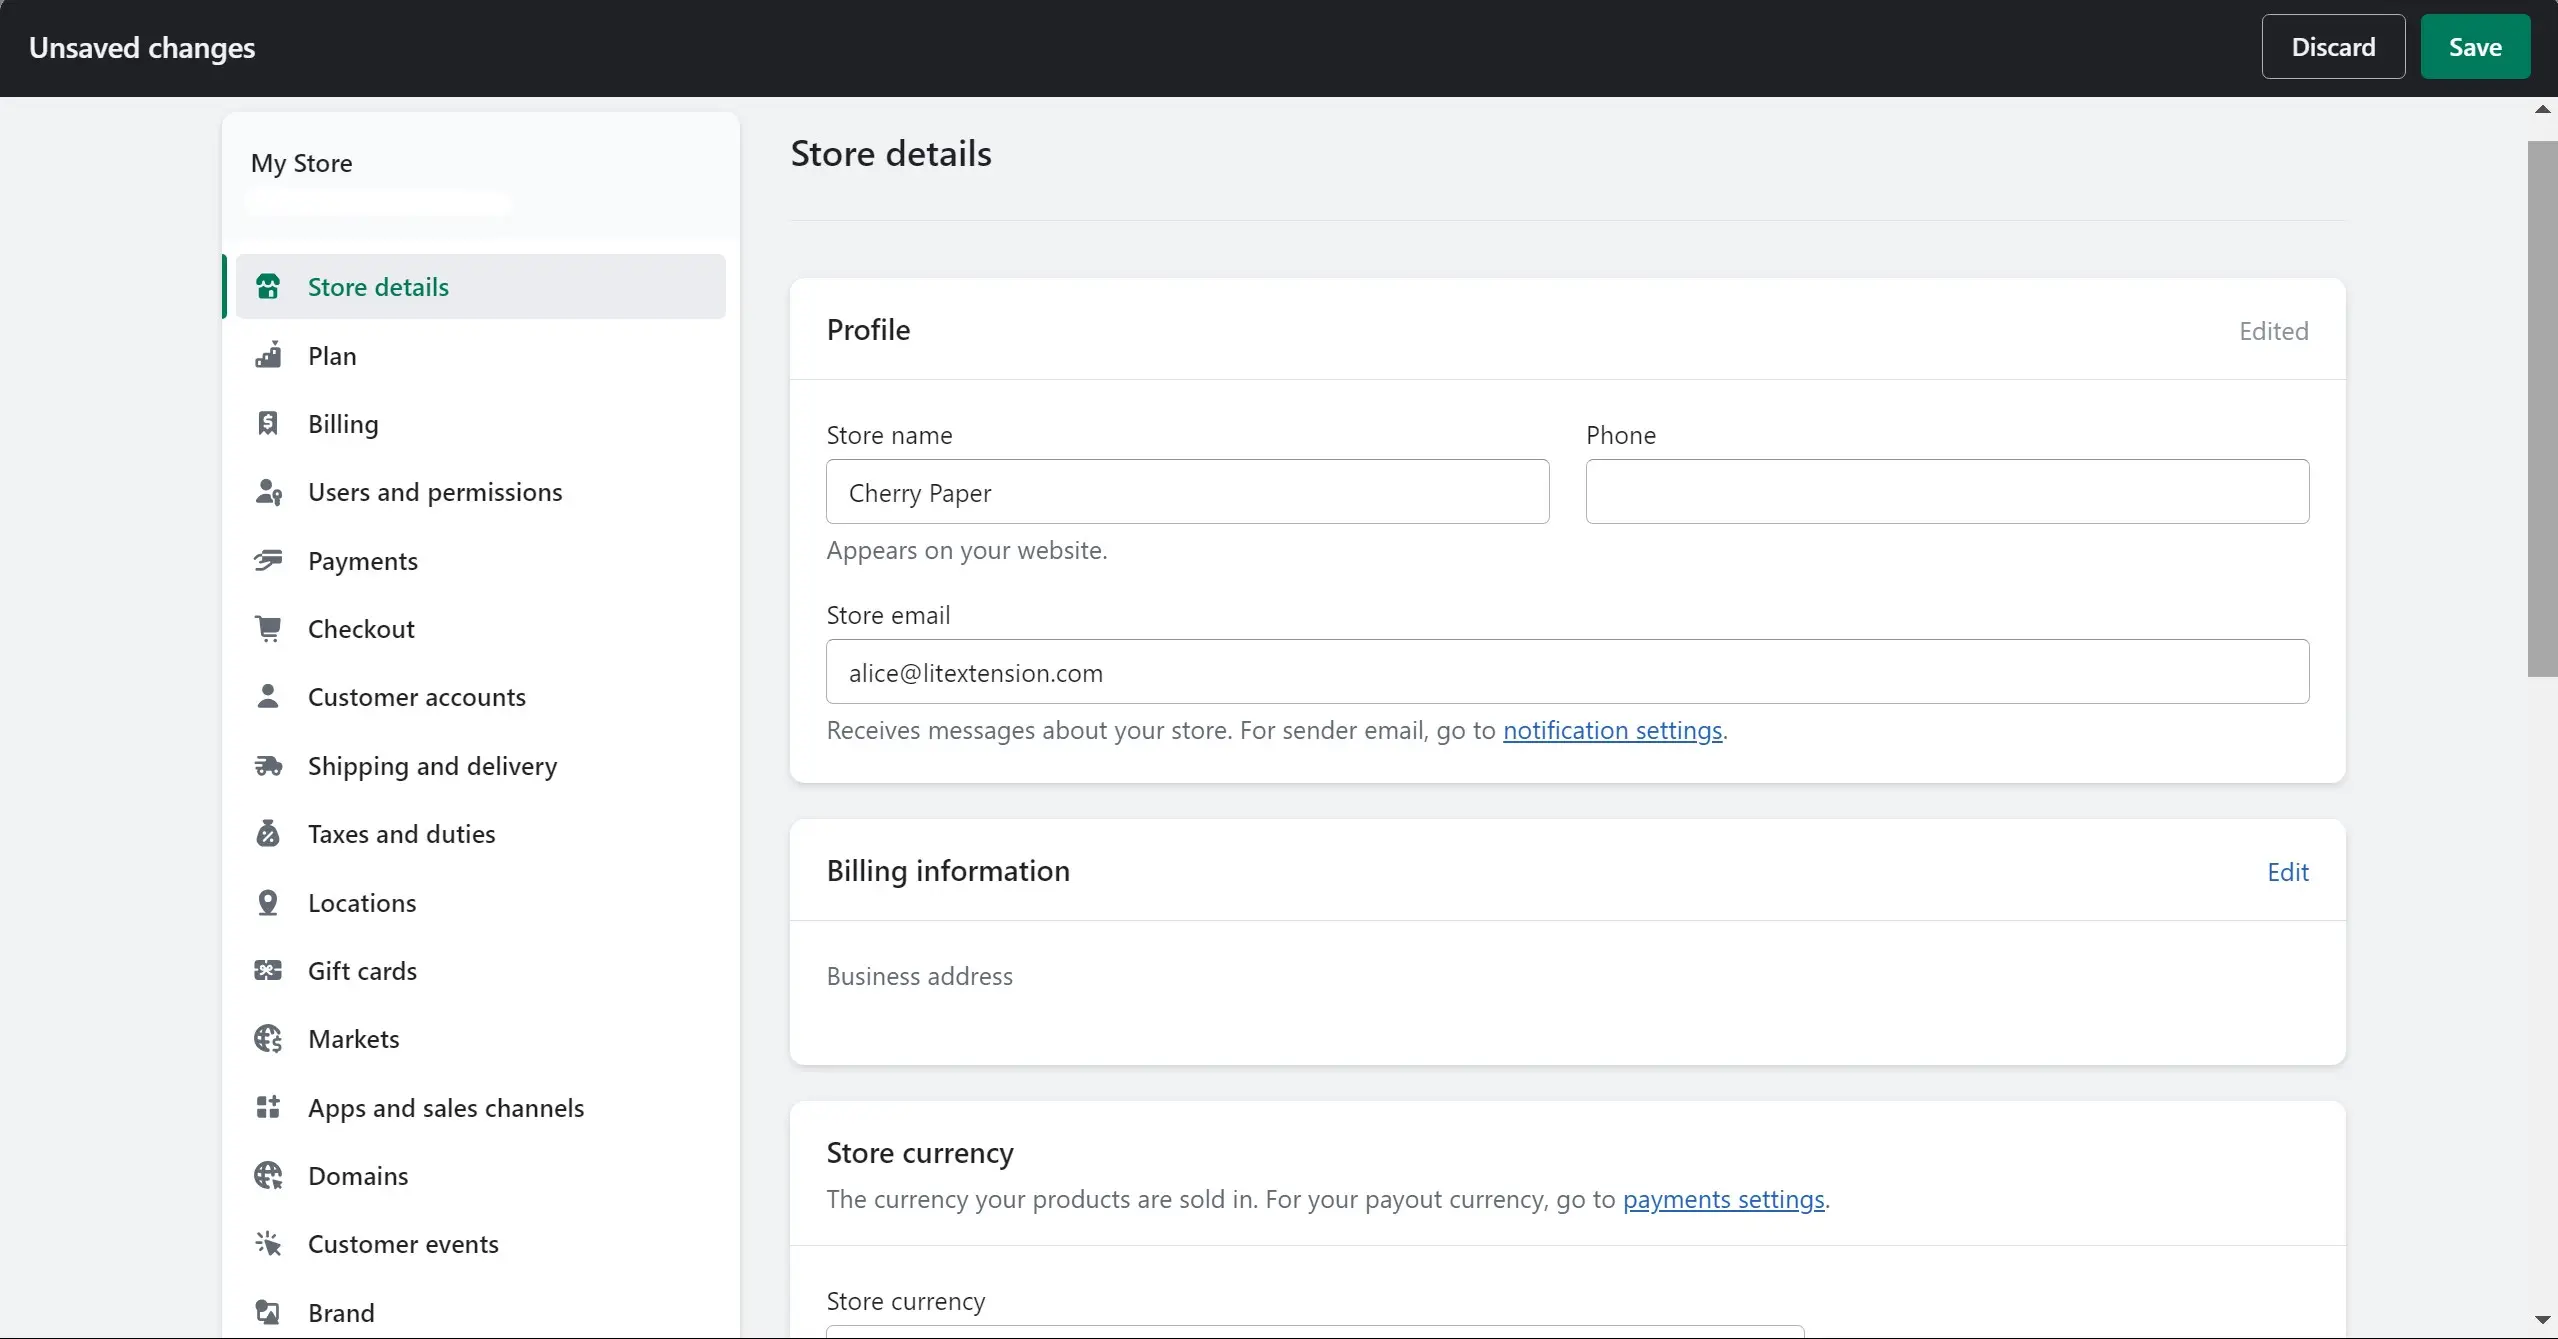
Store details
This element is your general information about the business.
Locations
Relates to inventory management, order fulfillment, and product selling. The locations might be any destinations (i.e. outlets, warehouses, drop shippers, etc.) or apps that connect with your inventory. The number of locations is limited based on your selected Shopify plan.
Shipping and delivery
After drafting out a solid shipping strategy, this is where you choose your preferred delivery methods for the business. Later, customers select one of the methods during checkout, and the shipping zone or rates will depend on where your customers are located.
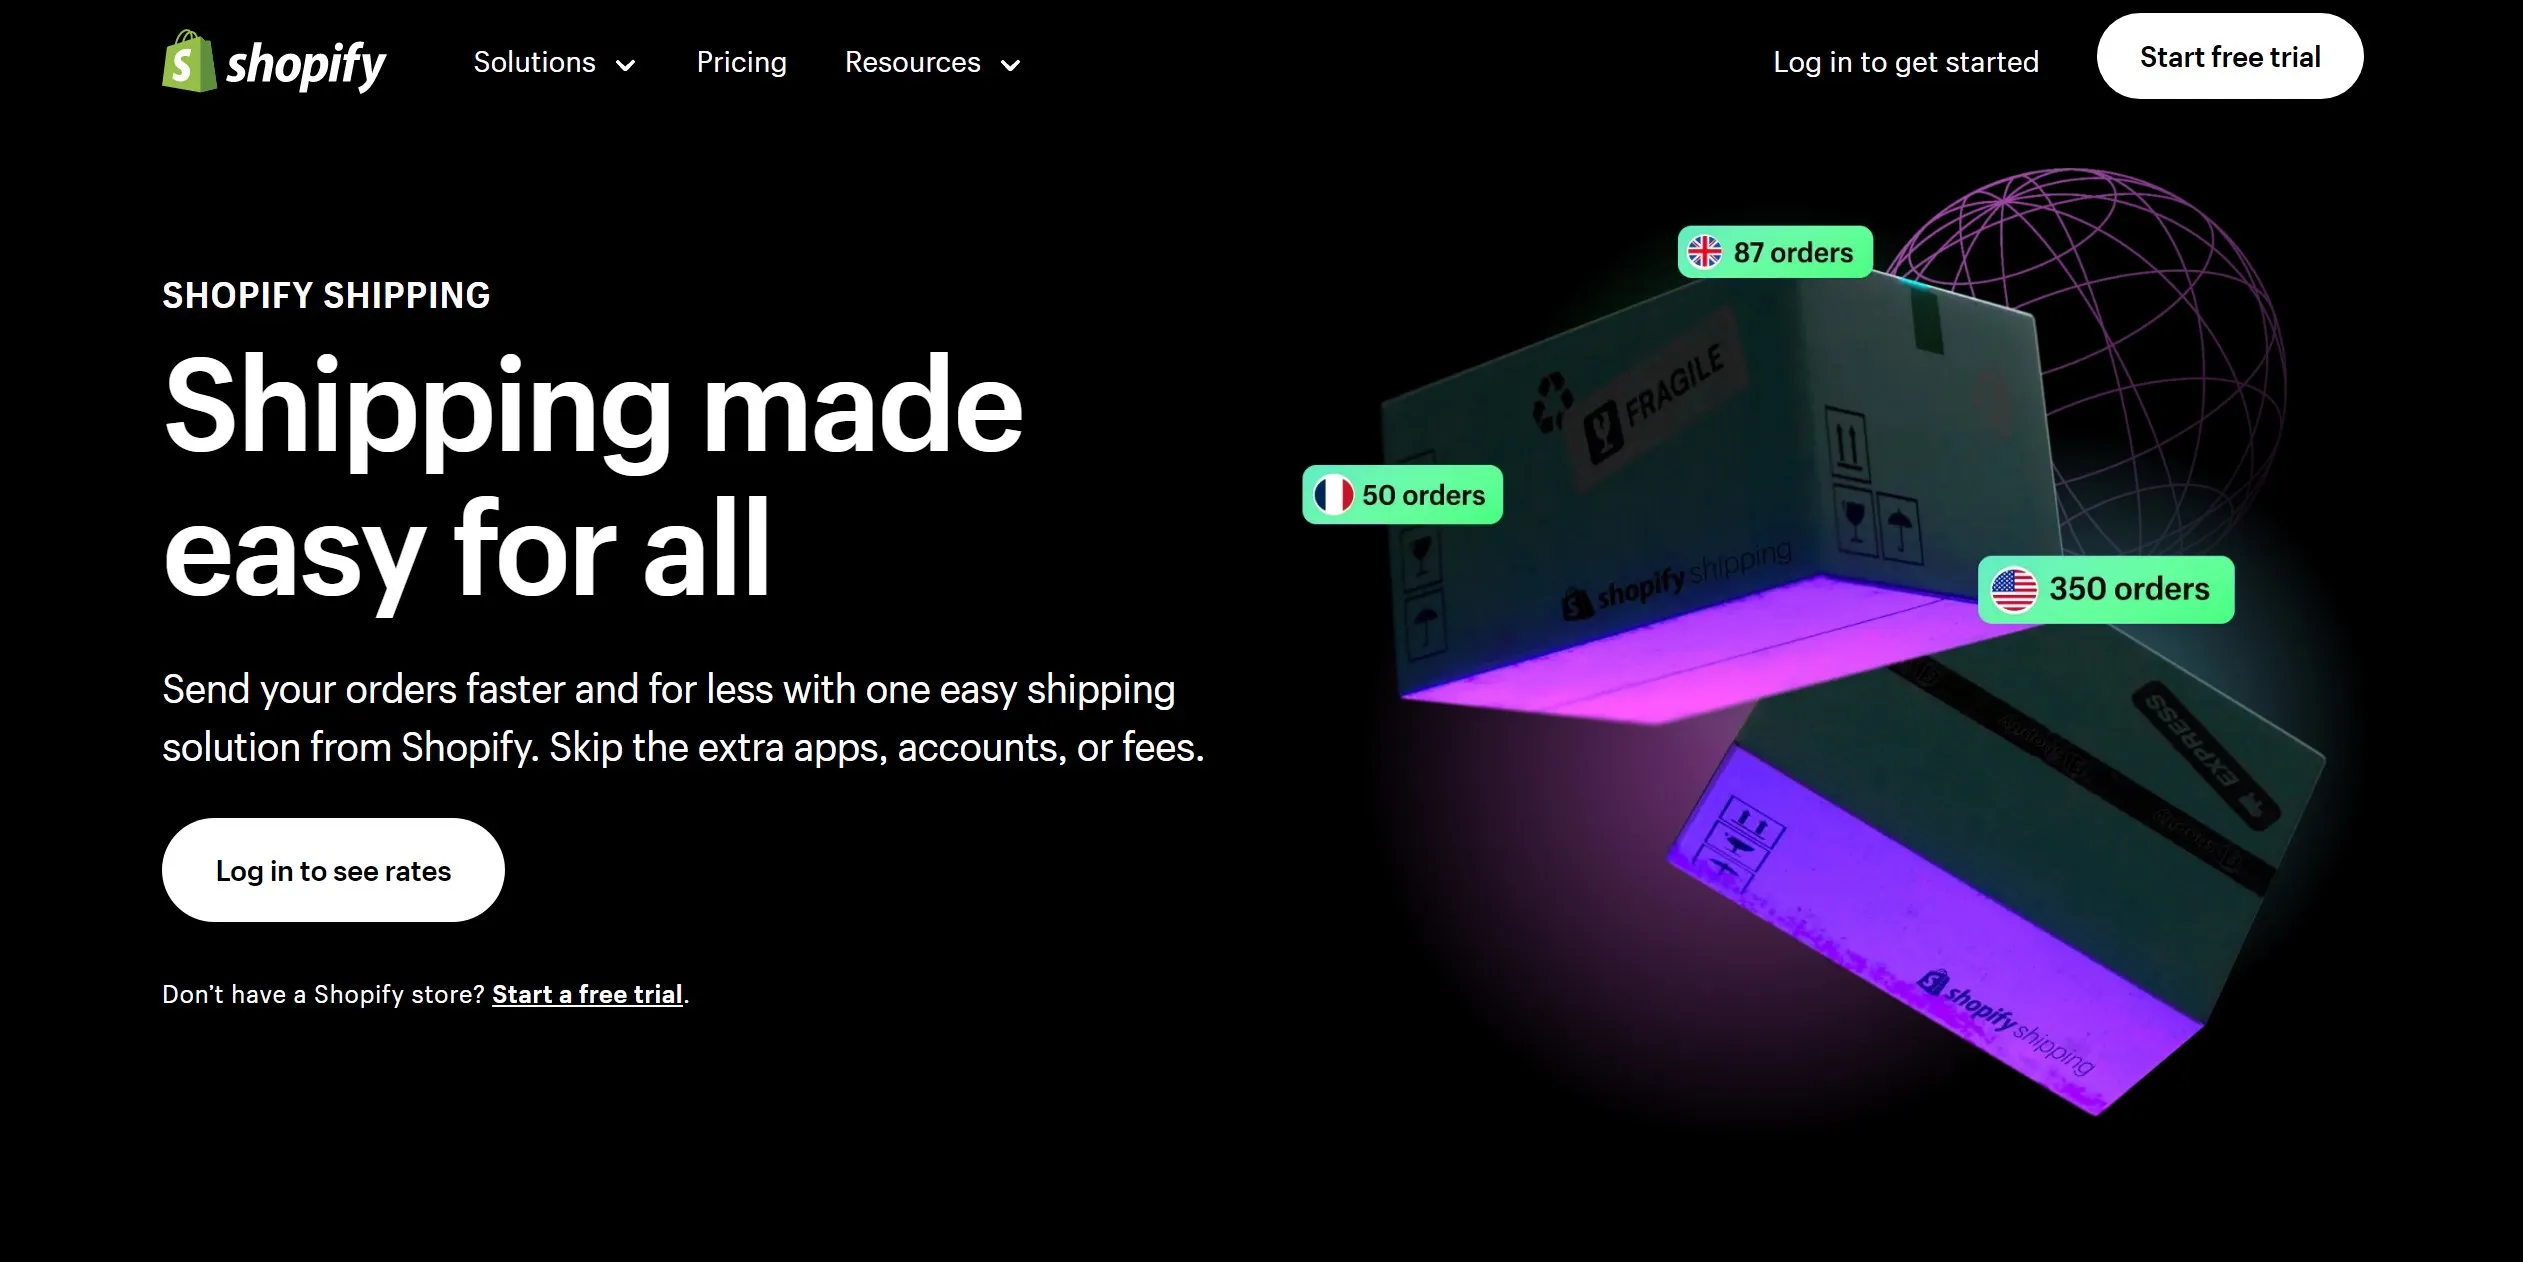
Shopify Shipping supports domestic services for Canada and the USA that help merchants to cut down some costs. They provide shipping labels that show the rates and optimize the delivery speed by allowing customers to leave packages at any post. At any location, you can totally offer free shipping based on price range, product weight, or discounts.
Checkout
This is where you (as the store owner) confirm orders. You can change the layout of your checkout page in the theme settings section. In this section, let customers create user accounts to store email, address, order history, etc. so that that information can be auto-filled at checkout.
At this step, you can also set up other accelerated checkout methods, namely Shop Pay, Google Pay, or Apple Pay. These Shopify checkout buttons will save lots of time for customers during the checkout process.
Receive payments
Before choosing the payment provider, make sure to keep an eye on both your location and your customers’ when selecting payment gateways, along with transaction fees, card types, and on-site/off-site checkout.
You may want to choose Shopify Payments or consider a list of more than 100 third-party providers for credit card payments. With non-credit card payments, you have probably heard of PayPal as the default provider, Amazon or Apple Pay. You check out our Shopify payment testing guide to properly set up payment on your Shopify store.
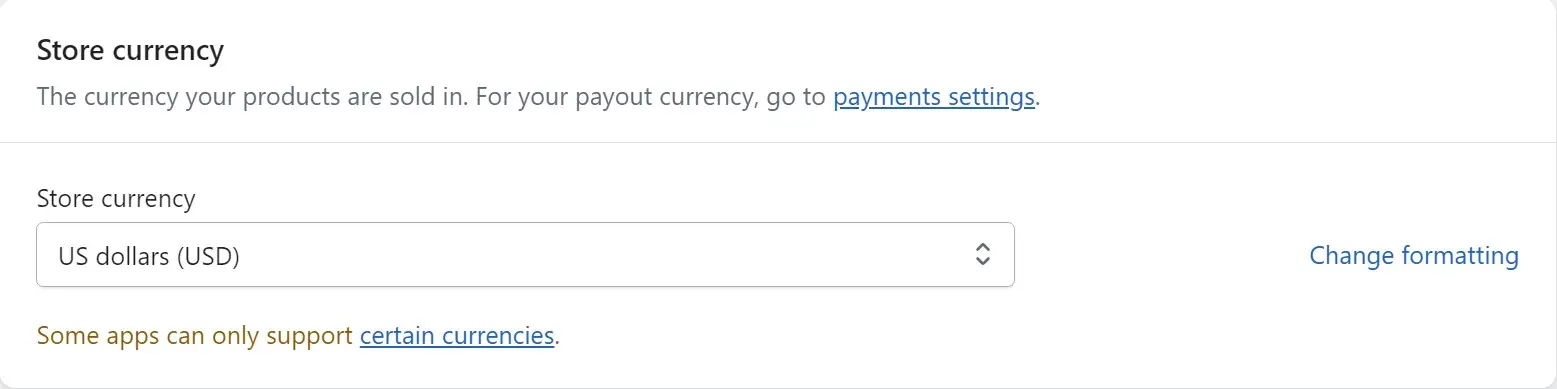
To choose your preferred currency, go to Settings > Store details > currency
Taxes
Most countries will require you to generate a tax on product sales and remit it back to the government. Luckily, Shopify with other invoice tools, such as Free Invoice Generator by PageFly simplifies the process by solving all common tax calculations. It applies default rates that need your confirmation or modification. Additionally, reports are available to help merchants to organize submission details when returning them to the government.
Learn everything you need to know about calculating taxes on Shopify with our Shopify Sales Tax Tutorial.
Step 6: Test your store
If you make it to this stage of the Shopify tutorial, it’s likely that you want the website to go live right away. However, you’d better test your online store before taking some orders. To test the online transaction, you can look for Shopify’s Bogus Gateway – a payment provider that enables stores to proceed with the testing.
Go to Settings > Payments to deactivate any providers that you have enabled.
Then, go to the Third-party providers section and click on Choose third-party provider. On the Third-party payment providers page, you can see Bogus Gateway right at the top of the list. Click on it.
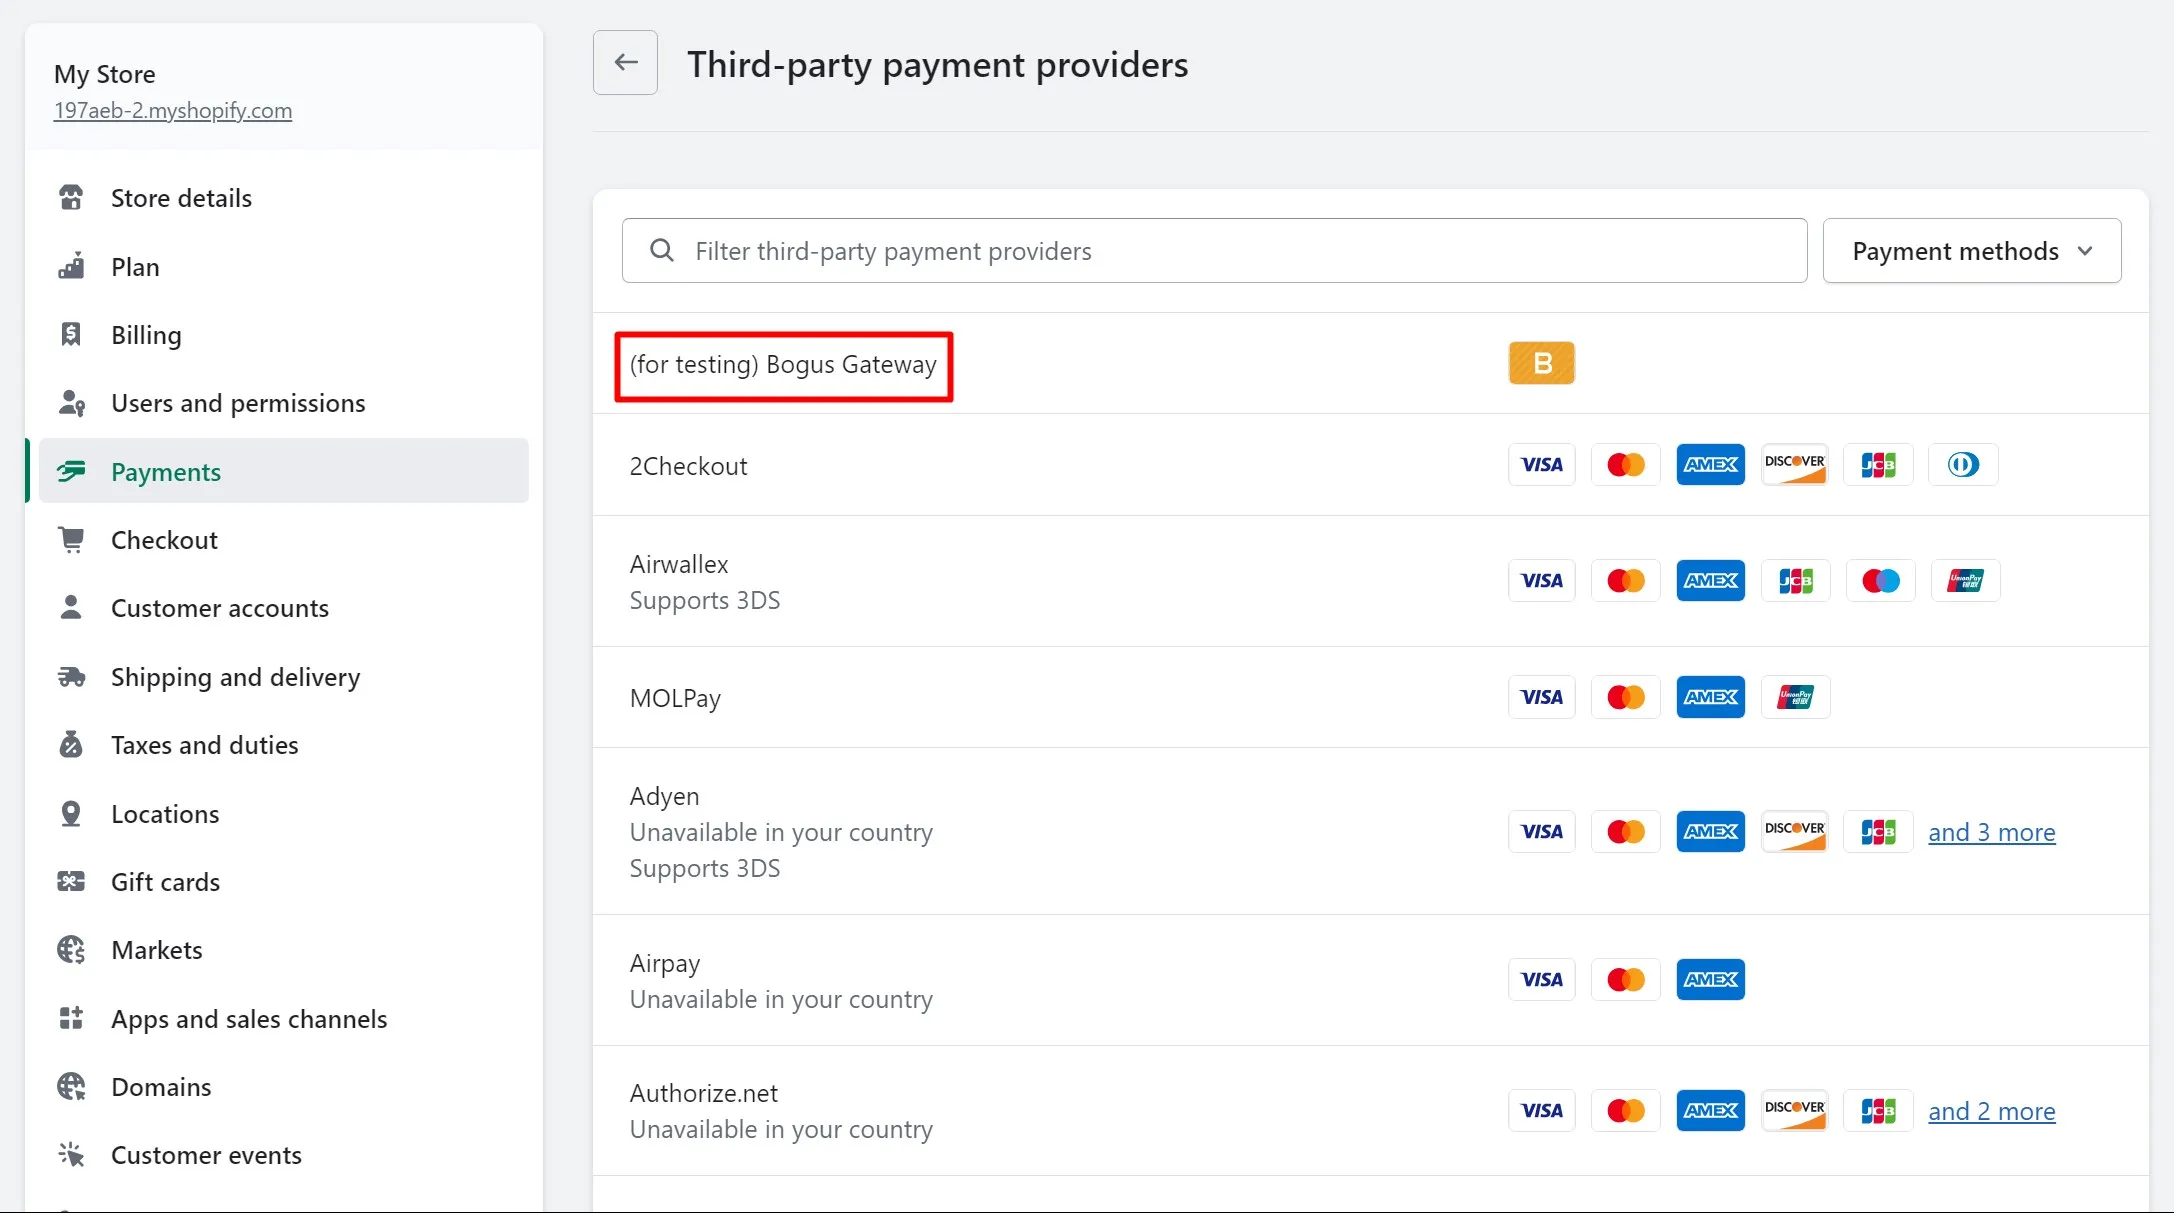
Then read the tutorial for further understanding and click on Activate (for testing) Bogus Gateway to start the testing.
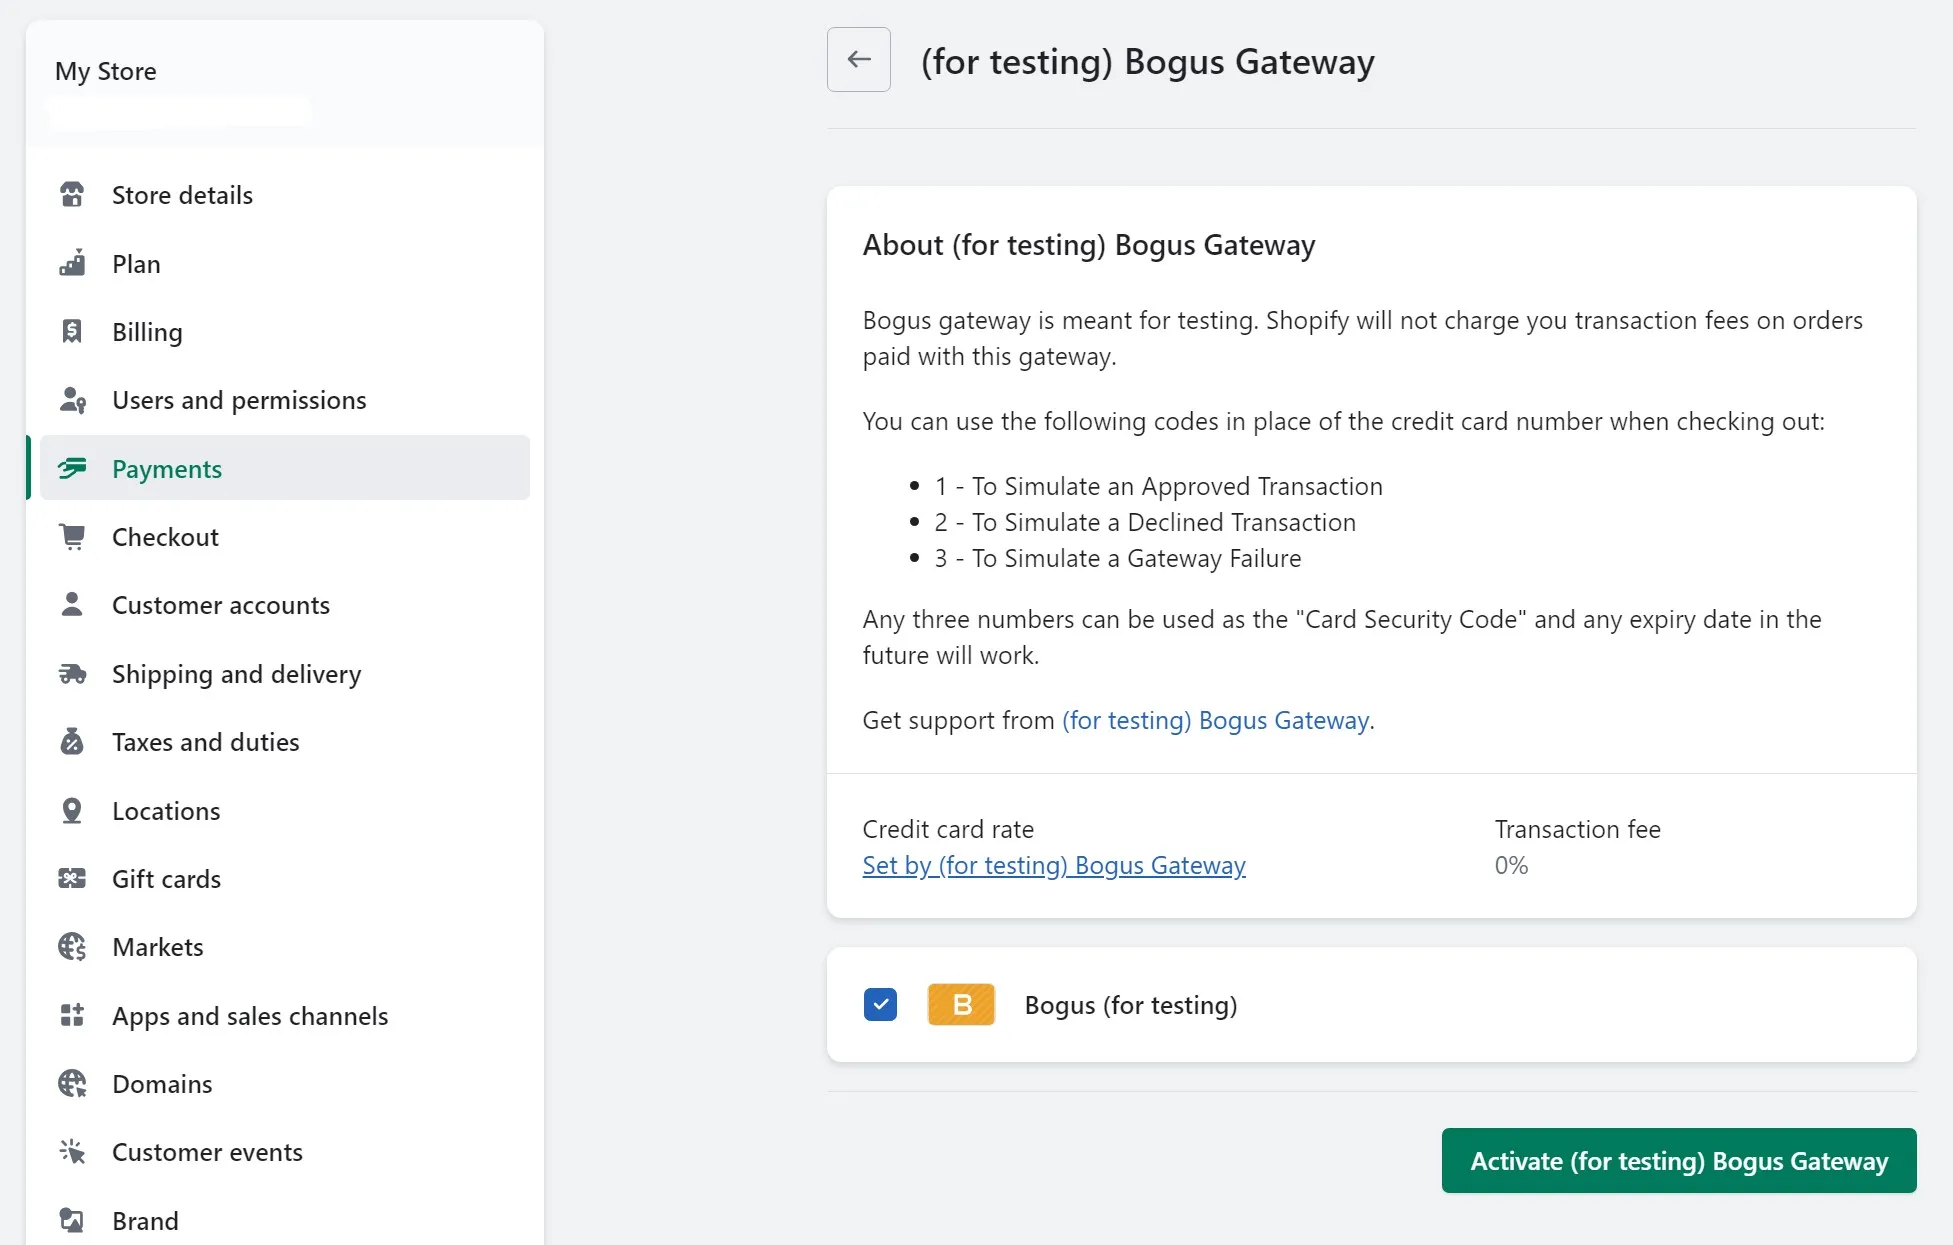
After that, you can visit your store website like any other customer and place some orders. Otherwise, you can apply an alternative way which is to use an actual credit card and test if the fund’s transfer is finished.
Don’t forget to cancel that order if you don’t want to charge yourself any fees though.
For further details, please check out our guide on how to test Shopify payments.
Step 7: Add a custom domain
The next step in this tutorial is adding a domain name. Just like any other website, your website needs the domain name as the address that allows visitors to search on the engine and access the store correctly. Here, Shopify offers a direct solution for you.
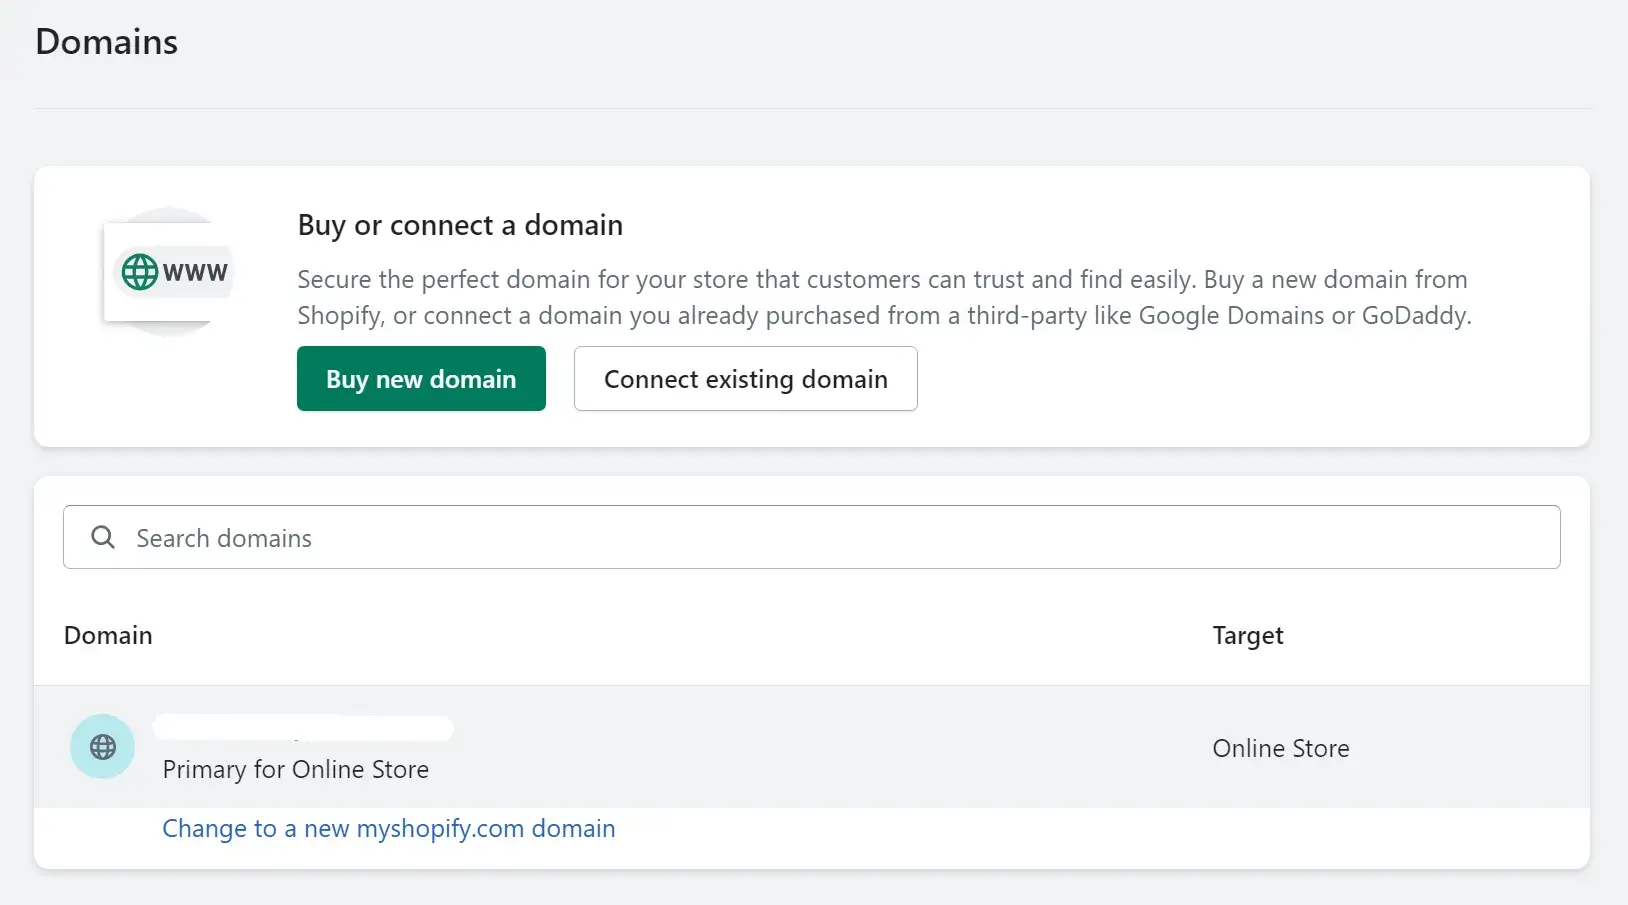
You can go to Settings > Domain.
domain
At first, Shopify assigned a default domain which is www.store-name.myshopify.com. Later on, when branding becomes more essential, any merchants (including you) will eventually want a different name that displays a customized URL, such as www.store-name.com that can also rank better in search.
In this instance, you can either buy a domain name from Shopify, which usually charges $11 (and above) yearly with automatic configuration. Not to mention, you can keep the domain name even if you no longer use the platform. Or else, you can purchase a domain name from many other providers that are available online.
When choosing a store name, our advice is that you should make sure it’s unique, clear, and easy to pronoun so that your store can stand out among the competitors.
In case you want a new store name, read our article on how to change your Shopify store name or change your Shopify domain name in the most efficient way!
Step 8: Optimize the store with Shopify apps
This is the last stage of this Shopify tutorial, where you can dive more into how Shopify works and improves the functionality of the apps!
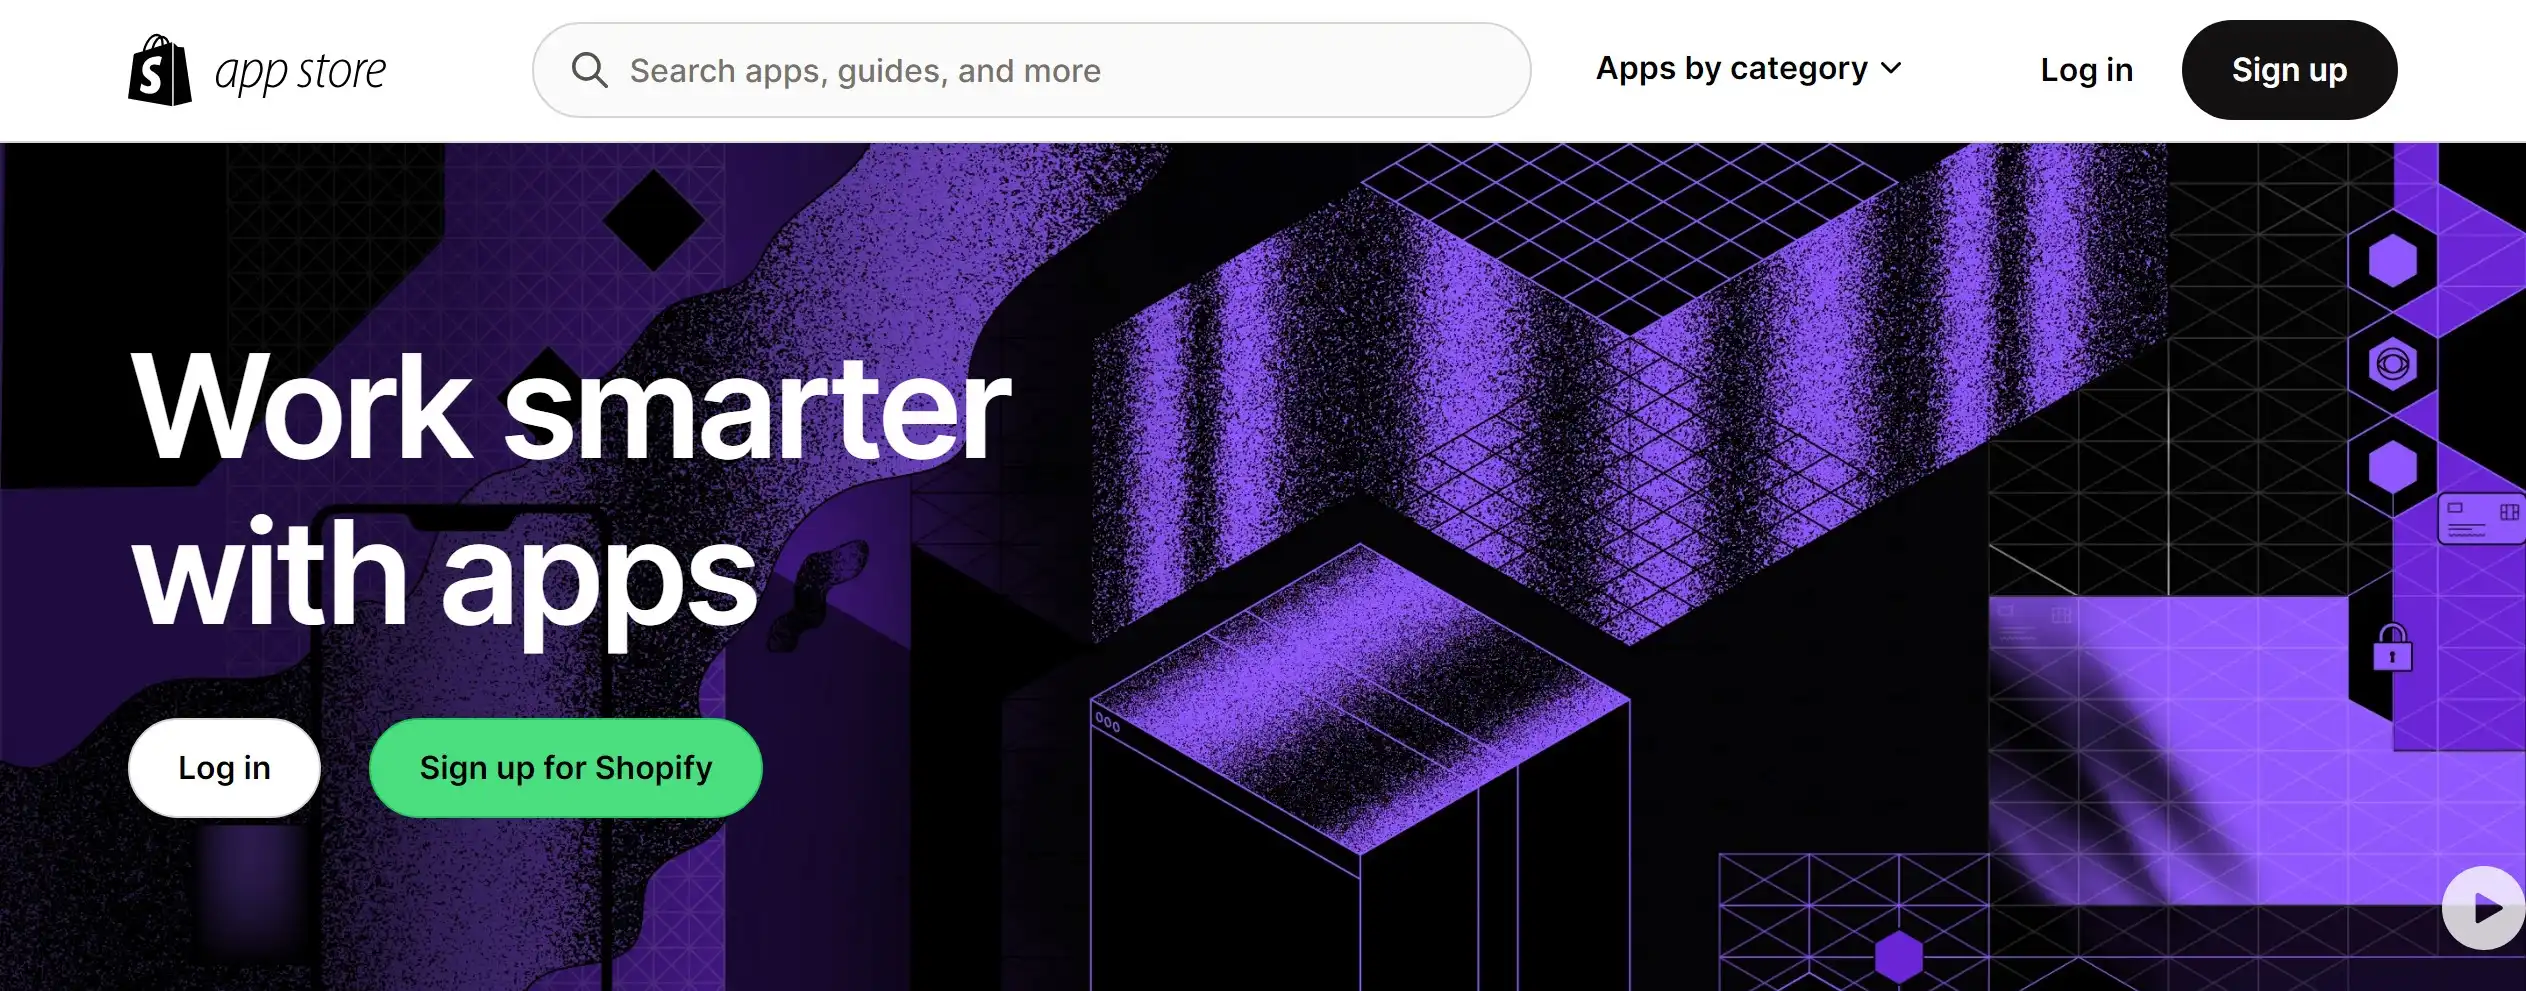
Accordingly, there are probably over 6000 Shopify apps on its App Store that can support any merchant to get more sales, generate social proof, or improve SEO capability. Sharpen your experience by skimming through our top-notch Shopify tips to boost sales that you should not ignore.
Go to Apps in the sidebar from the Admin page, and you will see a few recommended apps by Shopify based on your needs. Please take a look at my recommendations of the best Shopify apps to bring your store to another level. Or, if you want to save some bucks, feel free to check out my suggestions on the 25 best free Shopify apps.
Other crucial apps that I believe you should not ignore:
And that brings us to the final stage of this Shopify tutorial. But don’t leave yet, I still have some tips for you!
Step 9: Pick a plan and start the business!
Congratulations if you have made it to this stage of our Shopify tutorial! Once you make a decision to get the store to go live, spend some time researching and choosing between the 5 Shopify pricing plans: Shopify Starter, Basic Shopify, Shopify, Shopify Advanced, or Shopify Plus.
After selecting a plan, remember to remove all storefront passwords to get the store public. Go to Themes > Disable password.
Want to Migrate Your eCommerce Platform?
If you are intending to migrate to Shopify Plus, LitExtension offers a great migration service that helps you transfer all your data accurately and seamlessly with utmost security.
Shopify Tutorial: A Brief Introduction
1. What is Shopify?
It’s safe for me to say that Shopify is now one of the best eCommerce platforms that are created for all-size businesses. Since its launch in 2004, Shopify has supported over 800,000 digital stores across more than 175 countries and is undeniably becoming the #1 solution in shopping carts. Whether you desire to run a store business across any channel, Shopify is the best choice for beginners.
Don’t forget to check out other Shopify resources that I believe you should not miss:
In case you are wondering what this platform offers, please check out our Shopify review or take a look at the video below before moving to the tutorial.
2. How much is Shopify?
Building a Shopify store may only require a few clicks, but without an absolute Shopify tutorial, how to spend a good deal of money on it can give you sleepless nights, in my opinion.
To troubleshoot this all-time problem, I have fully analyzed Shopify pricing and features along with comparing different Shopify plans for each type of business. Though Shopify is not free, I personally think it is not outrageously expensive either if you are just a starter. The prices of this hosted solution vary considerably between price levels and the scope of business.
If you want to start the Shopify tutorial right, don’t forget to check out my insight on Shopify pricing plans in the table below:
[wptb id=49659]
All in all, to successfully set up a functional and profit-driven Shopify business, several costs are by default. For instance, your online presence can only get sales after setting up the hosting, a domain name, choosing a suitable theme, payment charges, and integrating with the best Shopify apps to enhance your store. Therefore, I will try my best to cover all these elements in this Shopify tutorial.
3. Which products or services can you offer on Shopify?
A Shopify tutorial won’t be completed without knowing the best products to sell on this platform.
With Shopify, You can offer a wide range of items – from dropshipping products to digital assets. As long as your listings don’t violate Shopify’s regulations, you can basically sell everything here.

Shopify dropshipping
Moreover, if you have been active in eCommerce for a while, you have probably heard of dropshipping – a new profitable business model. However, do not worry if you are just a beginner. Dropshipping is an easier option to start a business without managing product manufacturing, inventory, or shipments.
For Shopify, you can check out two popular dropshipping applications: Dsers and Spocket. Then you can decide which applications will benefit your current business status.
Now that we have a clear understanding of what is Shopify, let’s move on to the most important part, the Shopify tutorial and how to use this platform.
Shopify Tutorial: How To Use Shopify With Cost-Efficiency
In the long term, you might get your head in the online selling battle. Though there are hundreds of ways to make money on Shopify, some do not always make your profit margins better. To put an end to this Shopify tutorial, here are several quick solutions for you to consider when setting up a Shopify store:
1. Get the right Shopify plan
Check out if you’re not using all the features. This can also happen to app usage, when you may be losing money for premium apps but, in fact, only need the free package.
2. Boost app usage
Make sure to use all the apps because you might be paying for some even when not using any features at all. Especially, be aware of multi-purpose apps (i.e. Vitals, Sales Rocket, etc.) which can charge more than you think.
3. Avoid chargebacks
These might be a considerable drain on profitability and charge more fees. So, you should choose an app that avoids chargebacks to the store. Sometimes it only charges 5%, but reducing it can make a big difference in your profit.
4. Avoid transaction fees
Avoid using many payment gateways at the same time. Most gateways charge by the transaction volume made on your store site. If too many payment gateways are activated, you may receive very high transaction fees.
Make Your Migration Project A Breeze with LitExtension
Don’t have time to manually migrate to Shopify? Let LitExtension lift the burden off your shoulder with our top-of-the-class migration service. Enjoy a streamlined and secure data transfer process with no technical skill required!
Shopify Tutorial for Beginners – A Quick Recap
In all honesty, this Shopify guide is quite long at this point. So, here’s a quick recap on how to use Shopify in case you get lost.
#1. Create a Shopify account: Simply go to the Shopify homepage and select “Start free trial“.
#2. Explore the dashboard: At this step, you’ll be able to find everything you need to set up Shopify store
#3. Choose a storefront theme: Don’t forget to select a stunning yet functional website template to stay on top of customers’ minds.
#4. Add your sales channels and products: Your Shopify store setup process won’t be completed if you don’t include the products you want to sell and where else you want to sell them.
#5. Configure essential settings (payments, shipping, etc.): These settings will come in handy when you want to deliver a smooth and seamless customer experience on your website.
#6. Test your store: Don’t forget to put your store to test to ensure there won’t be any errors or glitches during the Shopify store setup.
#7. Add a custom domain: Owning a custom domain boosts your chance of ranking higher on SERP and staying on top of customers’ minds.
#8. Optimize the store with Shopify apps: I believe that these third-party plugins will further enhance your store functions and help you manage your business better.
#9. Select a Shopify plan and publish your store: Congratulations, you’ve reached the final step of the Shopify store setup. Now, simply choose the plan that works best for you and publish. Now you are ready to go!
How to Use Shopify Tutorial – FAQs
[sp_easyaccordion id=”56360″]
Final Thoughts
Whew! This Shopify tutorial has covered pretty much everything you should know on how to start a Shopify store.
As mentioned above, Shopify is a top-rated platform for eCommerce businesses for its ease of use, reasonable pricing, and various customization options! Over time, it is definitely a solid eCommerce solution to rely on for a long-term eCommerce strategy.
You can check out our LitExtension blog and join our eCommerce community to acquire more practical suggestions for your online stores. And, if you’re planning on moving to Shopify, visit our migration platform and experience the most time-plus cost-effective solution!