Introduction
Magento 2 is widely acknowledged as one of the most robust eCommerce platforms. With all innovations revolving around this version, it has grown robustly and gained trust and satisfaction from millions of online merchants all across the globe. Merchants now even can leverage Magento’s powerful capabilities to accelerate more sales in brick-and-mortar stores.
Due to its popularity and strengths, many merchants upgraded Magento 1 to Magento 2, or migrated from other platforms such as Shopify to Magento (or currently as Shopify to Adobe Commerce), to release their business’s potential with the help of Magento’s advanced features.
In this article, LitExtension will carefully illuminate the procedure to install Magento 2. Come along with us to see!
Need Help To Migrate Your Store?
If you are intending to upgrade Magento 1 to Magento 2, LitExtension offers a great migration service that helps you transfer your data from the current eCommerce platform to a new one accurately, painlessly with utmost security.
How to Set up Magento 2?

Pre-installation
Among several ways to install Magento 2, I suggest you use the most popular way, which I will discuss further below.
Before you start to install Magento 2, make sure you’ve done all of the following:
- Set up a server that meets Magento system requirements
- Created the Magento file system owner
Download Magento Software package
Go to Magento Tech Resource and select the Magento 2 installation method of your choice.
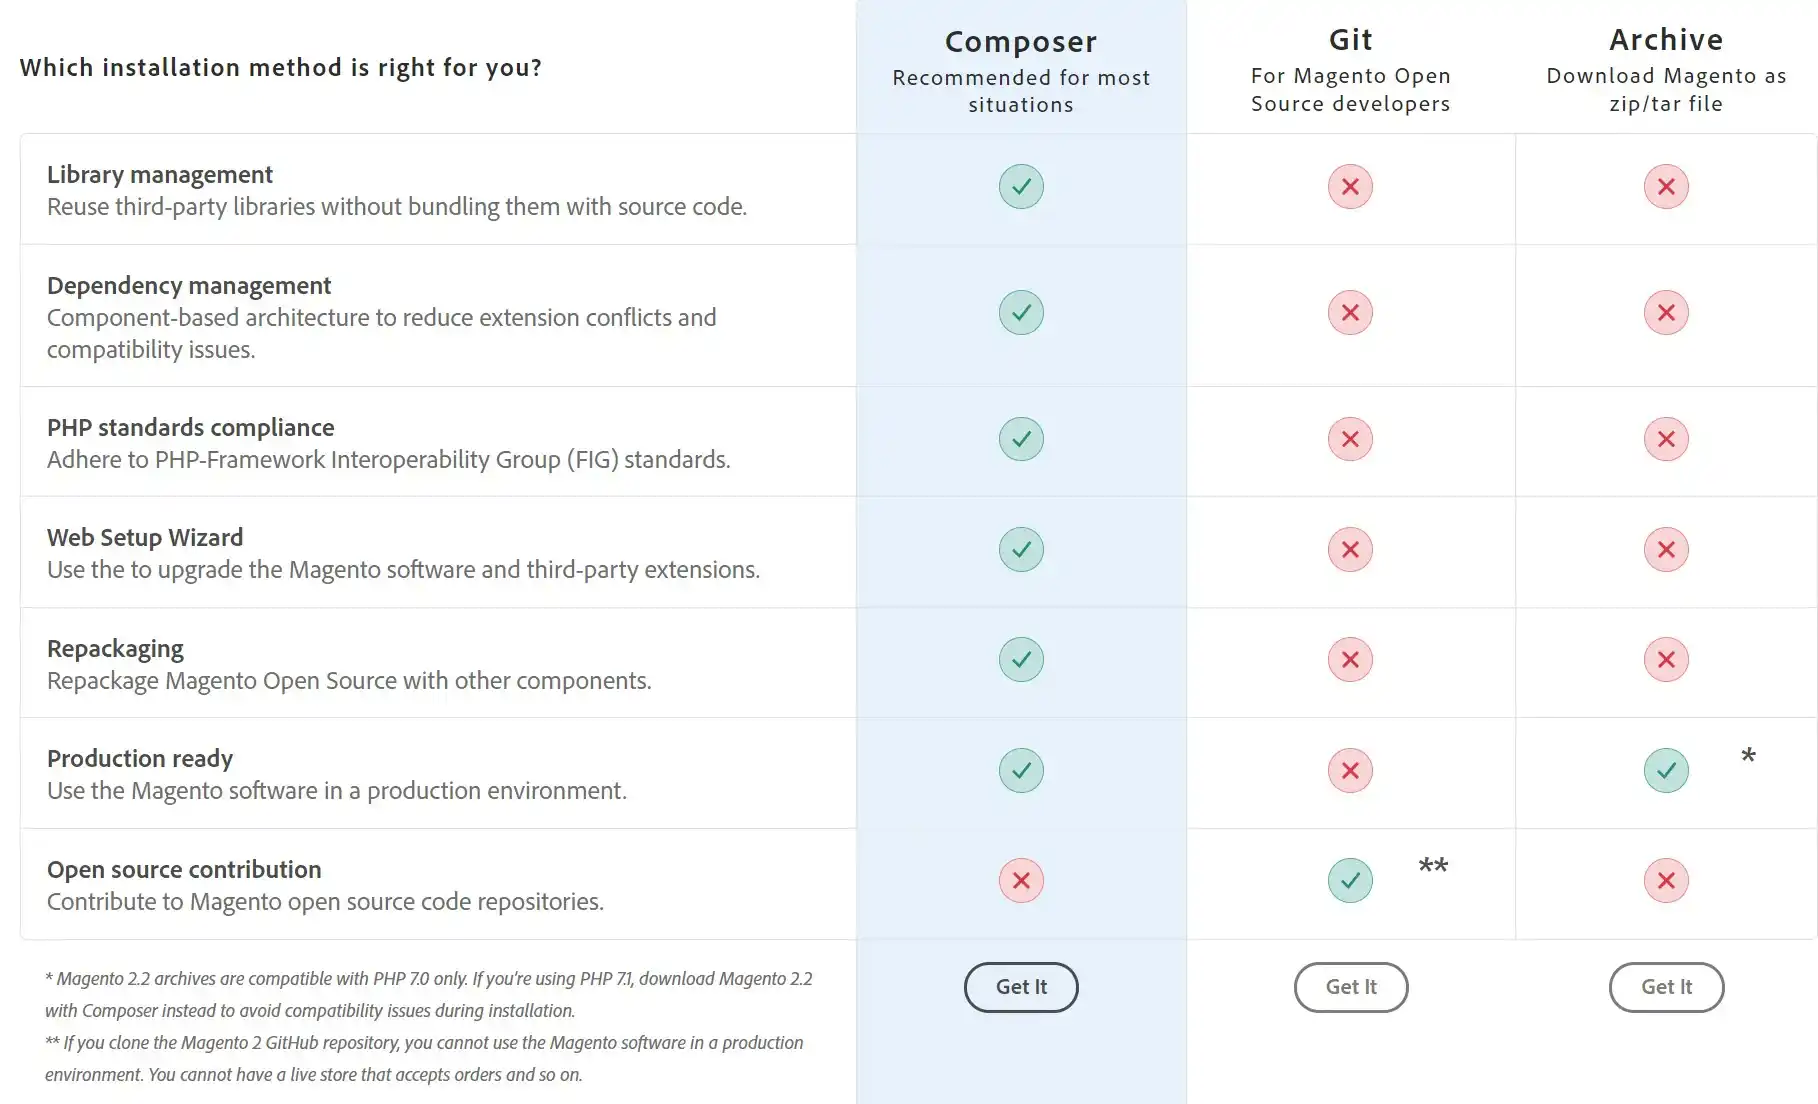
In this tutorial, I use version 2.2.1 to actualize the setup process of installing Magento 2.
Set up FTP
FTP (file transfer protocol) is an approach to migrate files from your computer to your managed server. First, you will need an FTP account to access the managed public_html server directory in order to transfer the Magento 2 archive. Probably you have had an account already. If not, you should consult the documentation or technical support of your shared hosting provider for additional information, such as Serverguy – a Magento hosting provider that is doing a pretty decent job and try its best to fulfill the Magento server requirements.
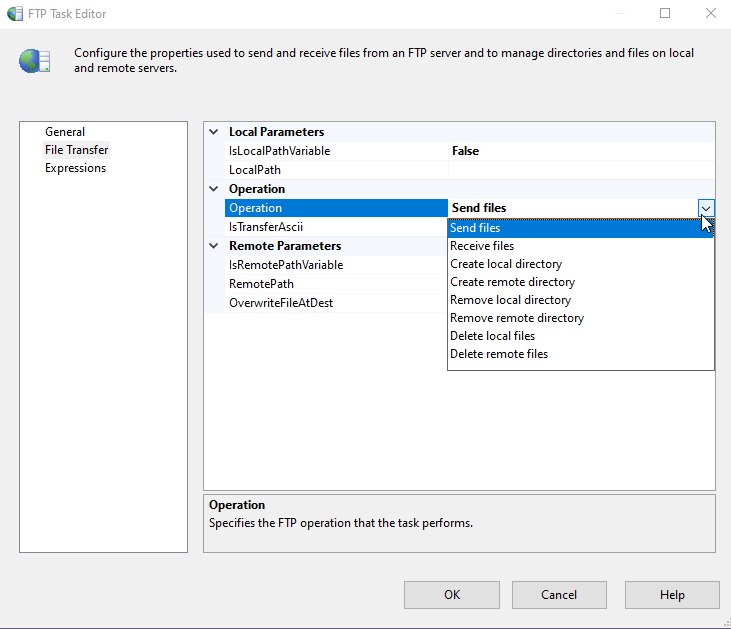
After that, you need to install and configure a file transfer protocol (FTP) to move the Magento 2 archive from your computer to your server.
There are some available ways that we highly recommend you to use:
- Windows: FileZilla or WinSCP
- Mac OS: CyberDuck or FileZilla
Need Help To Migrate Your Store?
Magento 2 Migration is super easy with LitExtension. We help you transfer all your data from any current eCommerce platform to Magento 2 accurately, seamlessly with utmost security.
Host your Magento store
Step 1: Log in to your managed server
Choose Protocol, enter “Host”, “Account” and “Password”.
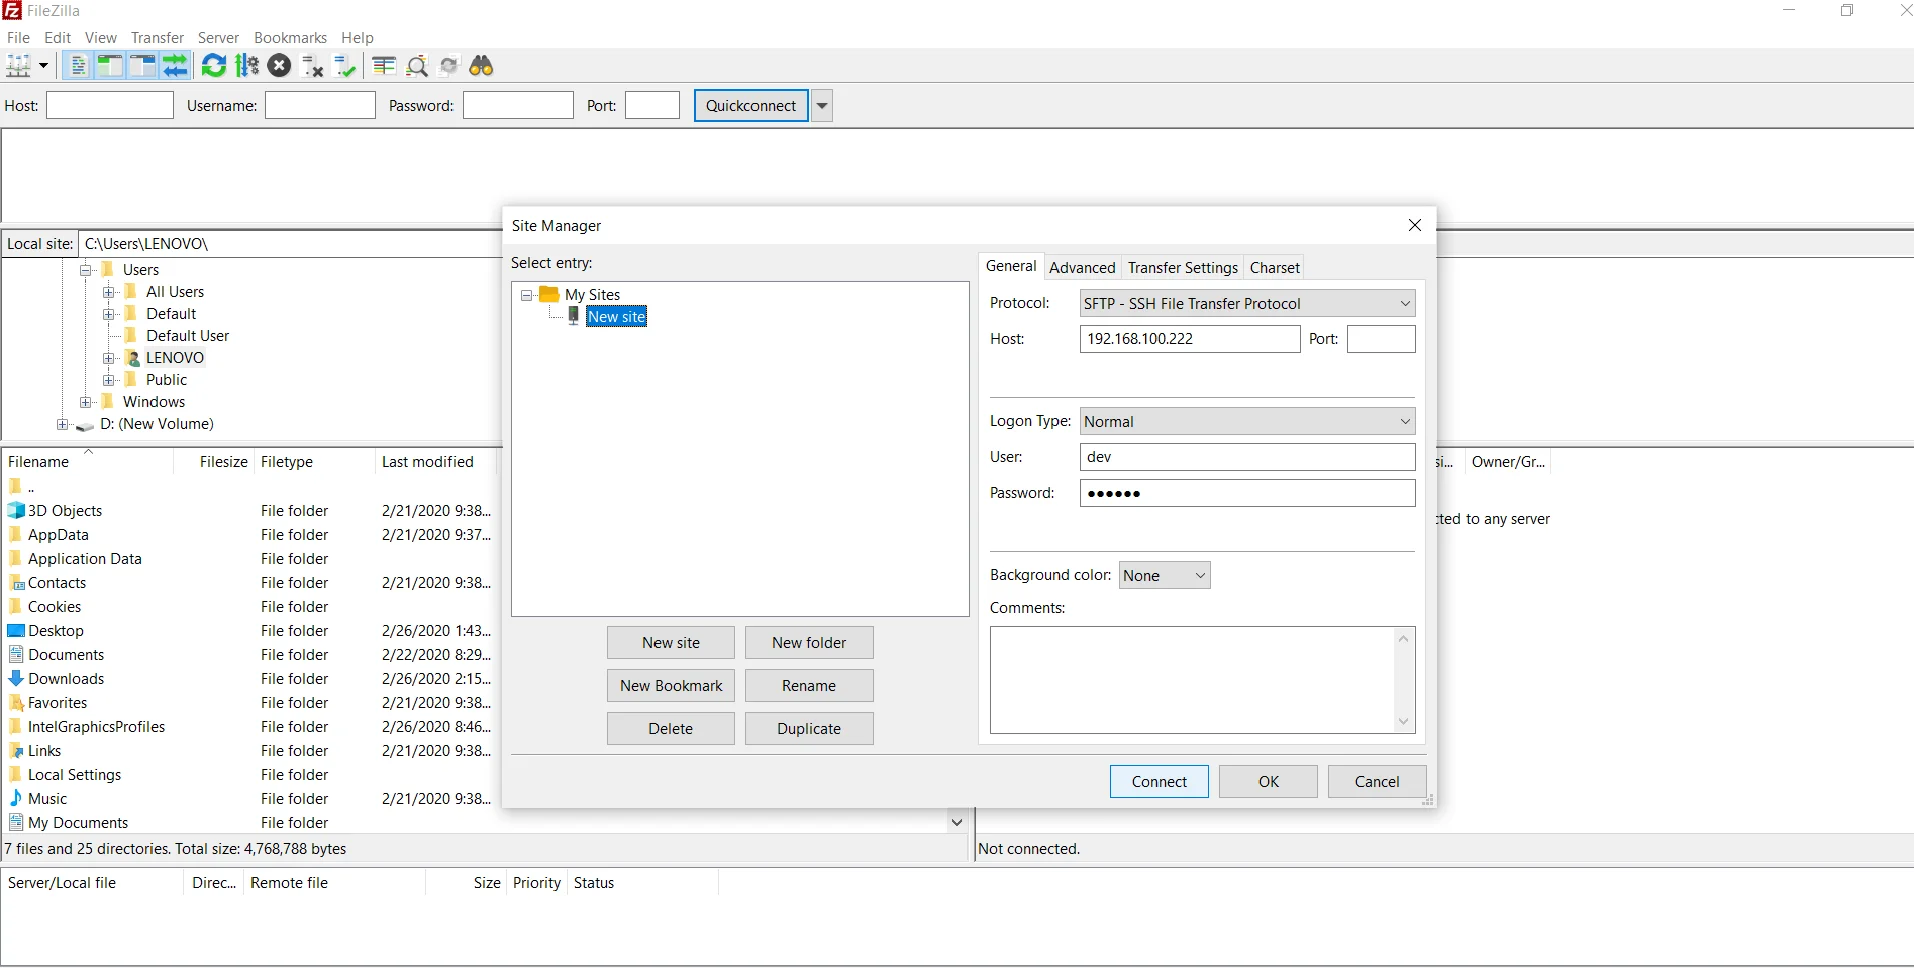
You can use the FTP account or SSH account.
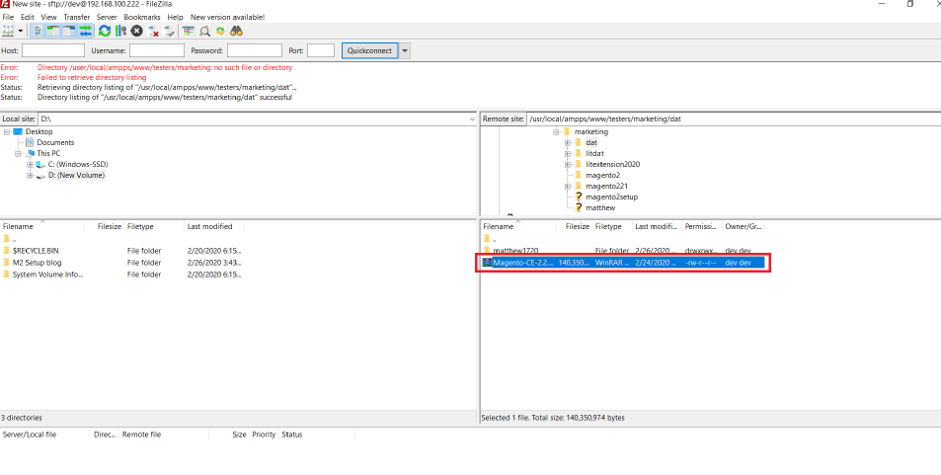
Step 2: Transfer the Magento 2 archive to the public_html directory.
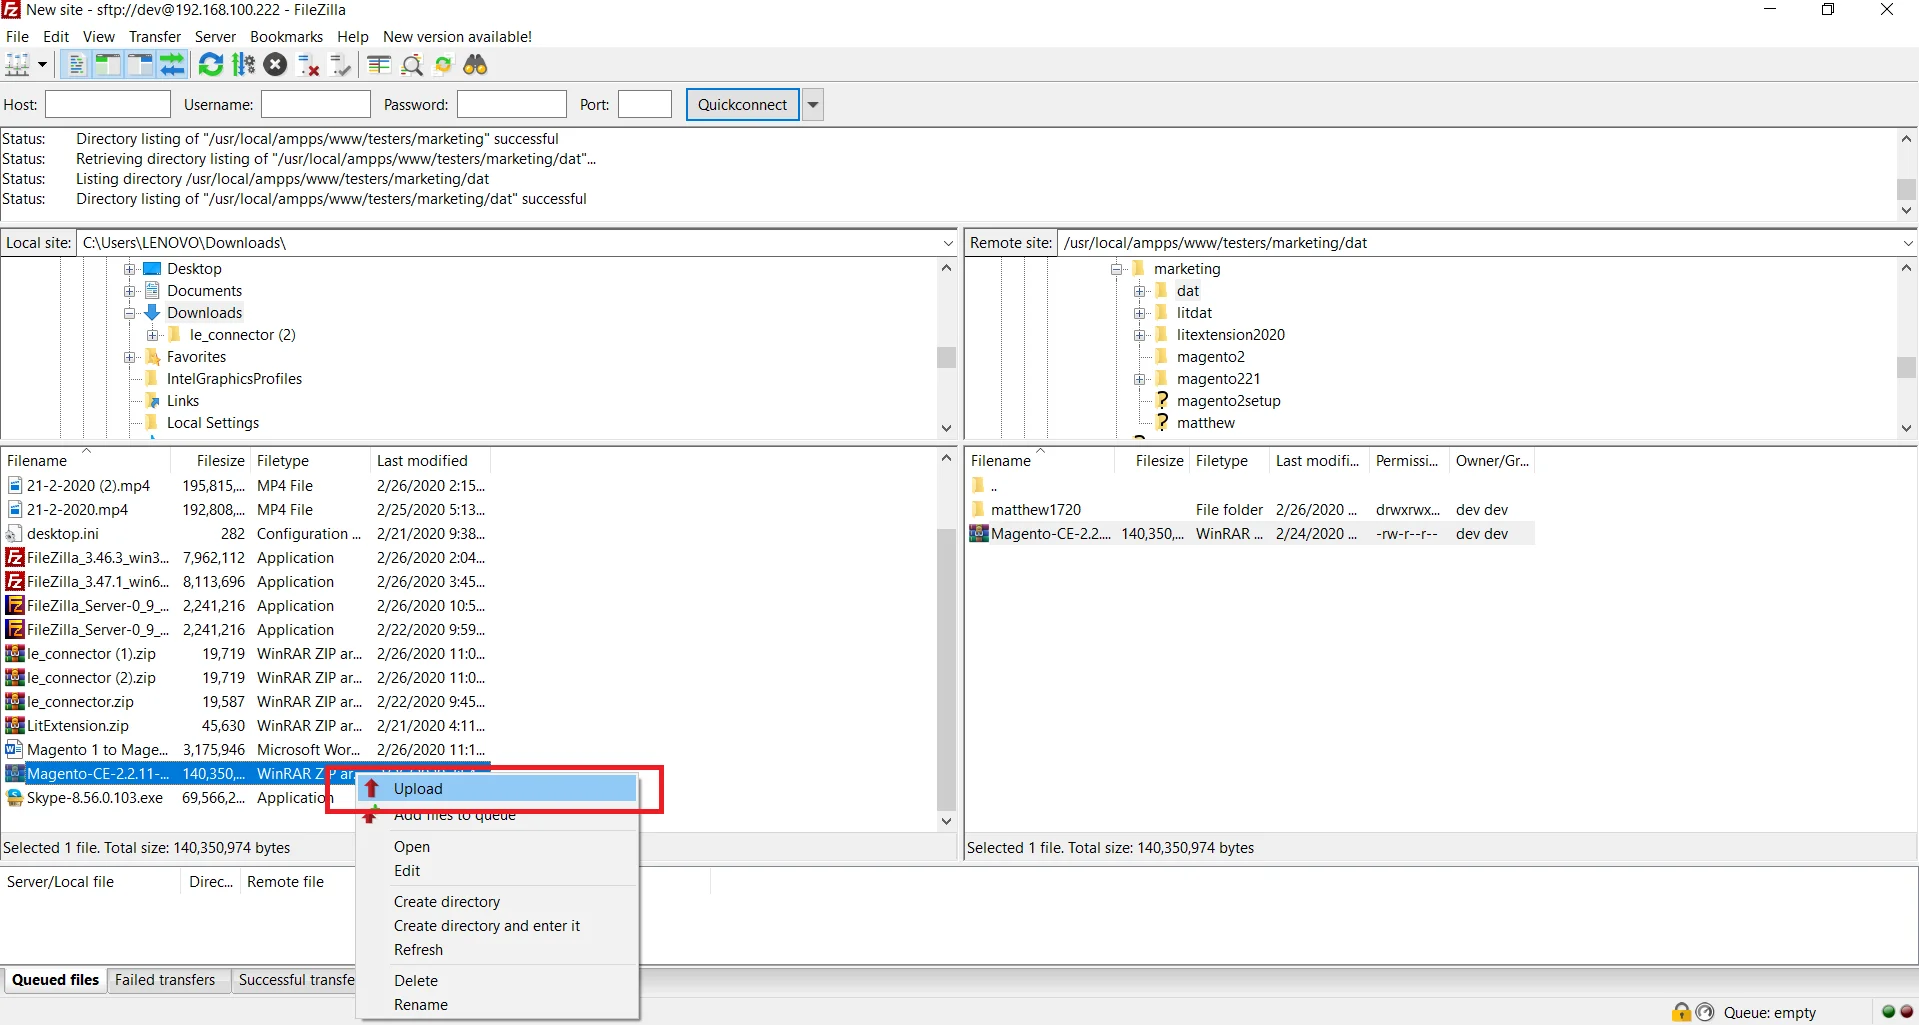
Locate Magento 2 archive on your local system on the left panel. Right-click on it, then click Upload to the folder you want to install Magento 2. In this case, my path is: /usr/local/ampps/testers/marketing/dat.
Step 3: Extract the archive
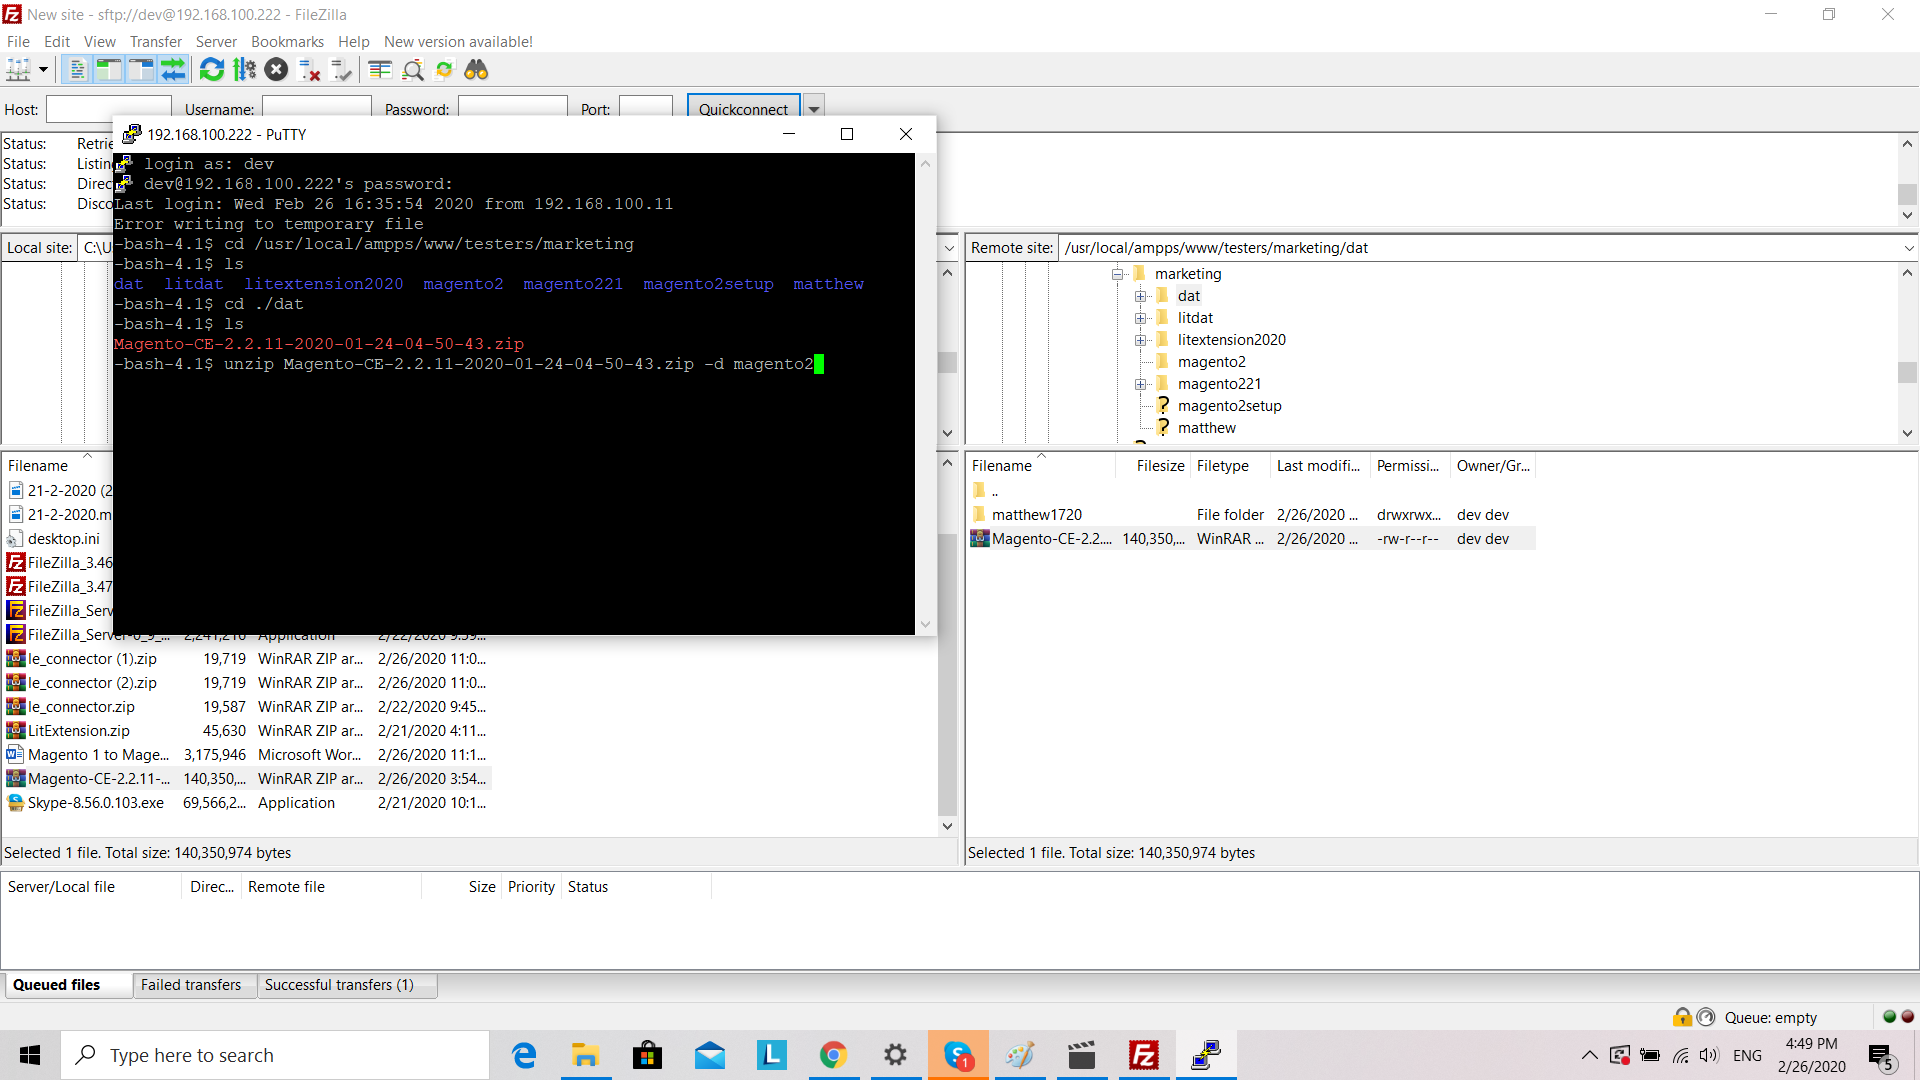
Having moved the archive to your host system, log in SSH to extract it. You can use PuTTY on Windows or SSH command in Linux-based systems.
1. Log in to SSH
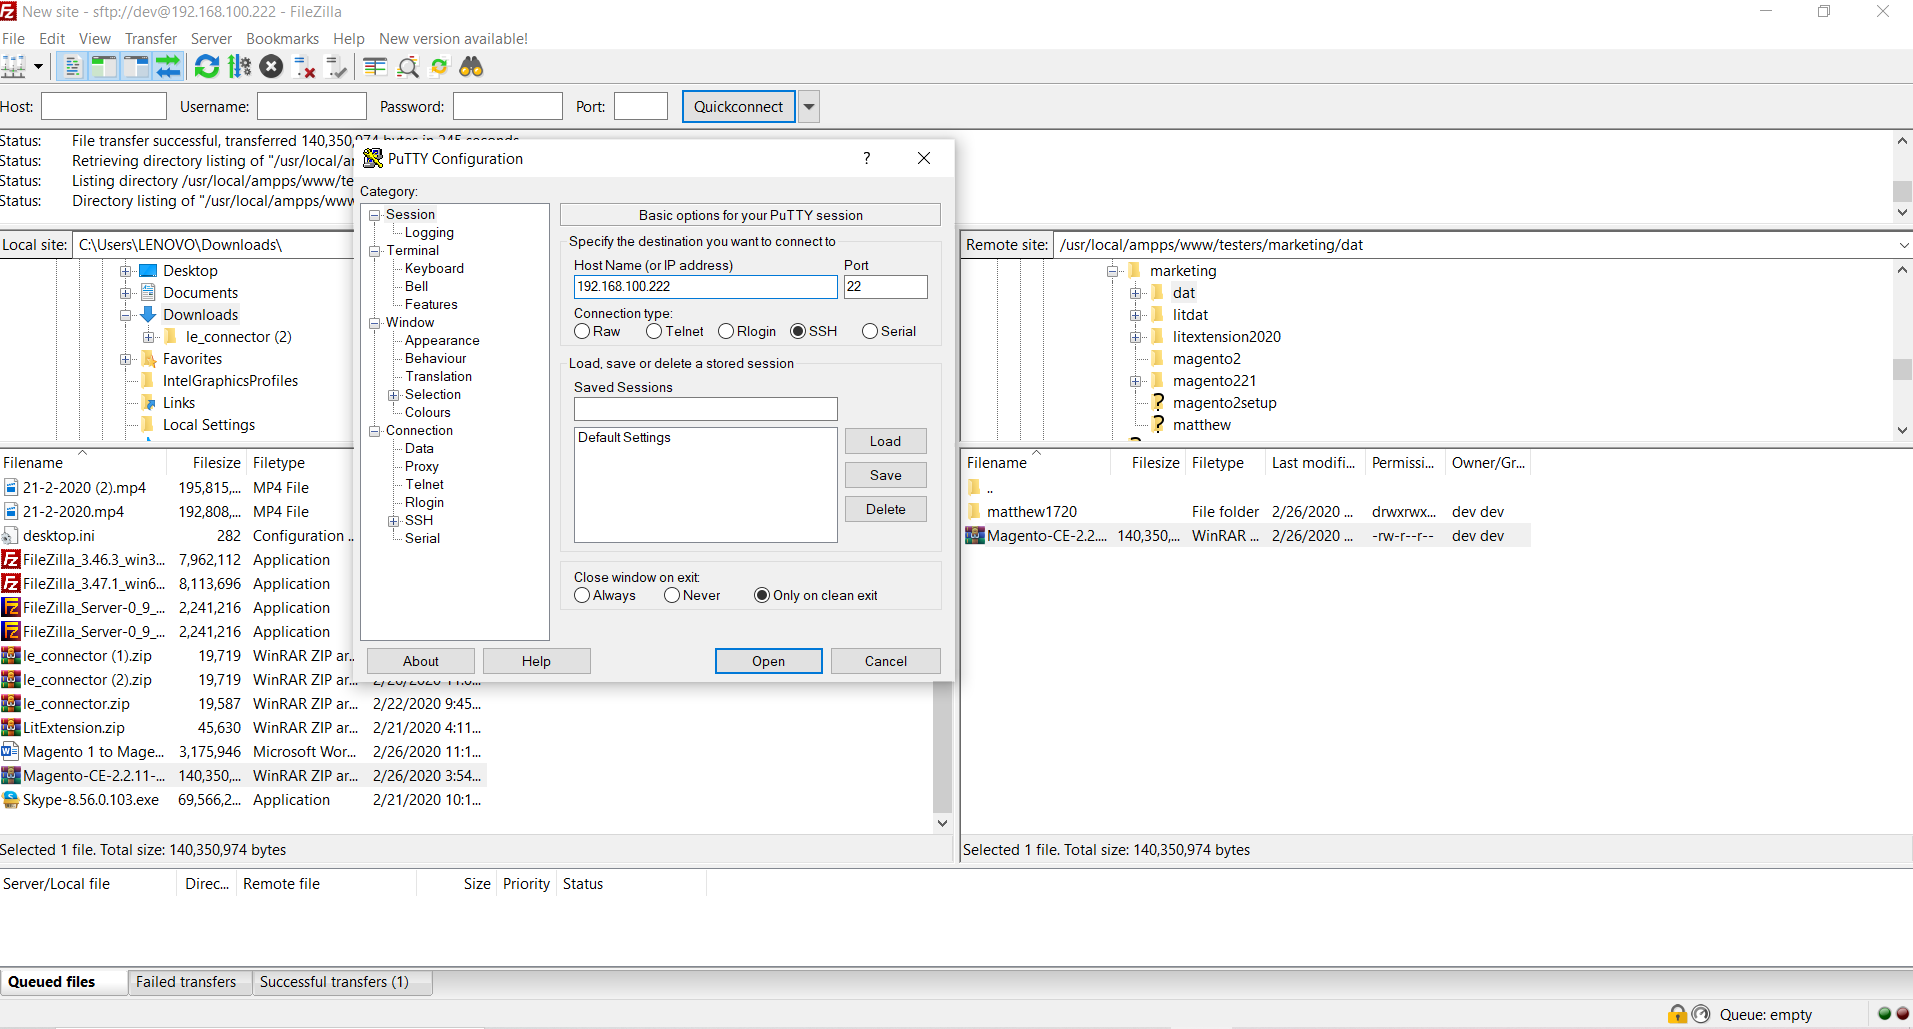
Enter “Host”, “Account” and “Password”
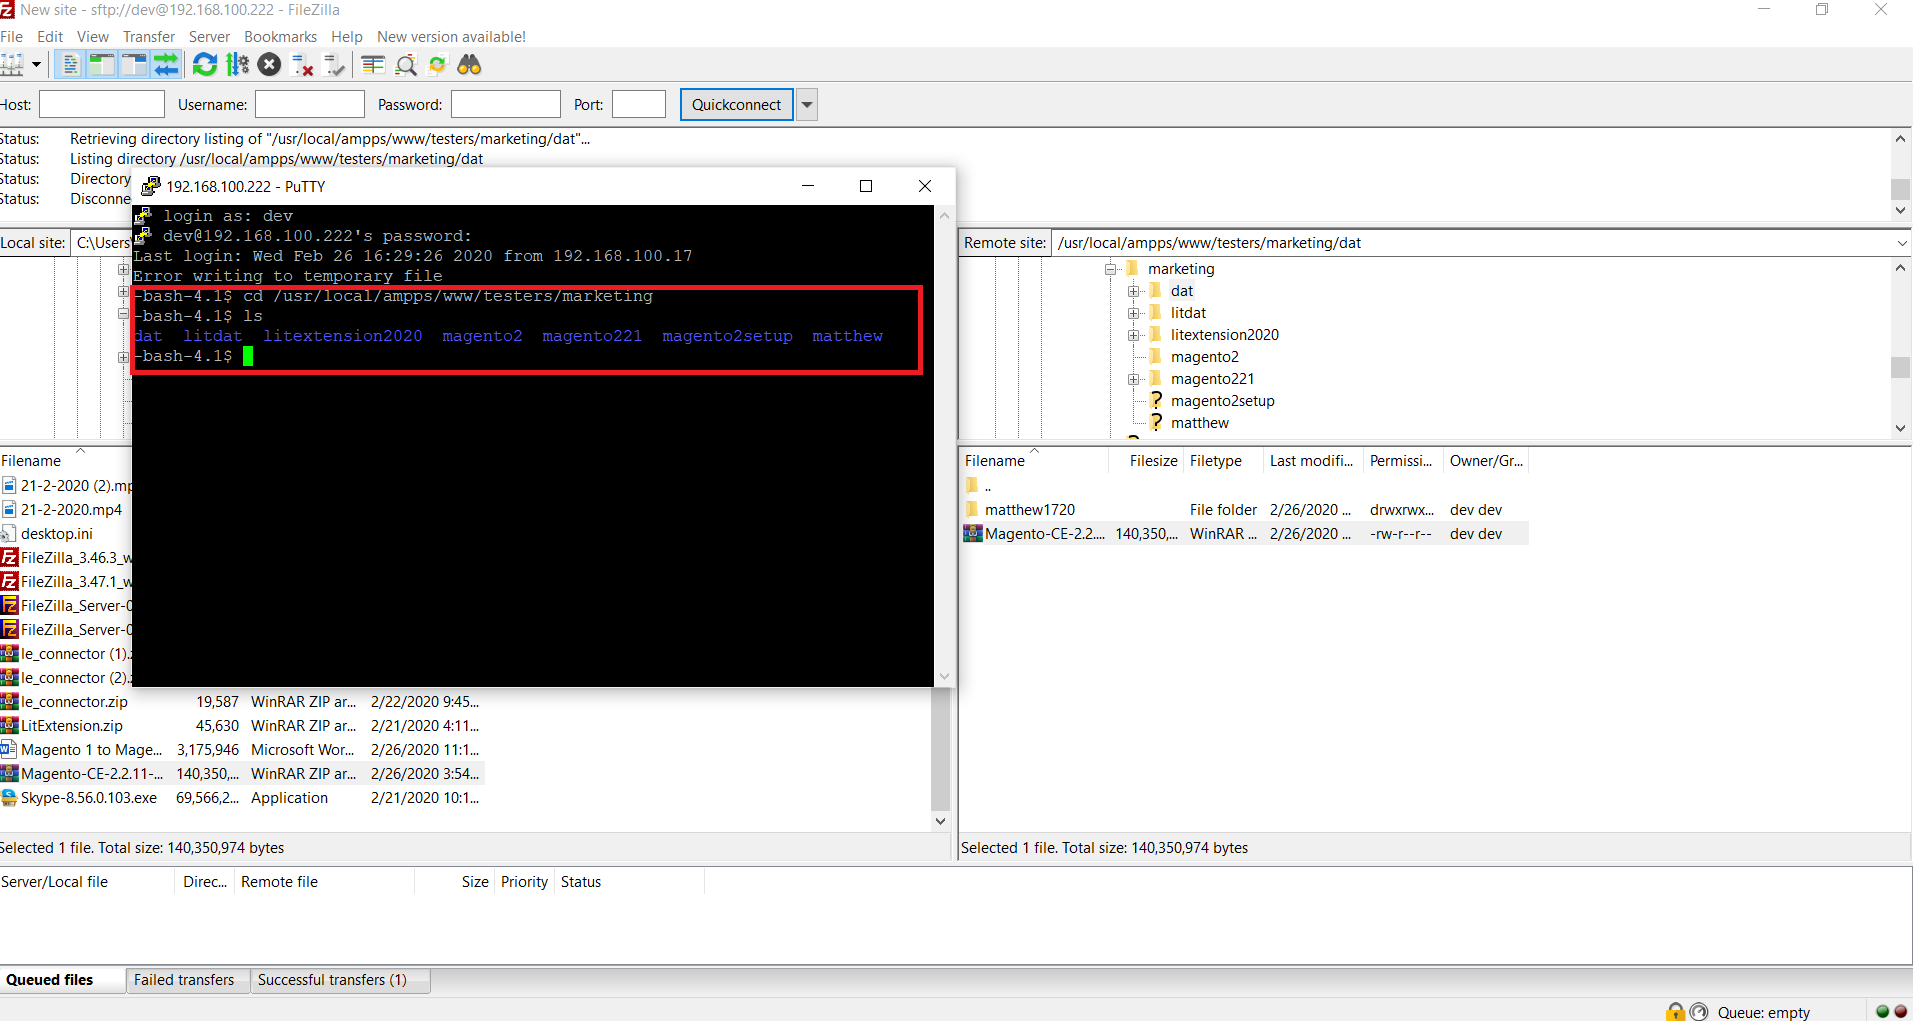
2. Type the command cd [the folder containing the Magento archive]
3. Type the command ls to list all the files in that folder.
4. Type the command cd./ [the folder consisting of the Magento 2 archive]
5. Type the command unzip Magento-CE-2.2.11-2020-01-24-04-50-43.zip -d magento2
Note: magento2 is the folder that’ll contain the unzipped files after the unzip procedure.
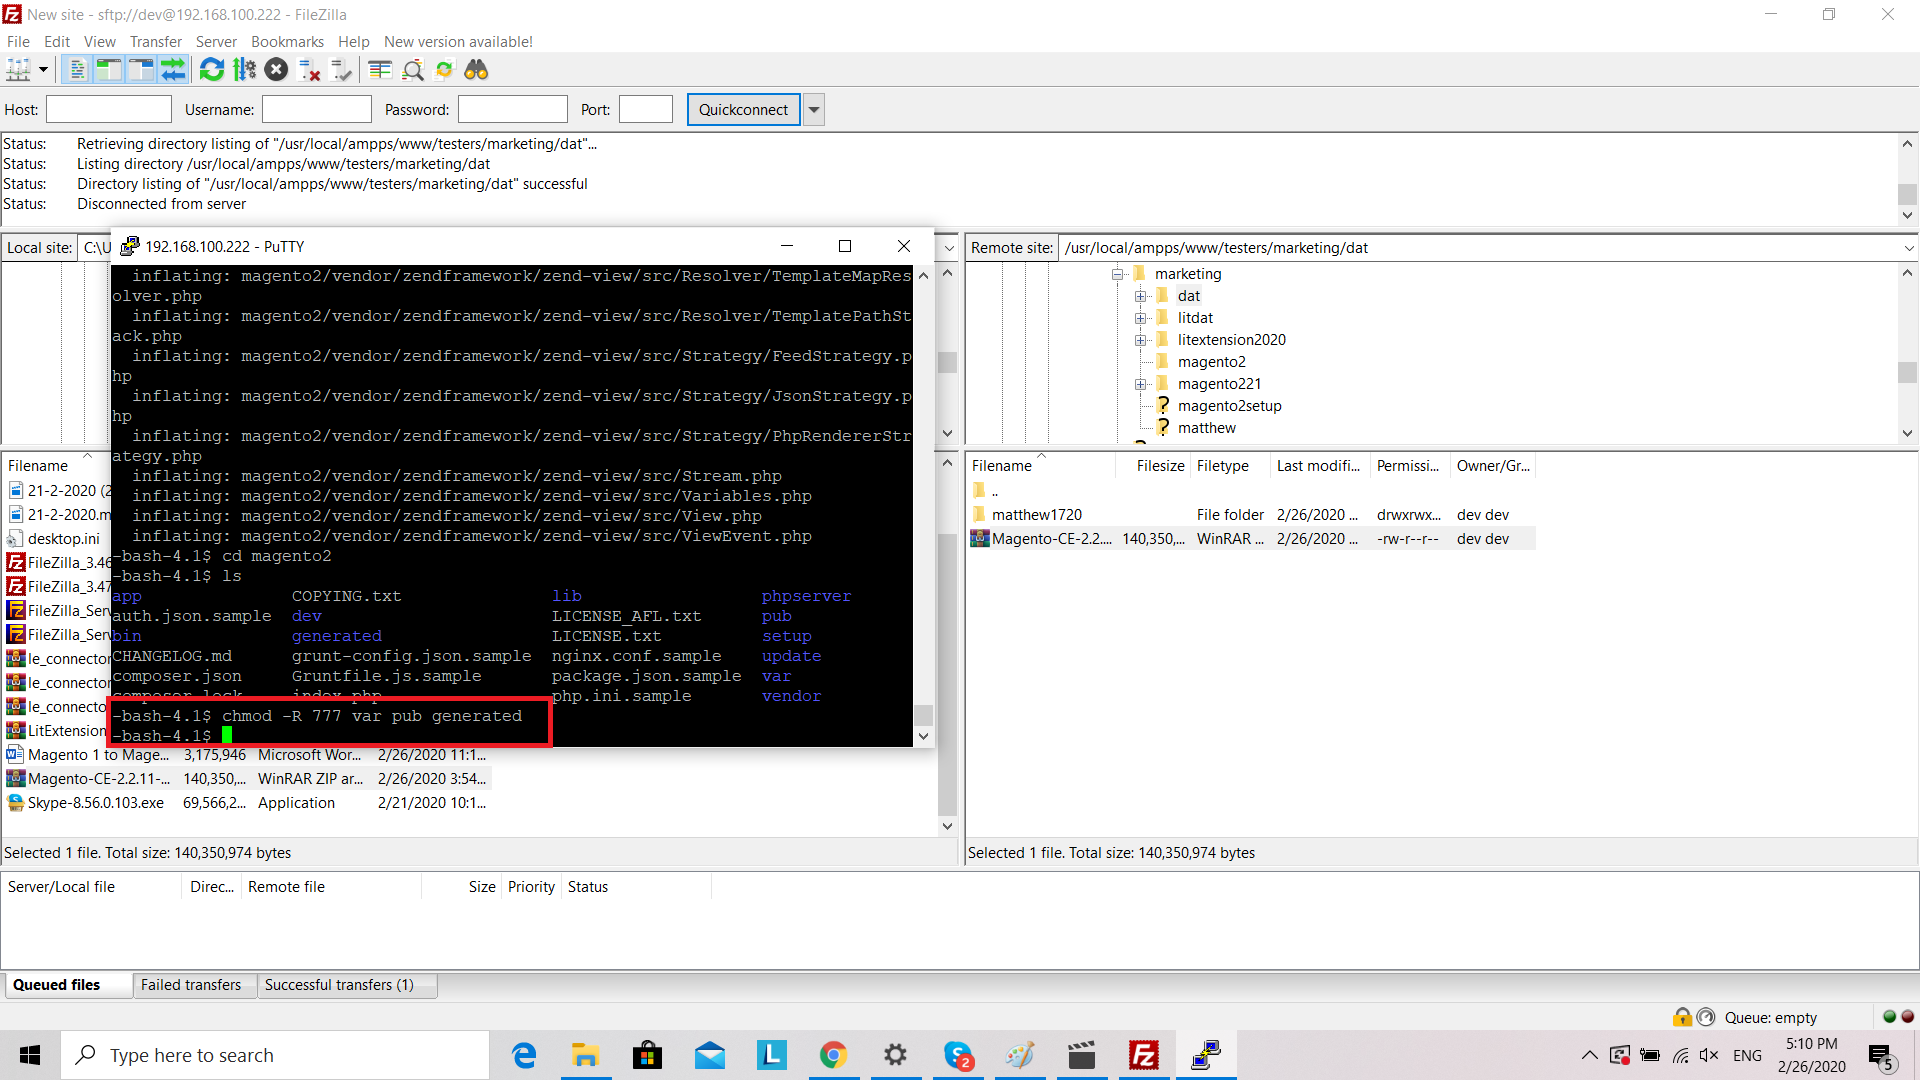
6. Unzip the archive

7. Type the command chmod -R 777 var pub generated to change the permission for those folders. You may get an exception printing error if you do not change the permissions.
(*Note: this command is for the testing store only and not recommended for the live environment. For the sake of utmost security, please follow this guideline.)
8. Access to the web server’s root and create the database.
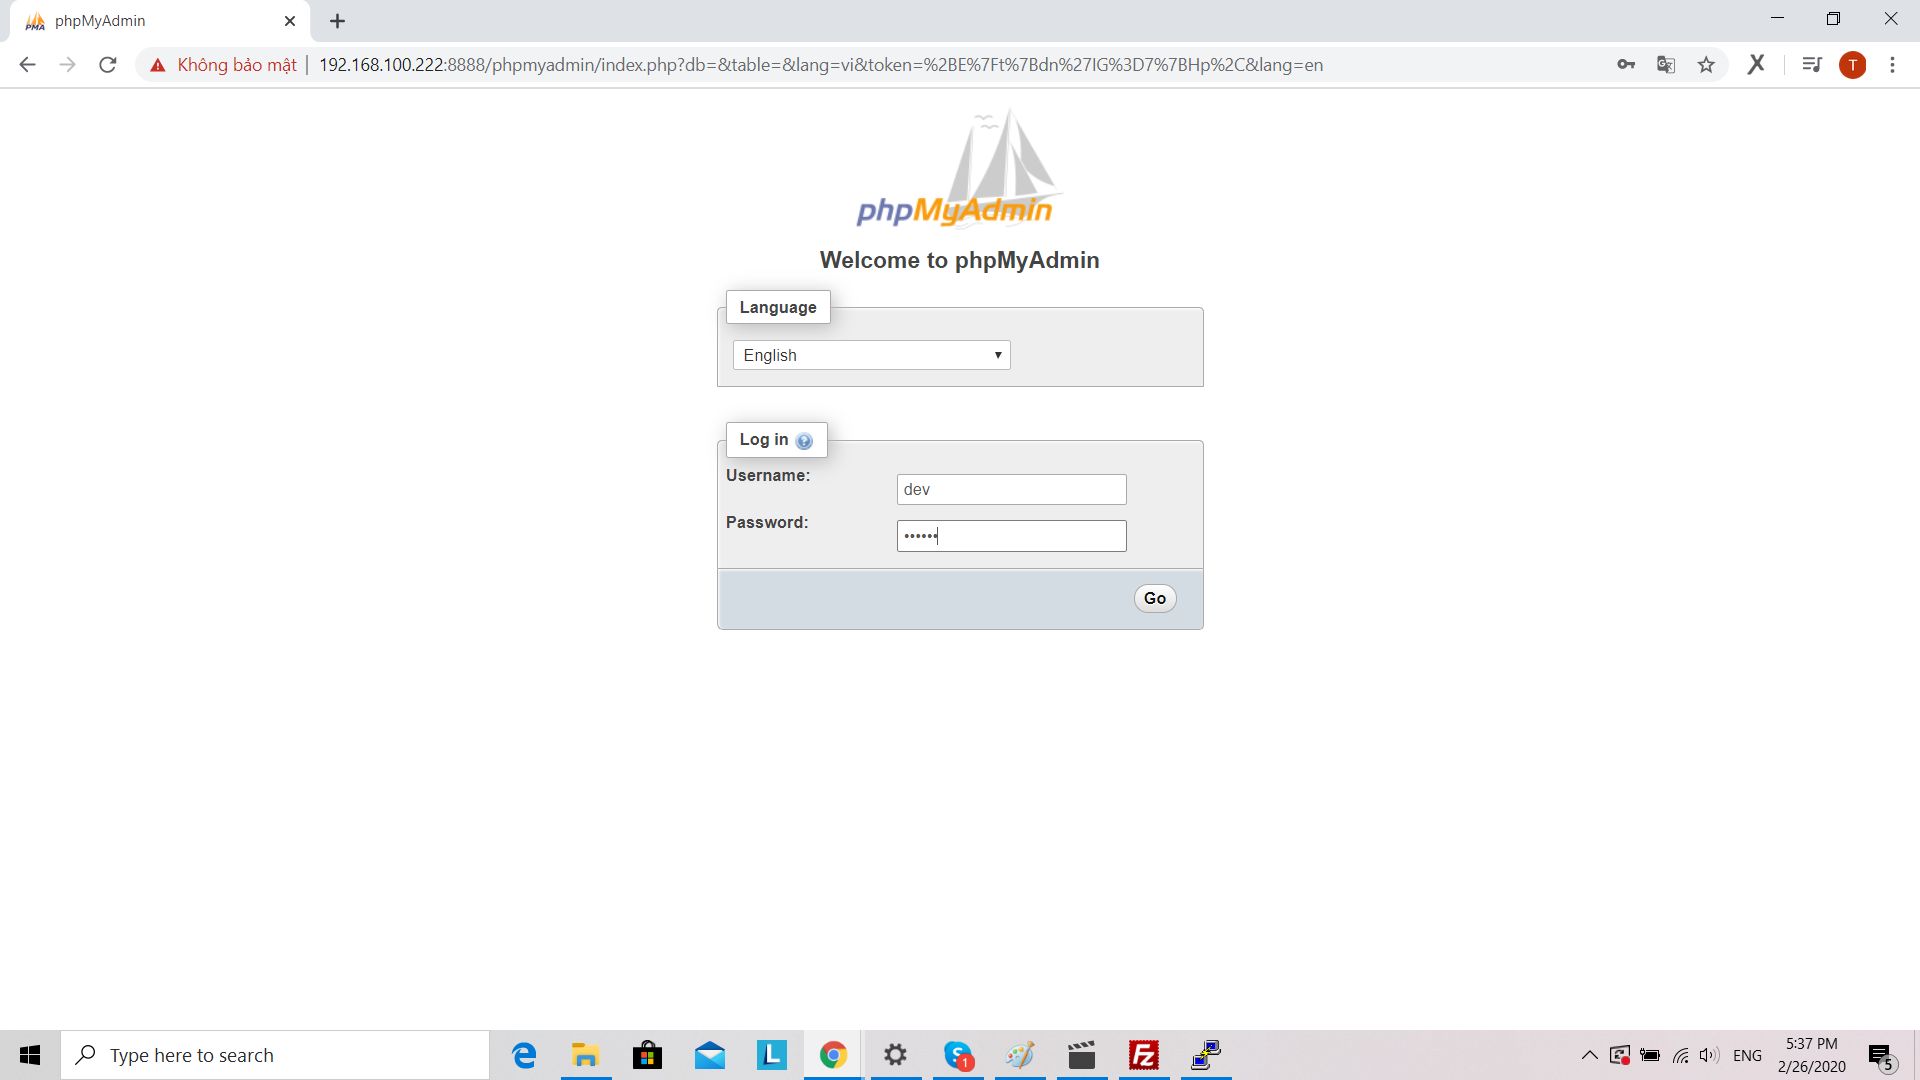
9. Enter the required information then click Create


How to Install Magento 2?
Now that you have your Magento hosting ready, let’s move on to how to install Magento 2.
The Setup Wizard gives you permission to enable or disable modules before you install the Magento software. It is a multi-page wizard that enables you to go back and forward one page at a time. You cannot skip pages, and you must enter all required information on every page before proceeding to the next page.
Access more essential resources on Magento (Adobe Commerce):
Step 1: Start a Web Browser
Step 2: Enter the following URL in the browser’s address or location bar:
| http://<Magento host or IP>/<path to Magento root>/setup |
For example, the Magento server’s IP address we use is 192.168.100.222 and you installed Magento 2 in the magento2/ directory relative to the web server’s docroot, enter:
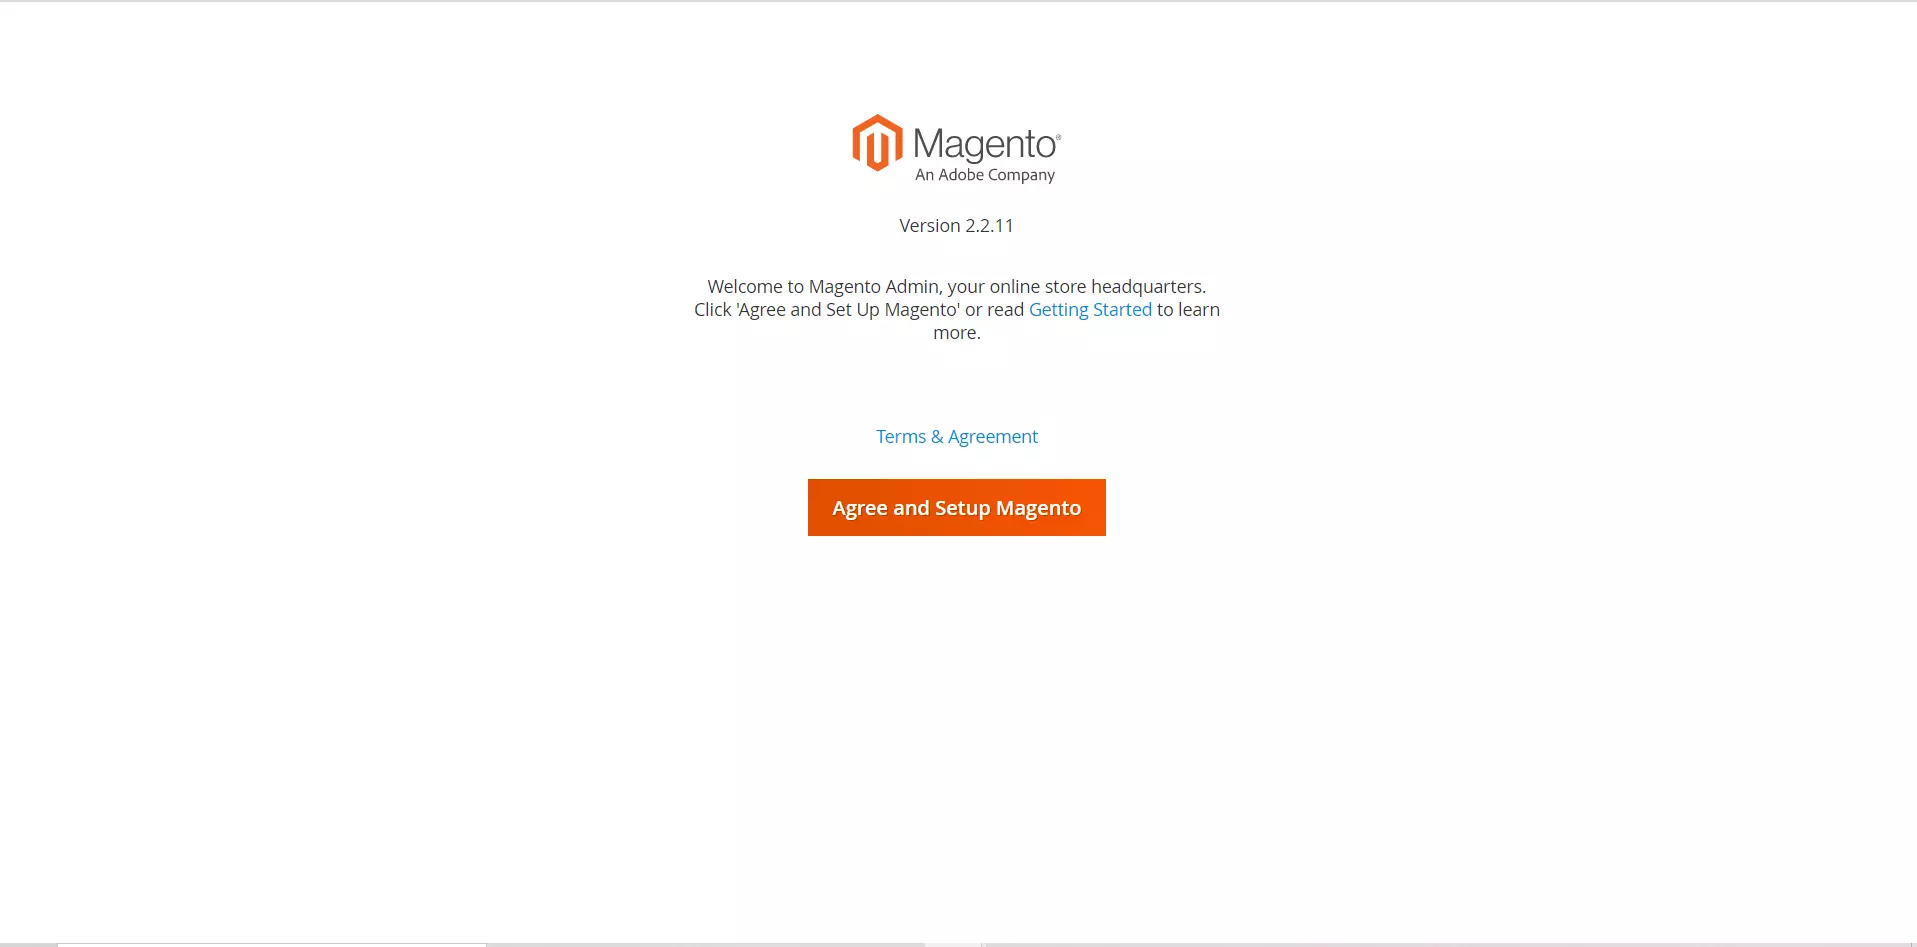
Step 3: On the initial page, click Agree and Set Up Magento
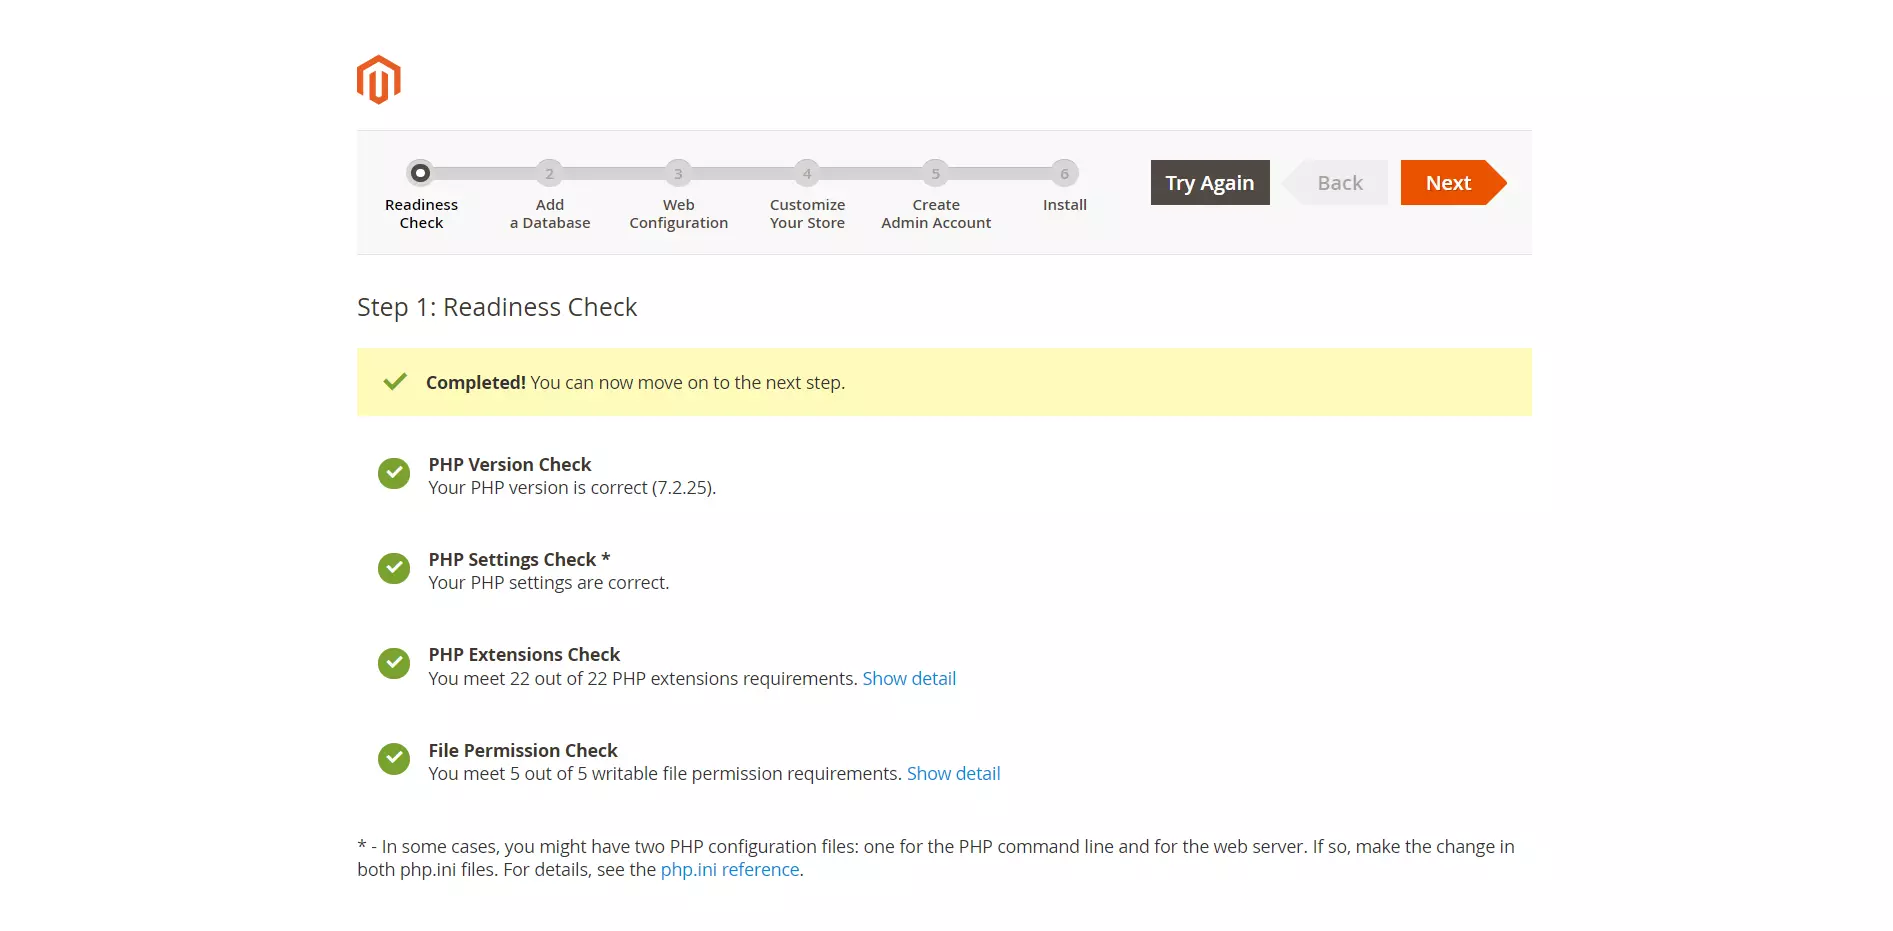
Step 4: Click Start Readiness Check
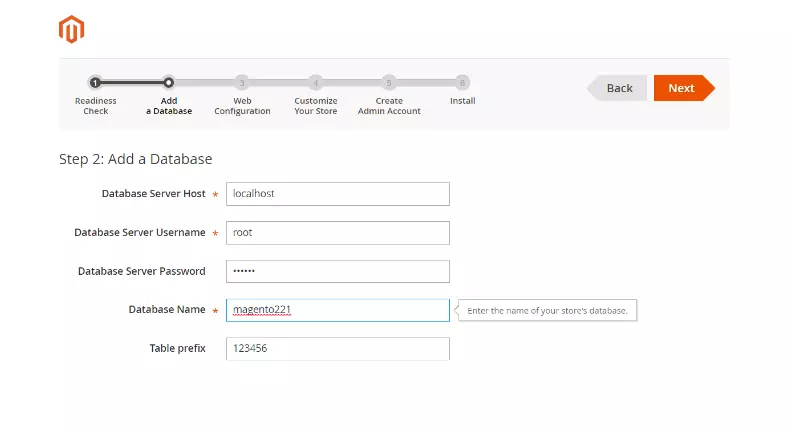
Step 5: Add a Database
Enter all the following required information about the database
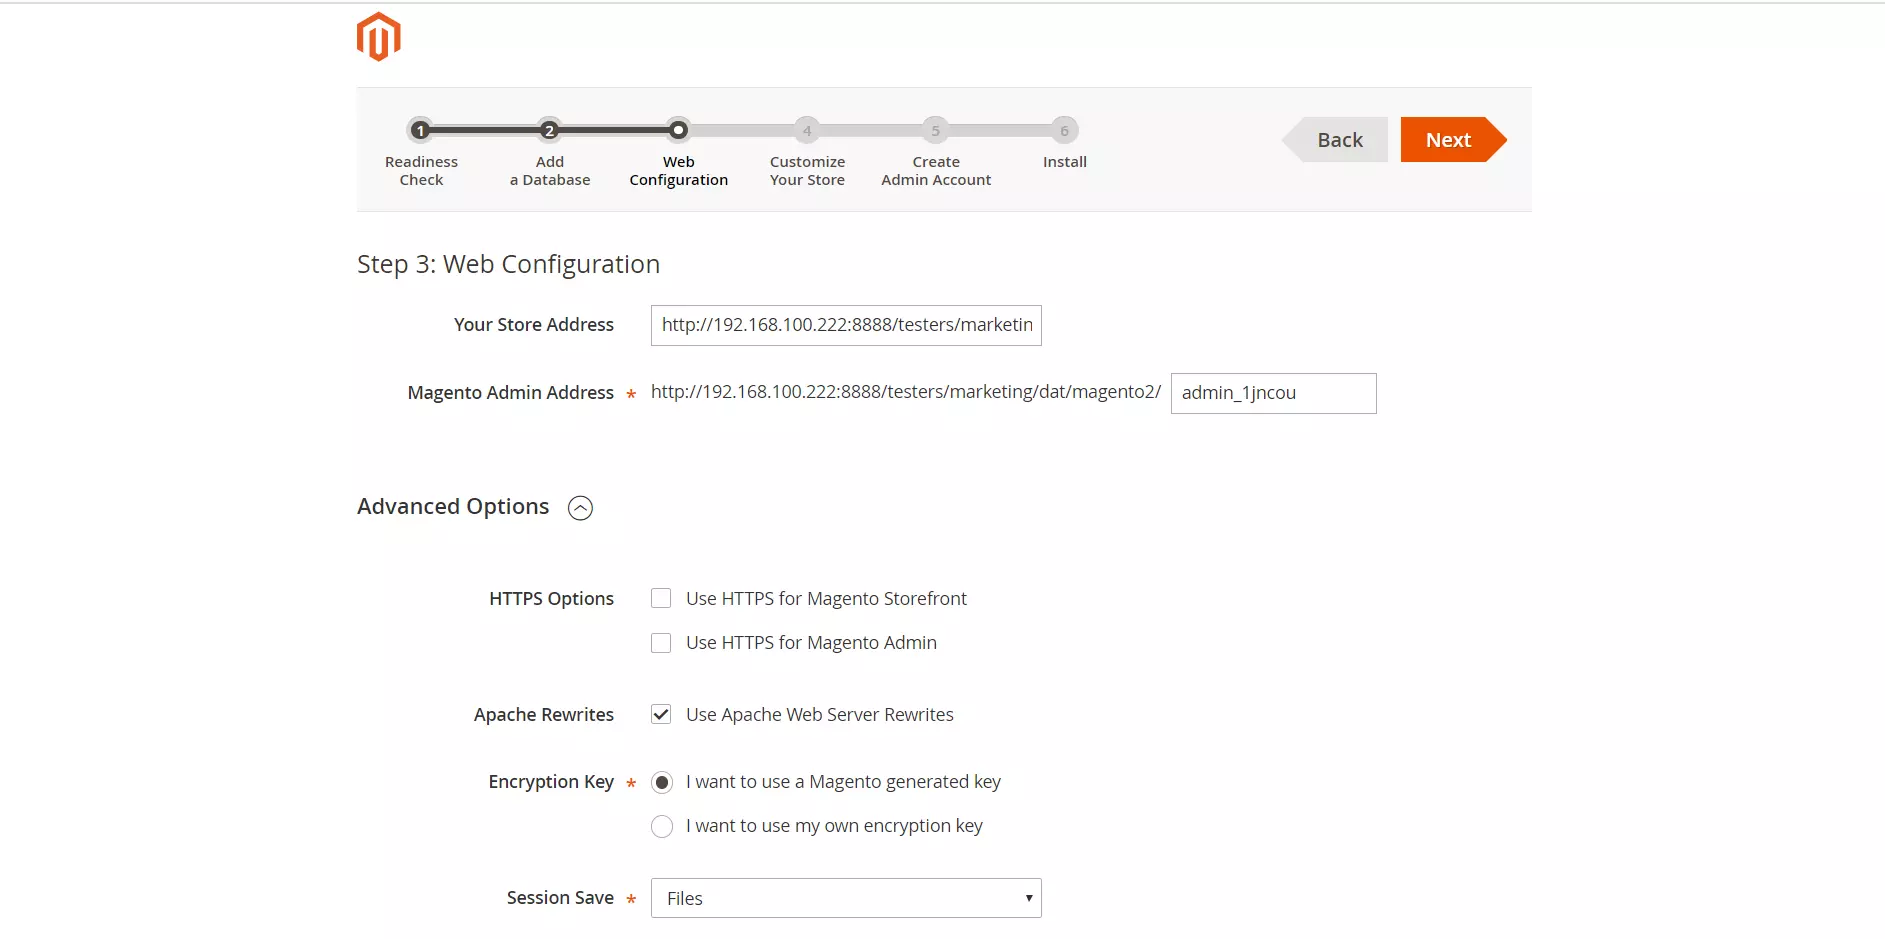
Step 6: Web Configuration
- Enter the following information:
- Your Store Address: http://www.example.com
- Magento Admin Address: Enter the relative URL by which to access the Magento Admin. e.g: secret, backend
- Then click Next
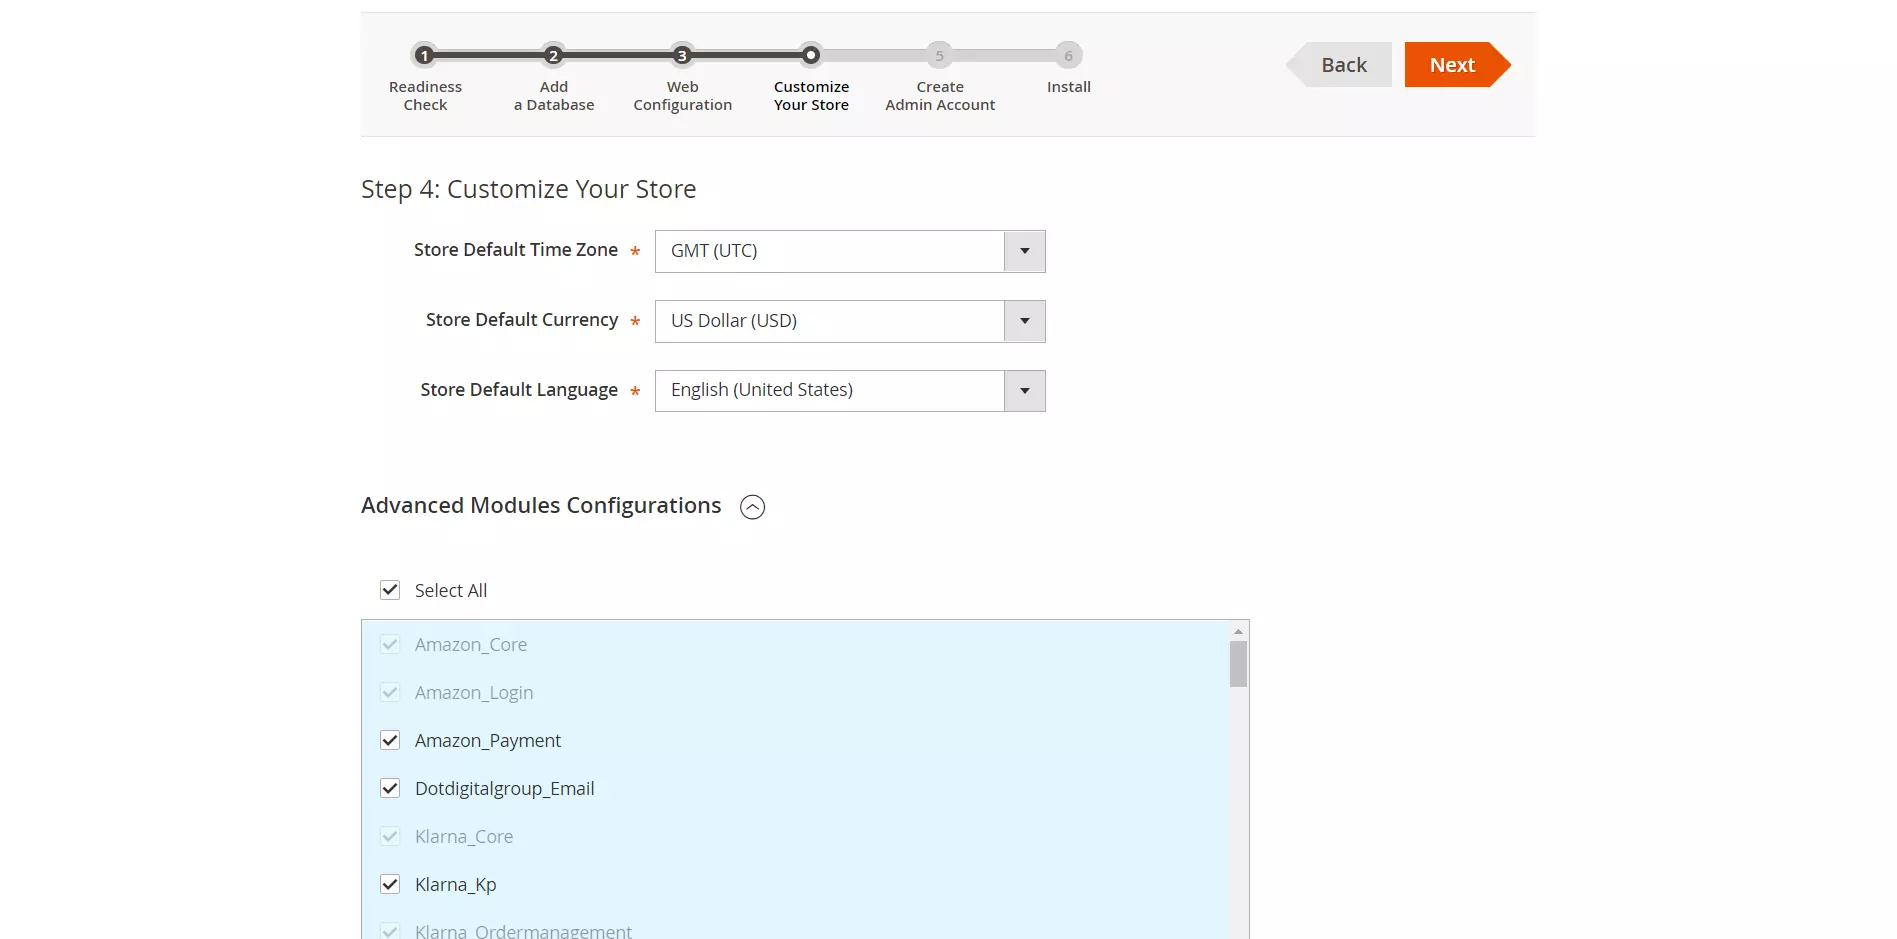
Step 7: Customize Your Store
- From the Store Default Time Zone list, click the name of your store’s time zone.
- In the Store Default Currency list, click the default currency to use in your store.
- From the Store Default Language list, click the default language to use in your store.
- Expand Advanced Modules Configuration to optionally enable or disable modules before you install the Magento software.
For individual modules, Skip Dependency Test with precaution. We would suggest against it because you manually modified the deployment configuration, and this is a typical reason for the error to happen. It is not recommended to edit the deployment configuration because future updates of the Magento software can reverse your changes.
Step 8: Create Admin Account
Enter admin information below:
- Provide a new Username
- Enter a new E-Mail
- Fill in a new Password
- Confirm Password
- Then click Next

Step 9: Install Magento 2
Having completed all previous steps in the Setup wizard, click Install Now.
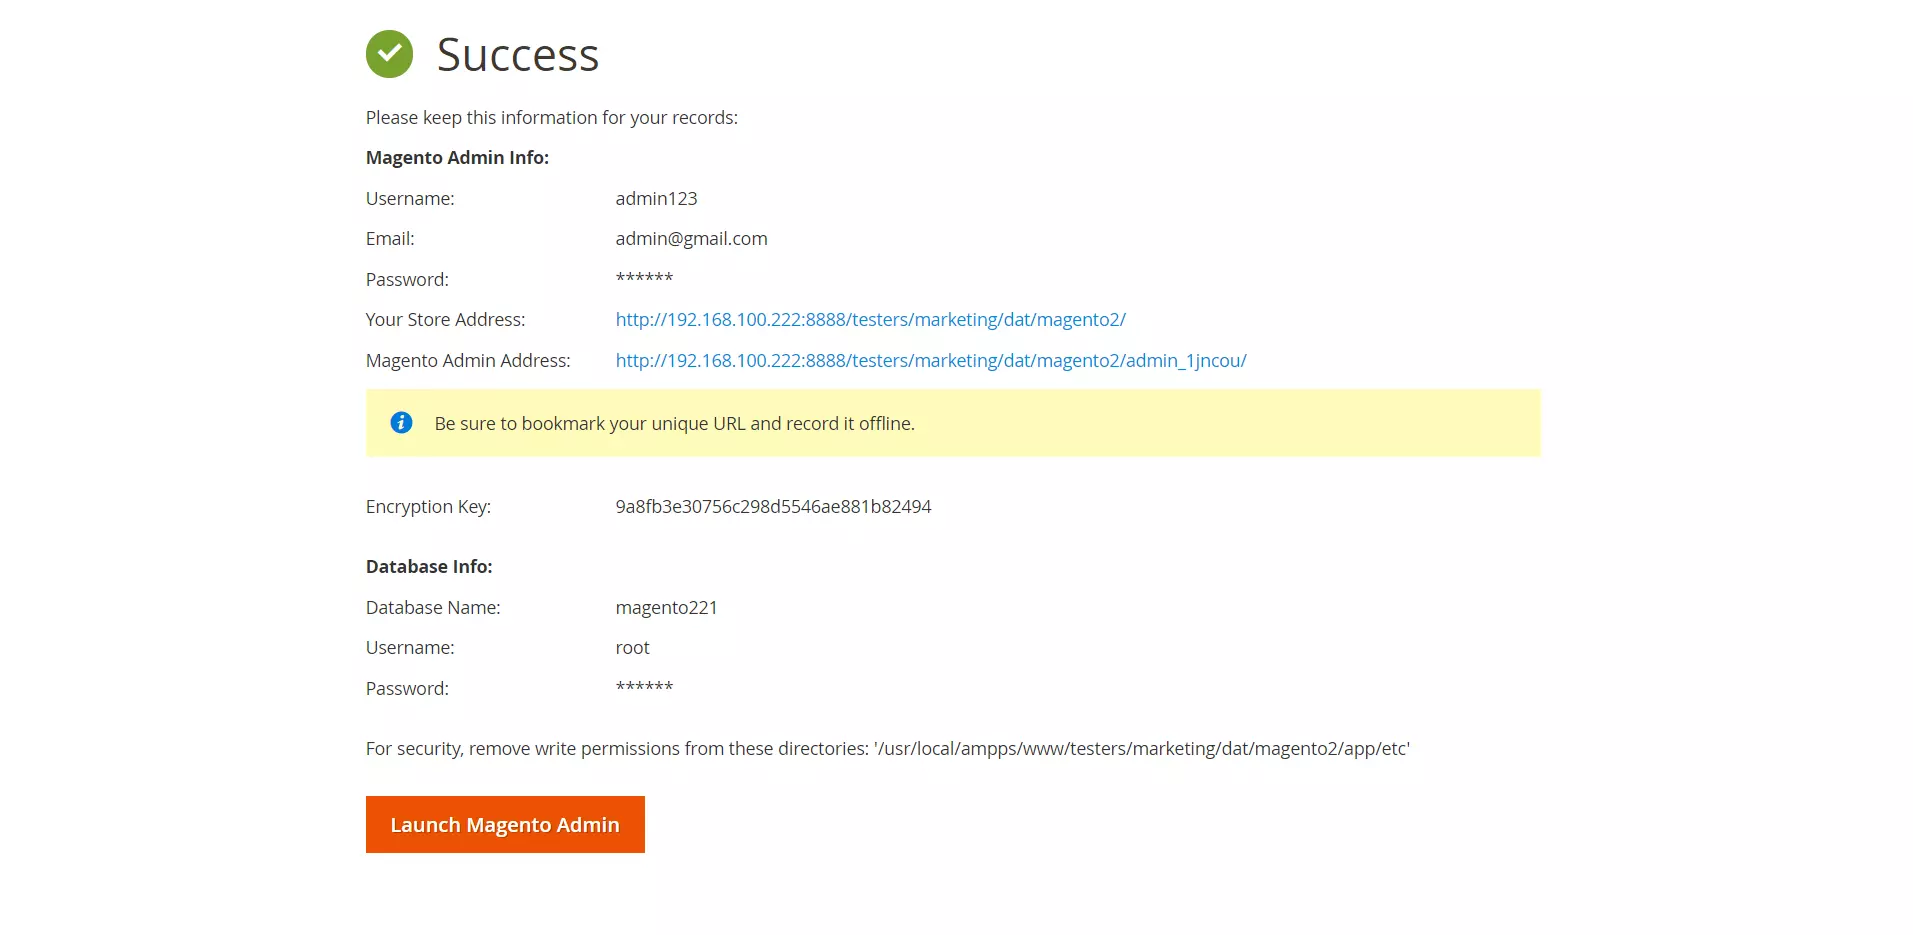
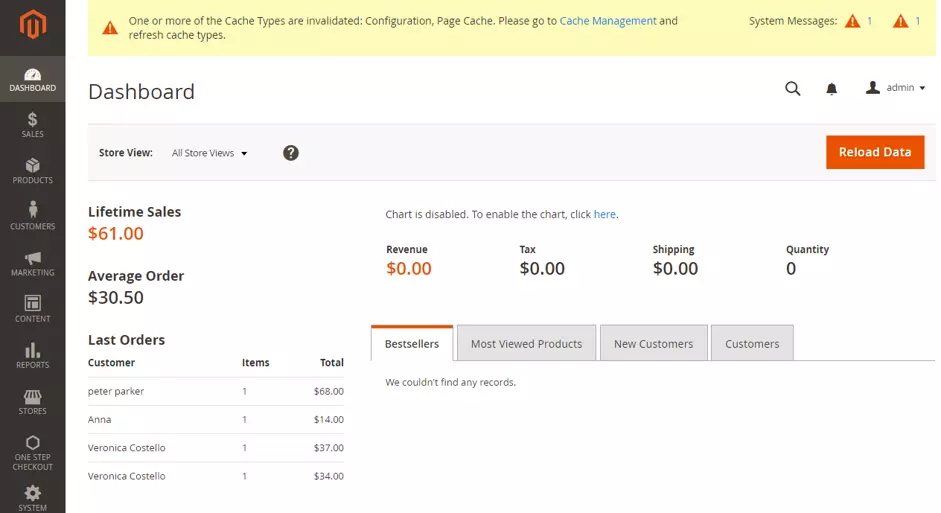
Click Launch Magento Admin to see the frontend and backend to see the result.

After successful installing Magento 2, it would be beneficial for you to take some service providers into consideration.
Find a better way to manage and streamline your business with:
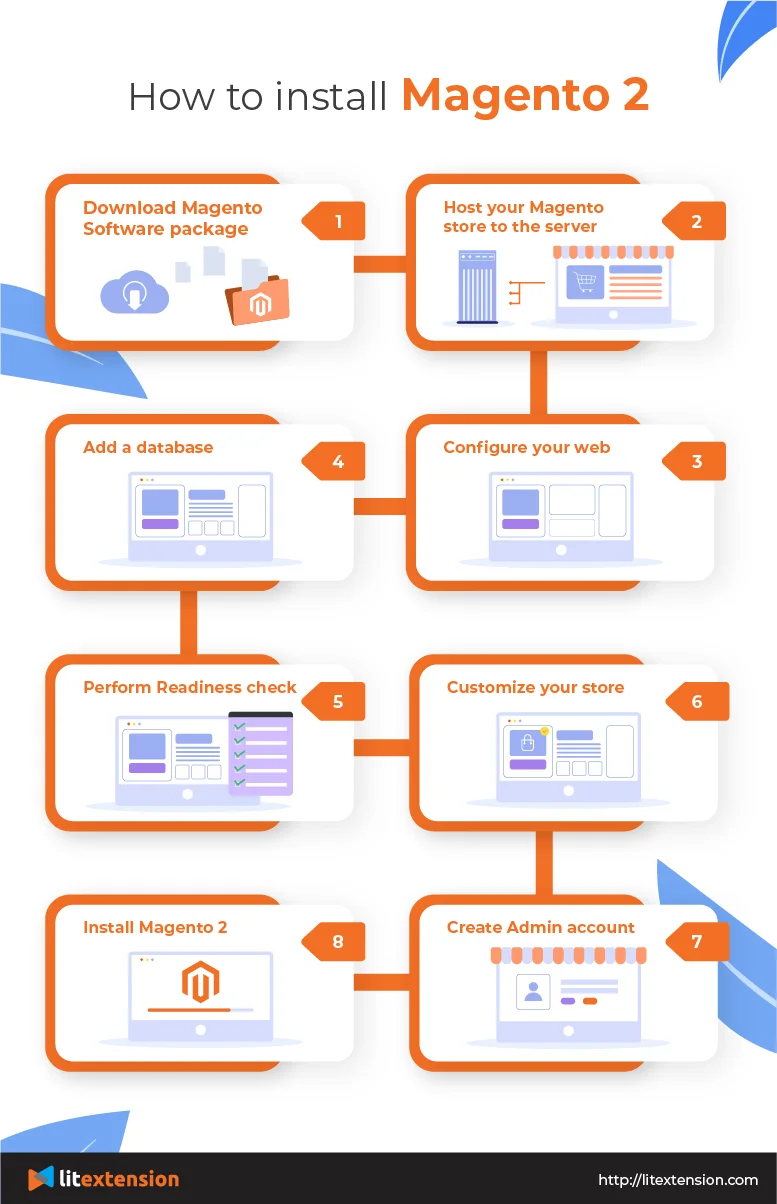
Here’s a quick overview of how to install Magento 2 and kickstart your business.
How to Install Magento 2 – Video Tutorial
To take a more detail-oriented look at the process, we have made a full-step installation video. Hope you’ll find this helpful!
Need Help To Migrate Your Store?
Migrating from Shopify to Magento is super easy with LitExtension. We help you transfer all your data from any current eCommerce platform to Magento accurately, seamlessly with utmost security.
Install Magento 2 – FAQs
How to download Magneto?
Downloading Magento 2 is not a dire task. Simply go to Magento Tech Resource, choose the Magento version that you want, and click Get it.
How to install Magento 2?
To install Magento 2, first, you’ll need to download Magento 2 and host your website. After that, follow the Setup wizard to configure your store, install, and you are ready to launch.
Conclusion
If you are looking for a solution to set up your store with Magento 2, especially those who have an interest in Magento 2 Upgrade, then we believe that this guideline is best designated for you to set forth on building up your store on this robust platform.
In comparison with other popular platforms, Magento 2 seemingly outperforms most of them since it provides features of scalability and improved performance along with security, B2B features, and maintenance. That’s probably one of the reasons why merchants are flocking to Magento 2 recently, based on our recent report. Consider several popular migrations to Magento:
Besides, if you are an existing user of Magento 1 and you’ve already felt the urge to upgrade from Magento 1 to Magento 2, have a look at our Magento 1 to Magento 2 migration provided by LitExtension – #1 Shopping Cart Migration Expert. The newest version of Magento 2 is ultra-fast, secure, more reliable, and really worth upgrading to.
We hope this article is as lucid as it should be. If you have any questions regarding it, please let us know at [email protected] or directly talk to our live chat supporters at LitExtension.
Further, you can join our Facebook community to get more eCommerce knowledge.