Introduction
Magento is well-known for being one of the best-in-class Content Management System (CMS) operating as a powerful eCommerce platform. It has been home over 160,000 live websites thanks to numerous built-in features and high customizability.
Functionality enrichment is what Magento always focuses on to help online merchants capture more opportunities from the eCommerce industry. “Multiple stores” is an outstanding feature of Magento that fulfills the need of diversifying sales channels of store owners to scale their business. It allows merchants to create several stores from one single admin panel and thus make store management more effective.
As a result, Magento multi stores functionality is highly suitable for those who want to turn their businesses from one-size-fits-all stores into specific stores for specific customer requirements. Plus, “multi stores” is a powerful feature that can benefit any businesses, especially those with international plans thanks to its convenience and cost-efficiency.
In this article, we will explore the merits of expanding selling systems on Magento 2 and then provide instructions on how to set up Magento multi stores with some simple steps.
Want to migrate to Magento?
If you are intending to migrate to Magento, LitExtension offers a great migration service that helps you transfer your data from the current eCommerce platform to a new one accurately, painlessly with utmost security.
Benefits of Magento Multi Stores Functionality
Driving more sales by multiplying stores is a goal for many merchants to achieve. Understanding this demand, Magento multi stores feature comes as a perfect solution to fuel online businesses.
Here are some highlighted advantages of running multiple stores in Magento 2:
Normally, creating multiple stores means adding different codes for each one. However, Magento multi stores share the same code that lets you take control over all these sites with one single backend. Therefore, it saves you a lot of time, effort and investment costs to expand the business, and also helps you manage your inventory easily.
Not only does the Magento multi stores feature help you ease the complexity of management, but it also allows you to configure basic settings for each store such as payment gateways, shipping methods, order tracking, and so on. Therefore, you can freely customize multiple stores as you expect.
Last but not least, each store matches different client’s demands because they perform different products, prices, and languages. As a result, your business can broadly cover various levels of customers and thus attract more sales traffic from diversification.
Magento multi stores will surely benefit you in many ways. If you are planning to re-platform your current store to Magento because of its top-notch features, you can consider using LitExtension. We are proud to be a leading company that offers an ultimate shopping cart migration service.
Essential resources about Magento (Adobe Commerce):
Now, let us walk you through several steps to set up multiple stores with Magento.
How to Set up Magento 2 Multi Stores
First of all, you will need to have a grasp of the multi-store structure in Magento 2. When you register as a store owner in Magento, you only operate on the Main Website by default. Of course, you can also set up several websites with separate IP addresses and domains with one single installation.
One website can contain several stores sharing the same cart, user sessions, payment gateways, and so on. Especially, each store can own a unique catalog, or they can have one product range and selection in common.
Besides the default store view, each store can add several ones. Each of them will set a specific store layout and language that decides the way pages are displayed in front of your online visitors.
In the next paragraphs, we will show you the guidance to set up multiple stores in Magento 2 with some simple steps.
#Step 1: Create root categories
Root category is the highest level of the category structure that takes the role of the main menu container. Therefore, your store can activate only one root category at a time.
First, log in to your Magento account as an authorized user. Then, navigate to Catalog > Categories > Add root category.
-
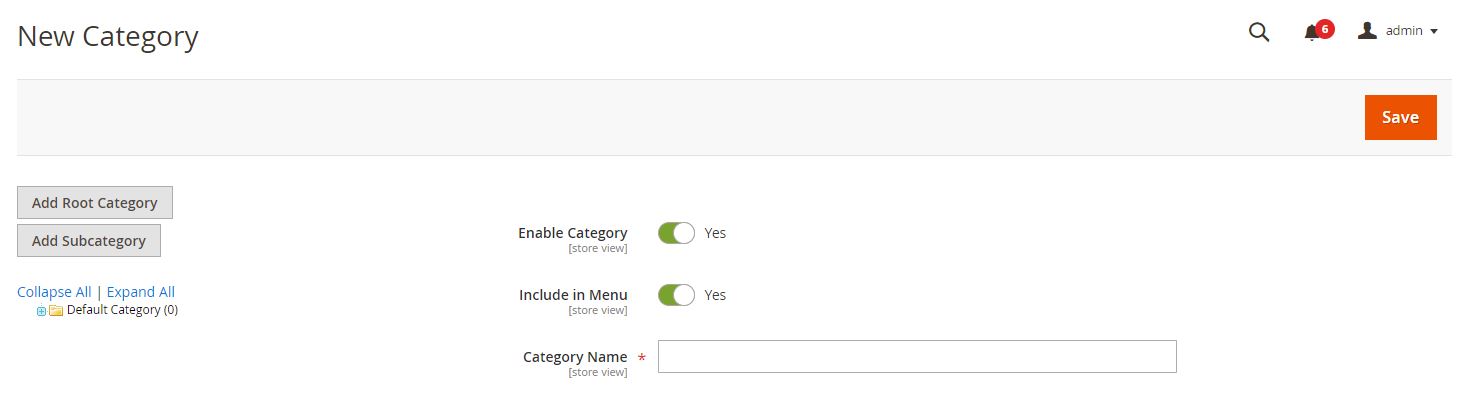
Create root categories
After that, you will need to enter a name in the Category Name bar to identify and distinguish it from the others. Plus, don’t forget to set the option Enable Category to Yes. On the top right corner of the screen, click the Save button to keep this change.
You can create as many root categories as necessary for your stores. However, this step is optional so you can skip it.
#Step 2: Create a new website
Creating a new website is the first and foremost thing you need to do to multiply your Magento stores.
To set up a new website, go to Stores and select All Stores in the Settings section. Then you will be redirected to the Stores page. At this step, click on Create Website to start configuring.
-
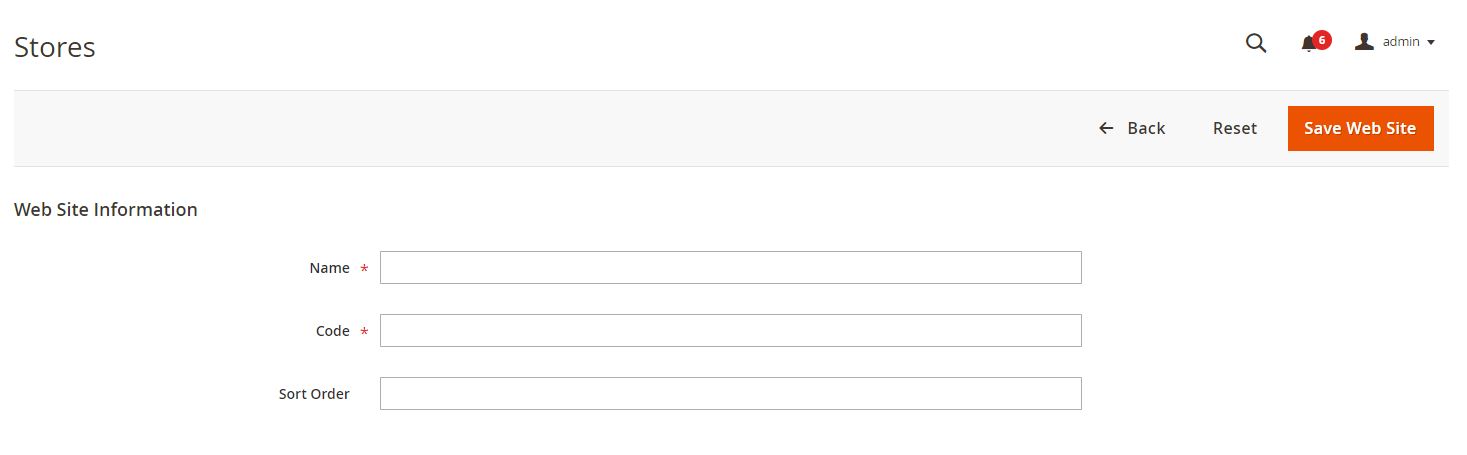
Create new websites
On the Stores page, you need to provide accurate information about your website including Name, Code and Sort Order. You can leave the Sort Order field blank, or set to its maximum value 0 by default.
After that, click Save Web Site and you already create a new website. Similar to the root category, you can set up as many websites as you want.
#Step 3: Create a new store
On the same Stores page, select Create Store to provide your new store information as the image below.
-
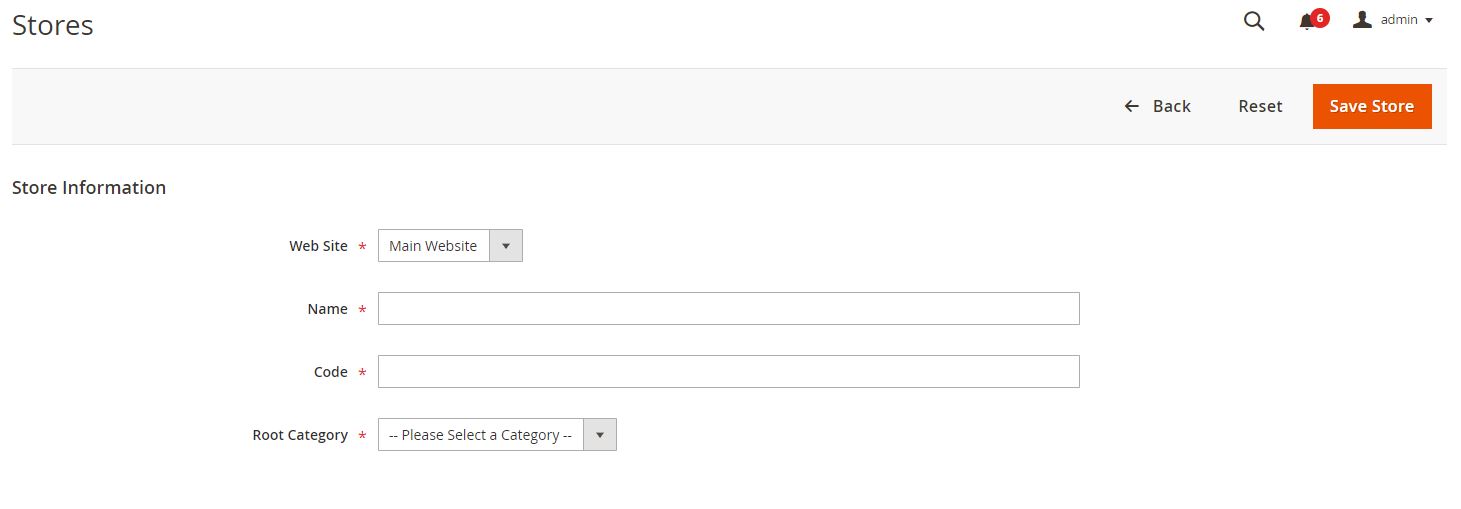
Create new stores
Then, click Save Store and move to the next step.
#Step 4: Create a new store view
Creating store views is of great importance as each of them displays different languages for your multi stores functionality.
You can set up the language for your store by clicking on the store view name in the language chooser of the header section. By doing this way, Magento sellers can debut their pages that meet the demand of foreign customers from various countries in the world.
The only difference is, the store view information includes Store, Name, Code, Status and Sort Order. Remember to select Enabled for the Status option to validate the store view. Next, hit the button Save Store View to complete.
-
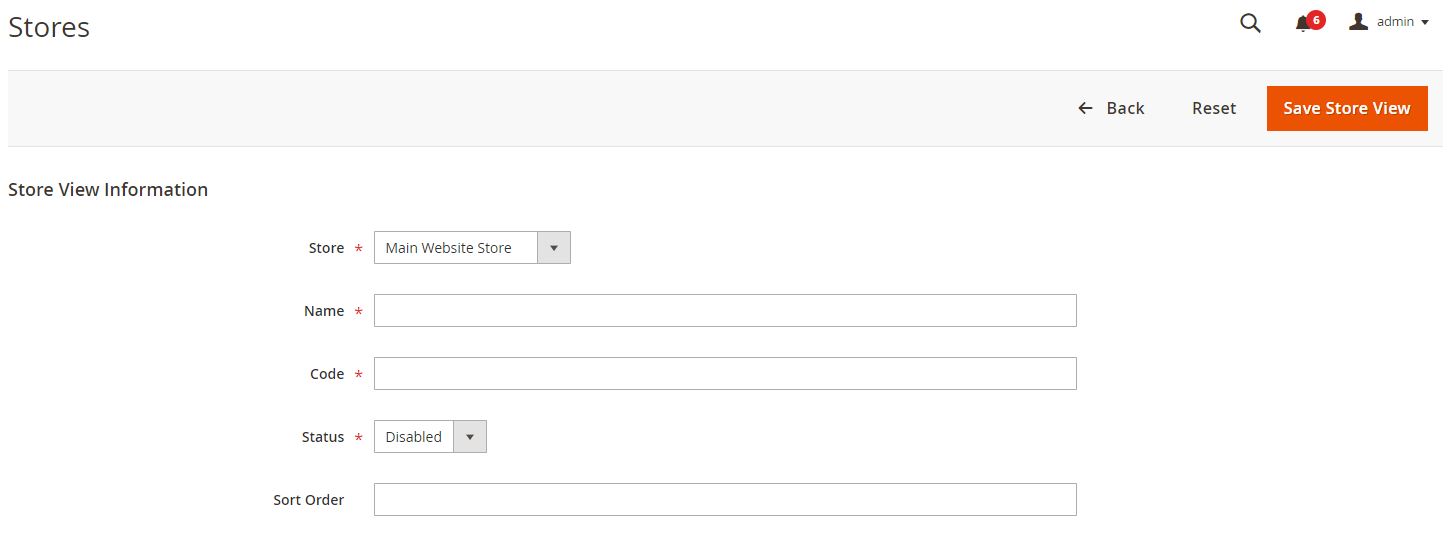
Create store views
#Step 5: Configure the website base URL
Unlike many other platforms, the Magento default site owns a base URL and an Admin URL for the storefront and the backend correspondingly. Therefore, you must change the base URL for each site in the Magento Admin.
First, in the Admin panel, navigate to Stores > Settings > Configuration > General, then choose Web from the General drop-down menu. Next, select the name of the website you want to configure from the Store View list located at the top of the page.
After that, you need to expand Base URLs in the right panel as following:
-
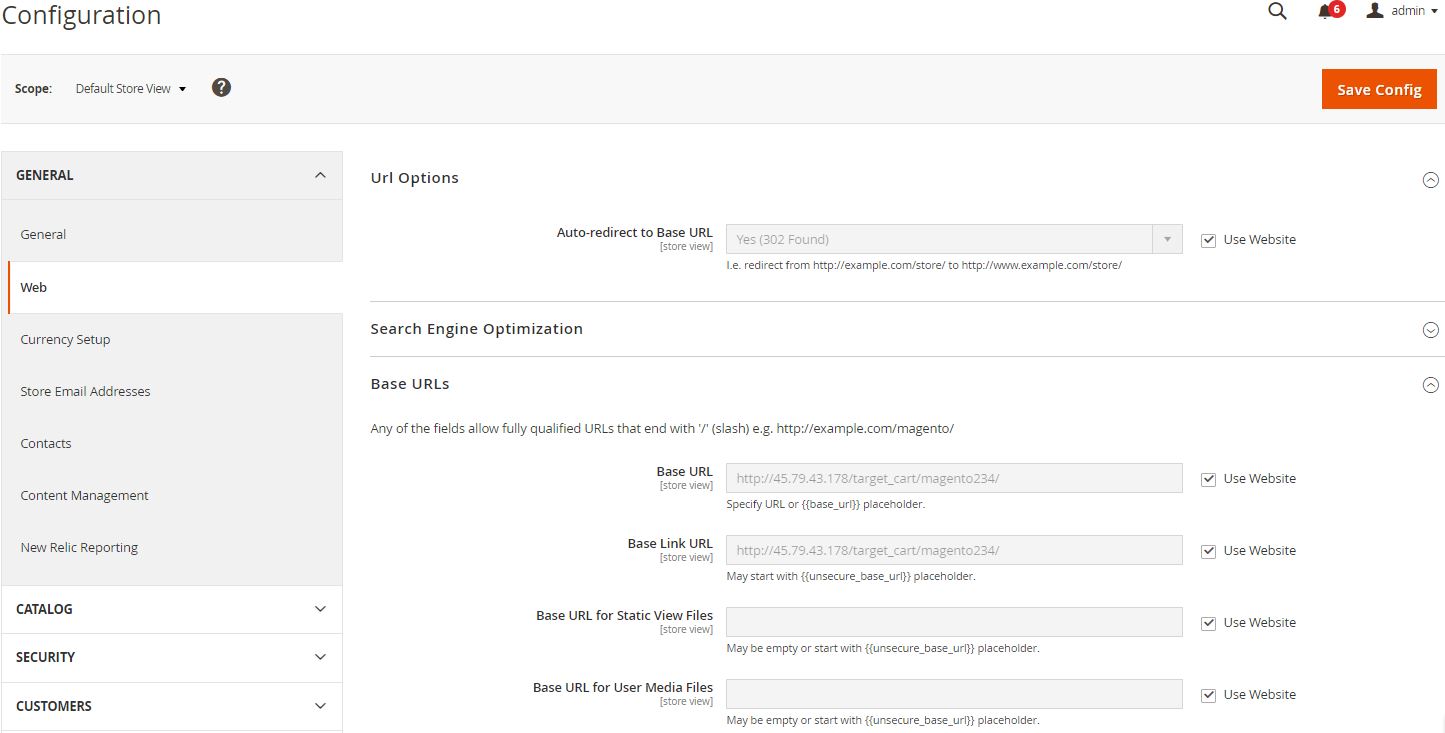
Configure the website base URL
First, make sure not to tick the option Use Website on the right side of the screen. Then, enter your domain name into the Base URL and Base Link URL fields. In case you don’t know how to fill in this information, there are examples right at the blank bars. Click Save Config to save these modifications.
You will need to configure the Secure Base URL in the Base URLs (Secure) section. The process is identical to what you have performed when customizing the information in the Base URLs section: untick the checkbox next to the Secure Base URL field; After that, fill in the Secure Base URL and Secure Base Link URL bars with your domain name.
-
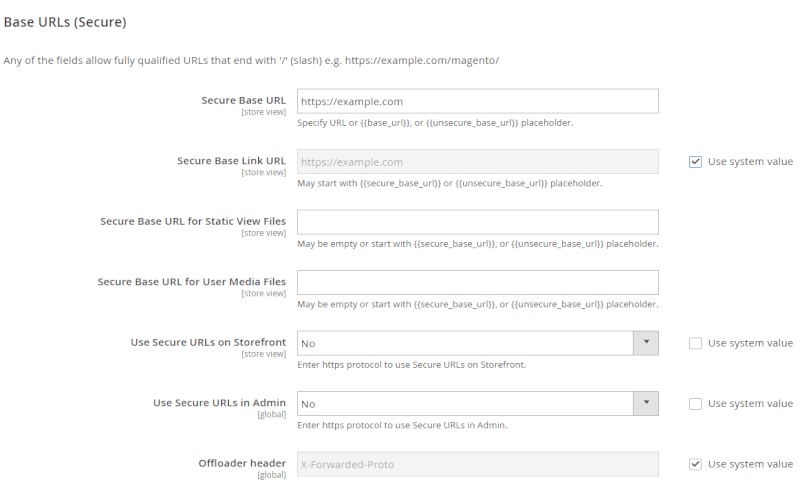
Configure the Secure Base URLs
#Step 6: Add the store code to the base URL
Adding the store code to the base URL is an optional choice for store owners to eliminate potential hassles of running Magento multi stores. This ensures the synchronization of index.php and .htaccess with the Magento codebase for future upgrades. As a result, there is no need to create directories on the Magento file system to store index.php and .htaccess.
In the Admin panel, navigate to the Web field like in Step 5. However, from the Store View list, select Default Config instead of any new website name.
-
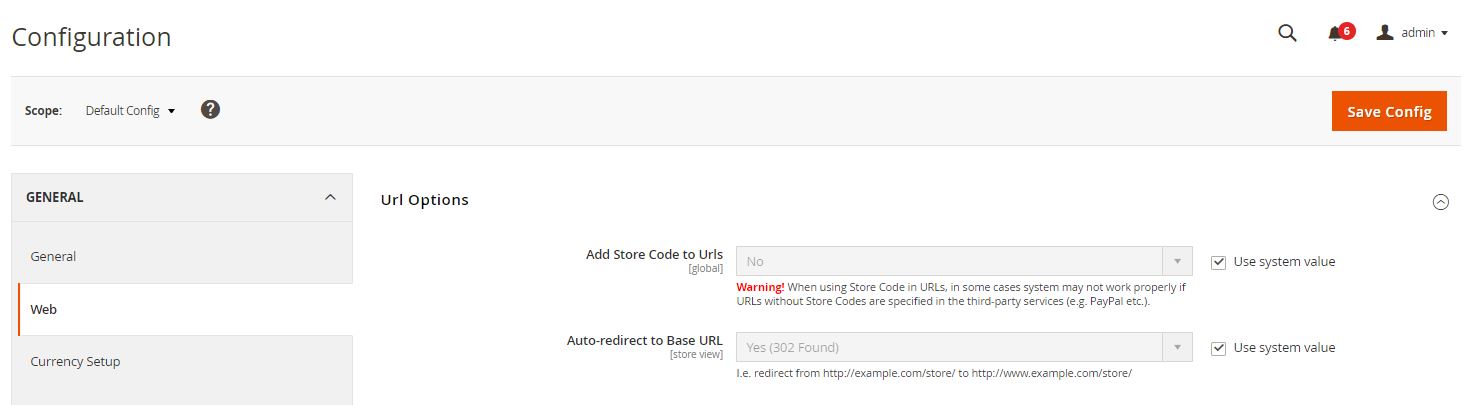
Add store code to the base URL
Next, expand the Url Options section and make sure to untick the Use system value checkbox next to the Add Store Code to Urls bar after setting this option to Yes. Choose Save Config to save these changes.
#Step 7: Alter the default store view base URL
This step is a must because you will lose access to the Magento Admin after changing the default store view base URL. But don’t worry because your access will return after you set up virtual hosts.
In your Magento 2 Admin Panel, go to Stores > Settings > Configuration > General > Web. In the Store View drop-down list in the upper-left corner of the screen, select Default Config. Next, expand Base URLs and clear the checkbox Use system value next to the Base Link URL field.
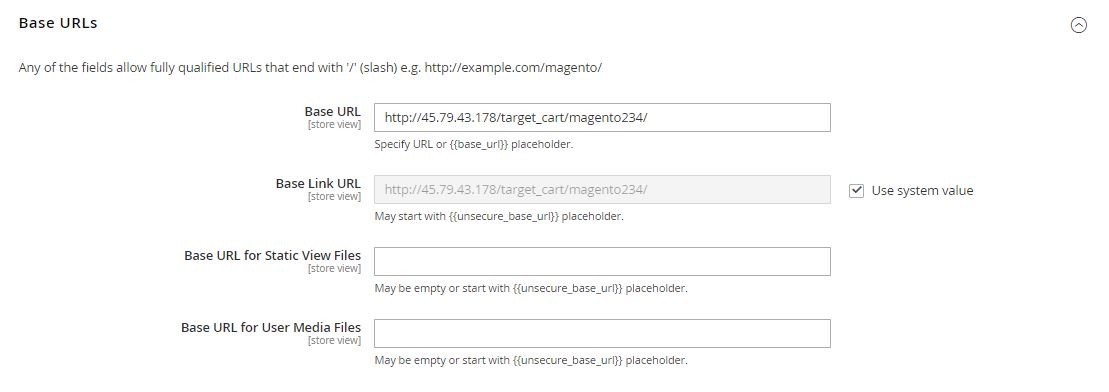
Here you need to enter the Base URL and Base Link URL fields. Click Save Config and do the same thing with the Base URLs (Secure).
Final Words
In summary, Magento multi stores functionality is a must-have weapon for store owners to foster product visibility. Through this article, we hope you can easily understand how to create multiple stores in Magento 2, and quickly make use of its favorable aspects.
Magento is a powerful eCommerce platform outperforming its competitors with a relatively-high loading speed, high security, rapid development and enhancement, and so on. Therefore, Magento can fulfill the demand for any kind of business, especially big sellers with lots of products. This encourages online merchants to settle down on this outstanding platform.
If you are planning to switch your business from another platform to Magento, check out our LitExtension Magento Migration service. If you are not a tech-savvy or too busy to migrate data on your own, our All-in-one Migration package is what you need. This is a perfect solution for you because it includes creating a fully-set Magento store.
In case you have any questions about Magento multi stores, or how to perform Magento migration flawlessly, don’t hesitate to contact our customer support team. We are always eager to help you with the whole process immediately!
In addition, don’t forget to join our community to get more eCommerce knowledge.