Working in the eCommerce industry for more than 10 years, we understand that there will be times when your current platform cannot fulfill all of your requirements. Especially if you are attempting to scale your business, moving from one to another is inevitable. Let us help! Migrating from Magento to WooCommerce has never been easier.
Take a look and see how you can move your online store from Magento to WooCommerce, following our steps below:
- 💡 Step 1: Back up Magento database
- 💡 Step 2: Set up a new WooCommerce store
- 💡 Step 3: Set up Source Cart and Target Cart
- 💡 Step 4: Select entities to migrate
- 💡 Step 5: Run Full Migration from Magento to WooCommerce
- 💡 Step 6: Follow the post-migration checklist
Need Help With Migrating Your Store?
If you intend to migrate from Magento to WooCommerce, LitExtension offers an accurate and worry-free migration service that helps you transfer your data from the current eCommerce platform to a new one with utmost security.
How to Migrate from Magento to WooCommerce in 3 steps
Magento to WooCommerce: The Preparation
#1 Backup your Magento store’s database
Before you migrate Magento to WooCommerce or perform any other cart-or-cart migration, make sure that your source store’s database is up to date and stored away safely. Although we won’t, in any case, make changes to your data during the migration, this procedure is important in helping you avoid any possible data loss.
To perform Magento 2 data migration to WooCommerce, follow the data back up steps below:
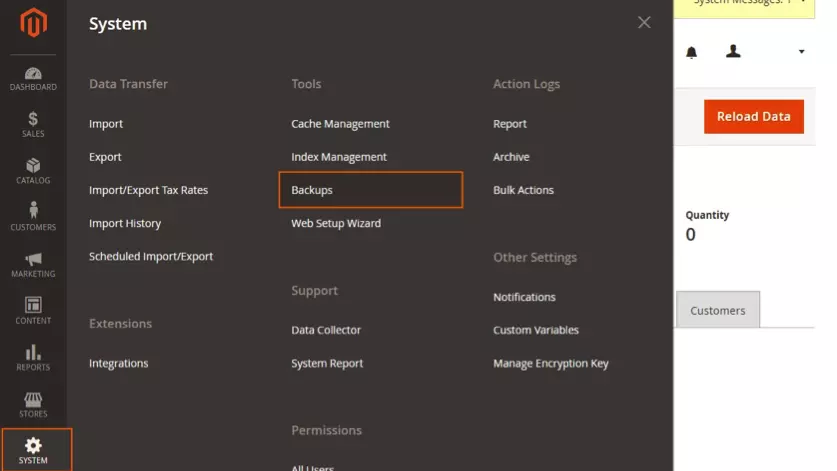
- First, on the Magento Admin Panel, choose Select > Tools > Backup
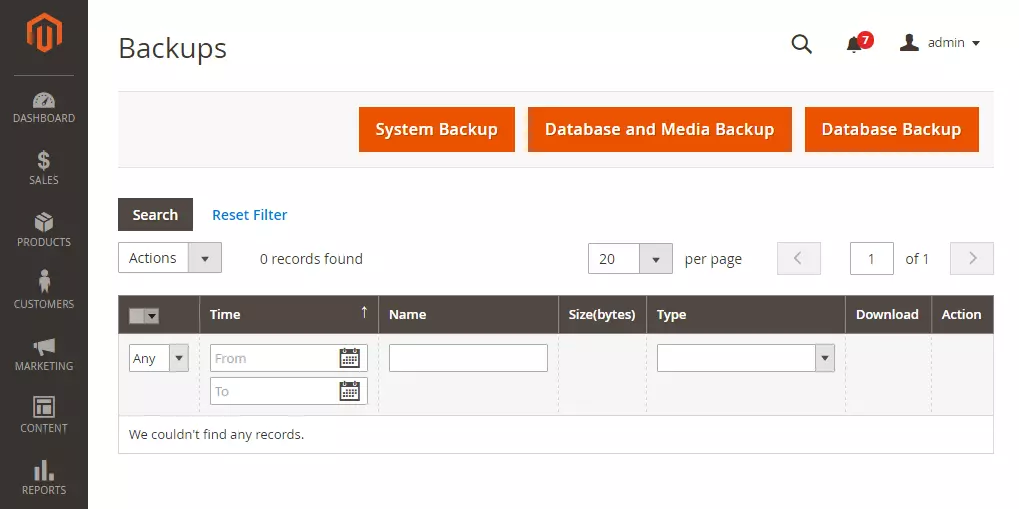
- In the upper-right corner, select the backup type from System Backup, Database, or Database and Media Backup.
- Choose your desired Backup options.
Set a name for the backup file for easy reference. You can also switch your store to maintenance mode during the backup to avoid data change during the process.
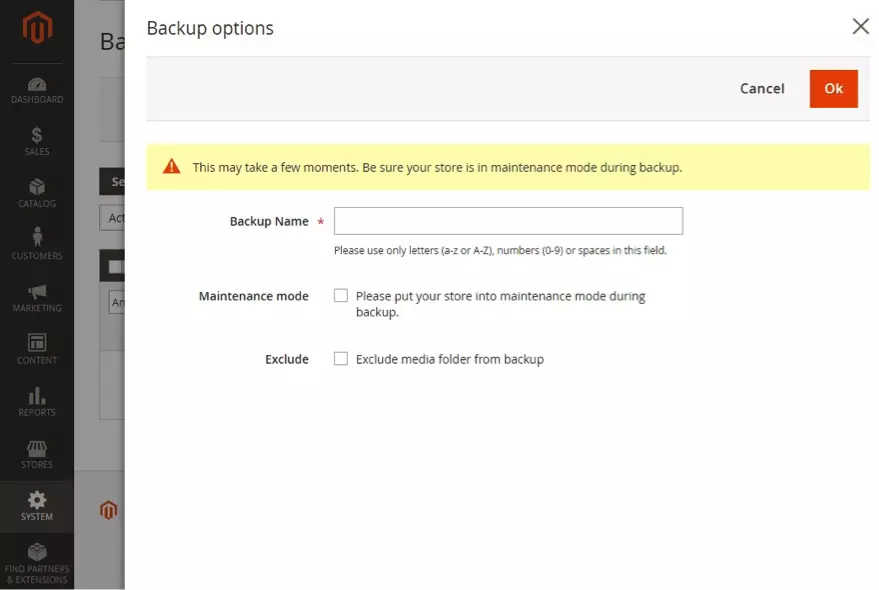
Once the backup is completed, Magento will turn off maintenance mode automatically, and you will receive a notification.
#2 Create your new WooCommerce store
After backing up the Magento database, it’s time to create your WooCommerce store. If you haven’t has any idea in mind yet, our tutorial video might be helpful:
To sum up, you would need to follow these steps:
Step 1: Set up WordPress
Before setting up WooCommerce, you need to install WordPress in advance.
- Choose hosting: Currently, many hosting companies have integrated with WooCommerce installation. A reliable WordPress hosting service that can take care of the full installation process is highly recommended if you’re not tech-savvy.
- Install WordPress: Alternatively, you can download the package from WordPress and manually install the platform using this detailed instructions.
- Find and install a WordPress theme
Step 2: Install WooCommerce
To install WooCommerce, on your WordPress admin:
- Go to Plugins > Add New
- Search for “WooCommerce”
- Click Install Now
- Click Activate Now, and you’re ready for your journey with WooCommerce!

Step 3: Follow WooCommerce Setup Wizard
When WooCommerce is activated for the first time, after selecting “Activate”, there will be a notification from WooCommerce Setup Wizard. You can follow the displayed steps to easily set up your store.
-
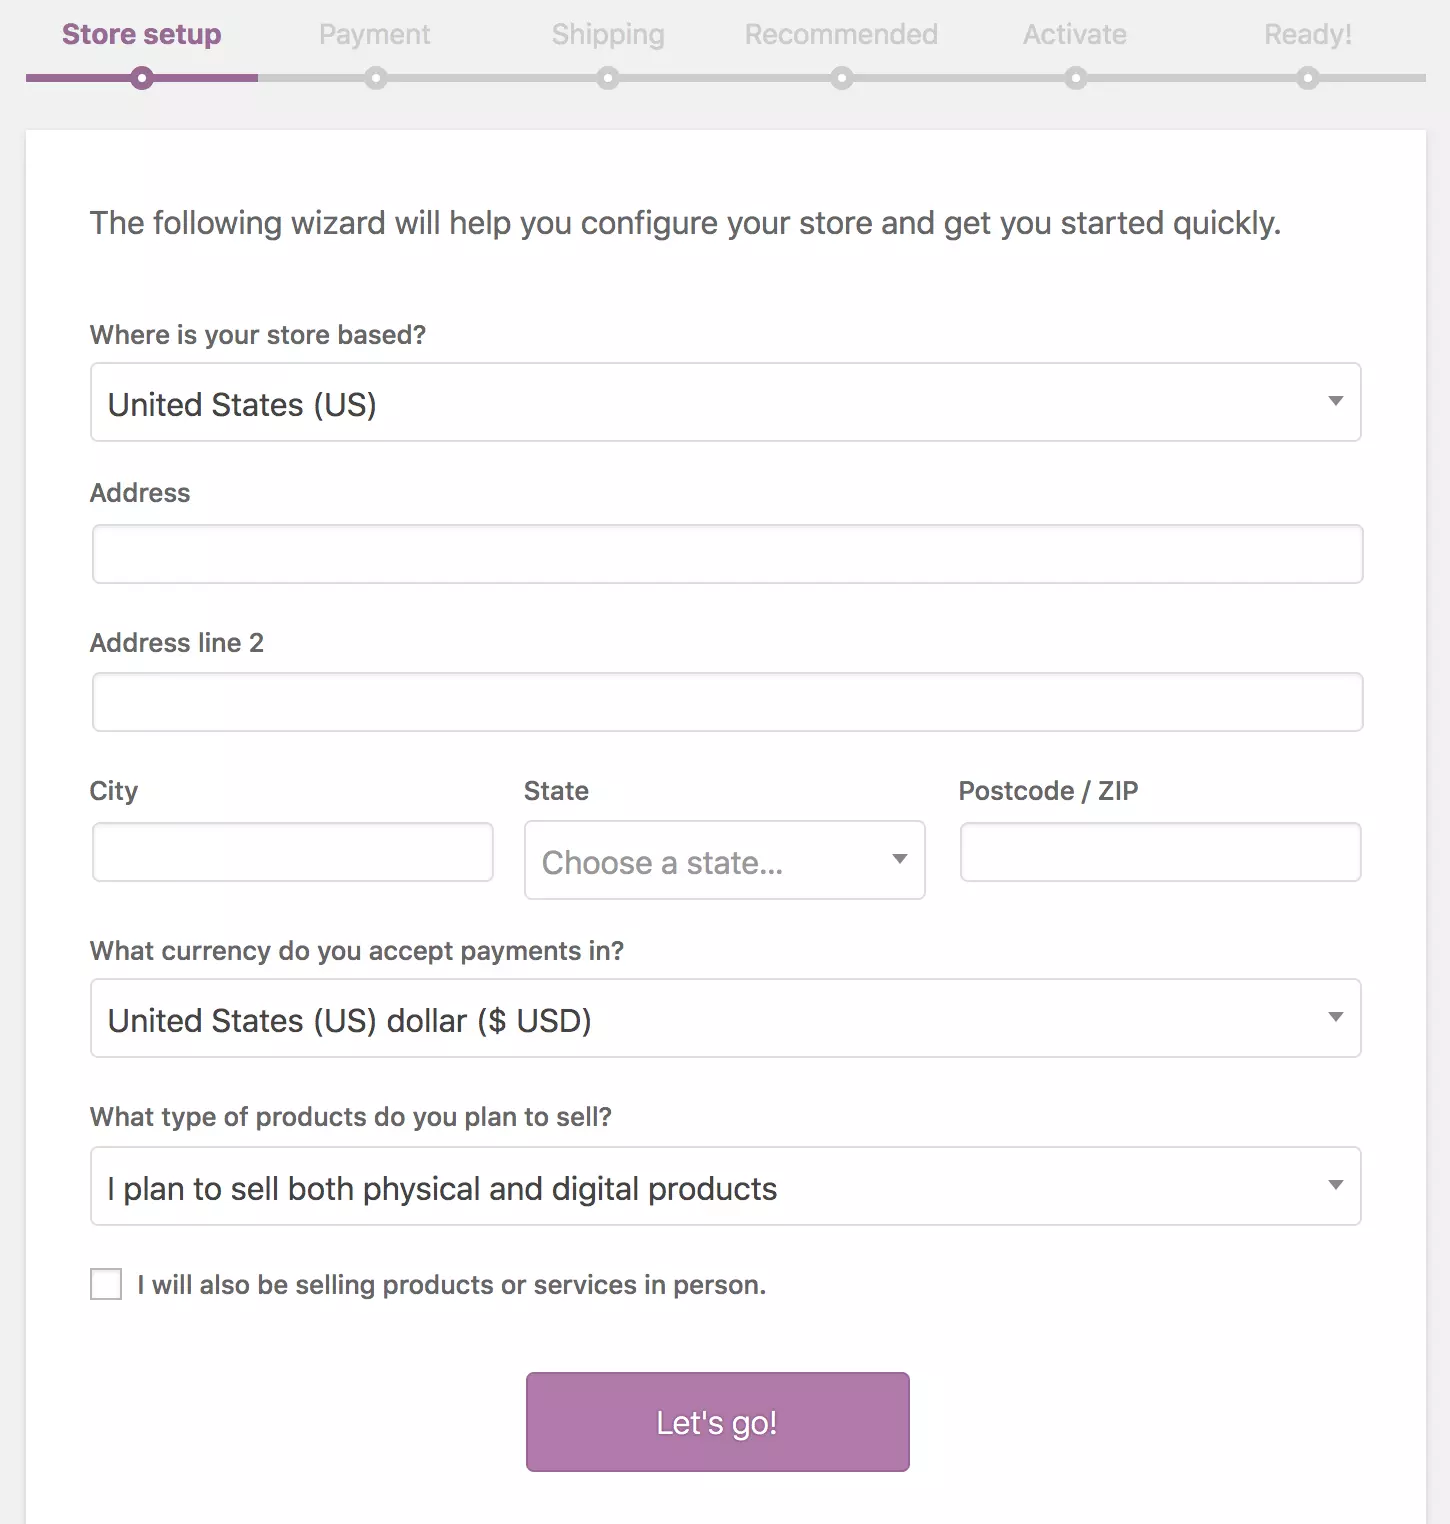
WooCommerce setup wizard
For more details on setting up your new WooCommerce store, check out: How to set up WooCommerce: A step-by-step guide.
Migrate from Magento to WooCommerce with LitExtension
Here’s come the most exciting part of the migration process! If you’re looking for a way to perform a quick and error-free migration at a reasonable cost, automated migration tools such as LitExtension are the answer!
This is perhaps the current most advanced method developed to make eCommerce migration easier. These tools will simplify the process of moving your business from one platform to another, saving you time while maximizing your store efficiency.
In this article, we will guide you through the steps to move Magento to Woocommerce using LitExtension – #1 Shopping Cart Migration Expert, as it’s the most efficient way to migrate your online store. For Magento, we also provide migration services from Magento to WordPress and between other platforms.
Let’s check out how you can transfer all your data with just a few clicks using LitExtension as your Magento to WooCommerce plugin!
#Step 1: Set up Source and Target Cart
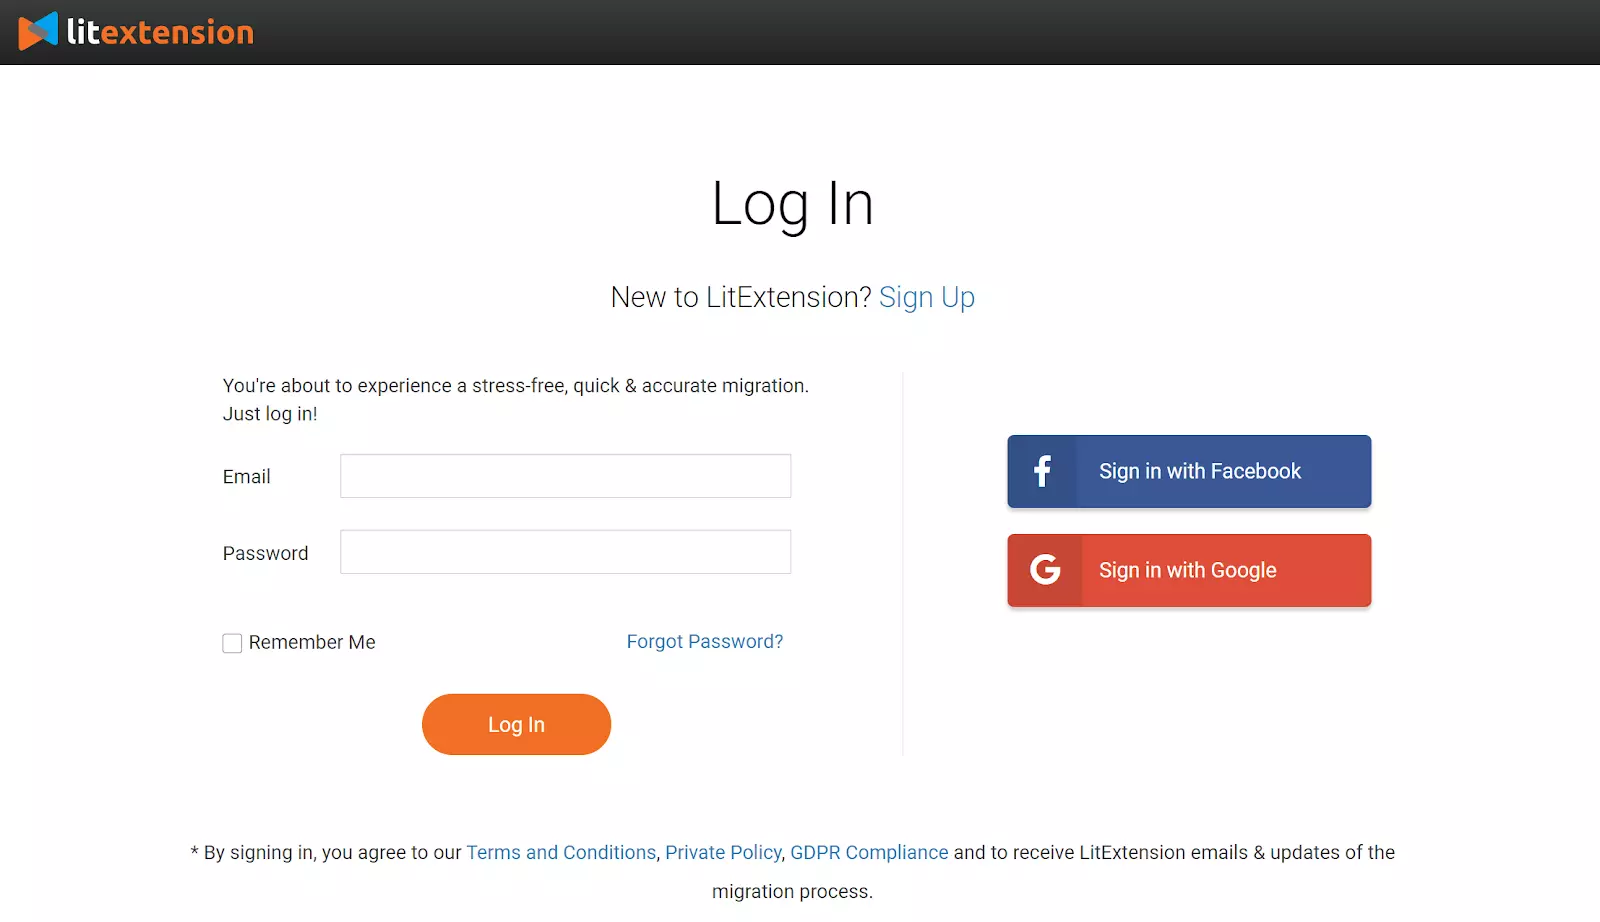
To begin, register an account on the LitExtension site. You also can log in easily by your existing Google or Facebook account.
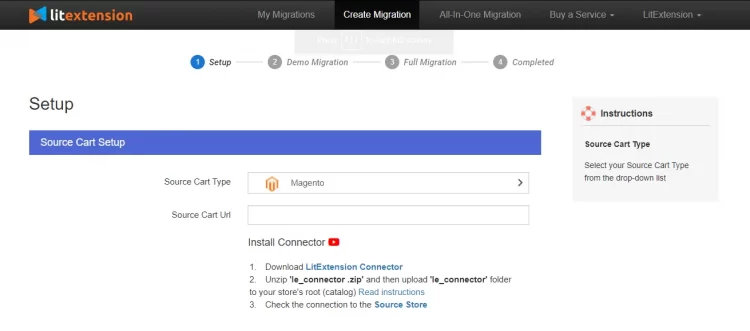
On the migration page, click Create New Migration option at the top right of the screen. Select Magento as Source Cart Type and enter the source store’s URL into the blank bar.
Then, click LitExtension Connector to download the connector, extract the zip file, and upload the connector to Source Store’s root folder. The Connector installation will be automatically checked and informed on the screen without manual checking.
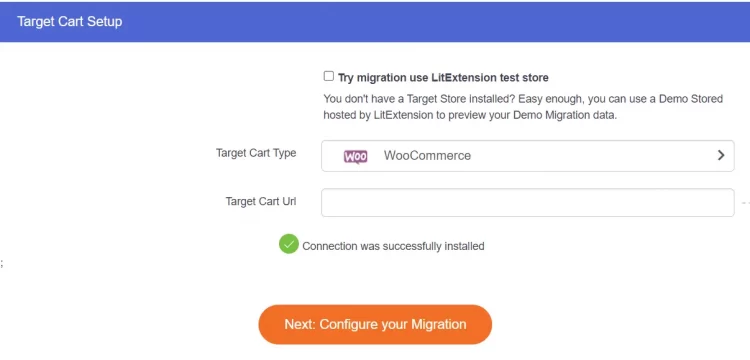
Repeat the same process to set up your Target Cart. Once you notice the successfull installation pop-up, hit “Next: Configure your Migration” to continue.
#Step 2: Select the migration entities
Once you’re done connecting your two stores, you can proceed to choose the entities you want to migrate. You can select either all of them or just certain data, for example only Products, Customers, and Orders.
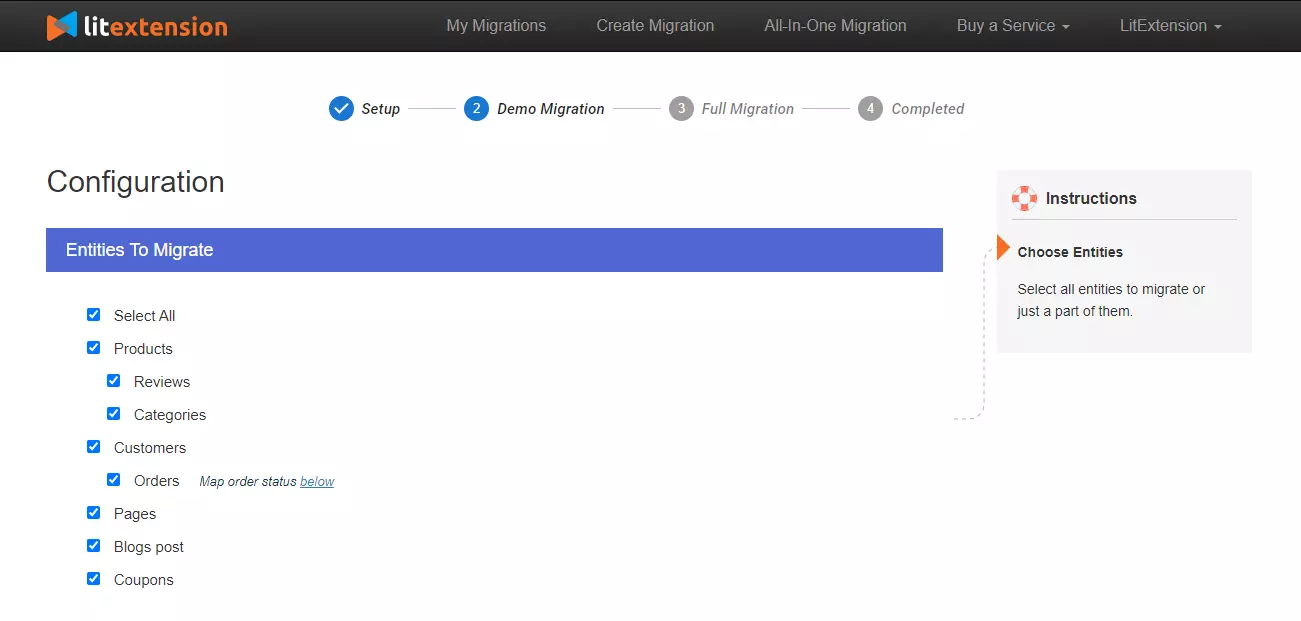
LitExtension also provides Additional Options to extend your migration possibilities. Depending on your selections, we will charge an extra fee from $19 – 39.
One of our highly-recommend option is “Preserve Order IDs on Target Store”. By selecting this, you may maintain the same IDs for orders on the Target Store that you used on the Source Store to save time and guarantee a smooth shopping experience despite platform adjustment. However, due to Magento’s architecture, LitExtension accept IDs that contain numbers only (and no other symbols or characters).
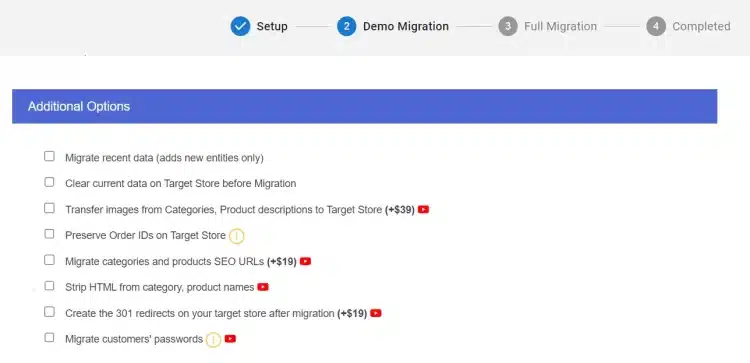
Don’t forget to map language between the two platforms for the best eCommerce experience!
#Step 3: Migrate from Magento to WooCommerce
Before making the full migration from Magento to WooCommerce with LitExtension, you can even try out our Demo Migration to get the general idea of what the actual migration will be like. However, if you wish to perform the full migration immediately, you can choose the “Skip Demo Migration” option and the Full Migration will be running.
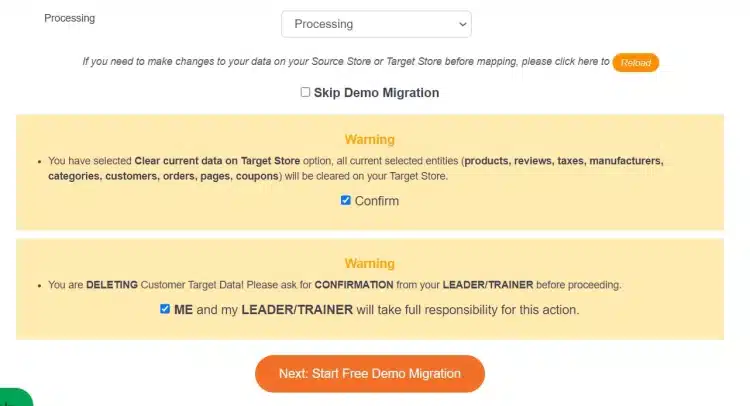
During the migrating process, you don’t have to keep your browser open. When your data is done being transferred from Magento to WooCommerce, LitExtension will send an email to notify you that your migration has now completed.
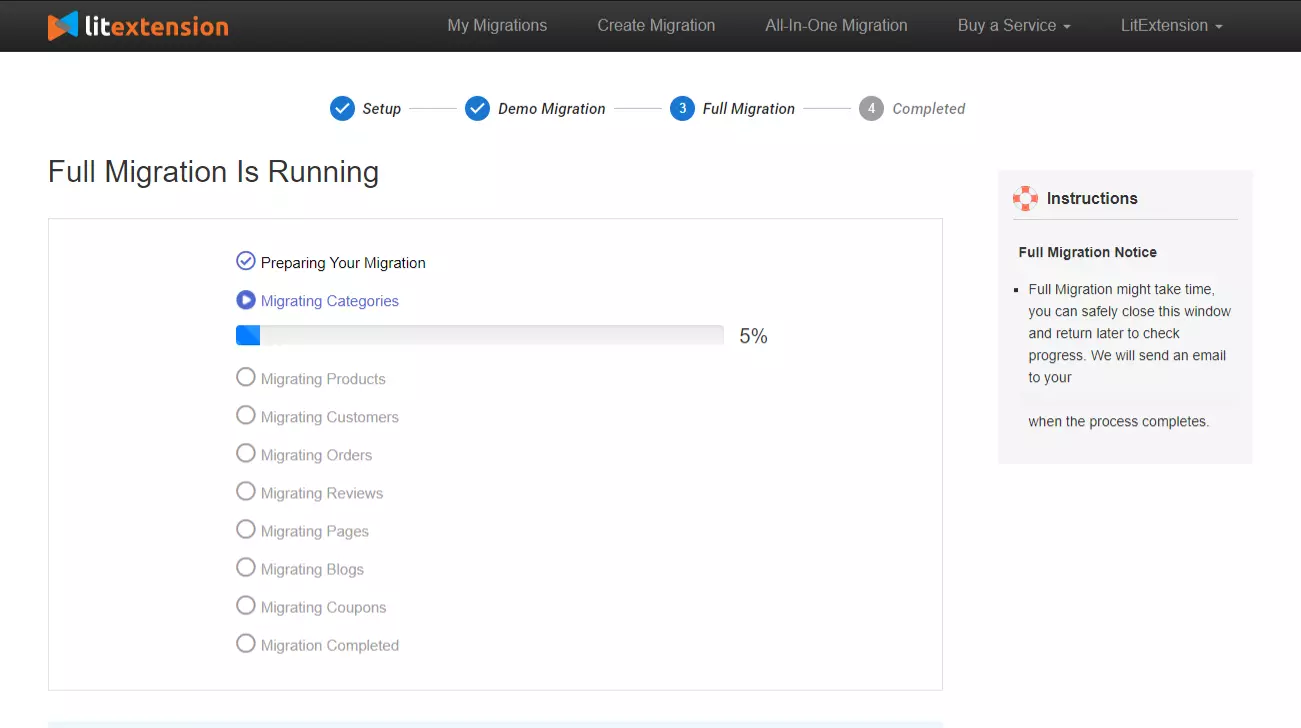
We also have a video version for you to follow, check it out for more details on how the service actually run:
Make Your Migration Project A Breeze with LitExtension
Don’t have time to switch from Magento to WooCommerce? Opt-in for our All-in-One Migration Service to have an exclusive Personal Assistant carry out the Shopify Migration for you without having to lift a finger.
Magento to WooCommerce: Post-migration Checklist
After your data migration, you would want to spend a good amount of time customizing your store before going live. We have gathered a checklist of all the important tasks:
#1 Check results after migration
Once the full migration is successful, you need to check if all of the data has been migrated accurately to your WooCommerce store. Remember that you have to check your data in both WooCommerce backend and frontend.
Refer to this article for the full guide on how to check the results of your migration on your WooCommerce store.
#2 Choose a theme for your new WooCommerce store
Currently, there is no direct solution to migrate themes from Magento to WooCommerce. You need to either choose a free theme or buy a new theme from a third party.
Luckily, WooCommerce works with any WordPress themes. This is great news especially if you’ve already picked a design style you like and wish to keep using it in your new store. There are currently over 10,000 free themes for WordPress that you can choose from, or you can buy a theme from a third-party provider such as ThemeForest.
#3 Add necessary extensions
The next step is to add the necessary extensions to help you boost your store’s performance.
WooCommerce is currently the eCommerce platform with one of the most diverse plugin selections on the market. You can access more than 55,000 plugins and extensions that are easy to integrate and offer various functionalities. Furthermore, you can manually customize your WordPress base code to create your own extensions.
Some of the most popular extensions are Yoast WooCommerce SEO, WooCommerce Multilingual, Contact Form 7, MonsterInsights, etc.
#4 Run Recent Data Migration
During and after the migration, LitExtension still keeps your source store active normally to ensure that the service doesn’t affect your sales or business performance. Therefore, your store will still receive new orders, customers, and new products throughout the data transfer, or when you’re configuring your new store after the migration.
After setting up your new store, you’ll have to transfer the newly incurred data in your old store to your new store as well.
That’s when our Recent Data Migration and Smart Update comes in handy. Within three months from the first migration, you may re-migrate as many times as you want at no additional cost.
This is an additional feature with a view to help you transfer all new data such as products, orders and customers from your source site to the target site after you’ve performed a full migration. Check out this video to see how you can perform Recent Data Migration:
With the Smart Update feature, LitExtension will compare data fields in both of your stores and look for the differences. If there is any data mismatch, the app will automatically perform updates onto your new store. Compared to Recent Data Migration, Smart Update can even update any data that has been modified from your source store as well as new ones.
For more information on how to perform Smart Update, take a look at our video tutorial below:
The Re-Migration service lets you re-import all of your data from Magento to WooCommerce in case there are problems happening during the initial process. This could happen because of corrupted migrate entities, failed store setup, or the migration negatively affects your new store’s performance.
#5 Change DNS and switch domain
After all store information has been fully implemented, the final step to set up a Magento store is to switch your new store’s domain.
Why is changing DNS and domain important after migration? Here are the three most prevailing issues you might face after completing a migration:
- You use the same hosting provider for both of your stores, under the same domain, but your target store is in the subdirectory.
- You use the same hosting provider for both of your stores, but each of them has a different domain name.
- Your source store and target store are hosted by different providers, under different domain names.
Why You Should Move From Magento To WooCommerce
For large eCommerce store owners, Magento is a great platform to build your website on. You have the power to manage hundreds of store locations and thousands of goods with ease. Moreover, the extensions that Magento offers can fulfill the requirements of even the most demanding businesses.
However, Magento users need to have strong coding knowledge in order to take advantage of its functions fully. The alternative options of hiring developers to manage your store can be costly, especially for small businesses.
On the other hand, for store owners whose biggest concern is to manage their costs effectively, WooCommerce would be a more suitably priced solution. It offers store owners over 50,000 diverse plug-ins and 30,000 website themes, many of which are free. You can also set up WooCommerce without much coding background, as it’s tailored to eCommerce beginners.
Therefore, if you need a more cost-efficient platform for your online business, WooCommerce is our suggested solution. Let’s take a look at our head-to-head comparison of WooCommerce vs Magento to see the big picture:
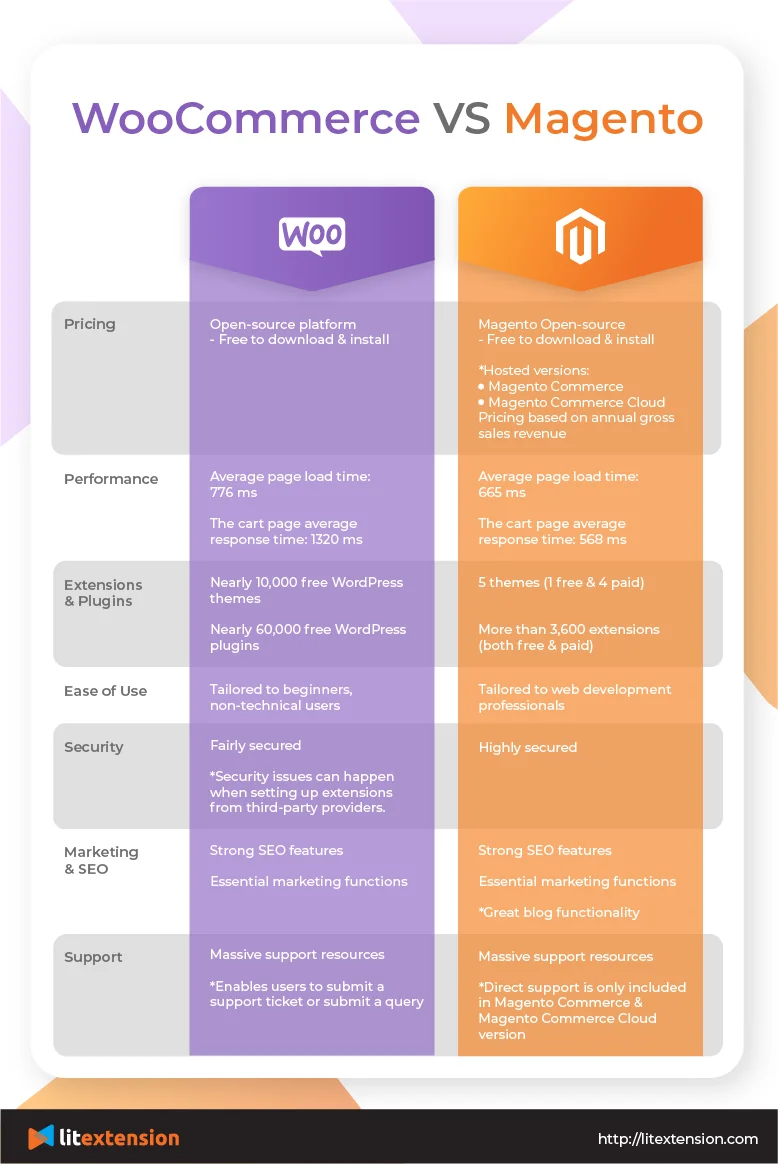
Other Methods to Switch Magento to WooCommerce
Migrate manually
Manually migrating your store means you will be handling all data transfers by yourself. Thus, you’re required to have a strong technical background. You’ll have full control over which data you want to transfer and make any customization you want.
However, this method may take a lot of time and isn’t suitable for users without coding knowledge.
Hire a professional
You can always choose to hire a developer to perform the data migration for you. They will personally assist you in managing store data, fixing errors and setting up your new website.
Depending on the complication of your migration, this method can cost you $50-$250 per hour. Even though you can request for any changes you want, this is certainly a costly method.
Want to Migrate Your Store and Grow on WooCommerce
Having decided that Magento is no longer the perfect fit? Transfer all your data to WooCommerce now and enjoy its powerful eCommerce functions that can bring your business to the next level.
Moving From Magento to WooCommerce: FAQs
[sp_easyaccordion id=”58090″]
Conclusion
As your business expands in size, you might notice that the current eCommerce platform you’re using may no longer be suitable. That’s when you need to perform shopping cart migration and move your online store to a new platform.
With the assistance of current automated migration tools such as LitExtension, cart-to-cart migration has certainly become less of a struggle. We hope that with this article, you can now migrate from Magento to WooCommerce with ease!
If you still have other questions, don’t hesitate to contact us for quick assistance. Or join in the discussion with thousands of other merchants and business owners in our dynamic eCommerce community!
Other popular migration pairs you can try out with LitExtension are: