Are you a beginner who wants to build an exceptional online store with Magento? If so, you have come to the right place. In this all-inclusive Magento tutorial, we will walk you through all you need to know about the Magento platform.
Here is a quick glance at what this guide covers:
- An overview of the Magento platform;
- How to set up a basic Magento website;
- How to use Magento features to drive better conversions.
Let’s dive right in!
Magento Tutorial 101: All The Fundamentals
What is Magento and its architecture?
Magento stands out in the realm of eCommerce platforms due to its open-source nature and PHP-based framework. Its architecture is intricately designed, offering a modular structure and employing a model-view-controller (MVC) framework.
To clarify further, with the MVC framework, your data, user interface, and logic are separated, giving you the flexibility to customize your online store without limits.
Why choose Magento?
Among tons of eCommerce platforms, there are reasons as to why Magento is often big brands’ favorite choice. After performing thousands of Magento migrations, most of our interviewed clients said they wanted the switch because of the following reasons:
- Customization: Magento offers unparalleled flexibility in in-store customization.
- Scalability: Capable of supporting both small and large-scale online stores.
- Community Support: Access to a large community of developers and users.
- SEO friendliness: Features that enhance your store’s visibility in search engines.
- Multi-store management: Efficient management of multiple stores from a single dashboard.
- Robust security: Regular updates ensure a secure platform for your transactions.

Magento 1 vs Magento 2: What are they?
If you have done your research beforehand, you’ve probably heard of Magento 1 and Magento 2. And if you are asking yourself which version to go with, the answer is simple: Magento 2.
FYI: Magento 1 was sunset in September 2018, and if you keep using this version after June 1, 2020, there will be big consequences, such as Payment Card Industry Data Security Standards non-compliance.
Also, Magento 2 is better than its old version in all possible aspects – page speed, ease of use, etc. So, Magento 2 will definitely be the version you should go with.
For more information on the differences and Magento 2’s pros over Magento 1, check out our head-to-head Magento 1 vs Magento 2 comparison.
Magento Tutorial: How To Set Up A Basic Magento Website
First, let’s explore the five necessary steps to set up a proper Magento website:
- Choose a hosting provider.
- Install Magento.
- Pick a theme and customize it.
- Add your products.
- Set up payments and shipping options.
Step #1: Choose a hosting provider
When setting up a Magento website, the first crucial step is to select a suitable hosting provider. The choice of hosting can significantly impact your store’s performance, security, and scalability. Here’s what to consider:
- Performance and reliability: Look for hosts that guarantee high uptime and fast loading speeds.
- Security: Ensure the provider offers robust security measures to protect your store and customer data.
- Specialized in Magento hosting: You should research and find hosts that specialize in Magento hosting. This will give you more optimized environments and better support.
- Scalability: Your host should be able to accommodate your store’s growth without a hitch.
- Cost: Balance your budget with the features and support you need.
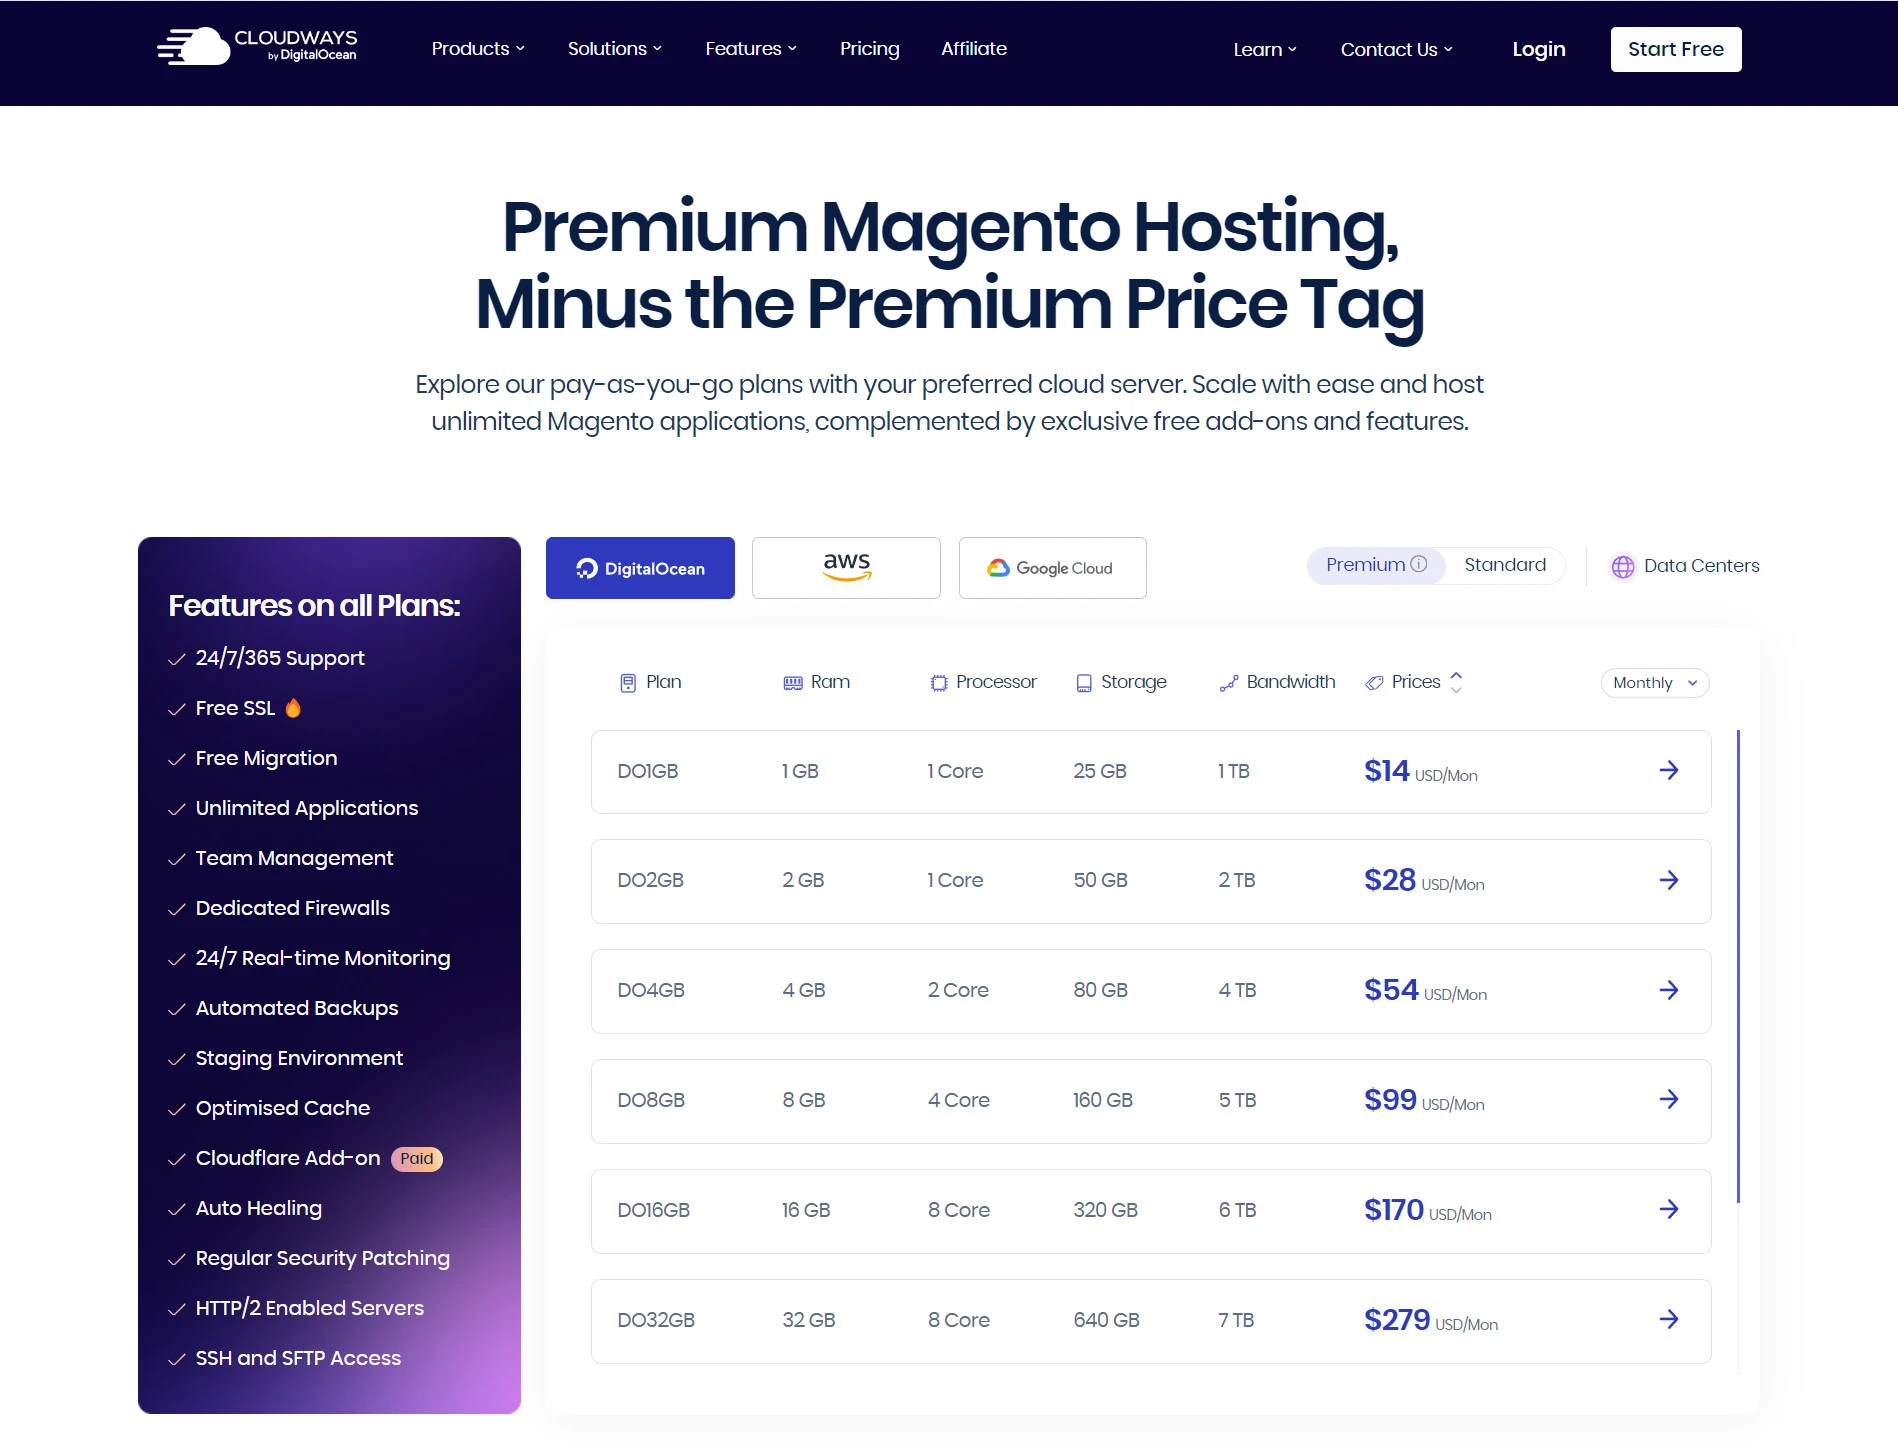
If you are a large-sized business, Magento Commerce Cloud Host is a no-brainer. This web-based business platform is hosted on Amazon Web Services and is specifically designed for online stores with high traffic and sales volume.
Nevertheless, if you’re on a budget, the Magento pricing for Magento Commerce can be a bit intimidating, ranging from $40,000 to $190,000 per year.
But there are tons of other notable providers you can consider. This includes CloudWays, SiteGround, Bluehost, and HostGator, each offering different plans and features suitable for your Magento hosting.
Step #2: Install Magento
After you’ve bought your domain and hosting plan, the next thing we’ll show you in this Magento tutorial is to install Magento.
- Preparation: Ensure your hosting environment meets Magento’s requirements.
- Download Magento: Obtain the latest version from the official Magento website.
- Upload and Extract: Upload the downloaded file to your server and extract it.
- Create a Database: Set up a new database for your Magento installation.
- Run the Installation Wizard: Access your domain in a web browser to start the installation wizard and follow the on-screen instructions.
- Configuration: Configure your store’s basic settings during the installation process.
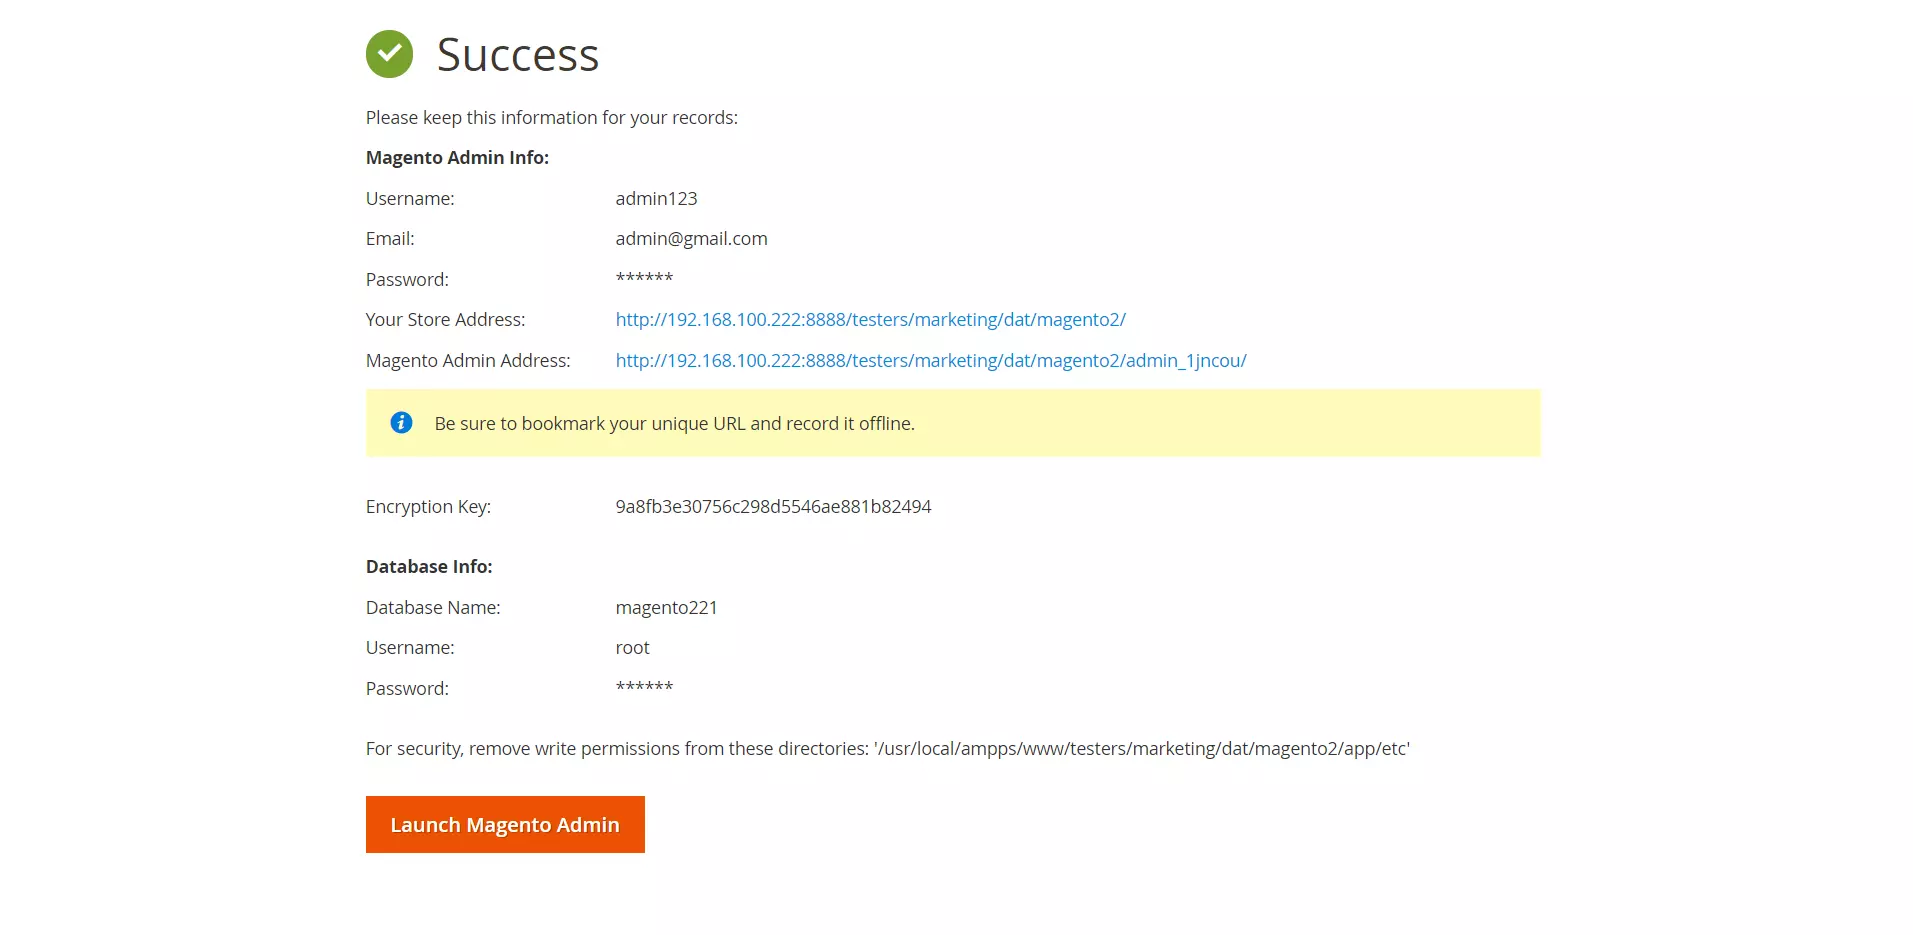
For more detailed instructions, kindly refer to our complete guide on how to install Magento 2.
Step #3: Pick a theme and customize it
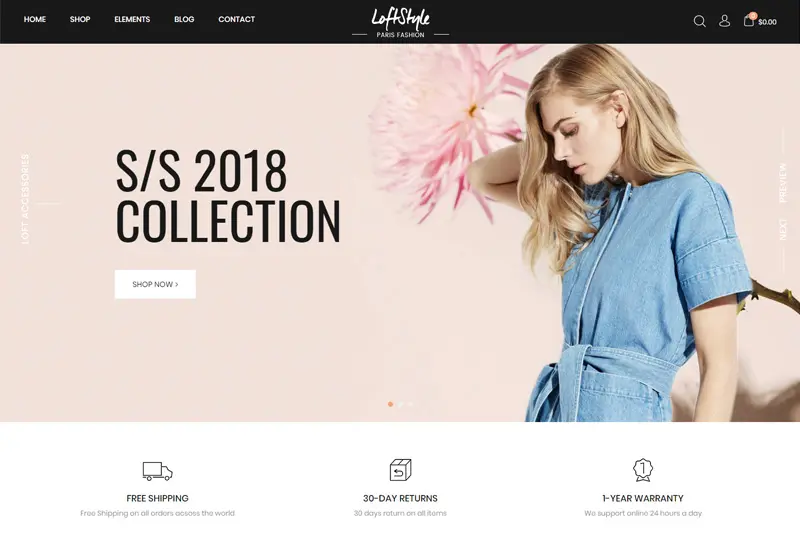
Let’s continue our Magento tutorial by picking a theme for your Magento store and start customizing it to your brand style and preferences.
There are dozens of places where you can buy your Magento theme, like ThemeForest, TemplateMonster, etc. However, for more guaranteed quality, we highly recommend that you pick a theme on the Magento theme marketplace.
Here are some tips you should keep in mind to pick the best Magento theme for your store:
- Ensure the theme is compatible with your version of Magento.
- The theme should be mobile-friendly, adapting seamlessly to different screen sizes.
- Look for themes that offer extensive customization options so you can tweak the design as per your brand identity.
- A lightweight theme that loads quickly is essential for a good user experience and SEO.
- Check if the theme follows best SEO practices.
- Ensure the theme developer provides regular updates and support.
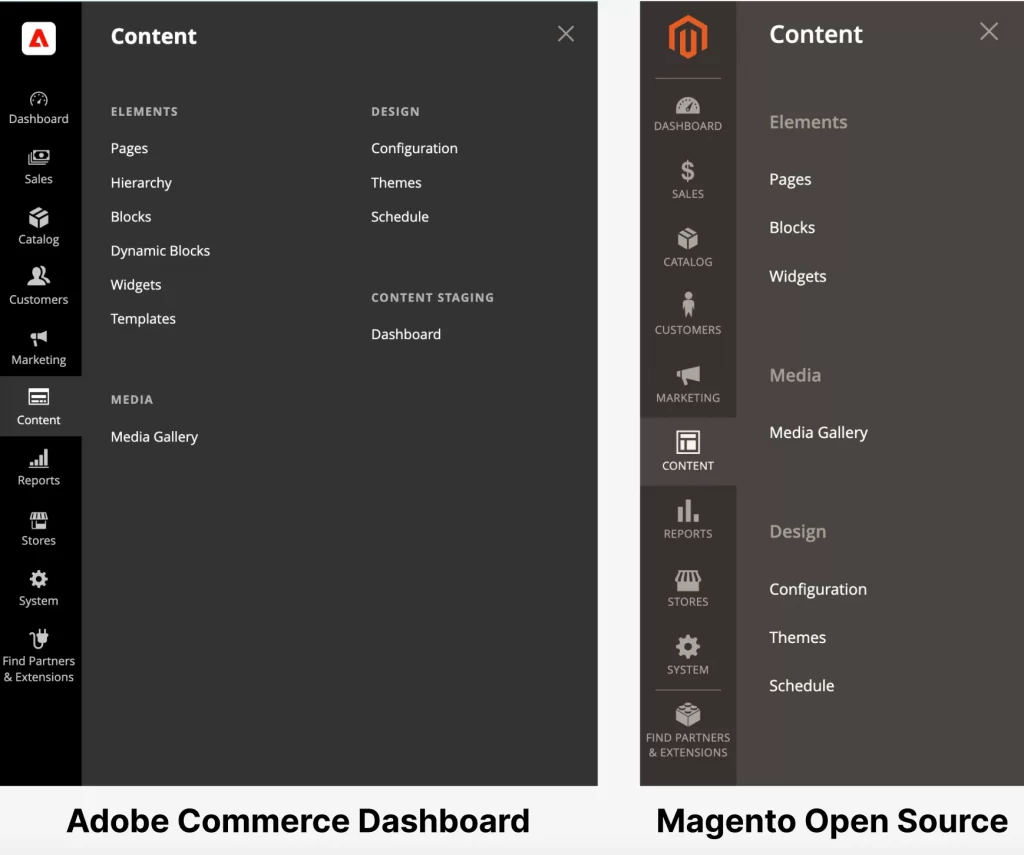
After you’ve picked a theme for your store, navigate to ‘Content‘, then ‘Design‘, and select ‘Configuration‘.
Afterward, you can change various elements like:
- Header and footer: Customize these sections to match your brand, including logo, navigation links, and contact information.
- Colors and fonts: Adjust the color scheme and typography to align with your brand identity.
- Layout and structure: Modify the layout, such as the number of columns, positioning of elements, and overall structure.
If you are on the Adobe Commerce plan (the paid version), then besides static blocks, you can also customize dynamic blocks to create interactive experiences for your website.
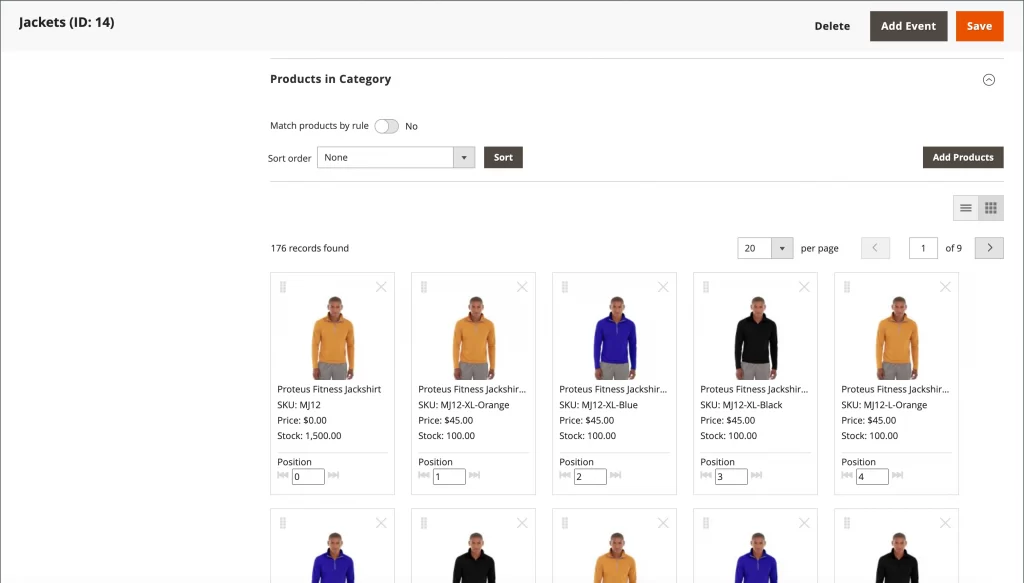
Step #4: Add your products and collections
Now that you have customized your theme, let’s keep setting up your Magento store by adding products to your store.
- Navigate to the ‘Products‘ section in your Magento admin panel.
- Choose the product type (simple, configurable, etc.), and fill in the details like name, price, and description.
- Add high-quality images to showcase your products.
If you have a large catalog, remember to group related products into collections to improve your navigation and customer experience.
Step #5: Set up payment options and shipping methods
Finally, setting up payment options and shipping methods is vital for a functional store:
- Payment options: Magento supports various payment gateways. Choose ones that suit your target audience, like PayPal, Stripe, or direct bank transfers.
- Shipping methods: Configure shipping methods based on your logistics. Options include flat rate, free shipping, or table rates based on weight, value, or destination.
Magento Tutorial: How To Use Magento Features To Drive Sales
With a basic store, you can start accepting payments and run your online business. However, that’s far from enough if you want to grow your store. Therefore, in this Magento tutorial, we’ll also show you how to use Magento features to promote your brand effectively.
Step #1: Run marketing campaigns
No matter how stunning and functional your Magento store can be, it might just be mediocre without you promoting it. Thus, in this Magento tutorial, we’ll walk you through Magento’s main marketing features– promotions, product reviews, and email marketing.
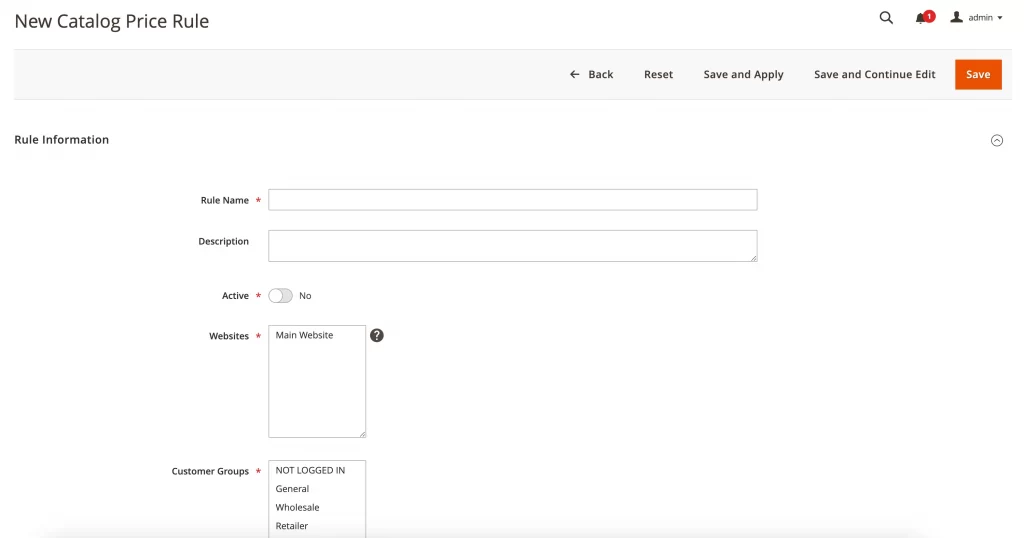
Promotions
You can utilize Magento’s Catalog Pricing Rules and Cart Pricing Rules for targeted discounts, like seasonal promotions or loyalty pricing. These can be strategic in offering your customers ongoing promotional pricing or checkout stage discounts, helping you close more deals.
Navigate to the ‘Marketing‘ tab in the Magento dashboard. Here, you’ll find options for ‘Catalog Price Rule‘ and ‘Cart Price Rule‘ to set up various discounts and promotions.
Product reviews
If you want to build a high-converting eCommerce website, adding product reviews is a must-do task. To manage your reviews:
- Go to the Magento Admin Panel.
- Click on ‘Stores‘ in the main menu, then select ‘Settings‘, and choose ‘Configuration‘.
- In the left panel, expand the ‘Catalog‘ section and click on ‘Catalog‘ beneath it.
- Find the ‘Product Reviews‘ section and expand it. Here, you will see that Product Reviews are enabled by default.

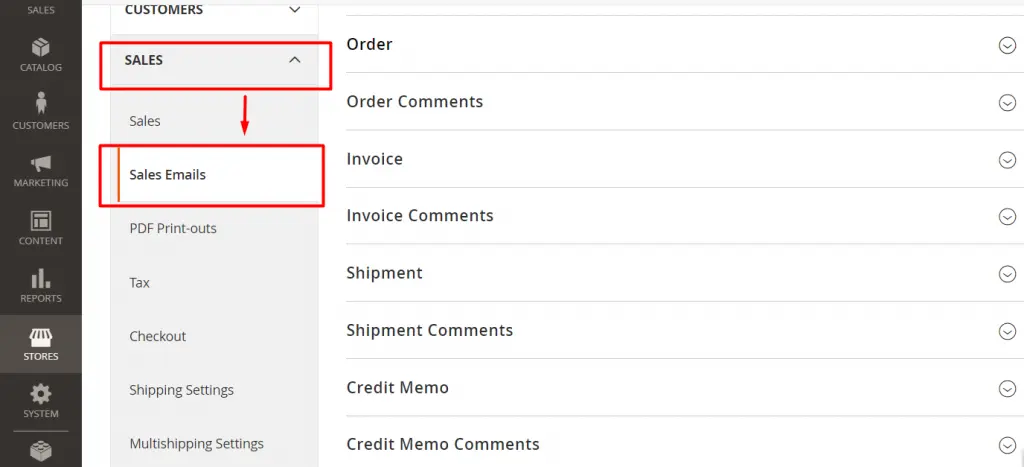
Email marketing
Magento supports comprehensive control over transactional and promotional emails, allowing you to customize email templates and effectively communicate with customers.
- Within your Admin Panel, choose Stores > Click Settings > Hit Configuration.
- On the left panel, under the Sales tab, click on the Sales Emails subtab.
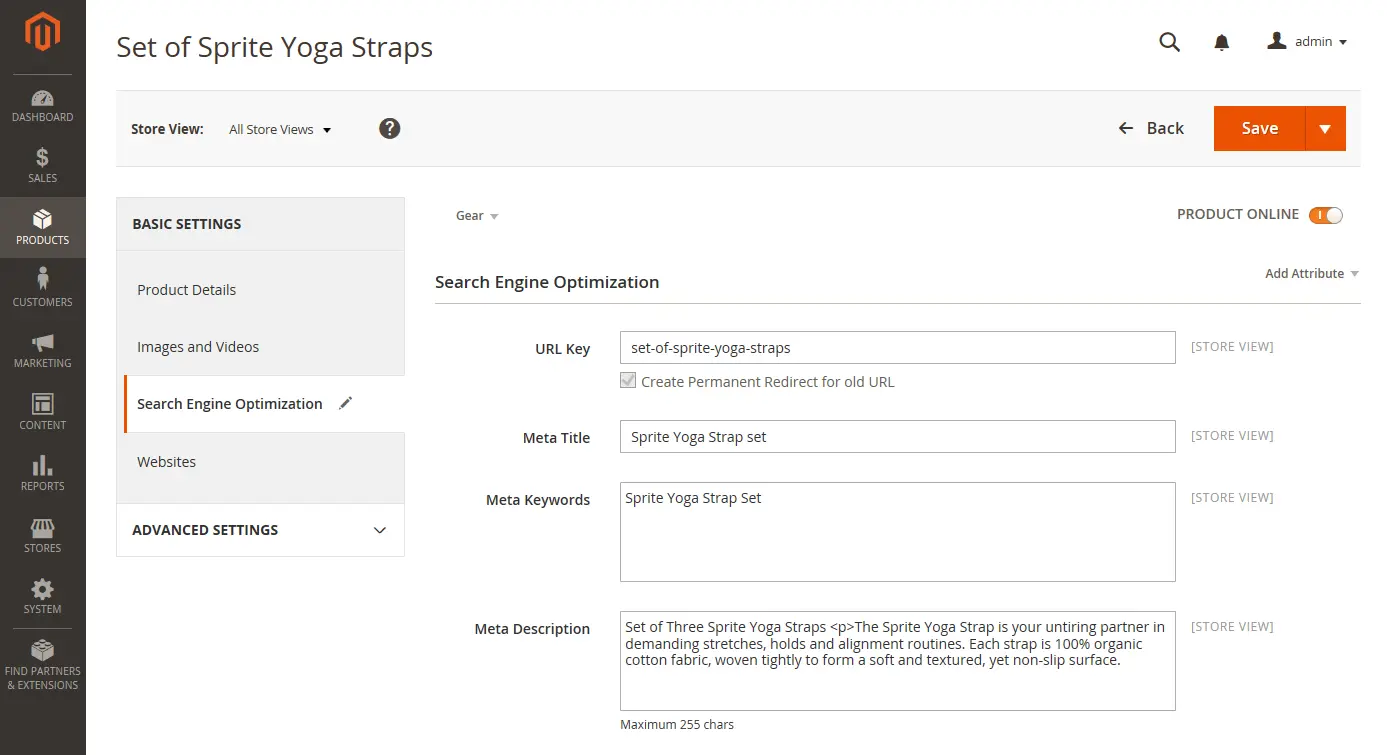
Step #2: Utilize Magento SEO features
SEO is critical for online visibility and long-term eCommerce success. Lucky for you, Magento’s SEO features are diverse and robust. To name a few prominent Magento SEO features:
- SEO-Friendly URLs and Metadata: Customize your product and category URLs and metadata for better search engine indexing.
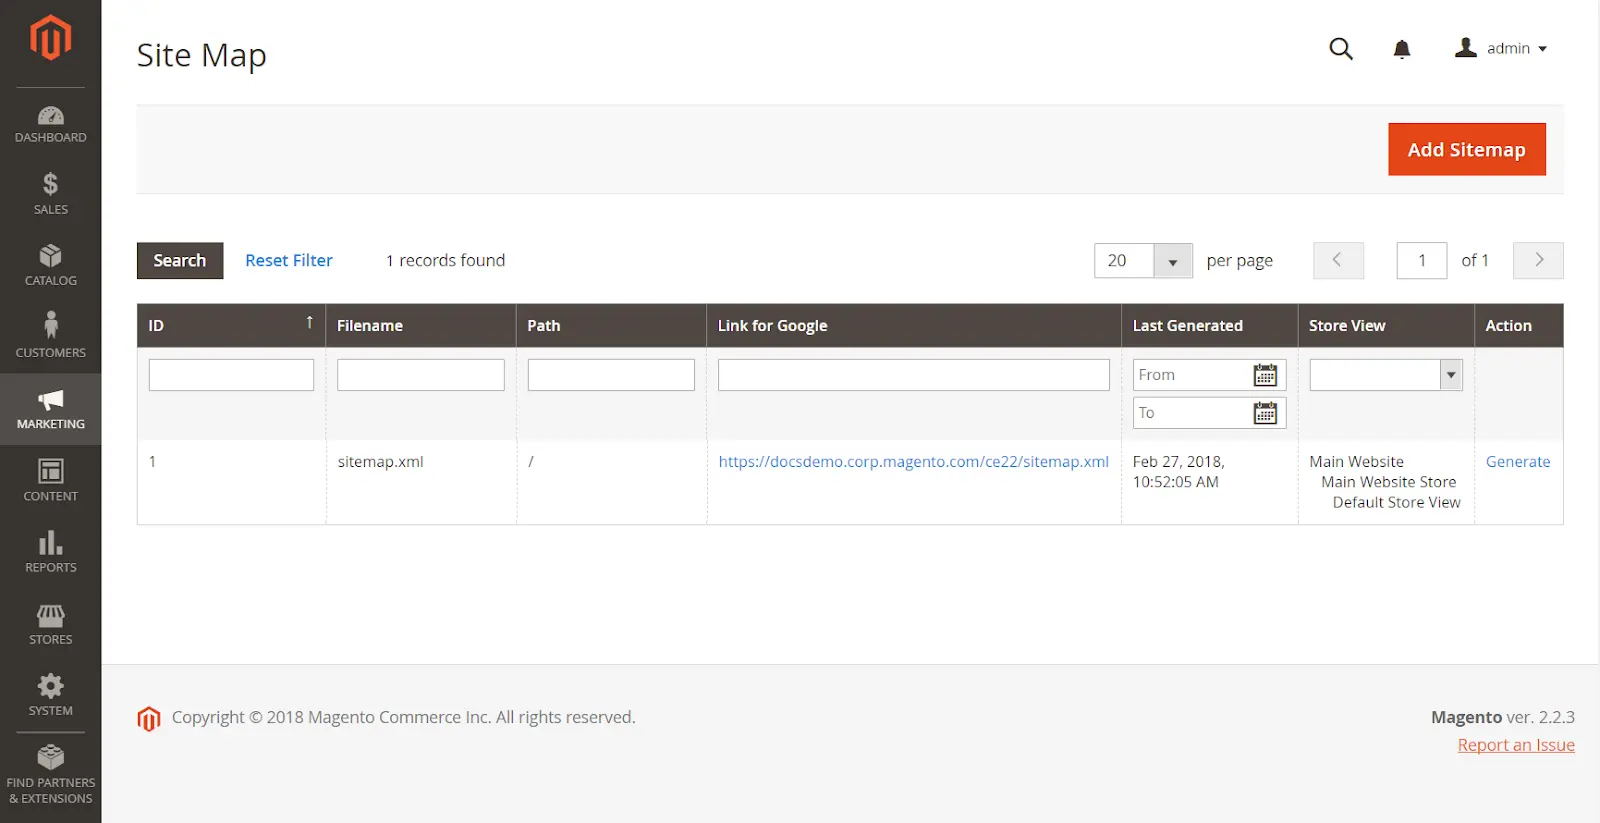
- XML sitemap: Magento has an SEO sitemap auto-generation feature, which you shouldn’t miss out on. To customize your XML sitemap settings in Magento, simply go to the ‘Marketing‘ section in your dashboard, then select ‘SEO & Search‘, and click on ‘Site Map‘. Then, you can adjust the priority, set the frequency, and specify the time for the XML sitemap generation how you like it.
Check out our comprehensive Magento SEO Tips for a more detailed guide on how to configure and make the most out of Magento’s SEO features.
Step #3: Track your analytics
If you want to make more educated decisions to improve your business operation and fuel your growth, you must track your analytics and reports. On your admin dashboard, choose ‘Reports’, and you’ll access tons of reports on your marketing campaigns, products, customers, and more.

Step #4: Install Magento extensions
Magento is powerful as an eCommerce platform. However, to truly extend your store functionality, you’ll need the help of extensions. Go to the Magento extension marketplace, find the extensions providing the features you want, and install them in your store.
From our expertise, here are the extensions you should install to your Magento store:
- SEO Extensions: SEO extensions are vital for improving your store’s search engine rankings and driving more organic traffic. Some recommended Magento SEO extensions include SEO Toolkit by Swissuplabs or ChatGPT SEO Optimizer AI by {t} Toogas.
- Product Management Extensions: Managing your products effectively is key to a smooth operation and enhanced customer experience. Some notable extensions in this category are Advanced Product Options Suite by MageWorx and Custom Stock Status by CoderKube Technologies.
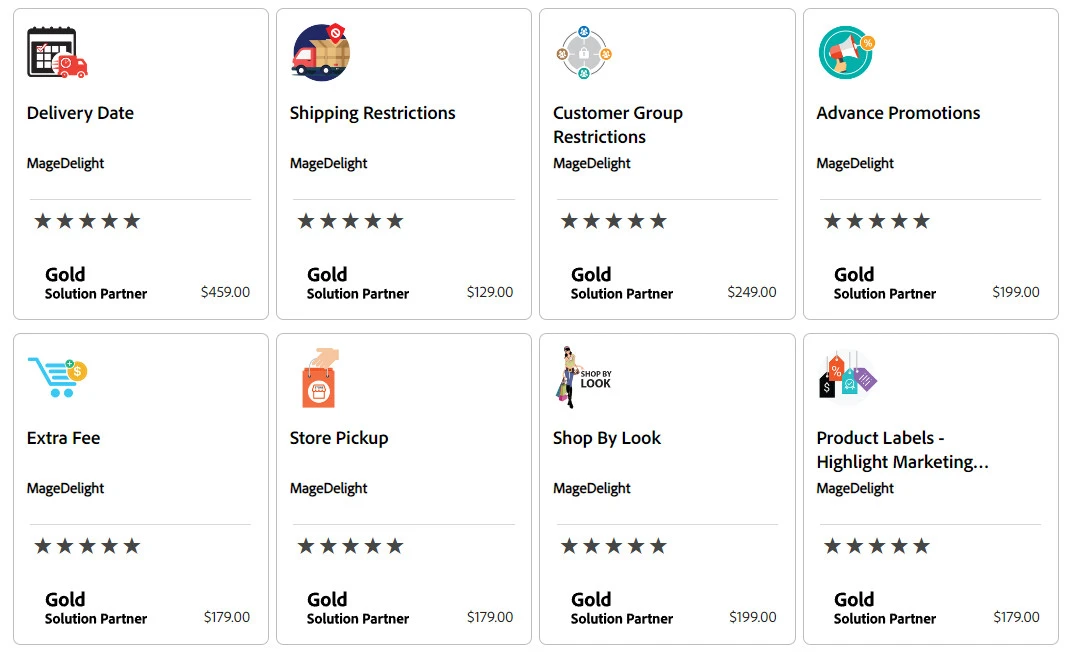
- Promotion and Sales Extensions: To drive sales and engage customers, these extensions offer various promotional tools and sales strategies. Top recommendations include Advance Promotions by MageDelight and Gift Card Subscription by Aheadworks.
Feel free to dive in our well-curated list of the best Magento extensions to help you drive more sales.
Step #5: Set up multiple stores
If you are a business with varied product lines or international operations, you should leverage Magento’s multi-store functionalities. Here are the seven steps needed to set up multiple stores on Magento:
- Create root categories: Set up main menu containers for each store.
- Build a new website: Establish distinct websites in the Magento admin.
- Create a new store: For each website, add stores that share a cart, user sessions, and payment gateways.
- Set up a new store view: Define specific layouts and languages for each store.
- Configure the website base URL: Set unique base URLs for each website.
- Add the store code to the base URL: This synchronizes the store code with Magento’s codebase.
- Alter the default store view base URL: Change the default URL to ensure correct store view routing.
For more detailed instructions with screenshots, refer to our step-by-step Magento Multi Stores Setup guide.
Step #6: Regularly update Magento for security
Last but not least, if you want to protect your store from cyber threats and be compliant with the latest industry standards, it’s highly advisable that you regularly update your Magento to the latest version.
Follow these steps to update your Magento properly:
- Back up Magento database: Log in to the Admin Panel, navigate to System > Tools > Backups, and choose the type of backup you want (system, database, and media, or database only).
- Upgrade process: Utilize Composer for the upgrade process. Begin by enabling maintenance mode, then disable cron jobs to prevent data corruption. Create a backup of your composer.json file and manage package dependencies. Update your Magento instance with the composer require-commerce command, specifying your desired Magento version.
- Post-upgrade review: After upgrading, review all changes in both the backend and frontend. Run command lines to resize images, reindex, and clear the cache for a proper display of data on the front end.
Frequently Asked Questions
[sp_easyaccordion id=”69336″]
Final Thoughts
If you want to build an exceptional online shop, launching your store with Magento is a brilliant choice, thanks to the platform’s robust built-in features. However, despite its scalability, Magento isn’t well-reputed for its ease of use. Hence, we hope after reading our comprehensive Magento tutorial, you’ll get a better grasp of how to set up and grow your Magento store.
Don’t forget to explore our LitExtension blog or join the Facebook Community for the latest insights into all things eCommerce– news, trends, tips, and tricks.