Now that you’ve completed moving your old eCommerce site to Magento, it’s time to start a new journey with this platform! In this article, let’s take a look at how to set up a Magento store after your successful data migration.
To help you set up your new site and optimize selling on Magento, we’ll go through these key points:
- How to configure your Magento store after shopping cart migration
- Tips to maximize your sales with Magento
- FAQs about setting up a Magento store
Let’s check them out!
How To Set Up A Magento Store After Data Migration
Step 1: Check for data migration accuracy
After your migration to Magento has been completed, it’s important to check whether all data has been transferred correctly. Doing this at an early stage will help reduce the risk of losing any important information during the move, especially if you plan to delete your old store in the future.
First, access your Magento store backend and compare the data with those on your source store. If all data matches, it means the data migration was performed successfully.
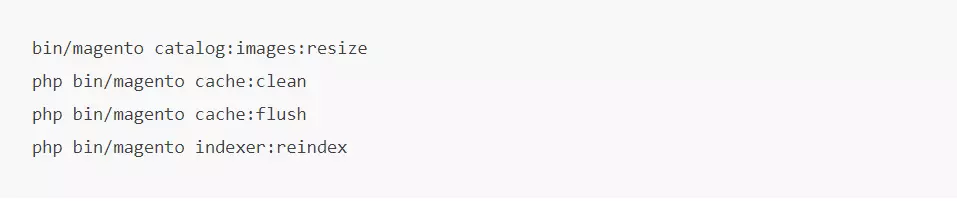
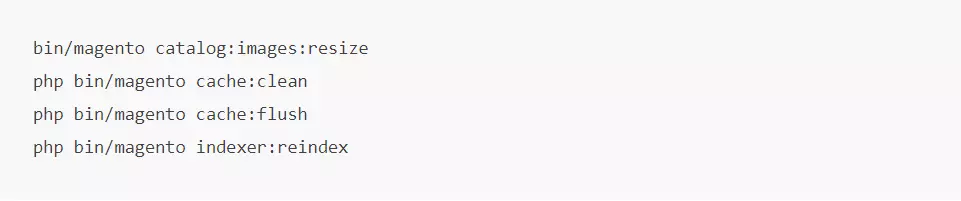
The next step is to verify all information displayed at your frontend. If the data is not shown correctly or some are missing, there might be some issues with your theme or configuration. In order for the data to show on your frontend, you need to run command line to resize images, reindex and clear cache as follows:
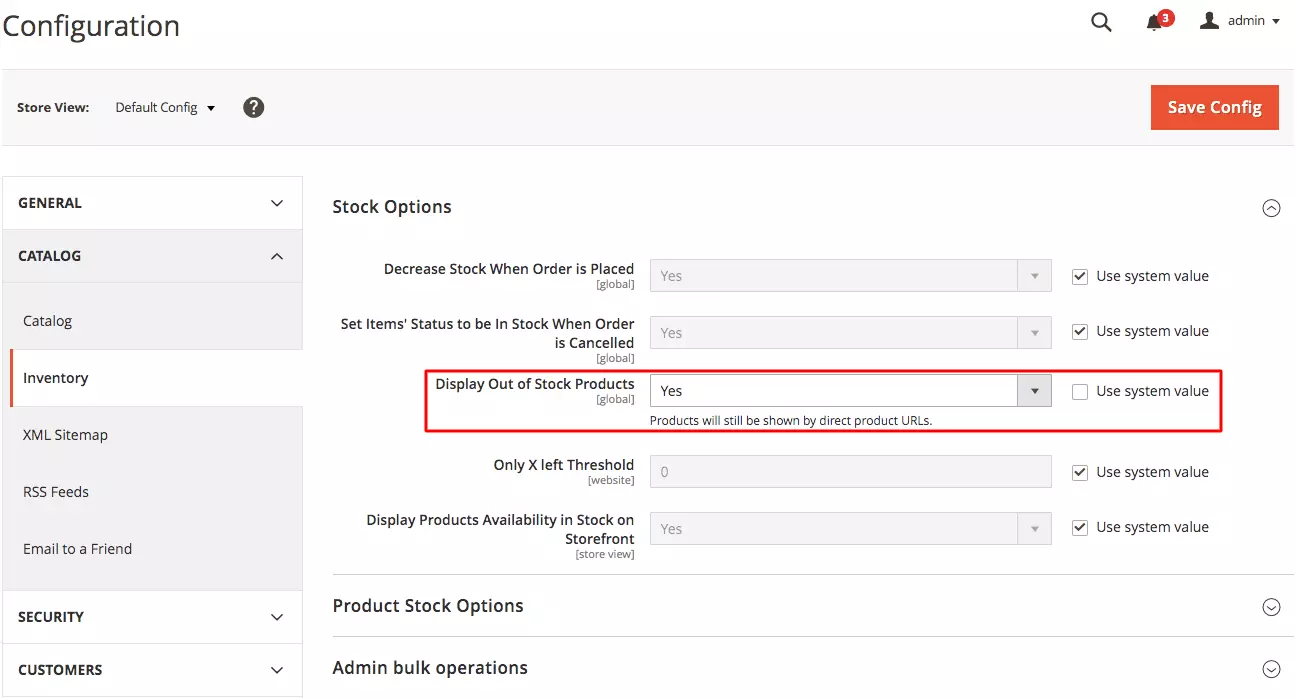
It’s worth noting that out-of-stock products are disabled on Magento by default. This means they will not show up on the frontend and are not visible to your customers. To display these products, follow these steps: Go to Stores > Configuration > Catalog > Inventory > Stock options > Choose “Yes” in Display Out of Stock Products, and click “Save config”.
Other data you might also want to check for accuracy
Together with your list of products, SKUs, customers etc., these are the types of data you may also want to verify that they have been migrated properly when you set up a Magento store:
- URL Redirects: It’s important that all your URL redirects are working after your data migration. Make sure that whenever customers access your old URLs, they will be automatically redirected to the new ones.
- SEO URLs: Migrating SEO URLs is crucial when moving your store from one platform to another, as it helps you maintain all the power score Google gives to a certain page to rank. Thus, you need to ensure that all your past SEO efforts still remain after the data migration process. If you didn’t choose this option during your data migration, here is why you need to maintain SEO URLs and how you can migrate them.
- Customer passwords: For a few specific cart-to-cart migrations, your customer passwords can be migrated along with other data. This makes it easier for your existing customers to log into your new store using the password that they used on your old store. Check if this functionality works properly if you selected the option to migrate them.
Step 2: Set up the theme for your new store
Since your old themes cannot be migrated to Magento, you may choose to install a third-party theme for building and customizing a theme from scratch.
If you’re using Magento for the first time and are uncertain about which theme you should choose, check out our list of best Magento themes currently available.
To install a theme template onto your Magento store, you need to add its code to your Magento 2 instance code base, and then register the theme in the database. The way a theme is distributed determines how this process is conducted.
First, set your Magento application to the developer or default mode. Then, proceed to install a theme in the followings methods:
If the theme comes in a set of files
If the theme contains a set of files, you can install it manually. All you need to do is to copy the <theme> directory to the <Magento root dir>/app/design/frontend directory.
However, make sure that all necessary theme files are stored in that same <theme> directory, and the directory structure is <VendorName>/<theme>.
If the theme is a composer package
In this situation, you’ll need to install your theme using a composer. Follow this official guide by Magento for more detailed information.
In summary, the installation process will include 7 steps:
- Purchase your desired theme from Magento Marketplace.
- Get the theme’s Composer name.
- Change to your Magento root directory and enter the command:
composer require <vendor>/<name>:<version>
For example:
composer require zero1/theme-fashionista-theme:1.0.0
- Wait for dependencies to update.
- Enter the following commands:
git add -A && git commit -m "Add theme"
git push origin <branch name>
- Log in to the Magento Admin.
- Click Content > Design > Themes. The theme will display in the right pane.
If the theme is distributed as an extension
If the theme acts as an extension, you can use the Web Setup Wizard in Magento Admin to install it. Find more information on how to add an extension to your Magento store in the next step.
The final step in setting up your Magento store’s theme is to register it. After you install a theme, go to your Magento Admin or reload any Magento Admin page to register your theme.
To find out whether a theme is registered, navigate to Content > Design > Themes in Magento Admin. You will find registered themes in the list of available templates.
Step 3: Install necessary extensions
The next step to set up a Magento store is to power it up with extensions. There are over 3000 extensions on Magento Marketplace to help you enhance your online store in every aspect. You can refer to this selection of the best extensions for Magento 2 store to find the most suitable option for you in each category.
If you are looking for a complete list of must-have extensions, Mageplaza is here to assist. They are one of the top Magento Extension Providers, offering not only excellent extensions but also great customer policy. You can enjoy a 60-day money back guarantee, 1-year free support and life-time free update when adding extensions with Mageplaza!
To install and configure an extension on Magento 2, check out Magento installation guide or see our summarization of the procedure as follows:
- Login to your Magento admin as a user with full administrator rights.
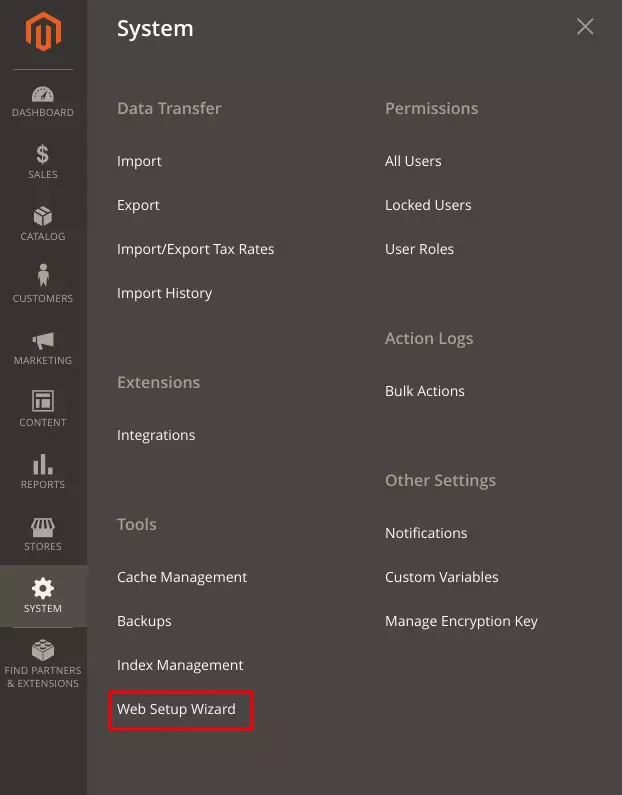
- From the Admin sidebar, go to System > Tools > Web Setup Wizard.
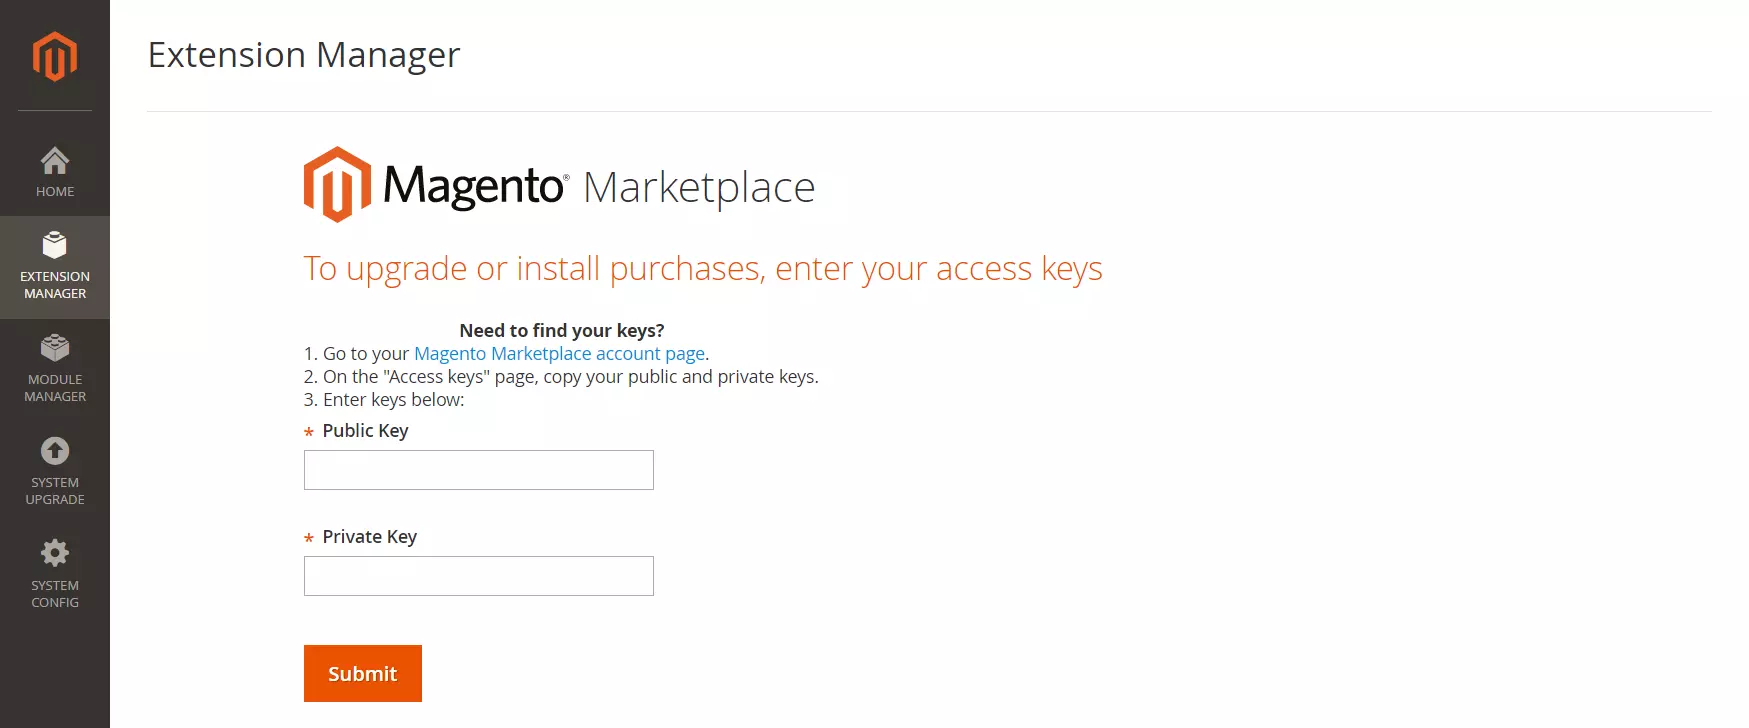
3. Click Extension Manager, then click Sign In.
4. Follow the instruction to fill in the blanks with the Public Access Key and Private Access Key from your Marketplace account.
After signing in, you can see the summary and list of all available updates, recently purchased extensions, currently installed extensions and sample data.
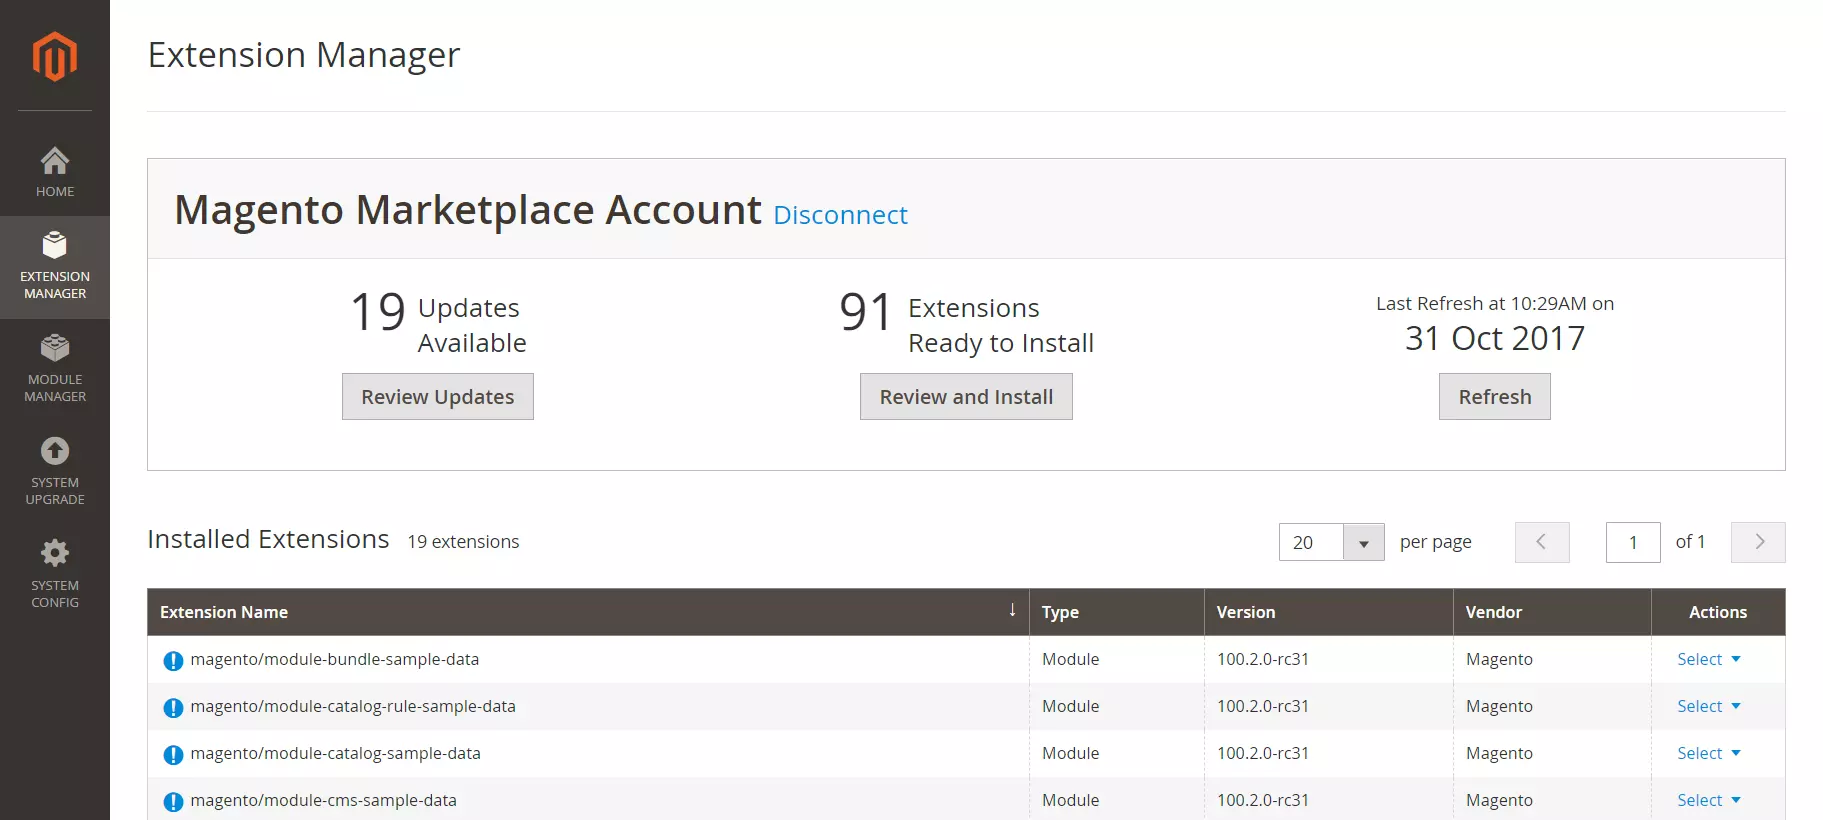
5. Under Extensions Ready to Install, click Review and Install to see a list of all available extensions.
6. In the Latest version column, choose the version that you want to install. Then in the Action column, click Install.
7. Finally, follow Magento step-by-step instructions to complete the installation.
Step 4: Develop custom functions
In case you cannot find a theme that matches your requirements or there is no extension that can fulfill the functionalities you want, you may have to develop them yourself.
However, if you’re not tech-savvy or don’t have experience with customizing Magento stores, we suggest getting expert help.
There are plenty of companies and freelancers that deal with Magento development. Among all, we would highly recommend our partner, Magenest – a seasoned system integrator and a top-tier Magento Business Solution Partner.
At the same time, Magenest is also the winner of Magento Imagine 2019: Top Magento 2 Certifications Award. We believe with their expertise in the field, Magenest can help you build the suitable functions you need for your store. Alternatively, you can also consider hiring Magento development services from other reputable providers to ensure your eCommerce platform is tailored to your business needs.
Step 5: Run Recent Data Migration and Smart Update
Once you’ve completed the tasks above, we highly recommend updating the latest data to your Magento store.
During and after the data migration, LitExtension still keeps your source store active. This ensures that the process of moving your store doesn’t affect your sales or business performance.
Therefore, you will still receive new orders, customers and new products throughout the data transfer, even when you’re configuring your new store. After you’ve completed setting up your Magento store, you’ll have to transfer these newly incurred data to your new store as well.
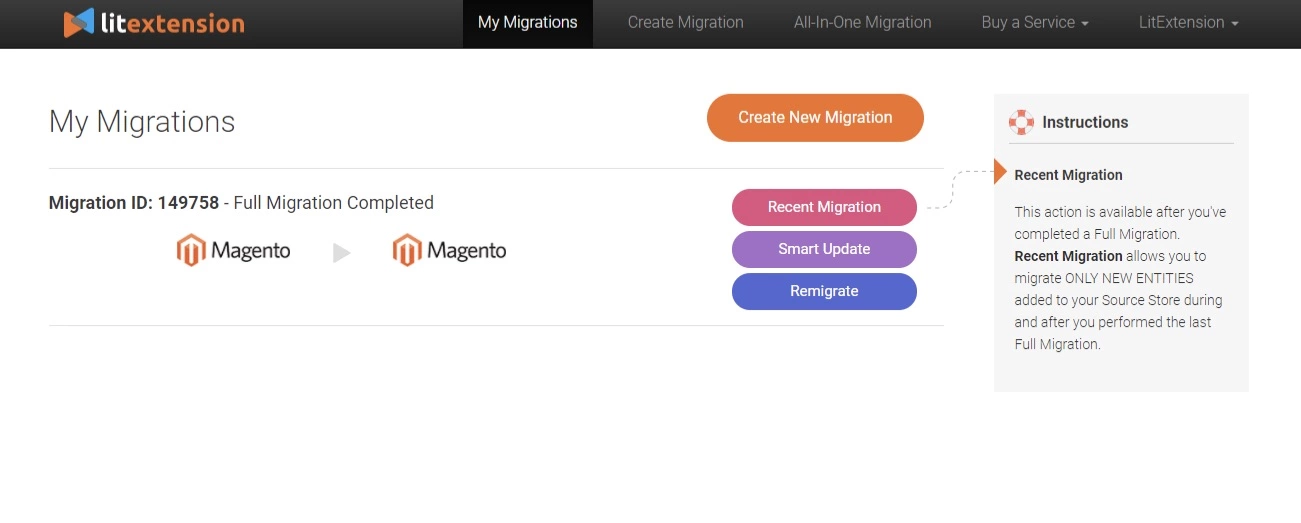
That’s when LitExtension’s Recent Data Migration and Smart Update come in handy.
 What is Recent Data Migration?
Recent Data Migration is an additional feature with a view to help you transfer all new data such as products, orders and customers from your source site to the target site after you’ve performed a full migration.
This feature will ensure that any new data incurred on your old store is migrated to the new Magenta store. You can use this option for free and unlimited times within 3 months after your initial migration!
Check out this video to see how you can perform Recent Data Migration:
What is Smart Update?
With the Smart Update feature, LitExtension will compare data fields in both of your stores and look for the differences. If there is any data mismatch, the app will automatically perform updates onto your new store.
Compared to Recent Data Migration, Smart Update can even update any data that has been modified from your source store as well as new ones. Recent Data Migration only allows you to migrate latest entities after the last full data migration.
For more information on how to perform Smart Update, take a look at this detailed article about why you need to update your data after shopping cart migration, or watch our video tutorial below:
Step 6: Update your front end data
Once you’ve finished the recent data migration in step 5, you’ll need the new data to show up on your store’s front end. Update these information by running the following command line:
Step 7: Change your store DNS and switch domain
After all store information has been fully implemented, the final step to set up a Magento store is to switch your new store’s domain.
Why is changing DNS and domain important after migration? Here are the three most prevailing issues you might face after completing a migration:
- You use the same hosting provider for both of your stores, under the same domain, but your target store is in the subdirectory.
- You use the same hosting provider for both of your stores, but each of them has a different domain name.
- Your source store and target store are hosted by different providers, under different domain names.
Check out this step-by-step instruction to switch the domain to your new store in each case.
Optimize Your New Magento Store: Best Tips And Tricks
After finishing the steps to set up your Magento store, you are now ready to benefit from all eCommerce functions this platform can offer. So how can Magento sellers take advantage of these functionalities and scale their business significantly?
Let’s take a look at these profitable tips and tricks to let you grow your sales with Magento:
#1 Choose the right hosting provider
With compatible hosting, your Magento store will enjoy faster site loading speed, improved store security and better SEO ranking. A good hosting provider also offers your website a trusted certificate that fulfills all your HTTPS requirements.

Magento has its own hosting provider called Magento Commerce Cloud, which is a managed, automated hosting platform for Magento Commerce software.
However, this all-in-one solution is more suitable for enterprise-level merchants with high sales volume or medium businesses preparing to grow. The annual licensing and hosting fees might get quite pricey.
✧ If you’re looking for less expensive alternatives to Magento Commerce Cloud, check out this list of the best hosting providers for Magento.
#2 Leverage your store’s SEO functions
Magento gives its users access to various built-in SEO features to boost their website’s ranking on search engine results pages. These include XML sitemaps, ability to rewrite SEO URLs, canonical tags, etc. Remember to optimize the built-in Magento CMS (Content Management System) as well for the best content optimization result.
Moreover, there are hundreds of SEO extensions currently available on the Magento Marketplace. These additional functions may come with a price, but they will help you keep track of your SEO performance and optimize the store better.
Here are even more SEO tips for your Magento website to rank higher on search result pages.
#3 Optimize Magento’s marketing features
Magento also provides an abundance of marketing tools to sellers, and you take advantage of them to draw more traffic to your website. Properly practicing Magento marketing also helps creating better brand awareness and increasing your revenue.
Find out how to make a difference in your sales using Magento marketing with this list of our available resources:
Setting Up A Magento Store – FAQs
[sp_easyaccordion id=”44186″]
Final Thoughts
With this article, we hope that you’ve noted all the essential steps to set up a Magento store, and confidently launch your new store. Should you have any questions, don’t hesitate to reach out to LitExtension for support, or join our dynamic eCommerce community and get help from thousands of store owners!