Website navigation is considered one of the make-or-break factors of a successful eCommerce business in general, and a Shopify store in particular. It’s important that your customers can find whatever they need as easily as possible, and setting up Shopify collections is the simplest way to arrange your store logically.
In today’s article, LitExtension – the #1 Shopping Cart Migration Expert will delve into the world of Shopify collections so that you can use them with absolute confidence and organize your products to increase your sales volume.
What are Shopify Collections?
Shopify collections are groups of products that you create to provide customers with an easy browsing experience while shopping on your Shopify store. These products can be organized according to your preferences or subject to the niche of your business.
Make sure to put yourself in your customers’ shoes when coming up with criteria to gather your products and think about ways they might want to browse through your store. Grouping items on your Shopify site is just like a retail store dividing its products into different sections. The more organized your store is, the easier it is for your customers to find the product they need.
Do you know that Shopify has more than one amazing feature to help you manage and grow your online business? Find out more below.
Component of a Shopify collection
Now that we have a brief understanding of what they are, let’s move on to the next part where we find out more about the components of a Shopify collection.
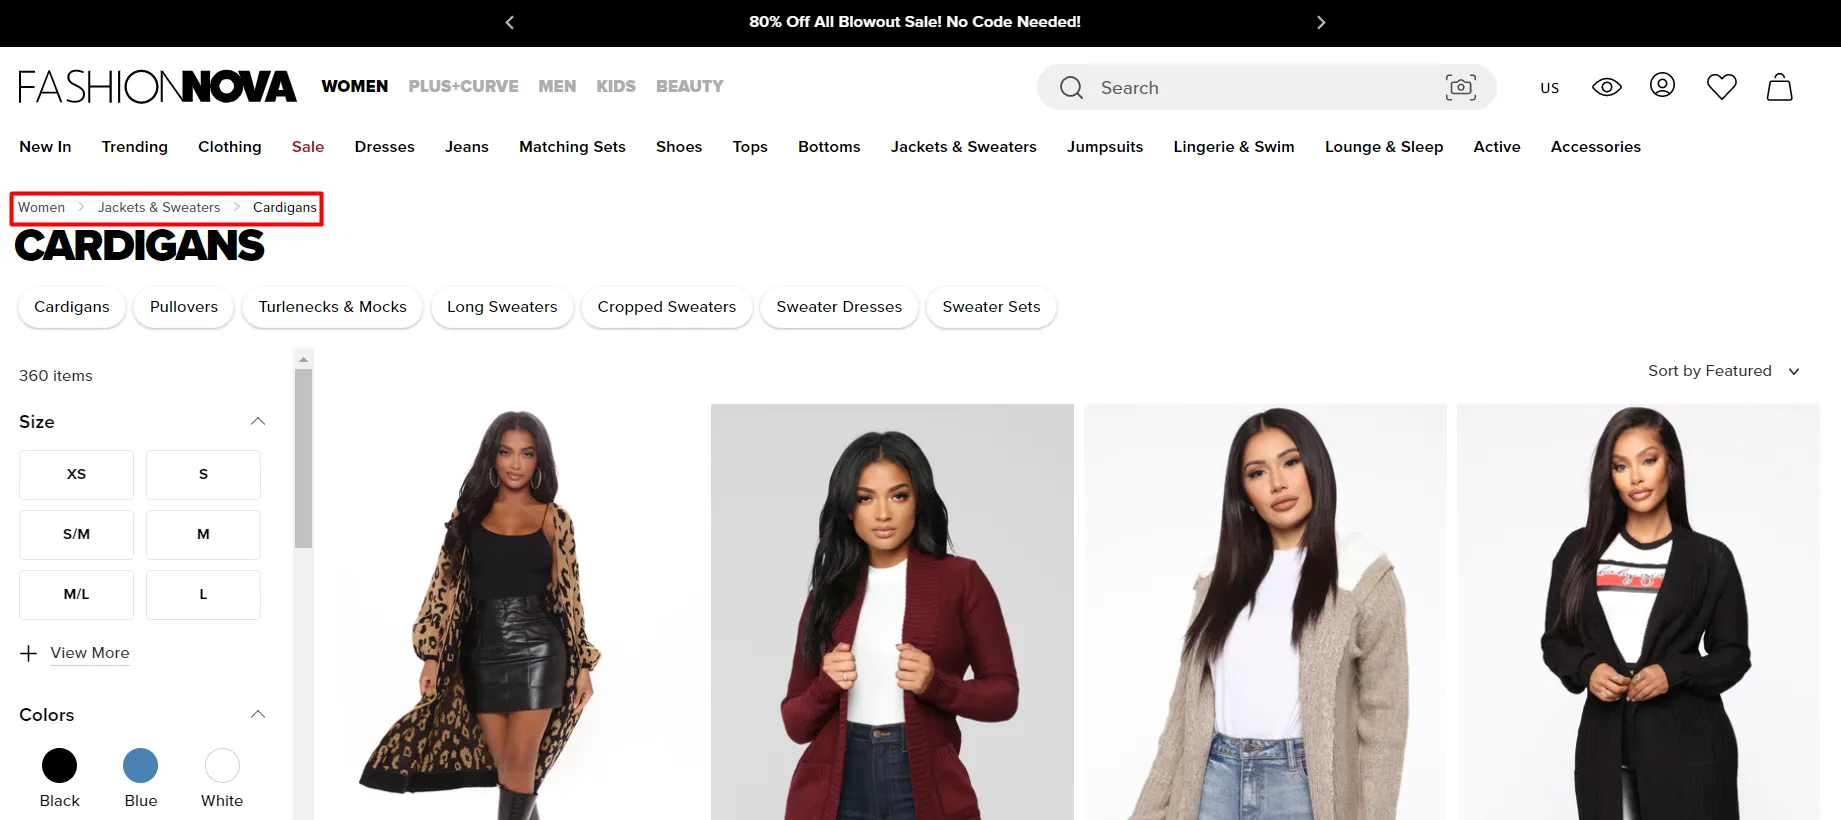
Category name
Frequently fixed on top of the navigation menu, the category name indicates which categories customers can browse. Each category can consist of multiple Shopify collection pages.
✧ Tips: Remember to put on some design effect whenever your customer hovers over a specific collection. It helps your customers to identify the collection page they’re currently on.
Page name
As mentioned above, a single category can have multiple collection pages. Each of them is distinct with different names so that the customers can opt for the exact type they are in need of at ease.
Pages
With numerous collection pages provided, the customer can navigate through and window-shop until they find their one-true product.
✧ Tips: For better visibility, each page should contain no more than 50 products. In some cases, the number of items can be decreased to over 20 based on the area each occupies on a page.
Breadcrumbs
Look right below the category name and you will see the breadcrumbs. They show both the parent categories and subcategories of your collection page. Through the utility of the breadcrumbs, customers can quickly switch between different categories and browse different collection pages with ease.
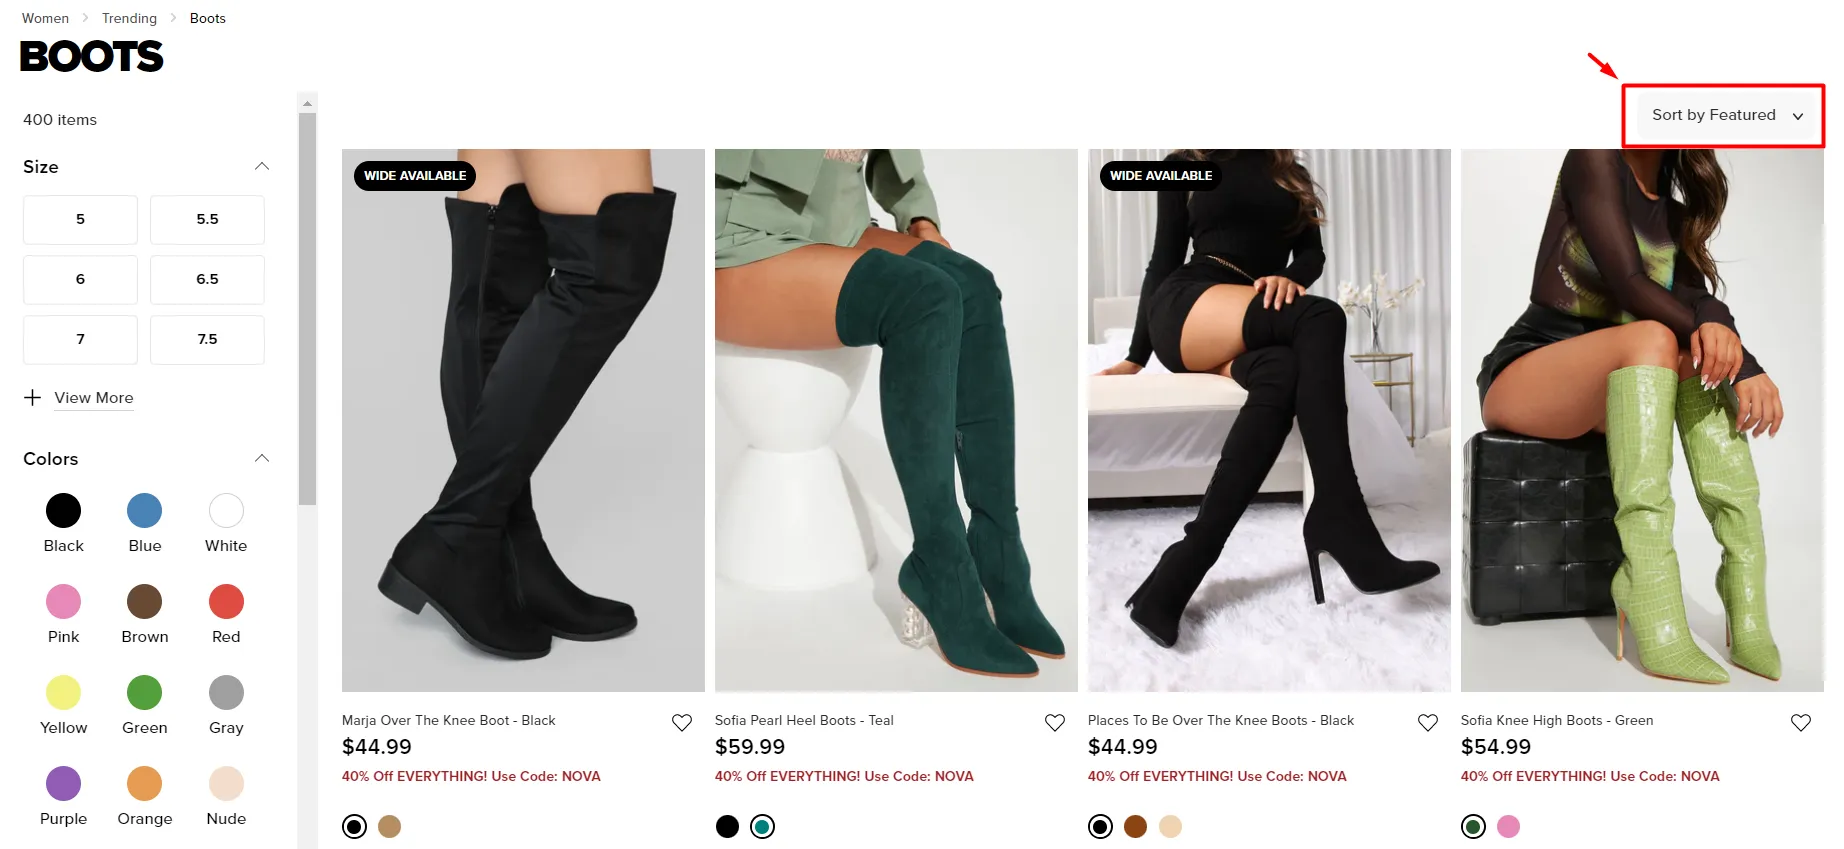
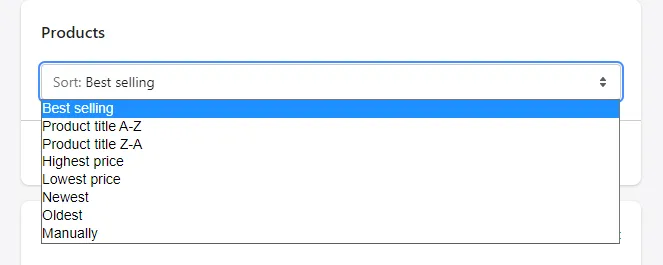
Sort menu
If a shopper happens to need a quick skim throughout your store, how would they do it? That’s when the sort menu comes in handy. It enables your customers to browse your items based on predefined criteria. For example, they are able to sort all of your products by price, from low to high. Or else, they can find the newest items in the blink of an eye just by sorting your product by date, from new to old.
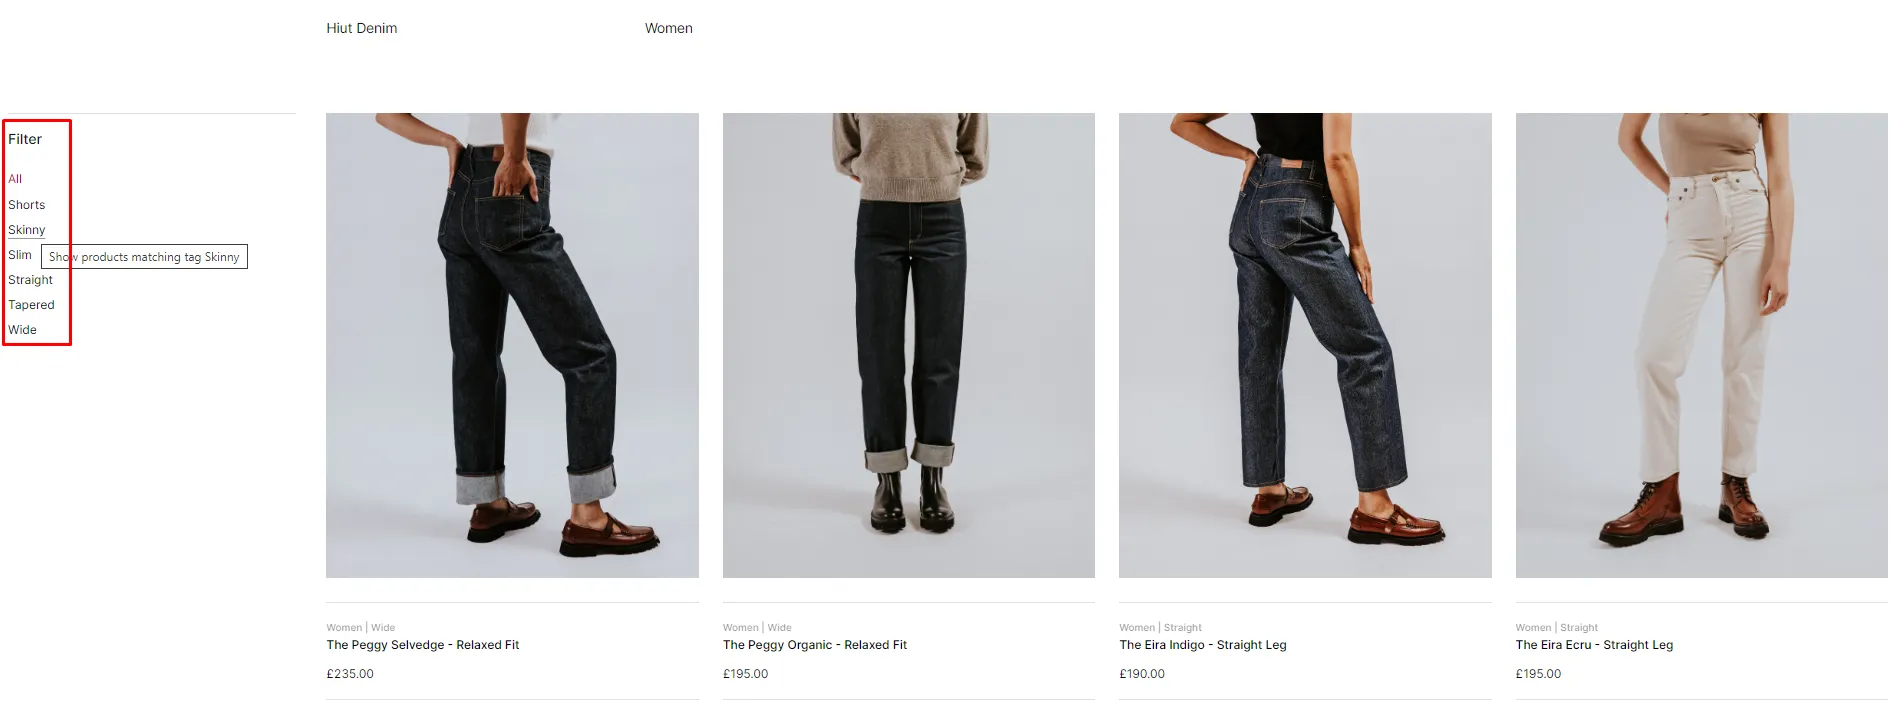
Browse-by
Meanwhile, the browse-by menu will take your customers to the exact subcategories they need. Normally, it’s possible to pick out more than one box and the products from the chosen subcategories will be displayed in turn.
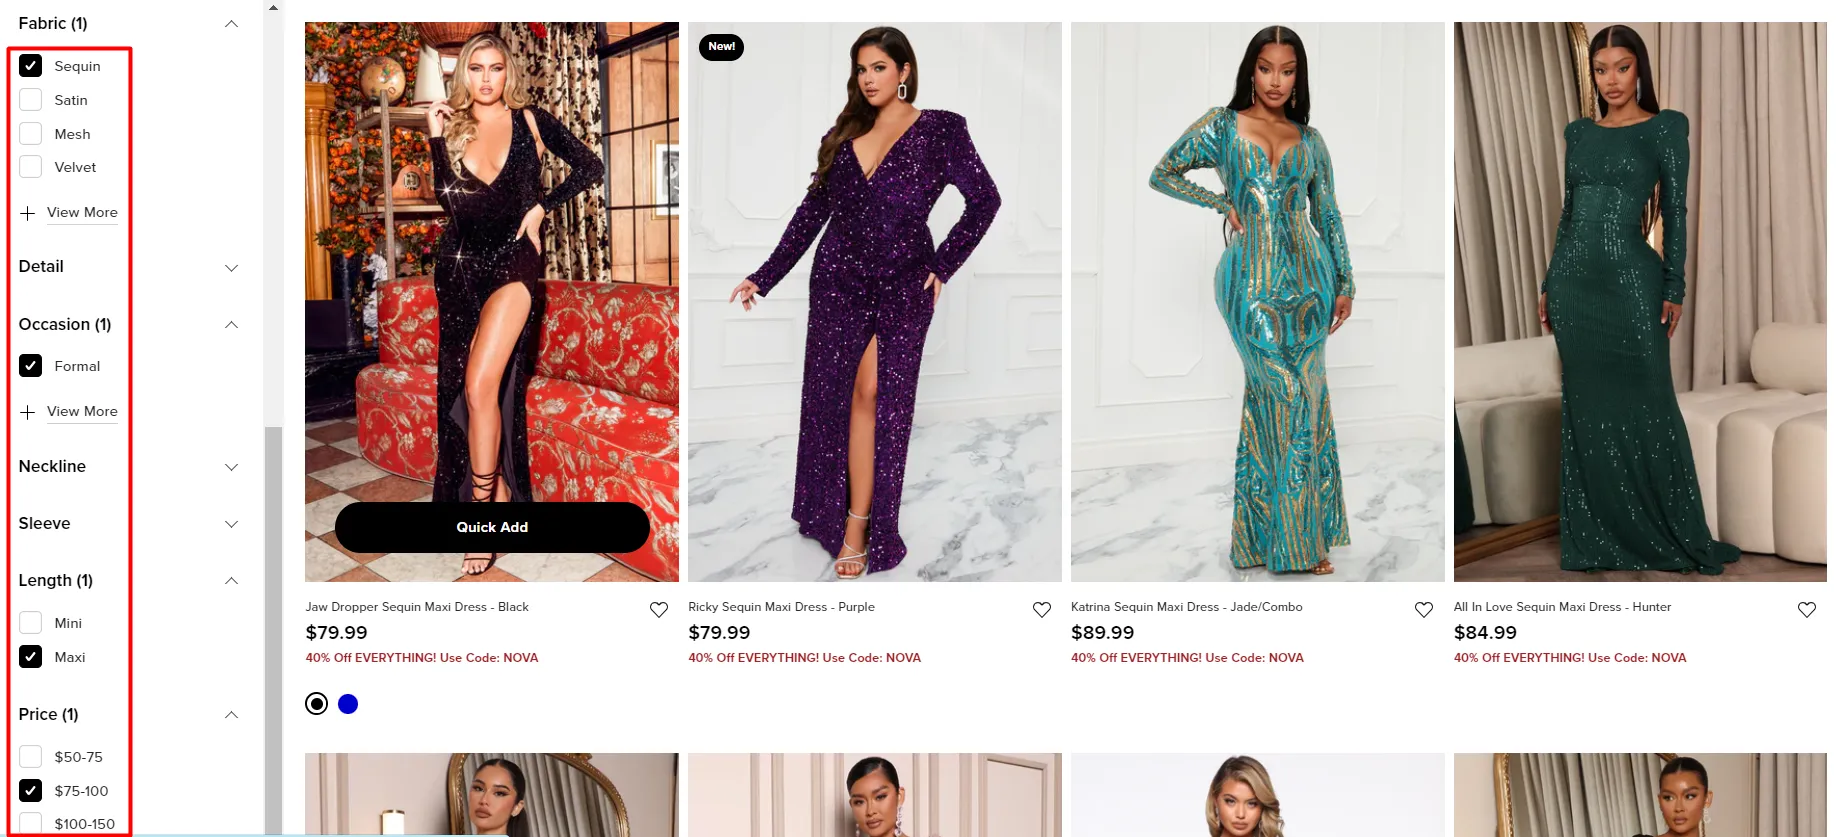
Filter menu
With a filter menu, your customers are able to find their desired products in a more specific way. Just by ticking on corresponding boxes to their needs, only products that match the criteria will appear on the product page.
Product details
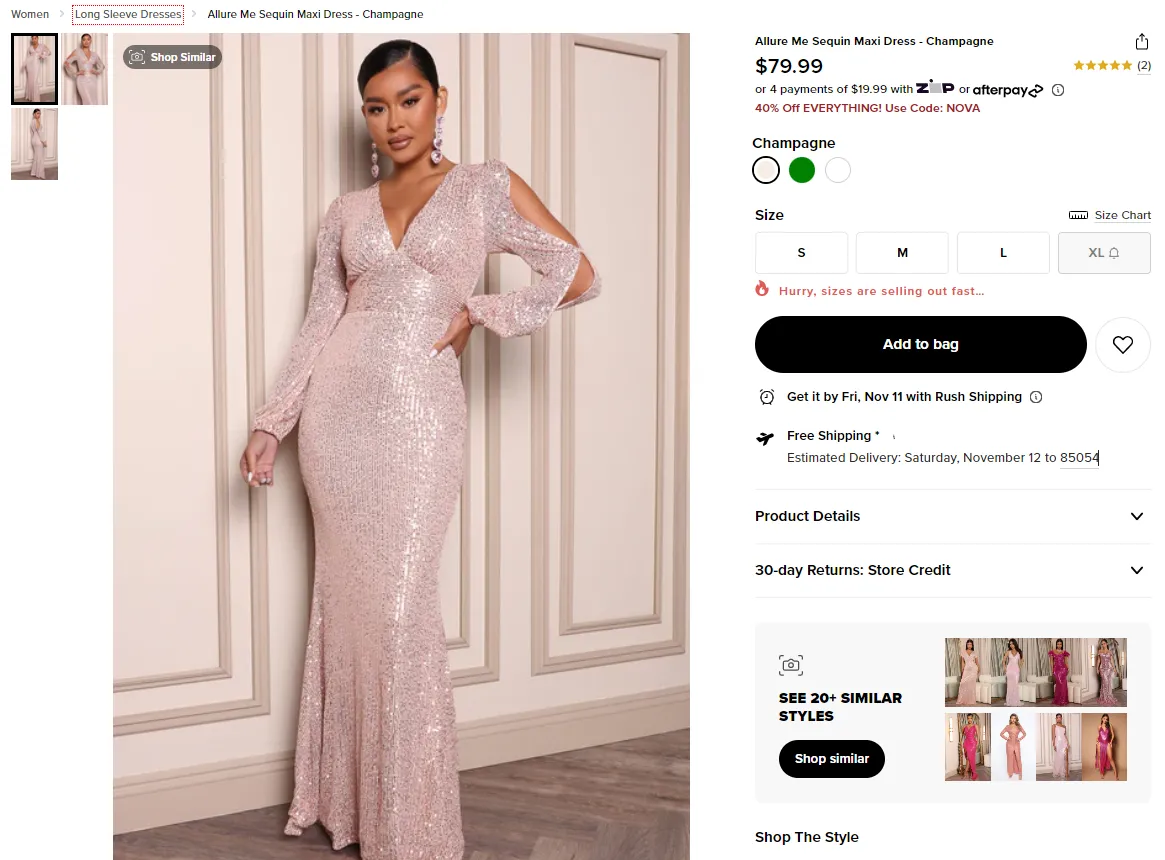
Finally, when the customer has filtered out the exact item they needed, they will click on it and arrive at the product details page. It’s where you showcase every detail about the product: the name, the price, available colors, and sizes, customer ratings, or feedback.
✧ Tips: Do not forget to add promotional offers in the product details section to increase the conversion rate.
Shopify sub collections (Shopify nested collections)
A cool feature of Shopify is sub-collections, which let you add another level of grouping within collections.
For example, if you sell clothes, you may have a main “Men’s Fashion” collection. Then within that, you can create Shopify sub collections like “T-Shirts”, “Pants”, and “Accessories”. Each sub-collection shows different product types together.
Instead of just one flat list, customers get a grouped browse experience that takes them deeper into specific categories. It’s helpful for large stores so people can easily find what they need.
Shopify’s default setup only includes top-level collections, but sub collections can be added through apps or custom code changes. This gives you more flexibility to showcase related items in an organized, user-friendly manner.
Shopify automated collections
Normally, stores have to manually add and remove items from collections whenever anything changes.
Automated collections solve this problem by letting collections update themselves automatically. You set rules that define which products should go in a collection.
For example, you could make a “Sale Items” collection that includes anything marked as on sale. As soon as a product’s price drops, it will be added to that collection. And if the sale ends, it will remove itself.
You can set up Shopify automated collections based on tags, vendors, prices, and more. This saves a lot of time!
Why You Need Shopify Collections
You may have the loveliest online stores of all time, but it doesn’t mean that your store drives more sales than a normal but well-organized one. If the shoppers can not find what they are looking for, they will head to another store in less than a minute.
Shopify collections will come in handy in this case. These sections not only help your customers to find the items they need easily but also contribute to creating product awareness and converting sales. With Shopify collections, you are able to direct customers to the promoted items. All you have to do is to put it in a nice-looking position with a special design effect to catch the eyes.

In general, Shopify collections bring benefits for both store owners and online shoppers. For store owners, Shopify collections help them to showcase their entire products in a natural and comfortable way. Likewise, online shoppers are able to access multiple choices and navigate stores with ease. The collections aid in simplifying the buying process, which means there will be more sales for store owners.
How to Create Shopify Collections?
Now that we know the basics of Shopify collections and their importance to online shopping businesses. Let’s learn how to use this amazing tool, starting with creating your own collections.
Shopify allows you to create two types of collections: manual and automated. In the following paragraphs, we’ll walk you through the process of creating collections on Shopify, both manually and automatically.
Manual collections
In general, a manual collection requires store owners to group up the products individually by hand. Its components (the chosen products) will remain the same unless you decide to add more or remove some products.
Though Shopify manual collection takes more time and effort to manage, it’s a great attempt to showcase your personalized and hand-picked items to customers. It will be an ideal choice if you are planning to set up a flash sale or create a Shopify landing page for a particular occasion like Black Friday – Cyber Monday, or want to create a specialized collection targeting a small group of consumers.
Below are the step-by-step instructions on how to create a manual collection on your Shopify store:
- Step 1: From the Shopify Admin Dashboard, go to Products > Collections.
- Step 2: Click Create collection.
- Step 3: Next, enter a title and description for the collection.
While the title field is mandatory, you don’t need to write the description for now and can skip it for later.
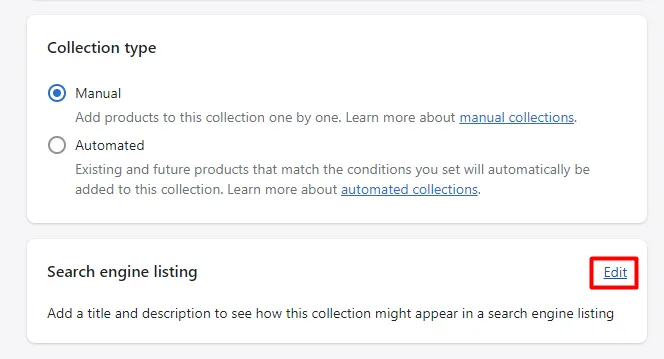
- Step 4: In the Collection type section, click Manual.
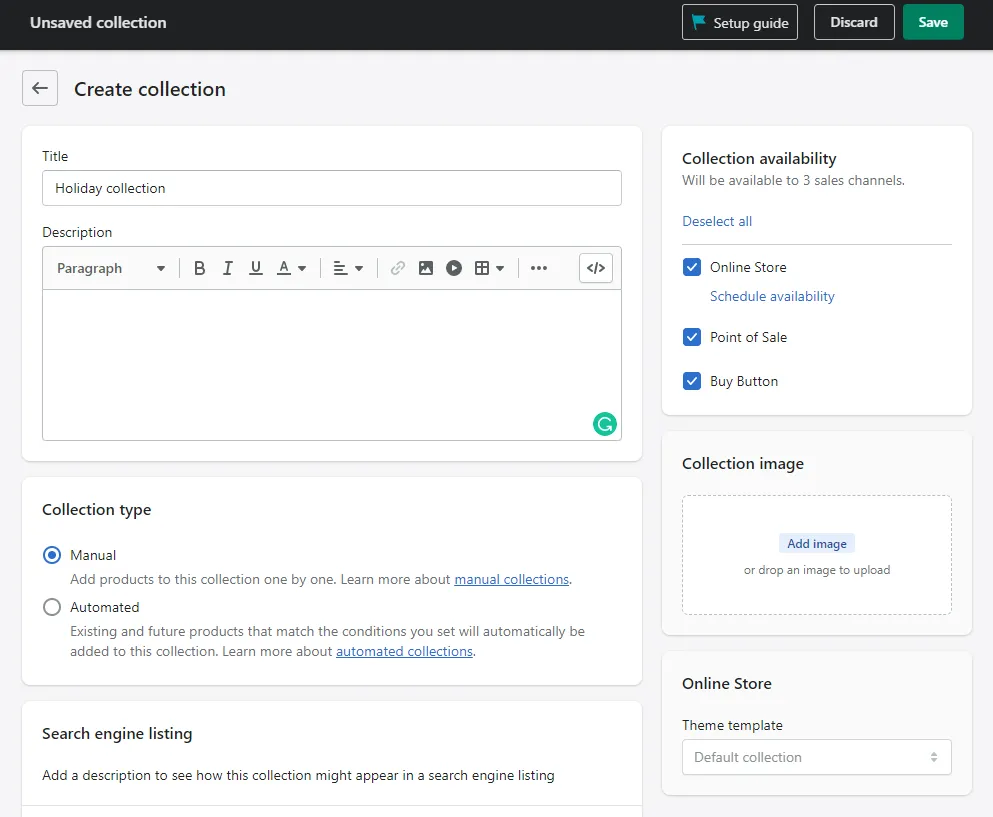
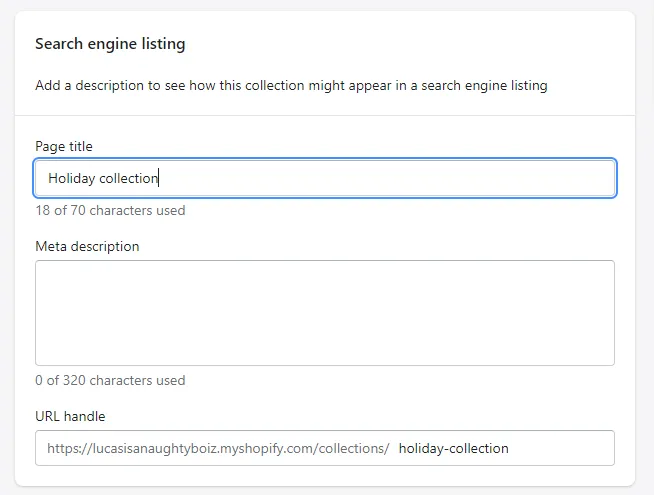
- Step 5: Move to the Search engine listing and click on Edit to preview how your collection will be displayed in search results.
By default, the search engine listing will use the collection’s name as the page title and the description as the meta description. In case you want to include keywords for ranking purposes, don’t forget to edit the meta description. You can make changes to the collection’s URL, but this only applies to the collection’s name part (learn more about Shopify meta tag).
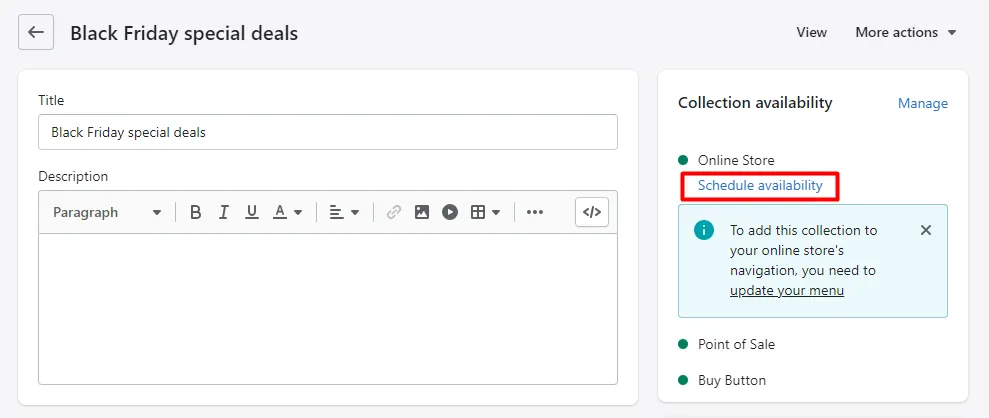
- Step 6: In the Collection availability section, tick or untick the boxes to choose the sales channels you want to show your collection on. The number of sales channels is subject to change based on your answers to Shopify questions when setting up your store.
The collection will not appear on your site unless you tick the Online Store box. In case you are not ready to publish them to the world yet, you can click on Schedule availability and schedule their handiness to a future date.

- Step 7: You can upload an image to represent the collection in the Collection image. Just click on the Add Image button or drop an image there. It’s worth noting that this section is optional and only visible on your store if your theme supports showing it. Don’t forget to check out Shopify image guidelines and make sure your media files comply with them.
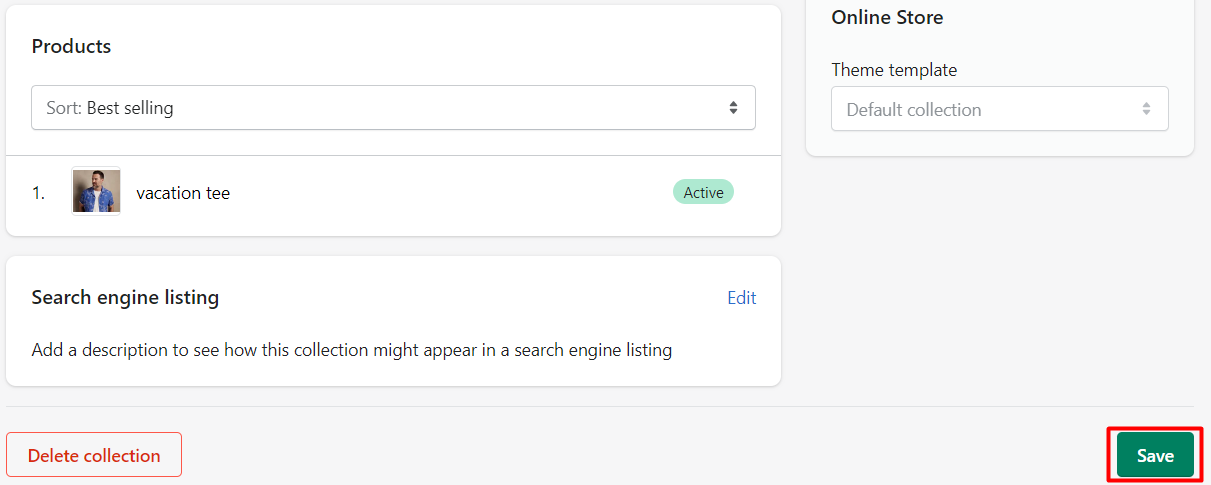
- Step 8: Click Save in the top right corner.
- Step 9: In the Product section, search for the products you want to include or click Browse and choose from the list of your products.
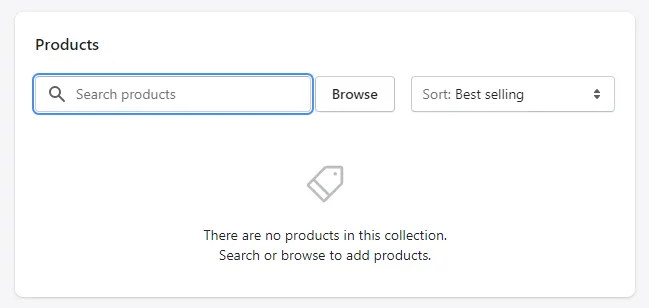
- Step 10: Set the sort order for how you want the products to be sorted in your store, to Best selling, Product title, Prices, etc.
- Step 11: Click Save when you finish.
Automated collections
With this type, how to add products to collections on Shopify will be a little different. Automated collections use predefined conditions to categorize matching products into specific groups. You can base on types, tags, and other details as conditions to arrange your products. It saves you a lot of time compared to manually adding items, especially when you update your inventory regularly.
You are able to define up to 60 conditions for an automated collection. What’s more, you can specify whether products need to match all conditions or only some of them to be included in the collection.
The following summarizes the process of creating an automated collection.
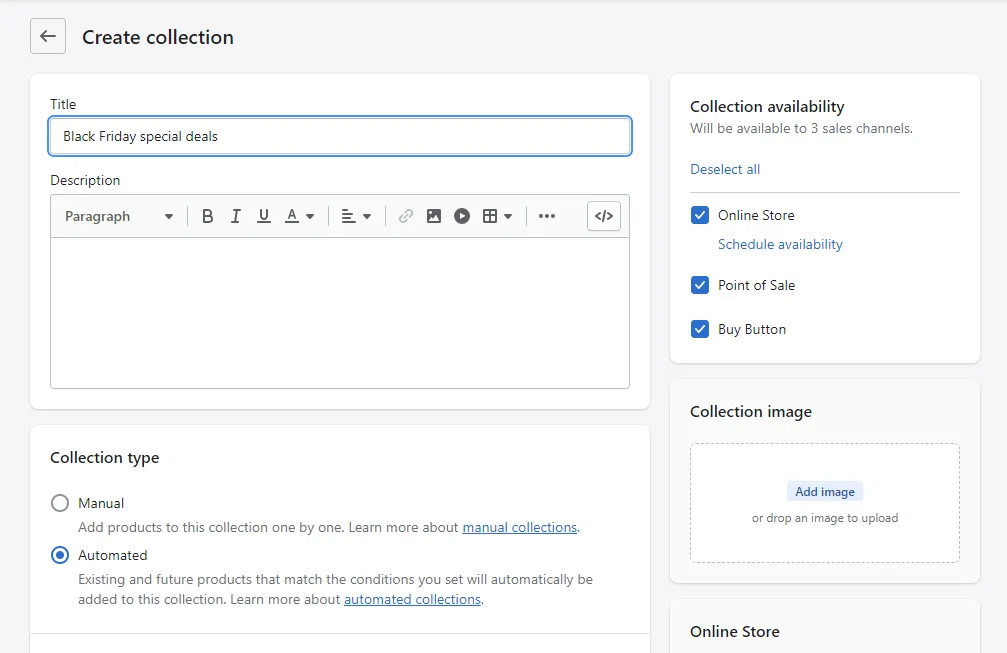
- Step 1: From the Shopify Admin Dashboard, go to Products > Collections.
- Step 2: Click Create collection.
- Step 3: Next, enter a title and description for the collection.
- Step 4: In the Collection type section, click Automated.
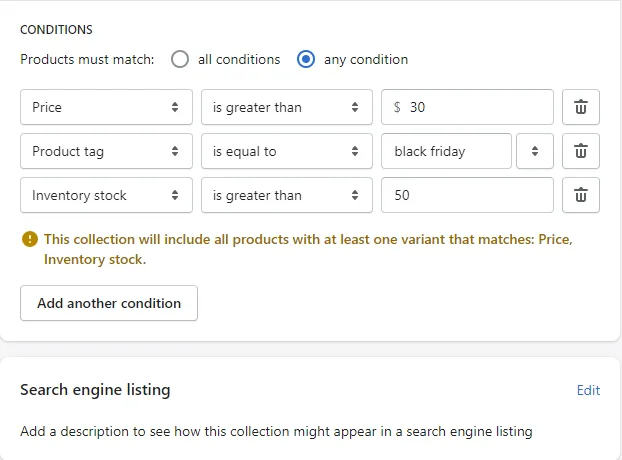
- Step 5: After that, select whether products need to meet all conditions or any condition to be included in the collection. Then, set the collection conditions using the drop-down lists.
- Step 6: Edit the Search engine listing in case you want to include more keywords, or let it be with the default information.
- Step 7: Set Collection availability and Collection image.
- Step 8: Click Save.
The products that match the conditions will automatically be included in the collection and displayed in the Product sections. Besides, whenever you add products to Shopify in the future, items that align with these terms will appear in the corresponding collection automatically. You can add more conditions later on, as long as the total number does not exceed 60.
- Step 9: Set the sort order as how you like it to showcase in your store, then hit Save when you finish.
One important note before moving to the next section. Once you’ve created a Shopify collection, you won’t be able to change its type. Therefore, our advice is that please carefully consider the functions and purposes of each collection type before making one.
Want to migrate to Shopify?
If you are intending to migrate to Shopify, LitExtension offers a great migration service that helps you transfer your data from the current eCommerce platform to a new one accurately, and painlessly with utmost security.
How to Add Collections on Shopify?
Now that you have created your own manual and automated collections, the work is not done yet!
There’s no point in creating hundreds of collections if your customers can not view and access them. Since Shopify will not automatically show the collections you created on your site, make sure to bring them to light by learning how to add links to collections.
Bear in mind that you will not be able to add a collection to the navigation bar unless it is available on the Online Store sales channel.
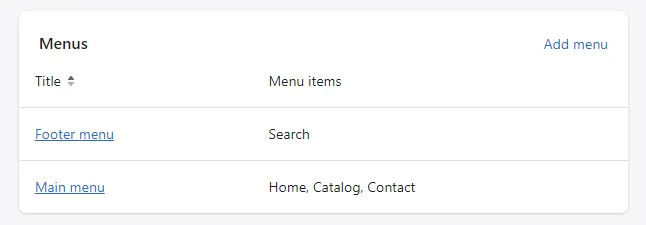
- Step 1: From the Shopify Admin Dashboard, go to Online Store > Navigation.
- Step 2: In the Menus section on the Navigation page, click the Main menu.
- Step 3: Next, click Add menu item on the Main menu page.
- Step 4: Add the name of the collection in the Name Next, select the collection you want to add a link to in the Collection list.
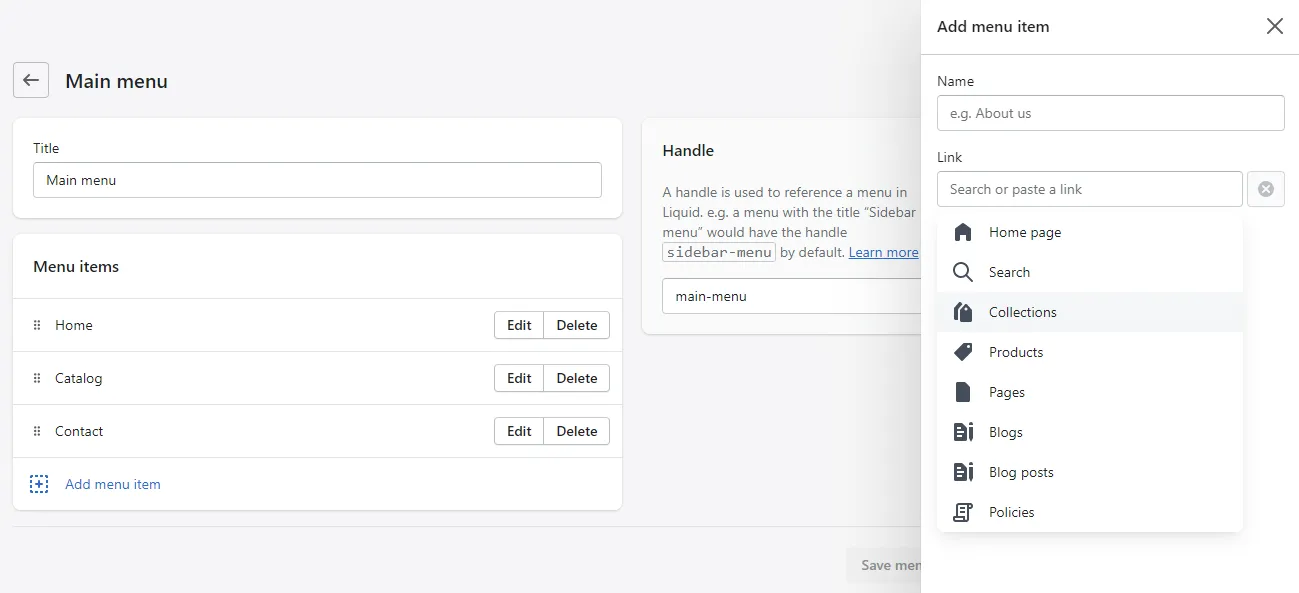
- Step 5: Click Add, then Save menu when you finish.
How to Manage Shopify Collections?
Your collections have been created and added successfully to your online store, but you don’t like the way they look yet? You wonder how to edit collections on Shopify? Quick, follow below guidelines.
Edit collection name or appearance
You can change the name of a collection in only a few steps.
- Step 1: From the Shopify Admin Dashboard, go to Products > Collections.
- Step 2: Click on the collection you want to rename.
- Step 3: On the collection details page, replace the current tile with a new one or update a new description as you wish.
- Step 4: Click Save to preserve the changes you made.
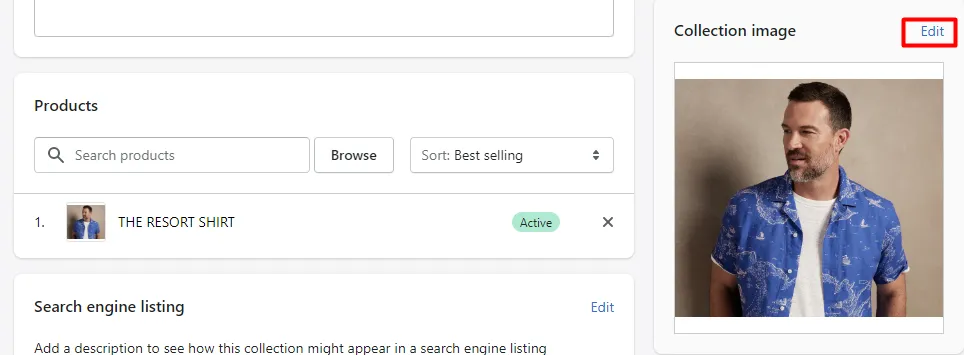
Besides, you can change how a collection looks by updating its featured image. To change the featured image, follow these steps:
- Step 1: From the Shopify Admin Dashboard, go to Products > Collections.
- Step 2: Choose the collection you want to update.
- Step 3: Click Edit on the Collection image section and upload the new featured image for the collection. If the collection doesn’t have a featured image yet, click Add image to update its appearance.
- Click Save.
Change the availability of collections on Shopify
What should you do when your collections are no longer appropriate, for example, your summer collections are still here on your site while winter has come? If that’s the case, go ahead and change your collection availability setting to hide them from your active sales channels.
The process can be summed up as follows:
- Step 1: From the Shopify Admin Dashboard, go to Products > Collections.
- Step 2: Click on the collection you want to hide.
- Step 3: On the Collection availability section, click Manage.
- Step 4: Untick the sales channel which you want to hide the collection from.
- Step 5: Hit Done, then Save to preserve the changes you just made.
Change the published date of Shopify collections
This process applies to the collections that you set a different publish date from the day you create them. Within only 5 steps, these collections will be available in your online store on the scheduled date.
- Step 1: From the Shopify Admin Dashboard, go to Products > Collections.
- Step 2: Click on the collection you want to change the published date.
- Step 3: On the Collection availability section, click on the Schedule availability option below the Online Store sales channel.
- Step 4: Set the new publish date and time.
- Step 5: Hit Save to keep the changes.
Delete a Shopify collection
Delete a Shopify collection means that you will permanently remove it from your online store. In case you just want it to disappear for a while, you can change its availability setting instead.
If you still want to delete a collection, follow these steps:
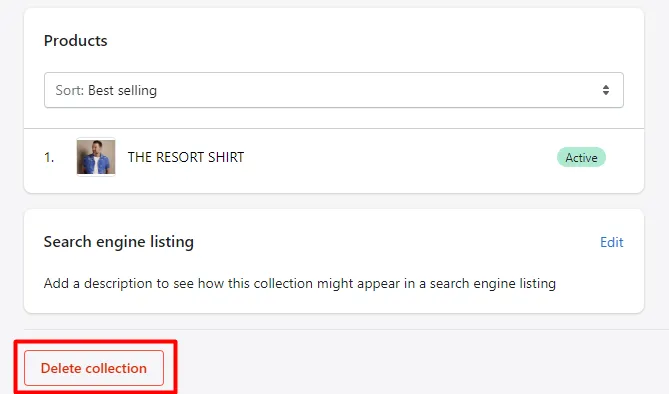
- Step 1: From the Shopify Admin Dashboard, go to Products > Collections.
- Step 2: Choose the collection you want to remove.
- Step 3: Scroll down to the bottom of the Collection details page, then click on Delete collection.
- Step 4: Click Delete collection on the confirmation box to confirm your decision.
Once a collection is deleted, the link to it is also removed permanently from your store. There is also a bulk option in case you want to delete more than one collection at a time.
Shopify Collections Optimization: 8 Best Practices
Successfully creating Shopify collections doesn’t mean that your sales will go up right away. Shopify collection is an amazing and free tool to organize online stores, and there might be millions of store owners doing the same thing.
To make the most out of your store’s navigation and increase sales volume of your store, here is a list of amazing Shopify tips and practices to optimize your Shopify collections.
1. Apply Shopify collections SEO
You can start by doing some keyword research to see what kinds of terms people are actually searching for related to your products. This will help guide your optimization.
You should optimize important elements like the collection page titles, descriptions, URLs, meta titles, meta descriptions, by including some of those important keywords. Describe what’s in each collection naturally without being too repetitive across pages.
You have to be sure collection images have detailed alt text added for context. And link collections together when related so search engines can easily crawl the connections.
2. Use compelling headers
Headers are a great way to transmit your product statement and are the first element to catch your customers’ eyes. Therefore, make sure to use compelling headers when adding Shopify collections to your online store.
You can also promote your best-selling products, featured items, or special discounts collection at this prime location. The more attractive your deals are, the more likely customers will click on them to find out and buy your products.
3. Apply killer CTAs to your Shopify collections
CTA (call-to-action) refers to a piece of content, banner, or webpage that was promptly designed to encourage customers to buy desired products. By provoking certain emotions, such as FOMO (fear of missing out), scarcity, or bundle value; you are able to push your customers to the next step in their buying journey. Simply, you are trying to give them a proper reason to buy your product.
Don’t limit yourself to a single type of CTA. Instead, try using different kinds of them to take full advantage. A banner with your most attractive sales, for example, should be put on top of your homepage. Killing headlines (both bold, fixed headlines and the small running ones) will double the effectiveness, and a pop-up banner right when your customers are about to leave your store will hold them for a little longer. You can even raise your email list if the pop-up banners can hook your customers with attractive discounts.

Think as a customer does! You are about to leave an online site for a more affordable option at a local store (say, 10% cheaper), when a pop-up banner appears stating that you will get a 20% discount plus free shipping if you purchase items in that collection today. What would you do next? I bet nine out of ten people will go ahead to grab the deal right away.
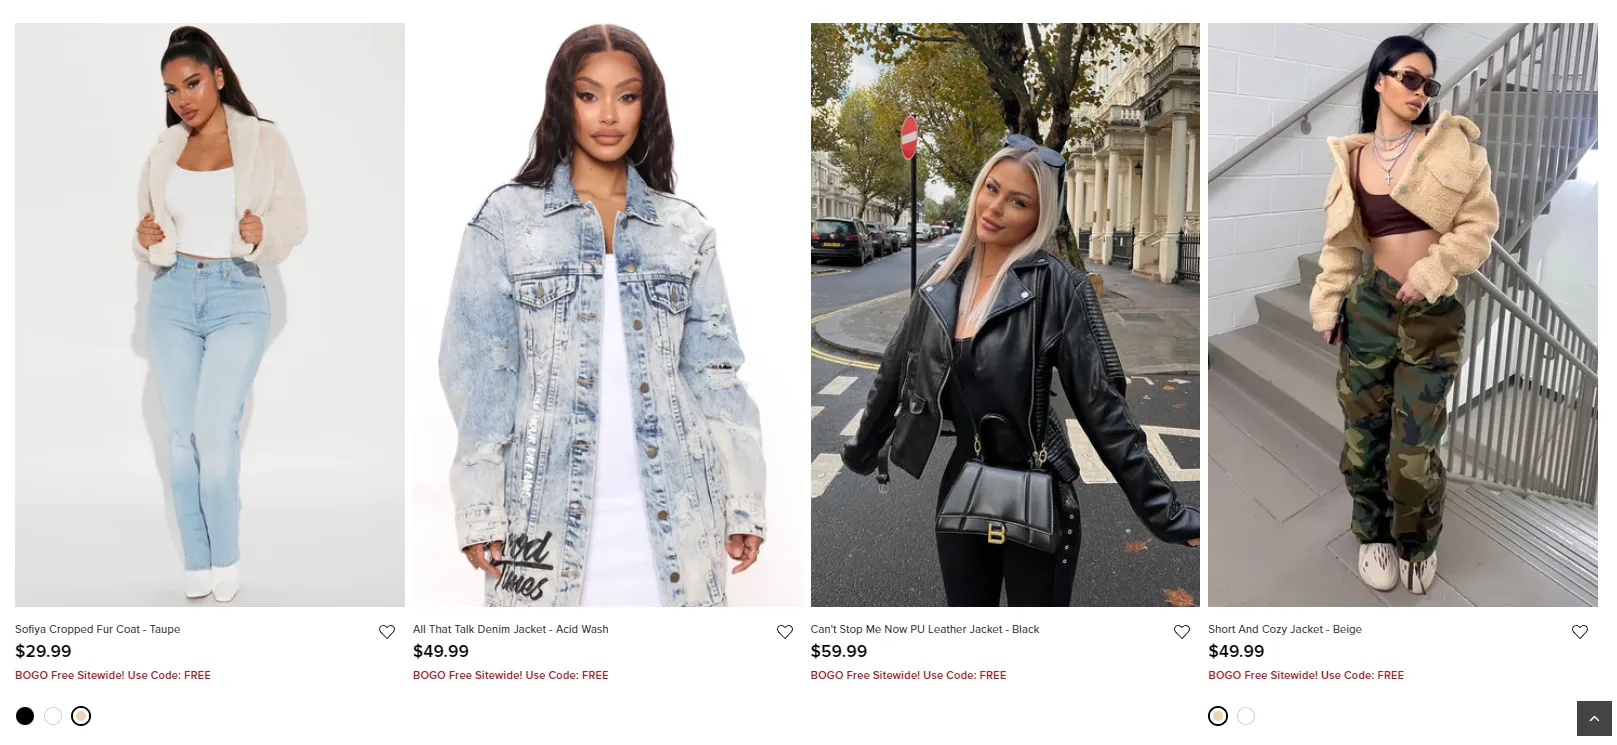
4. Use high-quality media
Bear in mind that you are selling online. No matter what kind of products you are offering on your website (services, digital or even physical), your customers can not touch or feel the products on their own. Hence, the only way to win over your customers is to show them, as clearly as possible, what they are going to bring home.
It’s also important to take nice photos of products, especially if you are selling clothing and apparel, or anything related to fashion and beauty. Besides, avoid taking boring product photos. Instead, have the model wear or hold them in certain places or situations to emphasize the usage. If possible, upload videos of your products so that your customers can imagine your products more easily.
Below are some tips to make the most out of media on your site:
- Shoot your products from different angles
- Save the media in a high-resolution format
- Allow easy zooming in and out on product imagery
- Keep your media consistent, and include some ‘you’ on them
5. Choose a suitable layout for your Shopify collections
You have excellent product imagery, but things might not work if you display them in the wrong way. Make sure to showcase your Shopify collections in a suitable layout to utilize the available space on each page. To do that, you can either use a grid view or a list layout.
A grid view works well when you want to optimize the visual experience and showcase your products one by one. Your customer can rely on their eyes to compare every product and pick out the ones that are most eye-catching. However, avoid stuffing too many products on a single line. Instead, display three to four products only and save the rest for the eyes to rest.

Meanwhile, a list layout provides the full details about your products and goes along well with industries where customers require more than just imagery.
6. Add trust factor
You gave out your best on imagery and layout, but the volume hasn’t increased yet. It might be owing to the lack of trust factors in your Shopify store. Besides providing details about your products, you have to prove that the information on your site is trustworthy.
Try adding some customer testimonials to prove that your products are worth buying. For example, a star rating under each product together with customer reviews shows how past customers enjoyed your items. Meanwhile, some products can say for themselves that ‘i’m selling like hotcakes’ if there are hundreds of people who have bought and been pleased.
7. Keep the best on top
Some of your products are in great demand for certain reasons. Let’s take advantage of that by putting a collection of best-selling items on top of your pages. It not only builds a great trust factor but also contributes to creating the FOMO effect for your customers. ‘Why do these products get a thousand buys?’, ‘Are they that good?’. Creating curiosity is an important part of converting a window shopper into a buyer.
Besides, you can put the products that are unique to your business, or ones that are on trend on the top corner of your online store. As mentioned above, the heading is one of the first elements to catch customers’ eyes. Make sure they catch what you want them to buy.
8. Enable easy navigation for Shopify collections
Creating Shopify collections is only the first step in enabling easy navigation. There’s much more to do next, such as putting the collections in suitable places. It assures your customers to find and obtain the products they need effortlessly.
Besides, remember to arrange the products of your collections in a logical way that your customers can sort and compare with ease. You can, for example, place your clothing items in an order of size, color, material, length, or fit if you are operating a fashion store.
Shopify Collections FAQs
[sp_easyaccordion id=”46948″]
Conclusion
Ta-da, we’ve guided you through everything you need to know about Shopify collections! After keeping up at this length, you must have known how to utilize Shopify collections as well as a list of amazing tips to make out of them to increase sales volume. Should there be anything unclear, do not hesitate to drop us a line. And don’t forget to check out LitExtension blog or join our eCommerce community for more information.
If you find Shopify collections a great tool to organize your store and want to re-platform, LitExtension – the #1 Shopping Cart Migration Expert is more than happy to help! With 10+ years of experience in the field, we have provided over 100.000 customers from all over the world with a fast, accurate, and seamless cart-to-cart migration experience. We do have a completely free Demo Migration that allows you to test out our service and see if it’s worthwhile for your investment.