Hi Shopify fellows! Are you finding a thorough guide on how to start a Shopify store? You’ve landed in the right place!
Fully understand your struggle with creating a Shopify business, we’ve compiled this step-by-step instruction to help you walk through the detailed process of how to start a Shopify store. This guide was compiled based on our experience setting up plenty of online stores on this platform, so in case you have any questions, feel free to reach out to us!
In this article, LitExtension – #1 Shopping Cart Migration Expert will provide you with guides to create a Shopify store from scratch:
- 💡 Step 1: Create a Shopify account
- 💡 Step 2: Add products to Shopify
- 💡 Step 3: Organize product collections
- 💡 Step 4: Pick & Customize storefront theme
- 💡 Step 5: Set up store navigation
- 💡 Step 6: Add a custom domain
- 💡 Step 7: Set up payments, checkout, taxes & shipping
- 💡 Step 8: Add sales channels
- 💡 Step 9: Add essential Shopify apps
- 💡 Step 10: Test Shopify store
- 💡 Step 11: Pick a plan & Launch your Shopify store
Let’s go right in!
How to Start a Shopify Store – Beginner’s Guide
First off, let’s learn how to start a Shopify store from scratch with the infographic below!
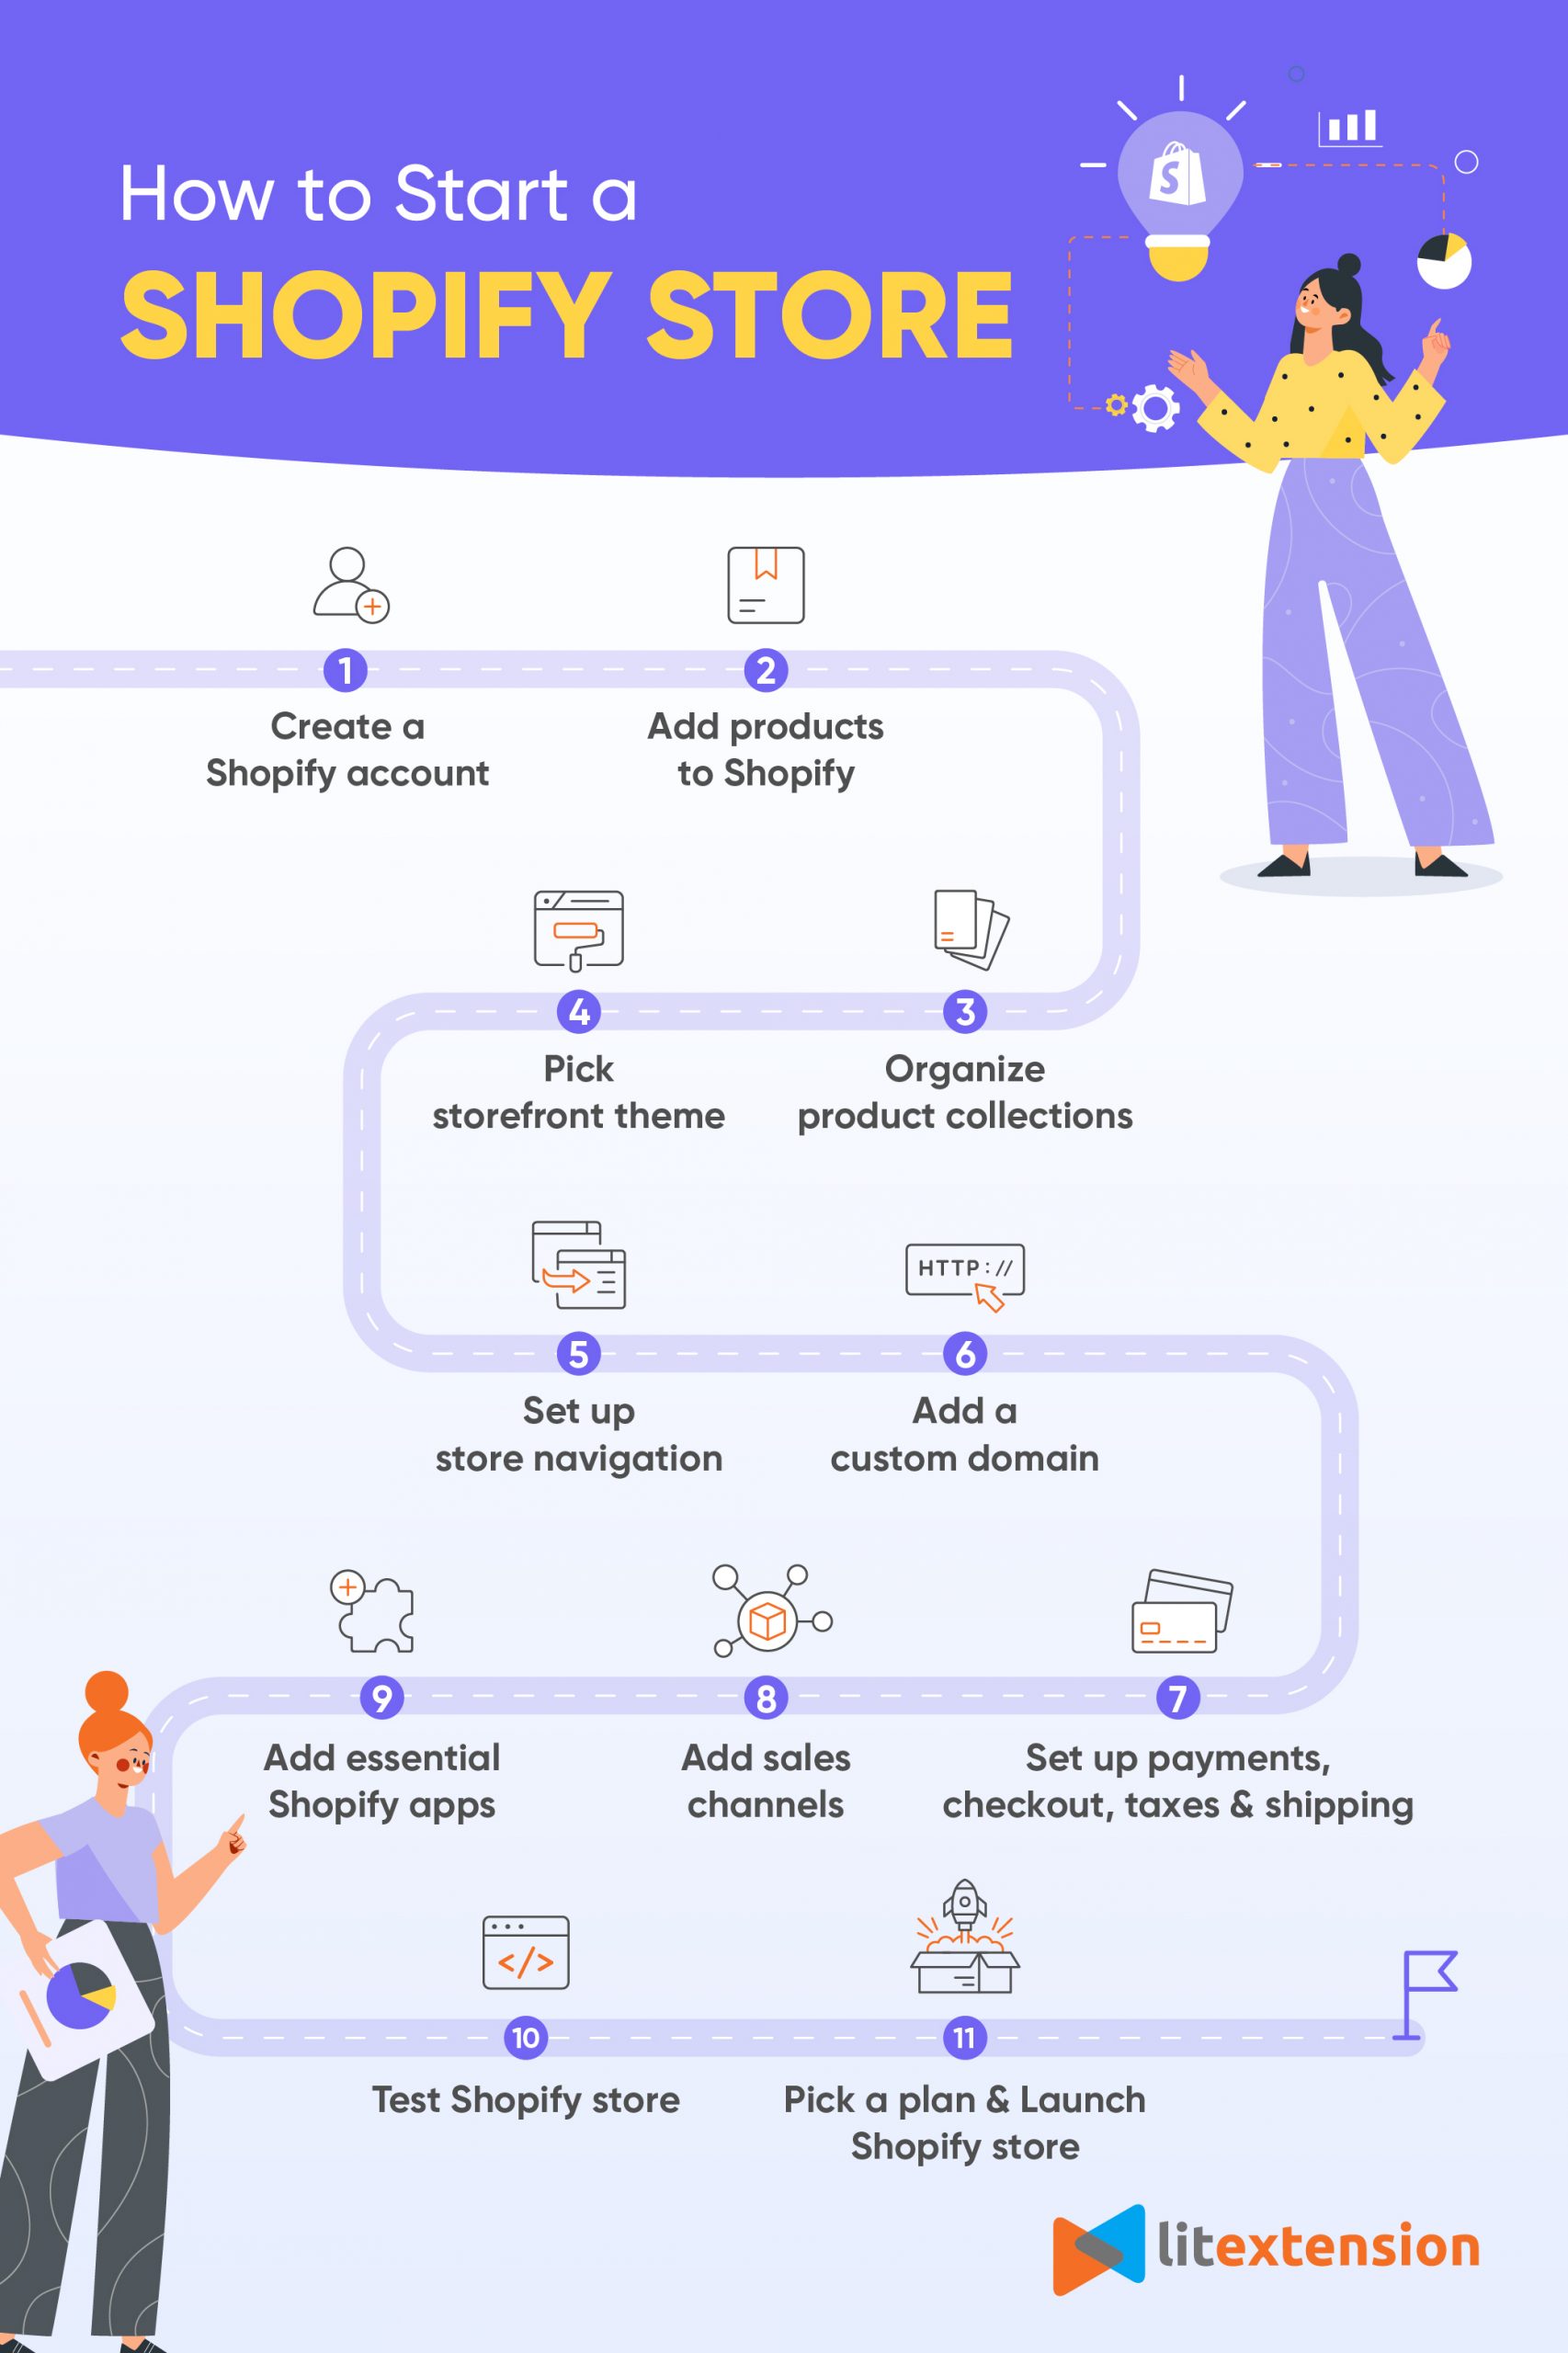
#1 Create a Shopify account
Go to Shopify Homepage, enter your email address, and click Start free trial. You can choose to answer some questions by Shopify. Or else, this platform streamlines your registration process by letting you skip everything and start your Shopify free trial right away.
Still concerned? Don’t worry, we’ve attached a detailed guideline below so you can start a Shopify store from scratch. You can also have a look at our Shopify tutorial with detailed instructions to get your Shopify store up and running in minutes!
#2 Add products to Shopify
Before you start a Shopify store, first, you need to have some products. Let’s learn how to add products to Shopify.
On the dashboard, navigate to the Products section. Here you can find some products to sell on Shopify or add your own products to start your business. If you’re about to do dropshipping on Shopify or build a Shopify POD (print-on-demand) business, this platform recommends some product-sourcing apps like Dsers, Printful, or Spocket.
Or, if you already have some products, click on Add your products button.
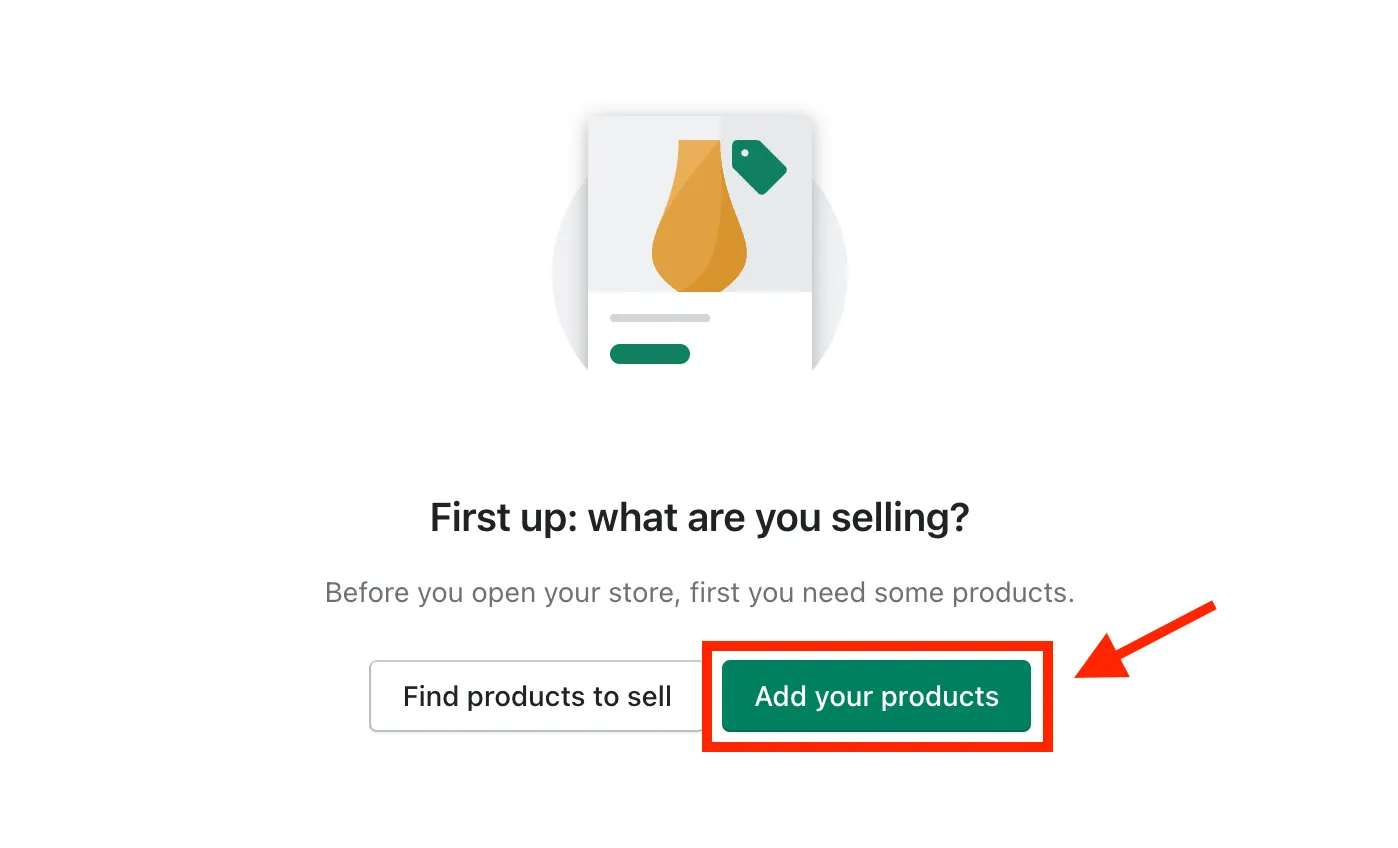
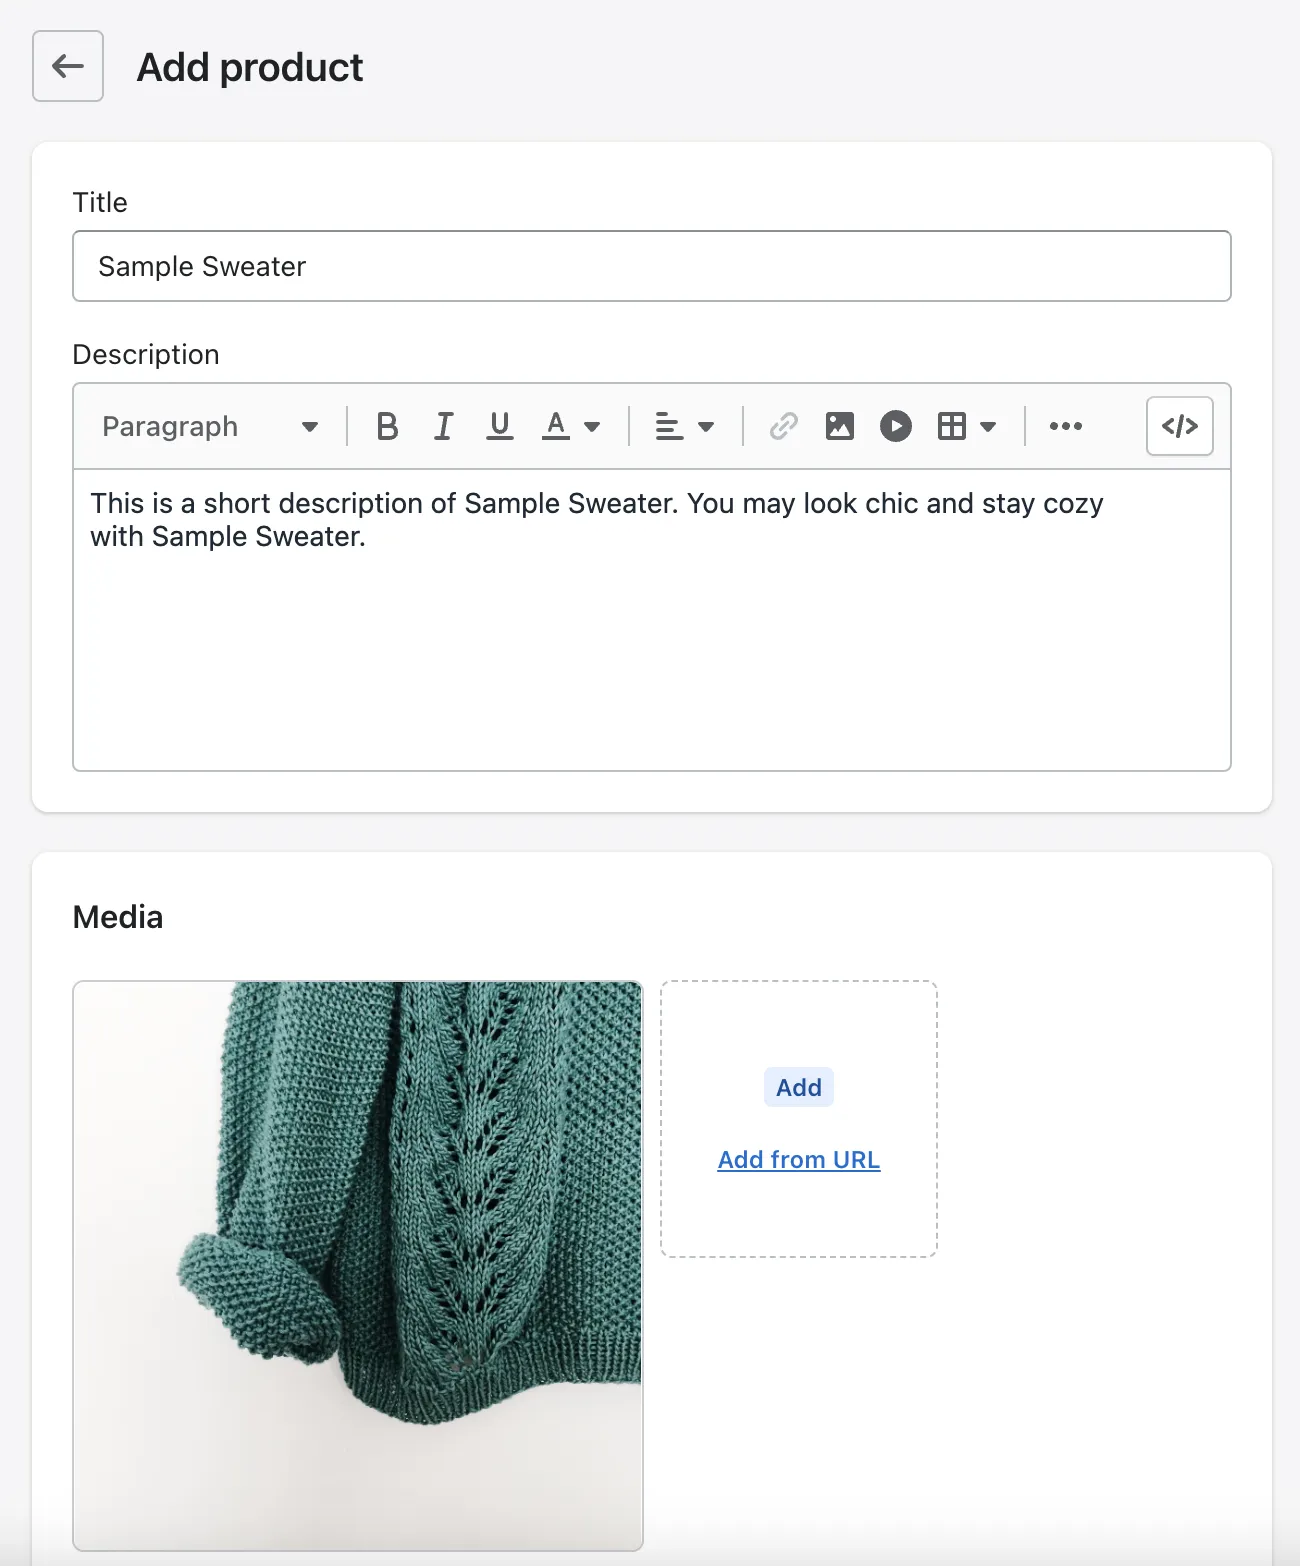
Product information is crucial and tells everything about what you’re selling, so don’t ever miss filling in as detailed as possible. Here, you are able to insert product images (you can add up to 250 images), fill in product tiles, some short descriptions, pricing, inventory, and other important information.
Don’t ever forget to fill in the Search engine listing part because this will decide how your product page will look on the search results. This is also an essential part of SEO, so don’t dismiss adding:
- Page title
- Meta description
- URL handle (or slug)
Hey! We have the ultimate resource to assist you with everything about adding products to your Shopify store and don’t forget to grasp some ideal products to sell on Shopify, also.
Or, if you have a list of orders and customers you’ve been selling somewhere else that want to import to Shopify, find out with Import Customers & Orders to Shopify in Simple Steps.
#3 Organize product collections
First, let us explain about product collections. Shopify product collections optimize your customers’ shopping experience on your Shopify store by making browsing simple. These products can be arranged based on your preferences or the market niche of your business.
In the image below, you may see an example from ColourPop Cosmetics – a very popular cosmetic store that chooses Shopify to power its eCommerce website.
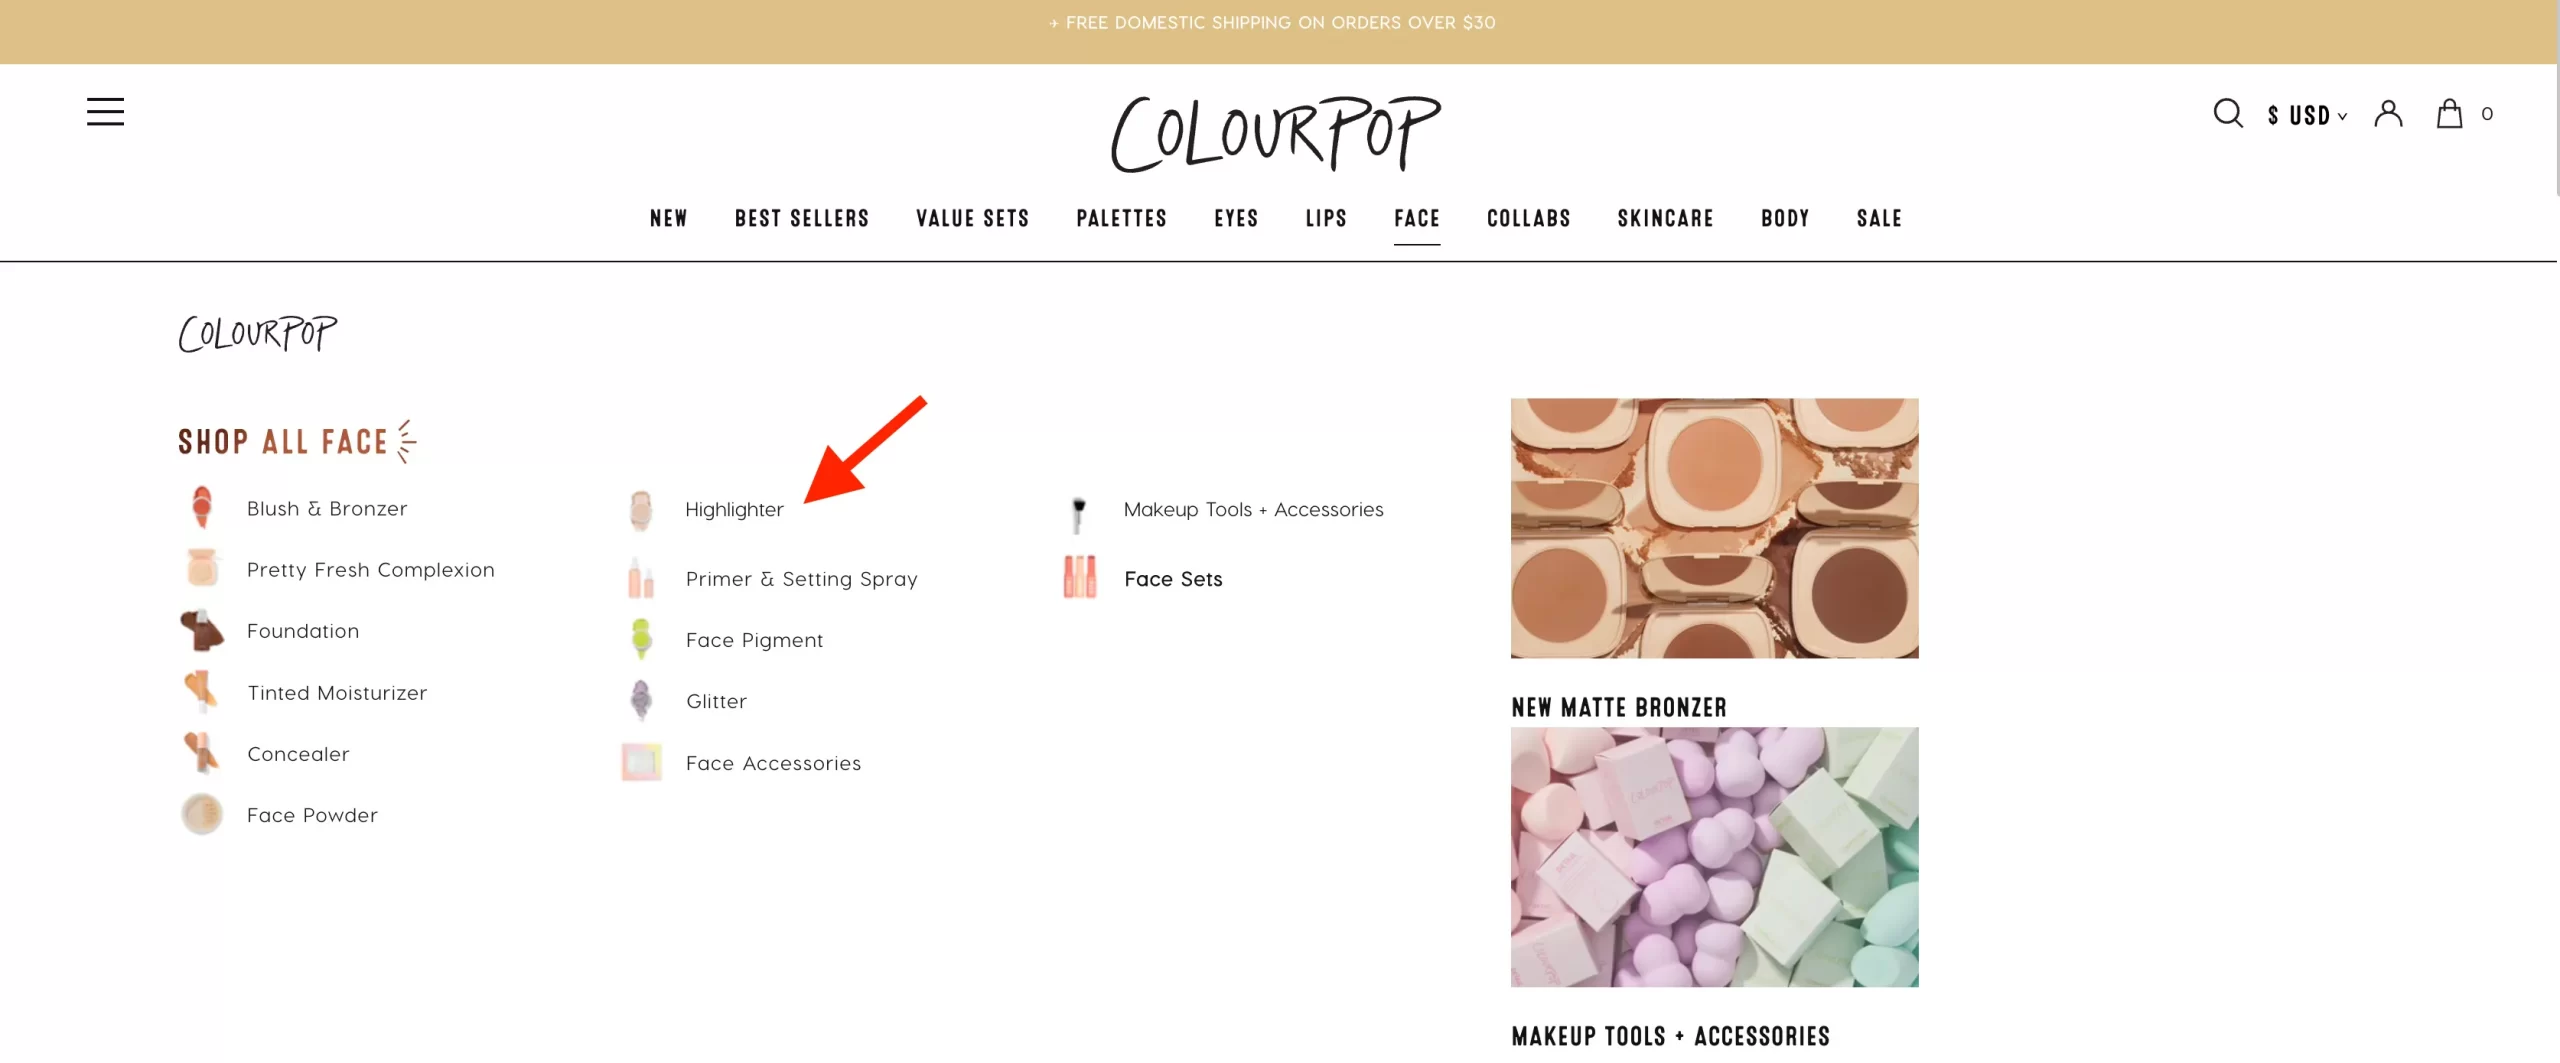
To find Collections, on your Shopify admin panel, navigate to Products > Collections.
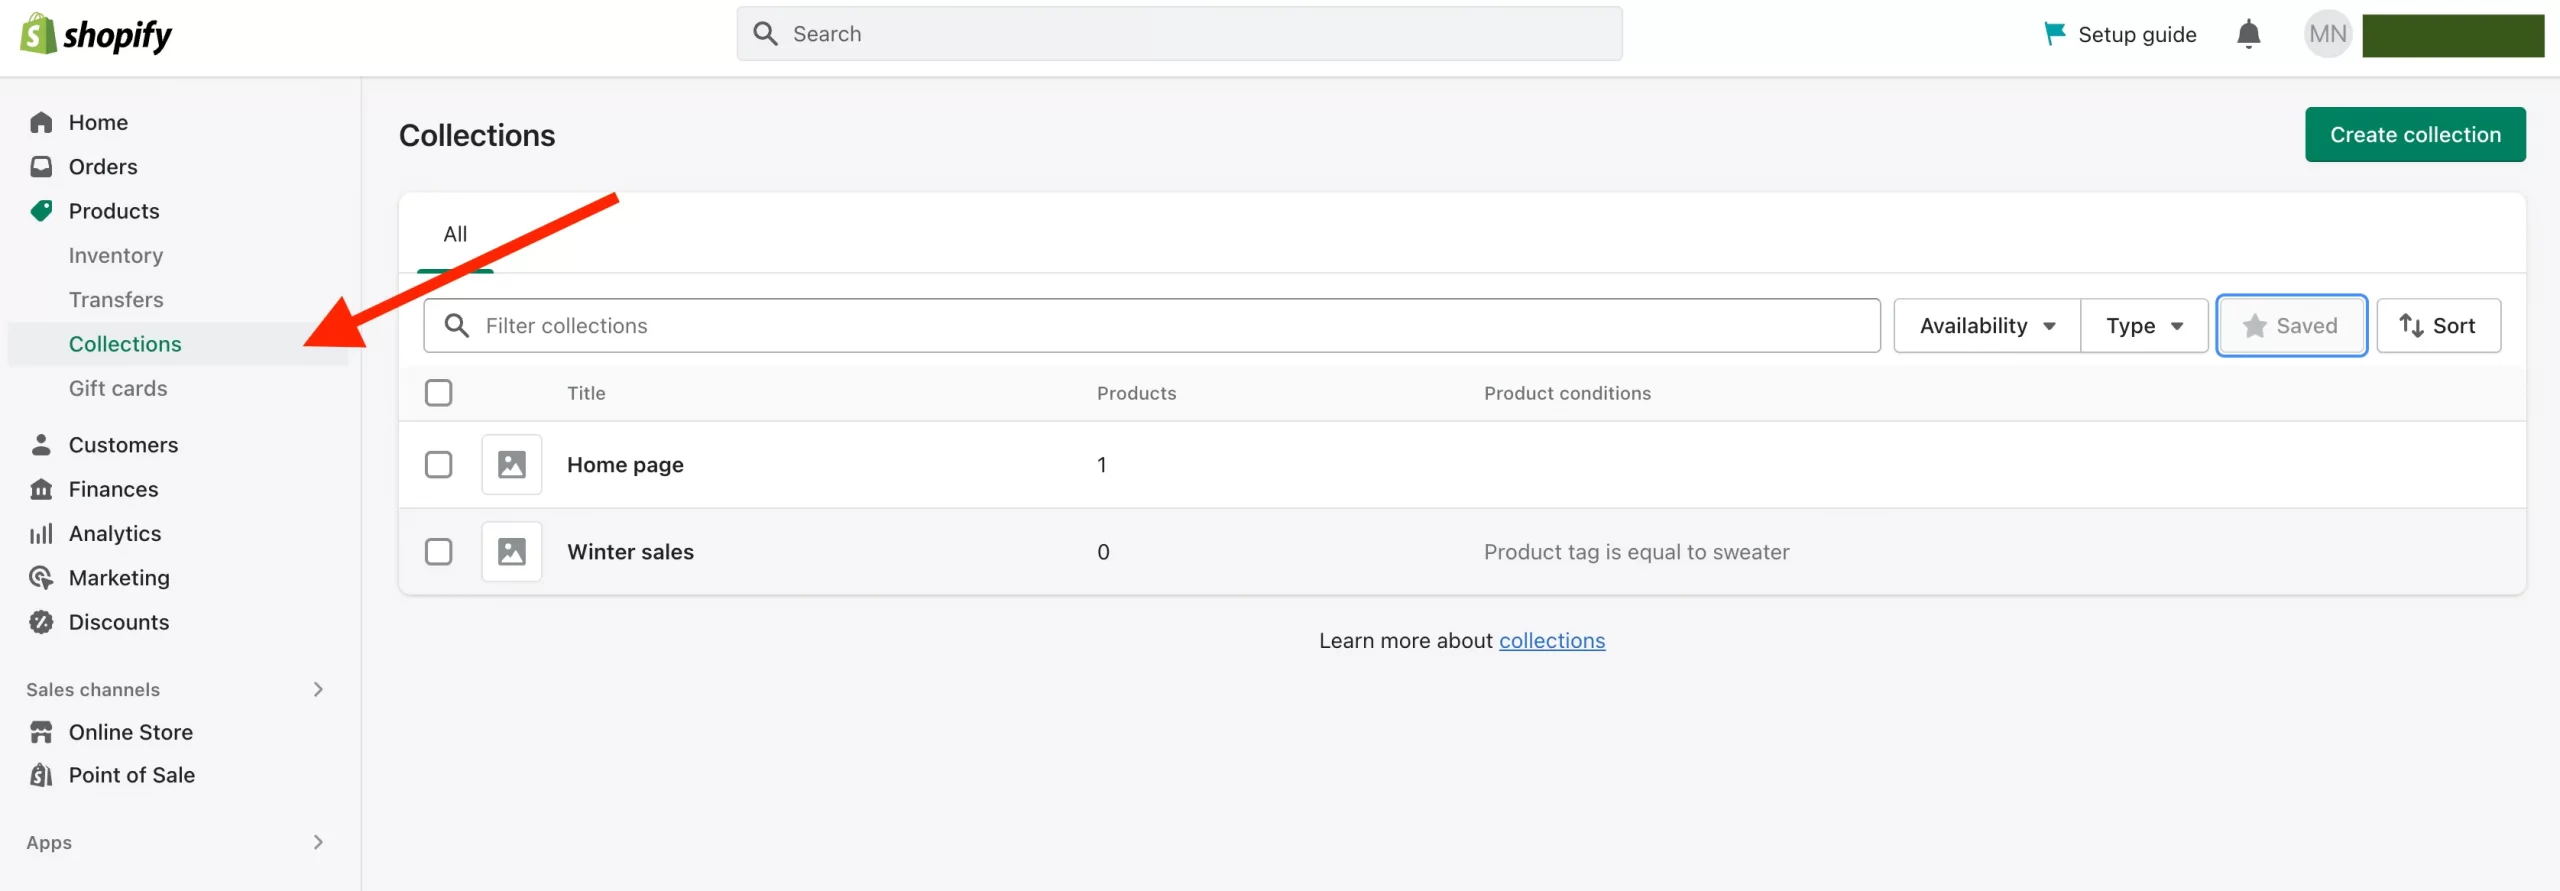
In this phase of how to start a Shopify store, we want to share some small but helpful tips for organizing your collections:
- Use catchy headers
- Create effective CTAs for your Shopify collections
- Select a layout that works for your Shopify collections
- Include the trust factor
- Keep the greatest at the top and make navigating simple
Although Shopify Collections are simple to organize, plenty still need to be done. Visit our ultimate website to learn everything there is to know about Shopify Collections!
Check out: Shopify Collections – A Comprehensive Guide To Increase Sales
The style and design of collection pages may vary depending on your chosen theme. Let’s find out which Shopify theme best fits your business strategy and collection presentation down below.
#4 Pick & Customize storefront theme
And now, let’s move to a crucial section that we cannot miss in our guide on how to start a Shopify store, choosing a website template.
First, you’ll need to visit Shopify Theme Store. Currently, there are 110+ Shopify themes on the marketplace (both Shopify free themes and premium ones). All the themes are well-designed to your need and vary with the industry (Clothing, Electronics, Arts and crafts,…)
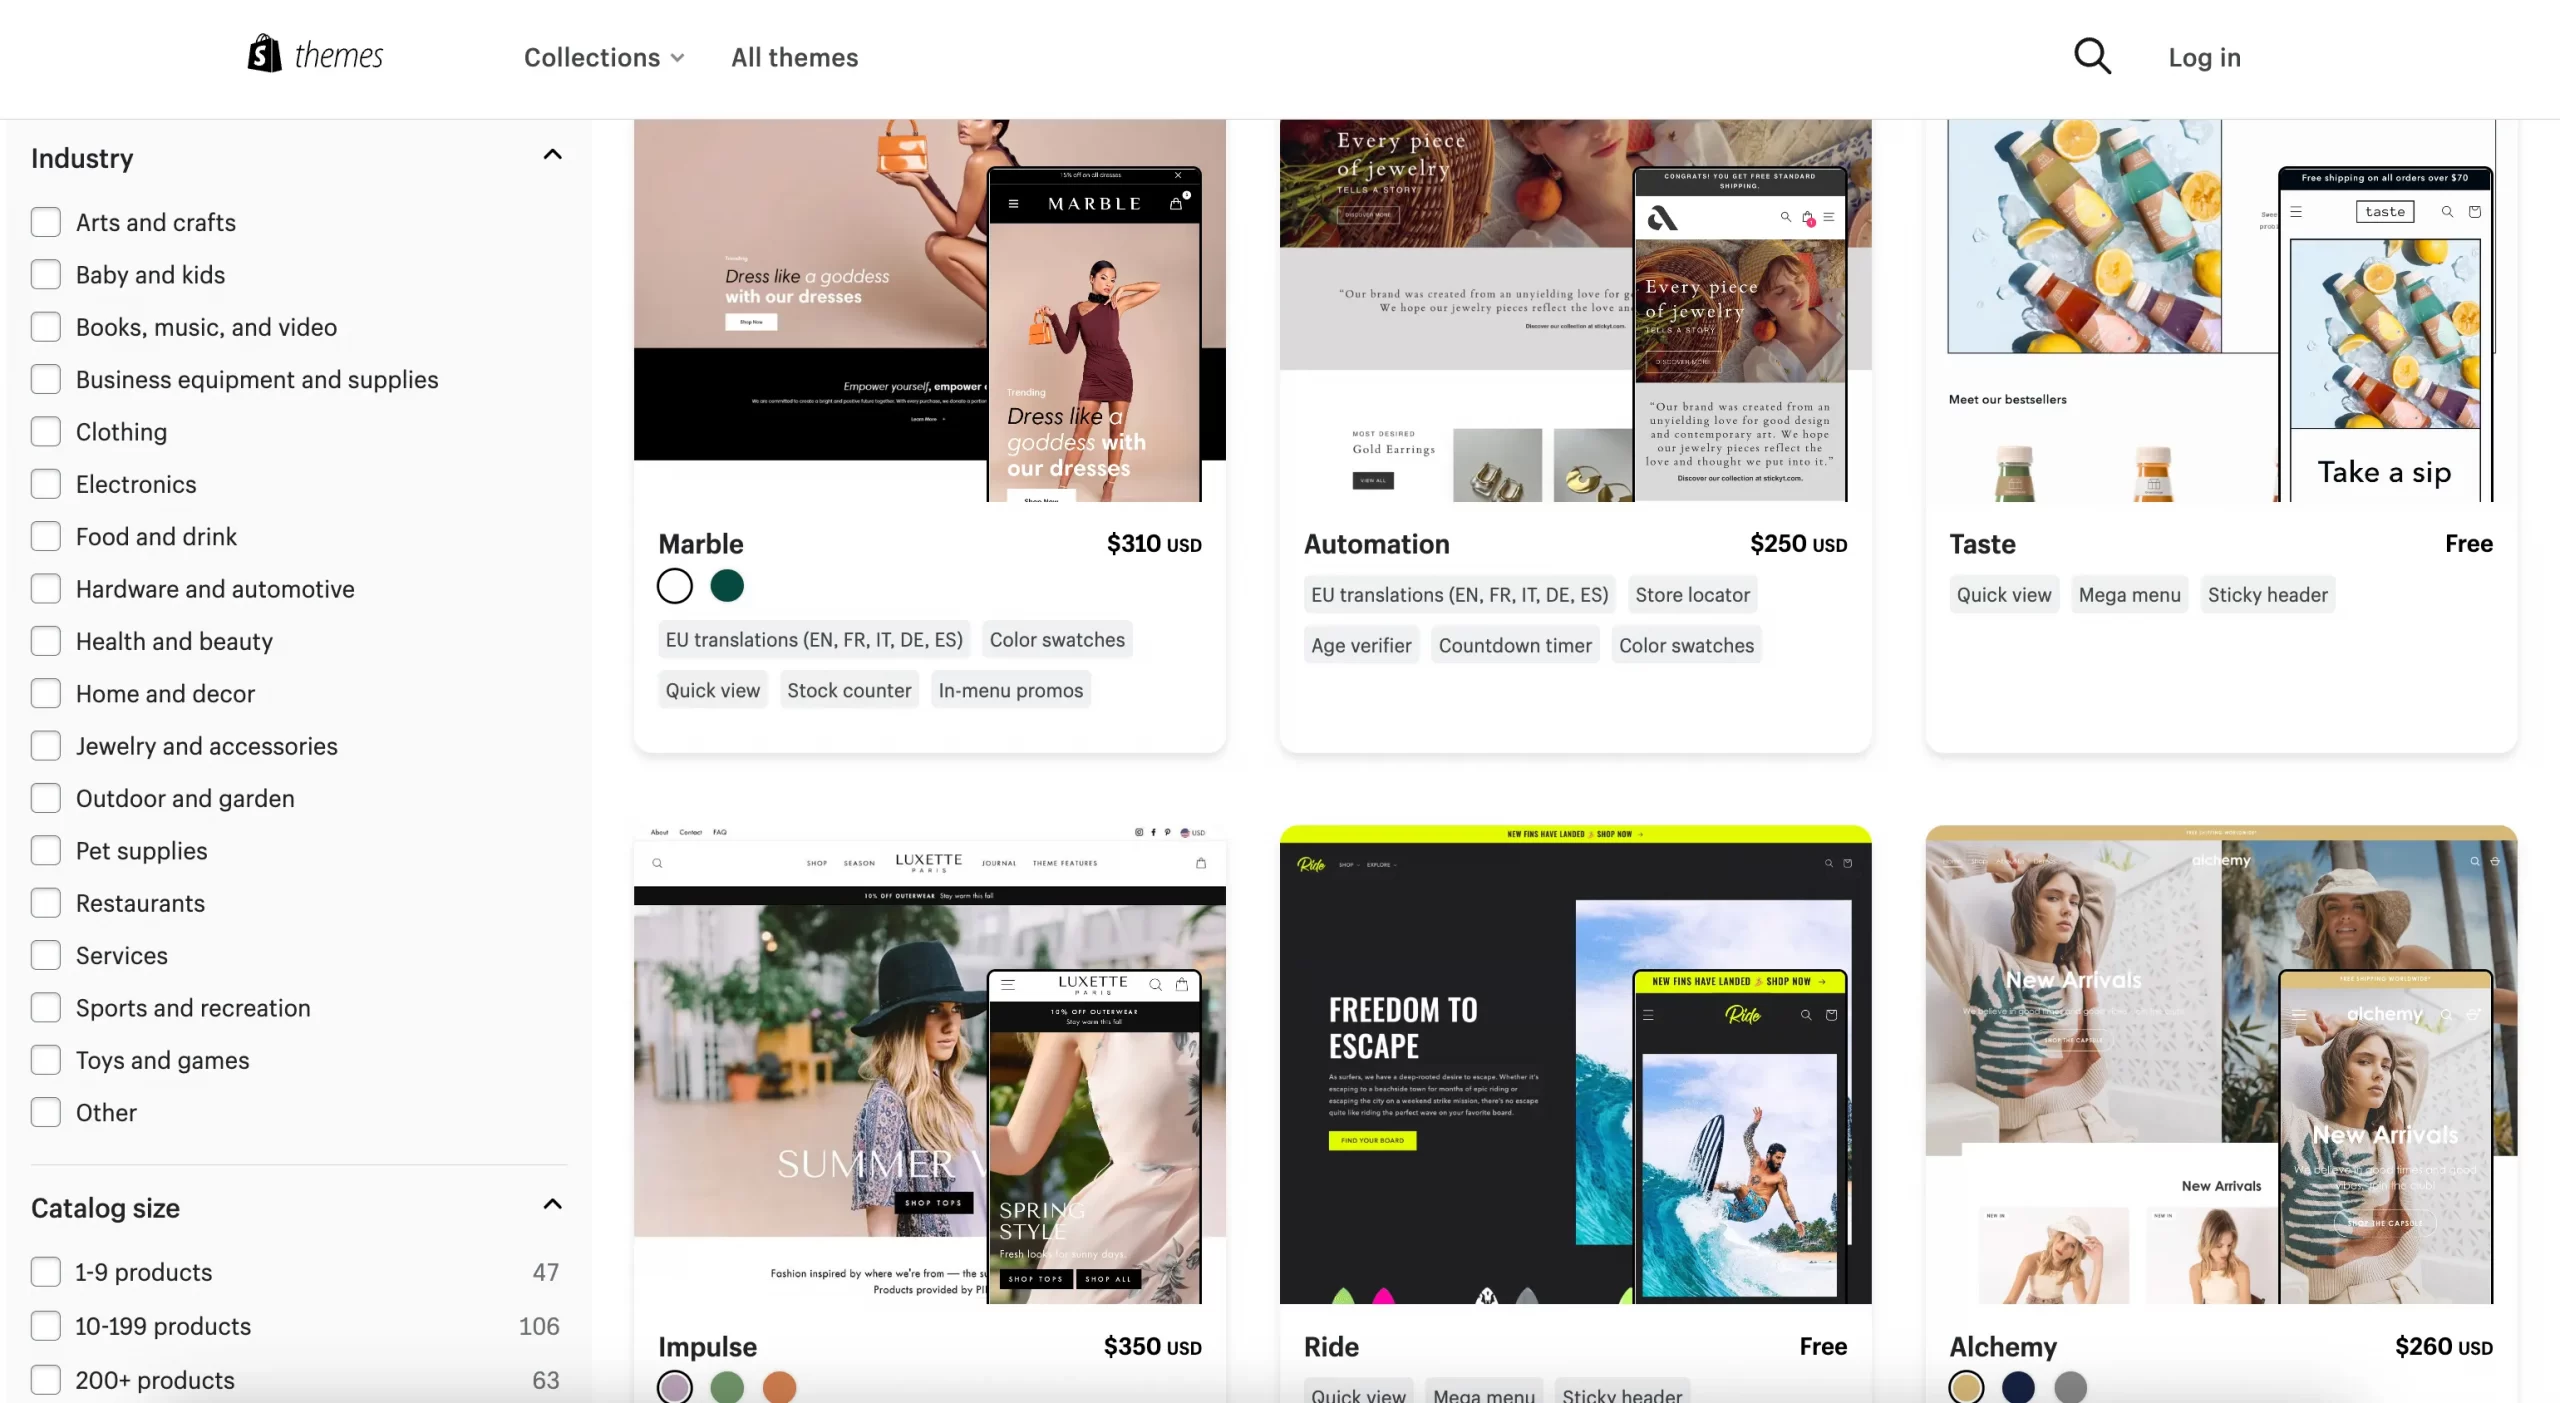
Do you know that you can try out unlimited themes and unlimited times within your trial? Even with the Shopify paid theme, you can always choose and edit it at no fee. Hence, our advice is that you should try as many website templates as you want before choosing the perfect theme to start your online business.
If you’re just getting started with Shopify, you might want to take these pages into account when customizing and editing theme:
- Homepage
- About Us page
- Products page
- Optimized landing page for conversions
Custom Shopify theme is not a difficult task, but it requires a bit of patience and consistency. Don’t worry, as we have complete and thorough guidelines to walk you through how to customize Shopify themes from scratch.
In case you need support to start a Shopify store, you may want to discover:
#5 Set up store navigation
After you’ve got all pages, collections, and landing pages ready, the next step to start a Shopify store is to connect and link everything together. Your visitors will be less likely to leave if your website has easy-to-use navigation that allows them to search for what they need.
On your admin dashboard, navigate to Online Store > Navigation.
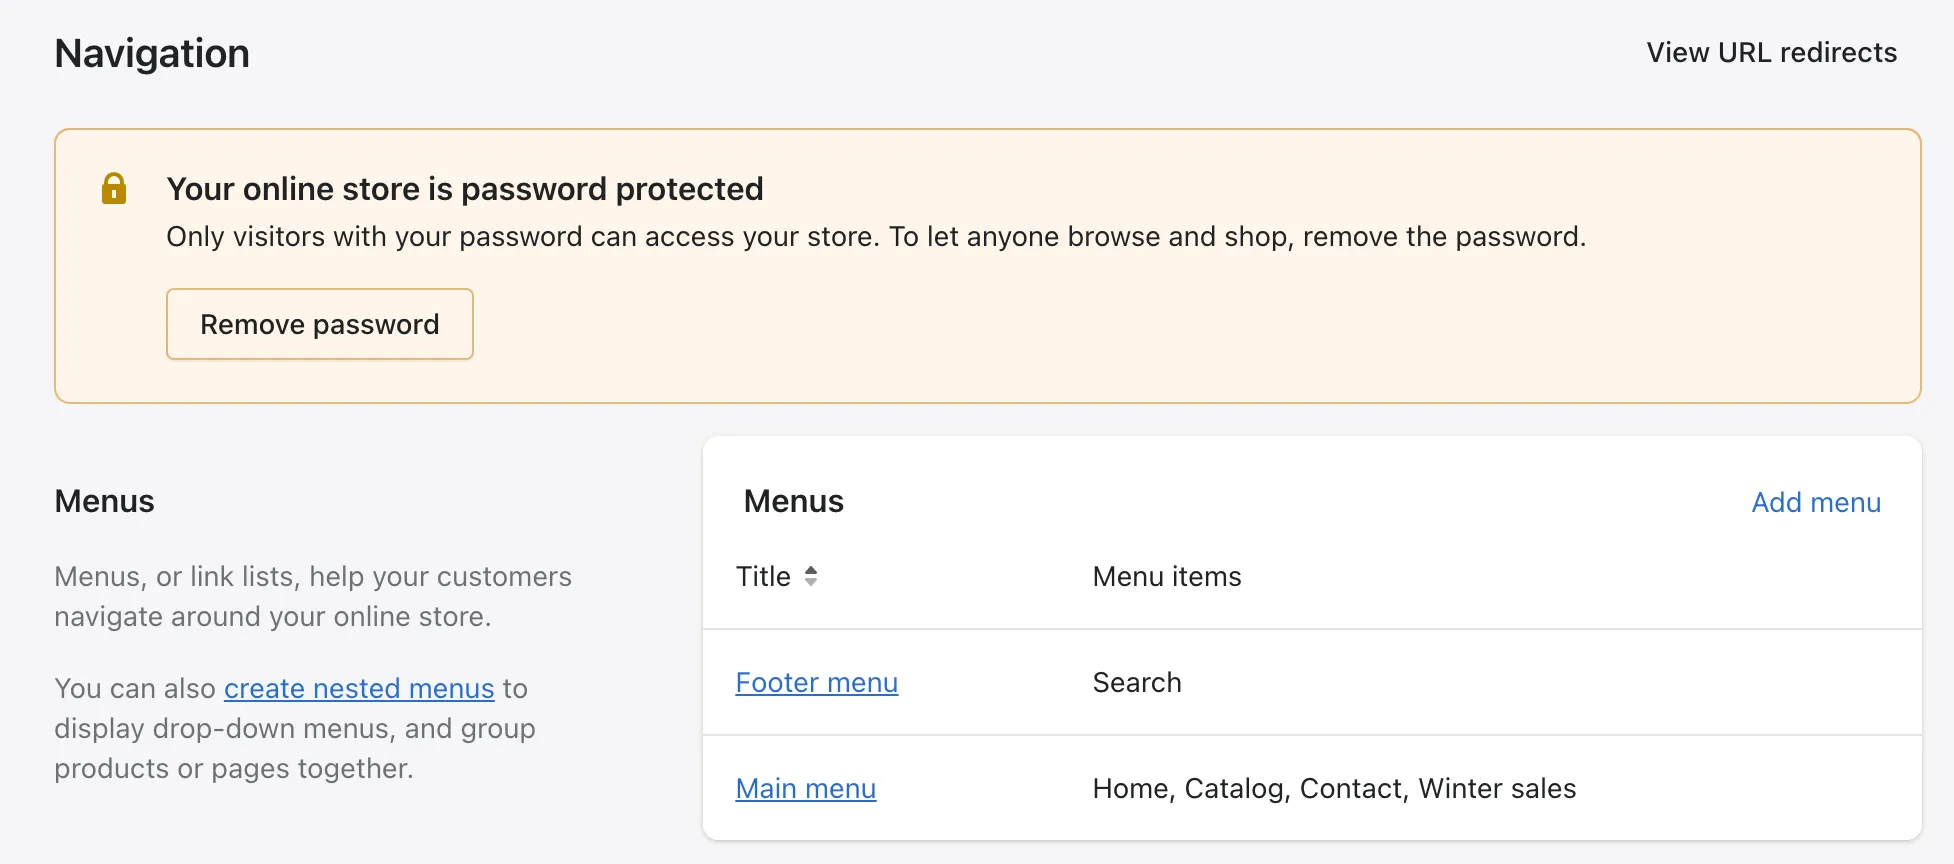
Here, you will notice two default menus that can be seen on every page: Main menu and Footer menu.
Main menu
Typically, the main menu is presented as a list of things in a sidebar or as items across the width of the header. To access your items and company details like “About us” page, a consumer will likely check your main menu.
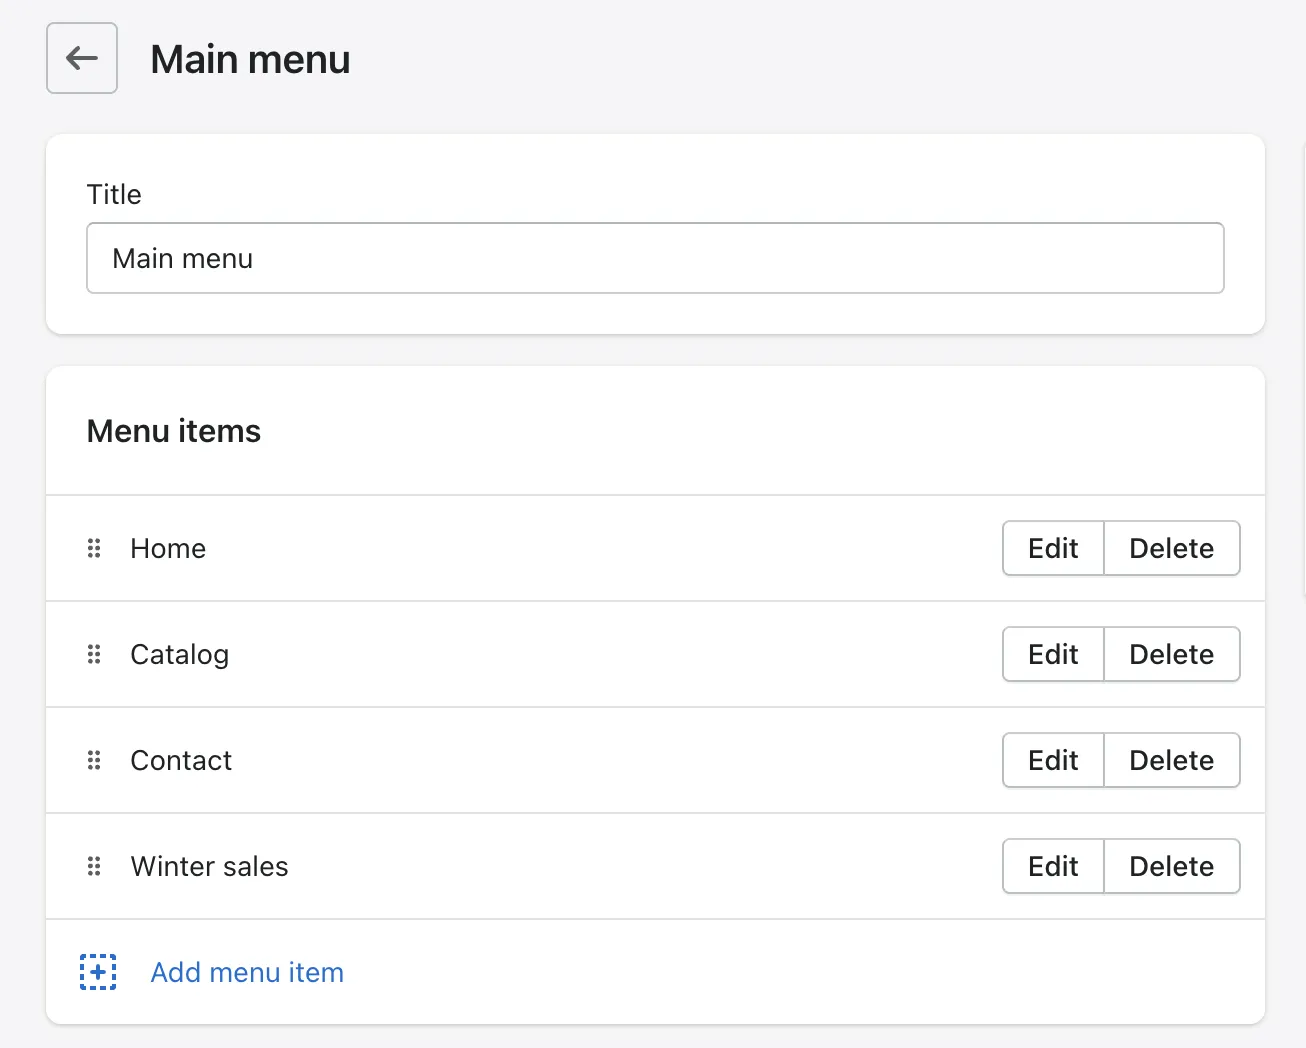
You can also add a drop-down menu or a sub-menu from the main menu. It’s usually displayed as a list of items related to the main menu item. Drop-down menus are helpful for grouping product collections, blogs, or store policies.
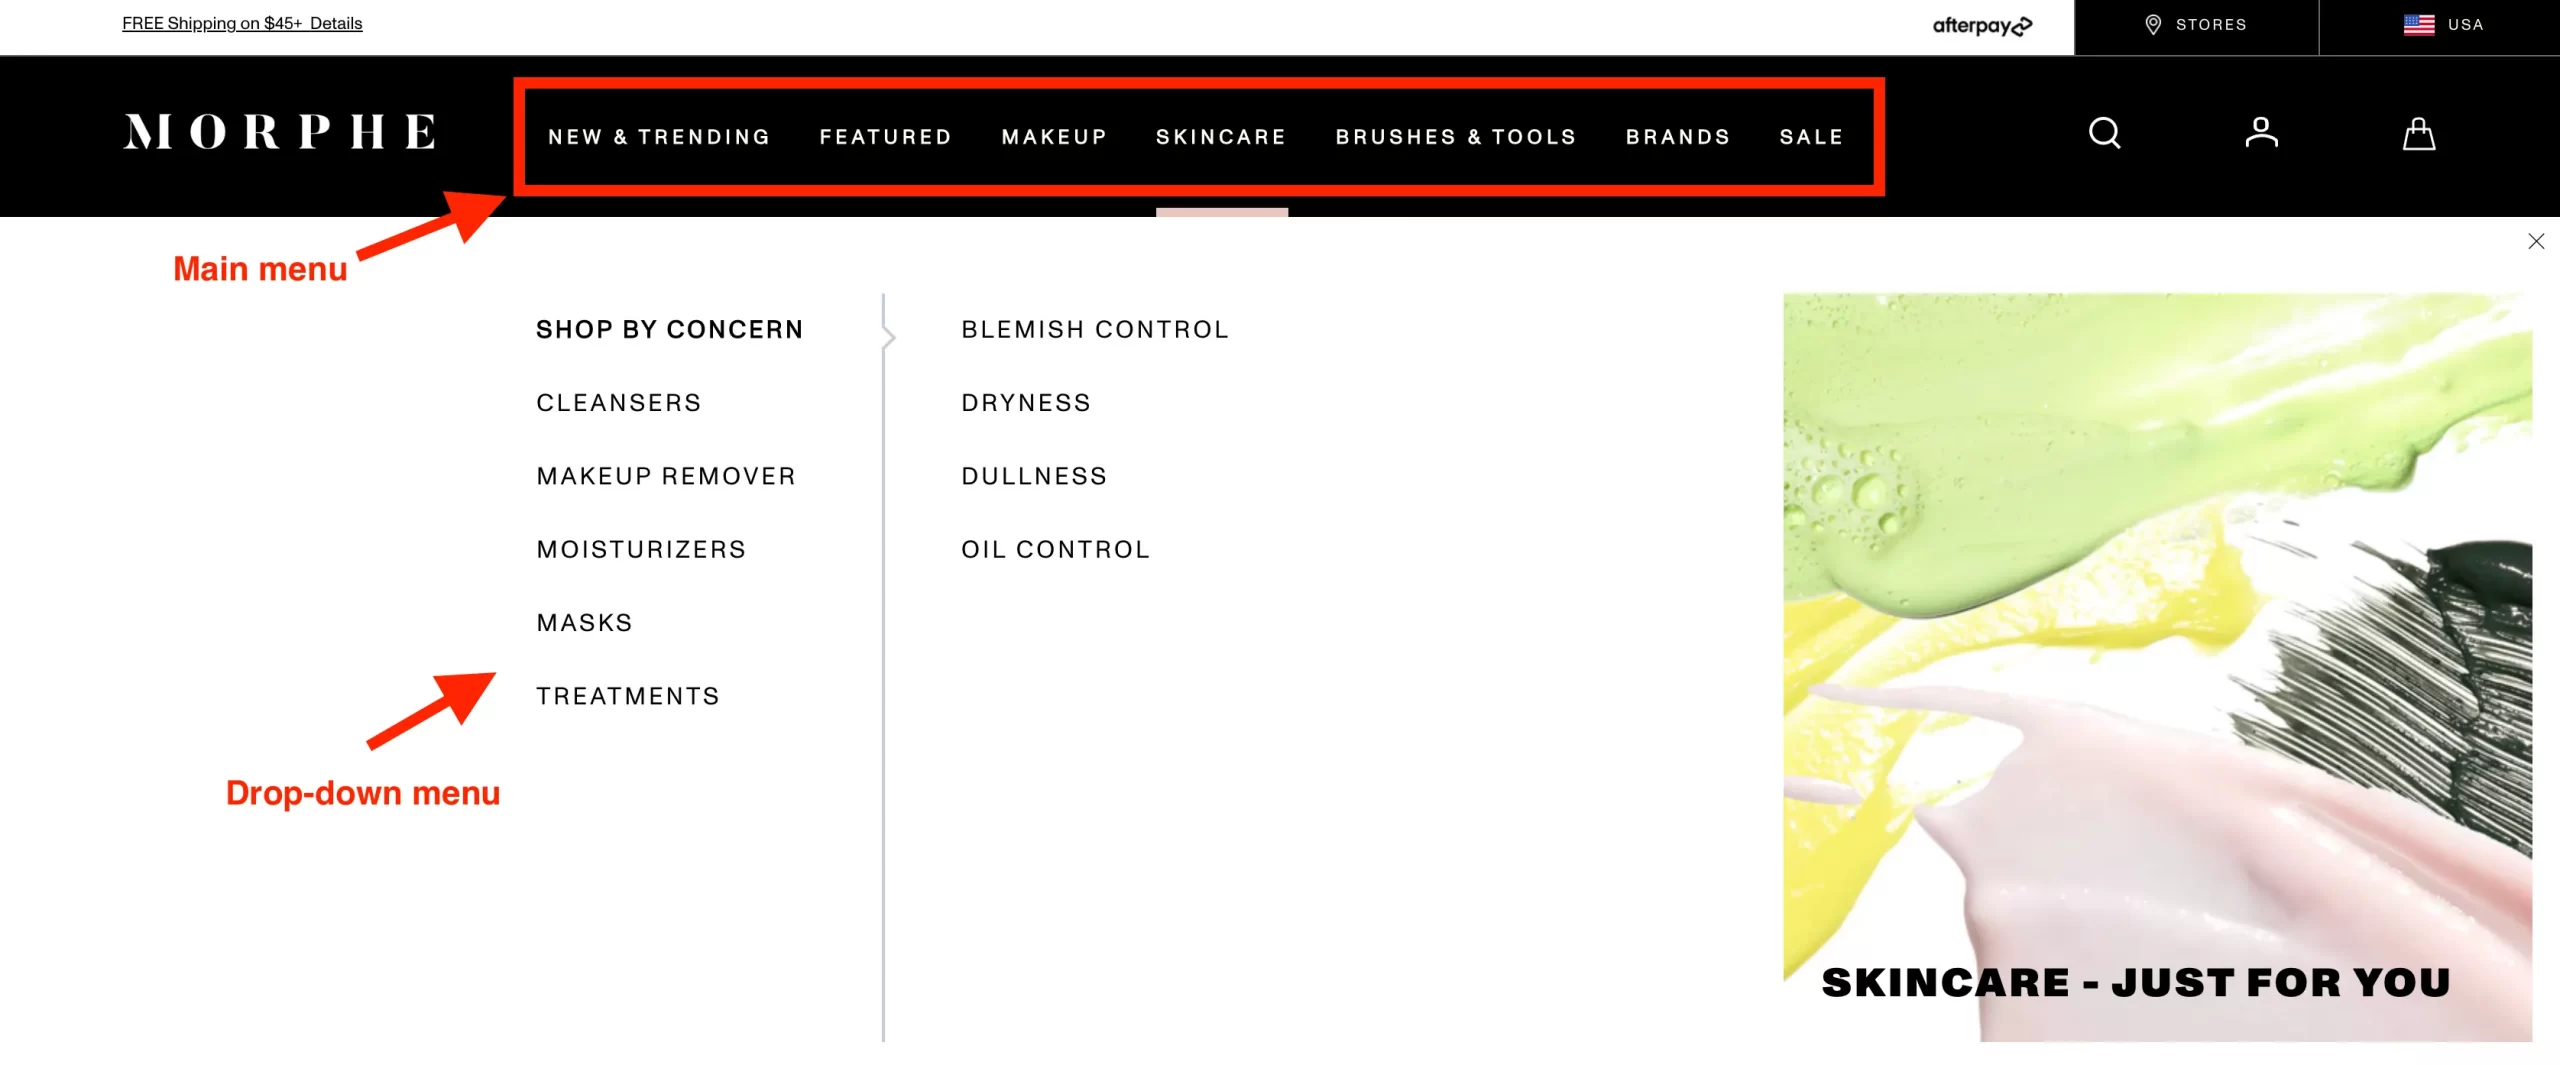
For instance, you can look at the image above. The highlighted part is the Main menu of Morphe – a popular cosmetic store that chose Shopify to power the website. When having a lot of products, they add them to collections and then organize them by using a drop-down menu. This may make it easier for a customer to find the things they need.
Footer menu
The footer menu is usually displayed in the width of the footer. Your customers will probably look at your footer menu to find your store policies and contact information.
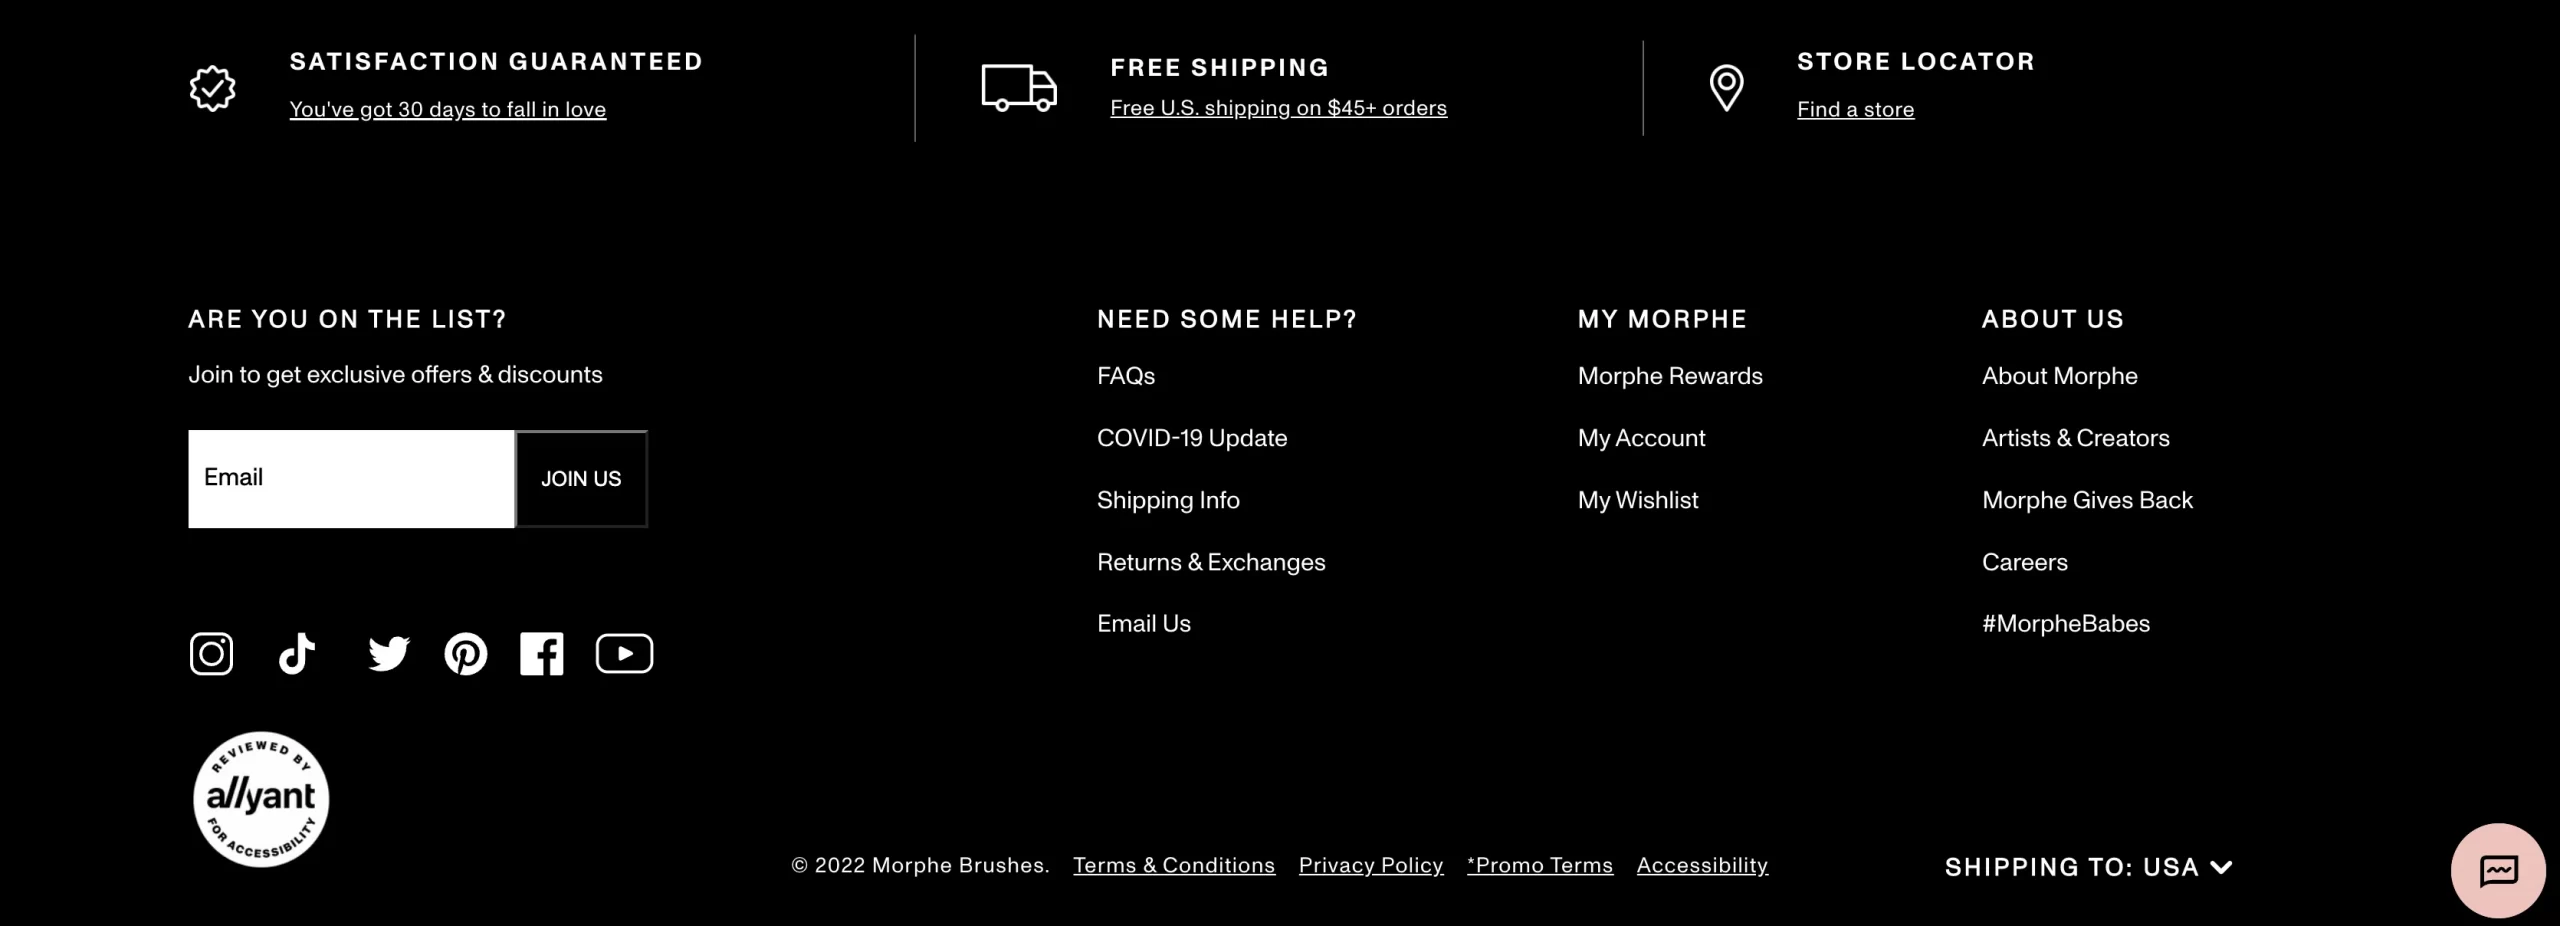
Each theme has a different design, so the navigation may look different. Our advice is that you should try out different within your trial (make use of it because Shopify lets you try unlimited themes!) and find your most suited design.
Curious about how to create a conversion-optimized landing page? Access our resources:
#6 Add a custom domain
An important step to start a Shopify store is to link your website with a custom domain. Here’s how you can complete this process.
On Shopify dashboard, navigate to Settings section, then click Domain.
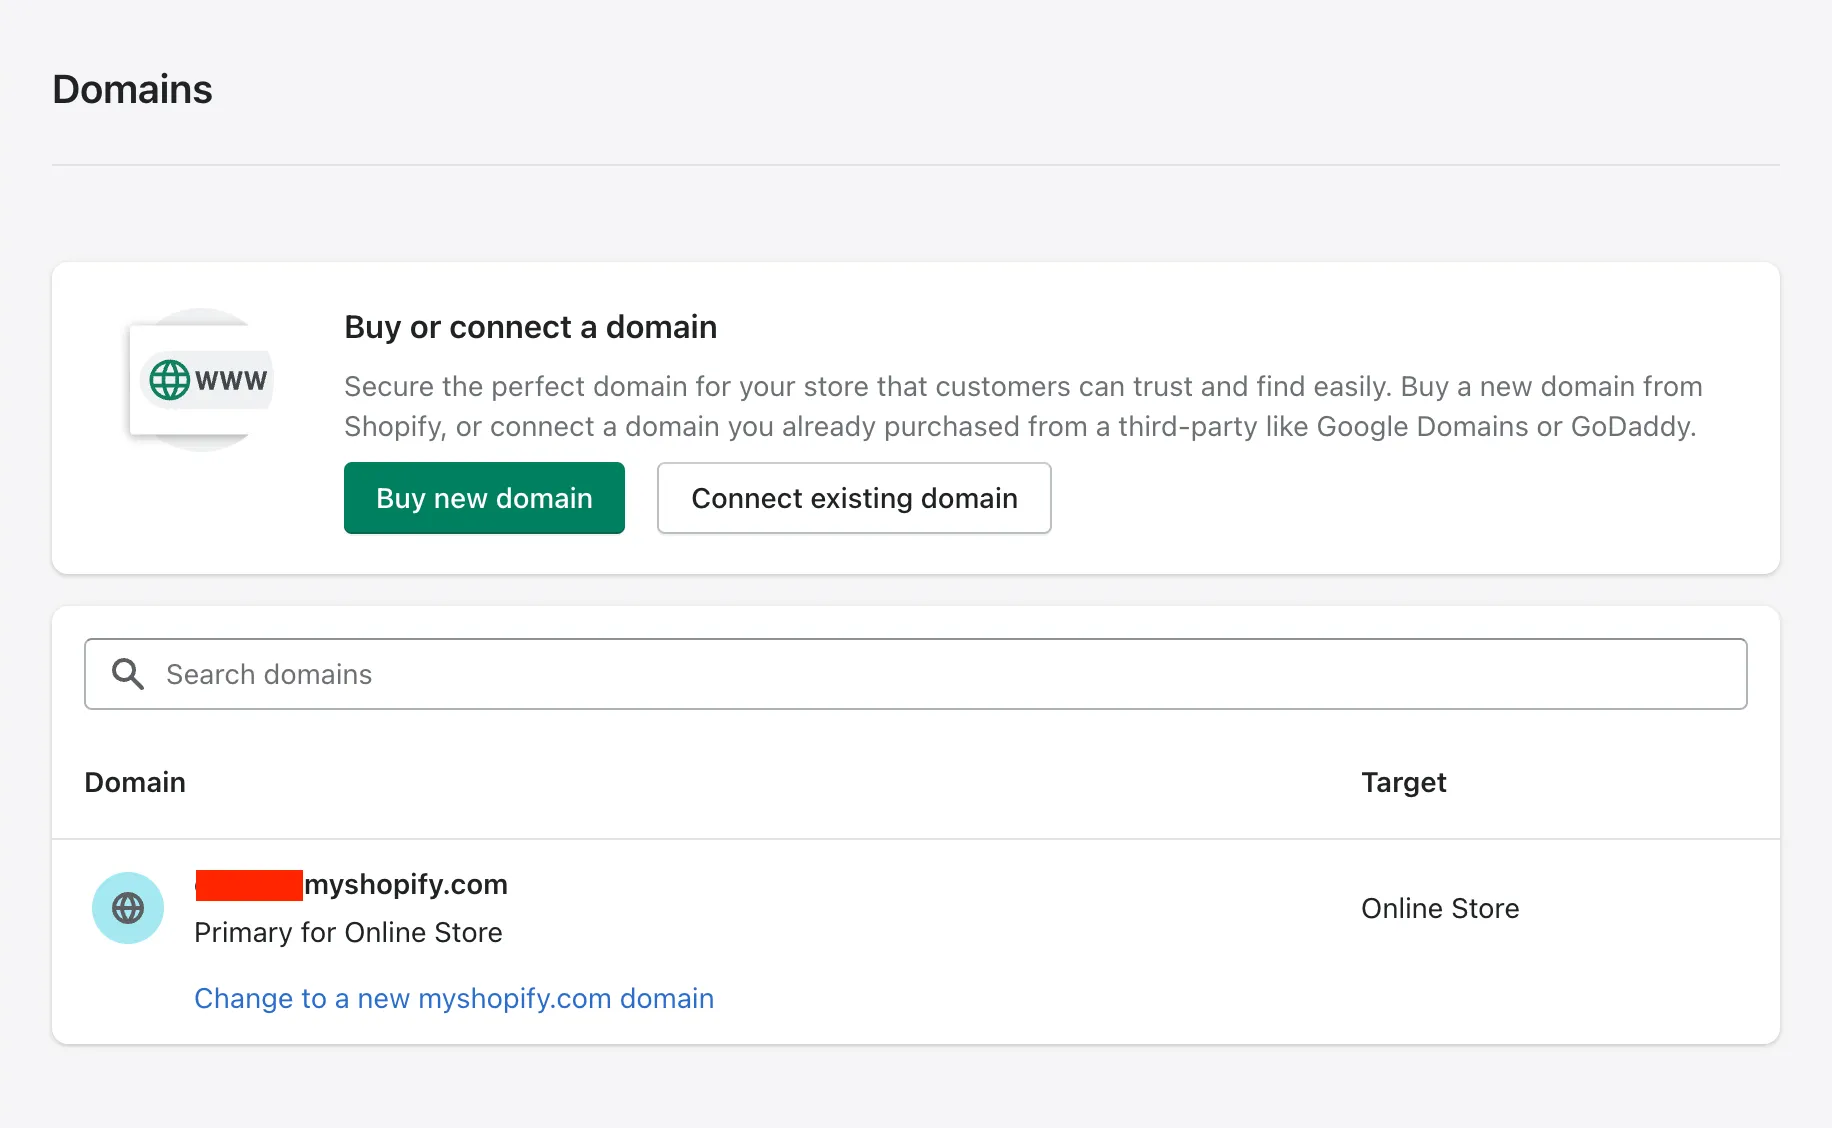
There are currently 3 ways to add a custom domain to Shopify, which are:
- Buy a domain through Shopify
- Connect your domain to Shopify
- Transfer your domain to Shopify
In case you already have a domain, we highly recommend transferring your domain to Shopify instead of buying a new one. This will help preserve your brand identity when you start a new website and avoid customer lost.
Access our resource: How to Transfer Domain To Shopify in 3 Steps
#7 Set up payments, checkout, taxes & shipping
Now, it’s time we moved to the next step: setting up essential eCommerce features to start selling.
Payments, checkout, taxes & shipping are the most important parts of your online store if you want to generate sales. Therefore, to start a Shopify store, carefully configure these sections to deliver a seamless shopping experience for your customers.
Payments
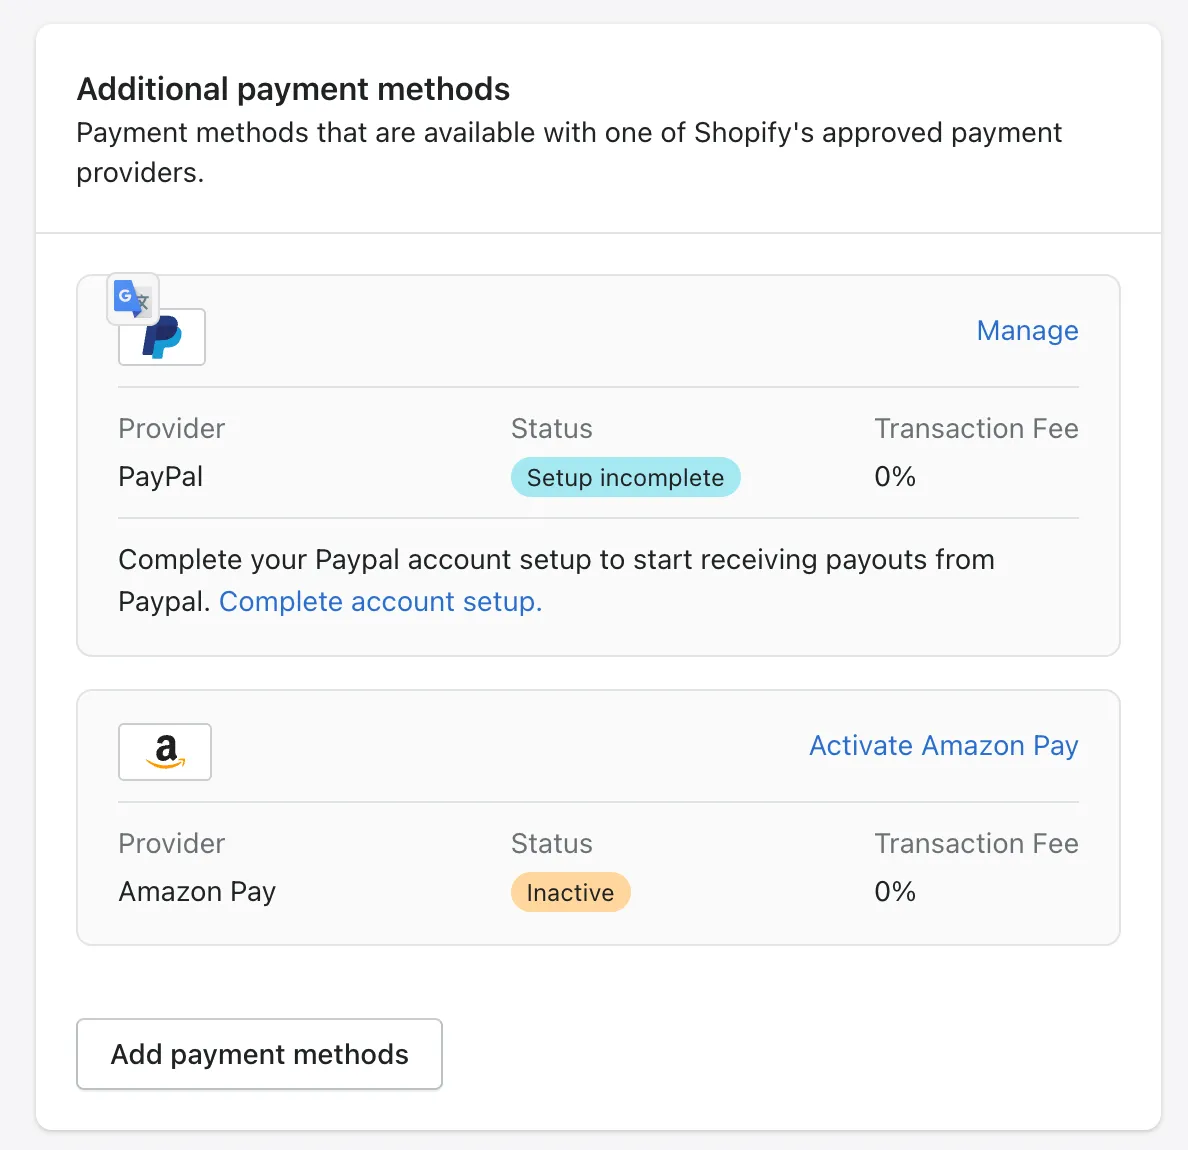
On your admin panel, navigate to Settings > Payments. Here you can find, add and set up the payment method with any third-party payment provider or with Shopify Payment (the integrated processor of Shopify).
You may not want to miss: What is Shopify Payments | Pros – Cons & How to Set Up
If you want to set up Manual payment methods to start generating sales, scroll down a little, and you may see that option to configure. ‘Manual payments methods‘ include:
- Create custom payment method
- Bank Deposit
- Money Order
- Cash on Delivery (COD)
Checkout
On your admin panel, navigate to Settings > Checkout. Here you can configure important detail about customer checkout settings.
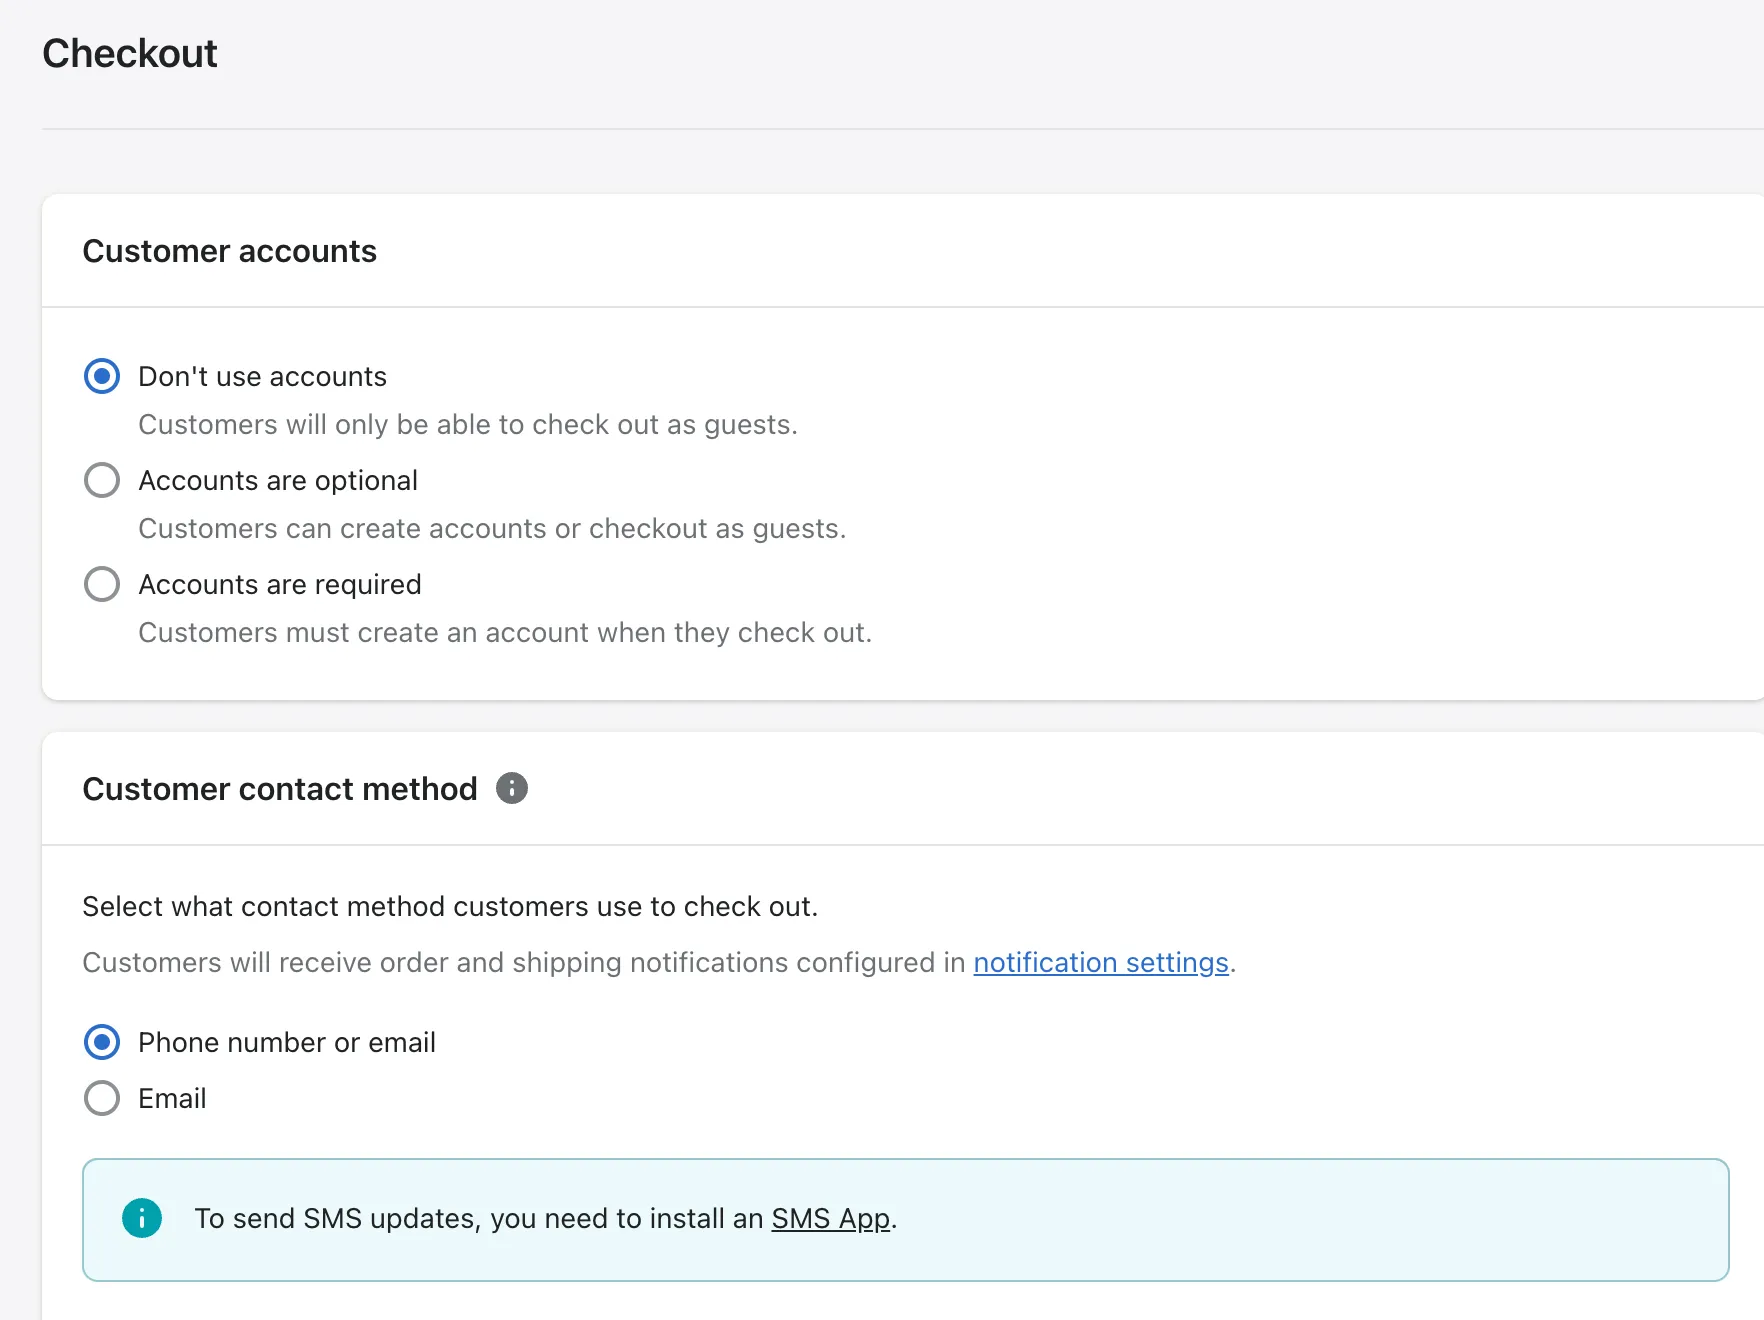
For example, with the Customer accounts section, you may decide on 1 of the 3 options:
- Don’t use accounts – Customers will only be able to check out as guests.
- Accounts are optional – Customers can create accounts or checkout as guests.
- Accounts are required – Customers must create an account when they check out.
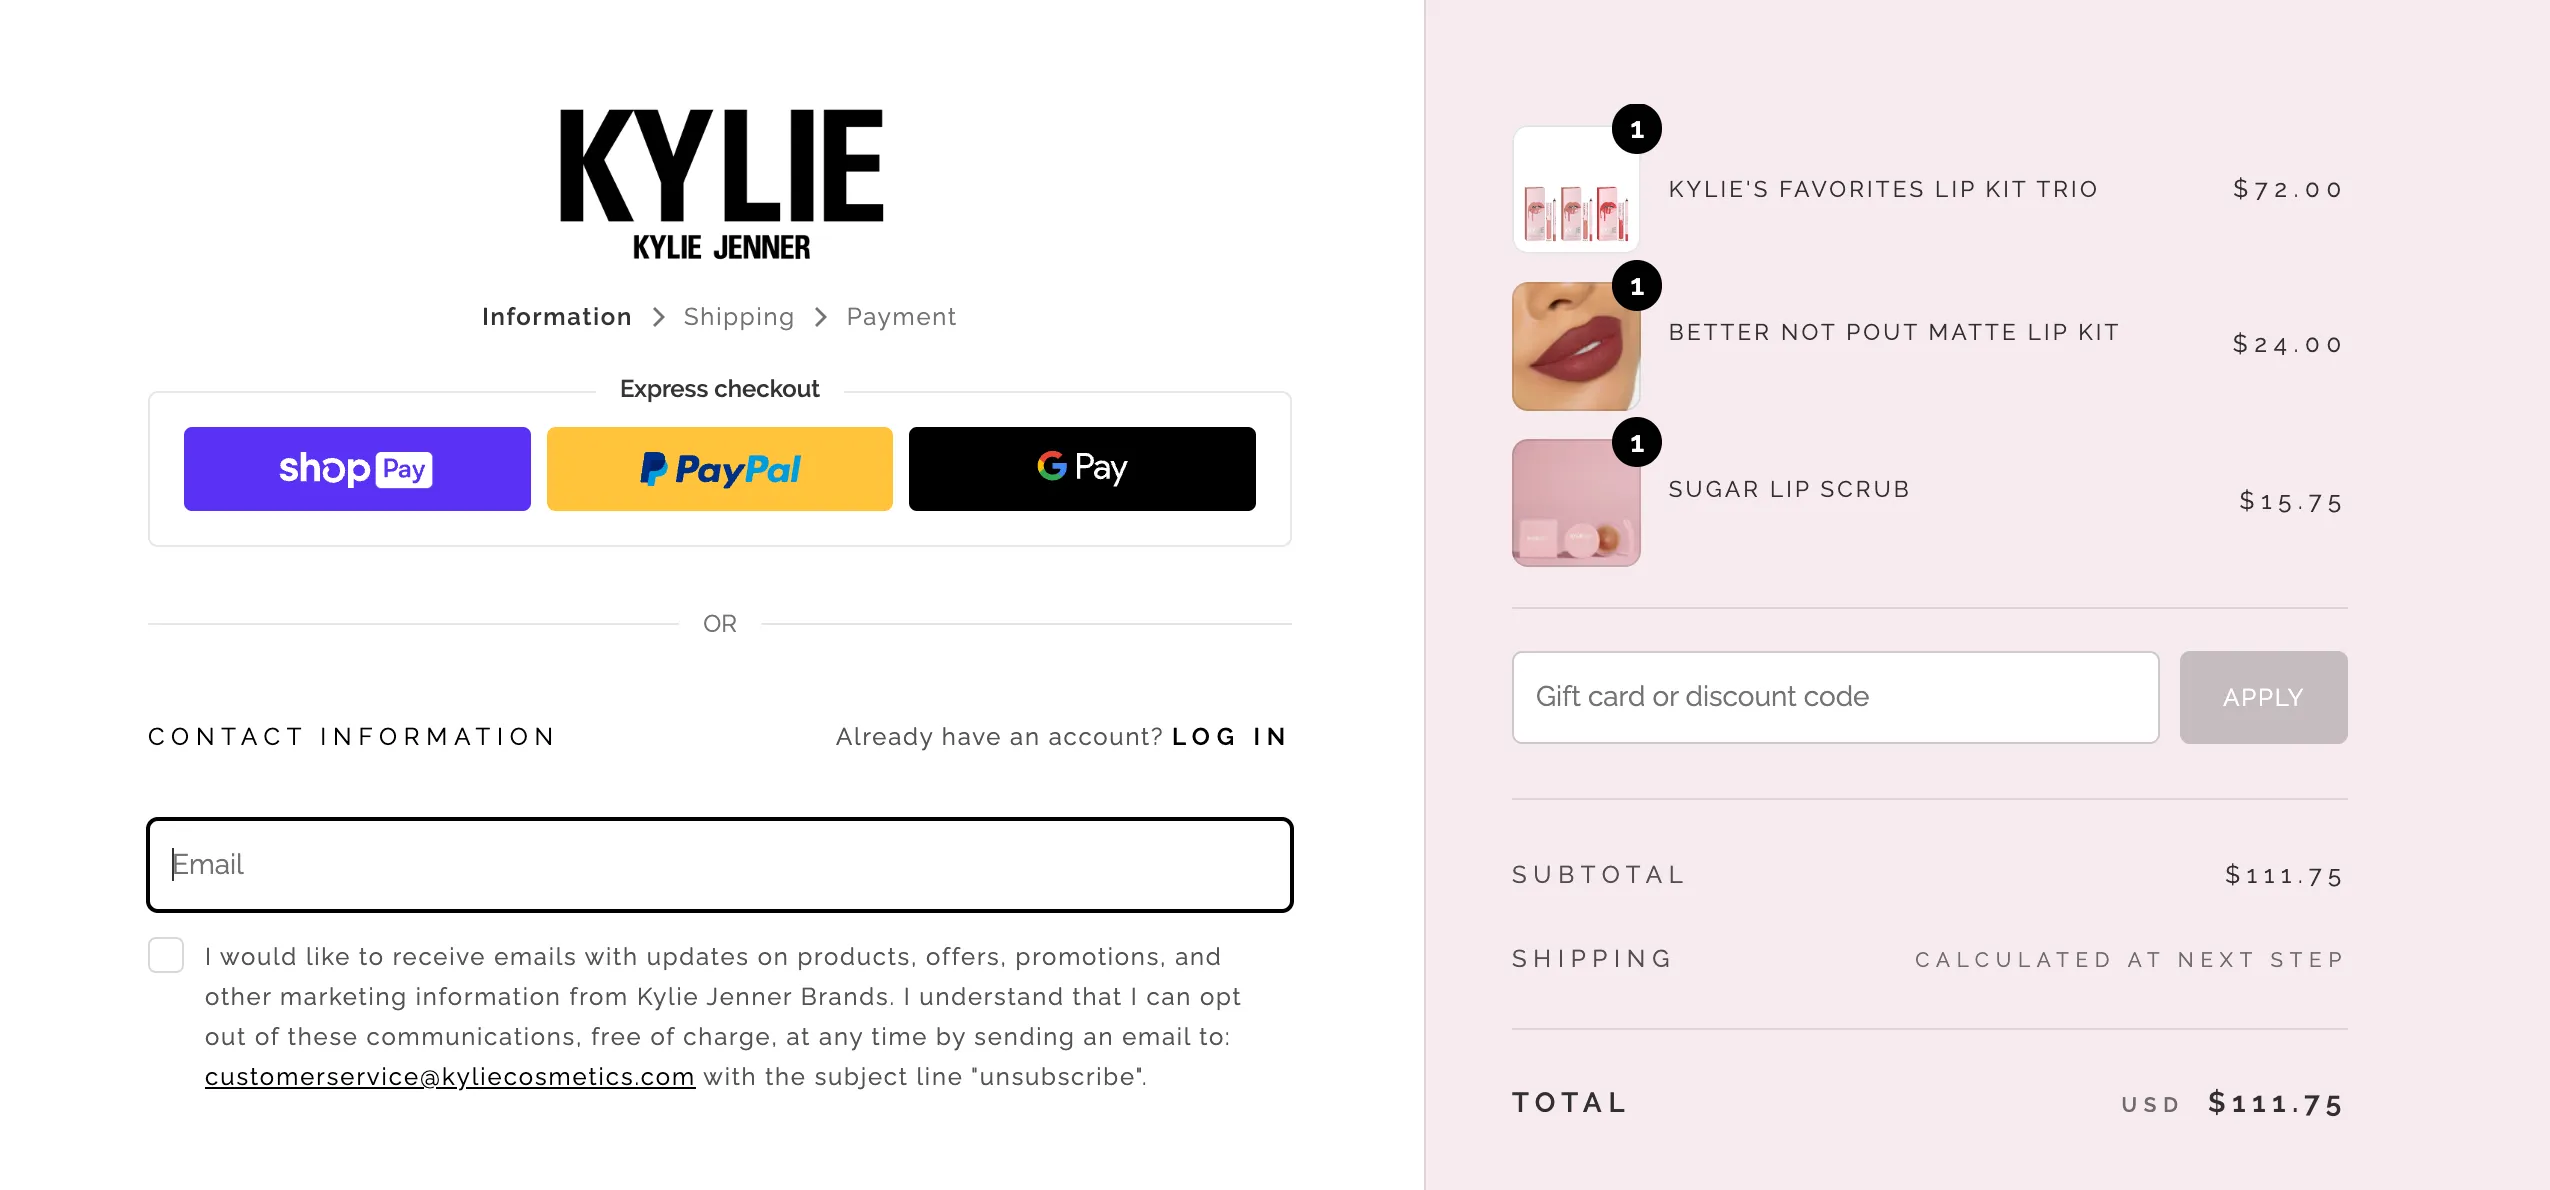
You can further configure and customize your Checkout based on your business strategies. The ultimate goal here is to simplify and deliver a comfortable checkout experience so that you can optimize your leads and boost your sales!
Shipping and delivery
As your customers reach the checkout page, you may need to collect their shipping information. To configure, on Shopify admin panel, find Settings > Shipping and delivery.
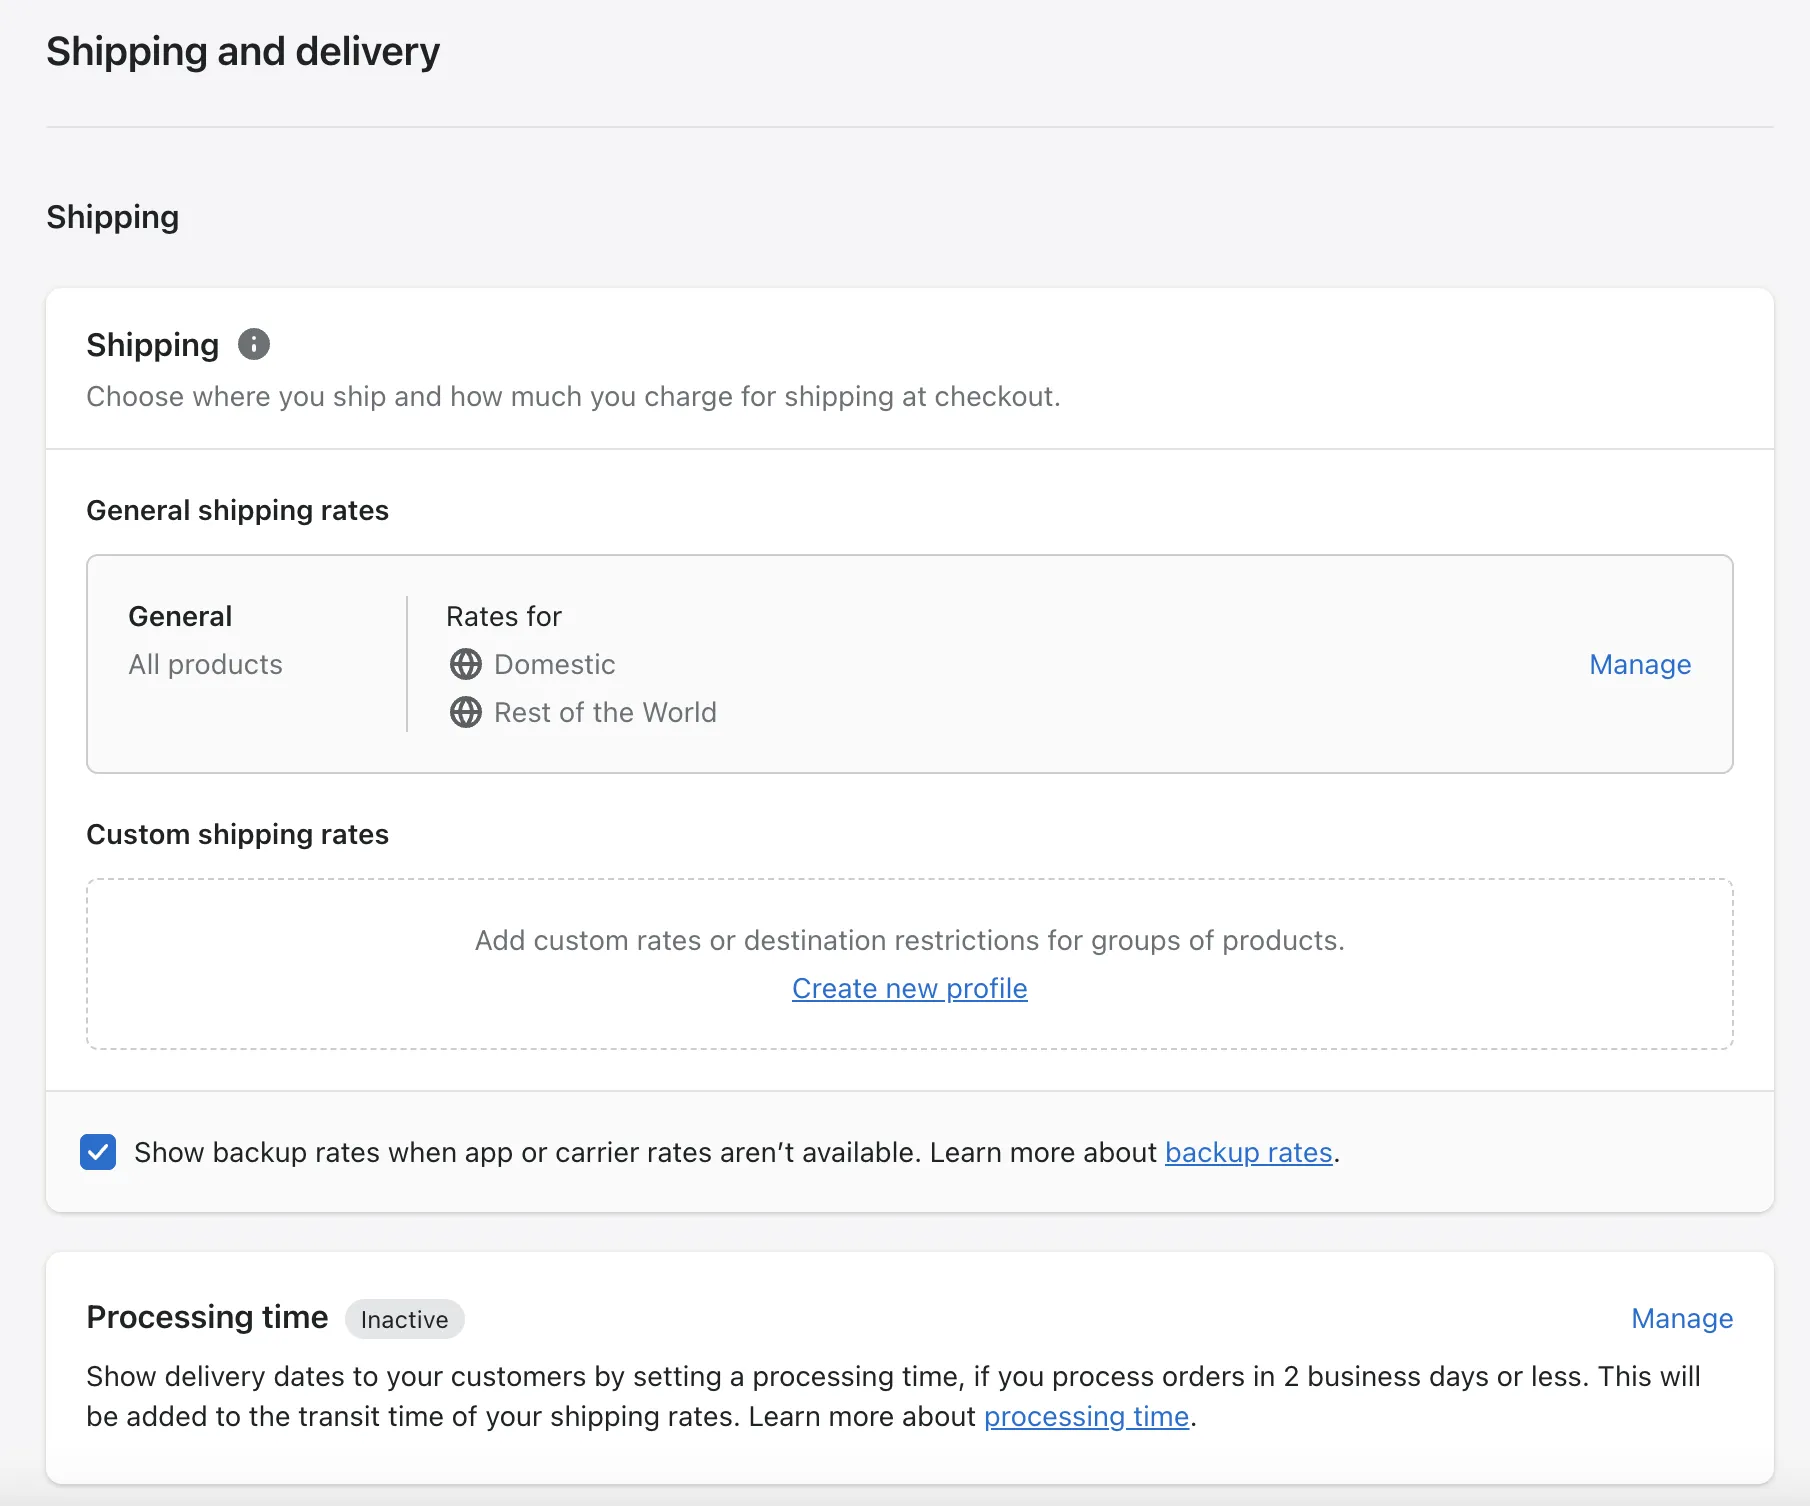
Before configuring and setting up shipping, it’s crucial to know about different shipping carriers and different shipping rates (you can check it out here). After that, you may get insight into how Shopify shipping works, and you’re able to set up general shipping rates and unique shipping rates.
Here are the things you need to meticulously set up when you start a Shopify store:
- Shipping (General shipping rates & Custom shipping rates)
- Local Delivery
- Local Pickup
- Shipping labels
- Invoice
- and many more
This information is essential for delivery. You surely do not want your parcels to get lost, and your customer may not need to wait for long. Once again, optimize your shipping to enhance customer satisfaction with your service.
You shouldn’t miss: How Does Shopify Shipping Work? A Complete Guide for You
Taxes and duties
On the admin dashboard of Shopify, find Settings > Taxes and duties.
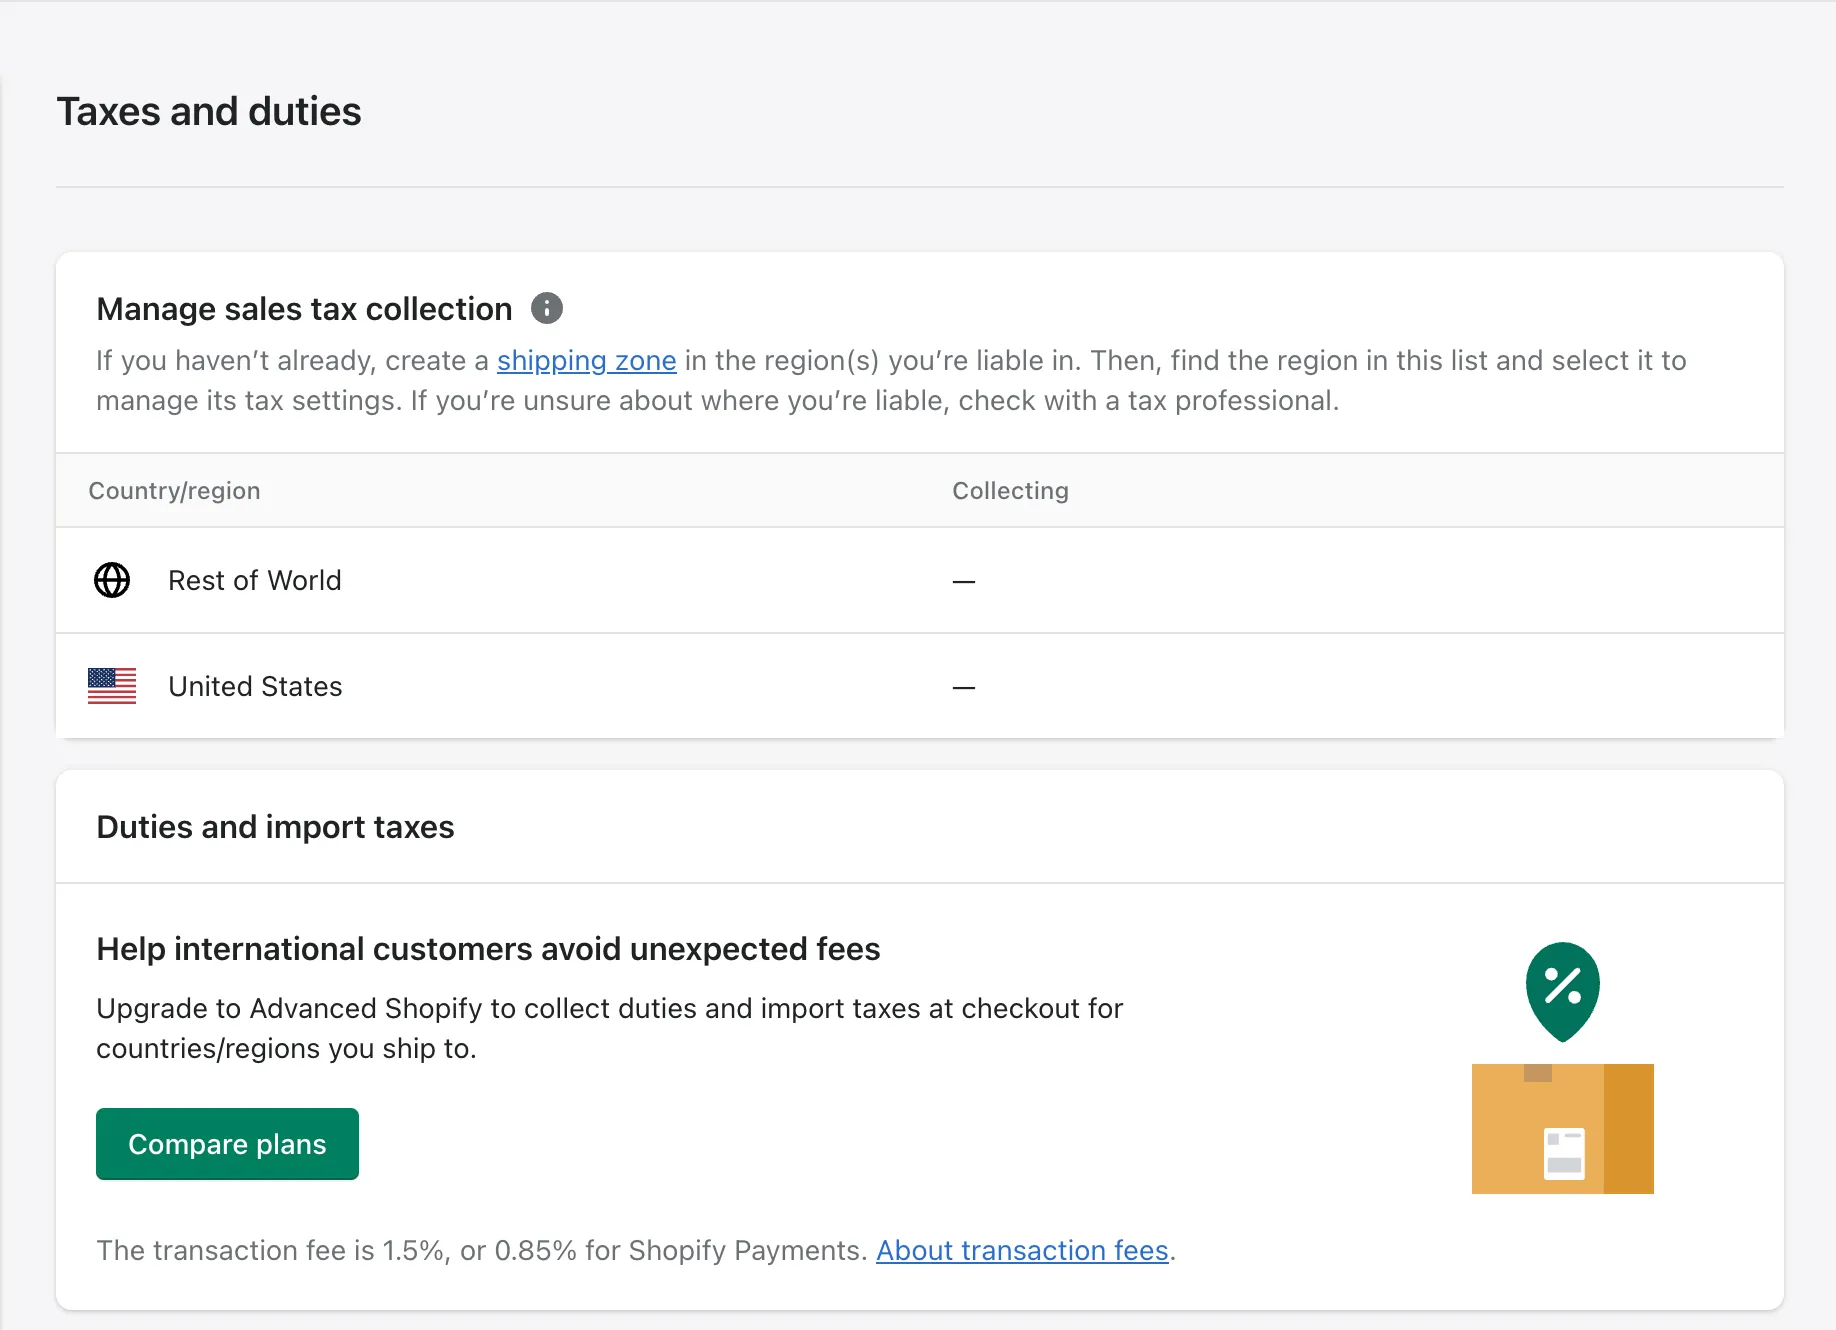
Most countries will require you to generate a tax on product sales and remit it back to the government. Luckily, Shopify simplifies the process by solving all common tax calculations. It applies default rates that need your confirmation or modification.
Let’s craft more information with: How to Charge Shopify Sales Tax on Your Store?
#8 Add sales channels
On your admin panel, find Settings > Apps and sales channels.
This is optional, you can sell via Shopify solely, or you can leverage your sales by connecting to other sales channels. We suggest you integrate Shopify with marketplaces like Amazon or Etsy for multichannel selling. You can look for a great source of sales channels on Shopify app market.
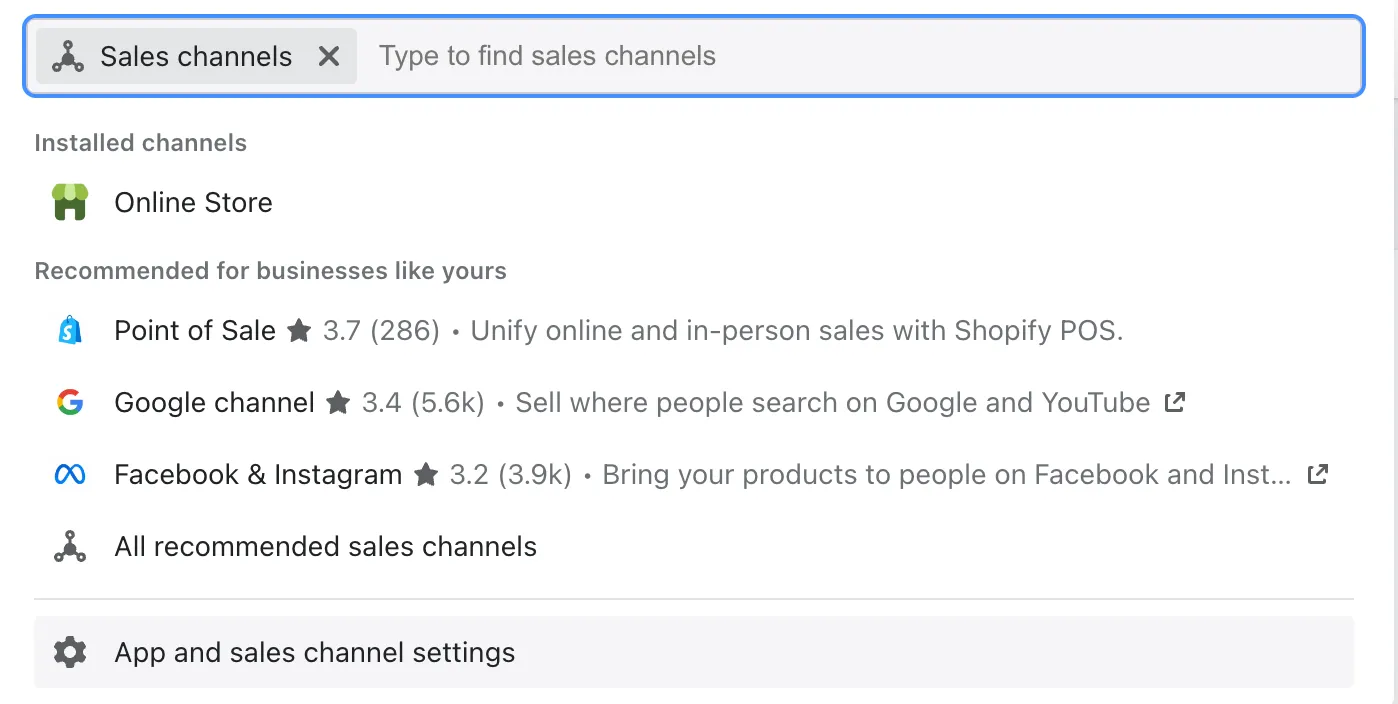
If you have an offline store, let’s add Shopify POS to create a seamless sell-in-person experience.
Learn more: Shopify POS System – Everything You Need to Know
#9 Add essential Shopify apps
On your admin panel, find Settings > Apps and sales channels.
For a successful and optimal eCommerce Shopify store, you may need more apps rather than just using the default features of Shopify. That does not mean Shopify apps are not good, but they’re not enough for you to scale and sell your business.
Go to Shopify App Store and explore thousands of apps & add-ons for your Shopify store.
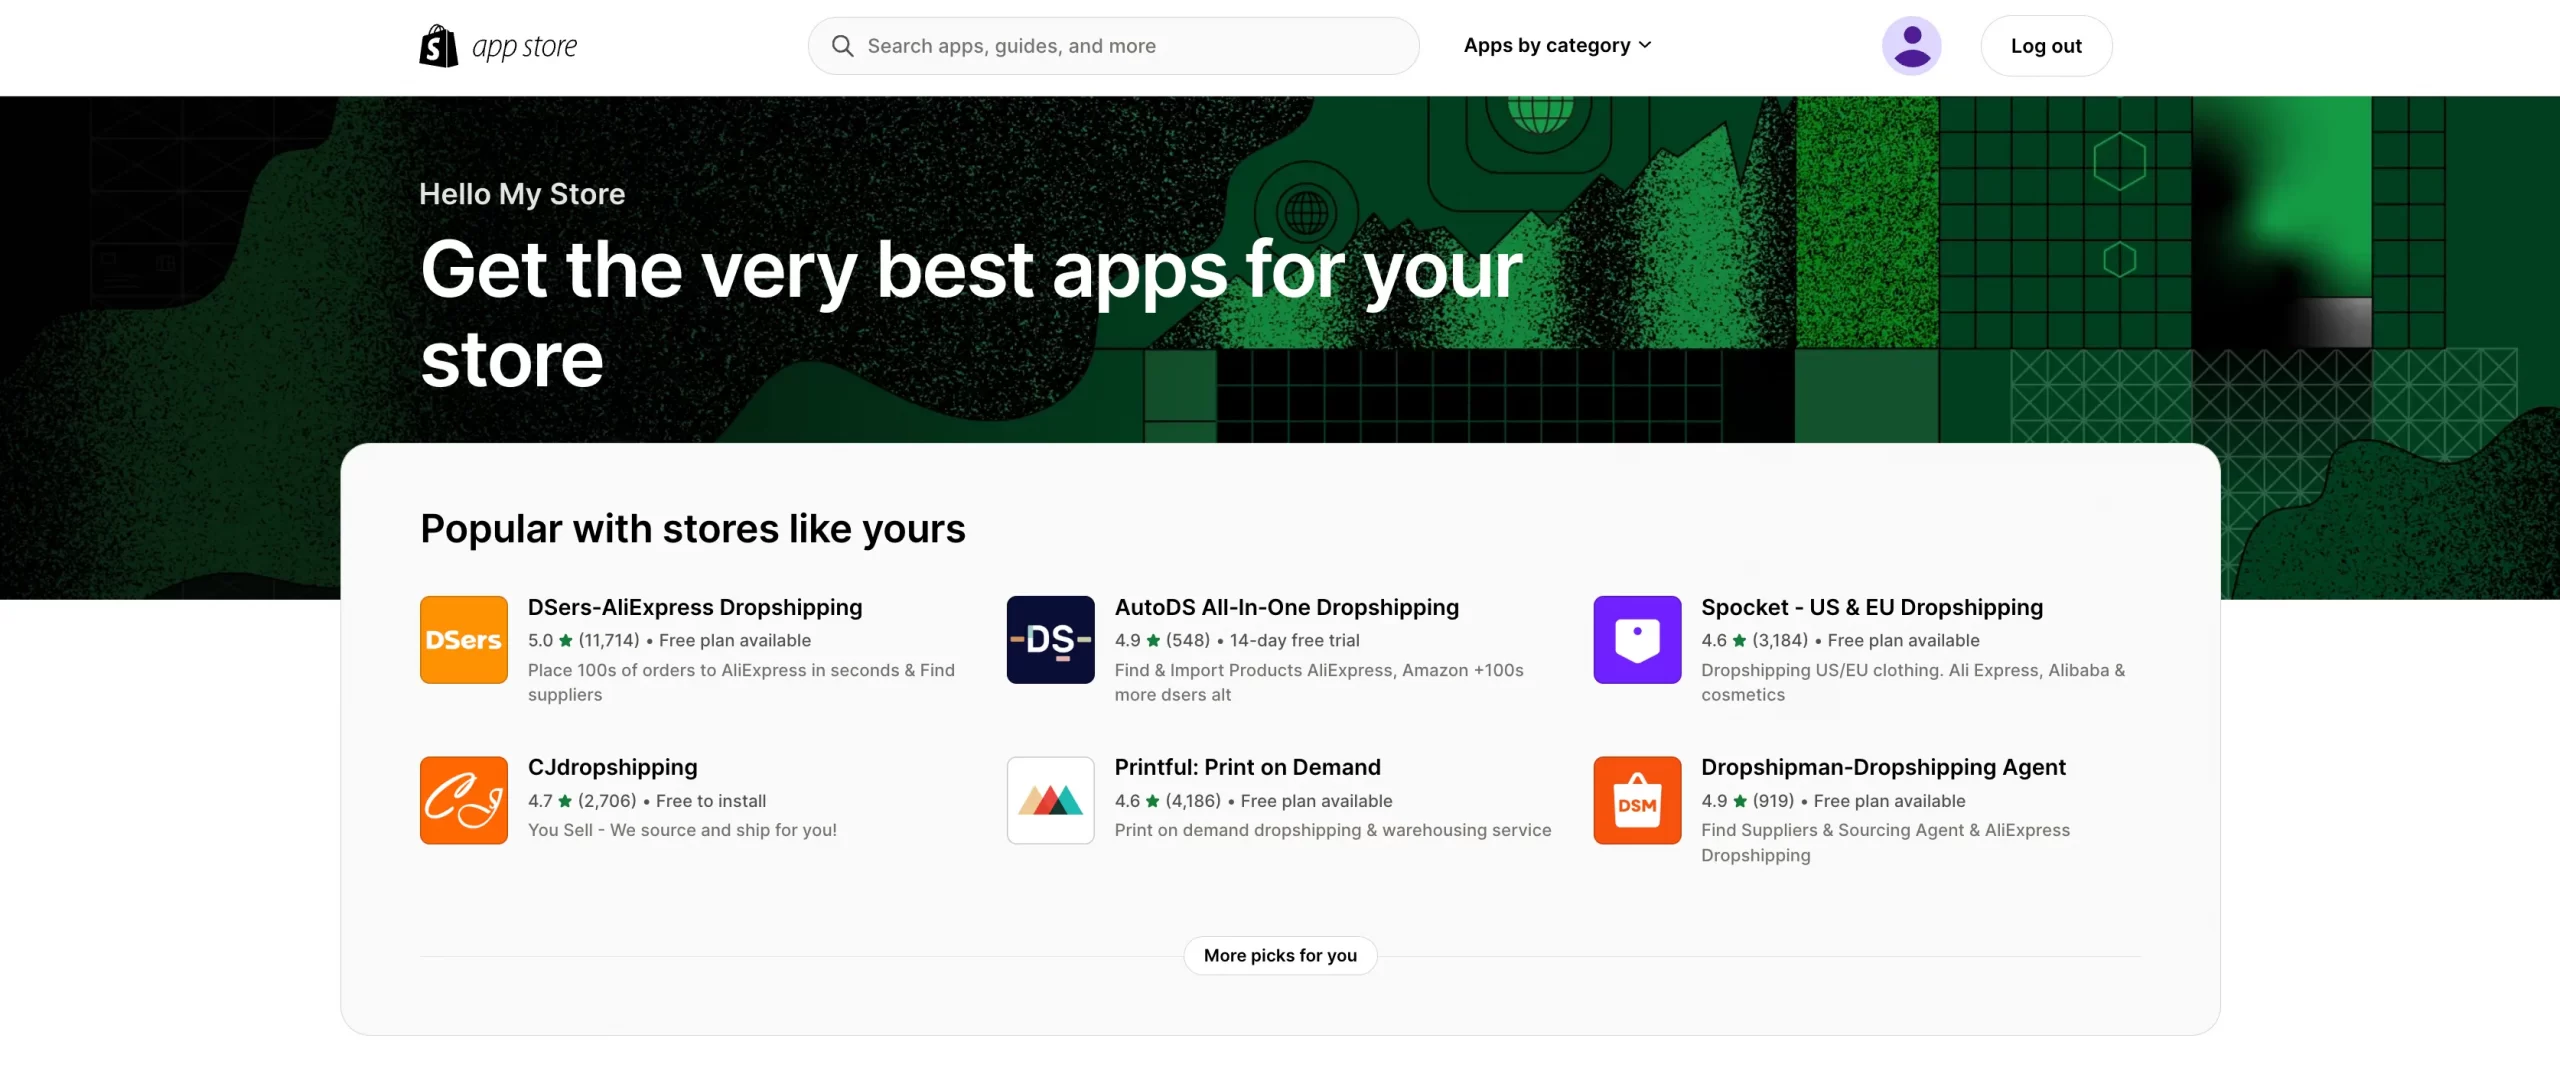
Basically, you may need apps related to Support, SEO & Marketing. With the booming of dropshipping, you may also want to add drop ship features to your Shopify eCommerce store.
These Shopify apps might be helpful for you:
#10 Test Shopify store
Congrats! You’ve made it to nearly the final step on how to start a Shopify store.
Now, you may need to test some orders before they are officially sold. On the Shopify admin panel, find Settings > Payments.
Find and click on See all other providers (as seen in the image below).
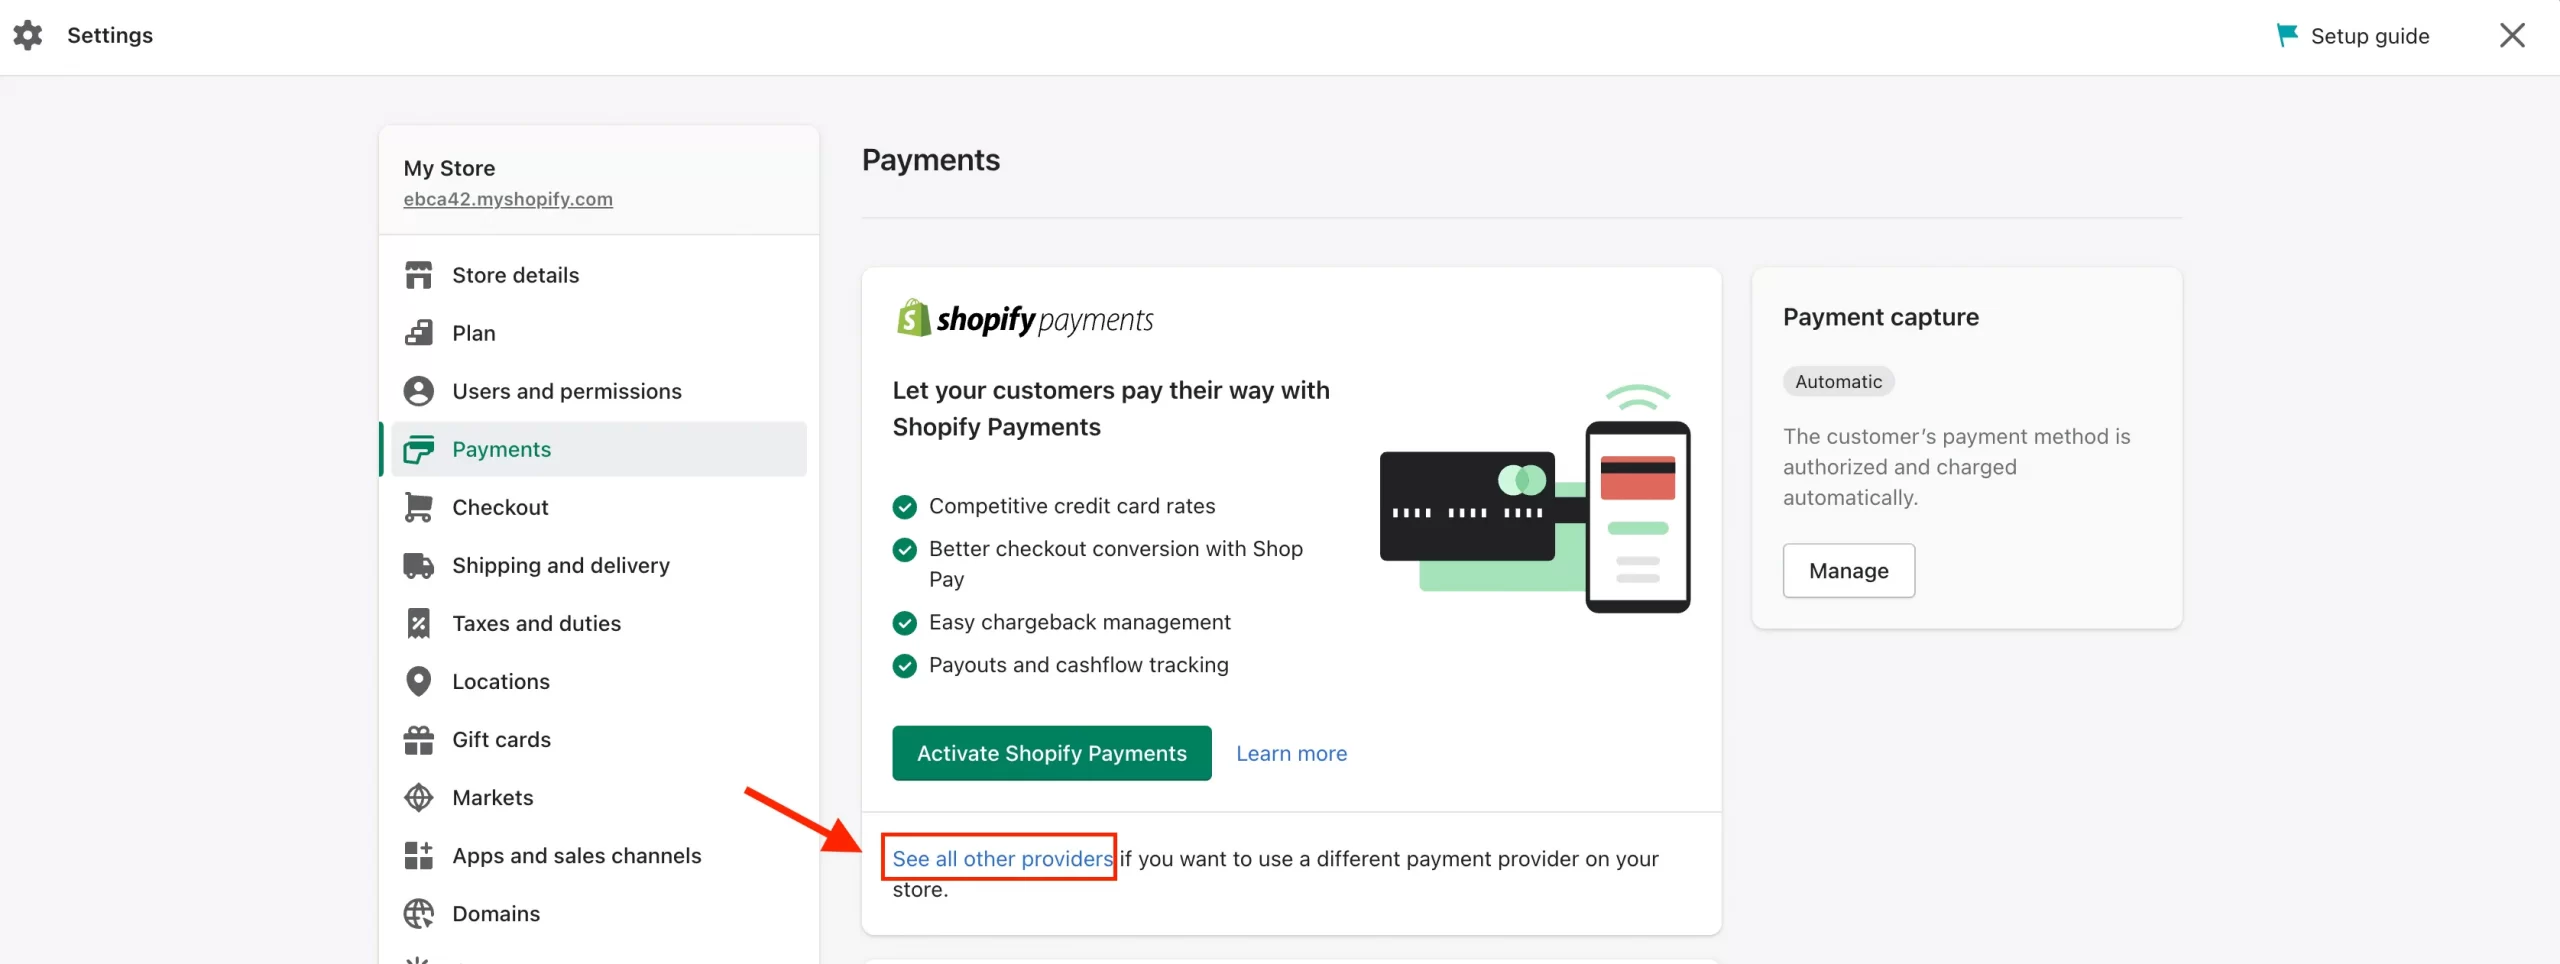
When clicking in, you will get into the Third-party payment providers section. For testing, click on ‘(for testing) Bogus Gateway‘ and activate it.
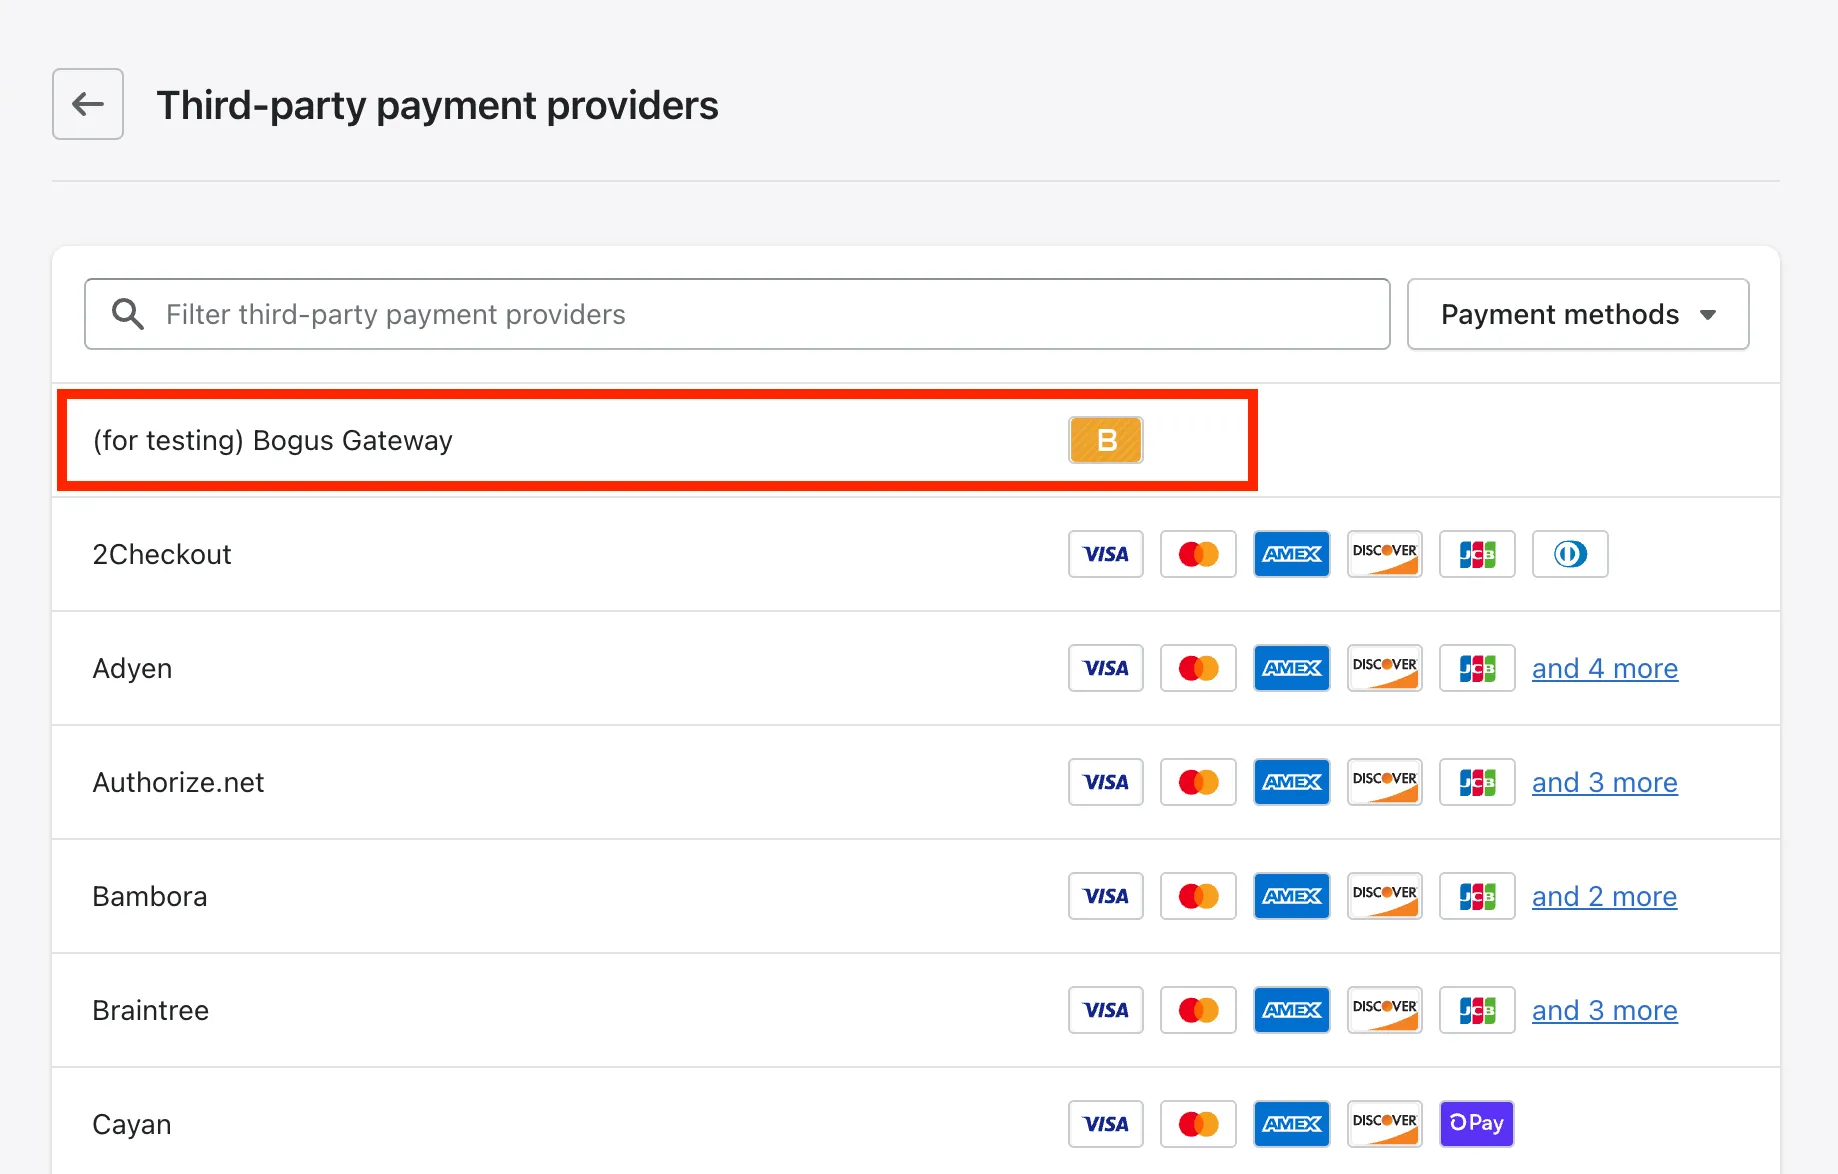
Now, you can get access to your store and act like a customer to test how your Shopify store payment and order work. Should any problems happen here? You can test it once again or contact the support team for more information!
Hey! Why don’t you let Litos assist you with Shopify store setup all the way? Litos – certified Shopify Expert has 10+ years in the field and can ensure that your Shopify store works properly and seamlessly.
#11 Pick a plan & Launch your Shopify store
Are you ready to start your online business?
Is the answer yes? You’ve made it to the final step! It’s time to pick a Shopify plan and get your store visible to everybody.
Currently, there are 6 pricing plans: Shopify Starter, Shopify Lite, Basic Shopify, Shopify, Advanced Shopify, and the enterprise plan – Shopify Plus.
To find out more about each Shopify plan and decide which plan suits you the most, you can visit: Shopify Pricing – Which Pricing Plans is Best?
[wptb id=48766]
After your 3-day free trial, you only have to pay $1/month for 3 months when choosing an annual plan. If you want more functions to support your business, consider a higher Shopify pricing tier.
Hey! Congratulations! You’ve got an amazing Shopify store now, and let’s impress your customers with your awesome selling ideas!
Why Shopify? Shopify in a Nutshell!
What is Shopify?
Let’s discover more about this eCommerce giant – Shopify. This is a powerful eCommerce platform with more than 4 million websites worldwide. Solely in the US, Shopify accounts for the largest eCommerce platform market share, with 25% of businesses using it to power their eCommerce store.
Grasp more insights about this eCommerce platform with:
Why choose Shopify for eCommerce?
Shopify is easy to use!
I must say that Shopify is one of the most user-friendly platforms in the world. Even if you start off by doing it yourself, this platform is rather simple to use, and it requires no specific technical skill or knowledge.
Shopify will provide you with:
- Drag-and-drop online store builder
- Straightforward admin dashboard
- Detailed guidelines to set up the store
And those are the reasons why Shopify is a great option to start your online business.
Shopify has dynamic support!
I have no doubt that Shopify comes with best-of-the-class support for its customers.
When you start a Shopify store, this eCommerce platform offers ongoing assistance with setting up your website. The support staff is available around-the-clock in multiple languages by live chat, email, or even phone via Shopify Help Center.
Shopify streamlines the checkout process!
To increase sales, the checkout process must be well simplified and optimized.
Luckily, Shopify offers Shop Pay which speeds up the online checkout process. Additionally, you can utilize 100+ payment gateways and various payment methods and currencies.
Shopify is highly secured!
Your eCommerce website’s data and content are kept on a server database by your web host. For visitors to be able to access your online store, you need web hosting. You are worry-free when Shopify offers secure hosting in any pricing plan, so you can start a Shopify store without worrying about hosting service and security!
5 Famous Shopify Stores to Inspire Your Business
The below Shopify site examples are all great for you to get inspired. Let’s steal some excellent store design tips to learn how to start a successful Shopify store!
#1 Gymshark
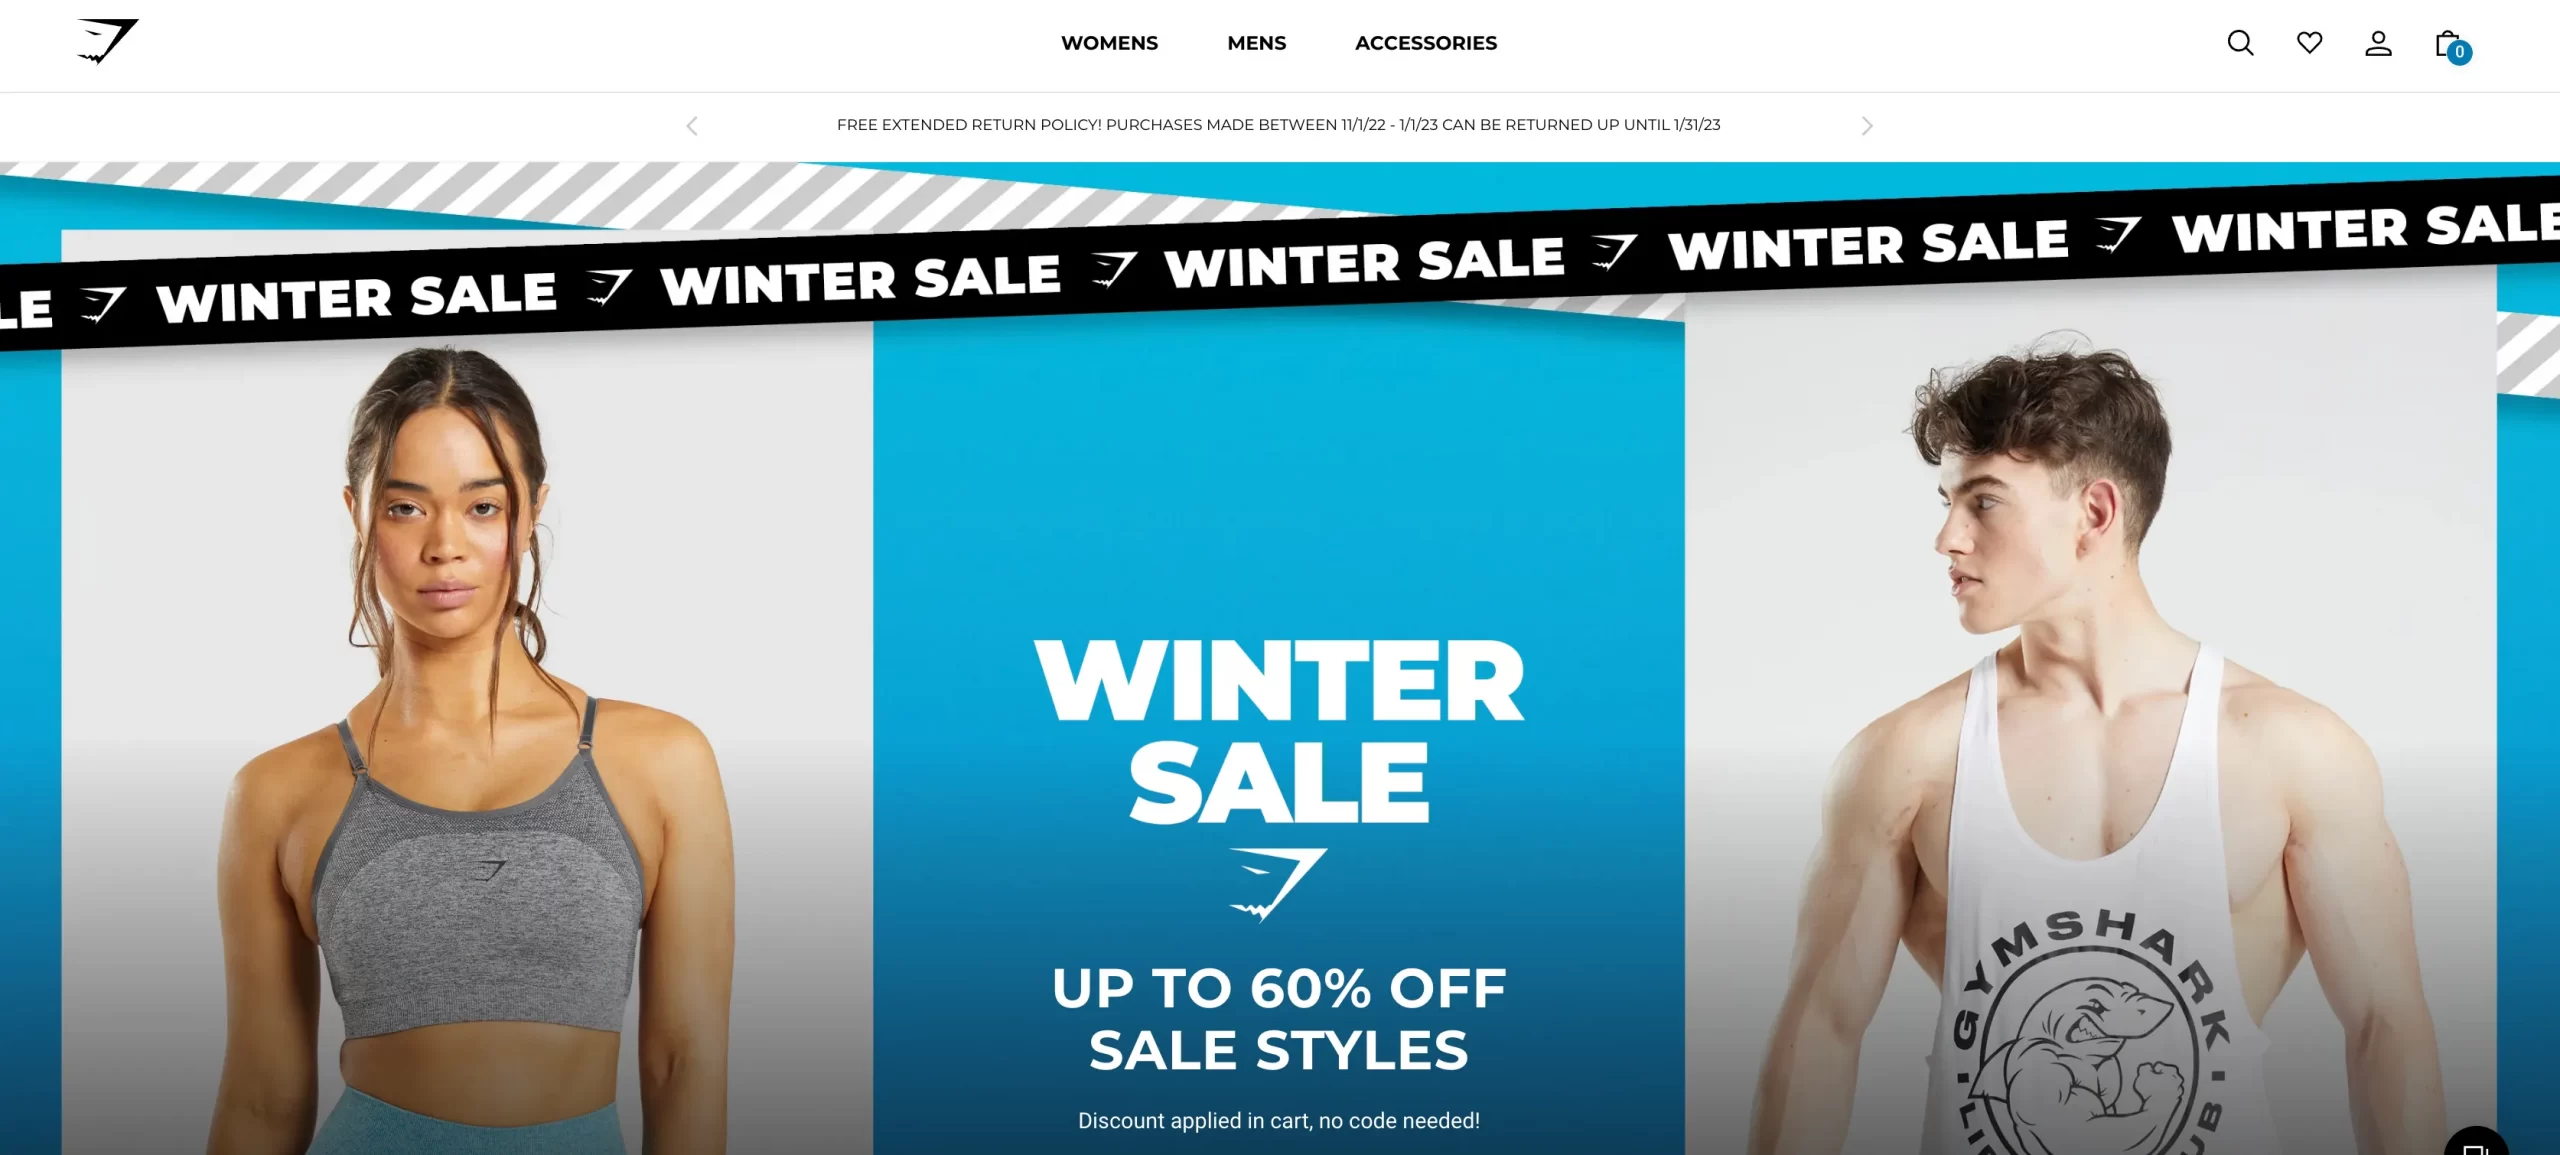
Does Gymshark use shopify?
Yes! Being powered by Shopify Plus, Gymshark is a very successful store that is moving its business model from dropshipping to a private label.
What can you learn from Gymshark?
- Clear website navigation
- Impressive product collections
- Amazing support hub
Do you know that Gymshark originally started on Magento? After facing issues with running and scaling the store, Gymshark decided to migrate to Shopify Plus.
Want to migrate from Magento to Shopify?
If you are intending to migrate from Magento to Shopify, LitExtension offers an excellent migration service that helps you transfer your data from the current eCommerce platform to a new one accurately with utmost security.
#2 ColourPop Cosmetics
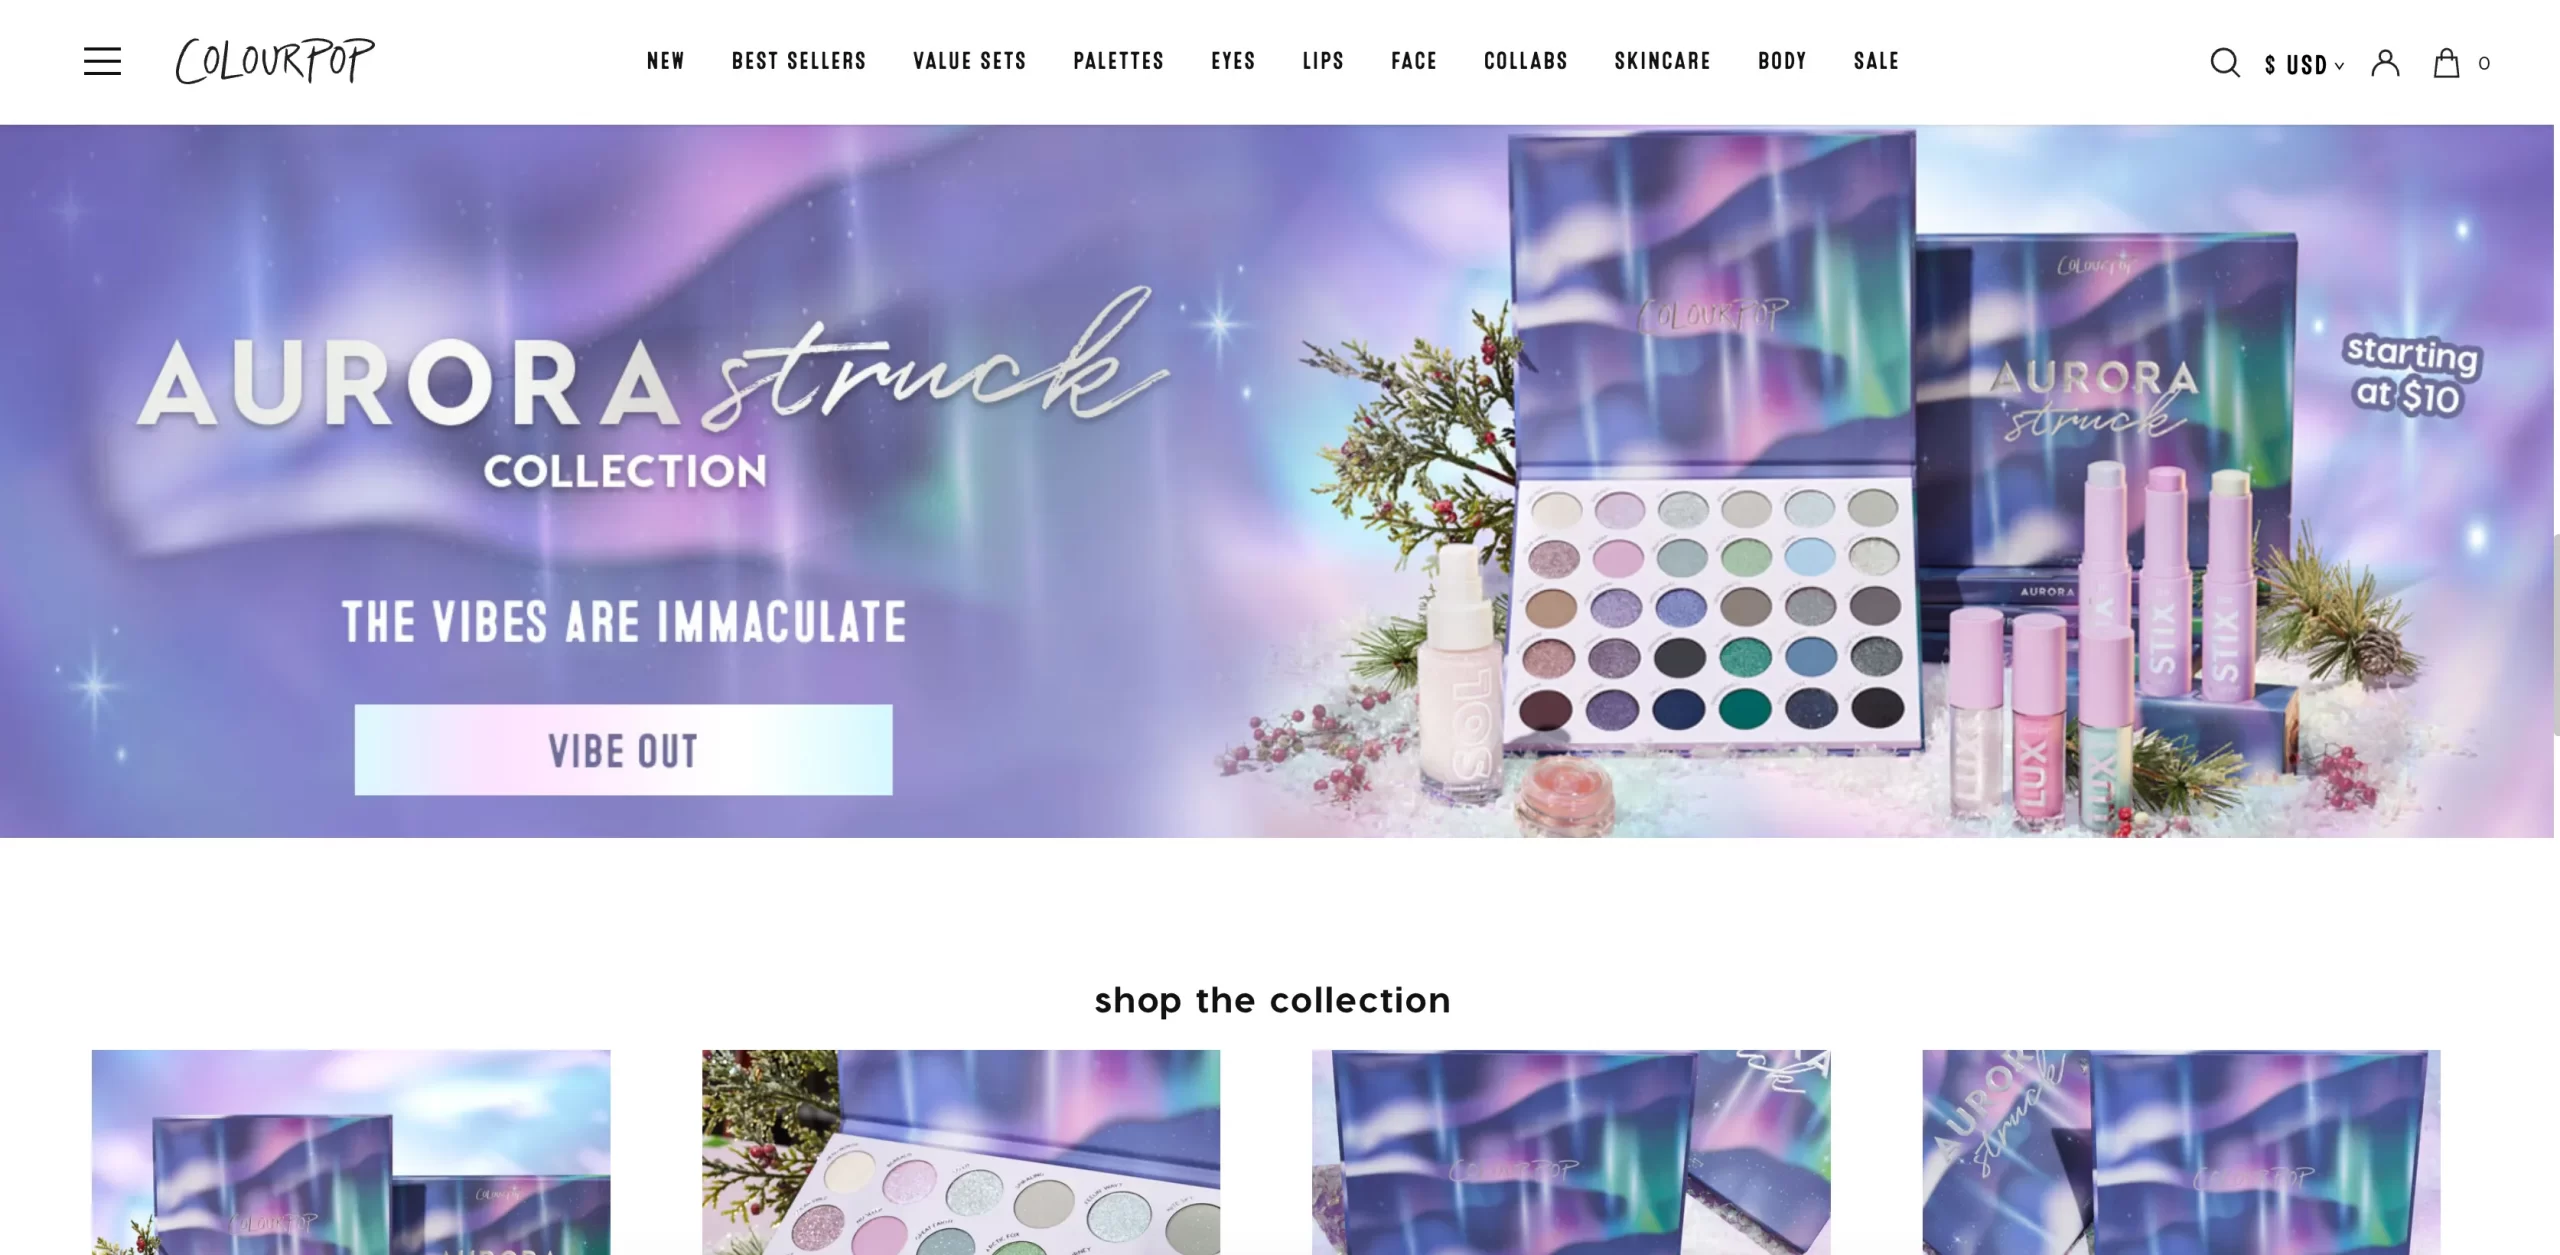
ColourPop Cosmetics is a beauty cosmetics company in the US.
What can you learn from ColourPop Cosmetics?
- Robust review system
- Effective product badges
- Easy-to-follow checkout page
#3 Jeffree Star Cosmetics
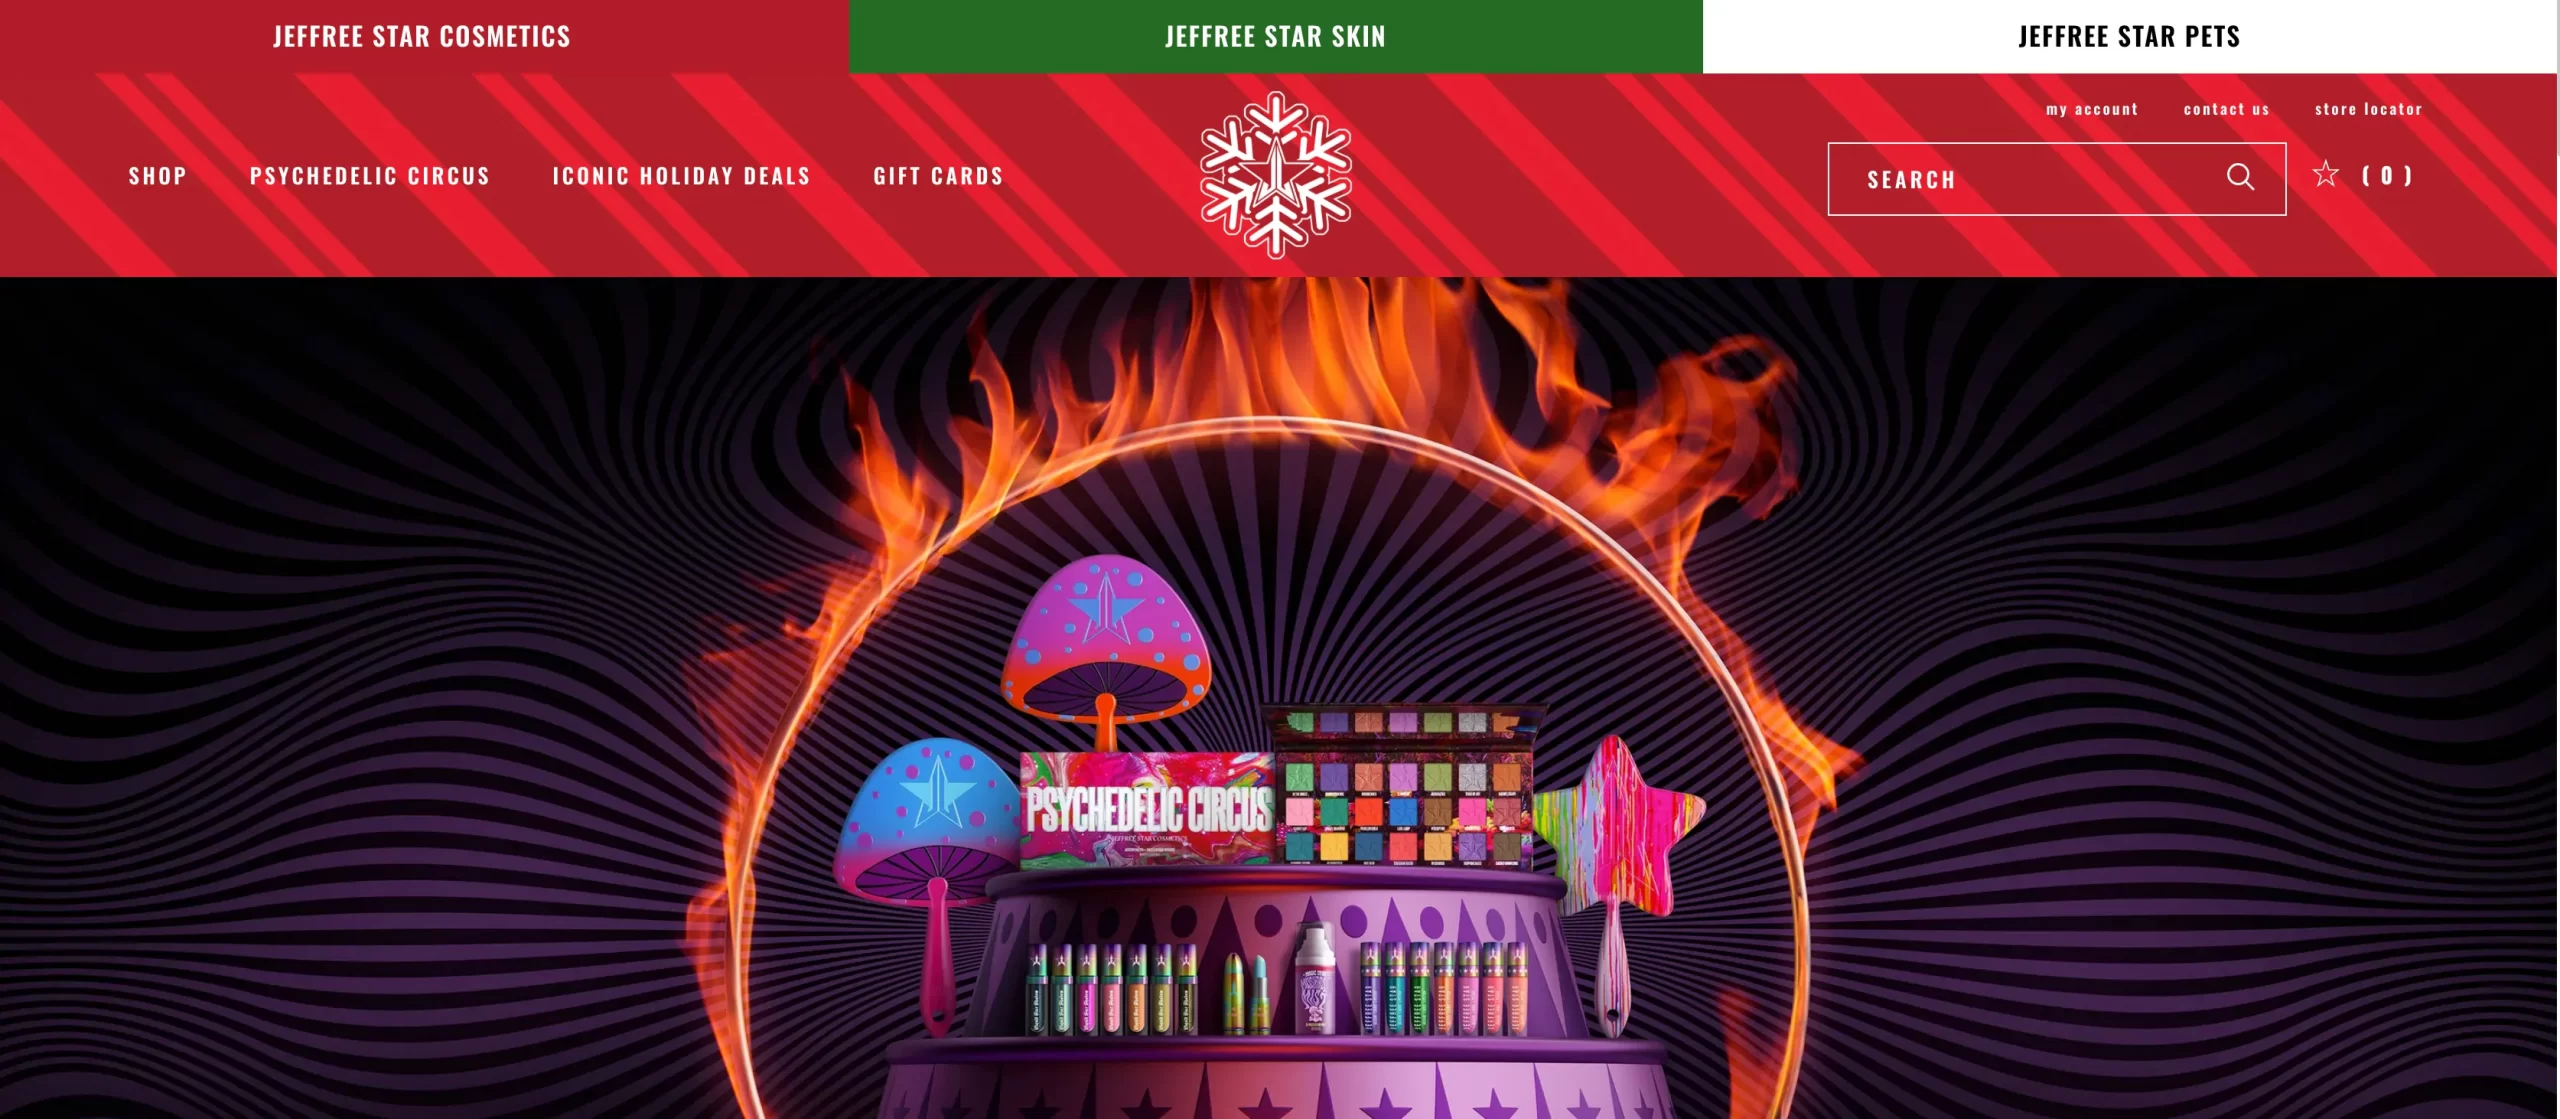
Jeffree Star is a famous make-up artist and is the founder and owner of Jeffree Star Cosmetics.
What can you learn from Jeffree Star Cosmetics?
- Clear website navigation
- Impressive sliders
- Great product suggestions
#4 Decathlon
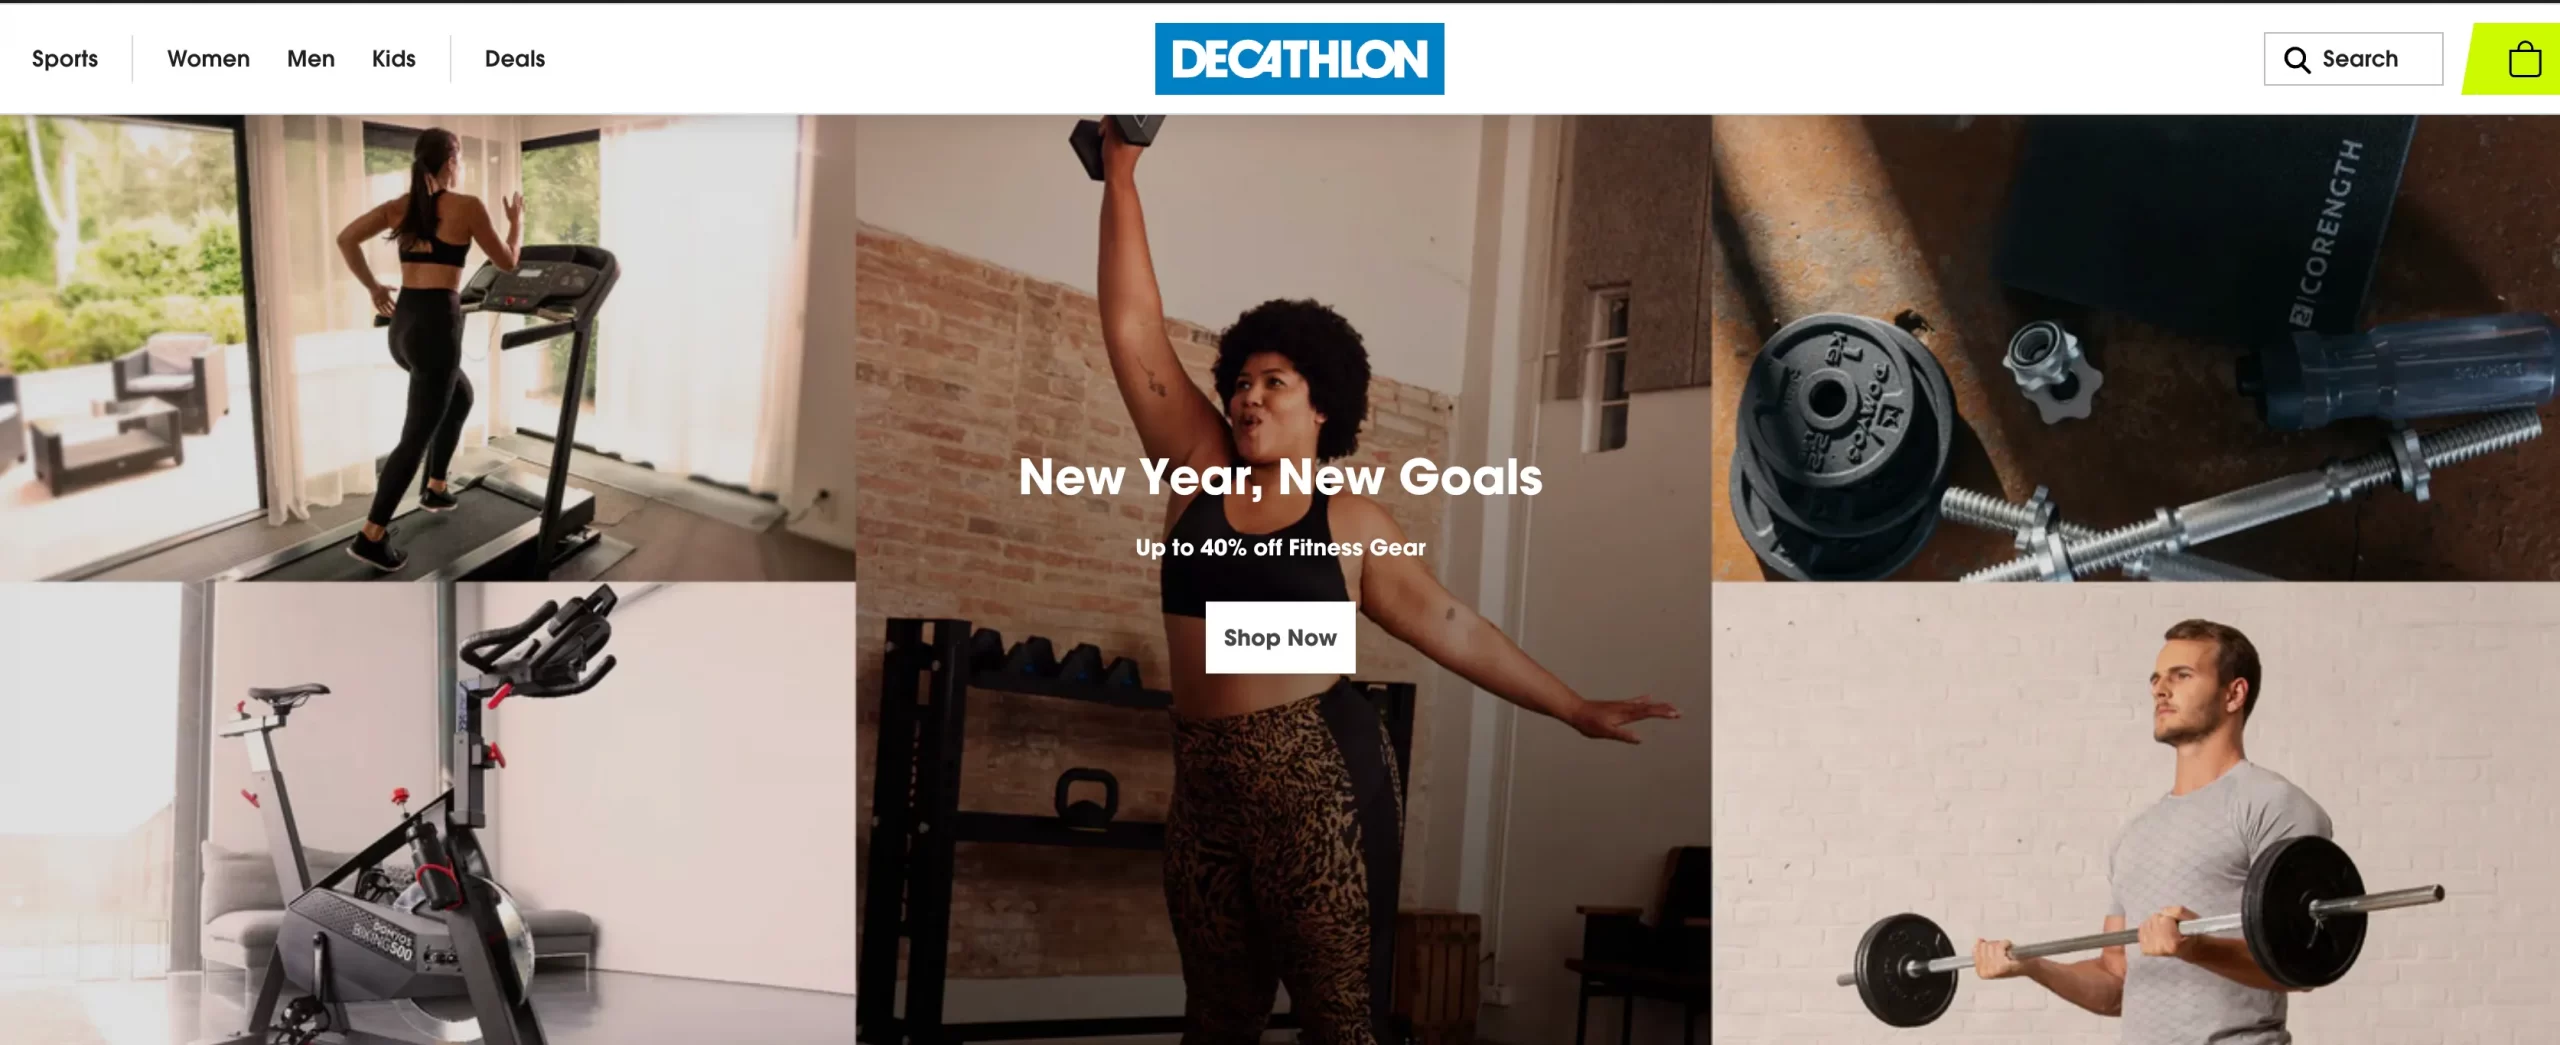
Decathlon is one of the most popular sporting goods retailers.
What can you learn from Decathlon?
- Clear website navigation
- Easy-to-follow product collection
- Excellent source of articles & case studies
#5 Kylie Cosmetics by Kylie Jenner
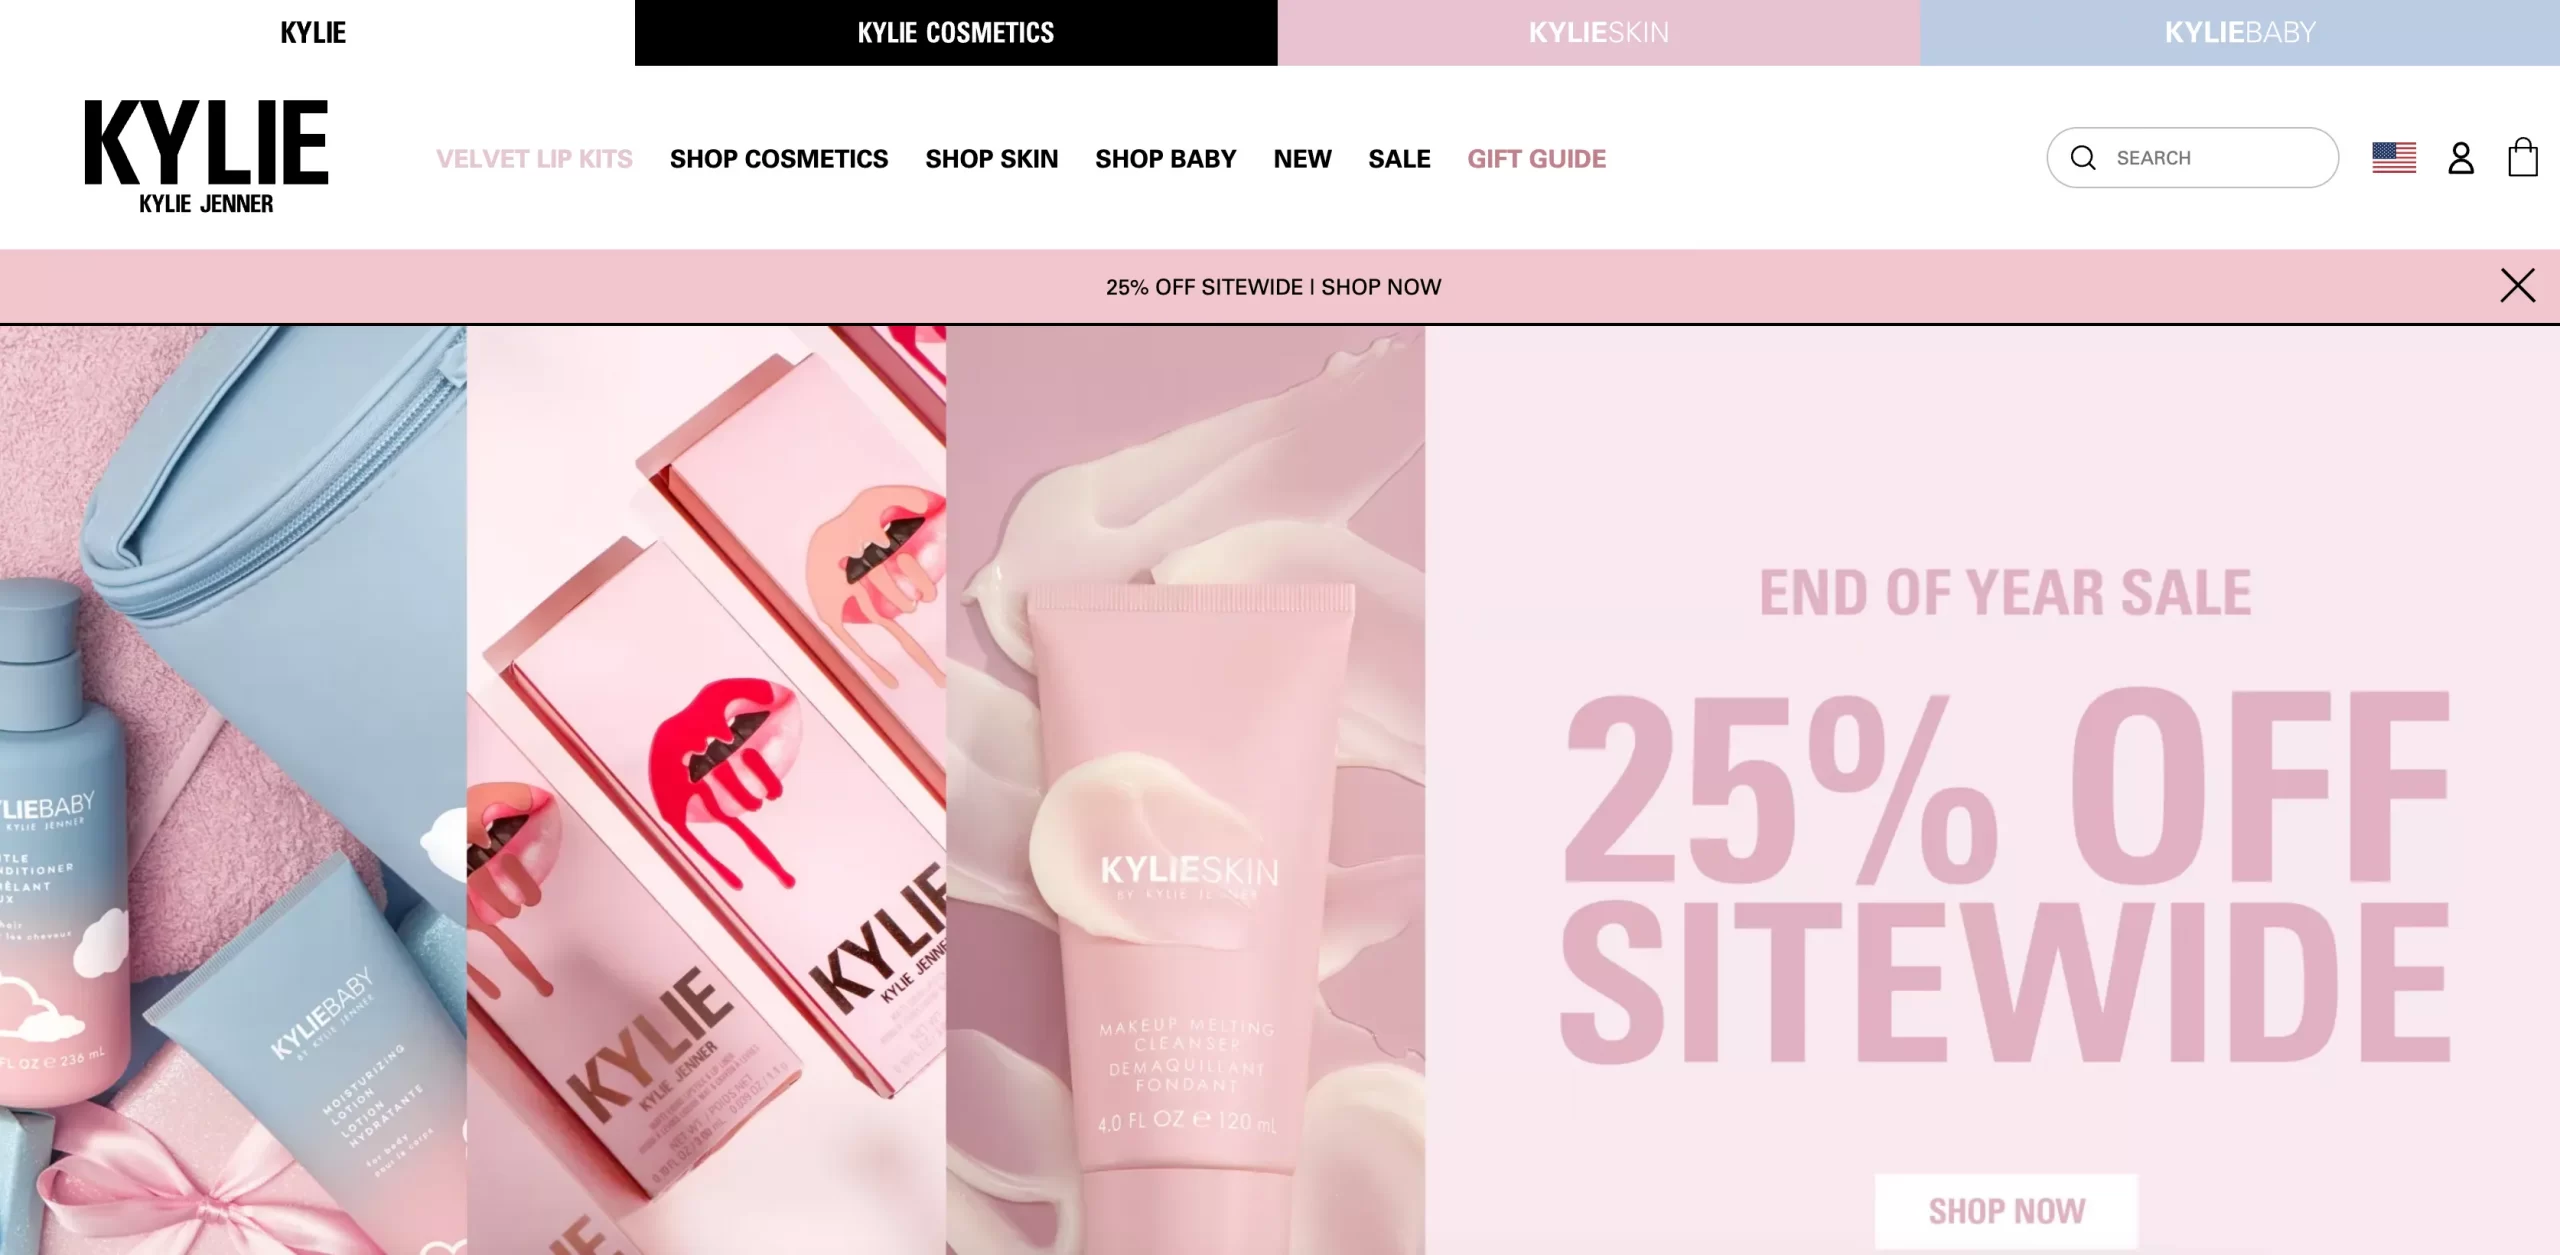
Kylie Cosmetics is a famous cosmetics brand by Kylie Jenner.
What can you learn from Kylie Jenner shopify theme design?
- Clear website navigation
- Personalized product recommendations
- Stunning product collections displayed
Learn more: Shopify store examples – 50+ stores to get inspired
Start a Shopify Store – FAQs
[sp_easyaccordion id=”48311″]
Are You Ready to Create Your Shopify Store?
We hope that via this Shopify guide, you will get all the information about how to start a Shopify store in an attractive and optimized way. We also want to recommend Litos – A certified Shopify Expert, if you need further assistance building your Shopify store to attract customers. Let your store boom and prosper in 2023!
If you intend to move to Shopify, LitExtension is always here to help. With 10+ years of experience, LitExtension ensures your migration process is accurate, seamless, and secure. Should you need any assistance, don’t hesitate to contact our experts!
If you want to connect to thousands of eCommerce gurus to gain more insights and grab more eCommerce tips & tricks, let’s check out our LitExtension blog and join our dynamic eCommerce Facebook community.
Thank you for reading this far!
