WooCommerce is an open-source platform powered by WordPress that is packed with all the features needed when building your eCommerce store. If you decide to choose this platform, you might wonder how to perform WooCommerce CSV import to transfer your data to this platform seamlessly.
Fortunately, you have come to the right place. We have just provided the correct answer that you’ve been looking for. And one by one, these key points will be addressed in the article today:
- Manually import data to WooCommerce using CSV files
- Automatically perform WooCommerce CSV import
- Automatically transfer data to WooCommerce with 3-step migration
No more beating around the bush. Let’s dive into it!
WooCommerce CSV Import – What Is & Why You Need It?
What is WooCommerce CSV Import?
WooCommerce CSV Import refers to the process of importing product data into a WooCommerce store using a CSV file. It allows you to bulk upload and update product information such as titles, descriptions, prices, stock levels, images, and more.
WooCommerce CSV Import is a convenient and efficient way to manage large quantities of products or make mass updates to existing product data in a WooCommerce store. It enables you to save time and effort by automating the product data import process.
Which data can you import to WooCommerce?
When performing WooCommerce CSV Import, you can import various types of data to your WooCommerce store. Below, we state some examples of the data that can be imported to WooCommerce:
[wptb id=60124]
Why do you need WooCommerce CSV import?
Basically, CSV file migration is needed when you cannot transfer data between two eCommerce platforms directly. Or, here’s what our customers are sharing on why they choose WooCommerce CSV import:
- Your old store collapsed, leaving only CSV files.
- Prioritize data security by avoiding direct intervention from other parties.
- Organize your data without interfering with your live store performance.
- Your store operates on a cloud server instead of a dedicated server.
What to Prepare Before Importing Data to WooCommerce?
#1 Back up your data
If you’re using another eCommerce platform and about to import your data to WooCommerce, before getting started with the WooCommerce CSV import steps, it is important to back up your data.
With eCommerce platforms, there is a higher chance of losing your data due to server failure, website hacking, or after updates. Once this happens, everything will disappear in just a blink of an eye. And no one would want that!
To avoid the worst-case scenario, you should create a complete backup file that includes everything about your website, such as customers, orders, and products. In this way, you can save time fixing the website from scratch, from then ensuring the best shopping experience for customers.
Each platform has a different method of backup and recovery, so our advice is to follow its document to avoid any mistakes closely.
In case you are looking for guides on how to back up your data on different platforms, these articles might be helpful:
#2 Open your WooCommerce store
In order to perform WooCommerce CSV import, it is obviously necessary to have your own online store on this specific platform. For those of you who haven’t opened your business yet, follow our guidelines below:
Step 1: Set up WordPress
To start the process of WooCommerce CSV import data, you must choose a hosting provider for your website. This is where all data is stored, and going for the right one will greatly benefit your business in the long run. We recommend going with popular sites like Bluehost, SiteGround, and WordPress.com.
Once you have made up your mind about the hosting, download the WordPress package and install it manually following their detailed instructions. After that, pick out any theme that best describes your brand, then move on to the next session.
Step 2: Download WooCommerce
From your WordPress Dashboard, navigate to Plugins > Add New.
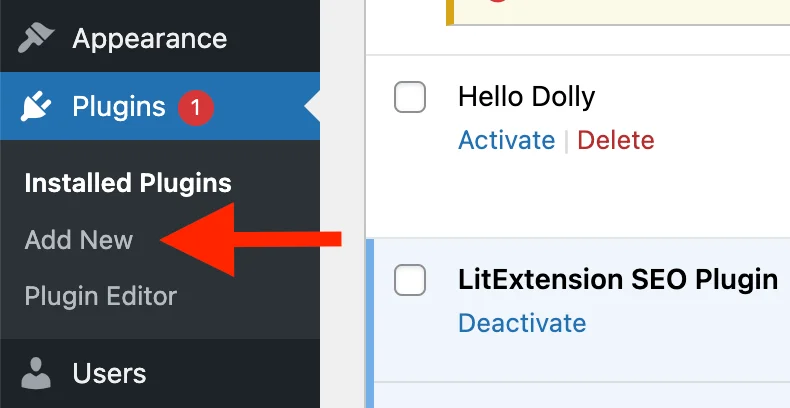
Then type “WooCommerce” into the search bar:
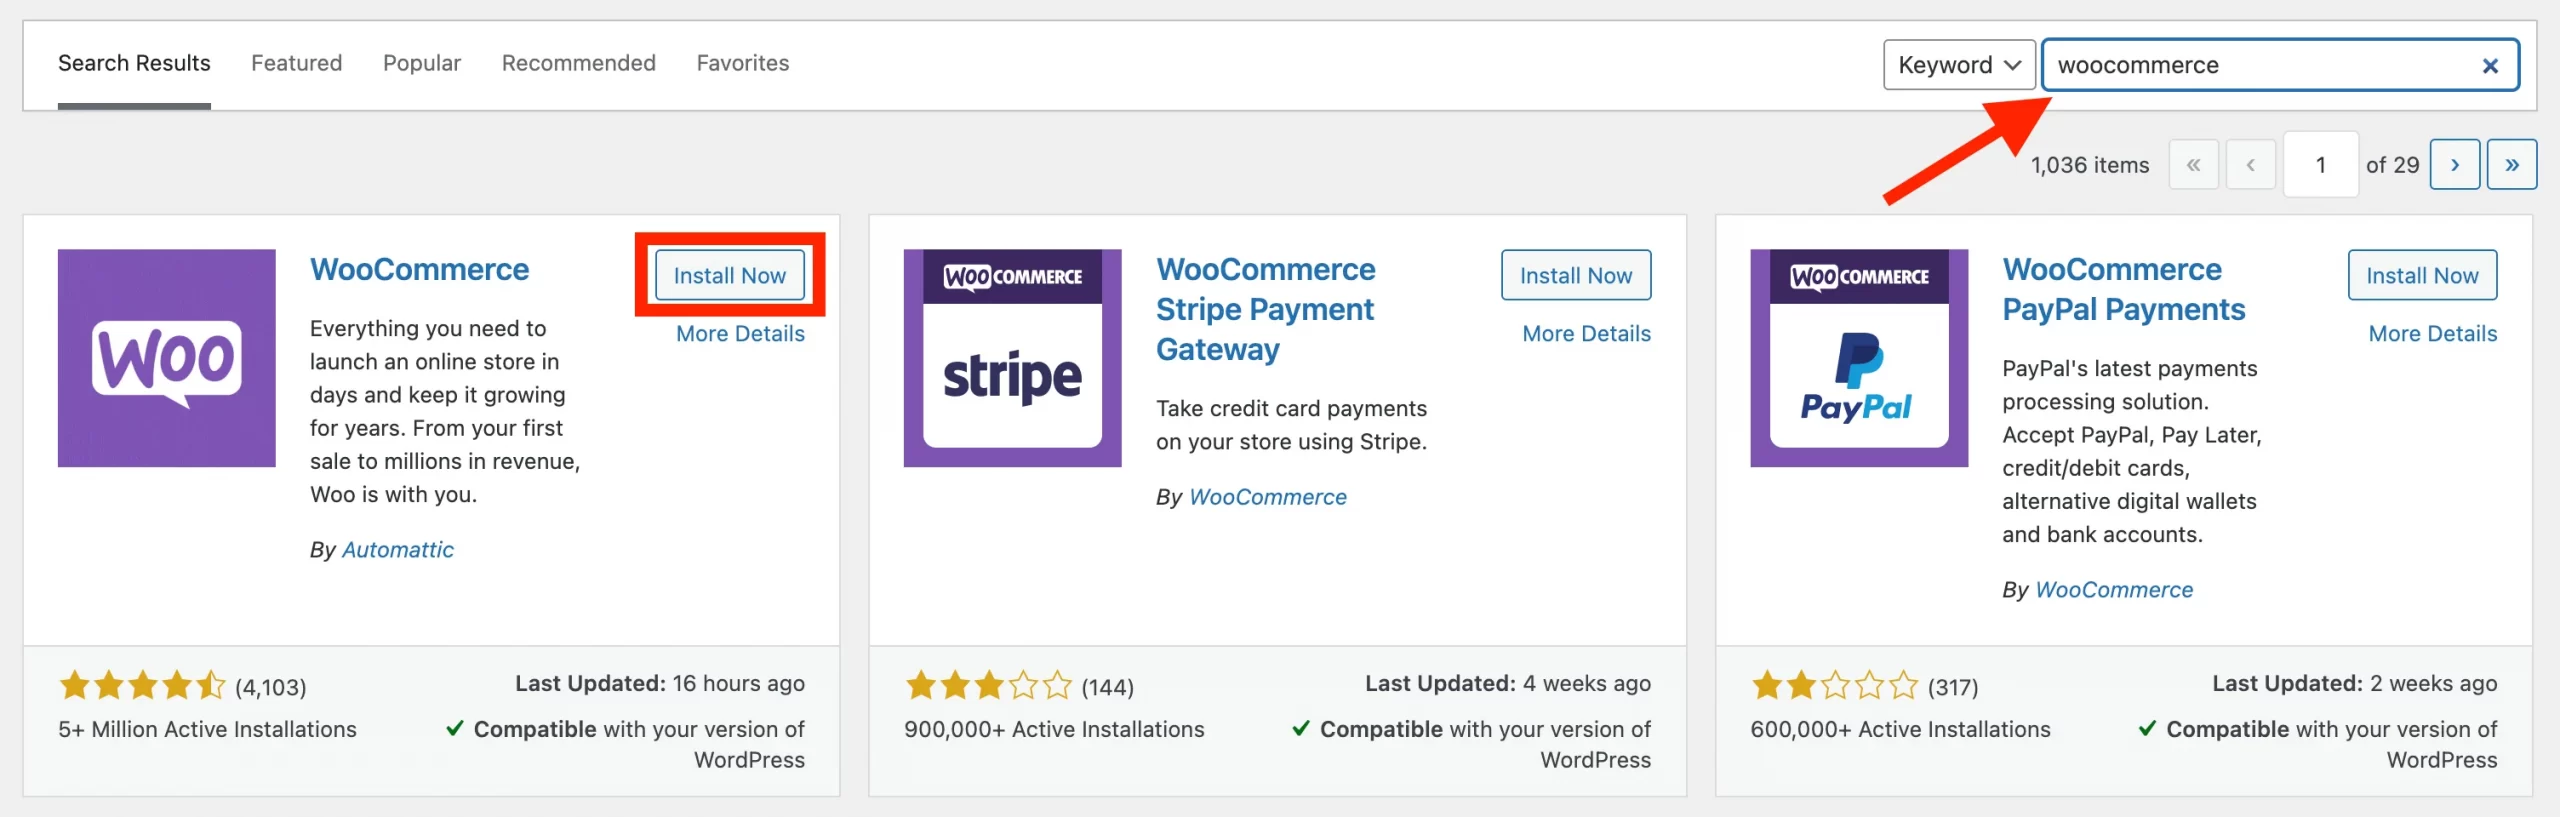
Click on the “Install Now” button next to the WooCommerce plugin and continue to hover your mouse over the “Activate Now” on the following page.
Step 3: Configure your WooCommerce store
At this step, you will easily notice a pop-up from WooCommerce Setup Wizard. You will be guided through how to set up your WooCommerce store with ease.
For more information, feel free to check out our article on how to set up WooCommerce: A step-by-step guide!
Also, the below tutorial video on setting up WooCommerce might help you:
How to Perform WooCommerce CSV Import Manually
WooCommerce has a built-in feature called Product CSV Importer and Exporter, enabling online store owners to upload their products manually. By using your CSV file, the tool can easily import most types of products, including ones with variants, in no time. Additionally, you can also perform WooCommerce export products and orders tasks besides importing solely.
But please note that though this option is cost-saving, it might require technical knowledge and skills to perform the WooCommerce products import manually.
To better guide you through the process, we have actually tested out the feature on our store. In this way, you can painlessly follow our footsteps on how to perform WooCommerce CSV import data as below:
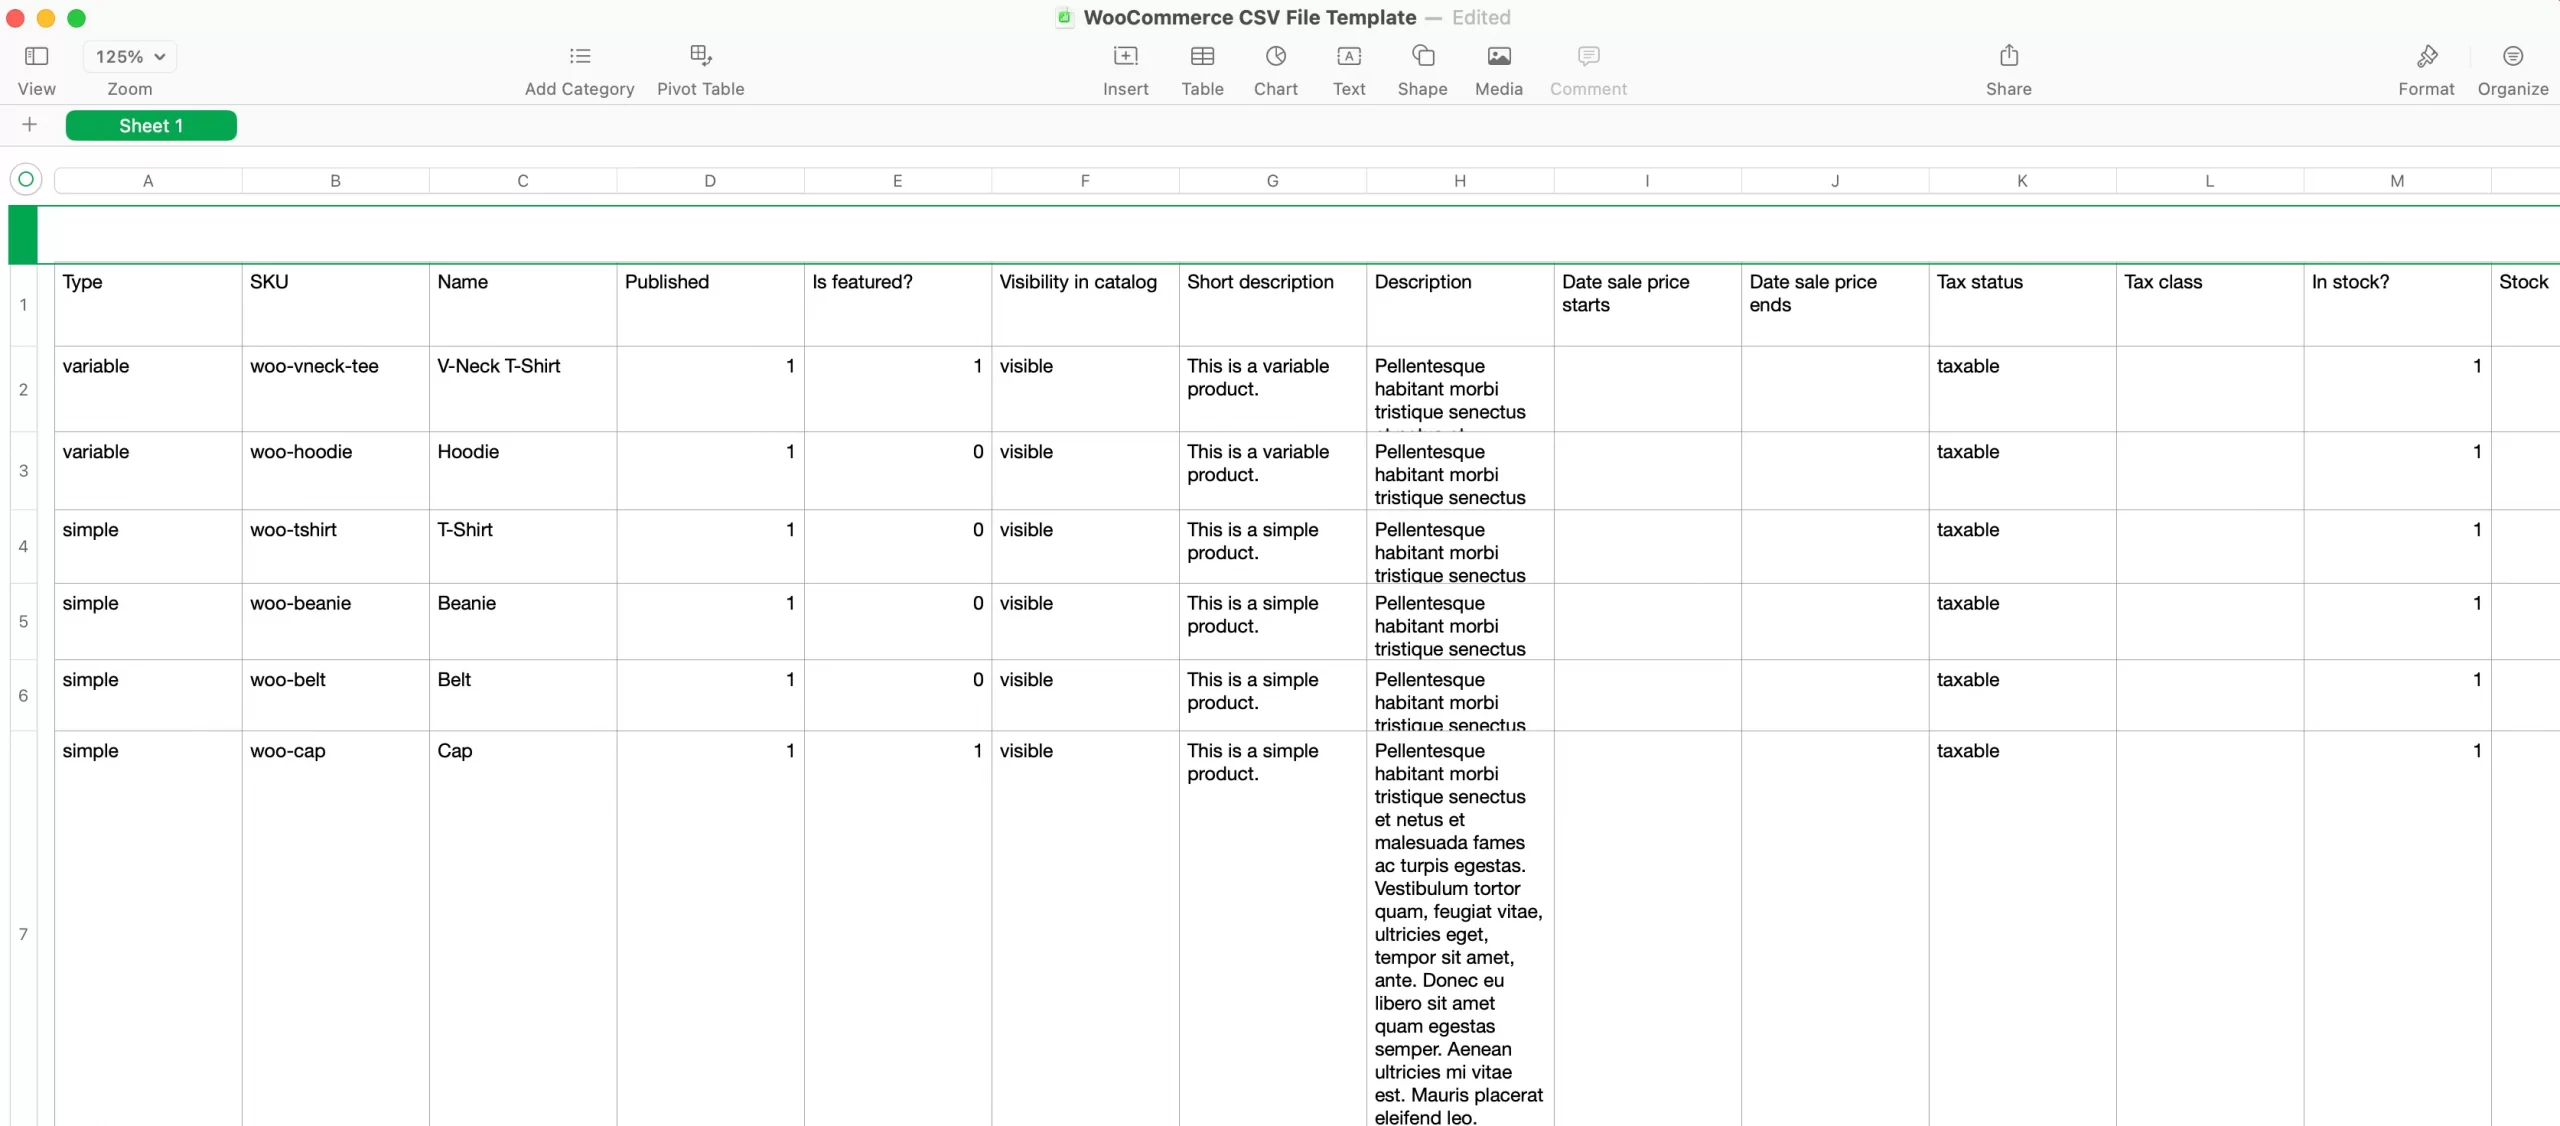
#1 Create a CSV file
To import merchandise quickly, WooCommerce requires online merchants to have their own CSV file with all the products-related information. There are 3 popular ways to do so:
- Export a CSV file from your current platform if you have one.
- Make your own CSV by downloading a WooCommerce CSV template from GitHub.
- Combine the 2 above methods by exporting a file from the current platform and tailoring it to a template from GitHub with your personal data.
From our perspective, the easiest way is directly export the file from your previous platform. Even in this case, you just need to make sure that the data is well-organized, similar to the WooCommerce data import template, if you plan to create your own CSV file.
#2 Customize CSV file
If you have a sample product CSV file download from GitHub, your next task is to customize the files with your product details.
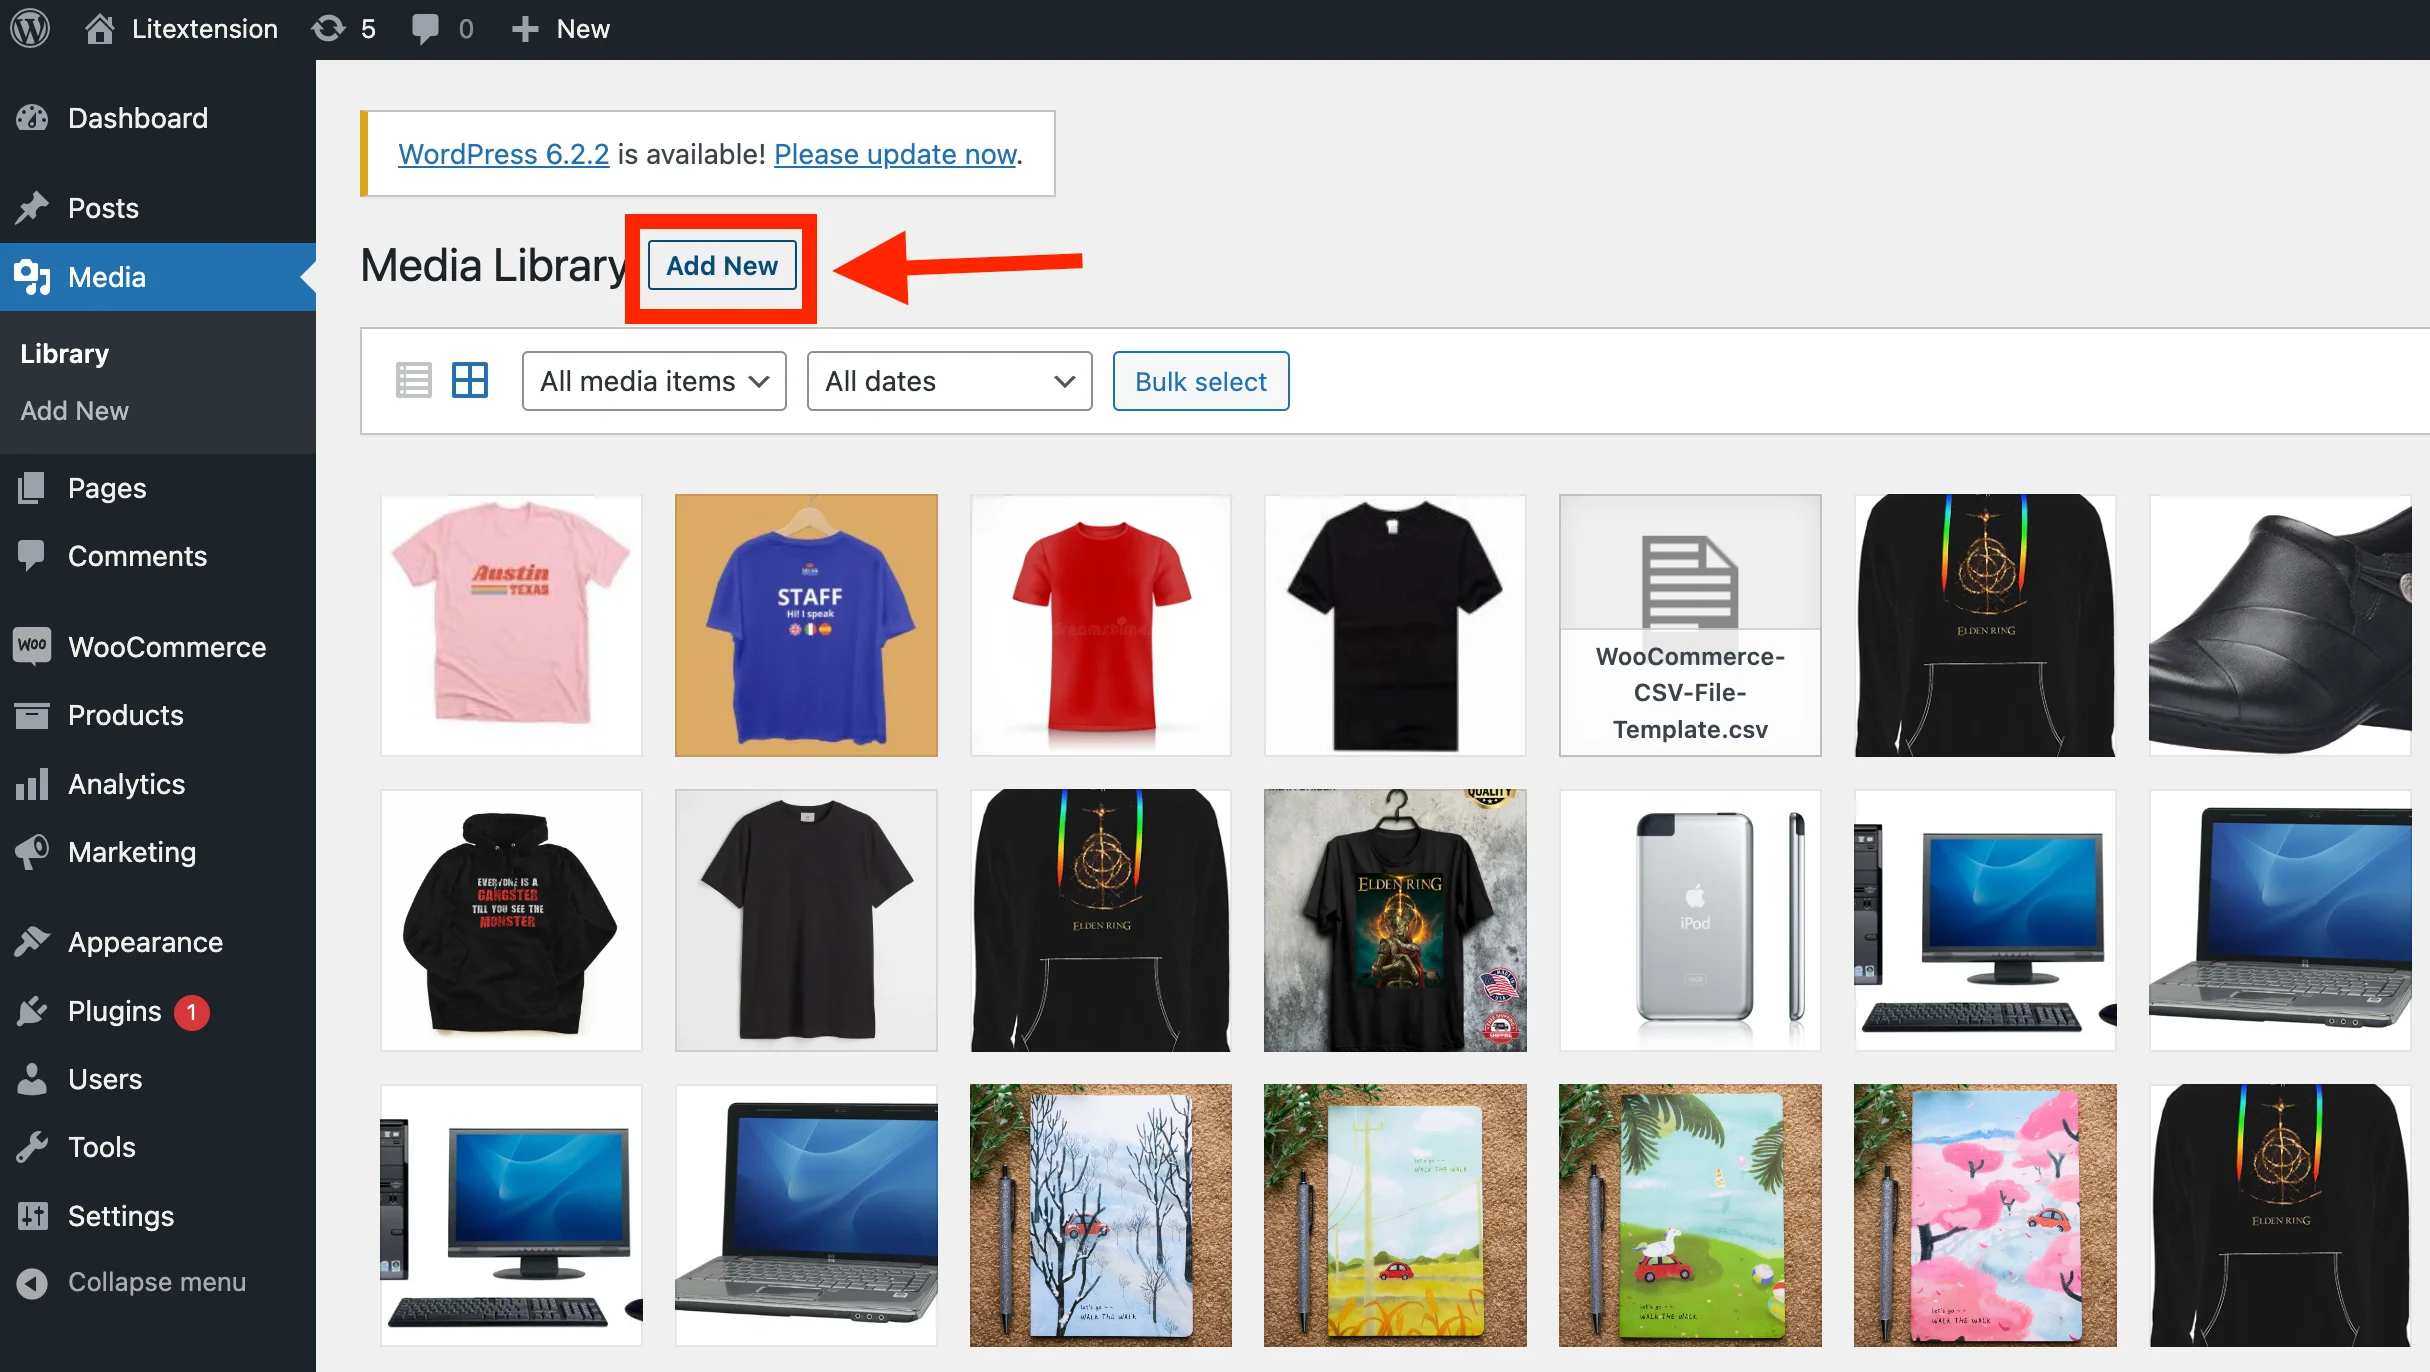
For how to add images when performing WooCommerce product import, you must first upload your image files to your WordPress WooCommerce dashboard.
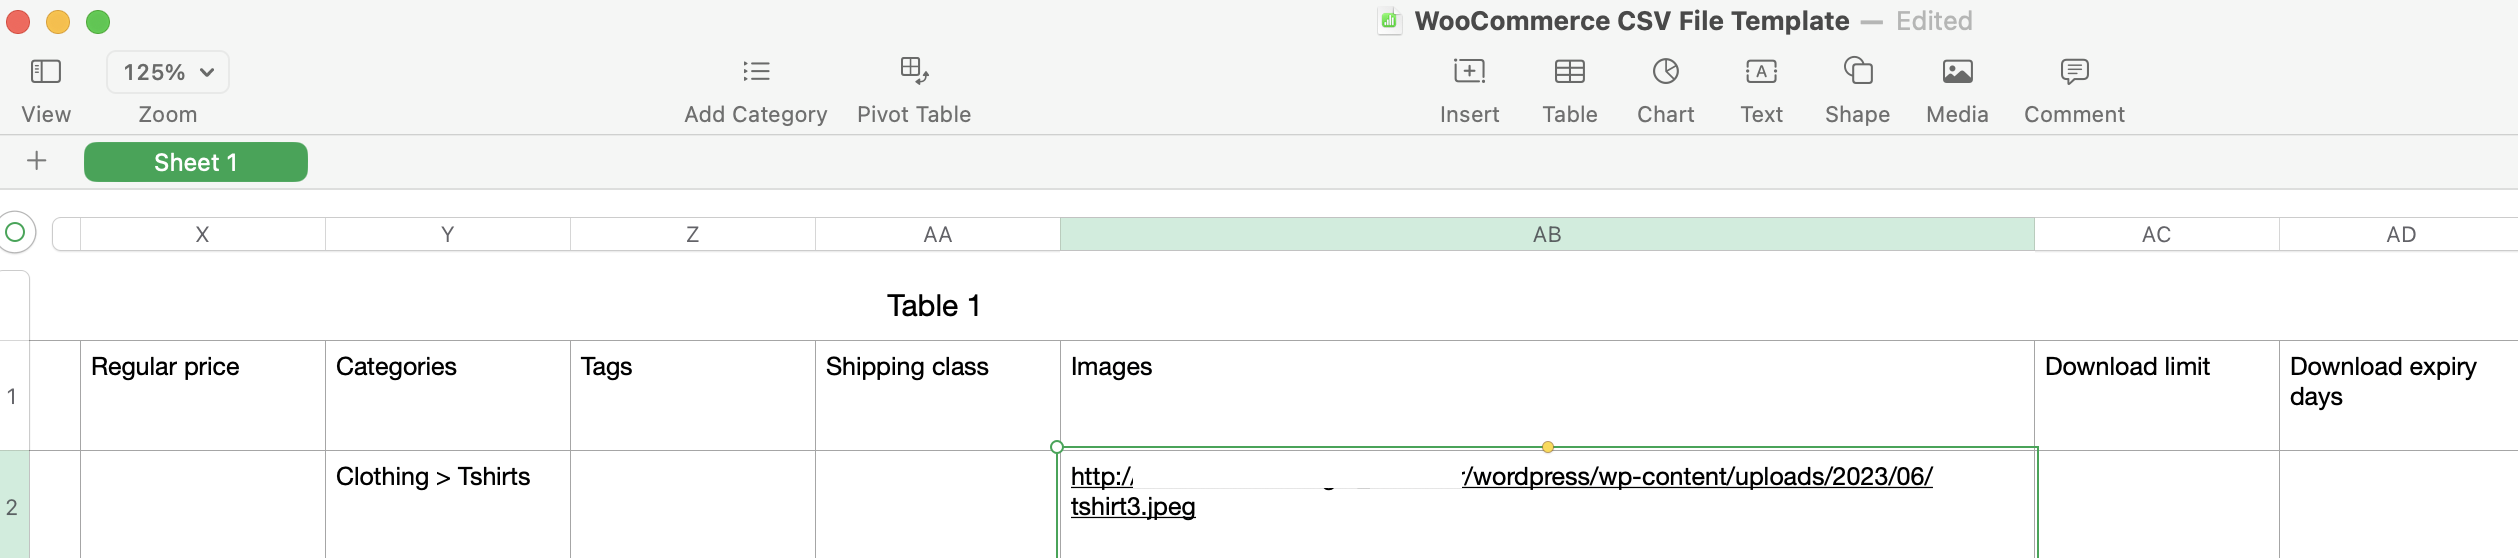
When you’ve uploaded the image file to WooCommerce, find the image URL: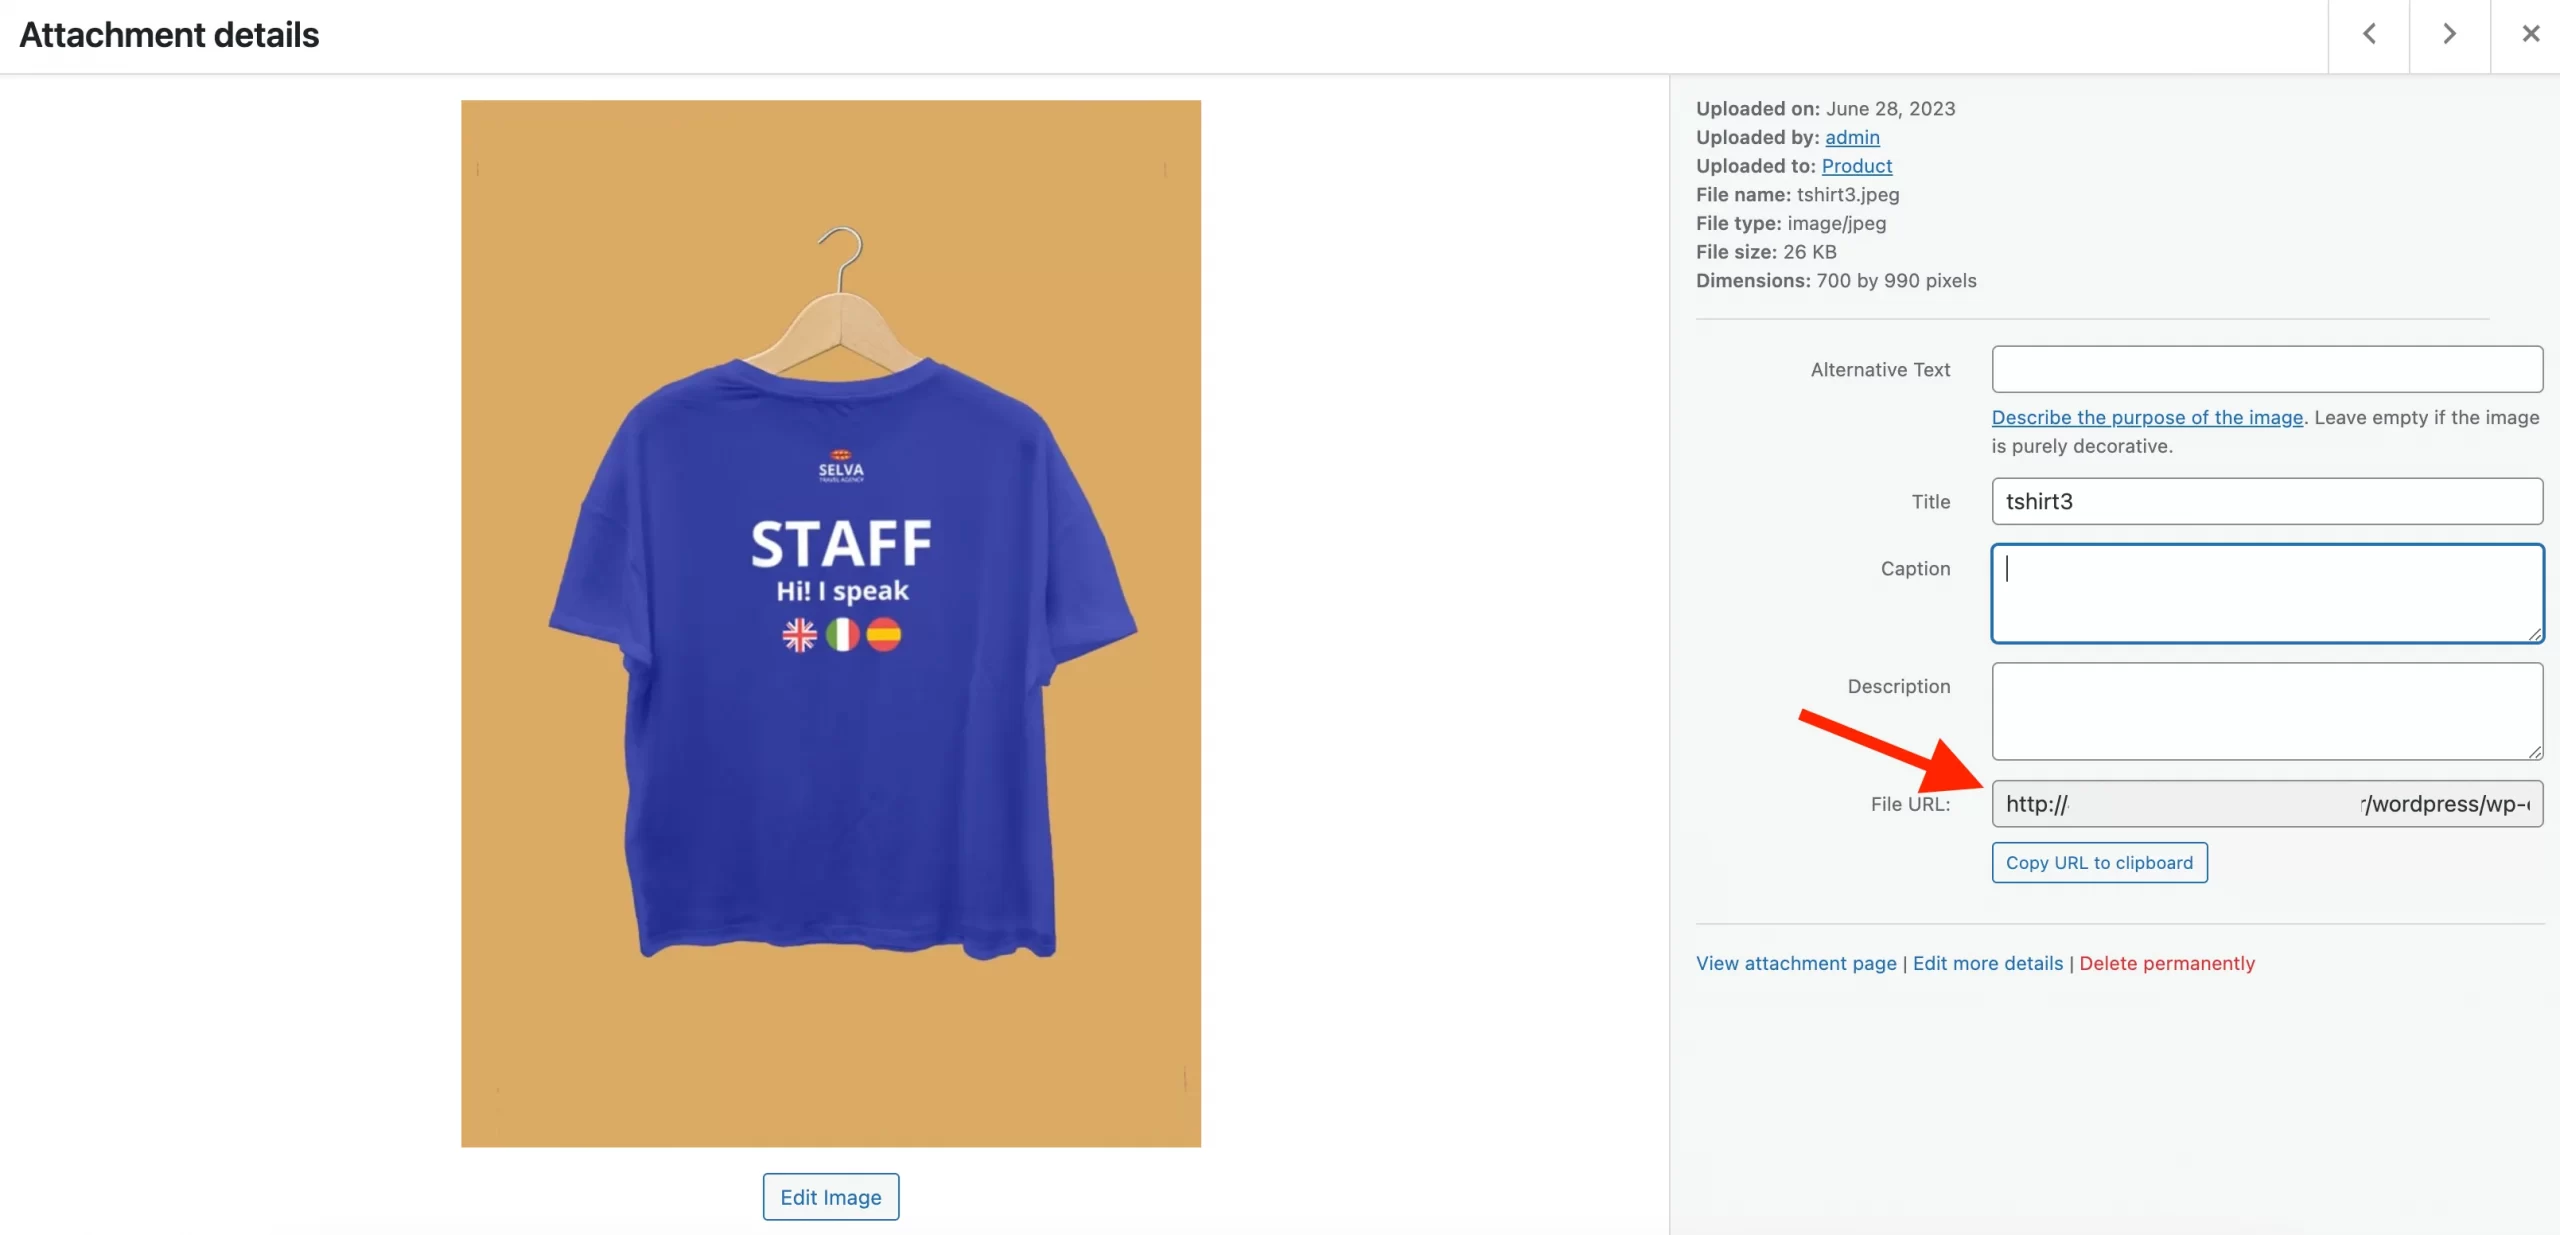
Find image URL and fill it into your WooCommerce CSV file:
To be more specific, you can follow some basic instructions for managing data and images:
[wptb id=56433]
Once you’ve finished customizing your file, export the file to CSV, and we can move to the next step!
#3 Import CSV file to WooCommerce
Normally, online merchants look for ways how to import products to WooCommerce because of multiple reasons. There are 2 main popular ones:
- Uploading new products.
- Updating existing products.
With each case, we will demonstrate detailed steps for you:
#3.1 Add new products
From your WooCommerce Dashboard, select “Products” on the left-hand sidebar:

Next, click on “Import” and the system will redirect you to a page where you can upload the products via CSV file:
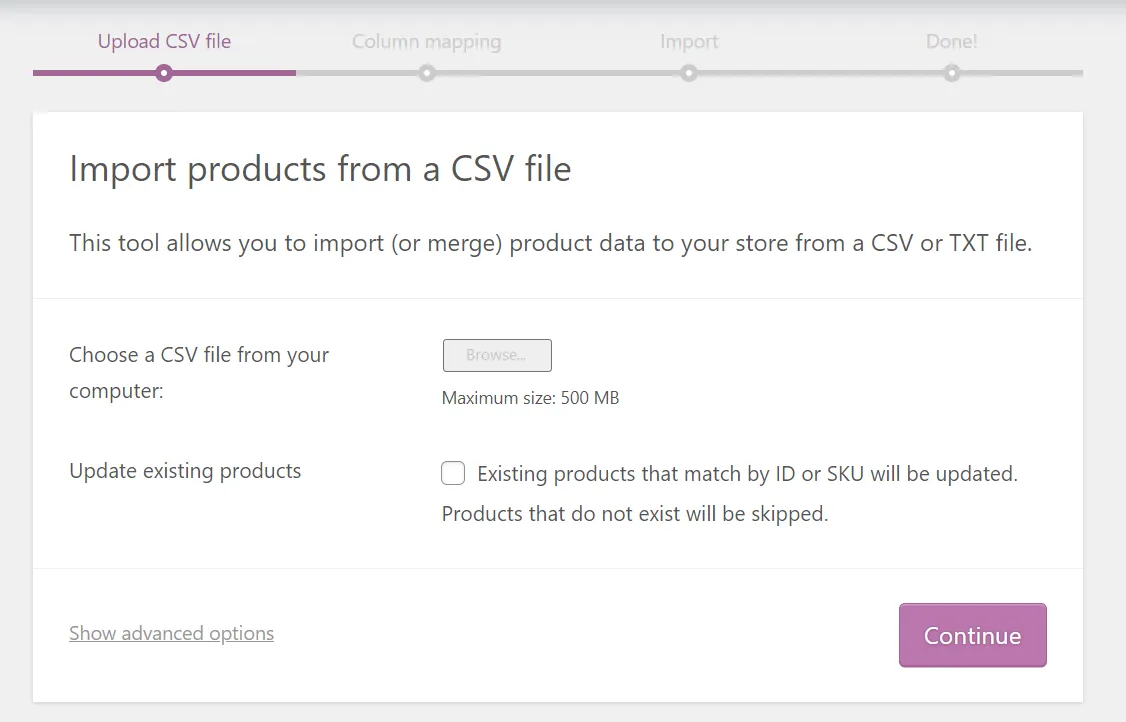
Hover your mouse over the “Choose file” button and “Continue” to go to the next step. For the Column Mapping, WooCommerce will automatically match the Column name on your CSV files to Fields:
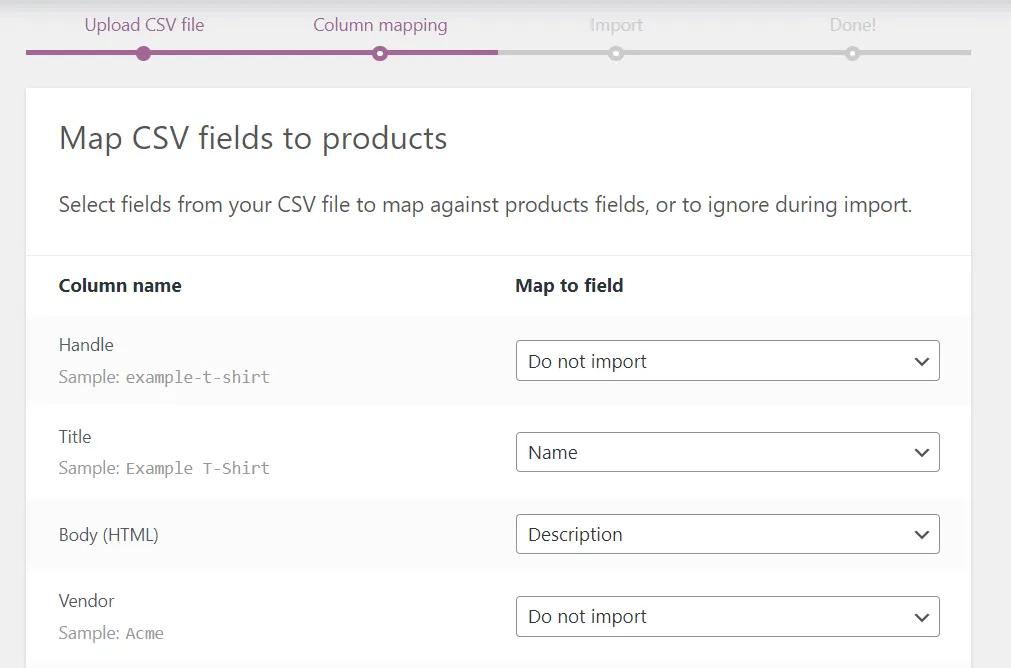
In addition, you can use the drop-down menus for advanced adjustments to the WooCommerce import categories. Complete the WooCommerce import CSV for products by selecting the “Run the importer” button:
#3.2 Update existing products
WooCommerce Product Importer CSV can also be utilized to update your existing product information, like adding a new brand, bulk-update, or changing tax class, etc. There’s not much difference in the steps for adding new products.
Likewise, starting with WooCommerce > Products > Import page. After uploading your CSV file, you tick the checkbox for “Update Existing Products” right under:
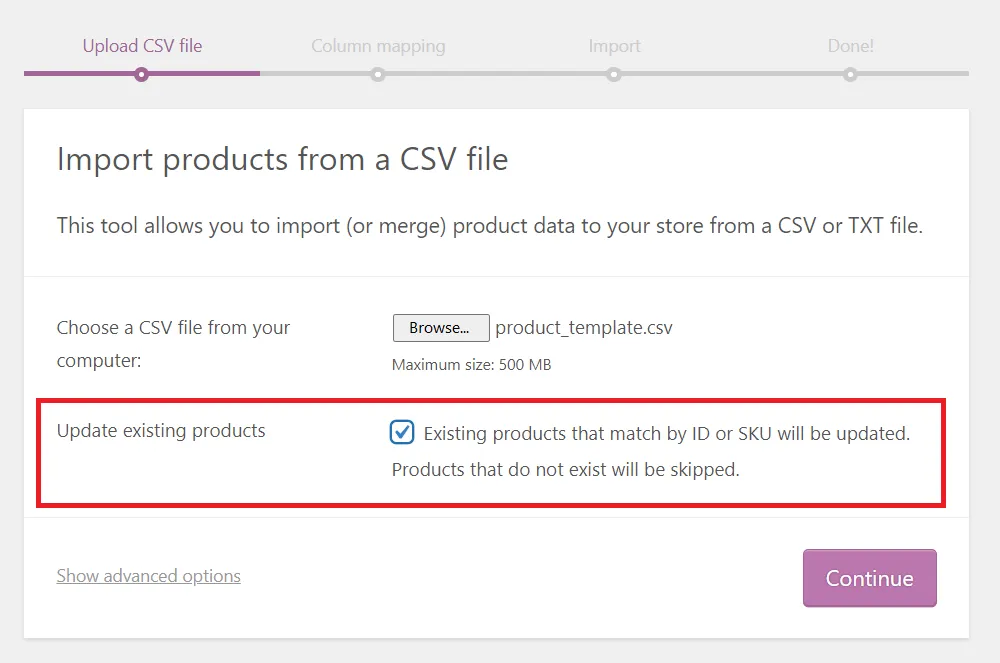
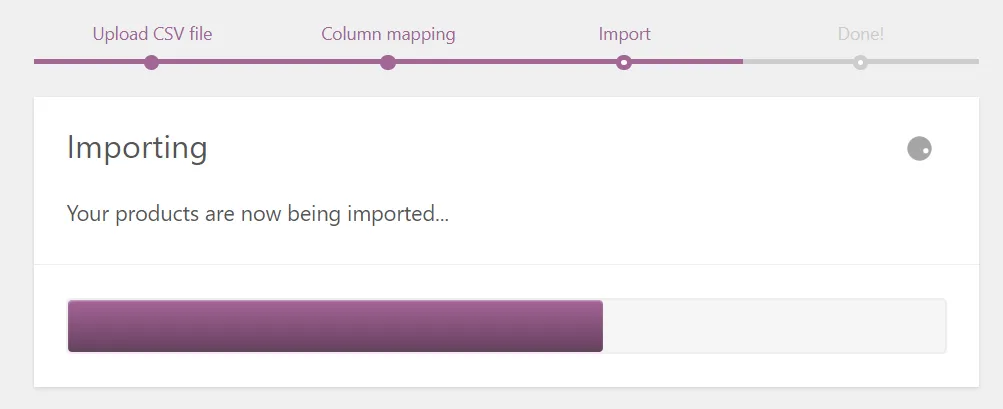
Click on “Continue” and the rest of the process will remain the same.
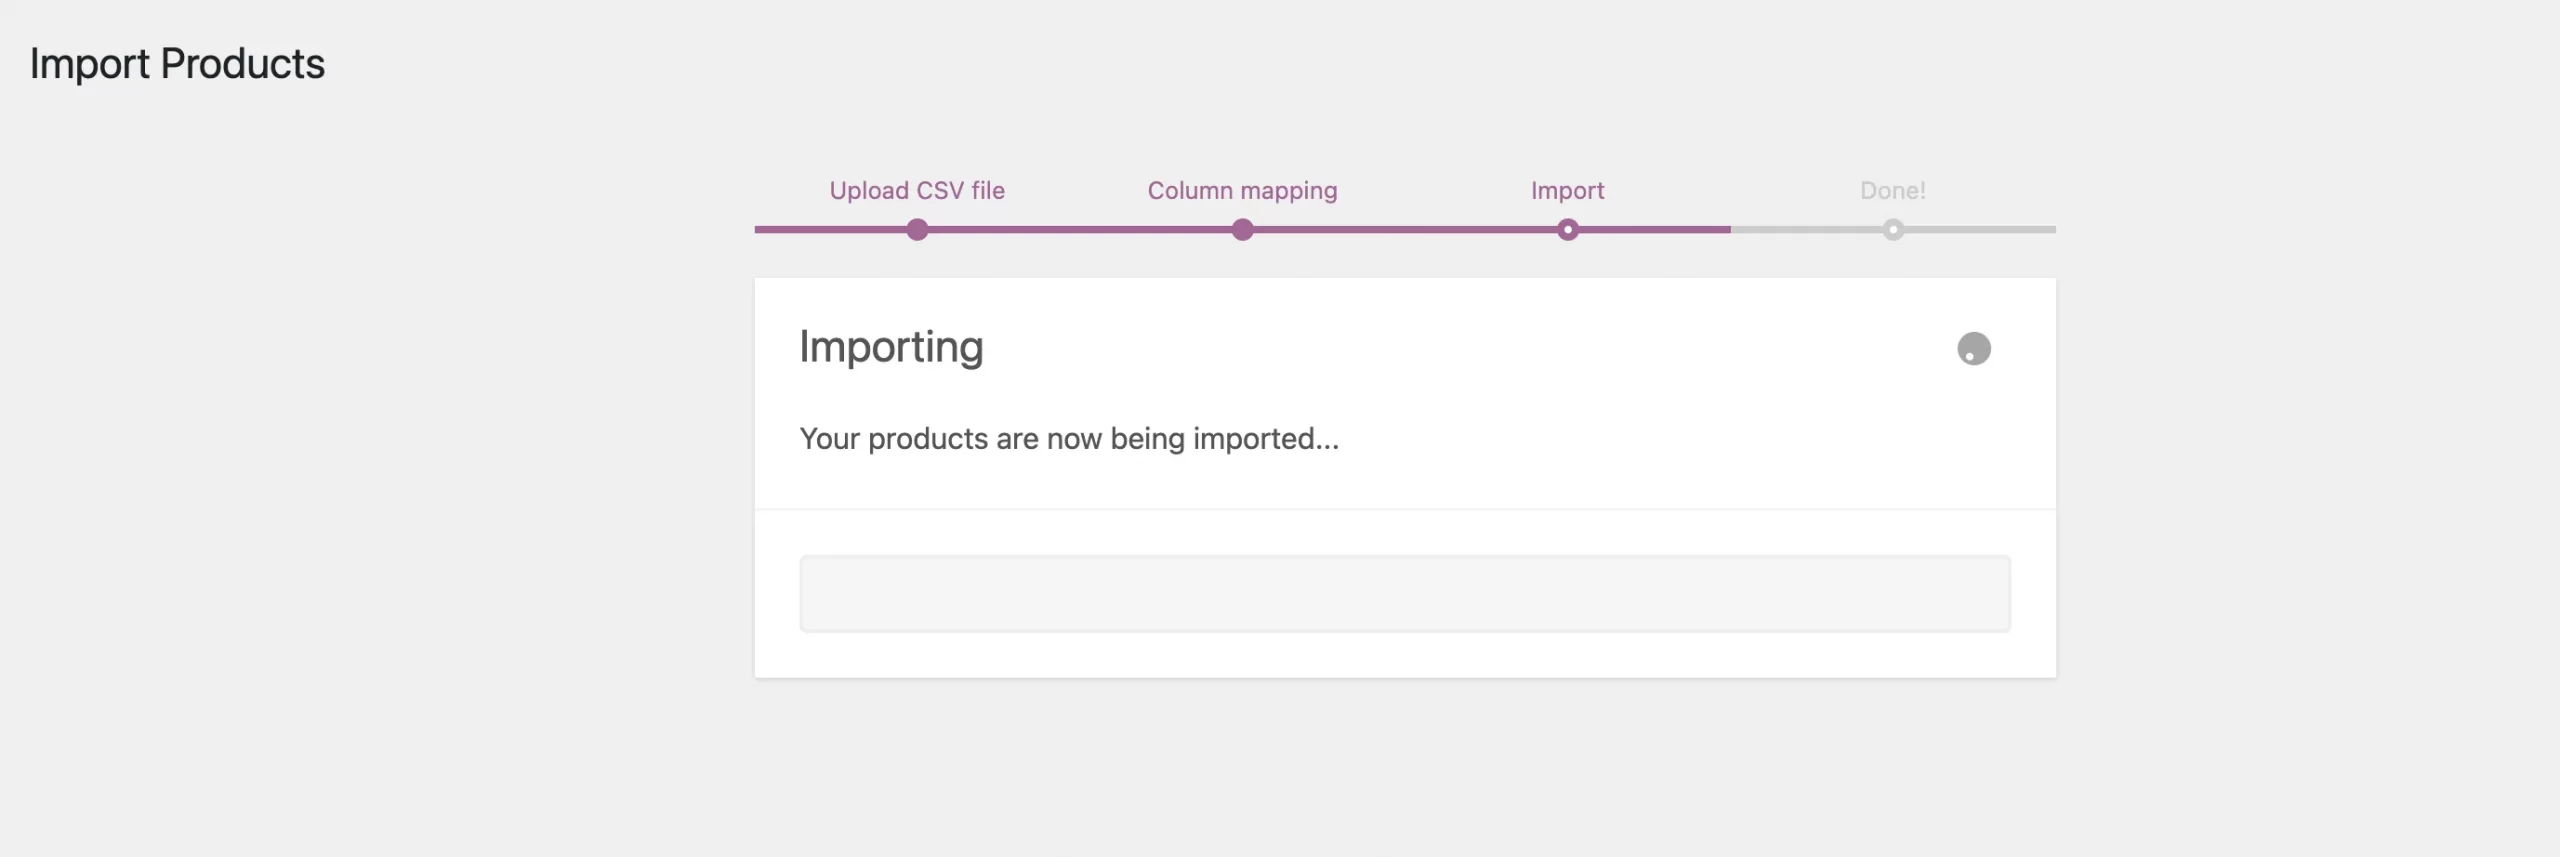
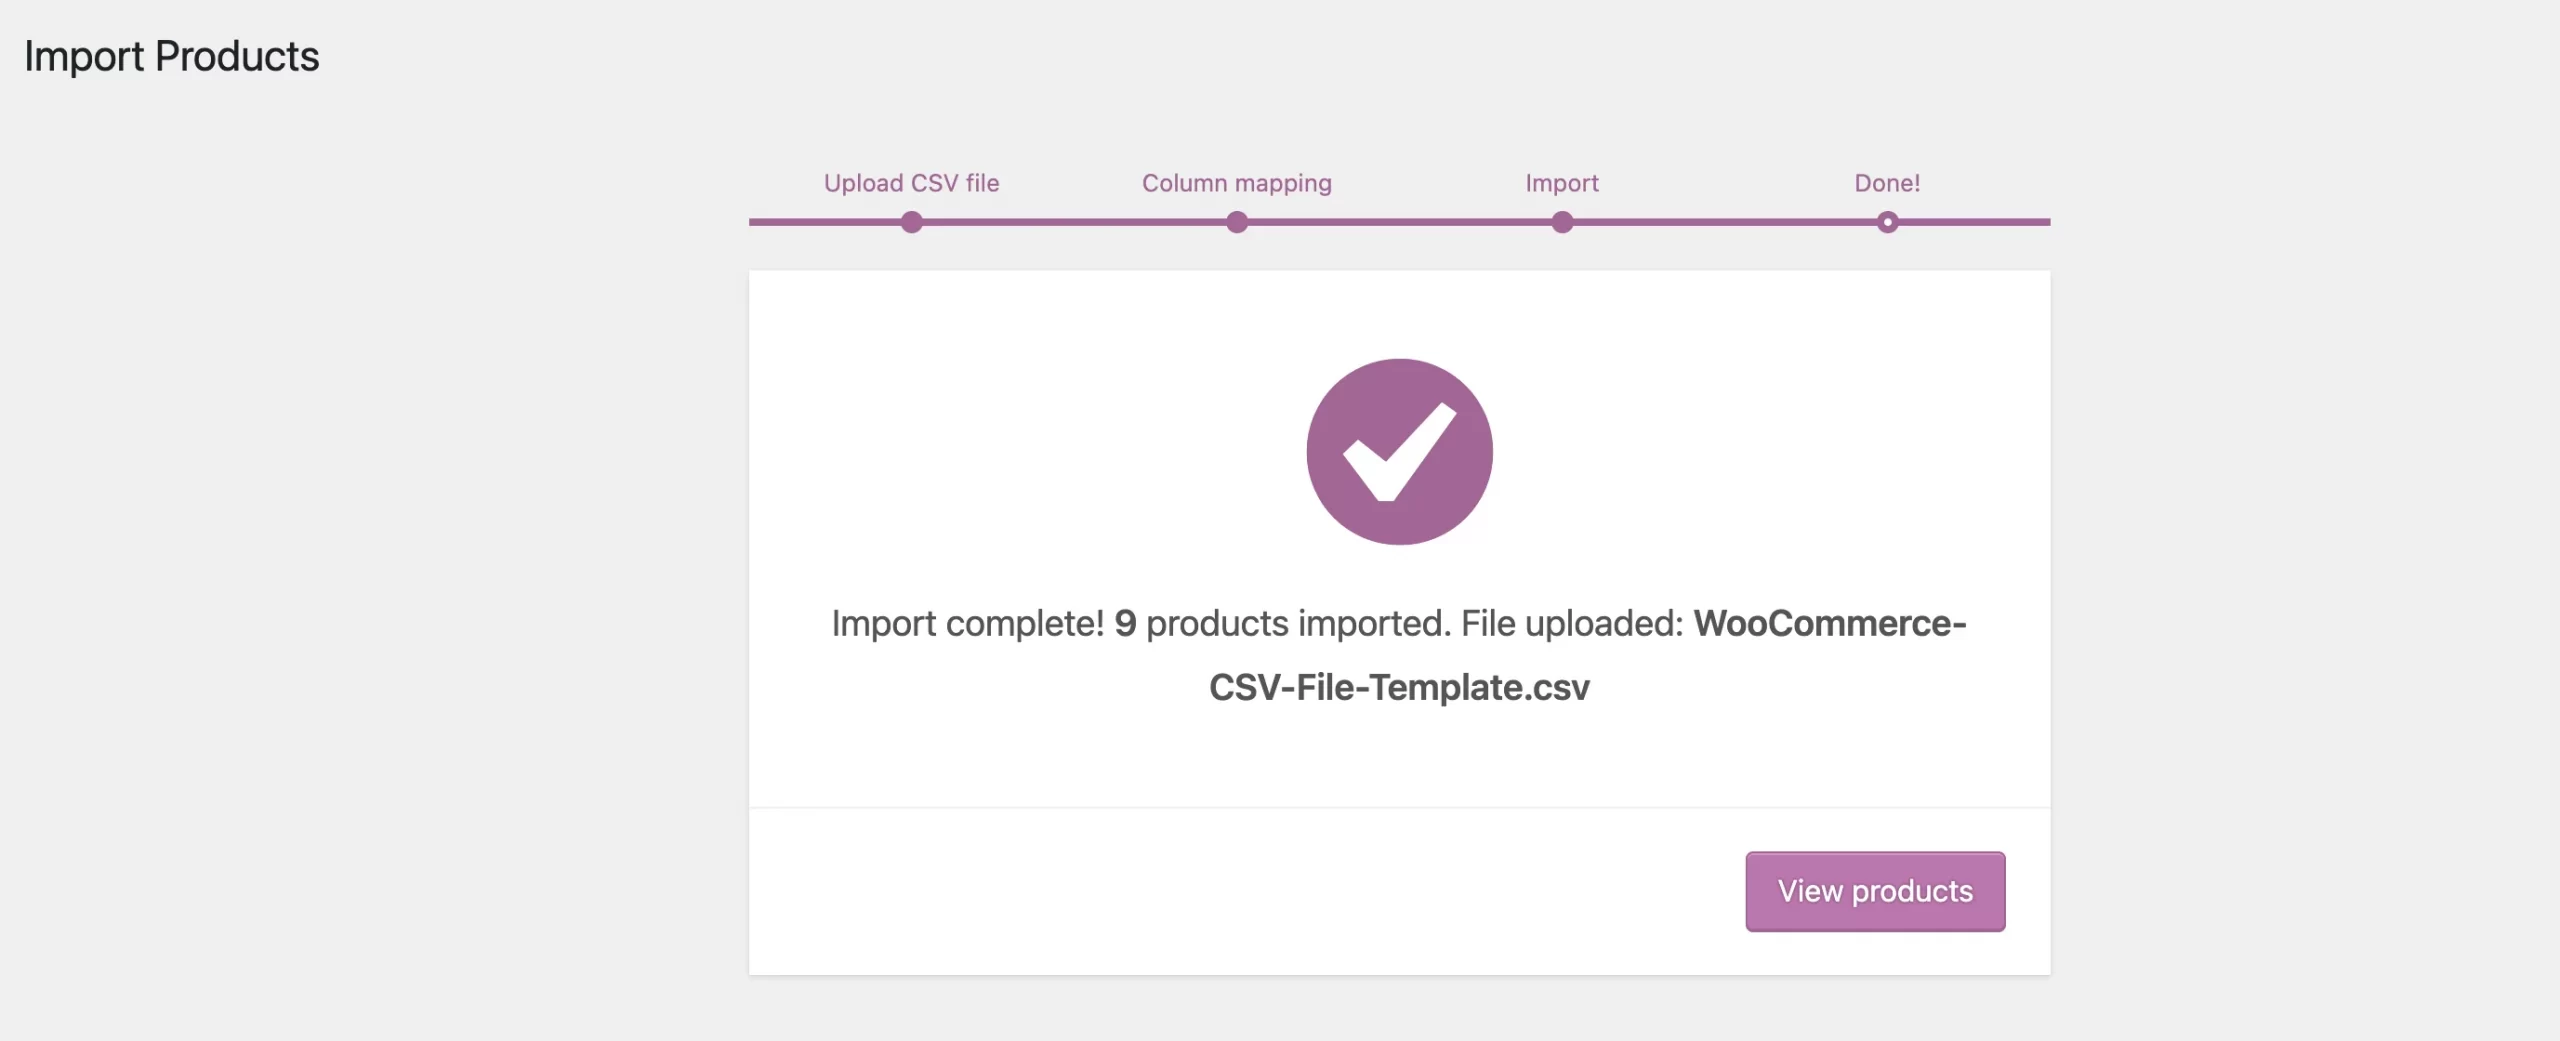
When the process is done, you will see a message showing on the screen below
#4 Check final result in WooCommerce store
We’re in the final steps of WooCommerce CSV import – check the final results on your WordPress WooCommerce store.
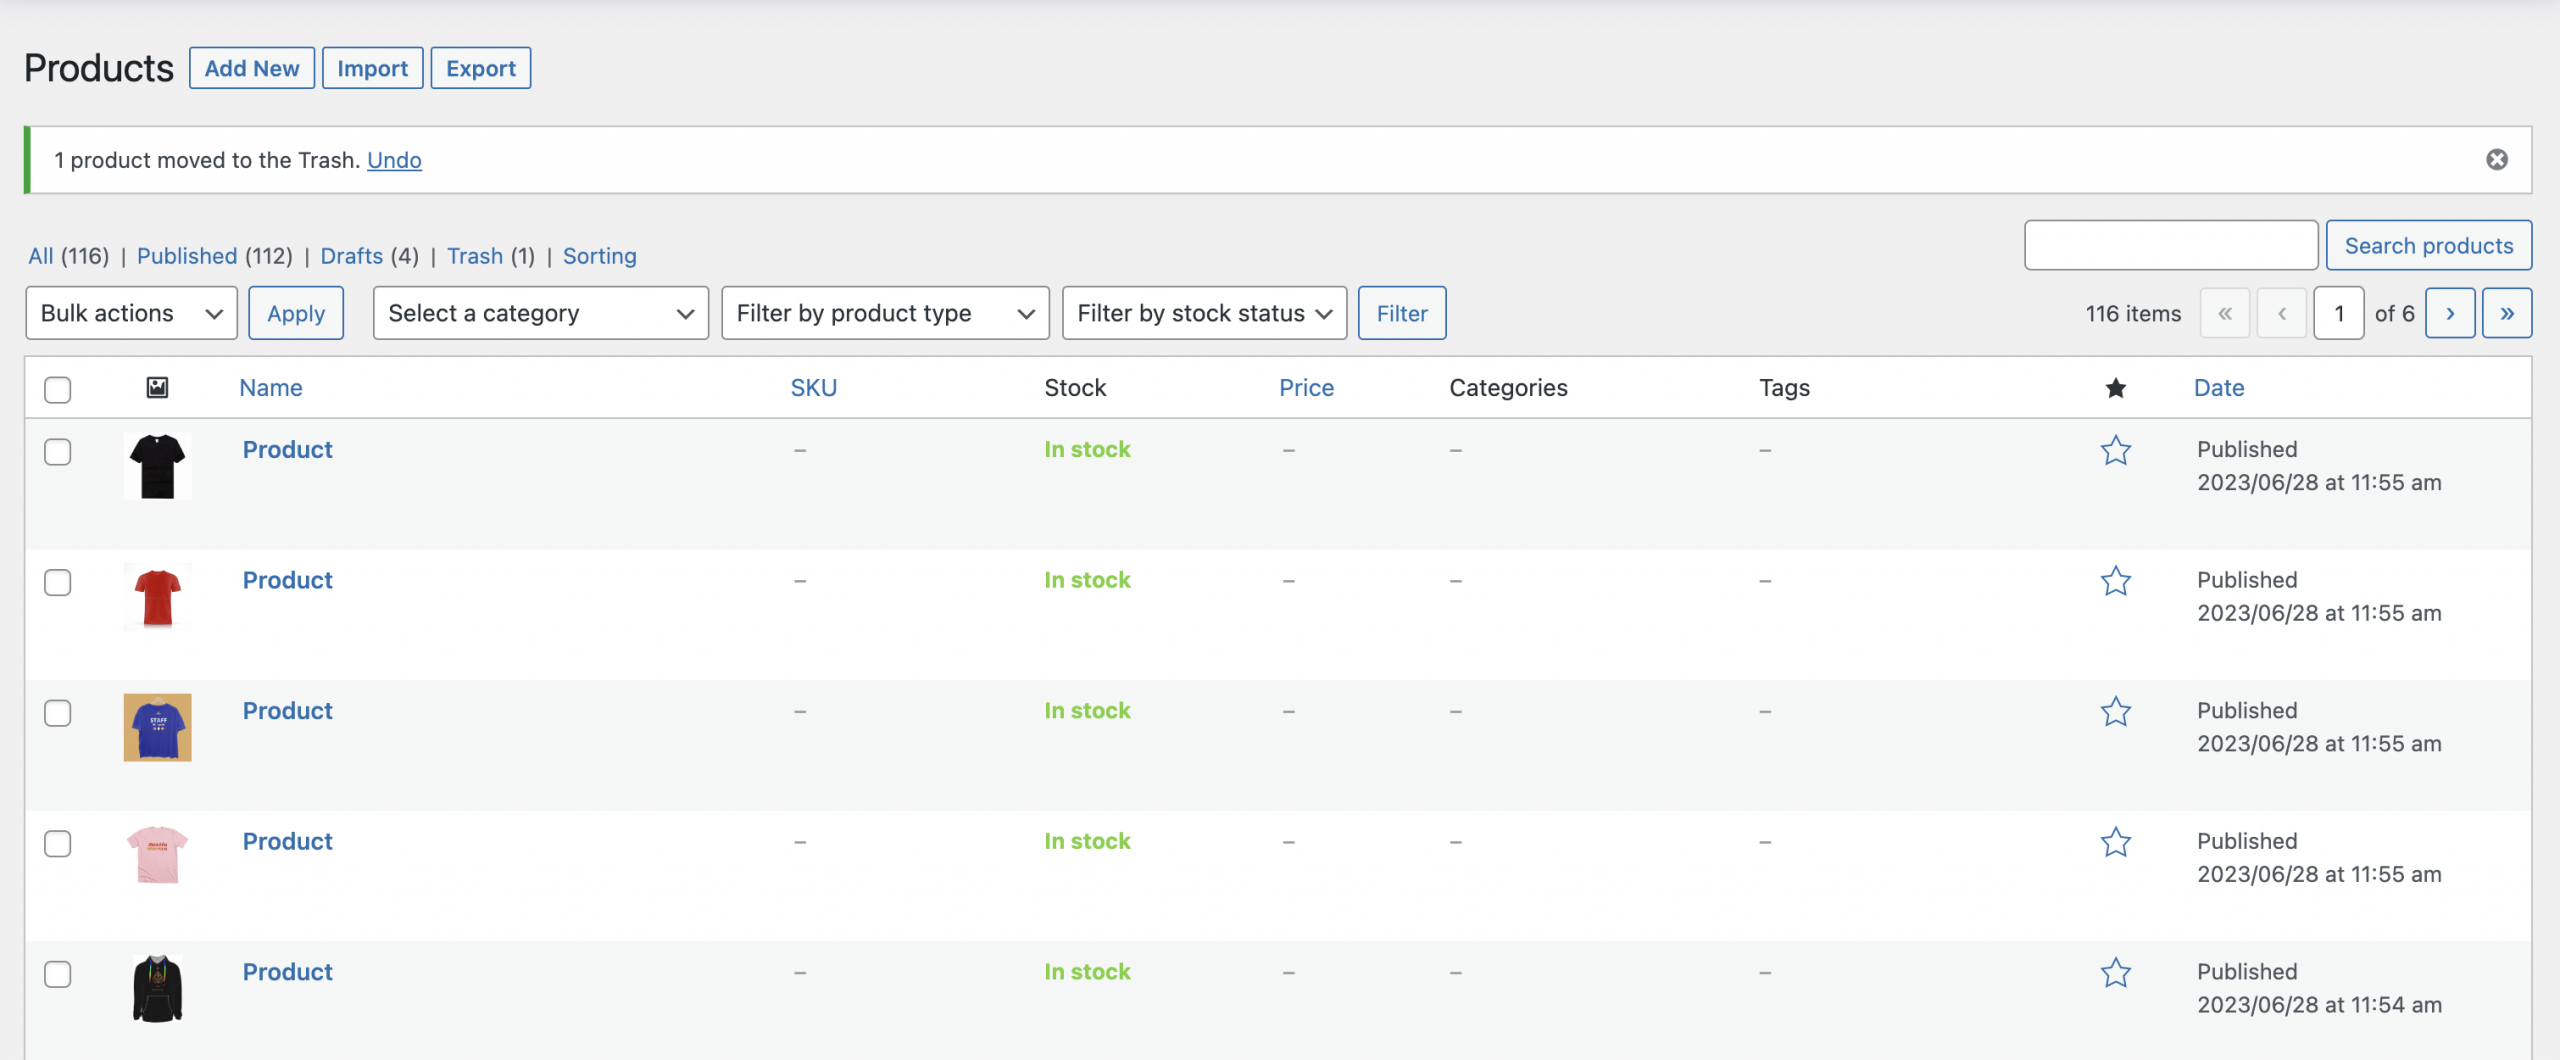
Take the time to thoroughly examine the imported data and verify that it is accurately reflected in your store. This step is crucial to guarantee a smooth data import and ensure that your products are accurately presented to your customers!
And that’s how you perform WooCommerce CSV import manually!
How to Perform WooCommerce CSV Import with LitExtension?
How about a more simple method in which you can automatically import your CSV file to the WooCommerce store with no hassle?
When it comes to WooCommerce CSV import, LitExtension is here to guarantee a seamless CSV File Migration. You can eliminate the risks and complexities associated with manually handling this intricate task! Rather than attempting the challenging process yourself, we offer this service that minimizes the potential for errors and streamlines the entire WooCommerce CSV file.
Here’s how to LitExtension handles your WooCommerce CSV import:
#1 Receive your CSV files
LitExtension will receive your CSV files containing the necessary data for your store. Your files could include product information, categories, pricing details, and any other relevant data.
#2 Customize CSV files to your requirements
Once we receive your CSV files, our team will work closely with you to understand your specific requirements. We will customize the CSV files to ensure they align with your desired data structure, fields, and formatting. This step allows us to tailor the import process to match your unique needs before migrating data to WooCommerce.
#3 Run CSV files migration to WooCommerce
With the customized CSV files in hand, we will start the CSV file migration process. Here, we will create updated products, categories, attributes, and other relevant entities based on the provided CSV data you’ve sent us.
We will ensure that the data from your CSV files are accurately imported into your WooCommerce store!
#4 Check migration result & Hand over store to you
Once the migration is complete, we meticulously review the results to ensure everything has been accurately transferred. Our team will examine that all data have been imported correctly. We will also address any issues that may arise during the migration process.
Once the review is complete, we will hand over the store to you, empowering you to take control and manage your WooCommerce store with the imported data. You can look further at how we perform CSV file migration in the below video!
With LitExtension, you can confidently avoid the hitches of manually managing the import and ensure a smooth and trouble-free transition to WooCommerce.
Need Help With Your WooCommerce Migration?
If you’re too busy performing the task or not confident working on your own, our experts are always willing to help. Try our All-in-One Migration service for a safe and worry-free data migration process!
How to Migrate Data to WooCommerce with LitExtension
In the above section, we have just mentioned CSV file migration.
If you don’t want to use CSV files to import data to WooCommerce, we provide you with an even more simple method with LitExtension WooCommerce migration service.
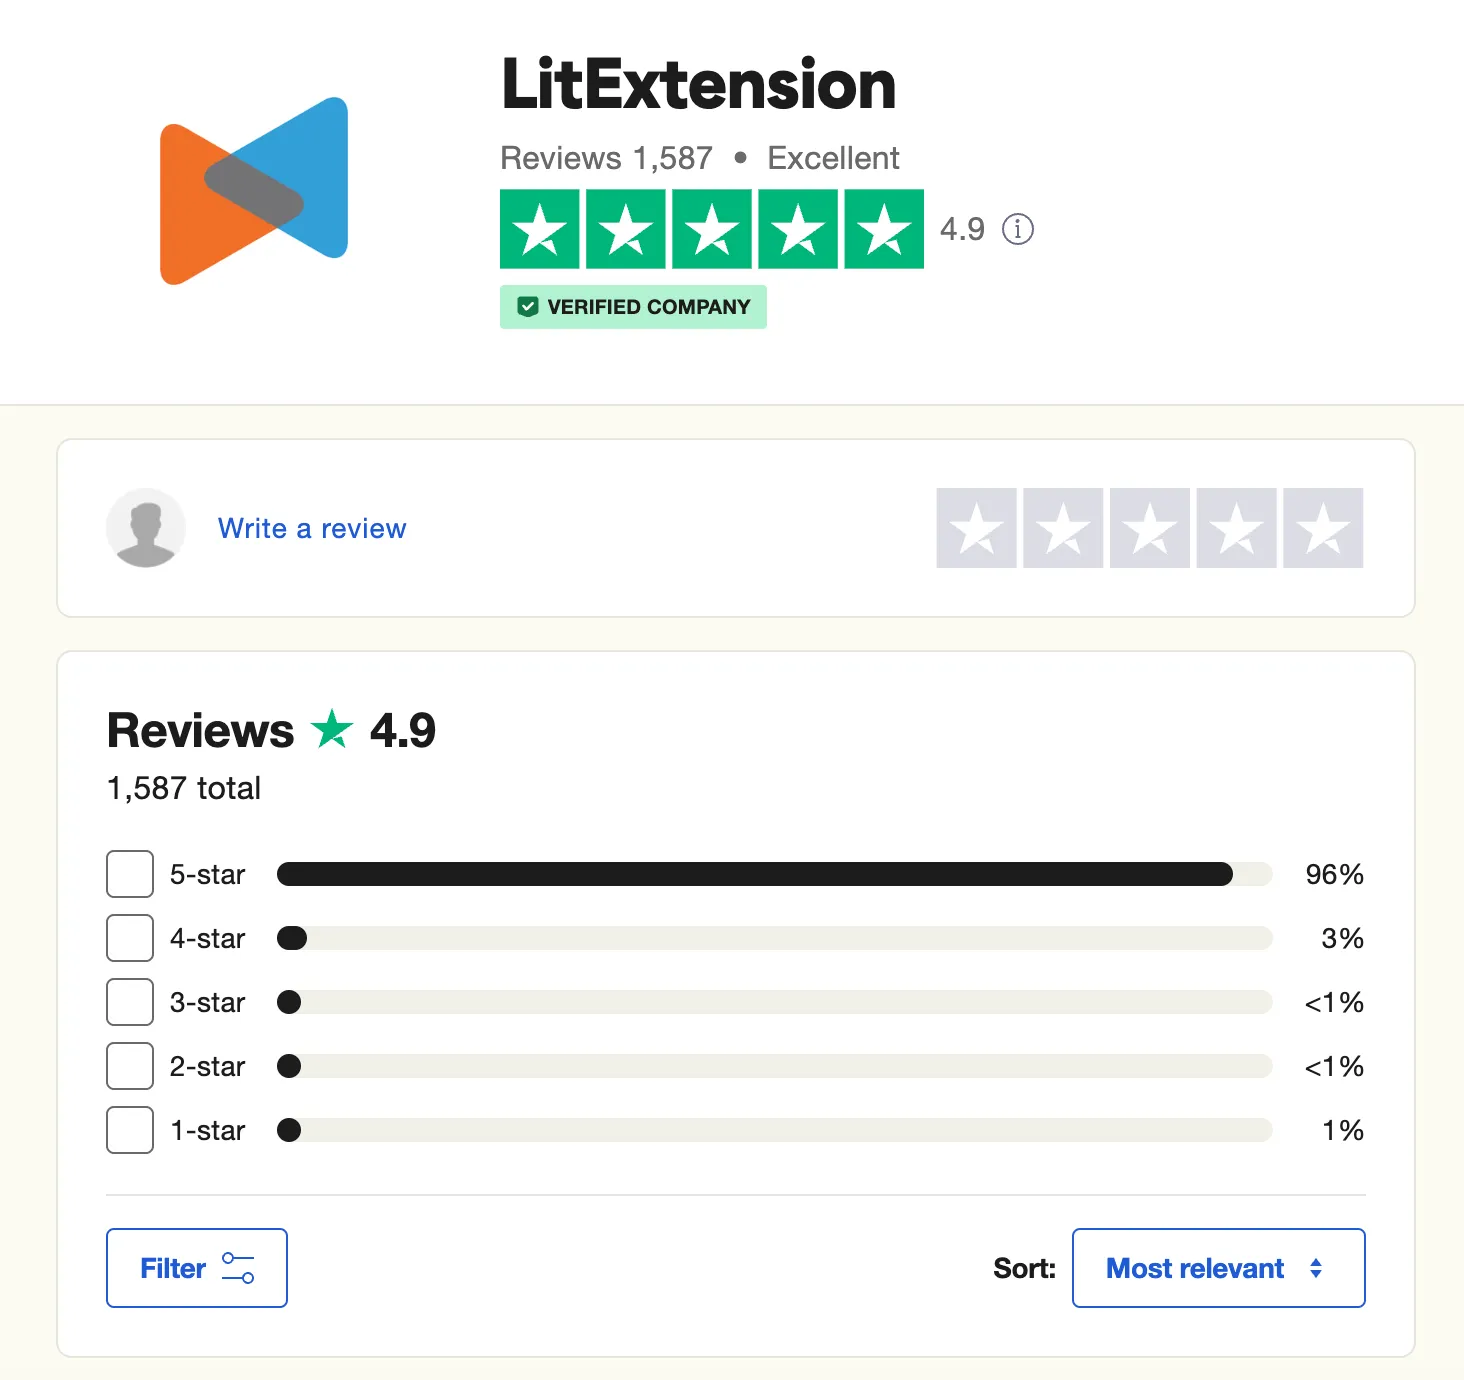
With over 11 years of working in the eCommerce industry, LitExtension has proven as the #1 Shopping Cart Migration Expert. We are here to help you migrate your data from Orders, Customers, to Products, etc, while guaranteeing the utmost security.
However, there are a few things you need to keep in mind prior to importing products with LitExtension:
- We can not reserve product IDs when transforming to WooCommerce due to the platform’s architecture. More specifically, products, orders, pages, etc will all be saved in a single file with different types, such as post_type=product and post_type=shop_order,…
- The number of variable products is limited to 1000 according to WooCommerce’s regulations. Therefore, you might have to contact the LitExtension team for further customization if you exceed this limitation.
If everything has been cleared, it’s time to start our WooCommerce product import journey!
#1 Set up Source Cart and Target Cart
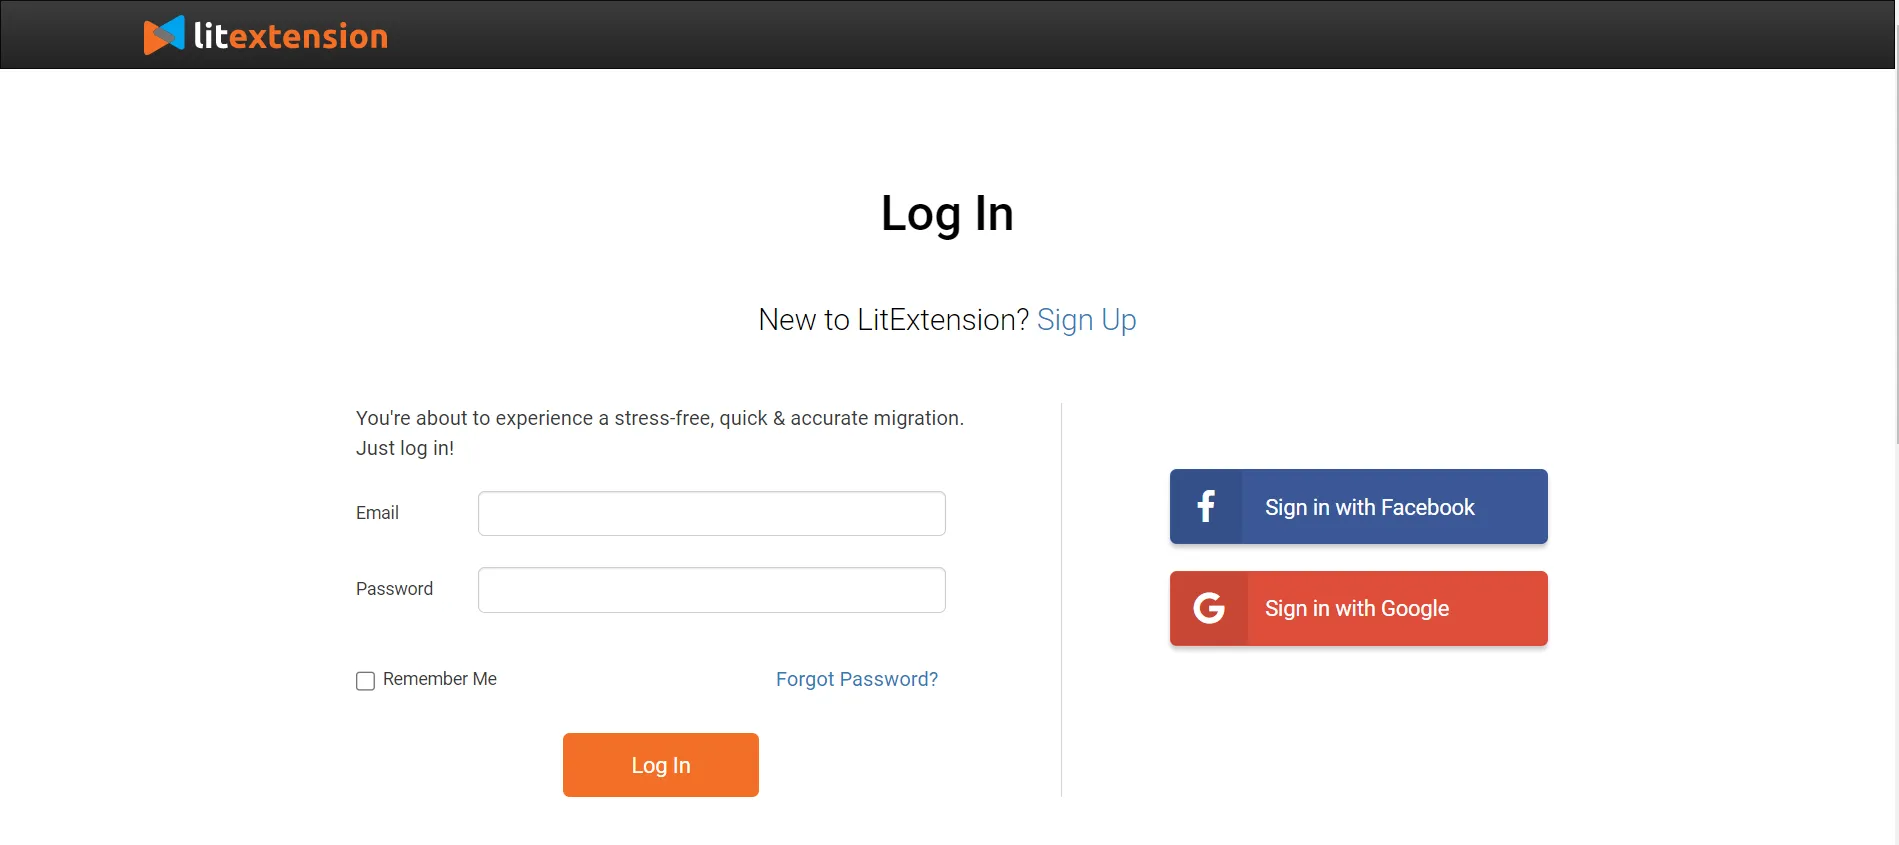
Firstly, you need to register for an account on the LitExtension website. You can also save time logging in with your existing Google or Facebook account.
Then hit “Create Migration” tab located on the top bar and you will be able to fill in the migration details!
With the first section, pick out your Source Cart type and fill in the URL along with other required information.
Moving on to the Target Cart setup, it must be set as WooCommerce as you are trying to import products to this platform.
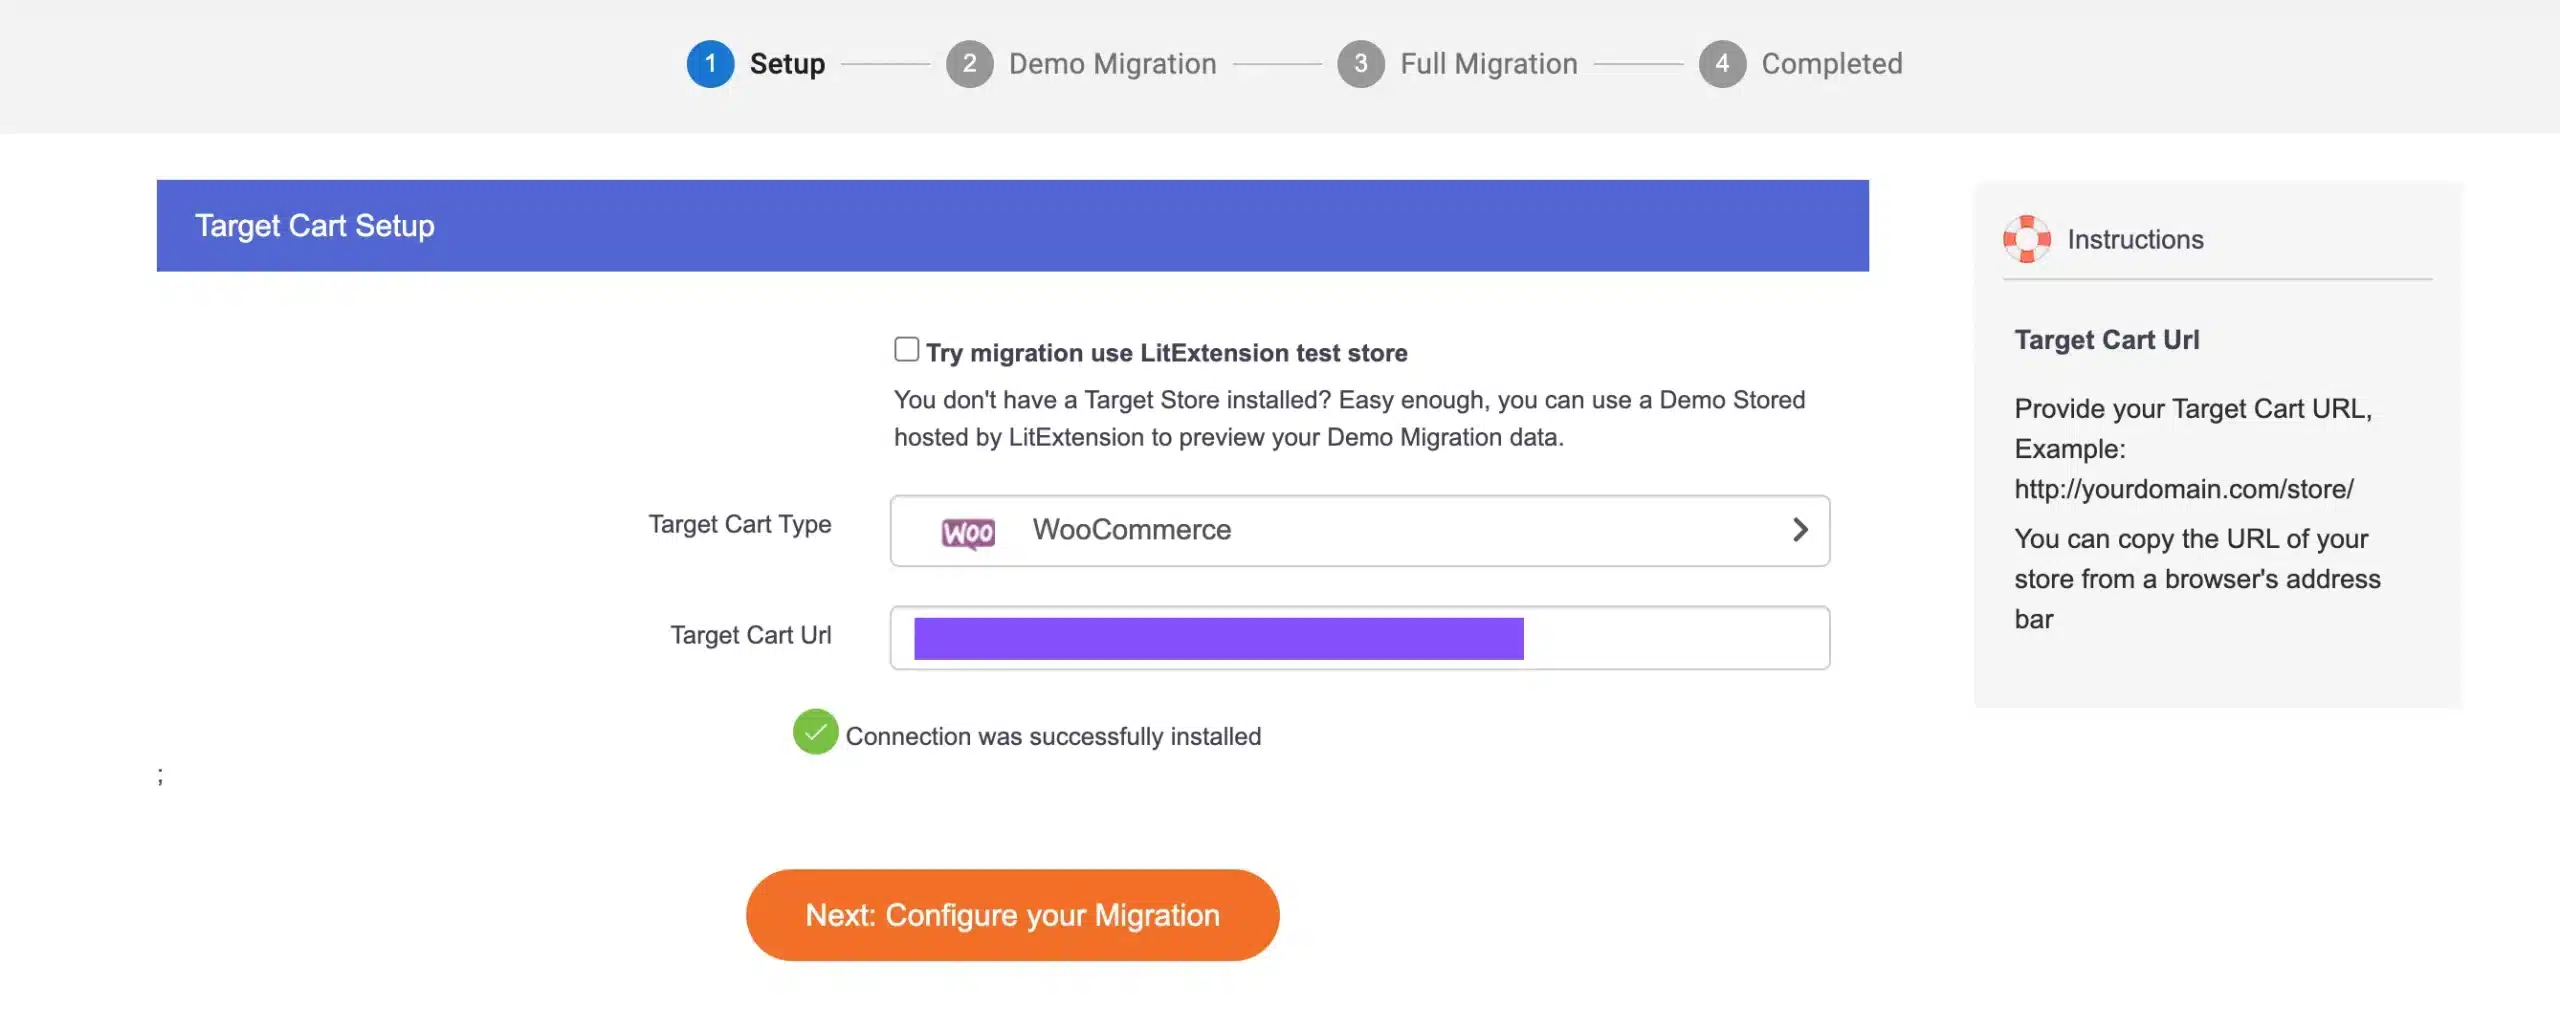
At this stage, you need to download the LitExtension connector and upload it to your Source Store’s root folder. When everything is ready, you’ll receive a notification saying “Connection was successfully installed”.
To help you, we’ve already prepared a detailed tutorial below:
#2 Select entities to migrate
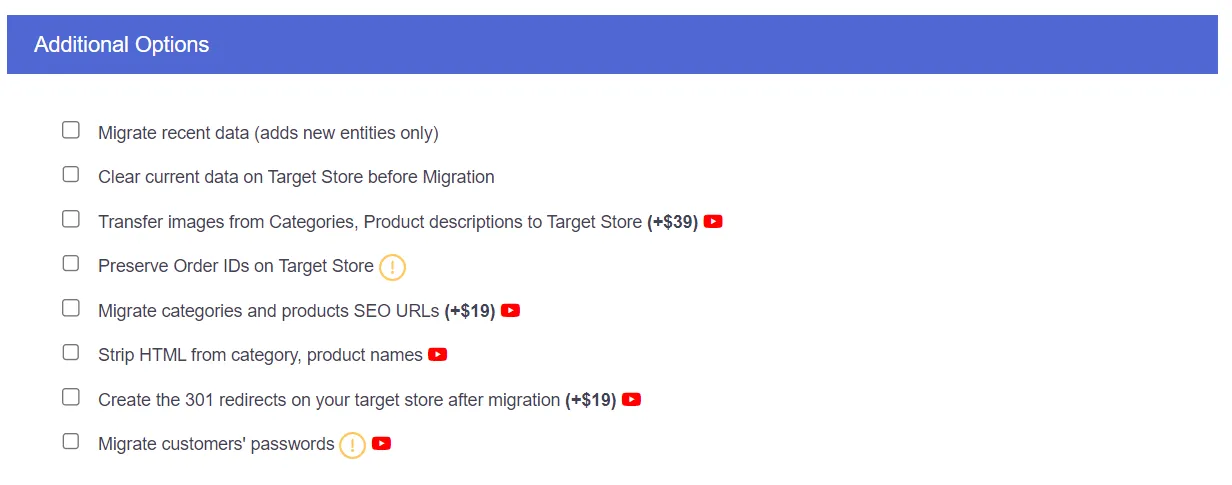
Here comes the most important part – choosing what we’ll transfer between the two carts. You can choose the “Select all” to transfer all data to WooCommerce or just select some options like customers or products to migrate.
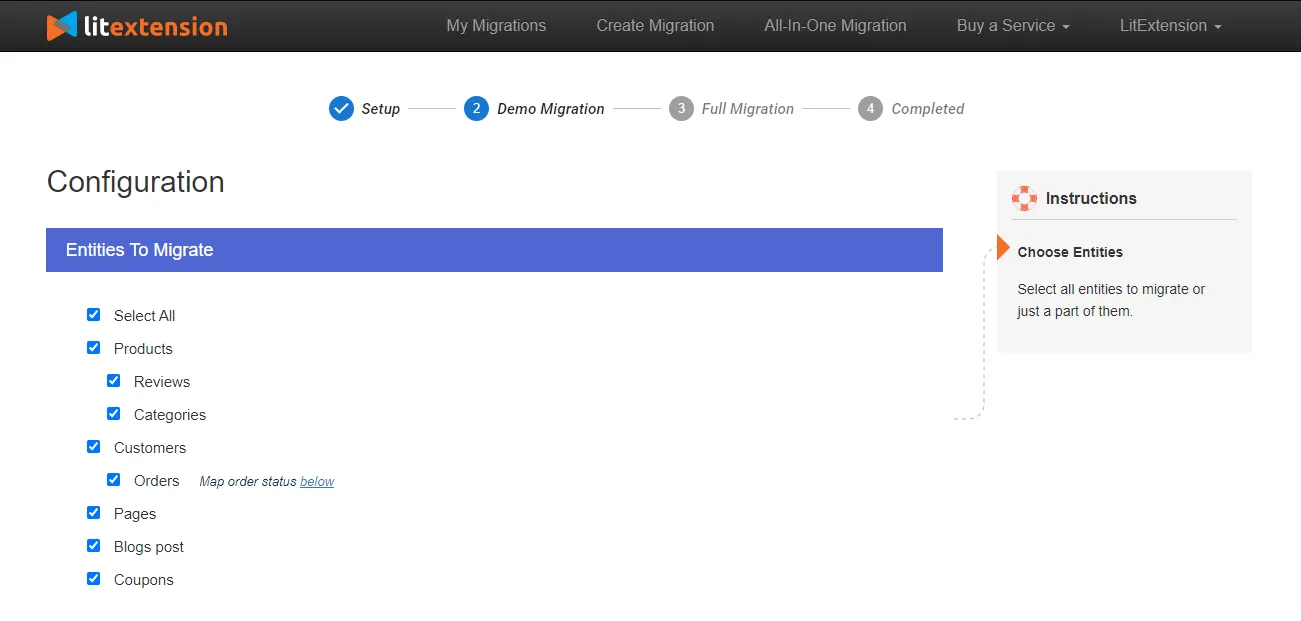
In case you want more advanced features, we also have “Additional Options” where online merchants can import images, SEO URLs, or strip HTML, etc, to enhance your store’s functions after the migration.
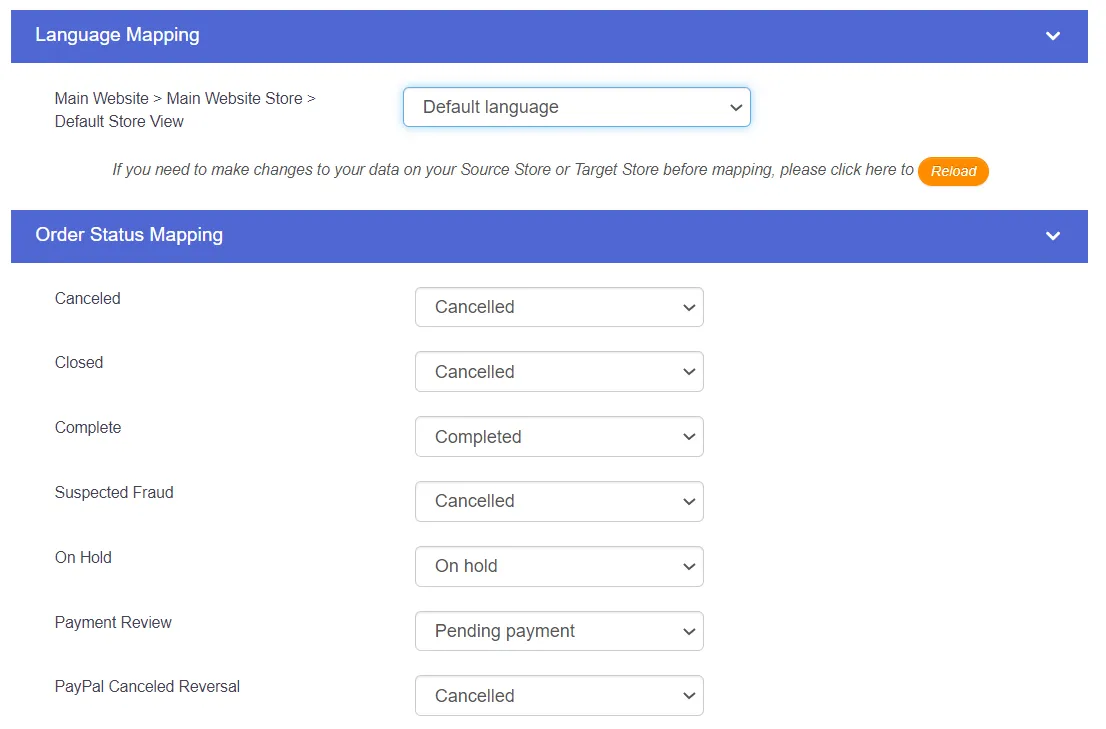
We highly recommend mapping language and order status to make sure that they will display correspondingly after the migration.
#3 Perform Full Migration
Before going with the Full Migration, LitExtension offers the “Demo Migration” option, where you can test out how the system works and what an actual migration will look like.
Still, if you want to save time and head for the Full Migration immediately, check the “Skip Demo Migration” box and the process will start running.

And that’s how easy it is to perform WooCommerce data import with LitExtension.
Want to migrate to WooCommerce?
If you are intending to migrate to WooCommerce, LitExtension offers a great migration service that helps you transfer your data from the current eCommerce platform to a new one accurately and seamlessly with utmost security.
#4 Follow post-migration checklist
When the migration process is done, you can follow our post-migration checklist to get your WooCommerce store ready to go live!
#4.1 Double-check the migrated data
Once the migration is successful, make sure that you double-check all of your data in your WooCommerce store. From the products, images, and customers to orders, everything needs to be covered to minimize the possibility of errors while running.
#4.2 Perform Recent Data Migration
Migrating with LitExtension allows you to turn off your device during the process since our services are entirely cloud-based. Also, your current store also works normally to avoid affecting customers’ experience. Hence, there might be new orders or customers appearing during that time.
To best update your WooCommerce store, run the “Recent Data Migration” service after the Full migration, follow our tutorial below. Don’t worry because it is completely free for the first three months!
#3 Pick a WooCommerce theme
Up to the present, there is no direct solution to migrate the theme to your WooCommerce store. For this reason, you will have to pick a new theme and customize it after the migration. You can find up to 10,000 free themes from the WordPress theme store, or buy from a third-party provider if you want.

Looking for a perfect WooCommerce theme for your online business? Don’t skip through Best WooCommerce Themes for Your Online Store!
#4 Add additional extensions
To enhance your store’s performance further, feel free to make use of the extensions. There are over 55,000 WooCommerce-compatible plugins available in WordPress. Pick the best apps for your store, and you are good to go!
Learn how to perform WooCommerce migration via our video below for the best visual instructions:
WooCommerce CSV Import – FAQs
[sp_easyaccordion id=”56438″]
How To Import to WooCommerce – Recap
We must say that anyone can easily perform importing data to WooCommerce steps. Based on your preference, you can either decide to work with LitExtension or perform the task on your own. As we have taken you through all the steps, here’s a recap of all the steps for 3 methods:
- Import data to WooCommerce using CSV files
- Automatically perform WooCommerce CSV import
- Automatically transfer data to WooCommerce with 3-step migration
How to import products to WooCommerce manually in 4 steps:
- Create your CSV file – store your data into a single CSV file according to WooCommerce’s requirements.
- Custom CSV file – match the column name to the corresponding field on WooCommerce.
- Run Product Importer – start the products importing to WooCommerce process.
- Check final result – review the final results in WooCommerce store after WooCommerce product import.
How to Perform WooCommerce CSV Import with LitExtension:
- Send CSV files – send your files and requirements to LitExtension experts.
- Let LitExtension customizes your CSV files – LitExtension will customize CSV files to your requirements.
- Wait for migration results – run CSV file migration to WooCommerce.
- Check migration result – LitExtension will check the final result and hand over the store to you!
How to import data to WooCommerce with LitExtension in 3 steps:
- Set up Source Cart and Target Cart – choose your cart type and fill in the URL
- Select entities to migrate – import products, orders, and so on to your WooCommerce store
- Perform the Full Migration – start running your data migration with LitExtension
- (Optional) Follow post migration checklist – set up apps and themes to maximize your business’ performance
If you want to upgrade WooCommerce to the latest version, you can always count on LitExtension WooCommerce Upgrade service.
Final Words
And that brings us to the end of our guide on how to perform WooCommerce CSV import data.
To put it briefly, there are multiple ways you can apply when it comes to product importer WooCommerce as long as it brings back the best suitability. Hopefully, our guide today on How to perform WooCommerce import has successfully helped you to perform the process with ease and generate more profits in the long run.
If you have any related questions, LitExtension – #1 The World Shopping Cart Migration Expert is always here to help. For more tips and tricks while working with WooCommerce, check out our LitExtension Blog or Facebook Community Group.