
How to Sell Courses on Shopify in 2026 (8-Step Guide)
In recent years, selling online courses has become increasingly popular among Shopify merchants. That’s because, unlike physical products, digital courses are much cheaper to produce and can also be reused, repackaged, and resold multiple times. So if you’re thinking about entering this fast-growing space, this guide on how to sell courses on Shopify is for you!
In the sections below, we’ll show you how to create an online course to sell on Shopify in 8 simple steps. Let’s get started!
Benefits of Selling Courses on Shopify
Selling courses on Shopify gives creators and merchants several practical advantages:
- Automated delivery: After a customer completes checkout, course access is granted automatically through your Shopify courses app. This design removes the need to manually enroll students, send files, or manage access requests. Better yet, as your audience grows, the delivery process continues to run in the background, helping you save time and reduce operational work.
- High profit margin: Online courses do not require physical inventory, shipping, or restocking. Once your content is created, you can continue selling it repeatedly with very little additional cost on Shopify. As a result, most of your revenue will go directly toward profit.
- Easy integration with other apps: Shopify’s ecosystem makes it easy to connect your courses with marketing, automation, subscription, and analytics tools. With such flexibility, you can build a complete sales and learning system and expand your setup over time without needing to migrate to another platform.
To help you maximize these benefits, the next section will explore the types of courses you should consider selling on Shopify.
5 Types of Courses to Sell on Shopify
Some of the most popular and profitable options include video-based masterclasses, membership programs/subscriptions, live workshops, digital guides, and quick-fix tutorials:
1. Video-based masterclasses (Pre-recorded)
First, we have pre-recorded video masterclasses, which are one of the most common and scalable course formats on Shopify. In this model, you record your lessons in advance, then organize them into modules or sections so that your students can learn at their own pace.
2. Membership programs & subscription content
Membership-based courses on Shopify focus on long-term engagement rather than one-time learning. Instead of selling a single course, you provide ongoing content such as new lessons, exclusive resources, community discussions, or monthly training sessions. Customers typically pay on a monthly or yearly subscription basis to maintain access.
3. Live workshops & interactive coaching
As the name suggests, live courses on Shopify focus on real-time interaction between instructors and students. These can include live workshops, group coaching sessions, cohort-based courses, or scheduled masterclasses delivered through livestream or video meeting tools.

4. Digital ebooks, guides & kits
Not all courses on Shopify need to be video-based. Many creators successfully sell knowledge through structured written content such as ebooks, implementation guides, templates, or resource kits. These are typically delivered as downloadable digital products and can be sold individually or bundled with other course formats.

5. Mini-courses & quick-fix tutorials
The term “mini-course” refers to shorter, highly focused training programs on Shopify designed to solve one specific problem quickly and deliver fast, practical results. That’s why they are often priced lower than full masterclasses and serve as attractive entry-level products.

How to Sell Courses on Shopify in 8 Steps
To sell courses on Shopify, you will essentially set up a store, use a Shopify course builder or management app (like Course Plus) to organize and deliver your lessons, and sell your course as a product that customers can purchase through Shopify’s checkout.
This setup is easy to assemble since Shopify allows you to sell courses as digital products with no additional fees beyond your regular plan, as seen in the guide below:
Step 1. Sign up for a Shopify account
First, go to Shopify’s official homepage and click the “Start for Free” button in the top right corner.
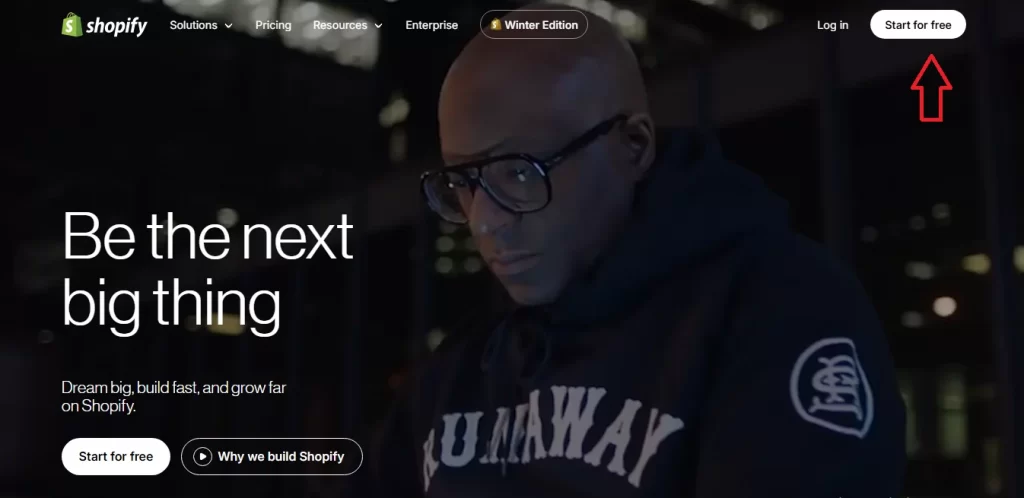
You will then be asked to either enter your email address or choose one of the available sign-up options: Continue with Google, Continue with Apple, or Continue with Facebook.
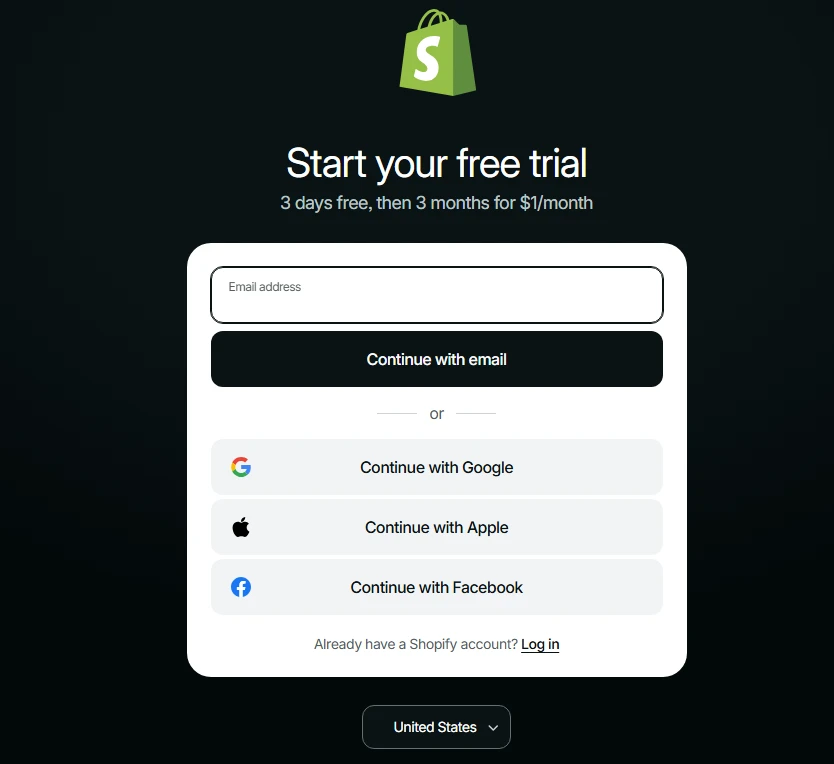
After selecting your preferred option, follow the on-screen prompts to complete the account creation process. Shopify may ask a few setup questions along the way, but you can simply follow through to reach your admin dashboard.
Step 2. Choose a Shopify plan
Once your account is ready, Shopify will prompt you to select a plan. There are four Shopify plans available: Basic, Grow, Advanced, and Plus, along with a 3-day free trial available for new users.
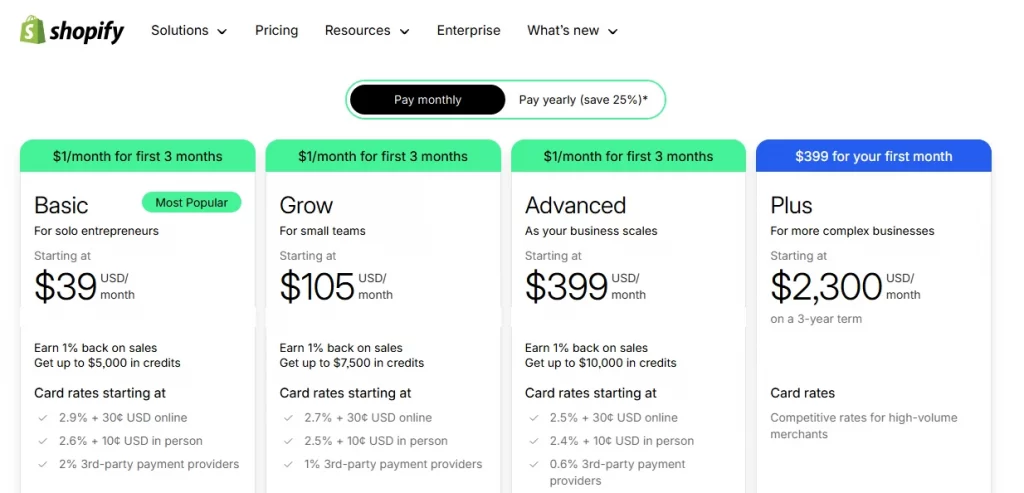
For those who decide to use the trial first and haven’t yet selected a plan, the good news is that you can still technically access all Shopify features. However, testing the purchase flow as a real customer later on will be very challenging since your trial store isn’t publicly available to external users at this stage.
That’s why we strongly recommend choosing a paid plan as soon as possible. You can start with the lowest-priced option, Basic, and upgrade later when your course business grows.
Step 3. Choose a course management app
Now, before creating any course products, you should first choose a course management app.
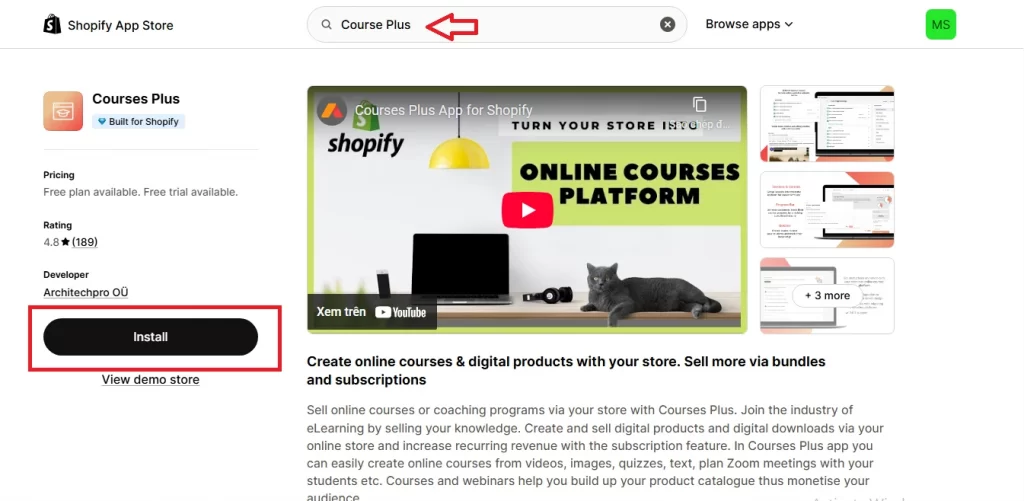
For this tutorial, we will be using Courses Plus, which offers a free plan along with paid plans ranging from $29.99 to $199.99 per month, depending on the features you need. To install the app:
- Go to the Shopify App Store, then search for Course Plus.
- Open the app listing and click “Install“, after which Shopify will ask you to approve the required permissions.
- Once you confirm, Course Plus will be automatically installed and appear in your Apps list inside the Shopify dashboard.
Note: If you would like to explore other course app alternatives, we will cover them in a separate section later.
Step 4. Prepare your course content
At this step, you should focus on preparing your course content. Here are some of our suggestions on what to do:
- First, clearly define what your students should learn from the course.
- Break your topic down into structured sections and lessons, such as introductions, core concepts, explanations, and practical applications.
- Decide which format works best for each lesson, be it video, PDF, ebook, slides, or a combination of formats.
Most importantly, make sure your content is clear, well-organized, and suitable for self-paced learning. Having everything prepared in advance will make the course-building process much smoother and help you avoid unnecessary interruptions later.
Step 5. Create course products
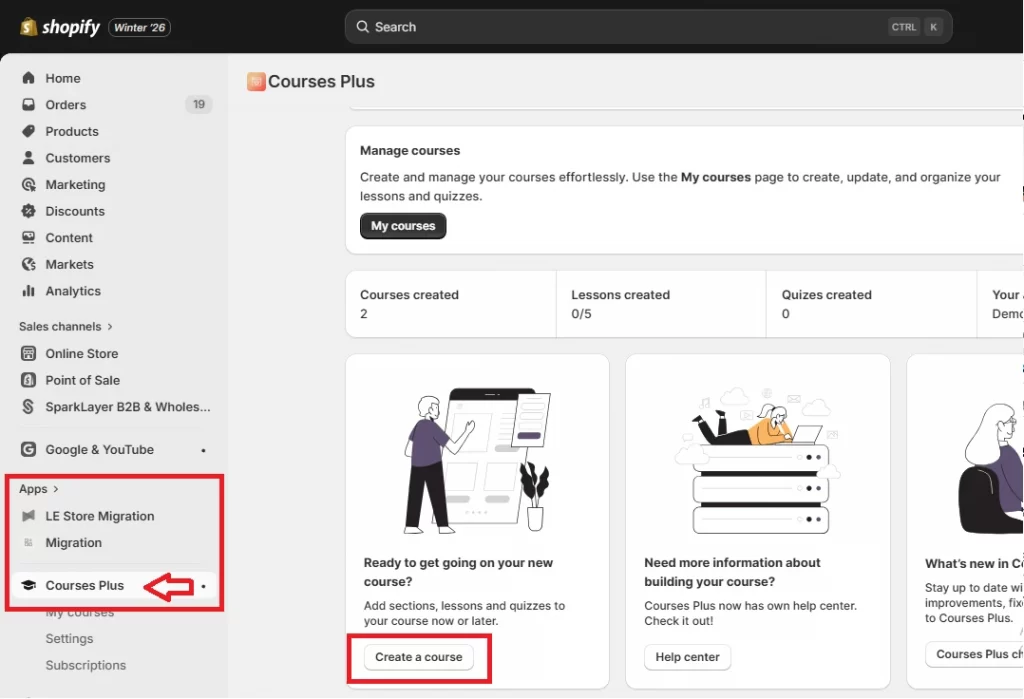
Now return to your Shopify admin. Go to Apps, select Courses Plus, and click the Create A Course button.
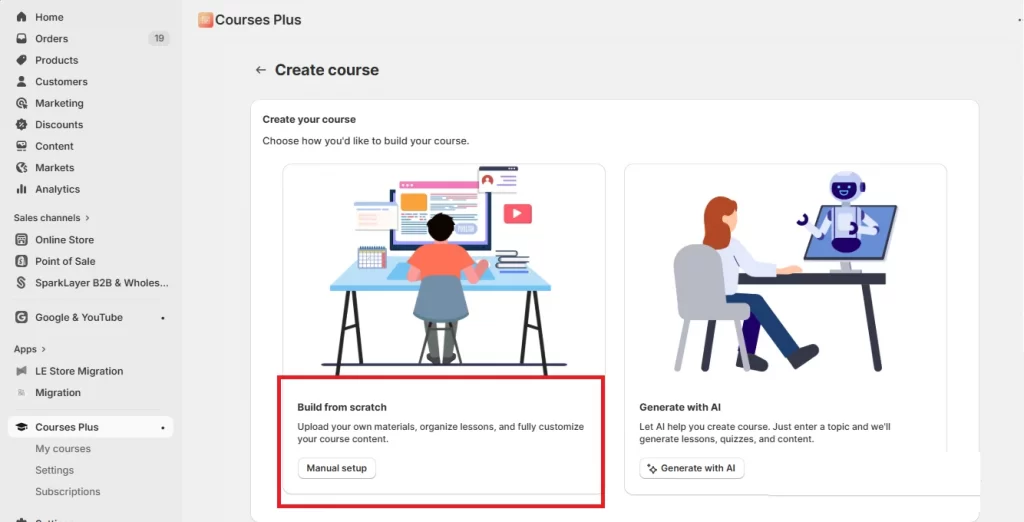
A pop-up willthen appear with two options: Build from Scratch and Generate with AI. The latter is only recommended for content preparation, not for the actual process of course building. Hence, we recommend you choose Build from Scratch instead.
After selecting this option, enter the Title and Description of your course.
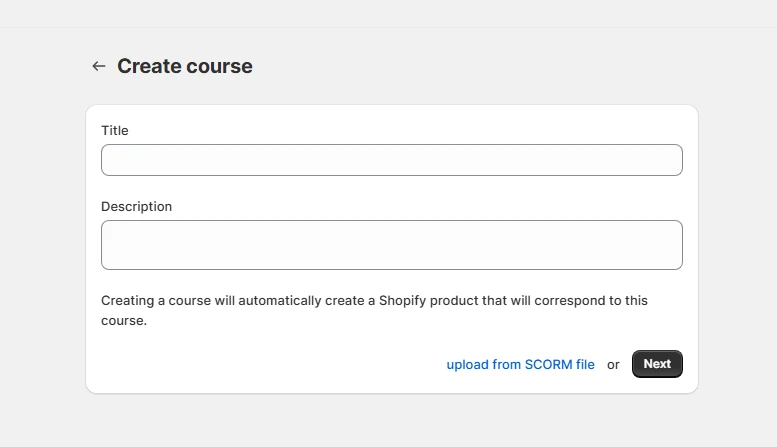
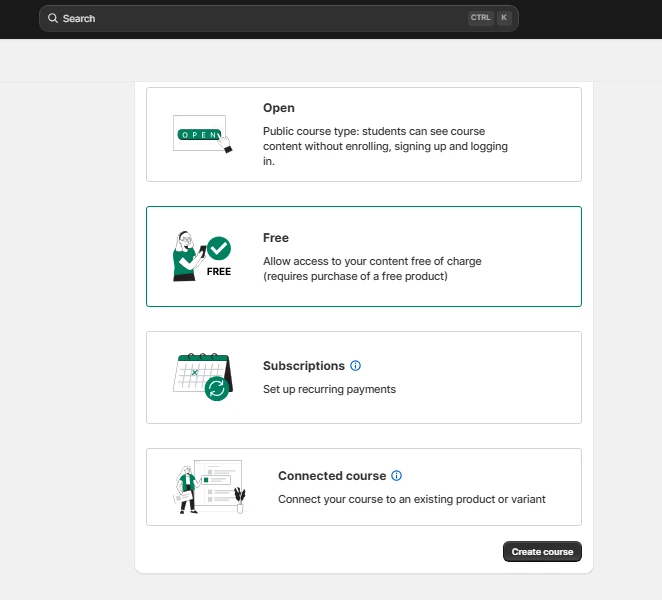
Then tick one of the six available pricing options from the list (e.g., Free, One-time purchase, Subscriptions, or Connected courses). Fill in the payment information accordingly, and click Create Course when everything is set.
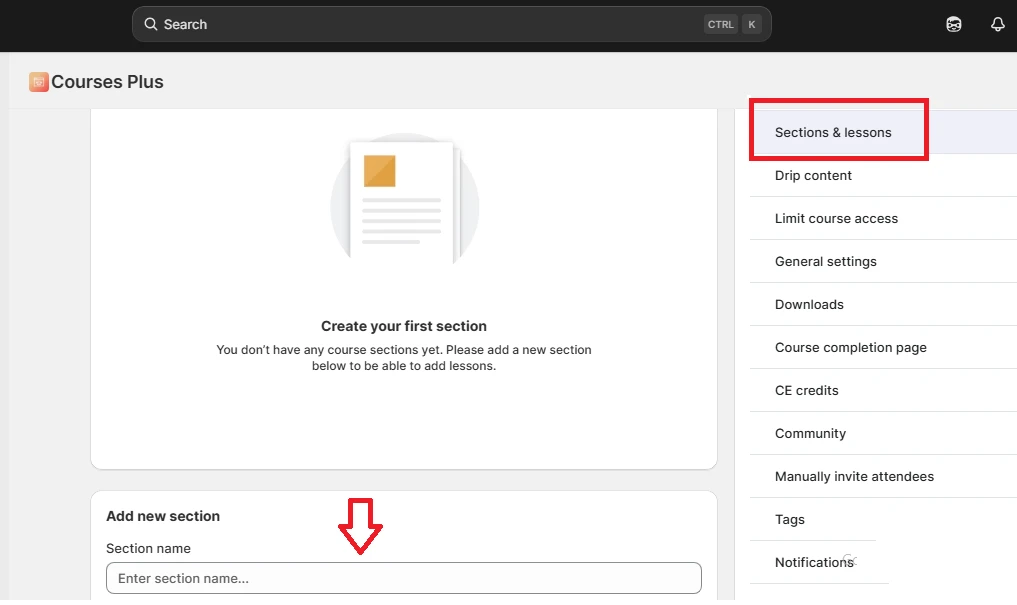
You will then be taken to the course dashboard. Here, click Section & Lessons to begin creating sections for your course (for example: Lesson 1: Introduction; Lesson 2: Concepts & Definition). Upload your prepared content files to the corresponding sections, which usually consist of PDFs, videos, ebooks, or other supported formats.
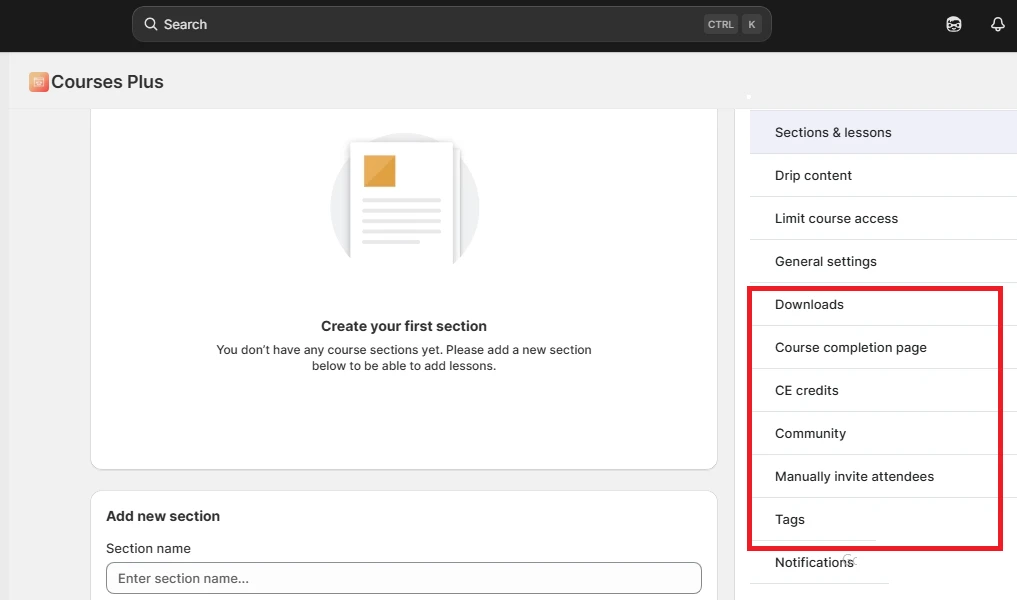
In addition, you can also customize other menu options such as:
- Course downloads (inputting download links for your students)
- Certificates
- Course complete page
- Tags (to add relevant hashtags and better organize your course.)
Step 6. Configure delivery settings
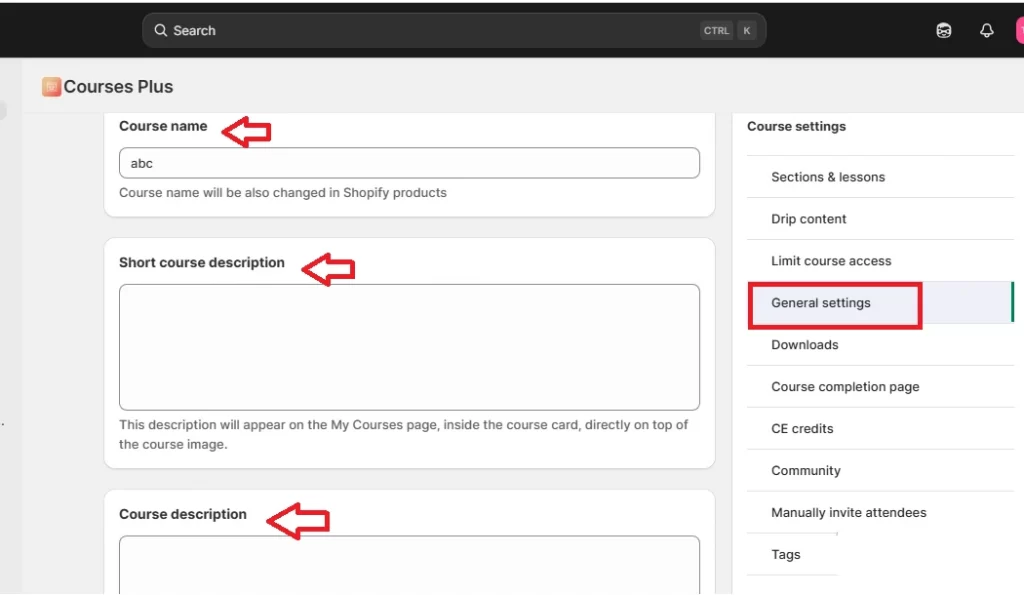
Now, from the course dashboard, go back and click General settings. Here, fill in the following info:
- Course name
- Short course description (a meta-style summary that appears directly on the course image)
- Course description (the full description that users will see after clicking into the course.)
Once done, continue to scroll down to configure the following settings in detail:
- Set expected completion time: Tick Display estimated completion time and enter the number of hours required to complete the course (such as 15 hours 0 minutes)
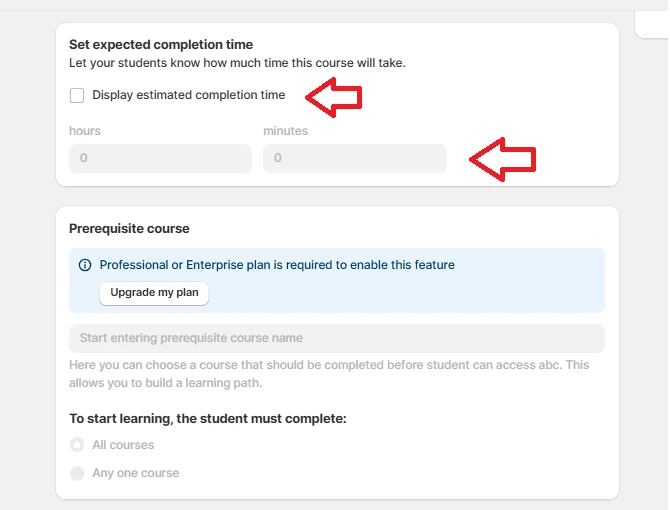
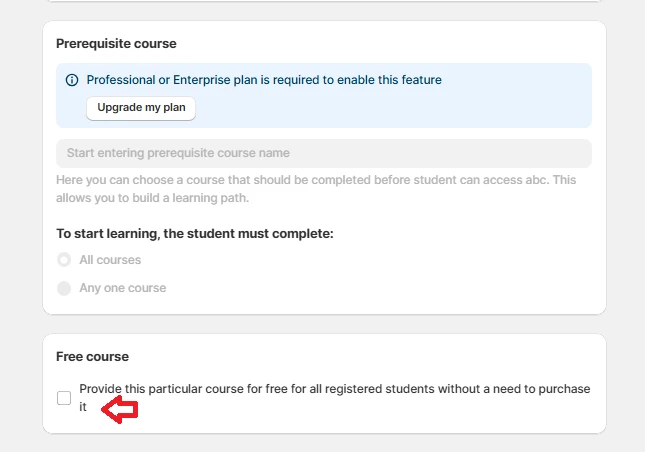
- Prerequisite course (available in higher plans): The option requires students to complete another course before accessing this one. However, since this is your very first course, this setting is not necessary for now and can be revisited later when you start building a structured learning path.
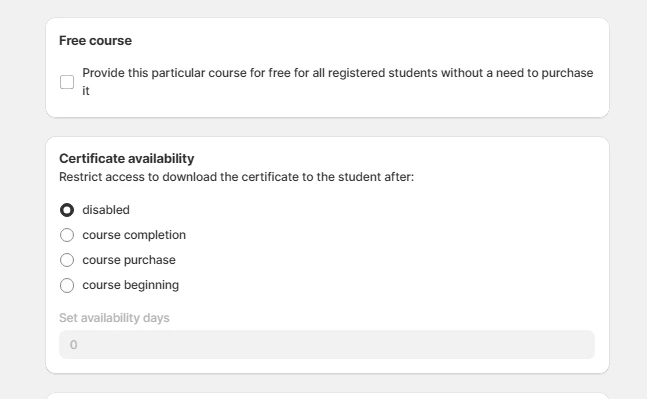
- Free course: If you want to make your Shopify courses free, tick “Provide this particular course for free for all registered students without a need to purchase it”. Otherwise, leave this option unchecked.
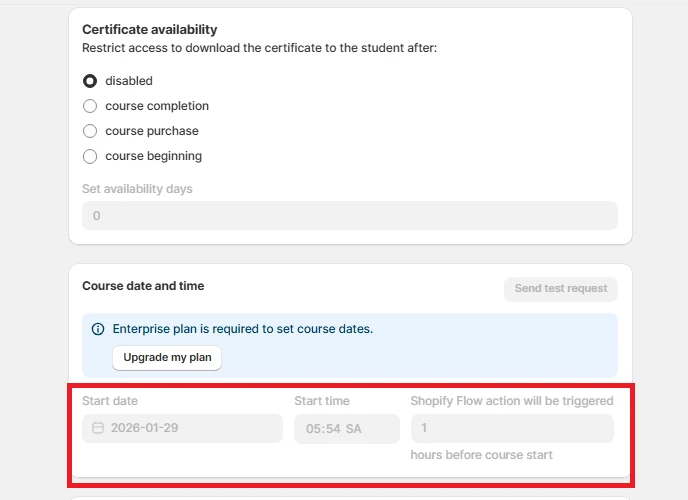
- Certificate availability: Under this section, you can restrict access to certificate downloads based on course completion, beginning, or purchase. Or simply select Disabled if you do not want to apply any restrictions.
- Course date and time: This setting is only available if you have purchased the Enterprise plan of Course Plus. You can set a specific start date and time for the course and even decide how long before the course starts that Shopify Flow will be triggered (e.g., enter 1 in the box to trigger it 1 hour before the course start)
Finally, upload a Course banner background. The recommended size is 1500 pixels in width and 210 pixels in height, and both static images and GIF files are acceptable.
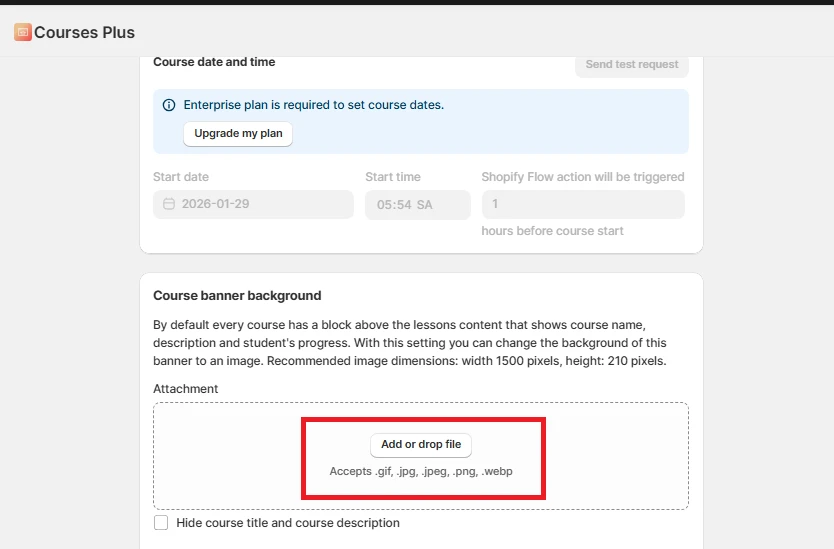
Once everything is configured, click Save.
Step 7. Test the purchase flow
Remember, before launching your course, it is important to test the purchase flow.
So, you should exit the admin view and access your store as a customer. Try purchasing the course yourself and going through the entire checkout process to confirm that payments work correctly and students can access the content without any issues. If you find any problems, fix them before moving on.
Step 8. Customize your store with your branding and theme
Now that your course is fully set up, the final step is to customize your store so it matches your branding and works well for selling courses.
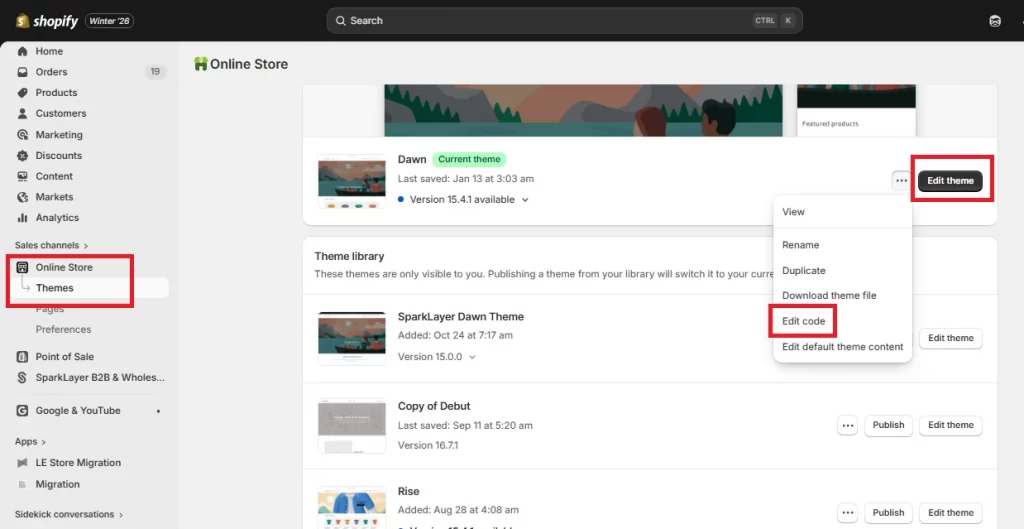
Go to the Shopify Theme Store, where you’ll find more than 1,000 themes to choose from. Pick one that fits your teaching style and audience, then return to your Shopify dashboard and navigate to Sales channels > Online store > Themes. You can check out the 12 best Shopify themes for digital product downloads compiled by our team here.

In the theme preview section, you will have two editing options:
- If you prefer easy editing, click Edit theme to use the Theme Editor. You can customize blocks, images, fonts, and layout using a beginner-friendly drag-and-drop interface.
- If you are comfortable working with code, click the three-dot icon next to Edit theme and choose Edit code instead.
Once your theme and branding are complete, your Shopify course store is ready to launch. And that’s how to sell courses on Shopify!
4 Best Course Management Apps on Shopify
Aside from Course Plus in the tutorial above, you can also consider alternative course management apps like Tevello Courses, Sky Pilo, LDT Courses, and Inflowkit Courses & Membership:
1. Tevello Courses & Communities
- Pricing: Free or $29/month; 14-day free trial available
- Rating: 5/5 (from 500+ users)
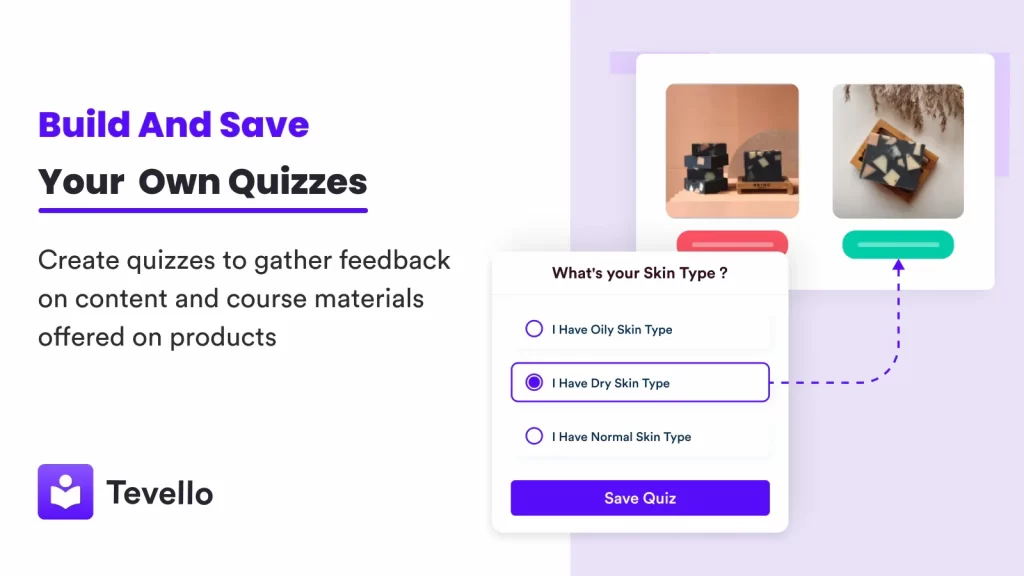
Like Courses Plus, Tevello is built for merchants who want their courses to feel like a natural extension of their Shopify store rather than a separate learning platform.
Specifically, Tevello supports product-based courses, interactive workshops, and certification-style programs. You can even create video-based lessons and digital downloads in multiple languages, which makes it suitable for brands with an international audience. And since Tevello also places a strong emphasis on community building, you will find it easy to create challenges, quizzes, and membership-style spaces that encourage participation and repeat engagement.
2. Sky Pilot – Digital Downloads
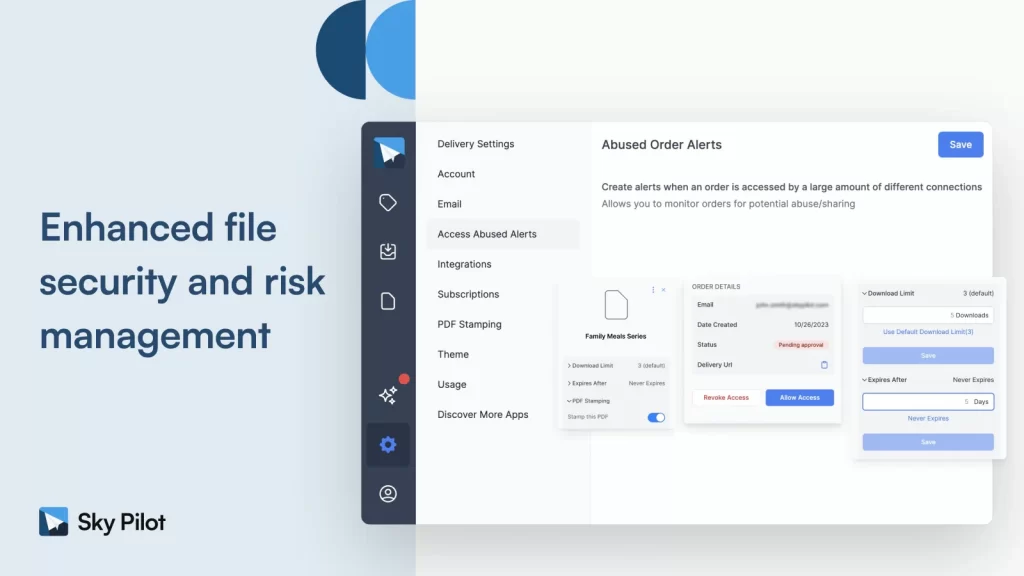
- Pricing: $9 to $54.99 per month; Free plan & 7-day free trial available
- Rating: 4.8/5 (from 350+ users).
Sky Pilot focuses on fast, secure delivery of digital files after purchase. Rather than positioning itself as a full learning management system, Sky Pilot is ideal for sellers whose “courses” are primarily downloadable or streamable assets such as PDFs, ebooks, videos, audio files, or design resources.
In terms of course types, Sky Pilot supports PDF-based courses, eBooks, recorded video lessons, audio courses, design resources, templates, photography packs, and other digital assets. These formats are ideal for self-paced learning, resource-driven education, or knowledge products where customers mainly need instant access to content after purchase.
Sky Pilot also fits well with one-off courses or subscription-style digital content, such as monthly resource drops, paid libraries, or bundled learning materials. You can even bundle digital course files with physical products, making it suitable for hybrid offerings like printed workbooks paired with downloadable lessons.
3. LDT Courses | Tutorials

- Pricing: $12.99 to $49.99 per month; Free plan & 7-day free trial available
- Rating: 4.9/5 (from 170+ users)
LDT Courses is closer to a traditional learning management system, designed for merchants who want to build structured online courses, tutorials, or coaching programs directly inside Shopify. It supports a wide range of content types, including:
- Private videos
- Audio files
- PDFs
- Ebooks
- Quizzes
- Text blocks
- Embedded HTML
- Zoom sessions
- Upsell products within lessons.
Additionally, a major strength of LDT Courses lies in student management and assessment. You can track learner progress, create quizzes with scores, and set up tests or exams as part of your curriculum. The app also includes secure media players with features such as subtitles, watermarks, and protected ebook viewers for PDF or EPUB formats.
4. Inflowkit Courses & Membership
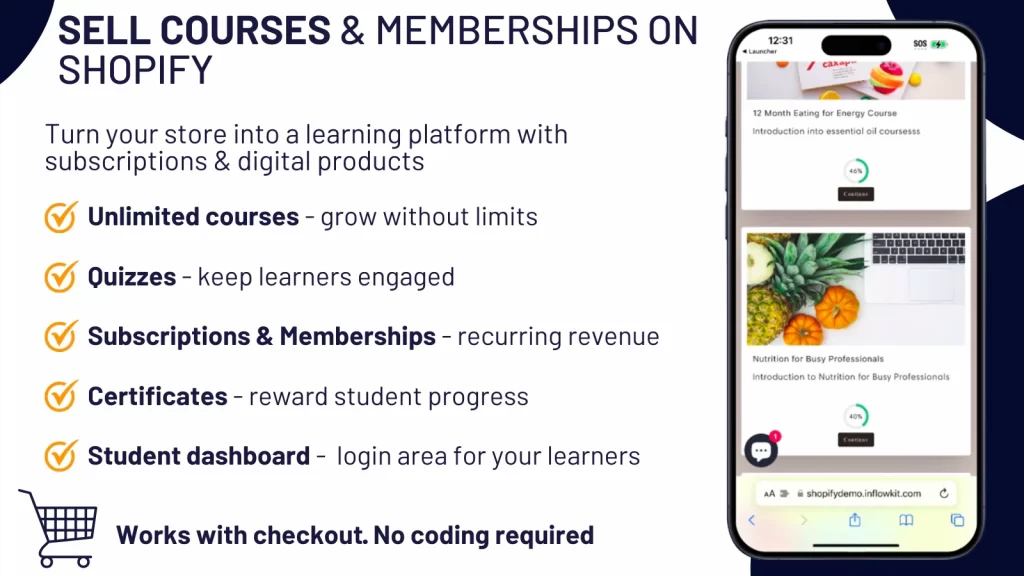
- Pricing: $19 or $49.99 per month; Free plan & 14-day free trial available
- Rating: 4.5/5 (from 35+ users)
Lastly, we highly recommend Inflowkit for creators who want flexibility in both content formats and monetization models.
In terms of course types, Inflowkit works well for lesson-based online courses, where content is organized into modules and lessons rather than standalone files. These courses can include video lessons, PDFs, downloadable resources, and supporting materials, all presented through a clean learner dashboard that helps students follow along and track their progress.
In addition, Inflowkit supports memberships, webinars, and gated content libraries, which are ideal for creators who want to offer ongoing access to educational content. And since it can also handle non-course digital products such as music, graphics, videos, and documents, you may consider combining education with broader digital offerings for your business.
How to Sell Online Courses on Shopify: FAQs
Can you sell a course through Shopify?
Yes, you can absolutely sell online courses directly through Shopify by utilizing specialized apps from the Shopify App Store, such as Tevello or Courses Plus.
What is not allowed to be sold on Shopify?
Shopify does not allow the sale of digital products that are illegal, harmful, or violate intellectual property rights under its Acceptable Use Policy (AUP). This includes pirated software, cracked plugins or themes, copyrighted ebooks or courses sold without permission, and any digital content that promotes illegal activity or circumvents security measures.
Can I add multiple files or modules to one course product?
Yes, you can add multiple files and modules to a single course product on Shopify. Almost all modern Learning Management Systems (LMS) and course creation platforms allow you to structure your course with multiple modules (sections) and populate each with various types of content files.
What is the best Shopify theme for selling online courses?
The best Shopify themes for selling online courses include Impulse (flexible/modern), Booster (high conversion/speed), and Dawn (free/versatile). Specialized themes like Studio or Motion are also excellent for digital products.
Can I set limits on how many times courses can be downloaded on Shopify?
Yes, you can set limits on how many times courses or digital files can be downloaded in Shopify using the Shopify Digital Downloads app. By default, downloads are unlimited, but you can configure them to restrict access and protect your content.
Are there additional fees for selling courses on Shopify?
Yes, there are additional fees associated with selling courses on Shopify beyond the base monthly subscription. They are primarily driven by the need for third-party apps to manage course content and, in some cases, extra transaction fees.
Final Words
All in all, learning how to sell courses on Shopify gives you a powerful way to turn your knowledge into a scalable, long-term revenue stream. By following the eight steps in this guide, you’ll have a clear foundation to launch your first course and gradually expand your digital education business over time!
And if you’re planning to take your course store further, such as building custom features or creating a more tailored learning experience, LitOS is here to help. With 15+ years of dedicated Shopify development expertise, our team is ready to support you every step of the way.
Ready to turn your knowledge into a Shopify course business?
At LitOS, we help brands build and grow successful course stores on Shopify with the right tech stack, smart customization, and hands-on support. Whether you’re launching your first course or scaling a full learning ecosystem, our team is here to help you do it right.
Contact Us
